

Sewing your own curtains is one of the easiest ways to refresh a room without spending a fortune.
Whether you want a custom fit, a stylish fabric, or a modern grommet finish, making curtains yourself gives you complete creative control.
Even if you’re new to sewing, the process is simple, rewarding, and surprisingly fun once you learn the basics.
With just a few tools, the right fabric, and clear steps, you can create beautiful curtains that instantly upgrade your space.
In this blog, you’ll learn how much fabric you need, the tools to gather, and the step-by-step method for sewing grommet curtains from start to finish.
Why Sew Your Curtains?
Sewing your own curtains gives you the freedom to create pieces that perfectly match your style, budget, and window size.
Instead of settling for store-bought options, you can design curtains that complement your room and make it feel unique. Plus, the process is surprisingly simple, even for beginners.
Here’s why it’s worth making your own curtains:
- Customization: You get to choose your fabric, length, width, and style, ensuring your curtains fit your space perfectly.
- Cost-Effective: Buying ready-made curtains can be expensive, especially if you have large windows or need custom sizes. DIY curtains save you money while still providing a high-end look.
- Satisfaction: Something rewarding about making something with your own hands is the beauty it adds to your home.
Step-by-Step Method to Sew Grommet Curtains
Before you begin sewing, it helps to understand each stage of the process so you know exactly what to expect. Follow these clear steps to create curtains that look clean and professionally made.
| Item | Purpose |
|---|---|
| Fabric (44 inches wide, unlined) | Primary material for the curtains |
| Measuring tape | Helps measure window size and fabric accurately |
| Tailor’s chalk | Marks fold lines, grommet placement, and cutting lines |
| Fabric clapper (optional) | Creates crisp, professional-looking pressed folds |
| #14 denim jean needle | Ideal for stitching through thick home décor fabrics |
| Sewing machine + matching thread | Used to sew hems, sides, and the top fold |
| Grommet tools + grommets | Needed to mark, cut, and attach curtain grommets |
| Iron + ironing board | Essential for pressing hems and creating neat folds |
| Scissors | For cutting fabric and trimming edges |
Step 1: Measure and Cut the Fabric
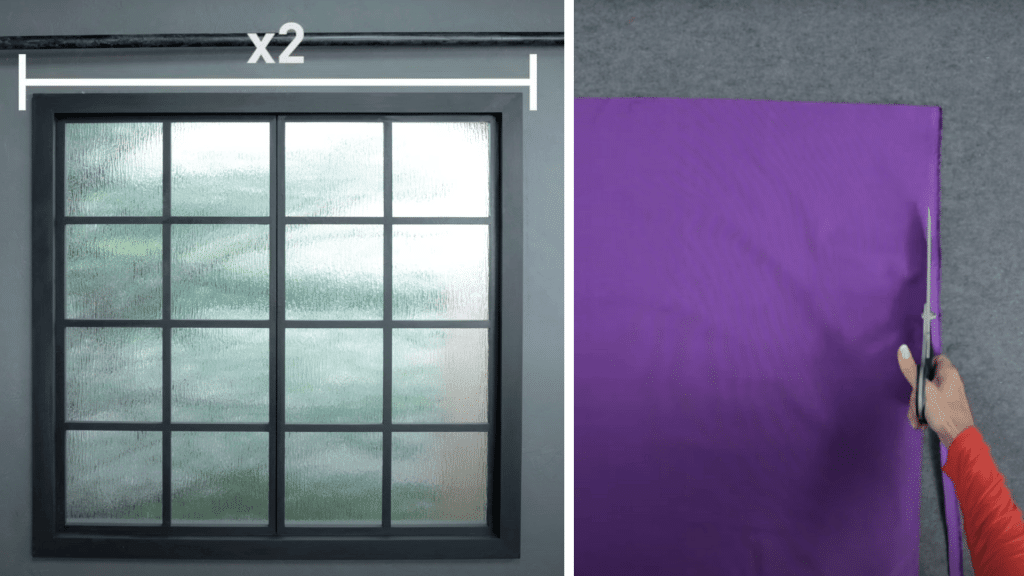
Measure the height of your window from the curtain rod to where you want the curtain to end. Add 16 inches to this measurement to include hems and the top fold.
Then measure the width and double it for a fuller, more refined drape. Cut your fabric to size and remove the selvage edges to prevent puckering and stiffness.
Materials Used:
- Measuring tape
- Fabric
- Scissors
- Tailor’s chalk
Step 2: Prepare the Side Hems
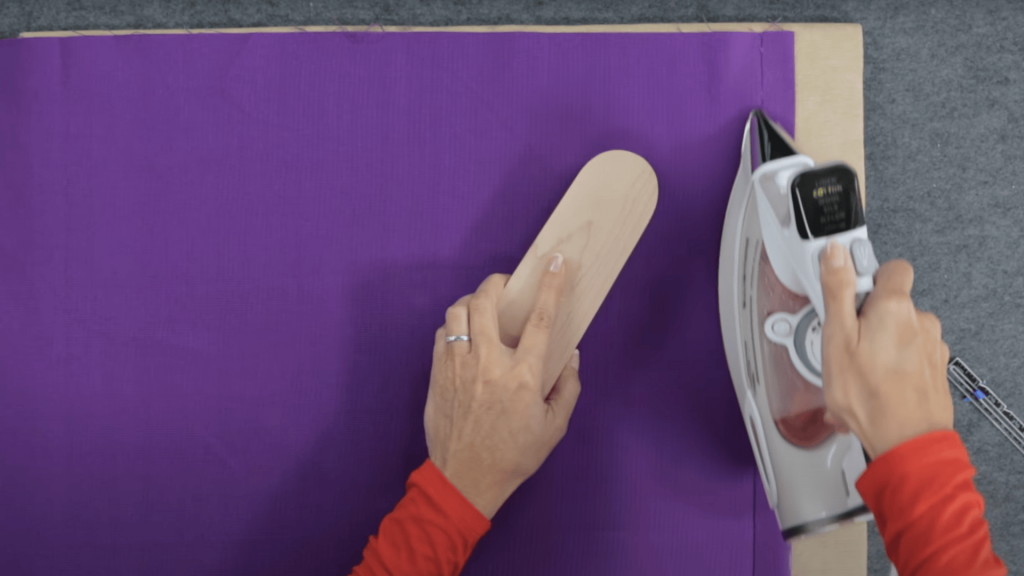
Fold each side of the curtain panel 1 inch toward the wrong side and press well. Fold another 1 inch to encase the raw edges, press again, and stitch the fold down using a steady, even seam.
A #14 denim jean needle helps the machine handle thicker home décor fabrics smoothly.
Materials Used:
- Iron + ironing board
- Tailor’s chalk
- Sewing machine
- #14 denim needle
Step 3: Create the Curtain Hem
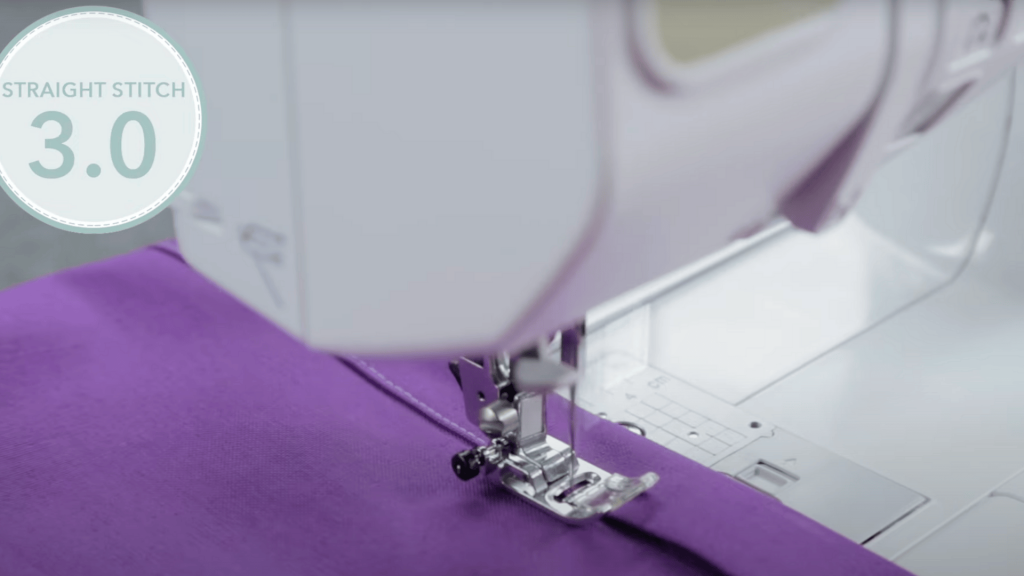
Measure 3 inches from the bottom edge, fold the fabric up, and press firmly. Fold another 3 inches to create a double-thick hem that helps your curtains hang beautifully.
Stitch along the edge, using either a folded scrap of fabric or the presser foot leveling button to keep your stitching even over thick layers.
Materials Used:
- Measuring tape
- Tailor’s chalk
- Iron
- Sewing machine
Step 4: Prepare the Top for Grommets
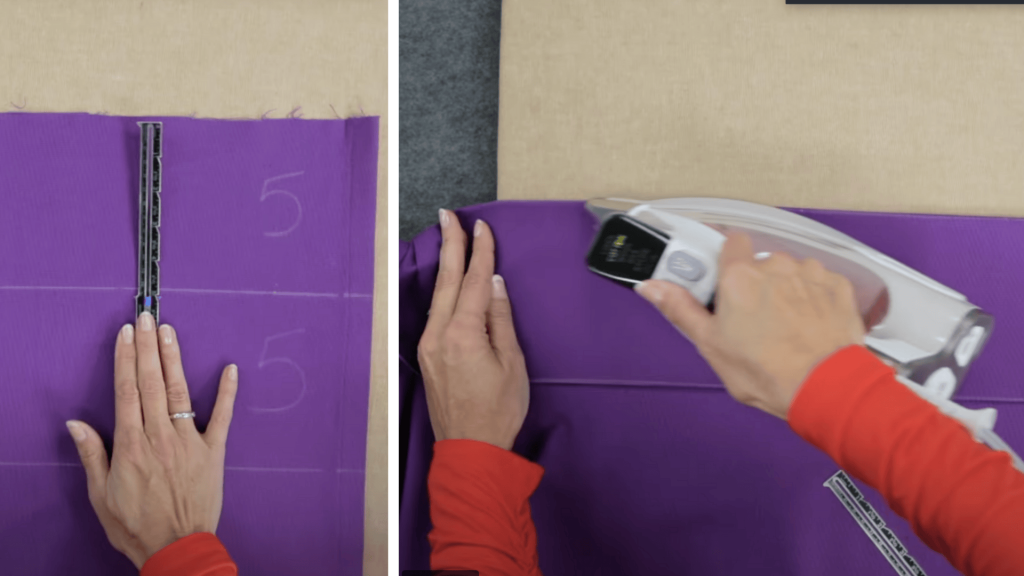
Measure 5 inches down from the top and press the fold firmly. Fold another 5 inches and press again to form a sturdy header that can support the grommets.
Stitch along the edge, keeping your seam straight and clean, since this area will be visible once hung.
Materials Used:
- Tailor’s chalk
- Iron
- Sewing machine
- Thread
Step 5: Attach the Grommets
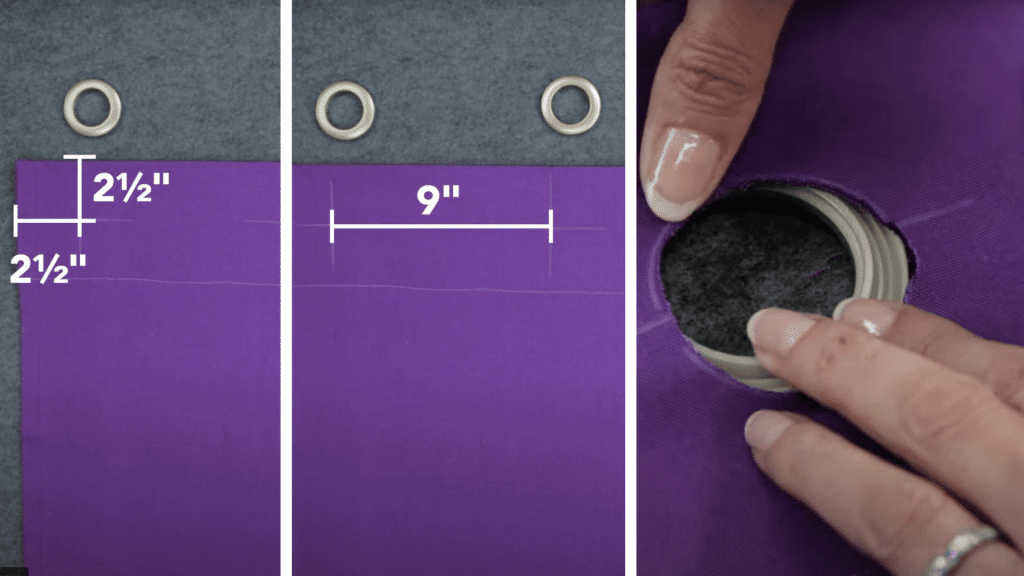
Use the provided grommet template to mark hole placement: 2.5 inches from the top and sides, with about 9 inches between grommets.
Cut out the circles carefully. Insert the raised center of the grommet from the front, then snap the second piece onto the back. Press firmly until the two halves lock.
Materials Used:
- Grommet set + template
- Scissors
- Tailor’s chalk
Step 6: Finish and Hang the Curtains
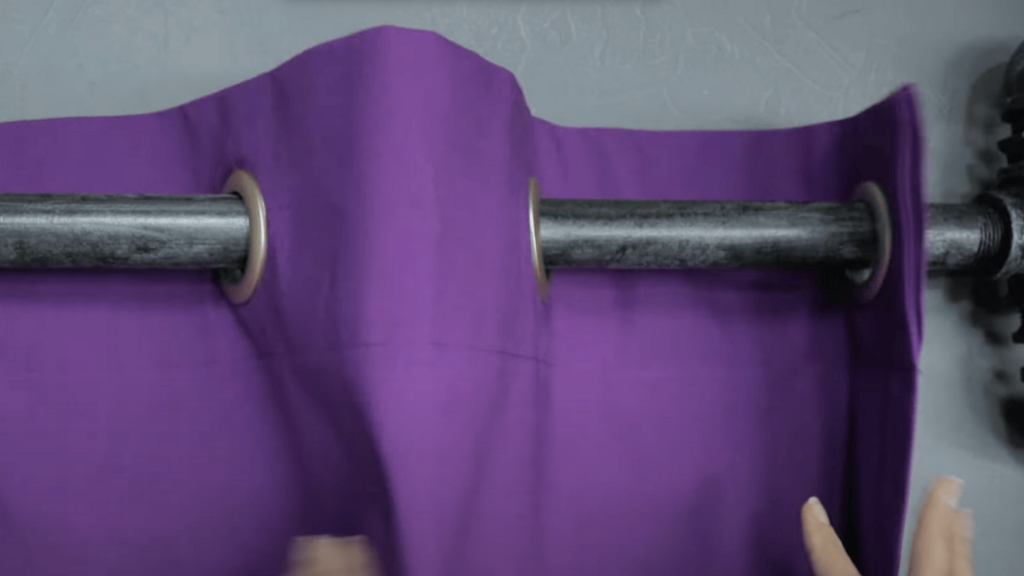
Once all the grommets are attached, slide the curtain panel onto your curtain rod. Adjust the folds so each grommet sits evenly, helping the curtain hang with smooth, attractive waves.
Step back and admire your finished DIY creation.
Materials Used:
- Curtain rod
- Finished the curtain panel
Video Tutorial
Special thanks to Craftsy for providing valuable insights in their video, which I referenced while creating this guide.
How Much Fabric Will You Need for Making Curtains?
To figure out how much fabric you need, start by measuring from the curtain rod down to the point where you want your curtains to end.
Add an extra 16 inches to this measurement to account for the top fold and bottom hem. Next, measure the width of your window and double that number to achieve a fuller, more luxurious look.
If you’re making simple decorative curtains, a standard fabric width of 44 inches is usually enough for each panel.
Ways to Hang Curtains
Once your curtains are finished, the way you hang them can completely change how they look and function. Here are a few popular hanging styles to help you choose the perfect finish for your space.
1. Rod Pocket

A rod pocket creates a soft, classic look by allowing the curtain rod to slide through a sewn channel at the top of the panel.
This style works beautifully with lightweight fabrics and provides gentle gathers when hung. It’s simple to assemble and ideal if you prefer a traditional, timeless finish.
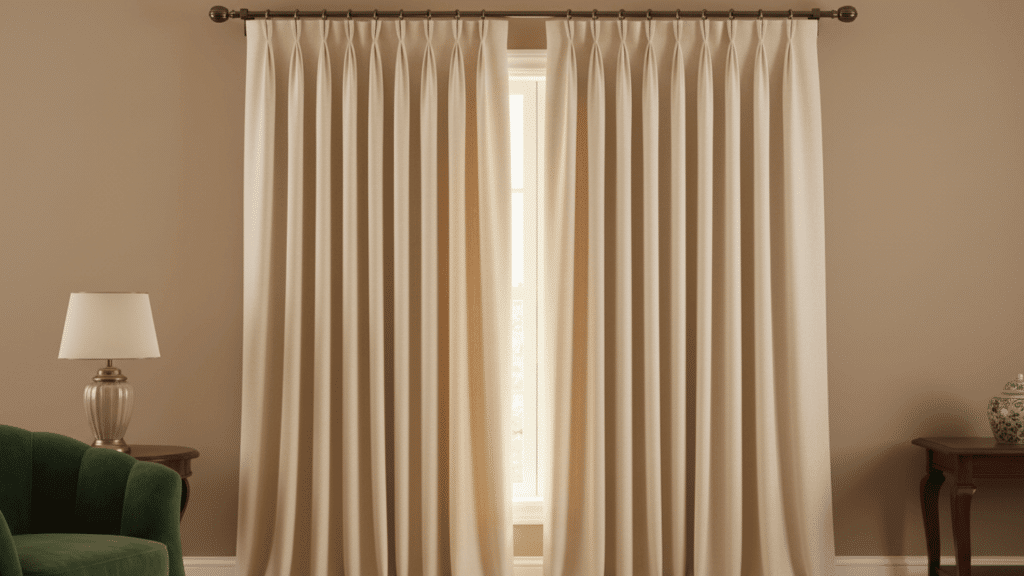
2. Grommets
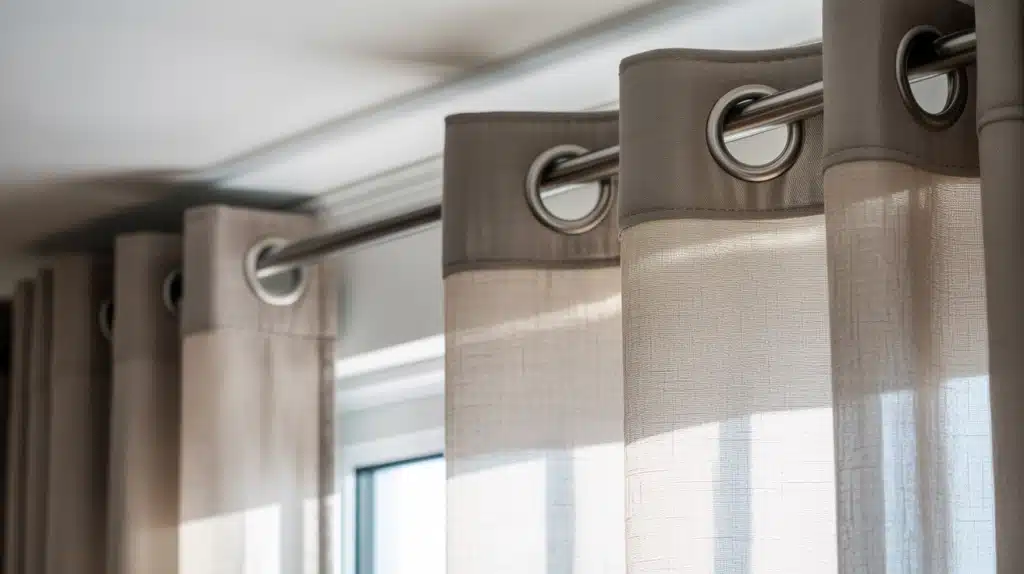
Grommets offer a sleek, modern style by letting the rod pass directly through metal rings built into the curtain top. They create smooth, even folds that stack neatly when the curtain is open.
This option is great for contemporary spaces and makes the curtain slide incredibly easily.
3. Tab Tops
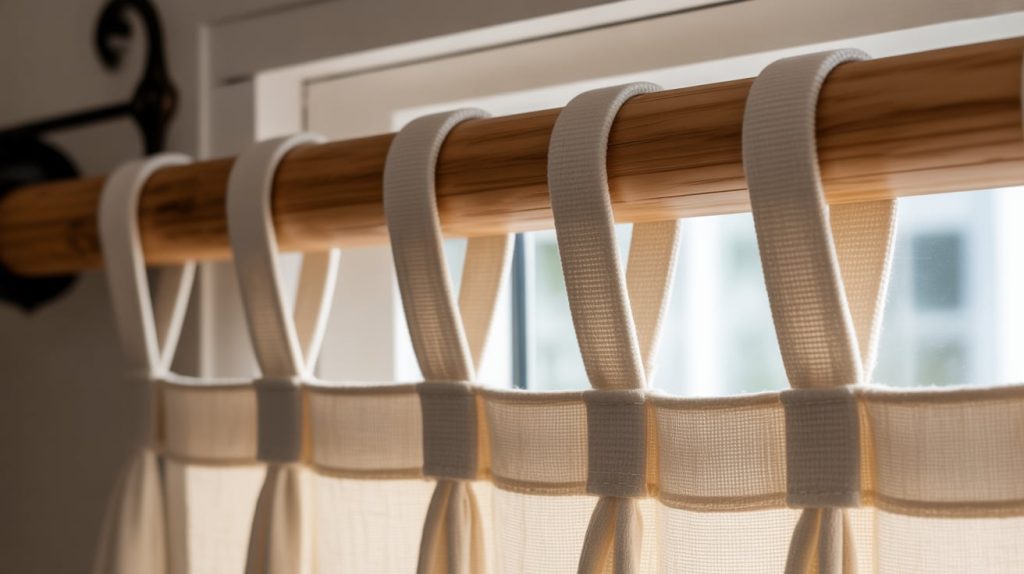
Tab top curtains feature fabric loops sewn along the top edge, giving them a relaxed, casual feel. They’re easy to hang and work well with natural or textured fabrics.
The exposed rod becomes part of the overall look, adding charm and warmth to your window design.
4. Pinch Pleats
Pinch pleats create a polished, tailored look by gathering fabric into structured folds at the top of the curtain.
This style adds grace and fullness, making it perfect for formal spaces like dining rooms or living rooms. It works best with heavier fabrics that hold shape well.
5. Ring Clips
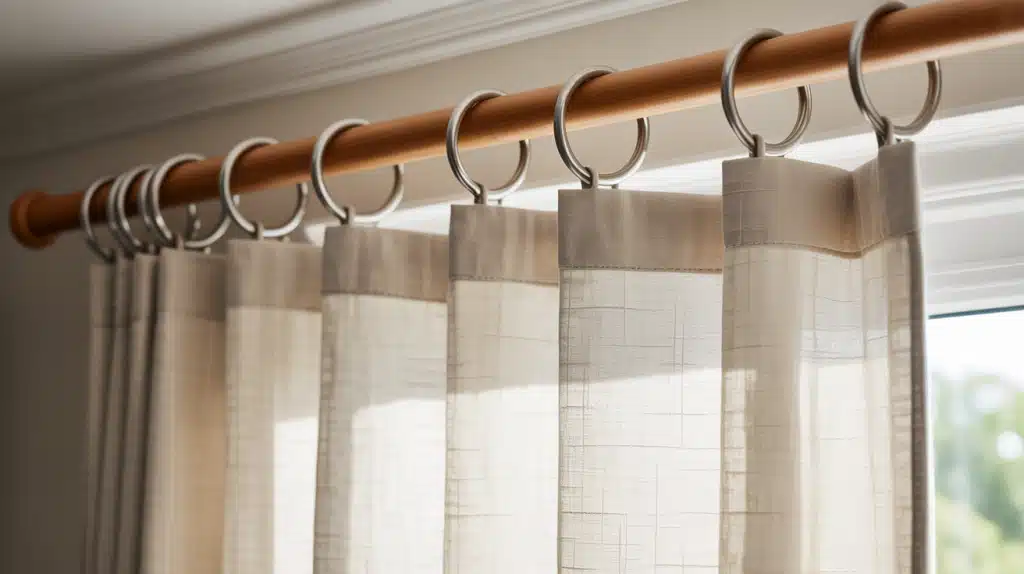
Ring clips are a flexible and beginner-friendly hanging option that uses small clips to attach the curtain to rings that slide along the rod.
They make adjusting the curtain length and fullness incredibly easy. This style adds an airy, effortless look and works with most fabric types.
Key Sewing Mistakes to Avoid for Perfect Curtains
Even small mistakes can affect how your curtains hang and look once they’re finished. Keeping an eye on these common issues will help you achieve a smooth, professional result.
| Mistake | Why It Matters |
|---|---|
| Incorrect measurements | Even minor errors can throw off the length and fullness, leading to curtains that don’t hang correctly. |
| Ignoring the selvage | Selvage edges are tighter and can cause puckering, so removing them helps the fabric drape smoothly. |
| Not pressing as you go. | Skipping pressing makes hems uneven and prevents your curtains from looking crisp and neat. |
| Choosing an unsuitable fabric | Fabric that’s too light or too heavy affects how the curtain hangs and can make sewing harder. |
| Uneven grommet placement | Poor spacing leads to crooked folds and a less professional appearance once hung. |
Tips for Sewing Curtains
If you want your curtains to look crisp and professional, a few small habits can make a big difference. Here are some simple tips that help your sewing process go smoothly and your finished curtains hang beautifully.
- Use the Right Needle: A #14 denim needle handles thicker home-décor fabrics with ease, helping you achieve clean, strong stitches. It also reduces skipped stitches and thread breakage.
- Iron as You Go: Pressing every fold, hem, and seam keeps your curtains looking crisp and polished. It also makes the fabric easier to work with and prevents uneven stitching.
- Pre-Wash Fabric: Washing your fabric before sewing removes sizing and prevents shrinking after your curtains are hung. This keeps your finished curtains fitting exactly as intended.
- Use a Seam Ripper: Mistakes happen, even for experienced sewists, so keep a seam ripper nearby. It lets you remove stitches cleanly without pulling or tearing the fabric.
- Choose a Neutral Fabric: If you’re unsure about color, neutrals like white, beige, or gray blend easily with most décor styles. They offer flexibility and stay timeless through changing trends.
Wrapping It Up
Sewing your own curtains is a simple project that delivers a significant visual impact, and now you have everything you need to create a custom set that fits your space perfectly.
From measuring and cutting the fabric to attaching grommets and hanging the finished panels, each step builds your confidence as you craft something beautiful.
Whether you’re updating a single room or dressing multiple windows, this method gives you flexibility, savings, and style.
Ready to bring your idea to life? Gather your supplies, choose a fabric you love, and start sewing your new curtains today.