
If your “quick little spray paint project” keeps turning into a sticky, streaky, what even is this situation, I have good news: you’re probably not bad at this.
Your room is.
Temperature, humidity, and airflow can absolutely wreck spray paint. I’m talking:
– paint that never fully dries,
– weird wrinkles and bubbles,
– finishes so rough they could exfoliate your elbows.
Once you understand how your space is messing with your paint, everything gets easier. Less rage sanding, more “wow, did I actually do that?”
In this post, I’ll walk you through:
- What kind of spray paint to grab
- How to safely spray indoors without fumigating your entire home
- The actual temperature and humidity ranges that work
- Drying times (and the evil recoat window that causes 90% of wrinkling)
- How to fix the most common disasters
Let’s start with the can in your hand.
Step 1: Are You Even Using the Right Spray Paint?
Before you start wildly shaking that can like a maraca, check what’s inside. The formula you’re using affects:
- How long it takes to dry
- How durable it is
- How toxic your air is going to feel
Here’s the quick version:
- Acrylic
My go to for most indoor stuff. Lower odor, dries pretty fast, and works great on furniture and decor that gets normal use (end tables, frames, lamps, etc.).
- Enamel
Use this when life is rough on the piece: cabinet pulls, kids’ furniture, things you wipe down constantly. It takes longer to cure, but once it’s hardened, it’s tough.
- Lacquer
The drama queen. Super fast drying, super smooth finish, strong fumes. Only use with really solid ventilation.
Also:
“Quick dry” and “2X coverage” are not magic spells. They do not fix bad prep, a sweaty room, or cold metal. They’re helpful, not holy.
Once your paint choice makes sense, let’s talk about whether you can actually spray this indoors without regretting your life choices.
Step 2: Can You Safely Spray Paint Indoors?
You can spray indoors. But it’s not “crack a window and hope for the best.”
Here’s your honest go or no go checklist. If you can’t say yes to these, pause. (No cheating. I see you.)
- You can create real cross ventilation (air flowing through the room, not just swirling).
- You can exhaust air outside usually with a fan in a window or door.
- There are no open flames or pilot lights nearby (gas water heater, furnace, stove = instant no).
- You can get at least 4 feet of space around your project.
- In an apartment: you’ve got a bathroom with an exhaust fan and window, or a covered balcony for smaller pieces.
If you’re good on that list, pick your room.
Best Places to Spray Indoors
- Attached garage with the door partly open
- Basement or workshop with windows
- A spare room where you can open a window and put a fan in it
Places That Are A Hard No
- Windowless bathrooms
- Closets (please no)
- Rooms with only one tiny window and no way to push air through
- Anywhere near pilot lights or open flames
Once you’ve picked a space, your next job is: don’t gas yourself out of it.
Step 3: Deal With Fumes Like a Responsible Adult
VOCs (volatile organic compounds) are what you smell when you spray paint. They’re also what give you headaches, nausea, and the realization that maybe you should’ve worn an actual mask.
Even “low odor” or “low VOC” cans still need air movement.
- In a well ventilated space, most of the strong smell fades in 2-3 hours.
- Keep air flowing for at least 24 hours before you sleep next to a freshly painted piece.
Super scientific smell test:
If the paint smell is still strong with a window open and a fan running, you do not have enough airflow yet. Your nose is a pretty decent tool here.
When the air’s moving, it’s time to contain the mess.
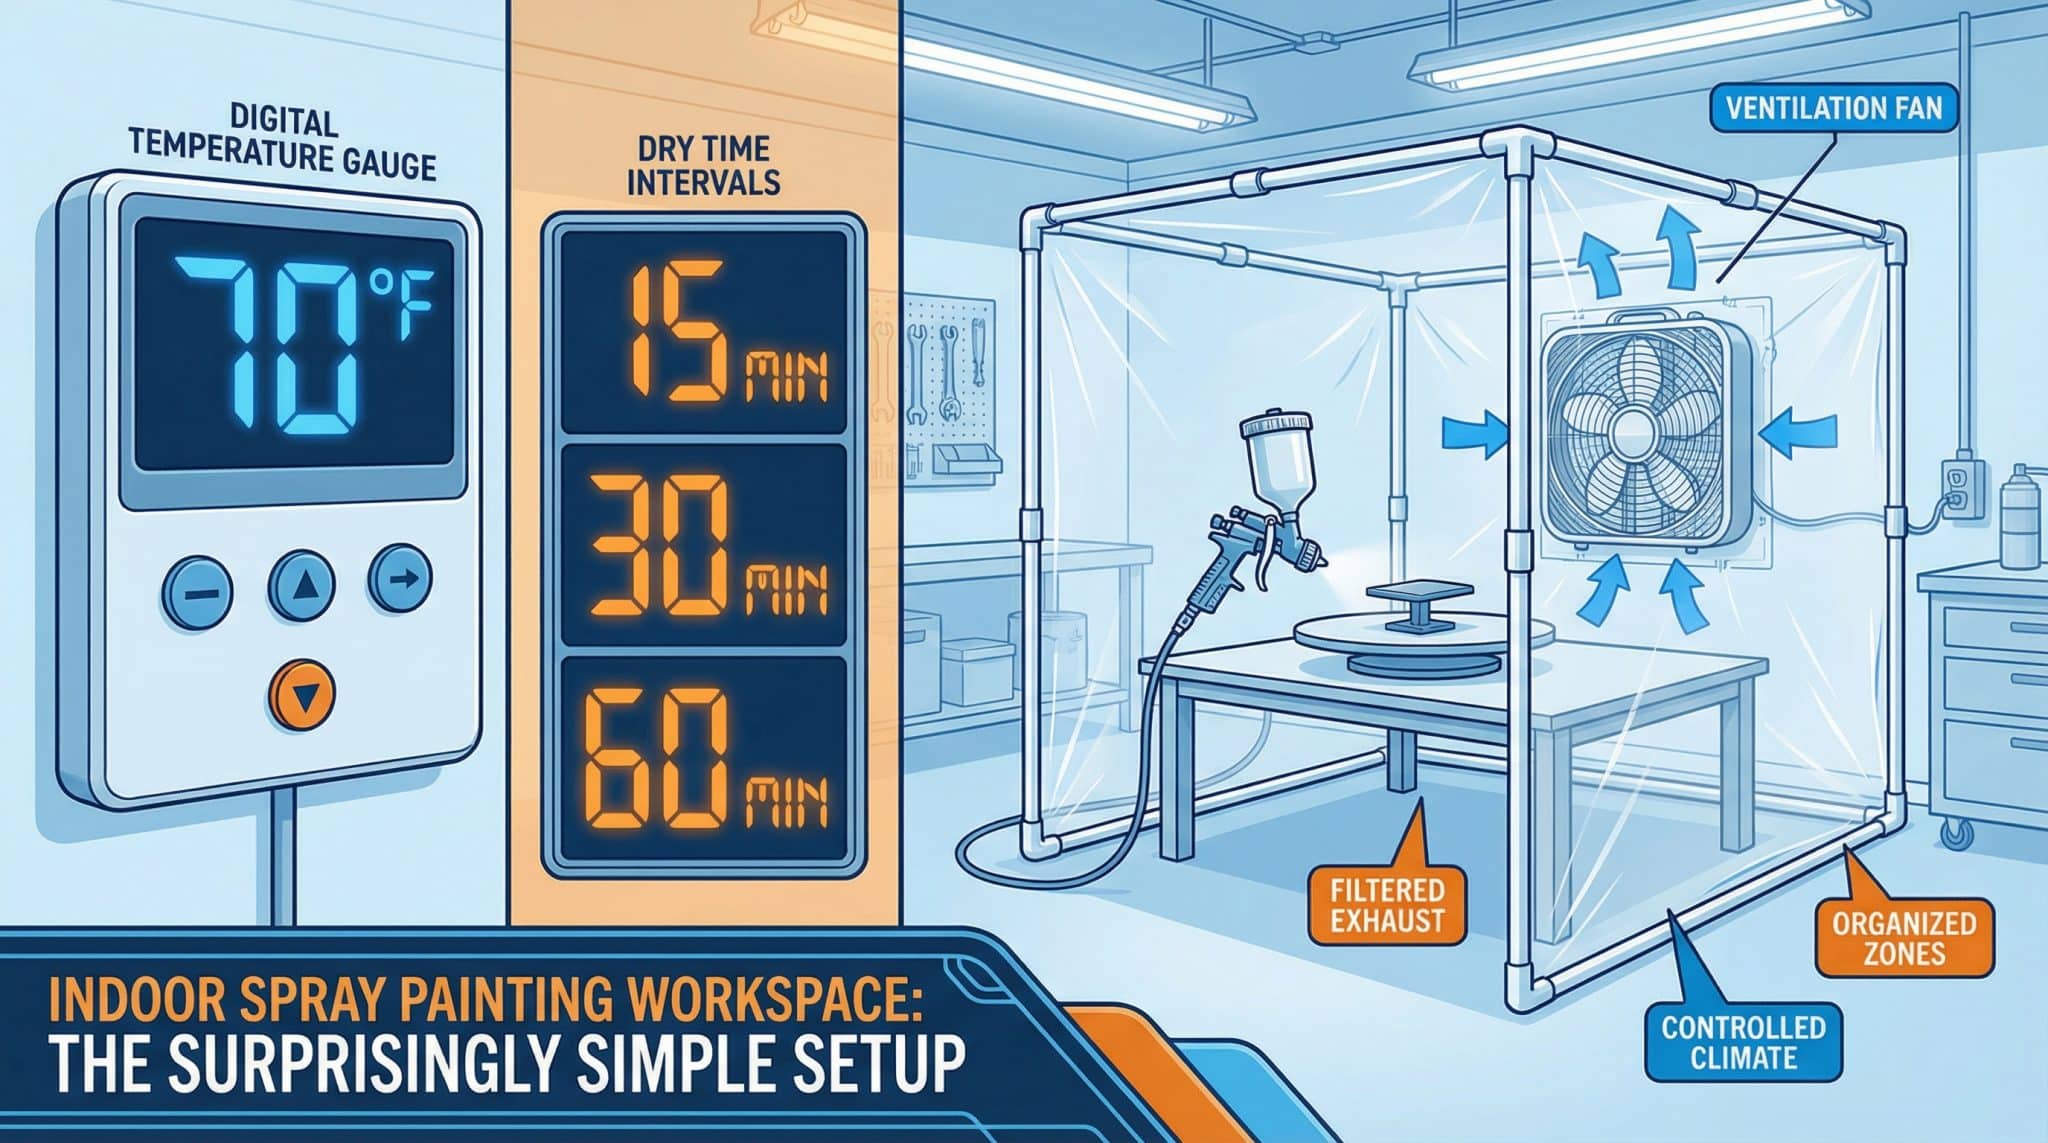
Step 4: Build a Cheap DIY Spray Booth (In 10 Minutes)
Think of this like a temporary shower stall for your furniture so the rest of your house doesn’t get a light misting of “permanent regret.”
For furniture, aim for about a 10′ x 10′ area so you can walk around the piece.
Simple budget booth:
- Buy a couple of plastic drop cloths (the crinkly cheap ones are fine).
- Hang them from the ceiling or wall in a U shape around your work area.
- Leave the open side facing your exhaust fan or window.
- Tape plastic or paper on the floor, overlapping it 3-4 feet past your project.
Now for the step everyone forgets:
- Close and cover HVAC vents in the room.
Fine mist will go into your ducts and surprise you later on your nice white trim in another room.
- Cover electronics nearby. Yes, even your laptop across the room. I once gave mine a soft matte finish it did not ask for.
Booth up? Great. Now let’s talk about the invisible villains: temperature and humidity.
Step 5: Temperature & Humidity The Sneaky Project Killers
Spray paint is picky. It wants “nice spring day,” not “sauna,” not “garage in January.”
The Sweet Spot for Temperature
Most cans will say this somewhere on the back, but generally:
- Ideal range: 50°F-85°F
- Happy place: around 70°F
And it’s not just the air that matters.
If you dragged a metal chair in from your 40°F garage into a 60°F room, that metal is still cold. Cold surfaces + spray paint especially on wood plastic or metal surfaces = sticky, slow drying, often cracking sadness.
Too cold (below ~50°F):
- Paint goes on wet and just… stays that way
- Poor adhesion
- Cracks and weirdness later
Too hot (above ~85°F):
- Paint dries in the air before it hits the surface
- Rough, sandpapery texture
- Poor adhesion again, just in a different flavor
Working in Heat
- Paint early in the day before your space turns into a sauna.
- Use light coats so each layer can flash off.
- If the room starts feeling hot to you, it’s probably too hot for the paint let it cool down.
Working in Cold
- Warm the room up before you start. Space heater on for 30 minutes, then turn it off before spraying. No spraying near an active heater.
- Let your spray cans come to room temp. You can stick them in a tub of room temp water for ~15 minutes if they’re chilly.
- Cold cans like to spit and spray unevenly. Ask me how I know.
Humidity: The Other Silent Saboteur
Humidity is sneaky because you can’t always see the problem until the paint is already weird.
Best humidity range: about 40-70%
- Below 40%: paint can dry too fast and feel dusty/chalky.
- Above 70%: expect slow drying, tacky surfaces, and cloudy clear coats.
Grab a cheap little hygrometer (humidity meter). They’re usually around $10 and worth every penny.
If humidity’s high:
- Run a dehumidifier in the room for a few hours first, or
- Pick a drier time of day to spray
Your future non-sticky furniture will thank you.
Step 6: Airflow & Safety Gear (Not Glamorous, But Necessary)
Is this the fun part? No.
Is this the part that keeps your brain cells intact? Yes.
How to Set Up Airflow That Actually Works
You want air moving through the space and out of your house.
Basic setup:
- Open a window or door on two sides of the room (or room + hallway).
- Put a box fan in one window/door, blowing out. This is your exhaust.
- If you have another fan, put it opposite side on low to help push fresh air in.
- For extra dust control, rubber band a cheap furnace filter to the back of your exhaust fan. Instant DIY air scrubber.
Paint particles = out. Fresh air = in. You = less dizzy.
What You Should Wear (Besides Old Sweatpants)
You do not need a hazmat suit, but you do need more than a paper mask and vibes.
Bare minimum:
- Respirator with organic vapor cartridges
The P100 ones with the pink filters are a good example. You’ll know it’s working when you basically can’t smell the paint.
- Safety glasses or goggles
Especially when spraying above eye level. Paint mist in the eyeball is not a cute look.
- Nitrile gloves
Because spending 20 minutes scrubbing paint off your nails is not peak joy.
Okay, you’re set up, your room is cooperating… now let’s deal with the part that tricks almost everyone: drying times.
Step 7: Drying, Curing, and the Evil Recoat Window
Most spray paint labels say something cheerful like “dries in 20 minutes!” and technically, they’re not lying.
But “dry to touch” and “ready for real life” are two very different things.
The Four Stages of Drying (Without the Science Lecture)
1. Dry to touch (about 10-30 minutes)
Looks dry, feels dry when you lightly tap it. Underneath? Still soft. Don’t start handling it yet.
2. Handle dry (roughly 1-2 hours)
You can gently move or flip the piece without smearing, but a fingernail can still leave a mark.
3. Recoat window (the important one)
Most spray paints like you to:
- Recoat within about 1 hour of the first coat
OR
- Wait a full 24 hours before recoating
That awkward middle area (2-12 hours-ish) is where people get wrinkling and cracking because the lower layer is semi-soft and the new layer shrinks on top of it.
4. Fully cured (24 hours to 7 days)
This is when the paint has actually hardened. Enamels especially can take several days. Until then, it’s more vulnerable to dents, scuffs, and things sticking to it.
If you only remember one thing:
“Dry” is not “done.” Respect the recoat window.
Different Paint Types, Different Personalities
Super quick cheat sheet:
- Lacquer: fastest. Touch dry in minutes, cured in about a day. Strong fumes, more finicky about humidity.
- Acrylic: middle of the road. Touch dry in ~10-20 minutes, cured in 1-2 days.
- Enamel: the slowpoke. Touch dry in 30-60 minutes, but can take 3-7 days to fully cure.
While it’s curing, go gentle:
- Don’t stack stuff on it
- Don’t shove it in a closet
- Don’t load a freshly painted shelf with heavy books the next day and then wonder why you have permanent book shaped dents
Step 8: Speeding Things Up (Without Destroying Your Finish)
You can’t cheat chemistry, but you can help it along a little.
- Do thin coats.
One heavy coat that sags will take way longer and look worse than 2-3 light coats.
- Keep the air moving.
Leave the fans running after you spray. Drying is just solvents leaving the paint moving air helps carry them off.
- Use gentle warmth, not blasting heat.
Bringing a cold room up into that nice 65-75°F range makes a big difference.
Heat guns and hair dryers can work on tiny areas, but:
– Keep them on low
– Keep them moving
– Hold them farther away than you think
Or you’ll end up with bubbles and blisters. Ask me how many times I had to learn this.
Step 9: How to Fix Common Spray Paint Disasters
Messed something up? Join the club. You almost never have to throw the whole piece away.
1. Sticky or Tacky Paint That Won’t Dry
If it’s still tacky after 48 hours:
- Move it somewhere warmer and drier
- Keep air circulating
- Severely stubborn pieces can take 5-7 days to fully harden
Do not keep adding more paint on top. That’s like stacking wet pancakes.
2. Wrinkled or Cracked Paint
Looks like alligator skin? Usually means:
- You recoated too soon, or
- You sprayed too heavy, or
- The surface was too hot or too cold
Fix:
- Let it cure completely (yes, really).
- Sand it smooth.
- Repaint using lighter coats and either inside the recoat window or after 24 hours.
Once you watch a perfectly good coat suddenly wrinkle up, you will never ignore recoat directions again.
3. Bubbles and Cloudy Clear Coats
Bubbles:
- Often from moisture under the paint or spraying onto a hot surface.
- Let it dry, sand back until smooth, and repaint once conditions are normal.
Cloudy / milky clear coat:
- Almost always high humidity.
- Wait for a drier day or lower humidity in the room before trying again.
4. That Lingering Spray Paint Smell
Strong smell for 24-48 hours? Normal.
Still strong after a week? Your piece didn’t cure with enough airflow.
- Move it to a room where you can open windows and run fans.
- If possible, let it “camp” outside under cover for a day or two.
Do not stick it in a closet to “air out.” That just traps the fumes with your clothes so everything smells like fresh DIY for weeks.
Final Checklist: So Your Next Project Actually Looks Professional
Before you shake that next can, run through this quick list:
- Temp & humidity:
Room and object are in the 50-85°F range, humidity roughly 40-70%.
- Ventilation:
You’ve got real cross ventilation, a fan exhausting air outside, and no pilot lights or open flames.
- Protection:
Plastic or paper down on the floor, a cheap little booth for overspray, vents covered, electronics protected.
- Gear:
Respirator with organic vapor cartridges, eye protection, nitrile gloves. (Fashionable? Maybe not. Worth it? 100%.)
- Timing:
You know your recoat window and you’re not going to “just do one more coat real quick” three hours later.
- Test piece:
If you’re unsure about conditions, give a scrap board or the back of the piece a test spray first.
Do that, and your indoor spray paint projects stop being a gamble and start looking like you actually know what you’re doing with creative spray methods.
Now go shake that can and make your next victim I mean, furniture piece gorgeous.