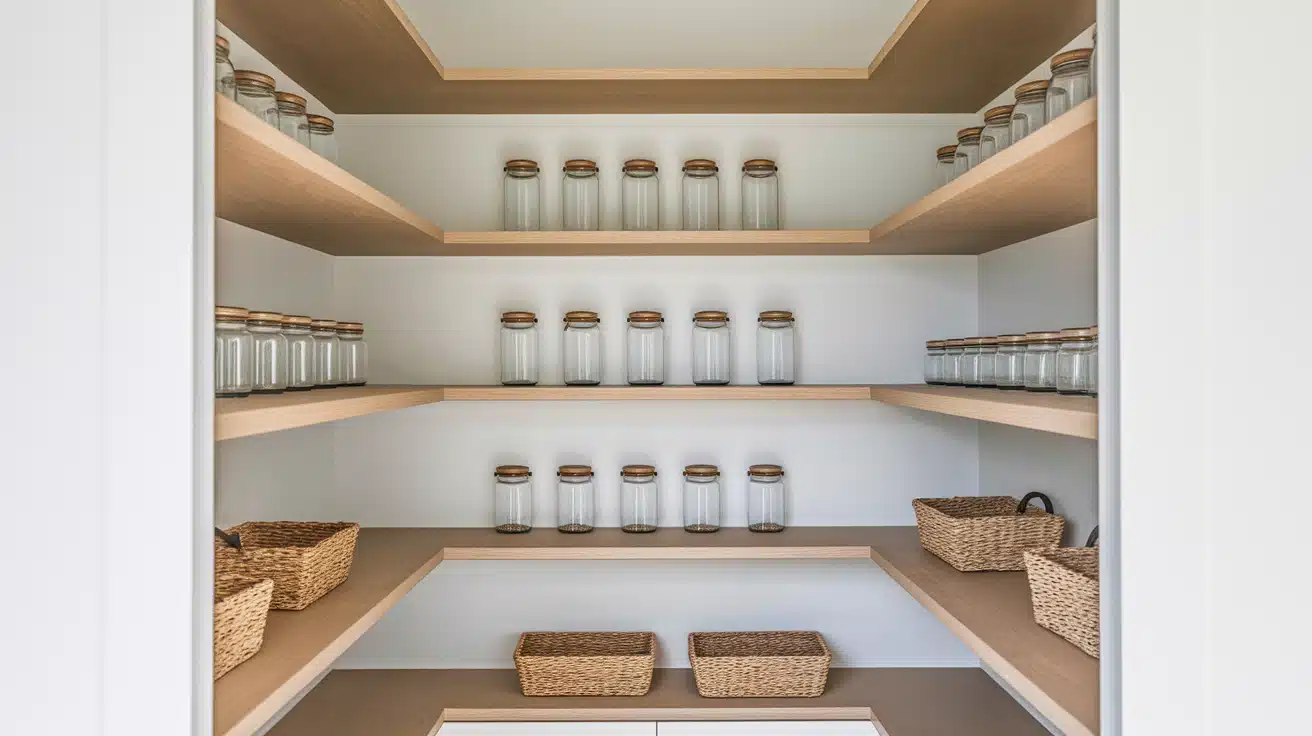

Running out of pantry storage space?
DIY floating pantry shelves offer a simple solution that works in any kitchen. These custom shelves help you organize canned goods, spices, and dry ingredients while keeping everything visible and within reach.
Floating shelves cost less than built-in cabinets and take just a weekend to complete. You can build them to fit your exact space and storage needs. Whether you have a small closet pantry or a large walk-in space, these shelves work anywhere.
This guide shows you step-by-step how to measure, cut, and install floating pantry shelves using basic tools.
You’ll learn to choose the right materials, find wall studs for secure mounting, and finish your shelves for long-lasting use. No special skills needed, just follow our simple instructions for professional-looking results.
Steps to Build DIY Floating Pantry Shelves
Make-over pantry storage with this DIY guide, which walks you through creating custom floating shelves from planning to installation.
Tools and Materials:
Gathering the right tools and materials before starting saves time and ensures professional results. Most items are available at your local hardware store, and you may already own many of the basic tools needed for this project.
| Category | Items Needed | Specifications |
|---|---|---|
| Wood Boards | Pine, oak, or poplar | 1×4 to 1×8 inches based on storage needs |
| Hardware | Brackets, screws, anchors | Brackets rated for 50+ pounds, 3-inch wood screws |
| Tools | Stud finder, level, drill, tape measure | Drill with bits, 2-4 foot level |
| Finishing | Sandpaper, finish | 120-grit and 220-grit sandpaper, wood stain/paint/polyurethane |
Let’s get started with a DIY floating pantry shelf:
Step 1: Measure and Plan
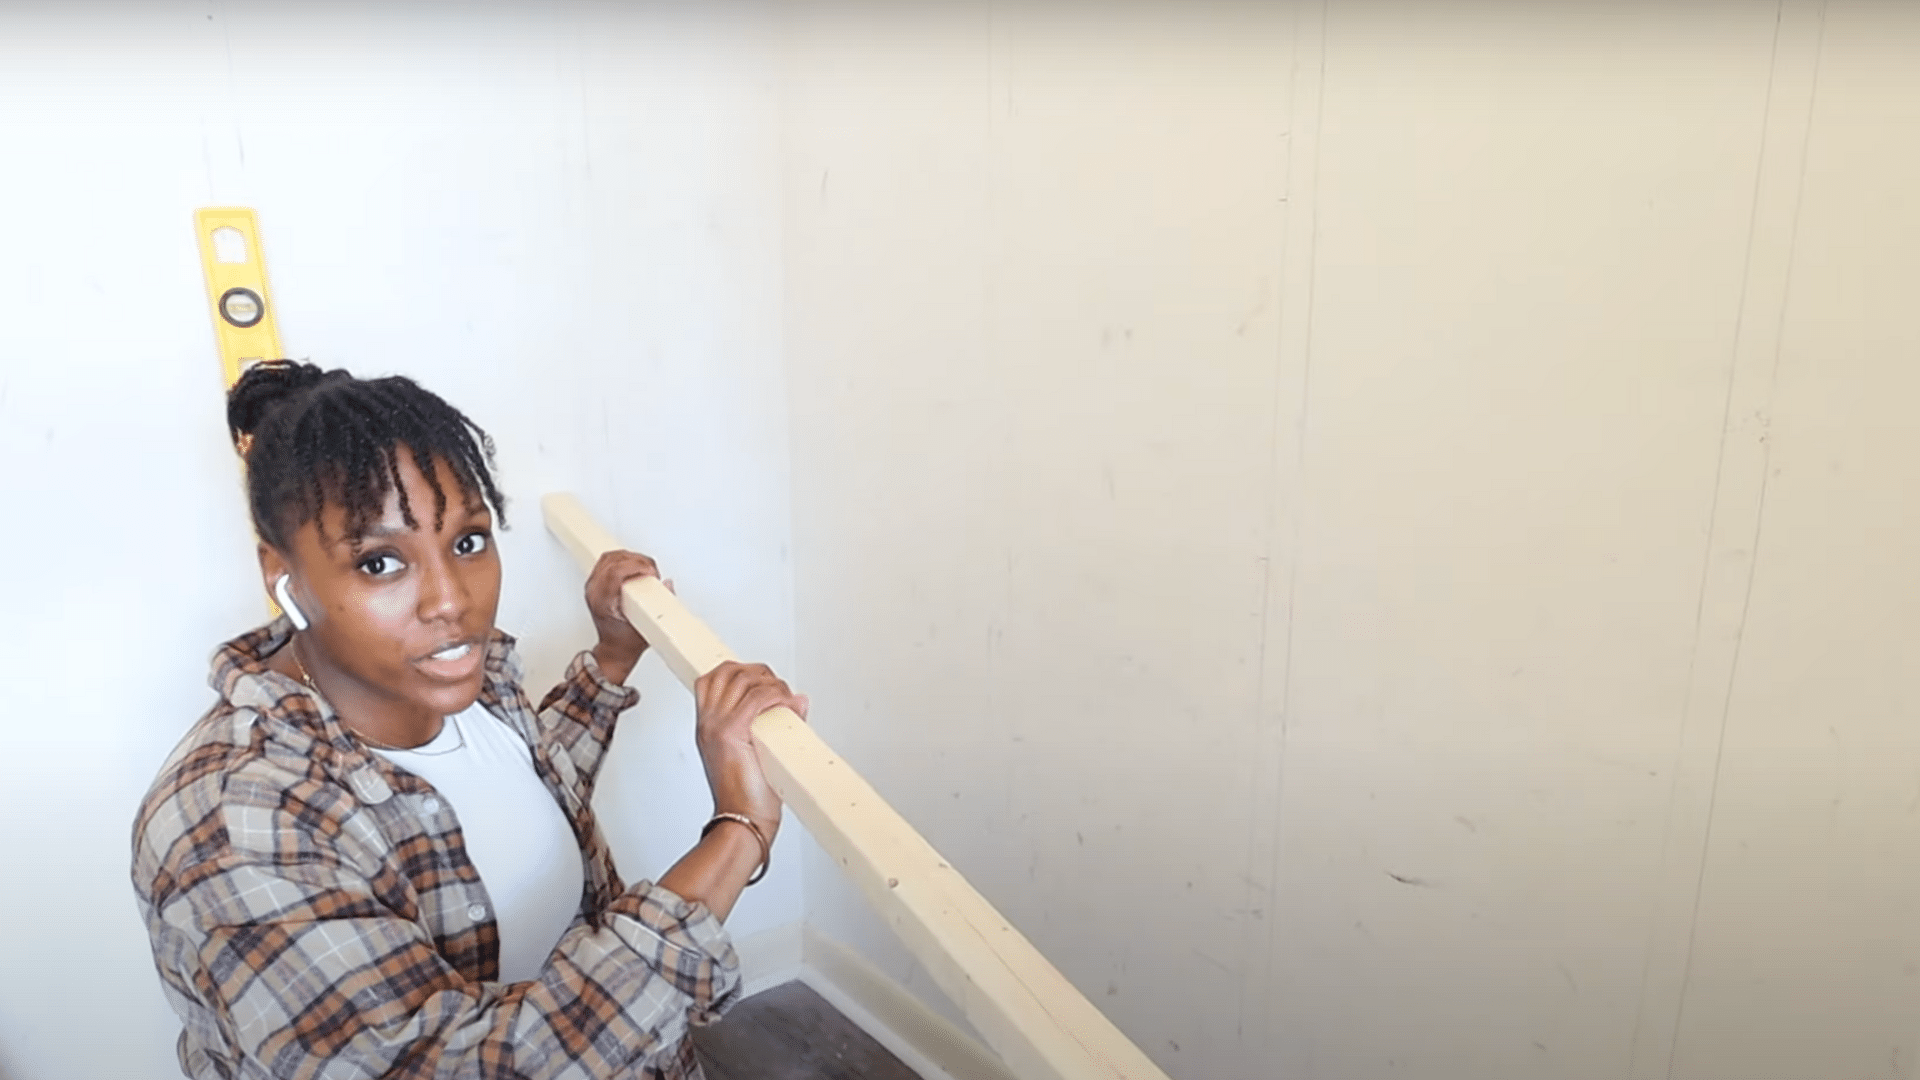
Start with accurate measurements to ensure your floating pantry shelves fit perfectly and function well. Poor planning leads to shelves that don’t hold enough items or look awkward in your space.
Document measurements with a simple sketch, including all dimensions and obstacles, and test your spacing plan by placing items on a temporary surface at planned heights before installation.
Add 1-2 inches above your tallest items for easy access and removal.
Step 2: Cut and Prep Wood
Precise cuts and proper wood prep ensure your floating pantry shelves look professional and last longer.
Measure twice and cut once by marking cut lines clearly with a pencil and using a fine-tooth blade (60-80 teeth) for clean edges. Support both sides of your cut with sawhorses to prevent splitting, cut slightly outside your marked line, then sand to the exact size.
Always use a sharp blade for cleaner cuts and less splintering. Cut slowly and steadily, as rushing leads to mistakes and rough edges. Keep a piece of scrap wood nearby to test your saw settings first.
Step 3: Locate Studs and Mark Bracket Placement
Locating wall studs is crucial for creating shelves that can safely support weight. Floating pantry shelves need solid support to prevent sagging or falling when loaded with canned goods and containers.
Wall studs provide the strongest mounting points for your floating shelves. Supporting 50+ pounds per shelf compared to just 10-20 pounds for drywall alone. Preventing shelf failure that could damage your pantry contents and walls.
Always find at least one stud per shelf for secure mounting, and use a magnetic stud finder if your electronic one isn’t working properly.
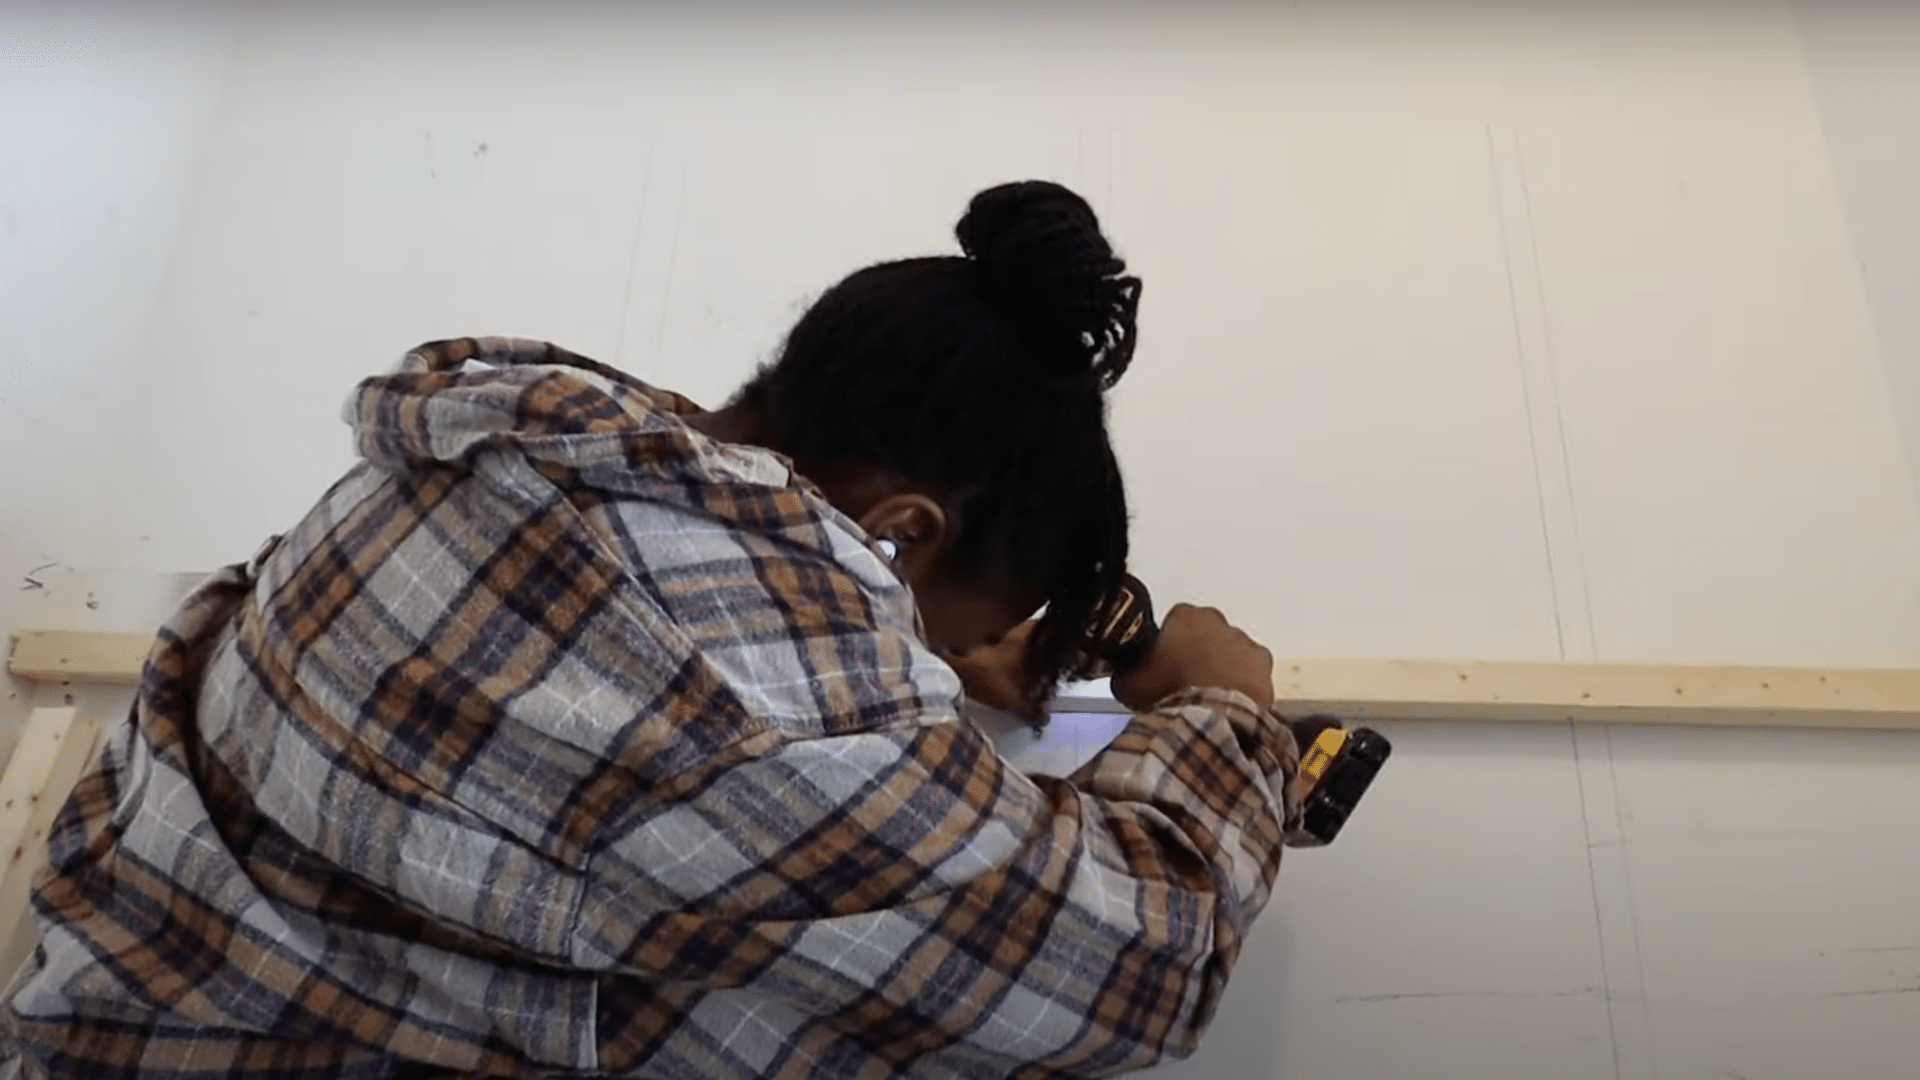
Step 4: Install Brackets or Shelf Supports
Select a bracket style that suits your preferred look and meets your shelf requirements. Both hidden and visible brackets work well when installed properly into wall studs.
Confused Between Hidden vs. Visible Brackets?
Hidden brackets create a clean, floating look but need precise installation. The bracket slides into a groove cut into the back of your shelf board.
Visible brackets offer easier installation and mount directly to the wall underneath the shelf. Consider your skill level – hidden brackets need more precision, while visible brackets are more forgiving for beginners.
Pro Tip: Choose visible brackets for your first project to build confidence, and always buy brackets rated for more weight than you plan to store.
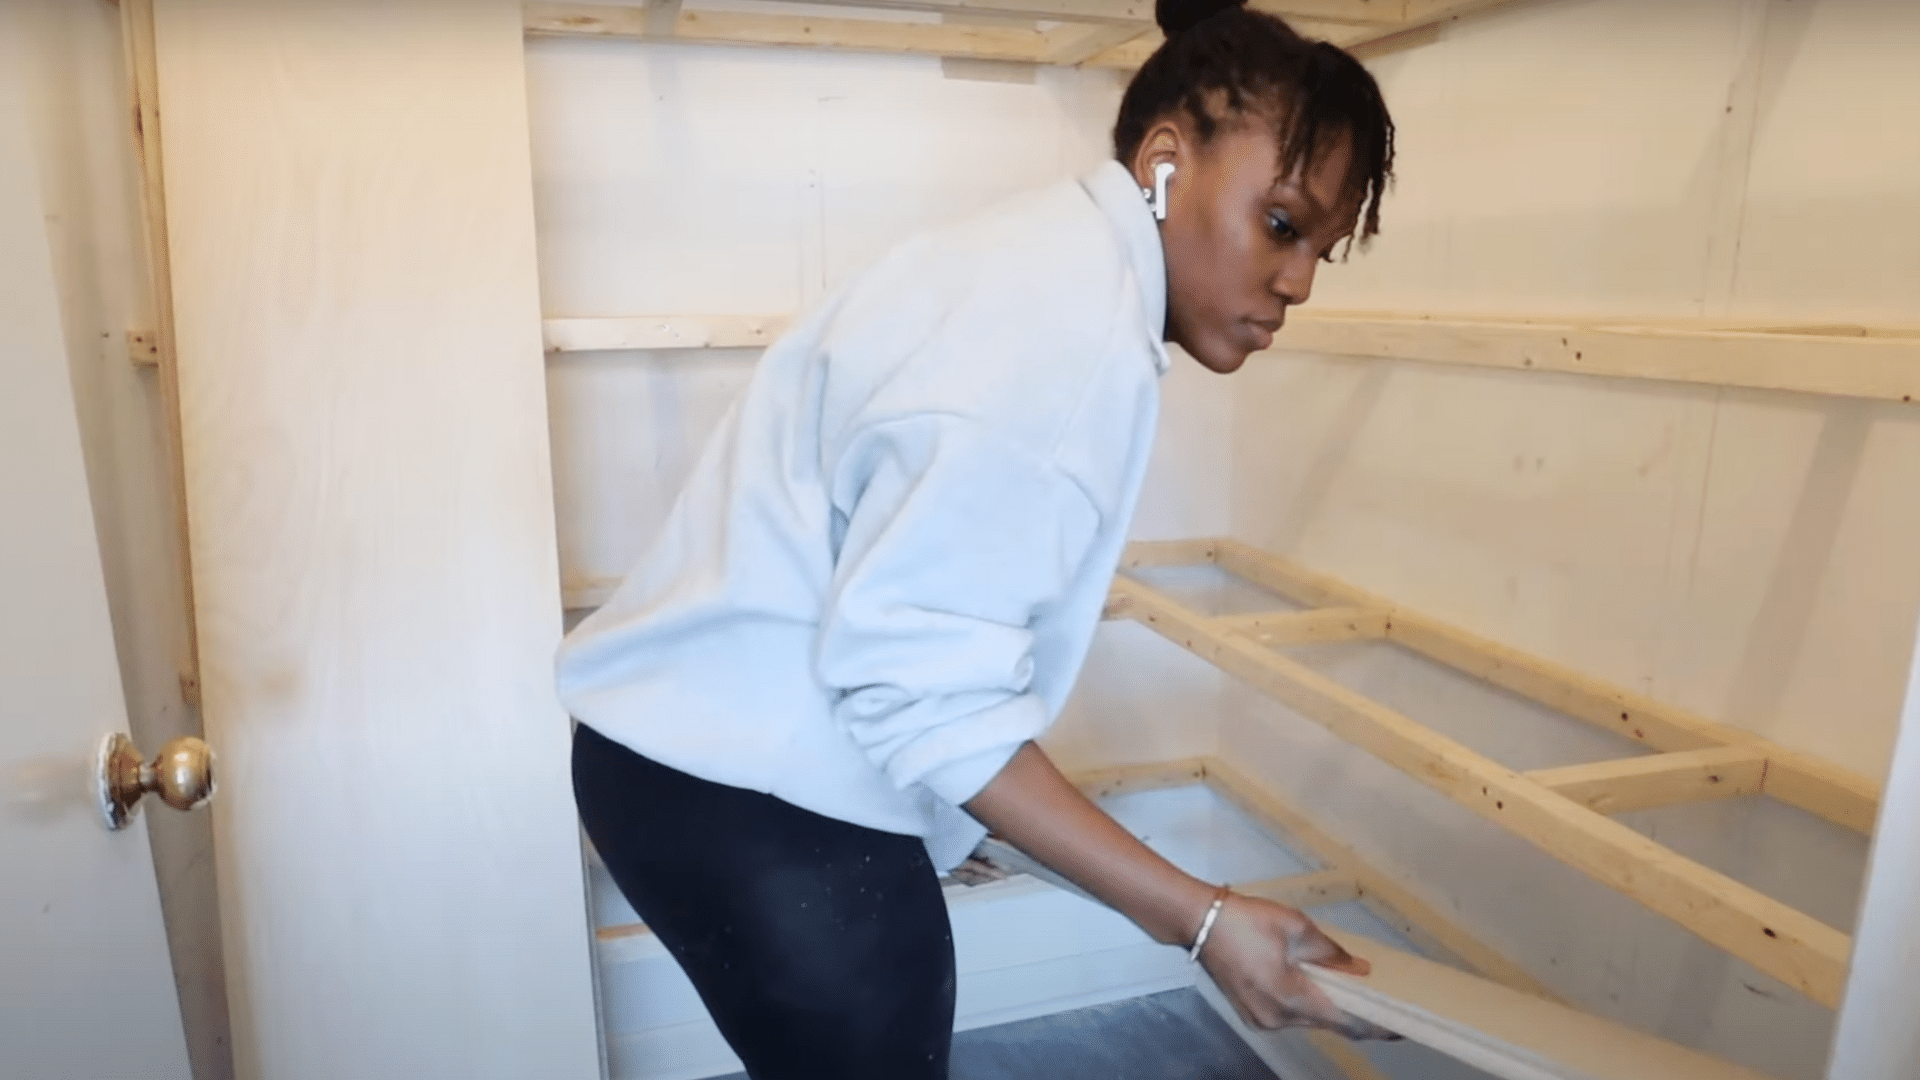
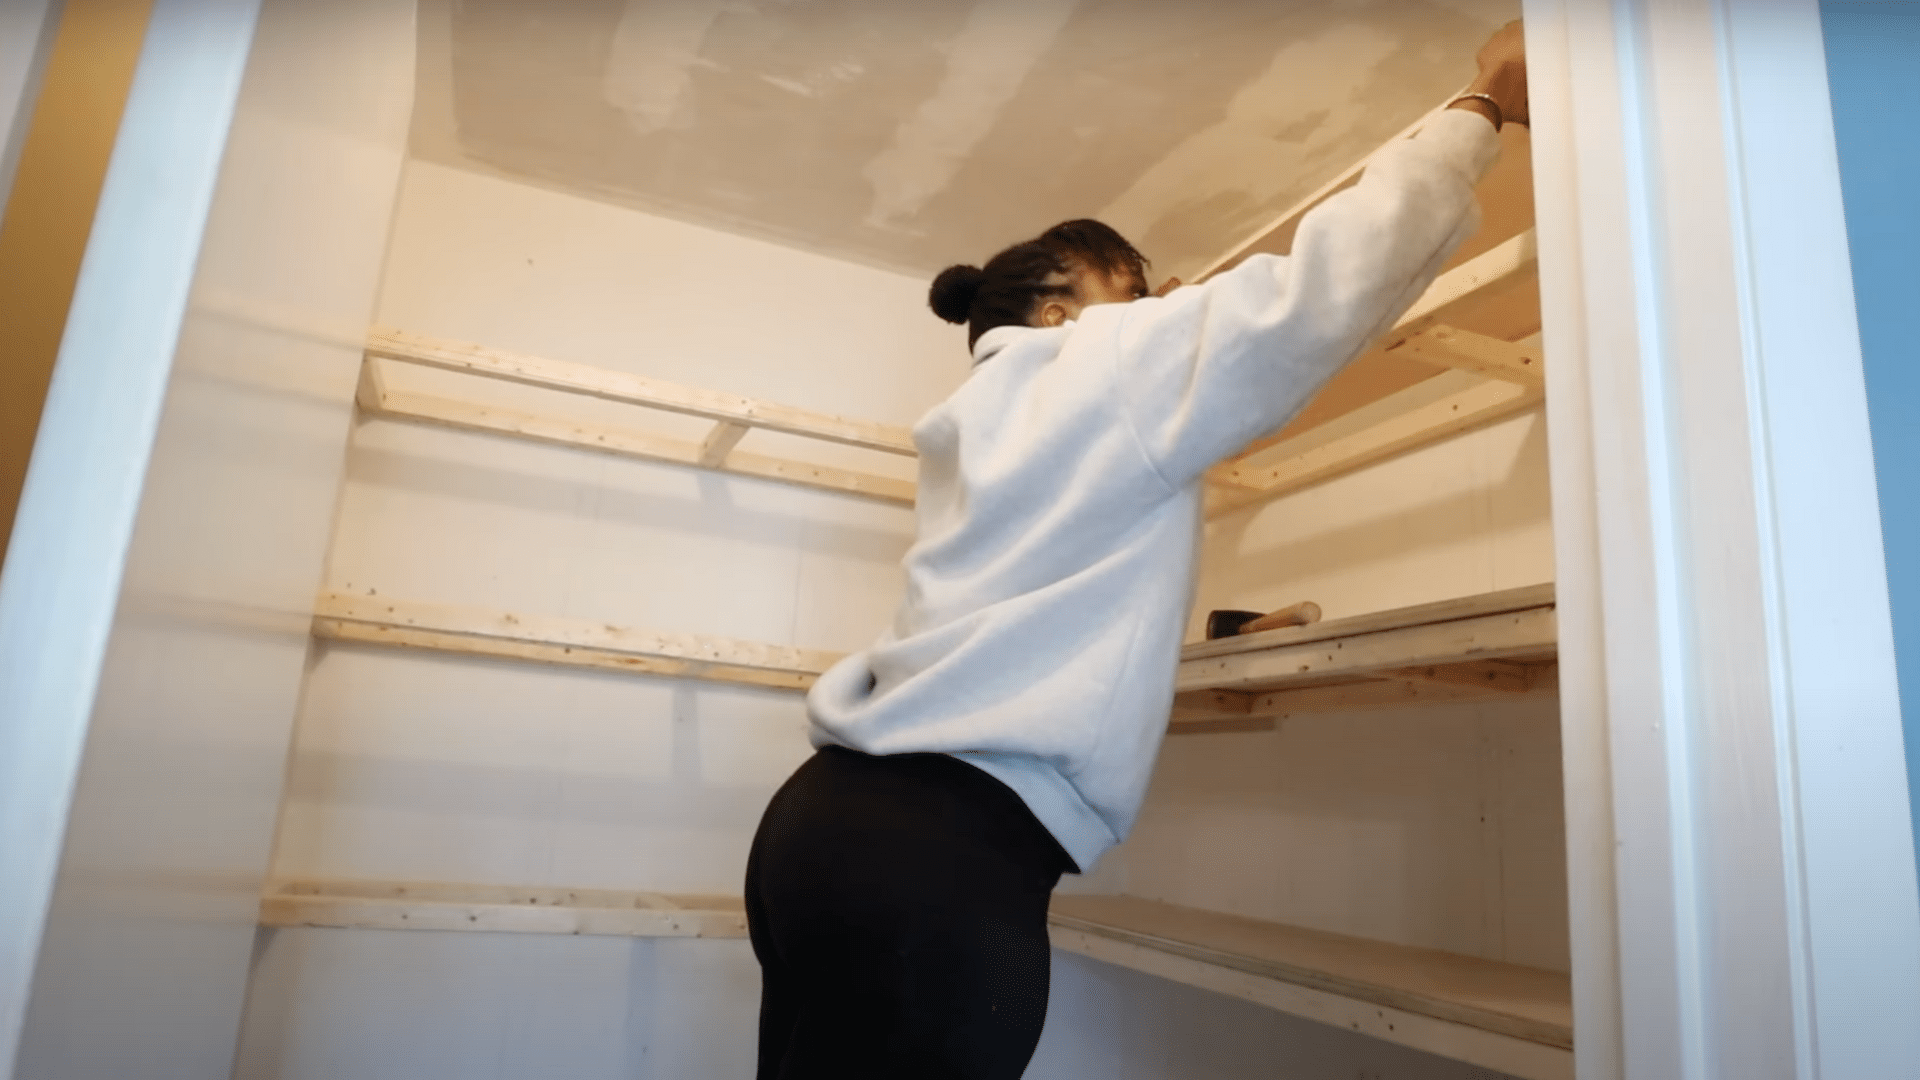
Step 5: Mount the Shelves
Proper shelf mounting ensures your floating pantry shelves stay secure and stable under weight. Take time to install each shelf correctly for long-lasting results.
Place each shelf onto its brackets carefully, ensuring it sits flush against the wall, then slide hidden brackets until fully seated or rest visible brackets on top with screws if needed.
Video Tutorial
I’d like to give credit to RemodelHandzfor their informative video, which served as a reference for this guide.
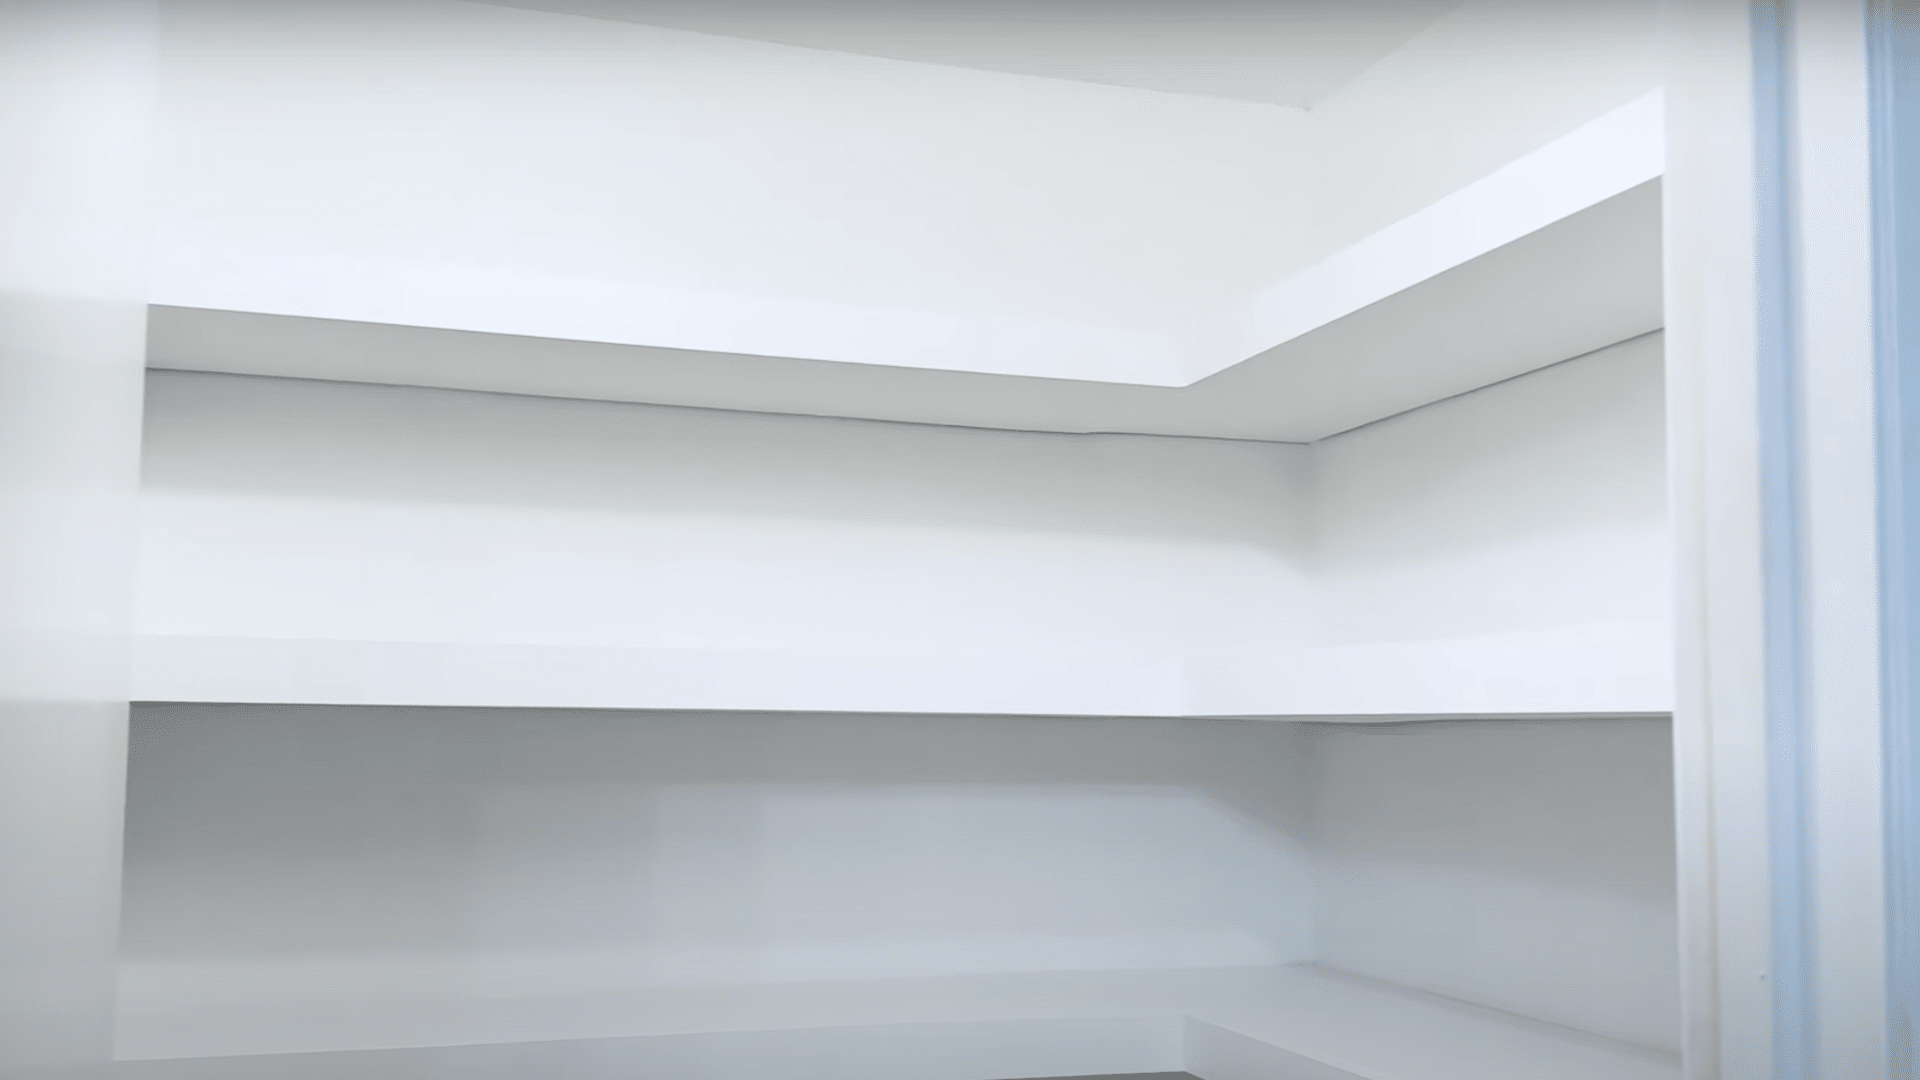
Average Shelf Depth and Spacing
Standard pantry items determine your shelf depth needs. Most canned goods and boxes work well with shelves 8-12 inches deep.
| Item Type | Recommended Shelf Depth | Common Examples |
|---|---|---|
| Canned goods | 4-6 inches | Soup cans, tomato sauce |
| Cereal boxes | 10-12 inches | Cereal, pasta boxes |
| Spice jars | 3-4 inches | Small spice containers |
| Large containers | 12-16 inches | Flour, sugar, storage bins |
Consider these spacing guidelines:
- Small items (spices, small cans): 8-10 inches apart
- Medium items (standard cans, jars): 12-14 inches apart
- Large items (cereal boxes, storage containers): 16-18 inches apart
Pro Tip: Measure your most commonly used items before cutting shelves to ensure a perfect fit, and plan spacing based on your tallest items rather than shortest to avoid wasted vertical space.
Finishing Touches and Styling Tips
The right finishing touches turn bare floating shelves into organized, attractive pantry storage. Small details make a big difference in both function and appearance.
- Clean shelves with a damp cloth before adding items to remove dust and debris.
- Group similar products together on each shelf for easy finding and visual order.
- Use matching containers for bulk items, such as flour and sugar, to create a uniform appearance.
- Leave 2-3 inches between item groups to avoid overcrowding and improve access.
- Add non-slip shelf liners to prevent items from sliding around during use.
- Install battery-powered LED strips under shelves for better visibility and ambiance.
Conclusion
You’ve just learned how to build floating pantry shelves that completely change your kitchen storage. This simple weekend project costs a fraction of store-bought options while giving you custom shelves that fit your exact space.
Following these steps, you can measure, cut, mount, and finish shelves that hold 50+ pounds each. Whether you have a tiny closet or a spacious walk-in pantry, these shelves work perfectly. The basic tools needed are probably sitting in your garage right now.
Ready to get started? Grab your measuring tape and head to your pantry. Within days, you’ll have professional-looking shelves keeping everything organized and accessible.
Say goodbye to cluttered counters and hello to storage that actually works for your family.