
Last winter, a homeowner dealt with a burst outdoor faucet that cost hundreds in emergency plumber fees. However, here’s what most people don’t know: outdoor faucets can be protected from freezing using simple materials commonly found around most homes.
This guide shows how to create a reliable faucet cover using paint buckets, zip ties, and old rags. This method costs very little and takes just minutes to set up. The materials are usually already available in garages or storage areas.
Homeowners can save hundreds on potential repair bills and avoid the headache of dealing with frozen pipes during the coldest days of winter. Burst pipes cause water damage and require expensive emergency repairs.
Here’s the simple DIY solution that has already protected faucets through multiple harsh winters without any failures.
Why Is It Necessary to Insulate an Outdoor Faucet?
Outdoor faucets need insulation to prevent freezing during cold weather. When water freezes inside pipes, it expands and can cause severe damage to your plumbing system. Key Reasons to Insulate Outdoor Faucets are.
1. Prevents Pipe Bursting
- Water expands by 9% when it freezes
- Creates massive pressure inside pipes
- Can crack or completely burst pipe walls
2. Avoids Water Flow Blockage
- Frozen water completely stops the faucet’s function
- Blocks outdoor activities like car washing
- Prevents watering plants or filling containers
3. Protects Home Foundation
- Burst pipes leak water around the foundation base
- Leaked water can freeze and expand further
- Creates foundation cracks requiring expensive repairs
Step-by-Step Guide to Insulating an Outdoor Faucet
Protect your outdoor faucet from freezing temperatures with this easy, budget-friendly DIY method, which utilizes paint buckets, zip ties, and rags.
Materials Needed
- Two 1-quart paint buckets
- Disposable cleaning rags
- Zip ties (4-6 pieces)
Tools Required
- Power drill
- Drill bit (appropriate size for zip ties)
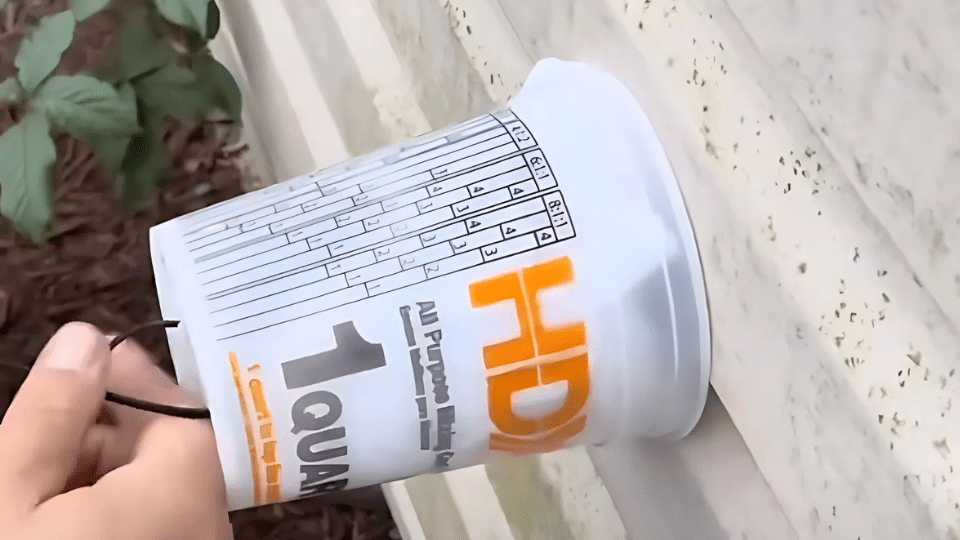
Step 1: Prepare the Paint Buckets
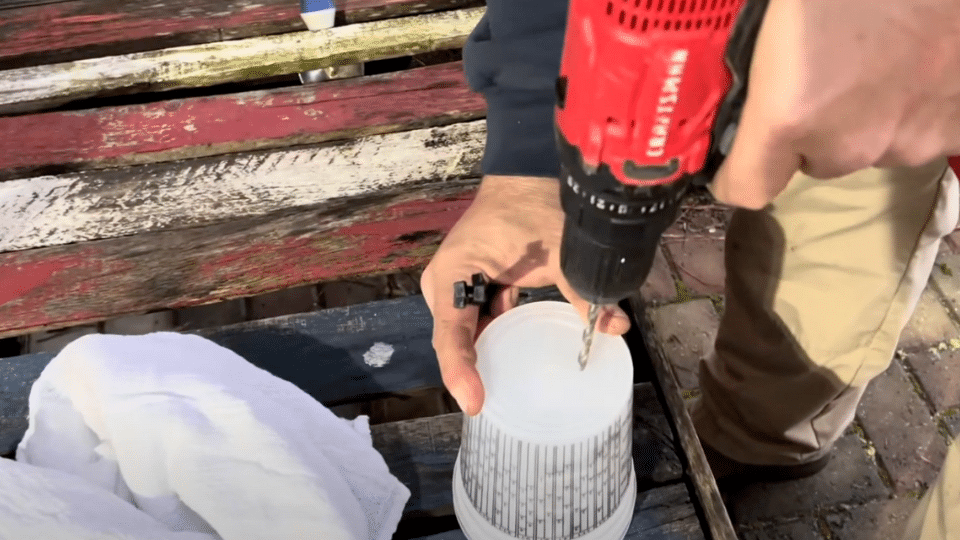
Stack both quart-sized paint buckets together perfectly. This ensures the holes line up correctly when you drill. Use a drill bit that matches the width of your zip ties.
Drill two holes directly across from each other, passing through both buckets simultaneously. Ensure that the holes are large enough for zip ties to pass through easily.
Pro Tip: Mark your drill spots with a marker first to ensure even spacing and straight holes.
Step 2: Position the First Zip Tie
Thread one zip tie through the first hole you drilled. The zip tie should go completely through both paint buckets. Leave the zip tie loose for now, don’t tighten it yet.
This will serve as one of your anchor points to secure the cover around the faucet spout.
Pro Tip: Keep zip ties loose during installation so you can easily adjust positioning and make final connections around the faucet.
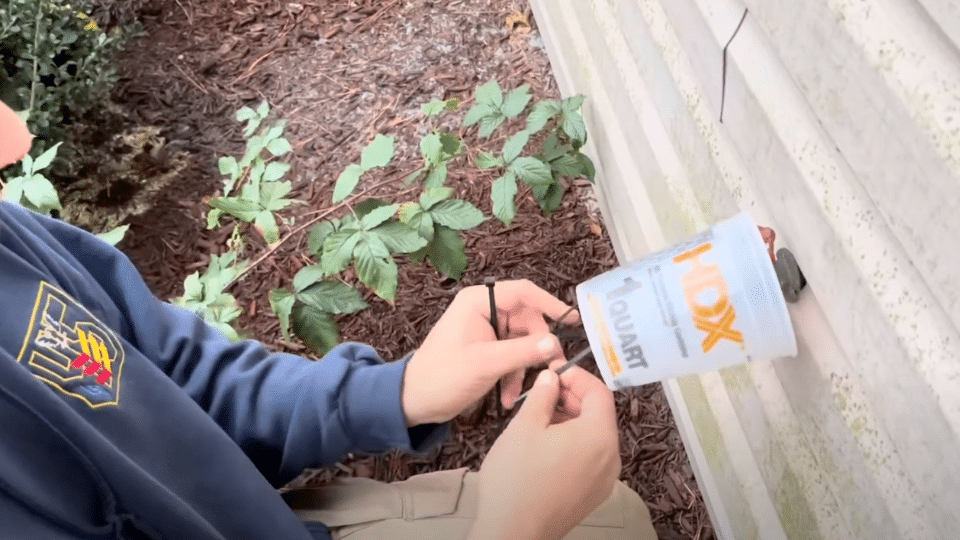
Step 3: Insert the Second Zip Tie
Feed another zip tie through the second hole, going through both buckets. Now you should have two zip ties creating an “X” pattern when viewed from the side.
These will wrap around your faucet to hold the cover in place securely during freezing weather.
Pro Tip: Use your fingers to feel inside the bucket and make sure zip ties move freely through the holes.
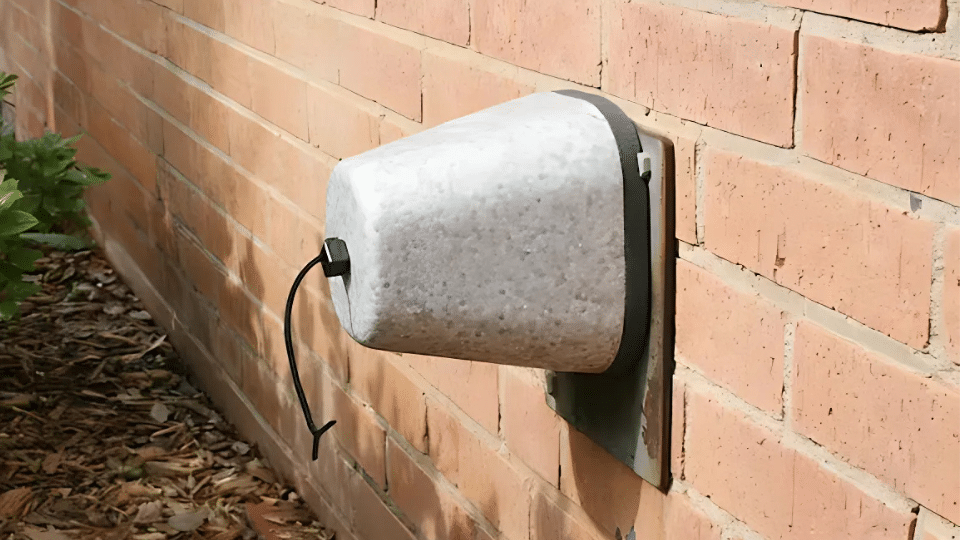
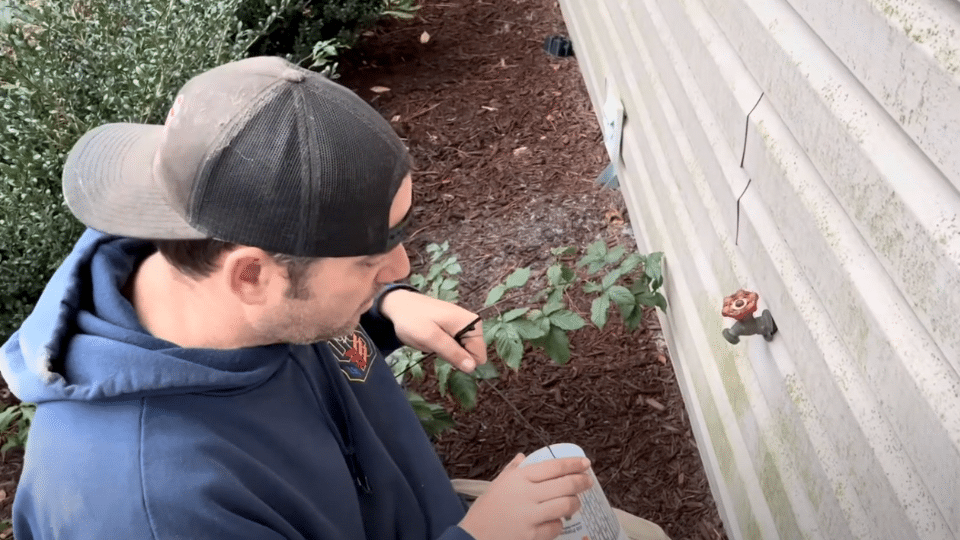
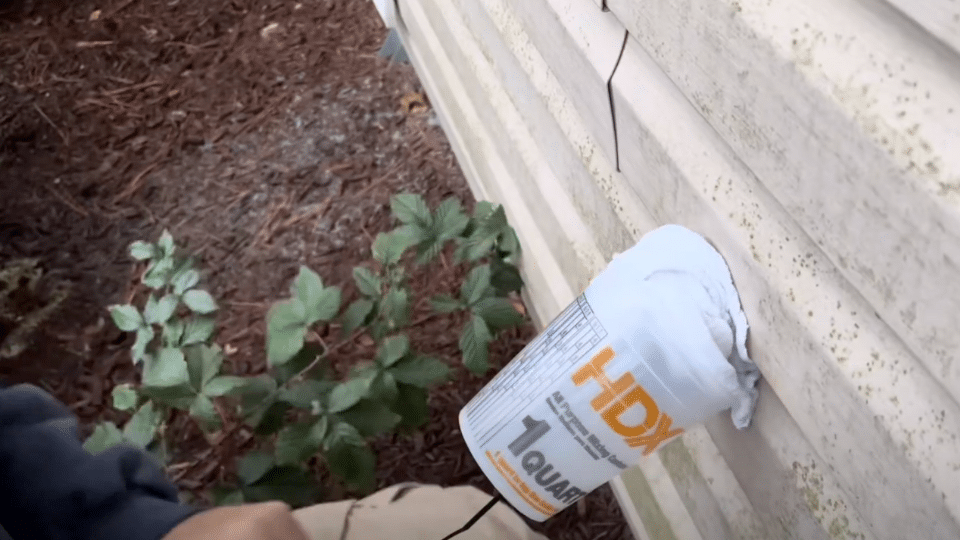
Step 4: Attach Cover to Faucet
Place the double-bucket cover over your outdoor faucet. Connect the loose ends of your zip ties around the faucet pipe or mounting area.
The buckets should sit securely over the faucet spout. Don’t fully tighten yet; connect the zip ties to hold everything in position.
Pro Tip: Center the cover over the spout opening and ensure it sits flush against the wall for maximum protection.
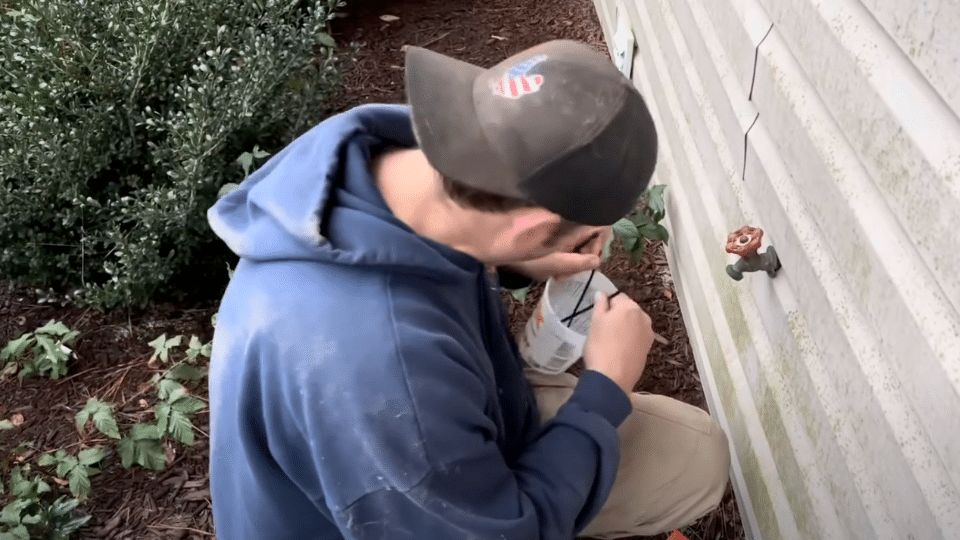
Step 5: Add Insulation Material
Stuff the disposable rags into the space between the faucet and the inside walls of the paint buckets. Pack them snugly but not too tightly.
The rags create an insulation barrier that traps warm air around the faucet, preventing cold air from reaching the pipes.
Pro Tip: Use enough rags to fill gaps, but leave some air space for insulation – don’t pack too densely.
Step 6: Secure and Tighten
Pull the zip ties tight to secure the cover firmly against the wall or faucet mounting. Ensure the cover won’t move or fall off during wind or adverse weather conditions.
Trim excess zip tie length with scissors or wire cutters. Test the security by gently tugging on the cover.
Pro Tip: Tighten zip ties gradually and evenly to avoid cracking the plastic buckets while ensuring a secure fit.
Video Tutorial
I want to acknowledge Homesteading and Hungry for the insightful video, which served as a key reference in compiling this guide.
Maintain & Reuse Faucet Covers
- Remove Carefully After Each Winter Cut. Use scissors to carefully cut zip ties instead of pulling them off harshly. Save the paint buckets and rags for use next season.
- Clean Components Thoroughly Before Storage. Wash paint buckets with warm, soapy water and let them dry completely. Replace any rags that smell musty or look worn out.
- Inspect and Replace Worn Parts. Check drill holes for cracks or enlargement each year before use. Replace damaged buckets and buy fresh zip ties annually.
- Store in a Dry, Protected Location. Keep buckets nested together in a garage, basement, or shed storage area. Store rags in a sealed plastic bag to stay clean and dry.
- Prepare Early Each Fall Season: Test fit your cover before the first freeze warning hits your area. Install covers when temperatures drop below 40°F consistently for protection.
- Make Annual Improvements: Add more rags if the previous winter had gaps or cold spots. Consider upgrading to stronger zip ties for areas with high wind.
- Create Backup Covers for Multiple Faucets: Make identical covers for all outdoor water.
Common Mistakes When Insulating Outdoor Faucets
Even with good intentions, minor errors in faucet insulation can lead to big winter problems. Here are the most common mistakes people make, along with simple ways to avoid them.
| Mistake | Why It’s a Problem | Solution |
|---|---|---|
| Using only a towel or rag | Absorbs moisture and freezes, offering poor insulation | Use rags inside a sealed, weatherproof cover (e.g., bucket) |
| Not tightening the faucet cover securely | Allows cold air to enter, reducing insulation effectiveness | Use zip ties or a strap to secure the cover firmly |
| Skipping insulation on mild winter days | Sudden cold snaps can still cause frozen pipes | Insulate faucets as a seasonal habit, not based on temperature |
| Leaving gaps between the cover and the wall | Cold air seeps in, reducing efficiency | Ensure the cover sits flush against the wall |
| Using thin or damaged insulation materials | Doesn’t retain heat or block wind properly | Replace worn covers yearly or reinforce with new material |
| Forgetting to remove hoses | Trapped water in hoses can freeze and burst the faucet | Always disconnect and drain garden hoses before winter |
Taking a few extra minutes to insulate properly can protect your pipes, prevent expensive damage, and ensure your faucet cover does its job all season long.
Conclusion
Protecting your outdoor faucets from freezing doesn’t have to break the bank or require professional help. This simple DIY outdoor faucet freeze protection method using paint buckets, zip ties, and rags costs less than $10 and takes just minutes to install.
Remember my neighbor’s $800 repair bill?
You can avoid that nightmare entirely with this straightforward solution. When temperatures start dropping, a few minutes of preparation can save you hundreds in emergency plumber fees and the stress of dealing with burst pipes.
The best part? These covers last for years with proper care and storage. Set up your faucet covers before the next cold snap hits your area.
Have you tried this method, or do you have any other practical tips for freeze protection? Share your experience in the comments below!
Frequently Asked Questions
What Is the Best Insulator for Outdoor Faucets?
Foam insulation or fiberglass works best. They trap air, resist moisture, and don’t absorb water like fabric materials do.
Can You Put Heat Tape on an Outdoor Faucet?
Yes, but use outdoor-rated heat tape and follow the manufacturer’s instructions. Install it on pipes, not directly on the faucet.
Can I Wrap My Outside Faucets with a Towel?
No. Towels absorb moisture and freeze, making them poor insulators. Use weatherproof covers that keep moisture out instead.