
Dark blue walls are supposed to feel moody and rich and a little bit “I drink espresso after dinner.” But too often they end up looking… streaky. Patchy. Like you panic painted at 9:47pm with a roller that’s been aging in the back of the garage since 2011.
And listen this usually isn’t a “you’re bad at painting” problem. It’s a primer problem. Specifically: slapping dark navy over white (or skipping primer entirely) and then wondering why you’re on coat four, muttering to yourself, and reconsidering every life decision that brought you to this moment.
If you want dark blue that looks intentional (not “oops”), here’s the game plan.
The biggest secret: stop putting dark blue over white
White under navy is basically a neon sign for every flaw on your wall. Little dents? Suddenly they’re starring in their own Broadway show. Roller overlaps? Now they’re a feature, not a bug.
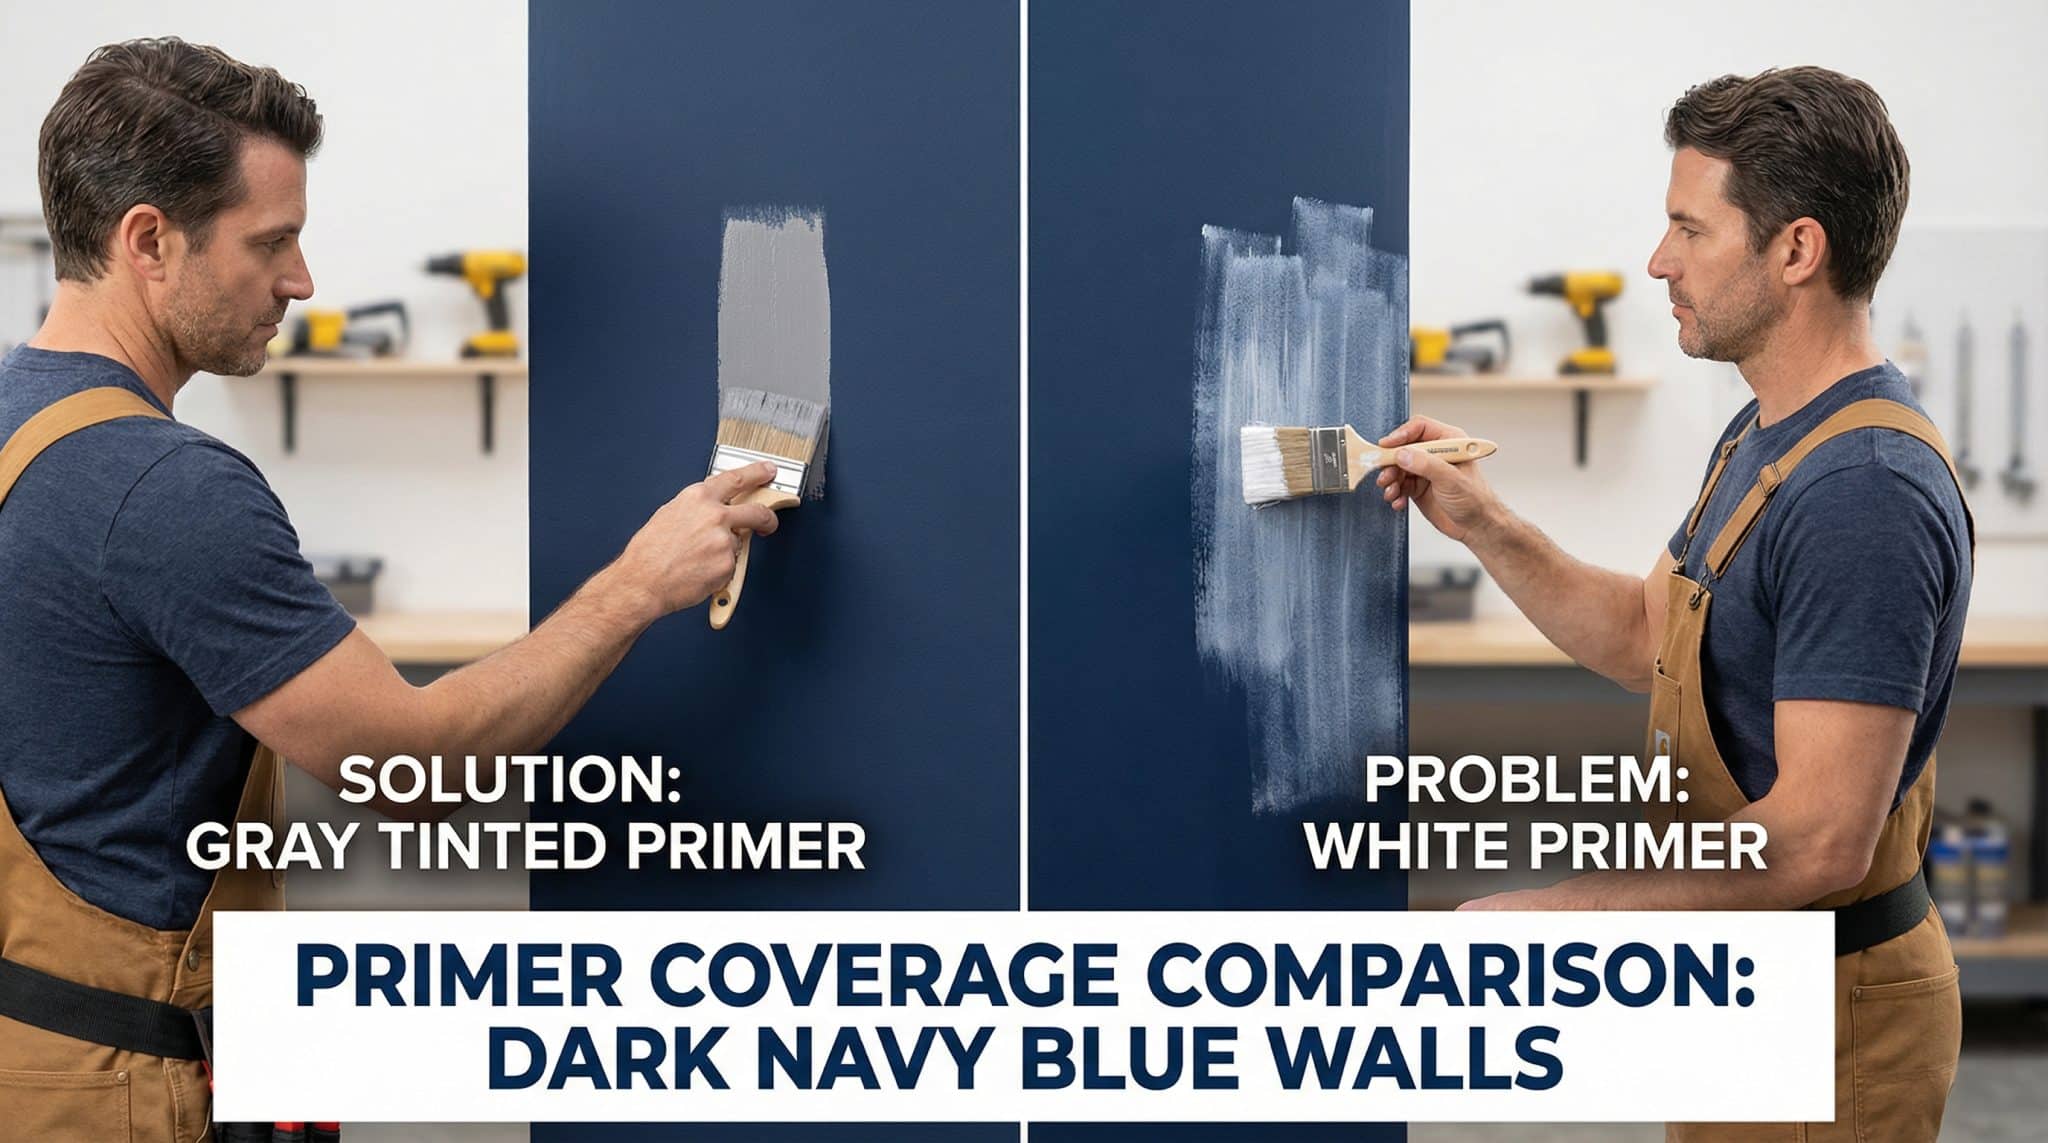
A gray tinted primer is the difference between:
- two coats of paint and feeling smug, and
- four coats of paint and crying into a paint tray.
Gray evens things out. It calms down the contrast. Your navy doesn’t have to fight for its life to cover a bright white base.
“Okay, what shade of gray?”
When you’re at the paint counter, ask them to tint your primer to about 65-75% of your final color. For a deep blue, that usually lands in a medium to dark gray. It’s often free. It saves you at least one coat. It’s the best “hack” that isn’t really a hack it’s just how paint works.
(And yes, I learned this the hard way. I once did navy over white primer in a hallway and it looked like the walls had… stripes. Like a fashionable jail cell.)
Before you do anything: test a patch like a responsible adult (ugh)
If you have time for one “boring but smart” thing, do this:
Brush or roll a small patch of primer in a closet, behind a dresser, somewhere your furniture already hides your sins. Let it dry.
Then check:
- Old color screaming through? You’ll want gray tinted primer (and possibly a second primer coat).
- Yellow/brown spots showing up? That’s stain bleed. You need a stain blocker.
That 10 minute test can save you an entire weekend of rage rolling.
Pick the right primer (because primer is not one size fits all)
I wish I could tell you “just buy this one can and you’re fine,” but picking Sherwin Williams paint lines is fussy. Here’s the simple version:
1) Most normal painted walls (in decent shape)
Use a high hide latex primer and tint it gray. This is the “default good choice” for the majority of walls that aren’t greasy, stained, or glossy.
2) Glossy trim, shiny doors, cabinets, anything slick
You need a bonding primer. Non-negotiable. Regular primer will bead up or peel later, and you’ll be standing there holding a sad paint chip like “why are you doing this to me?”
If your trim has sheen, assume it’s slippery. Bonding primer is your insurance policy.
3) Water stains, smoke, mystery house ghosts
You need a stain blocking primer.
- Minor stains can sometimes be handled with water based stain blockers.
- Heavy smoke/nicotine? Go straight to a shellac based stain blocker (the nuclear option). It works, but it smells like a chemistry set and you need proper ventilation. Worth it if the alternative is stains reappearing like a horror movie sequel.
4) Bare wood trim (especially oak)
Bare wood can bleed tannins through paint and turn your gorgeous navy into “why is this… brownish?” Use an oil based primer on tannin heavy wood if you don’t want surprises.
Can you skip primer?
Sometimes, yes.
If your walls are already painted, in good shape, and you’re going dark to dark with a quality paint? You can often skip primer.
But if you’re going light to dark (hello, beige to navy), if there are stains, if the surface is glossy, or if the wall is questionable in any way… prime it.
And no, I’m not counting “paint and primer in one” as real primer for dark colors. That stuff is basically a motivational quote printed on a paint can.
Prep that actually matters (aka “painting on top of grease is not a vibe”)
Primer won’t stick to dust, grease, or flaking paint. It just won’t. So do this quick prep and your future self will want to hug you:
- Clean the walls (dish soap + water works) and let them dry well.
- Scrape anything peeling, then do the painter’s tape test: press tape, rip it off. If paint lifts, you have adhesion issues hello, bonding primer.
- Patch + sand nail holes and dents, then wipe off dust.
- Scuff glossy surfaces with 150-220 grit (or use liquid deglosser if sanding makes you want to move).
This is the unsexy part that makes the pretty part look expensive.
How to roll primer without lap marks (so your navy doesn’t snitch on you)
Lap marks happen when edges dry before you blend them like your phone dying mid-GPS.
Here’s how to avoid that:
- Cut in, but don’t cut in the entire room and then roll later. Do one wall (or a section) at a time while everything stays wet.
- Roll in 3×3-ish sections, overlapping while the primer is still damp.
- Use the right roller nap:
- 3/8″ for smooth walls
- 1/2″ for a little texture
- Two thin coats beat one thick coat. Thick coats take forever to dry and love to look weird.
Quick coverage check (my favorite “catch it now” move)
Once the primer dries, shine a bright light across the wall at an angle. If you see patchiness or the old color peeking through in obvious spots, do a second primer coat before you start with the navy.
Fixing it at the primer stage is easy. Fixing it after topcoat is… character building.
The coat count reality check (so you stop “just one more coat”-ing yourself to death)
Here’s what most dark blue projects look like in real life:
- Gray tinted primer on previously painted walls:
1 coat primer + 2 coats paint = 3 total - White primer under dark blue (why though):
2 coats primer + 2-3 coats paint = 4-5 total - New bare drywall:
usually 2 primer + 2 paint = 4 total - Stained walls:
1-2 stain blocking primer + 2 paint = 3-4 total
If you want the “wow” navy without the exhaustion, that first scenario is the one we’re aiming for.
If something goes sideways, it’s usually one of these
Because paint loves to humble us:
- Primer looks blotchy: normal. Add another coat if needed.
- Stains show up later: wrong primer. Spot prime with the right stain blocker, then repaint.
- Paint peels off trim: you skipped bonding primer or didn’t prep enough. Sand back, reprime properly.
- Primer stays tacky forever: it’s too cold, too humid, or too thick. Increase airflow and do thinner coats.
Diagnose it once, fix it once. No spiraling.
My personal hill to die on: gray primer is what makes navy look “designer”
If you take nothing else from my rambling: deep navy wall color needs a gray tinted base unless you enjoy unnecessary coats and visible roller chaos.
Get the right primer, do the minimal prep, keep a wet edge, and your walls will look like you hired someone with a white van that says “Fine Finishes” on the side.
And you’ll get to be insufferable about it, which is honestly half the fun.