What if those tired, worn-down wooden floors in your home could tell a different story? Beneath those scratches and faded patches lies hidden beauty waiting to be brought back to life.
Many homeowners don’t realize that their old, dull hardwood floors hold secret potential – a chance for renewal without the steep cost of replacement.
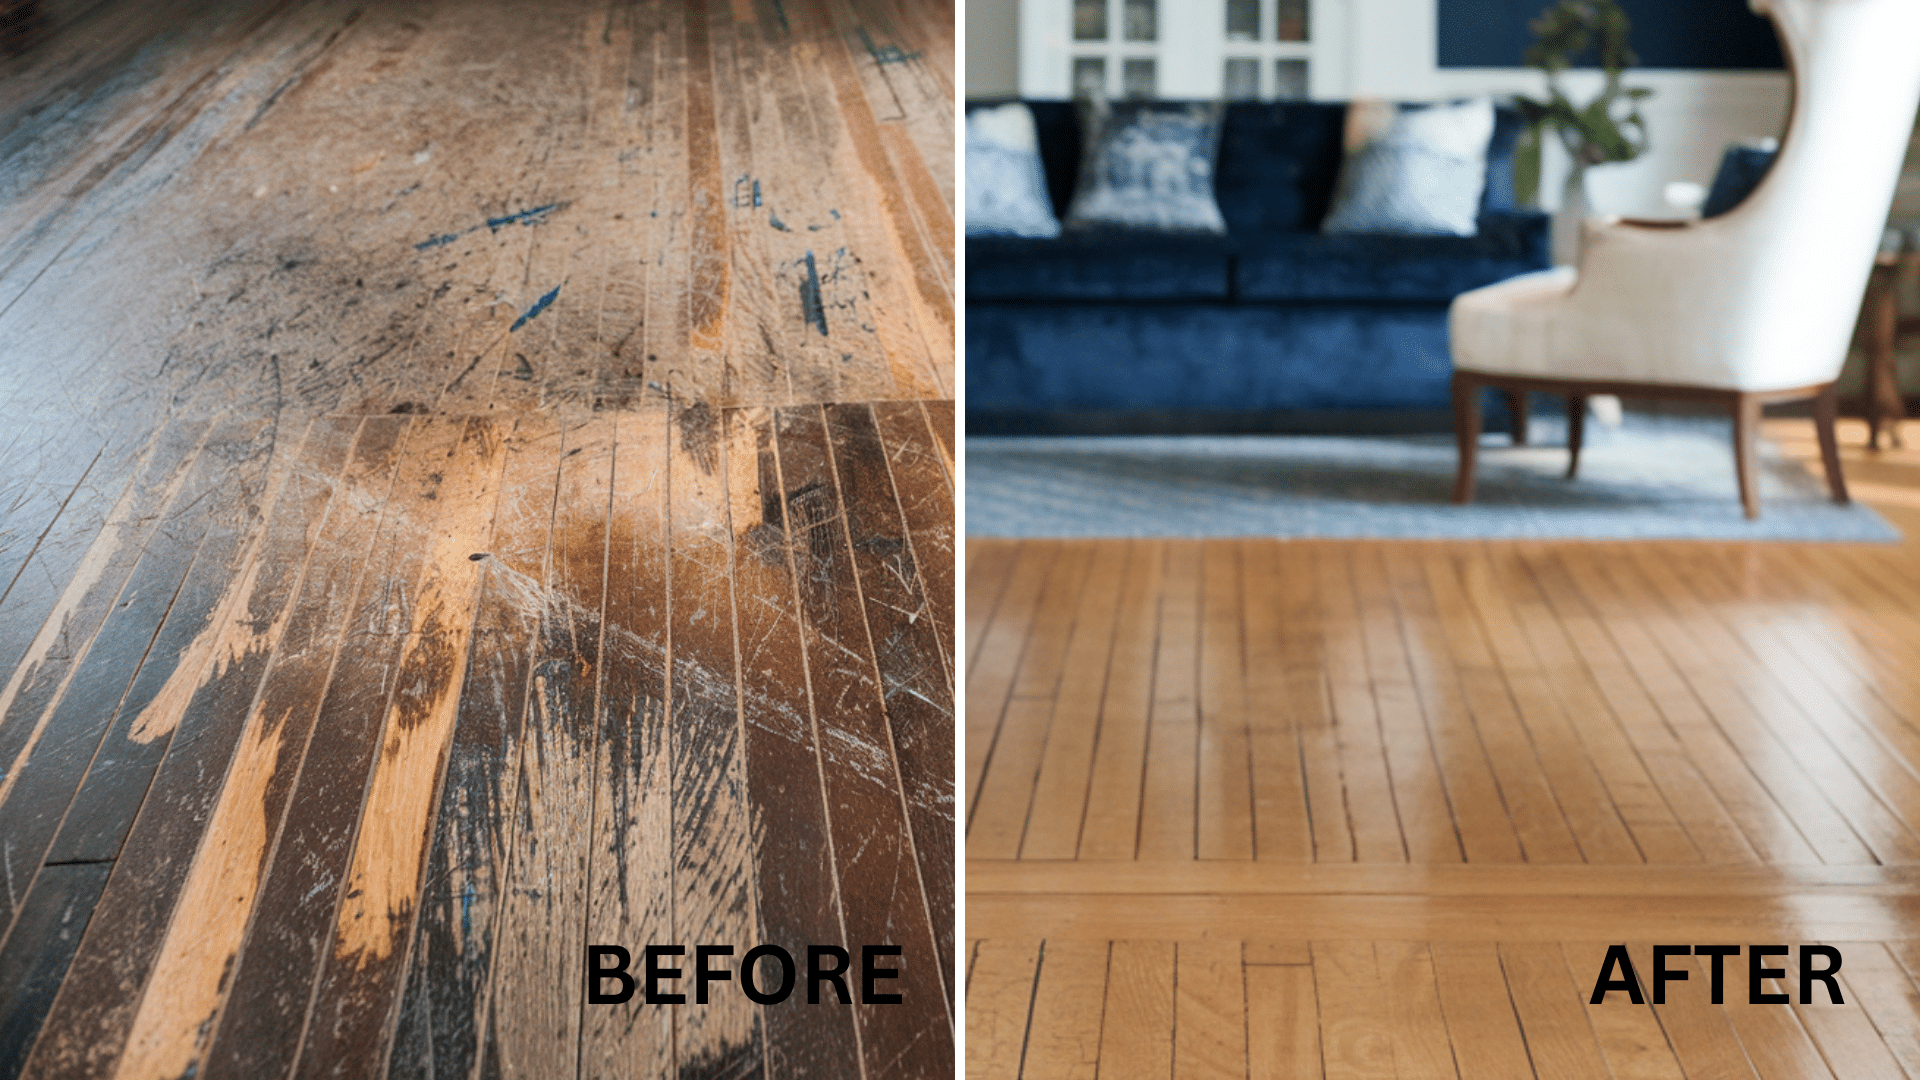
The process of renewing old hardwood surfaces creates some of the most striking changes possible in home improvement. When you see the comparison of worn, lifeless boards next to freshly renewed wood, the difference can leave you speechless.
This guide will walk you through the entire renewal process, from spotting signs that your floors need attention to the final touches that make wood surfaces gleam with renewed life.
When Does Your Wood Floor Need New Life? 5 Clear Signs
Your hardwood floors send clear messages when they need attention. Learning to spot these signals helps you catch problems early, saving both your floors and your wallet. Here are five key indicators:
- Deep Scratches and Marks: Damage from pets or furniture
- Color Loss and Fading: Sunlight has faded tones
- Water Damage and Dark Spots: Moisture causing dark patches
- Bare Wood: Finish worn to raw wood
- No Shine or Reflection: Lost protective floor finish
The right renewal process can restore even heavily damaged floors, bringing back their natural beauty and protection.
What You’ll Need: Hardwood Floor Renewal Tools
Before starting your floor renewal project, gather all necessary supplies. Having everything ready will make the process smoother and help you avoid interruptions that could affect your results.
| Equipment | Purpose |
|---|---|
| Orbital floor sander | Removes old finish and levels wood surface |
| Sandpaper (40, 60, 100 grit) | Different grits for progressive smoothing |
| Handheld orbital sander | Reaches edges and corners where floor sander can’t go |
| Vacuum cleaner and mop | Removes dust between sanding steps |
| Wood filler | Repairs cracks, holes, and deep scratches |
| Pre-stain conditioner | Helps wood accept stain evenly |
| Wood stain (color choice) | Adds color to bare wood |
| Polyurethane finish | Protects wood with durable clear coat |
| Applicators (rollers/brushes) | For applying stain and finish evenly |
| Safety gear | Protects lungs, eyes, and skin during process |
These materials might seem like a significant investment, but they’re far less expensive than replacing your floors entirely. Many home improvement stores offer equipment rentals for the larger items like sanders, making this project more budget-friendly.
Step-by-Step Guide to Refinishing Hardwood Floors
Bringing your worn wood floors back to life is satisfying but requires careful attention to each step. Follow this comprehensive guide to transform your tired floors into stunning centerpieces for your home.
Step 1: Identify Your Flooring Type

Know what you’re working with before starting. Solid hardwood can handle multiple renewals, while engineered wood needs special care.
Check thickness by examining an exposed section near a wall or vent—if less than 3/4 inch, you likely have engineered flooring.
Look at grain patterns too; solid wood shows natural variation while engineered often has repeating patterns. This step matters because using the wrong techniques on engineered floors can cause permanent damage.
Step 2: Preparation
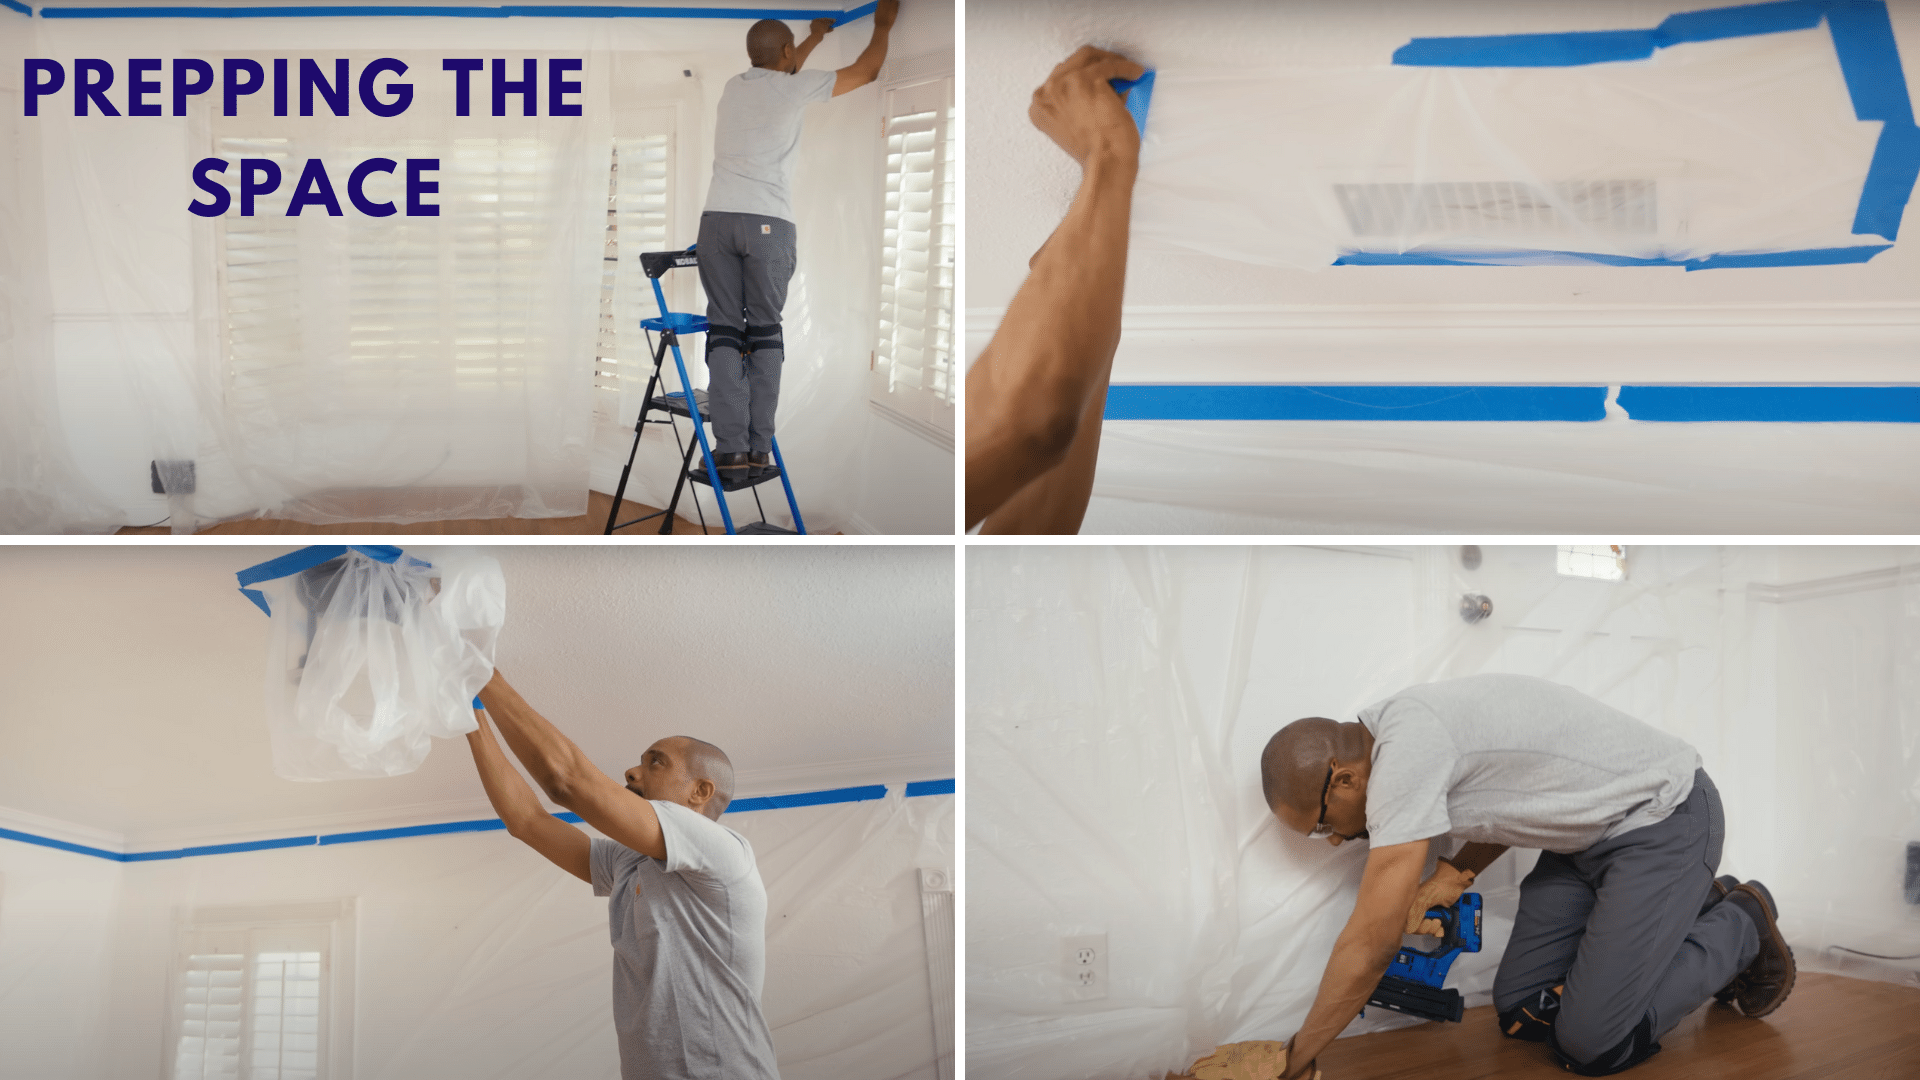
Clear everything from the room—furniture, rugs, and curtains—to give yourself a blank canvas. Cover vents, doorways, and light fixtures with plastic sheeting to prevent dust from spreading throughout your home.
Check the floor carefully for loose boards and secure them with finishing nails. Use a nail set to push any protruding nail heads below the surface. Remove baseboards if possible for complete edge-to-edge renewal.
This thorough prep work saves headaches later and ensures you achieve professional-quality results.
Step 3: Initial Sanding
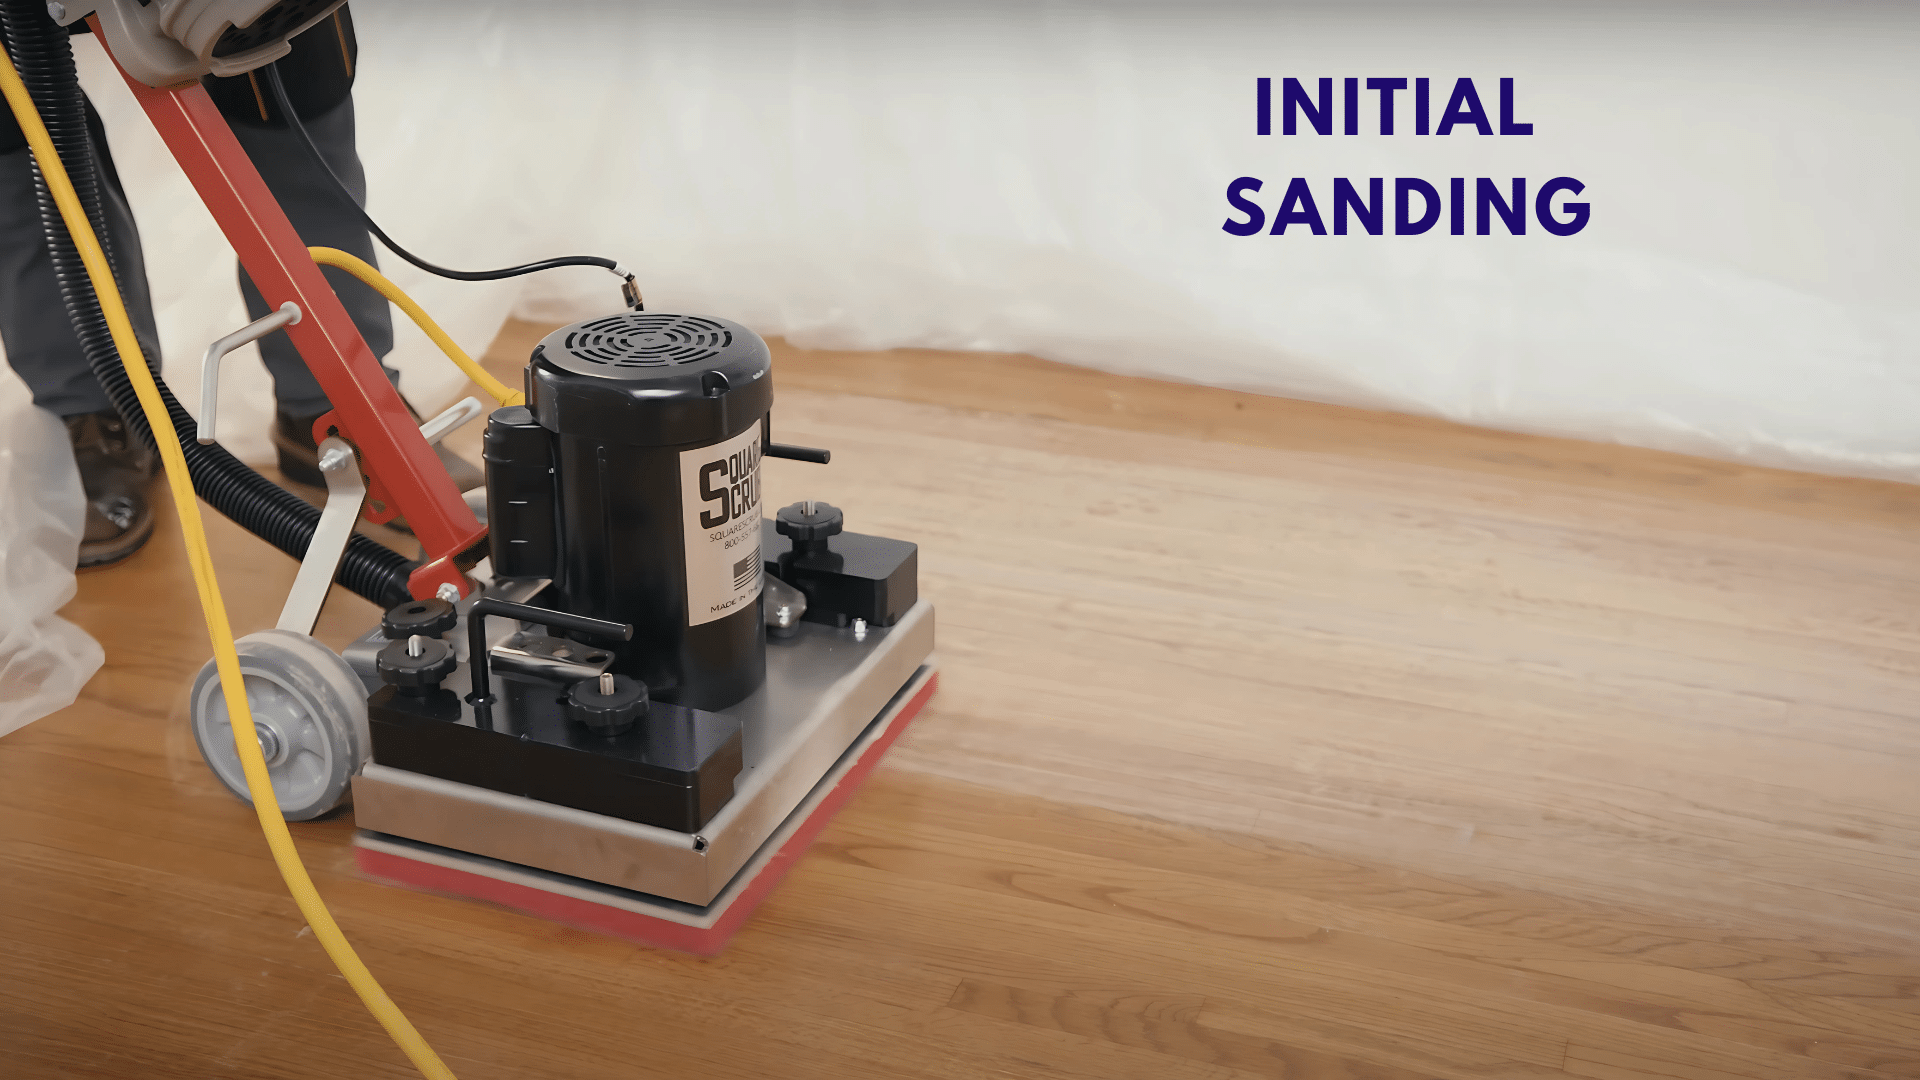
Start the renewal process with a rented orbital floor sander, which is safer and easier to handle than drum sanders. Begin with coarse 40-grit sandpaper to strip away the old finish and smooth out surface imperfections.
Work methodically in straight lines with the wood grain, slightly overlapping each pass. Don’t rush—uneven sanding shows in the final result.
For edges and corners that the big machine can’t reach, use a handheld orbital sander with the same grit. Vacuum thoroughly when finished to prepare for the next sanding phase.
Step 4: Additional Sanding Passes
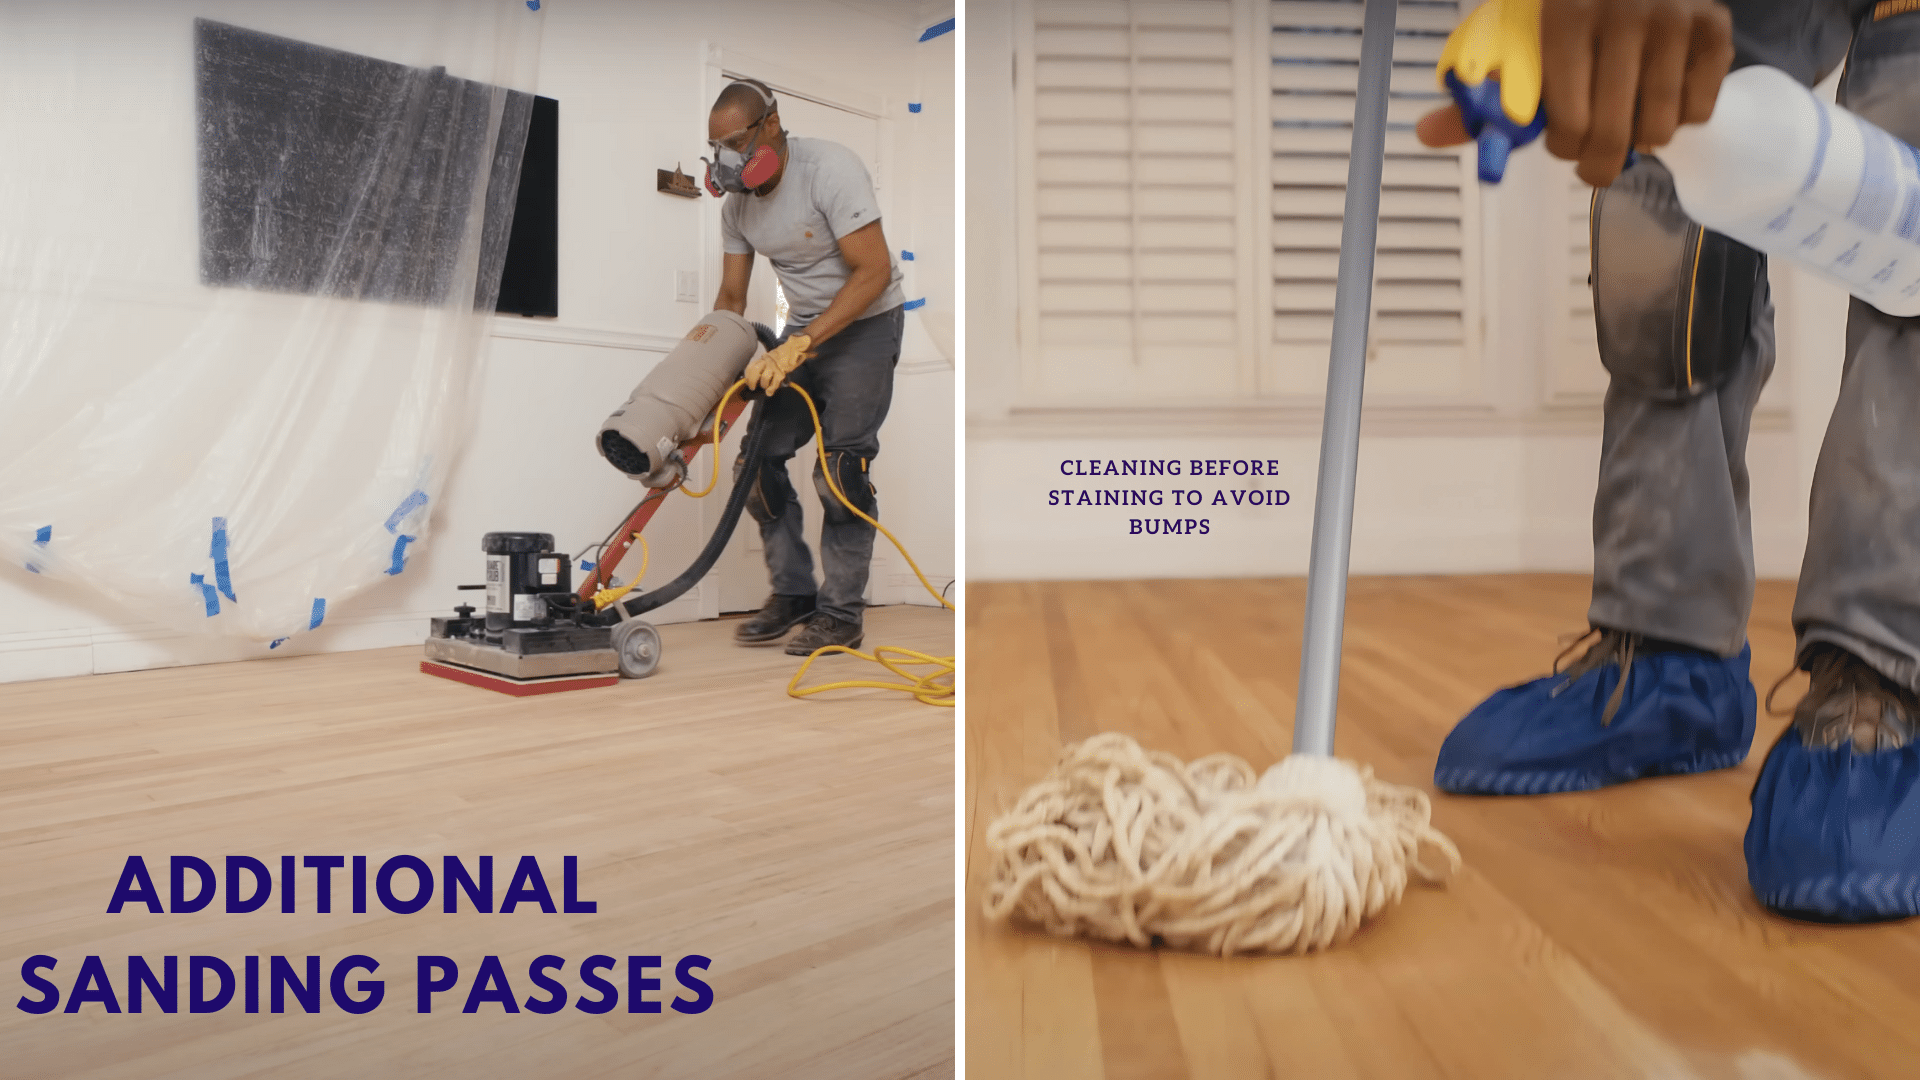
After the first sanding, inspect your floor for remaining flaws. Fill any gouges or deep scratches with wood filler that matches your floor color.
Once fillers dry, proceed with a medium 60-grit sandpaper for your second pass, following the same pattern as before. Complete the sanding process with fine 100-grit paper for a silky-smooth surface that will accept stain evenly.
Clean between each sanding stage—any dust left behind will create bumps in your finish. After the final sanding, mop with a damp (not wet) microfiber cloth to capture even the finest dust particles.
Step 5: Pre-Staining
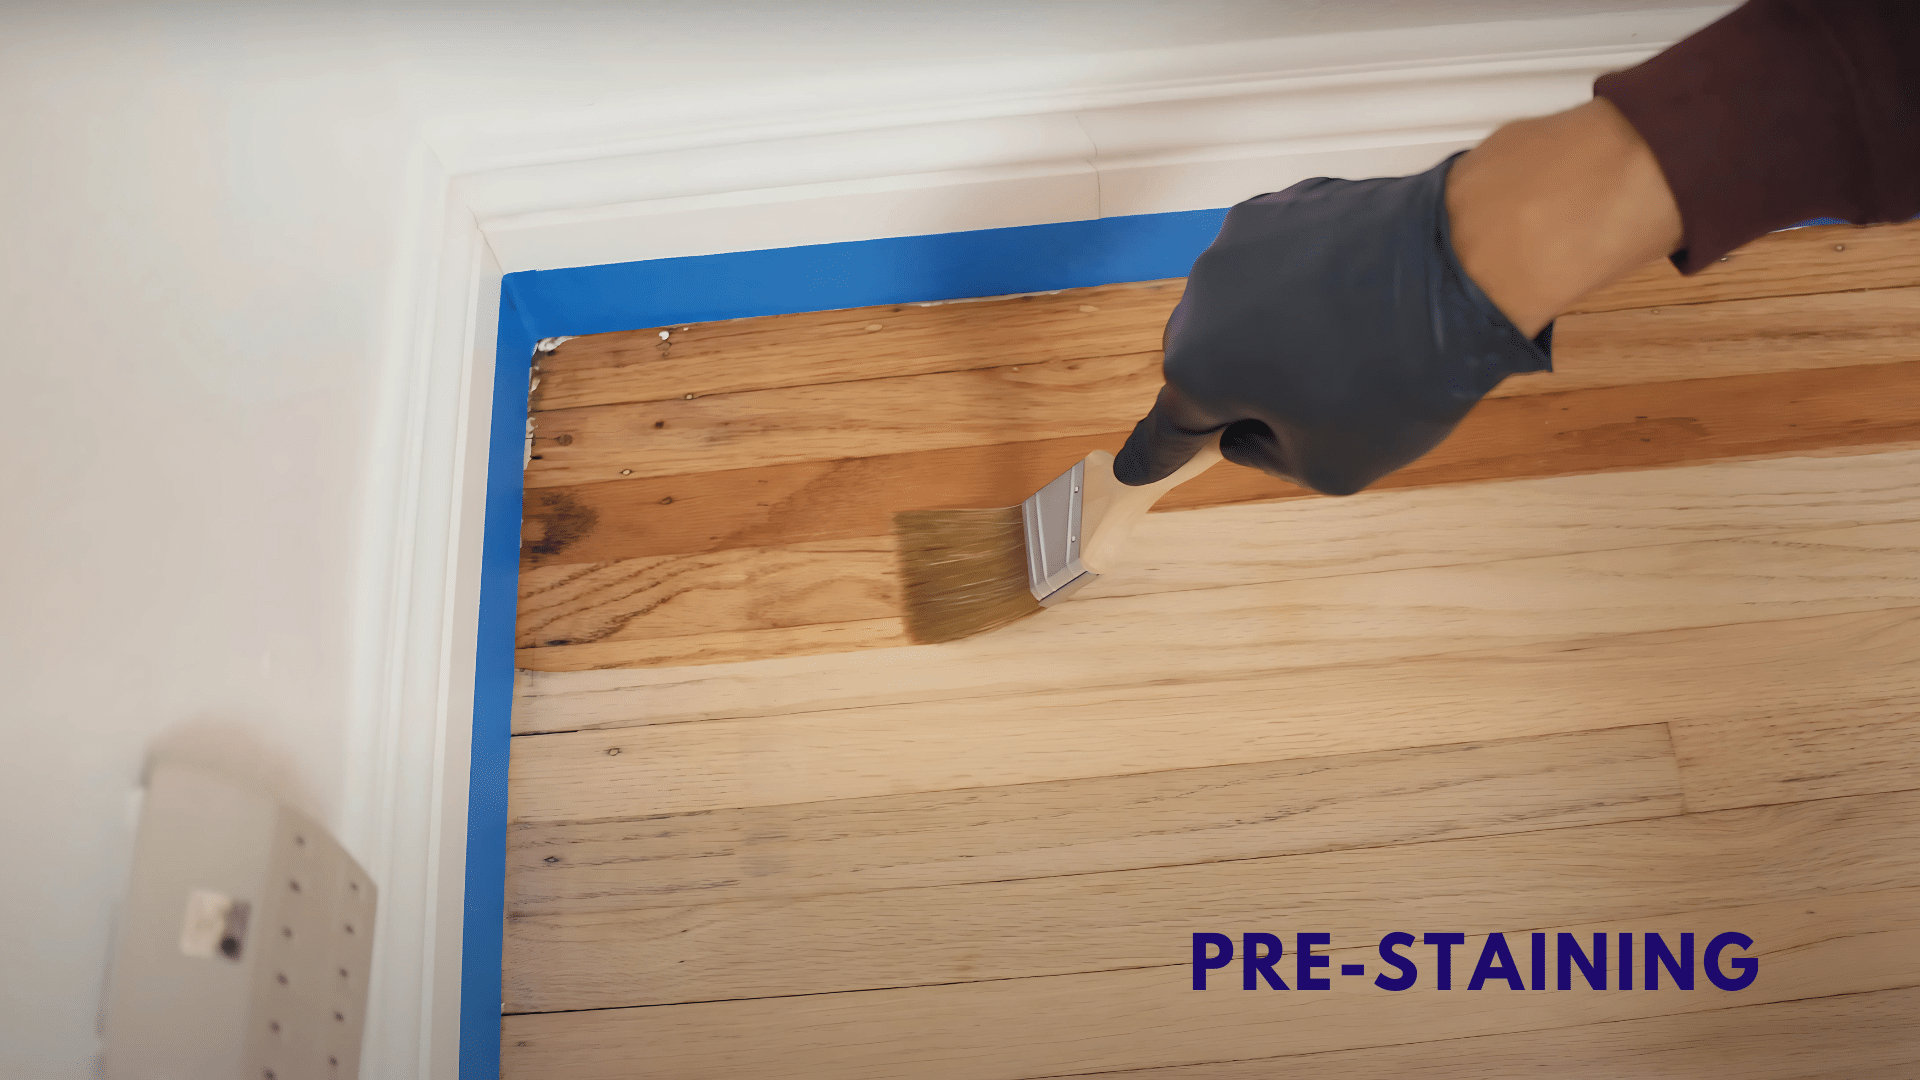
Apply a wood conditioner to ensure even stain absorption, especially important for pine, maple, and birch floors that can develop blotchy patterns when stained. Using a clean cloth or applicator, spread the conditioner evenly across the entire floor surface.
This step prevents dark spots and streaking by partially sealing the more porous areas of the wood.
Follow the product’s directions exactly—most require 15-30 minutes of absorption time before wiping away excess and proceeding to staining. This often-skipped step makes a noticeable difference in your final results.
Step 6: Staining
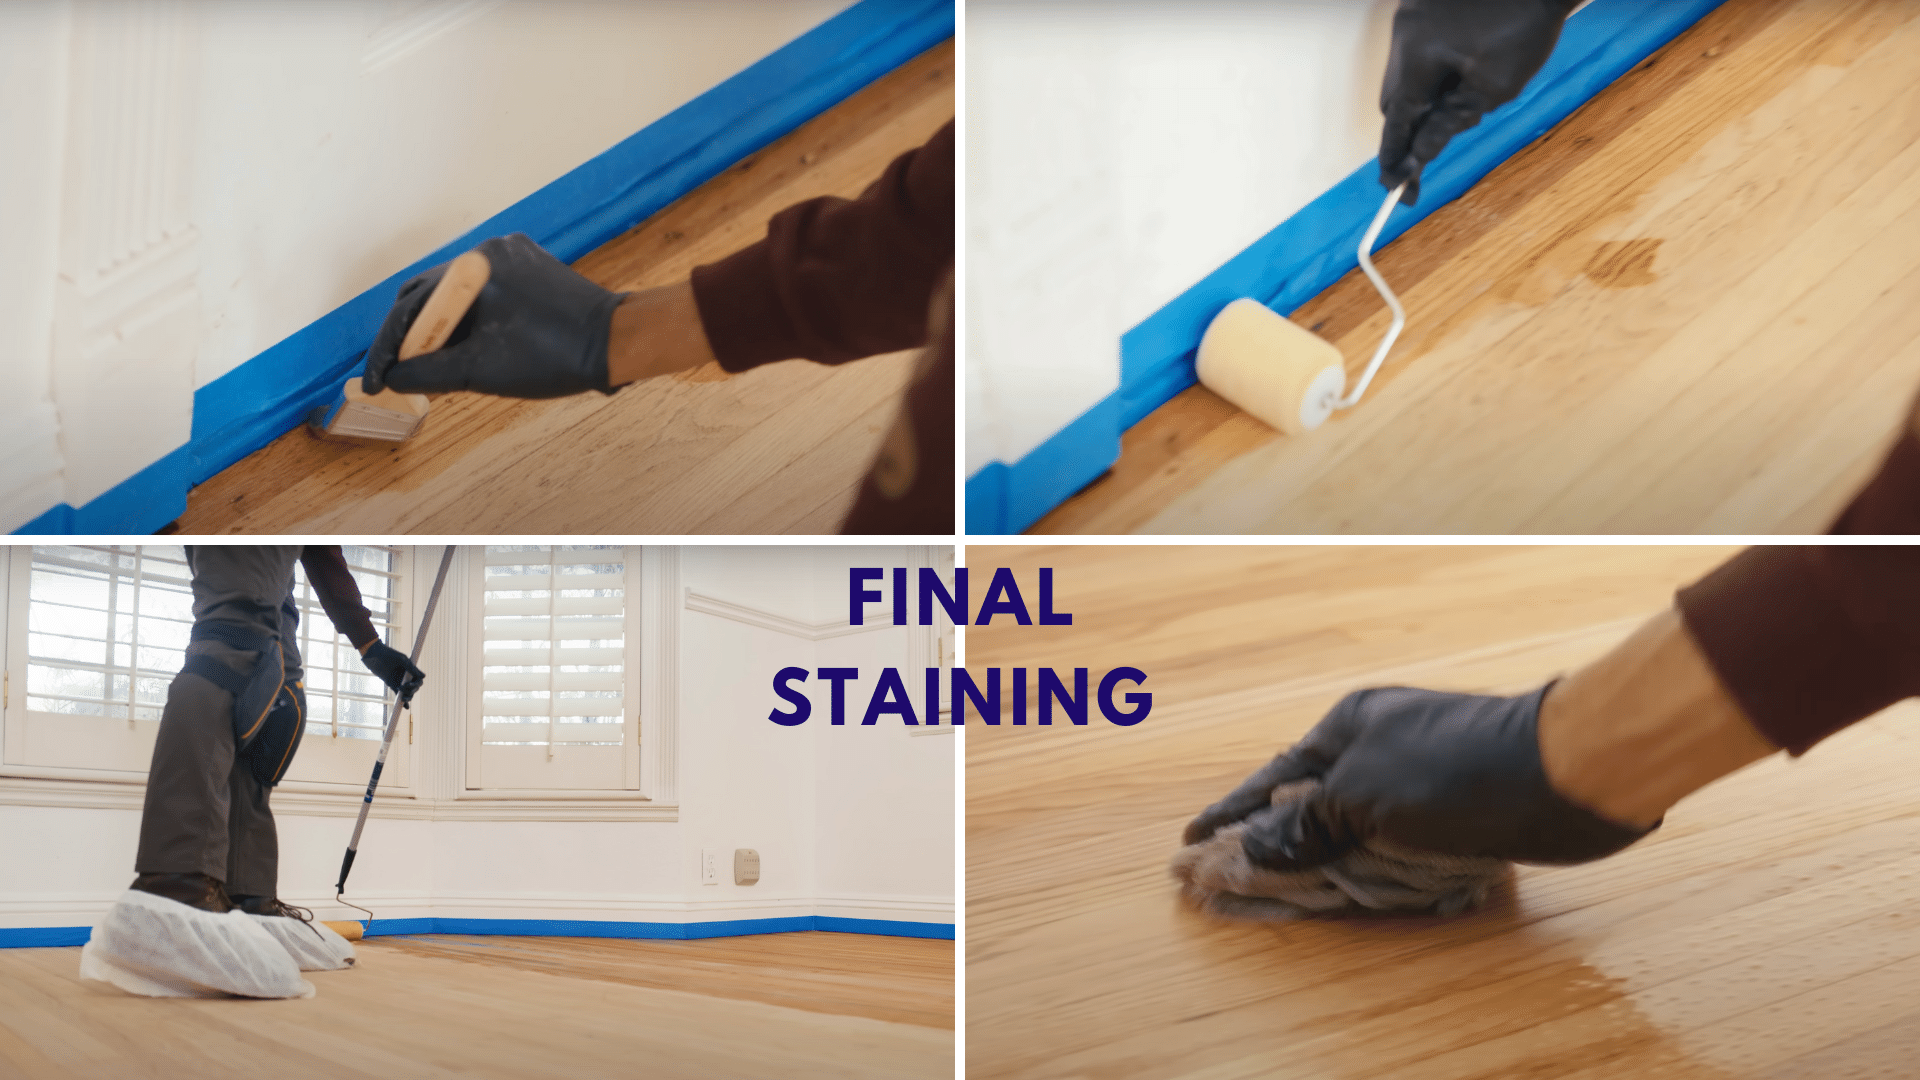
Select a stain color that complements your home’s style and desired mood. Working in small sections of about 3-4 feet, apply stain with a roller for large areas and a brush for edges.
Maintain a wet edge to prevent lap marks, and work toward an exit to avoid boxing yourself in. Right after application, use a clean, dry cloth to wipe away excess stain in the direction of the wood grain.
This controls color intensity and prevents pooling. Allow the stain to dry completely according to the manufacturer’s time recommendations—rushing this step leads to adhesion problems with the protective finish.
Step 7: Applying Polyurethane Finish
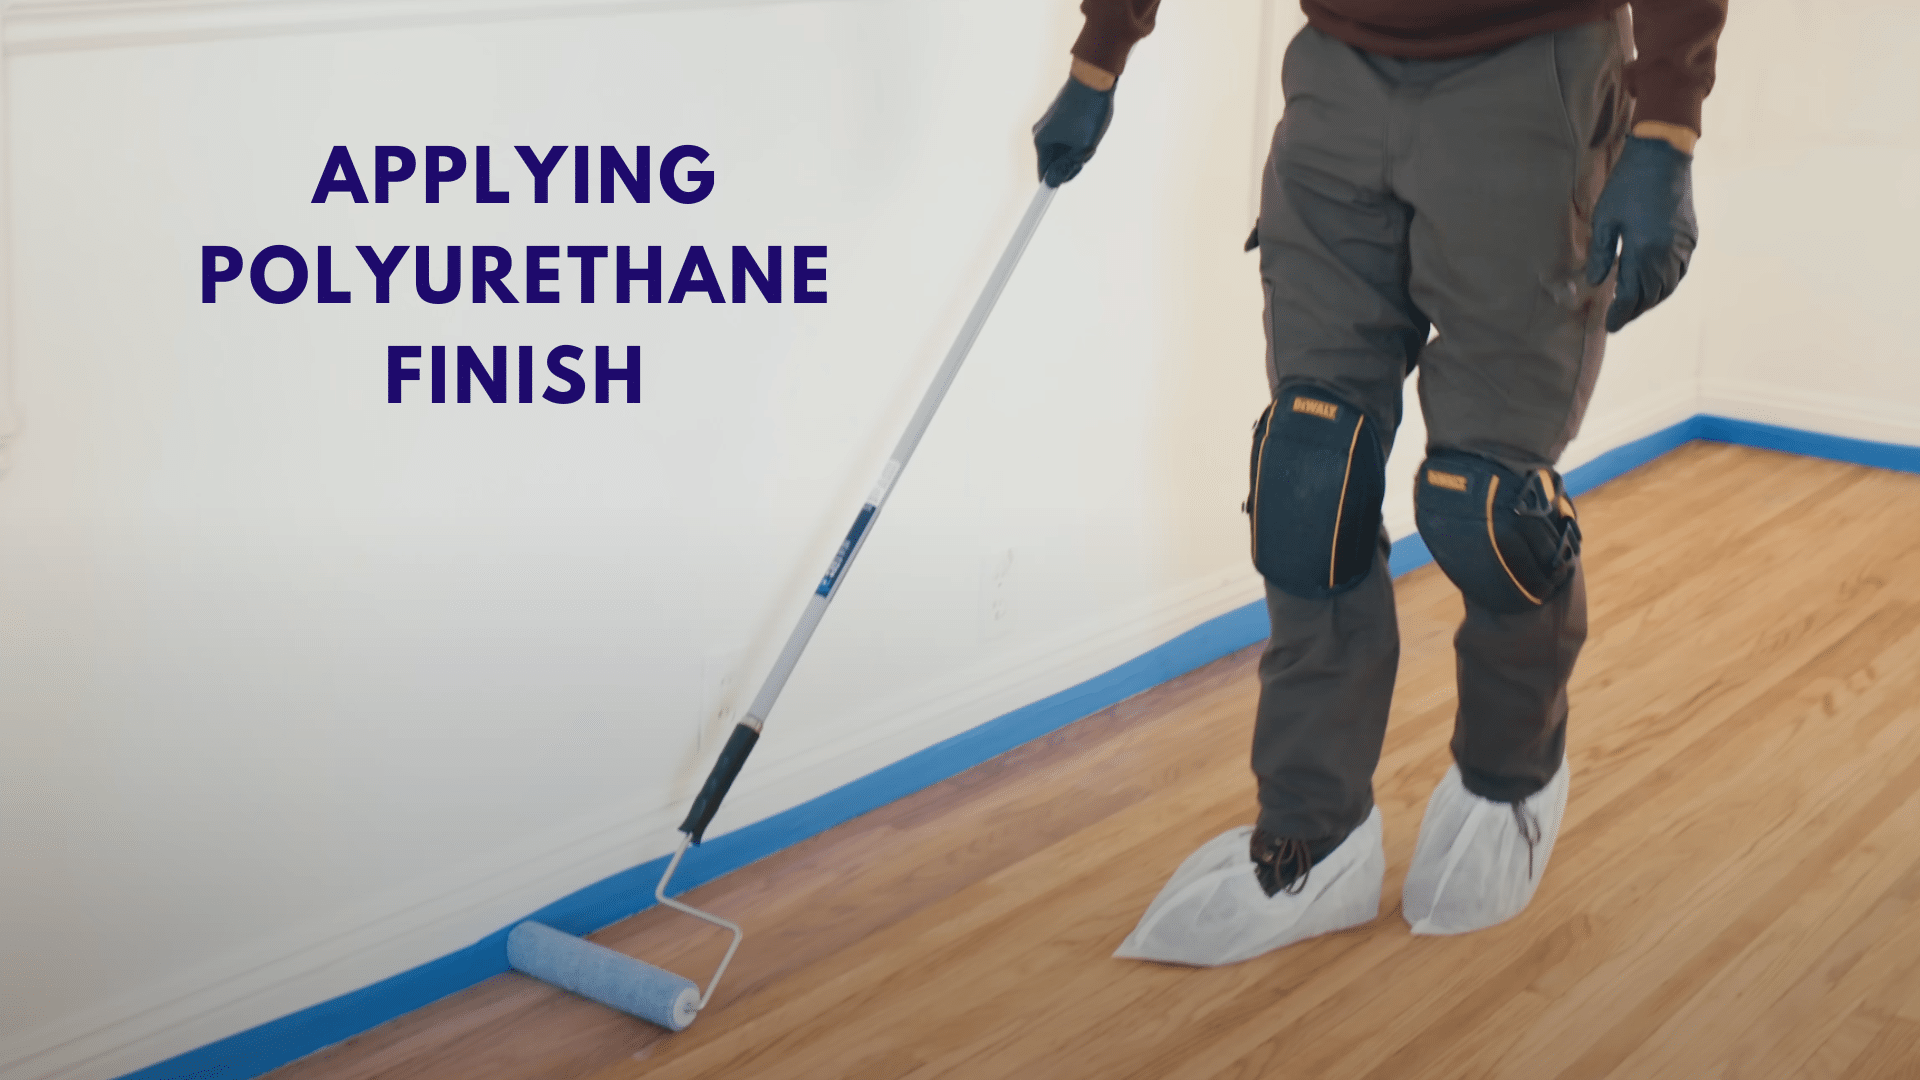
The final protective layer needs careful application. Choose between glossy, semi-gloss, or satin polyurethane based on your style preference.
Using a high-quality applicator, apply polyurethane in thin, even coats in the direction of the wood grain. Work from the far corner toward an exit, maintaining a wet edge.
Allow the first coat to dry completely (usually 24 hours), then lightly sand with very fine 220-grit sandpaper, vacuum and tack cloth to remove dust, and apply a second coat. Floors need 2-3 protective coats. Avoid foot traffic for 24 hours post-final coat and wait a week before replacing furniture.
Step 8: Drying and Curing Time
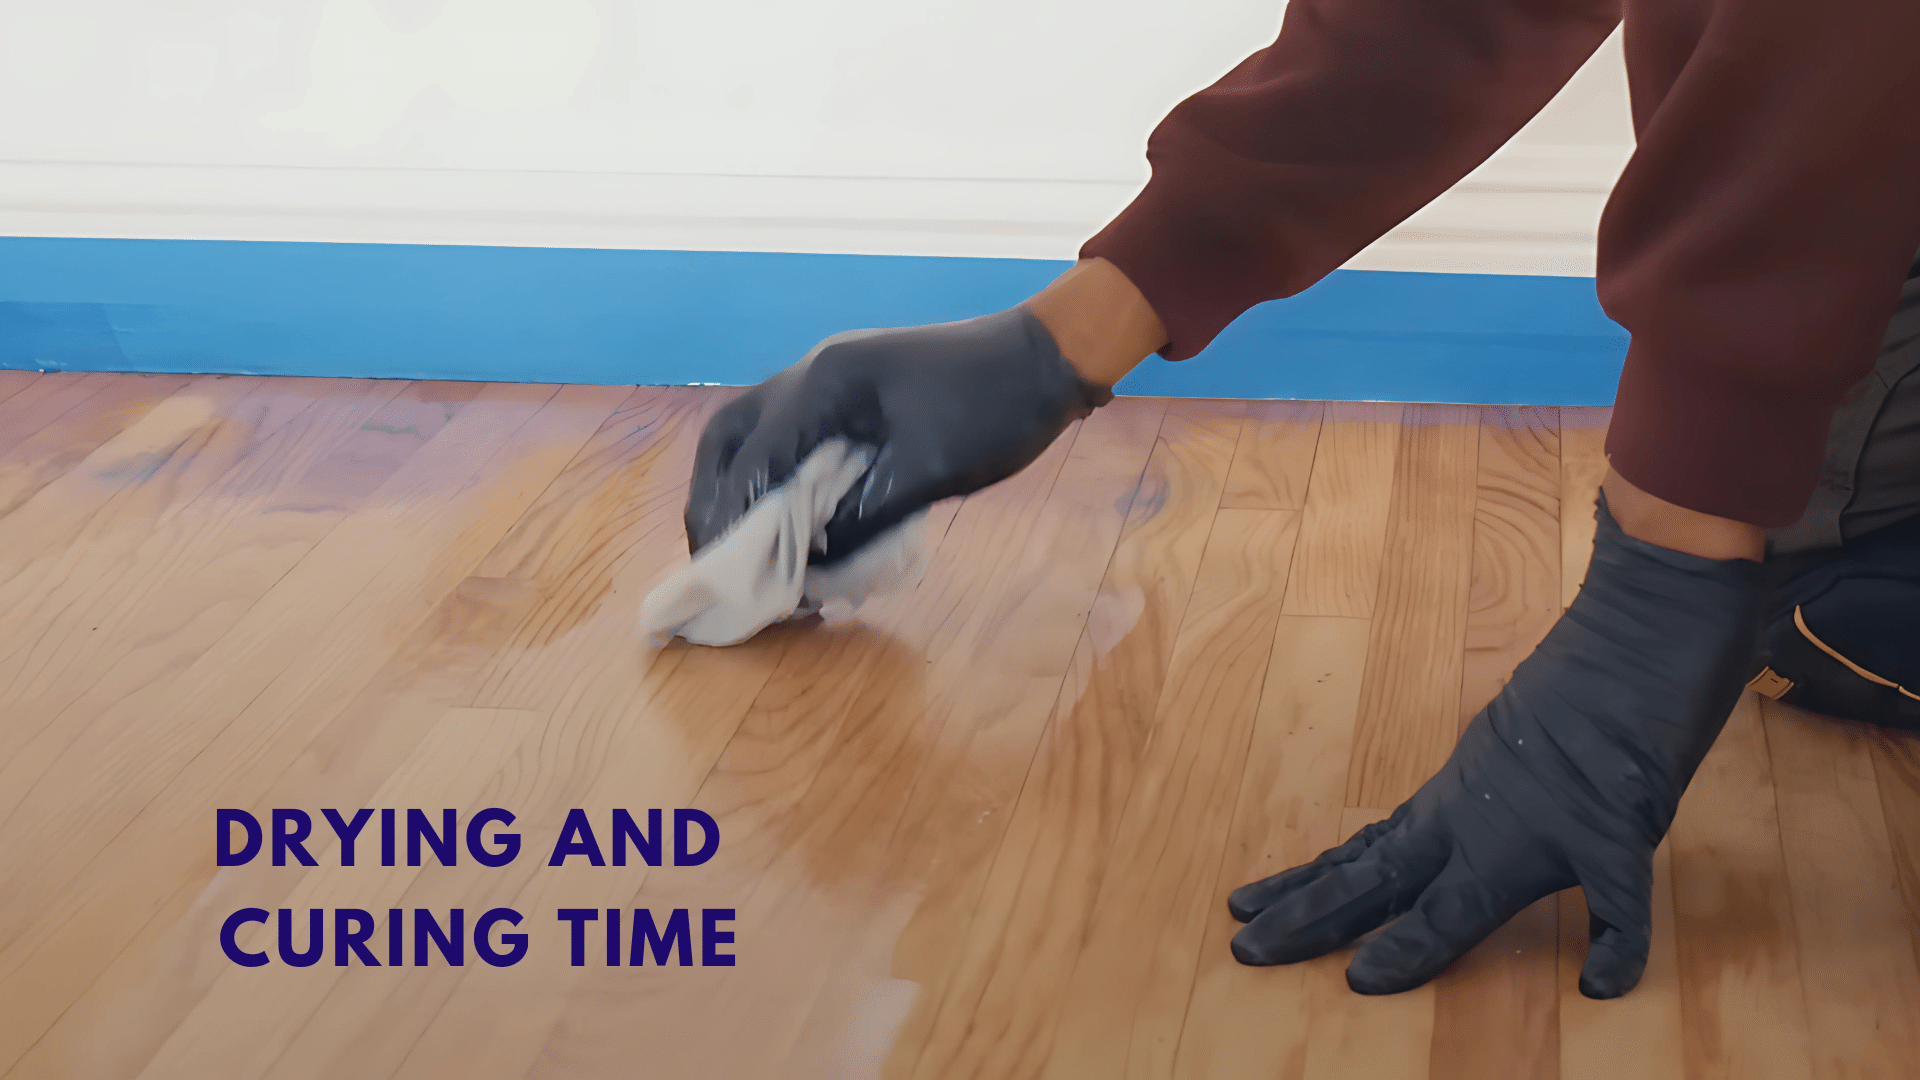
Patience brings reward in this final step. While polyurethane may feel dry to touch within hours, complete curing takes time. Keep foot traffic minimal for the first 48 hours.
Wait 72 hours before allowing pets on the floor, as their nails can damage partially cured finish. Wait a full week before returning furniture, and use felt pads under all furniture legs.
Don’t place area rugs for at least two weeks, as they can trap moisture and prevent proper curing. This waiting period ensures your hard work results in a floor that will remain beautiful for years to come.
Quick Tips:
|
These small but important details will help you get professional-quality results when bringing your old floors back to life.
Remarkable Changes: Before and After Floor Renewal
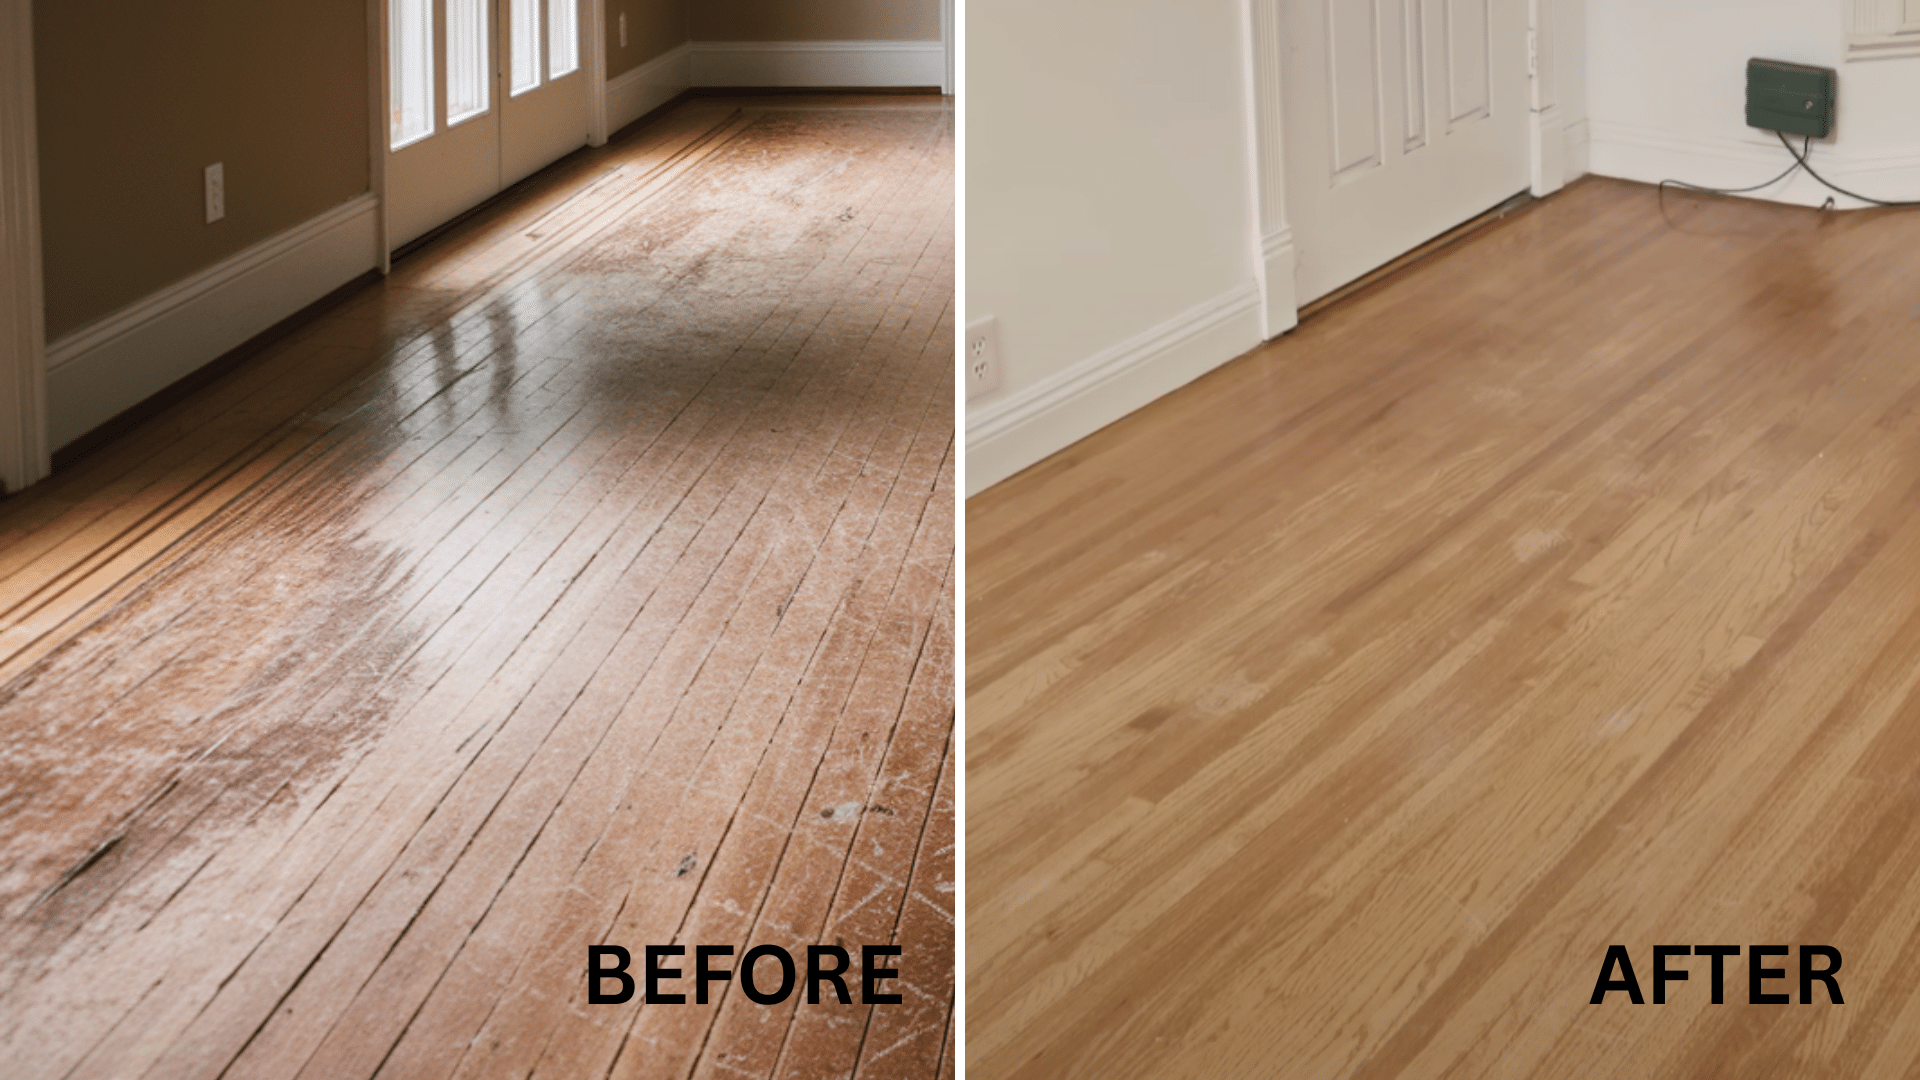
Above are the results of the complete process refinishing of the old hardwood. which are quite noticeable and suprising. it gave a complete new look the the room or the interior.
Video Tutorial
Below is the attached video on how to refinish your old hardwood floor by Lowe’s Home Improvement
Trending Hardwood Floor Colors and Finishes to Consider
When bringing your old hardwood floors back to life, choosing the right color and finish can make all the difference in the final look of your home. Current styles favor both classic options and newer takes on traditional finishes.
Popular Shades
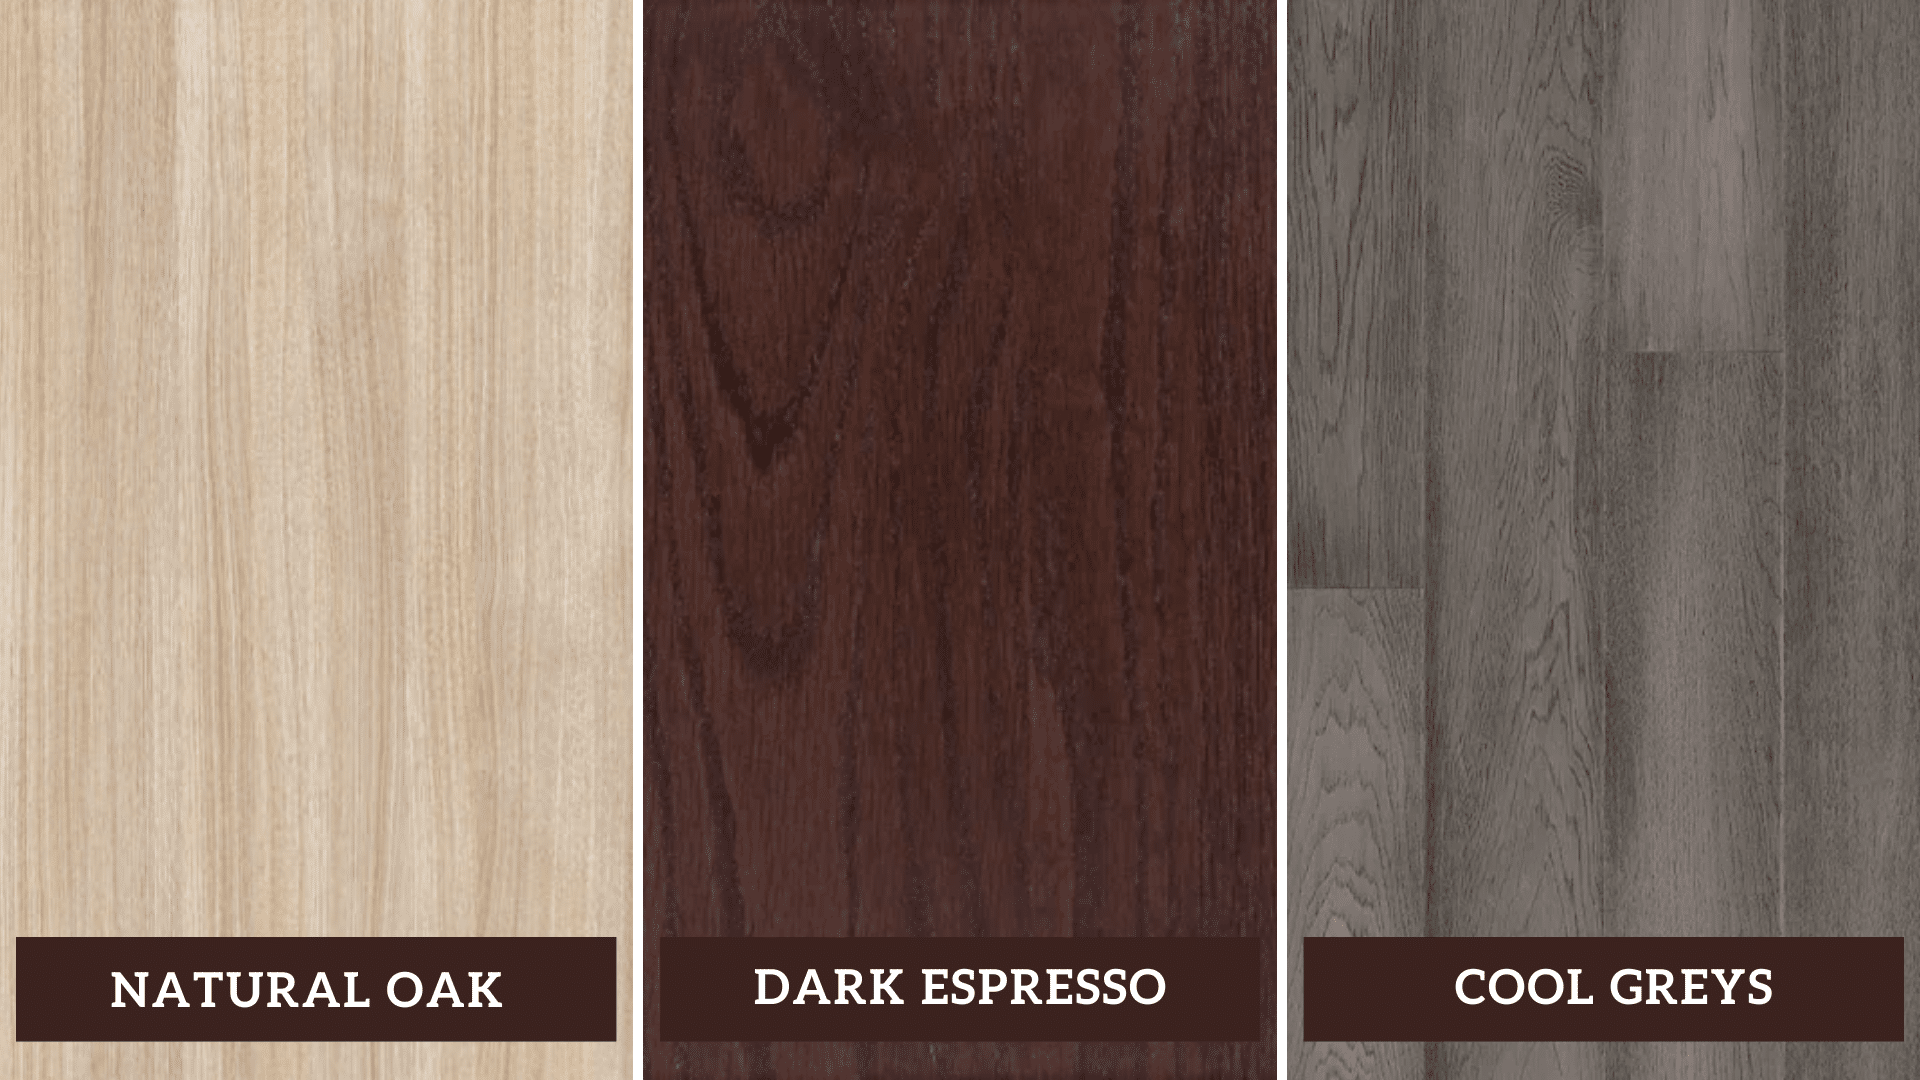
Today’s most sought-after hardwood floor colors blend timeless appeal with fresh twists, giving homeowners more options than ever to express their personal style.
- Natural oak is a timeless choice for homeowners, offering a warm tone that highlights the wood’s grain patterns. This neutral option suits most styles and remains fashionable.
- Dark espresso tones add rich coloring and a sense of luxury, ideal for formal areas or traditional designs.
- Cool greys have become popular, fitting modern styles and providing a fresh take on flooring while keeping spaces cozy.
Modern Finish Trends
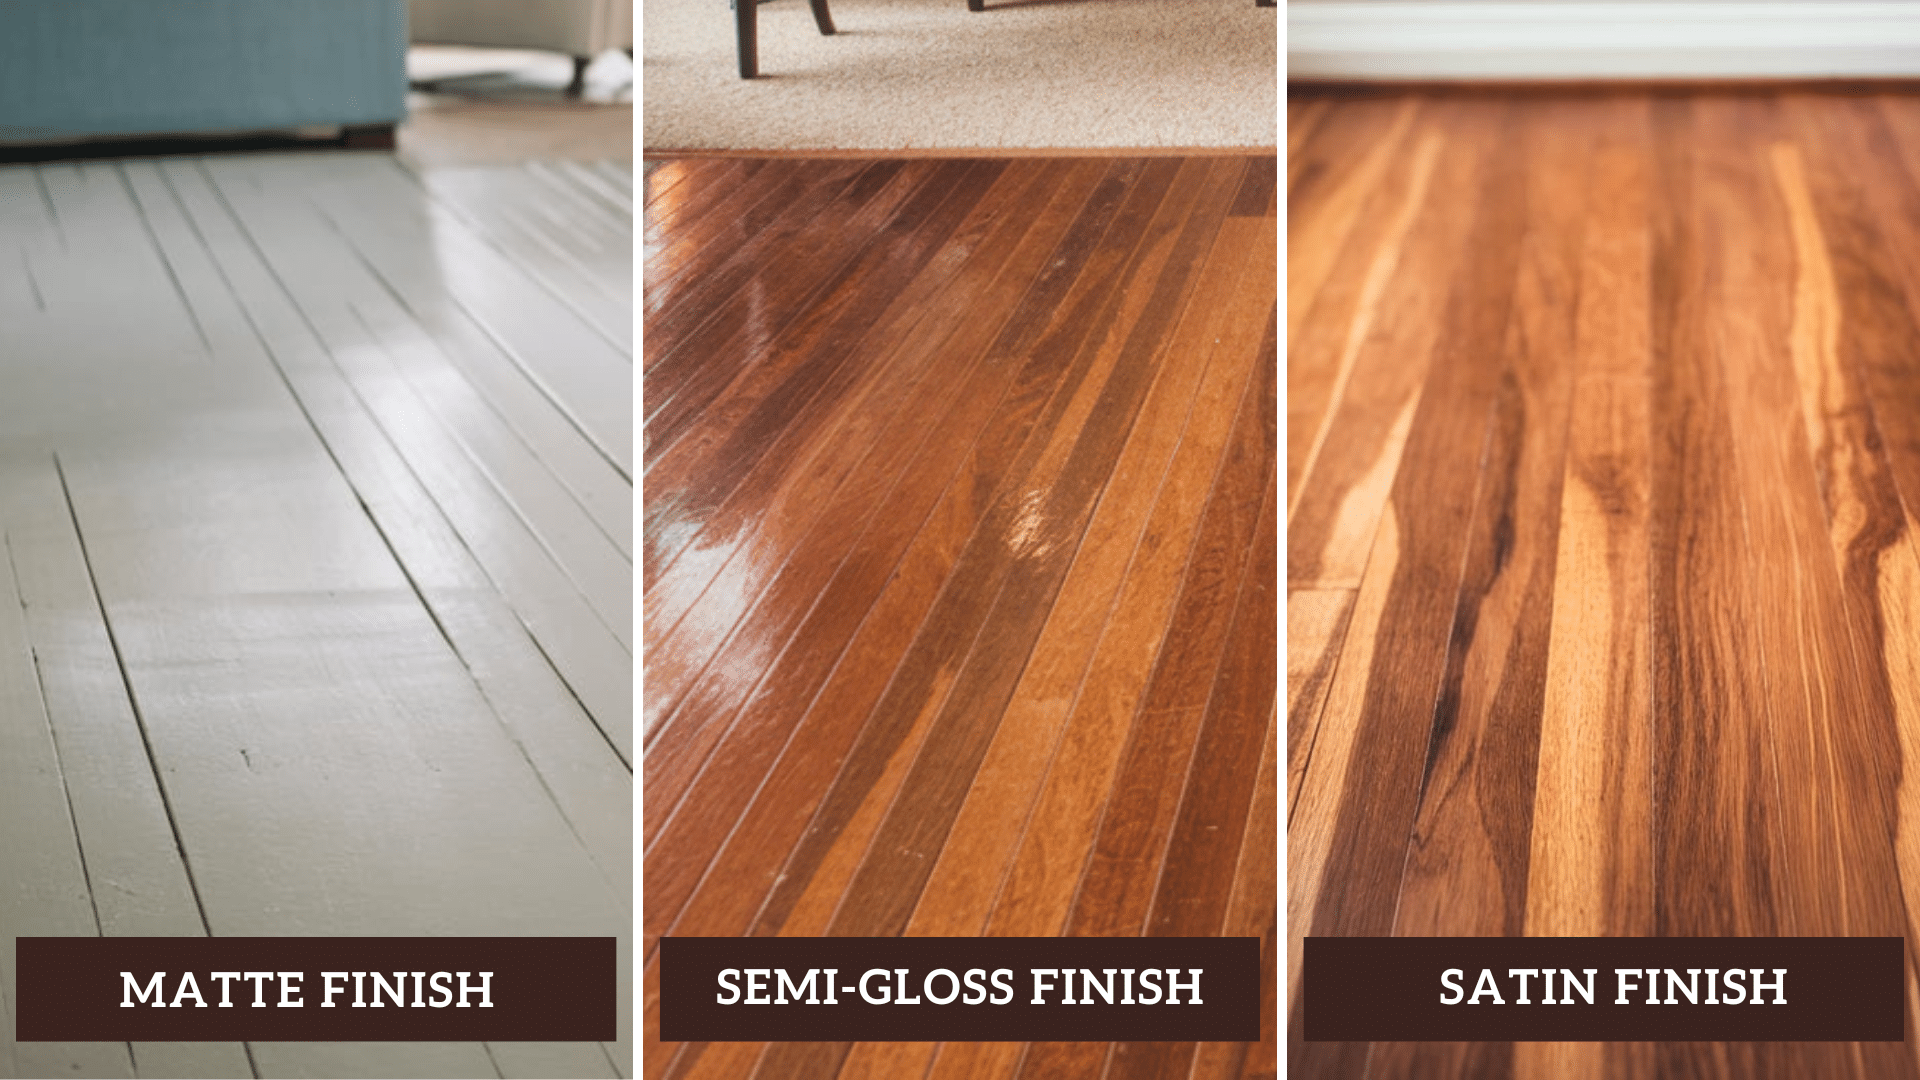
The finish you select impacts not just how your floor looks but also how it handles daily use. Today’s homeowners often choose from these popular options:
| Finish Type | Shine Level | Appearance & Benefits | Ideal For |
|---|---|---|---|
| Matte | Low-shine | Natural appearance; hides scratches, dents, footprints, and dust well | Busy households with children and pets |
| Semi-gloss | Medium-shine | Balances brightness and ease of maintenance; reflects moderate light | Homes needing a blend of aesthetics and practicality |
| Satin | Subtle sheen | Offers slight reflection; easier to maintain than high-gloss; popular among designers | Modern homes seeking style and practicality |
Tips for Choosing the Right Color and Finish
Selecting the perfect combination for your home involves several considerations:
- Consider your home’s overall style: Traditional homes often pair well with warmer, classic wood tones, while modern spaces can handle cooler or more distinctive colors.
- Consider room dimensions: Light colors open up small spaces; darker tones add coziness to larger rooms
- Evaluate your lighting: Natural light lets you go darker; limited light works better with lighter floors
- Sample in your space: Always test colors in your actual room before making final decisions
- Coordinate with existing wood: Your new floors should work with, not against, your current furniture and trim
When selecting both color and finish, remember that your floors will be a long-term feature of your home.
While trends come and go, choosing options that complement your home’s natural character often leads to the most satisfying long-term results.
Final Thoughts on Floor Renewal
Bringing worn hardwood floors back to their original beauty creates one of the most striking changes in home improvement. This process not only saves you money compared to full replacement but also maintains the character and value of your home.
The trip from dull, marked floors to gleaming wood surfaces can be deeply satisfying. Each step—from thorough sanding to applying the final protective coat—brings you closer to floors that will impress for years to come.
Consider taking photos before you begin. When you compare these with the finished result, you’ll see just how much your effort has transformed your space.
Ready to start? Your hidden wood treasure awaits beneath those scratches and worn patches—all it needs is your attention to shine again.
