

Does your roof look worn and weathered? Cracked tiles and faded colors can make your entire home appear neglected. Many homeowners believe they need a complete roof replacement when their tiles begin to show signs of age.
But here’s what most people don’t know: tile restoration can bring your roof back to life for a fraction of the cost. Professional restoration removes years of damage, restores original colors, and adds protective coatings that extend your roof’s lifespan.
Stop worrying about expensive roof replacements. In this guide, you’ll learn the complete tile restoration process – from initial assessment to final protective sealing. We’ll show you how restoration works, what it costs, and why it might be the perfect solution for your home.
Ready to give your roof a second chance? Let’s dig into how tile restoration can change your property.
What is Tile Roof Restoration?
Tile roof restoration is a cost-effective process that repairs and renews existing roof tiles without full replacement. This method cleans, repairs, and protects your existing tiles while addressing any underlying structural issues.
Types of Tile Roofs and Their Restoration Needs
- Concrete tiles need pressure washing, crack repairs, and protective sealers to prevent water damage and color fading
- Terracotta tiles require gentle cleaning methods, mortar repairs, and specialized coatings that preserve their natural clay finish
- Slate tiles demand expert handling for chip repairs, weatherproofing treatments, and careful cleaning to maintain their stone texture
Each tile type has different porosity levels and weather resistance. Professional restoration teams utilize specialized techniques and products tailored to your roof’s specific material, ensuring lasting results.
Signs Your Tile Roof Needs Restoration
- Cracked or broken tiles – Look for visible cracks, missing pieces, or completely broken tiles that expose your roof structure to water damage and weather elements.
- Water leaks or ceiling stains – Brown or yellow stains on your ceiling, water dripping during rain, or damp spots in your attic indicate that damaged tiles are allowing water to pass through.
- Algae, moss, or mold growth – Green or black growth on your roof surface indicates moisture problems and poor drainage that can weaken tiles and create health risks.
- Sagging roof structure or rusted flashing – Visible roof sagging, bent gutters, or corroded metal flashing around chimneys and vents show structural damage that needs immediate repair.
- Higher energy bills – Sudden increases in heating or cooling costs often mean damaged tiles are reducing your home’s insulation effectiveness and letting conditioned air escape.
Step-by-Step Tile Repair Guide
Fix cracked, loose, or missing tiles yourself with simple tools and materials. This guide walks you through each repair method, from quick fixes to complete tile replacement.
Tools Required
| Tool | Purpose |
|---|---|
| Wire brush | Remove dirt and debris from cracks |
| Silicon applicator | Apply sealant to cracks |
| Pry bar/tile lifter | Remove and lift tiles safely |
| Safety equipment | Protect yourself while working on roof |
Materials Required
| Material | Purpose |
|---|---|
| High-quality silicon sealant | Seal cracks and prevent water entry |
| Replacement tiles (if available) | Replace severely damaged tiles |
| Cleaning solution | Clean tile surfaces before repair |
Step 1: Assess the Damage
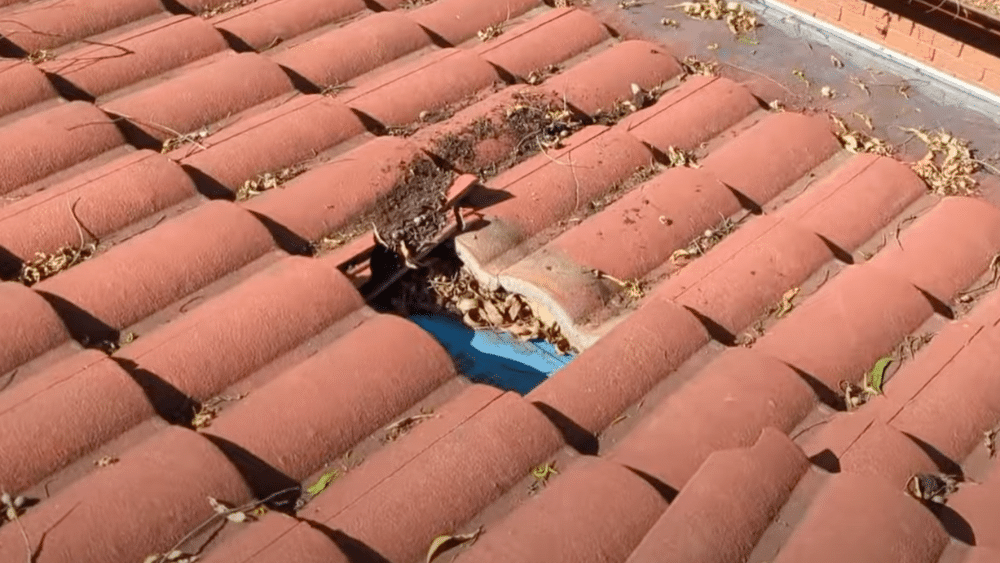
Start by examining the broken tile thoroughly. Check for visible cracks, water damage, and inspect the surrounding tiles for similar issues. Inspect both the top surface and the underside of the tile to fully understand the extent of the damage.
- Remove surrounding tiles to expose the work area completely
- Check for water damage in the roof battens and insulation
- Document all damaged tiles that need attention
Pro Tip: Always check tiles near large trees more frequently, as falling branches cause most tile damage.
Step 2: Remove the Damaged Tile
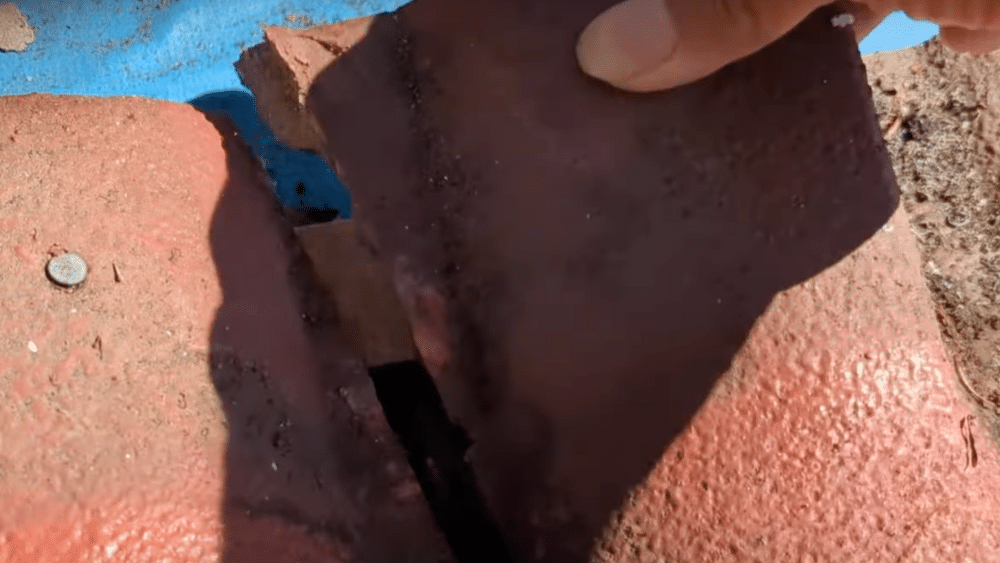
Carefully lift the broken tile and any surrounding tiles that block access to your work area. Handle tiles gently to avoid creating additional cracks. Keep the removed tiles organized so you can replace them in the correct order.
- Use proper lifting technique to avoid back injury
- Place the removed tiles on a flat, safe surface
- Note the position of each tile for accurate replacement
Pro Tip: Take photos before removing tiles to remember their exact placement and overlap pattern.
Step 3: Clean the Crack Thoroughly
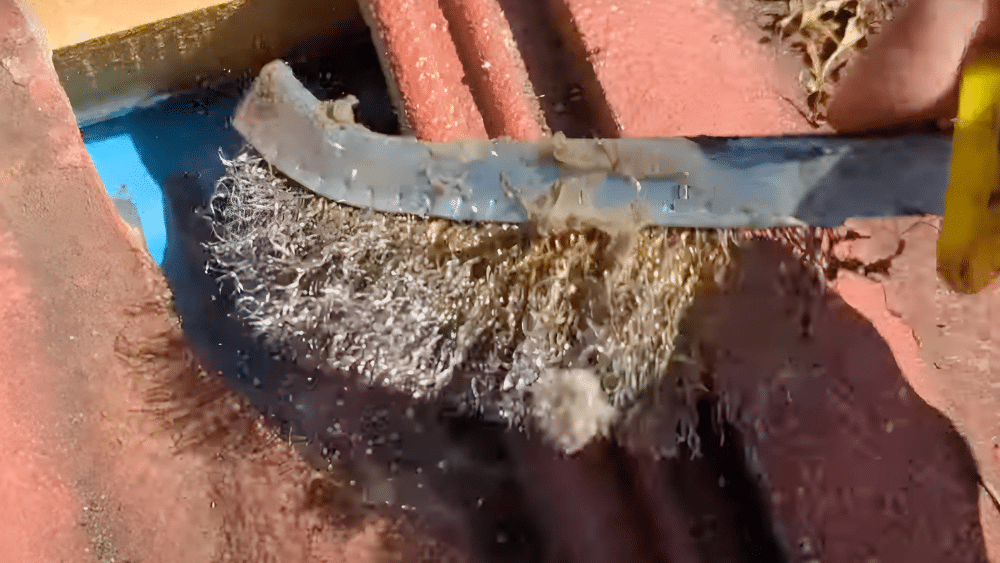
Use a wire brush to remove all dirt, debris, and loose material from the crack. This step is critical for proper silicon adhesion. Brush both sides of the crack until you reach clean, solid tile material.
- Brush in multiple directions to remove all loose particles
- Check for any flaking or crumbling tile edges
- Wipe clean with a damp cloth after brushing
Pro Tip: A clean crack surface ensures your silicon repair will last longer and create a waterproof seal.
Step 4: Apply Silicon Sealant

Apply high-quality silicon sealant to both edges of the crack. Use steady pressure to ensure the silicon penetrates deep into the crack. Smooth the silicone with your finger to create an even seal along both crack edges.
- Apply silicon generously to both crack surfaces
- Press the silicon deep into the crack for maximum adhesion
- Smooth excess silicon to create a neat finish
Pro Tip: Work quickly but carefully – silicon starts to skin over within minutes of application.
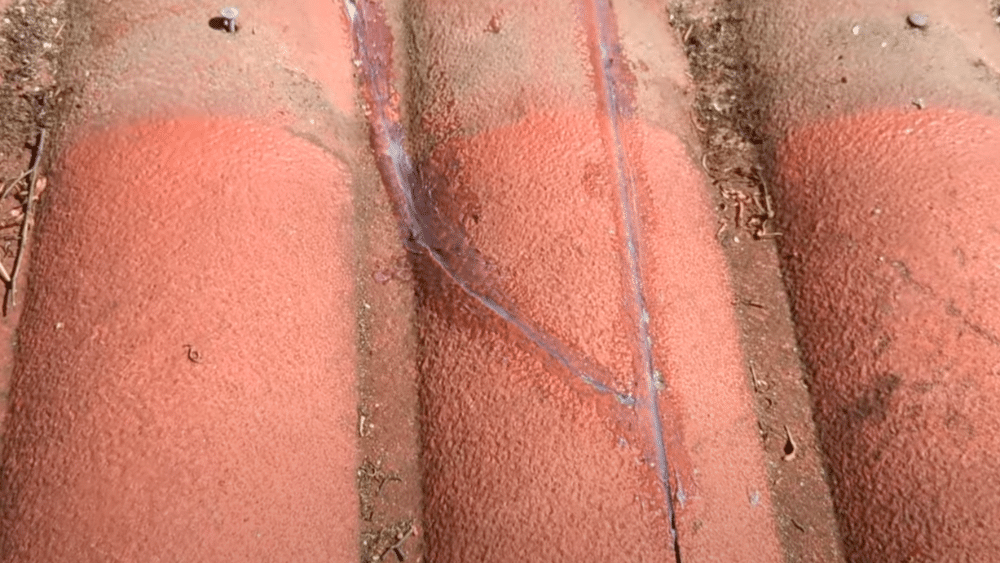
Step 5: Seal the Water Course
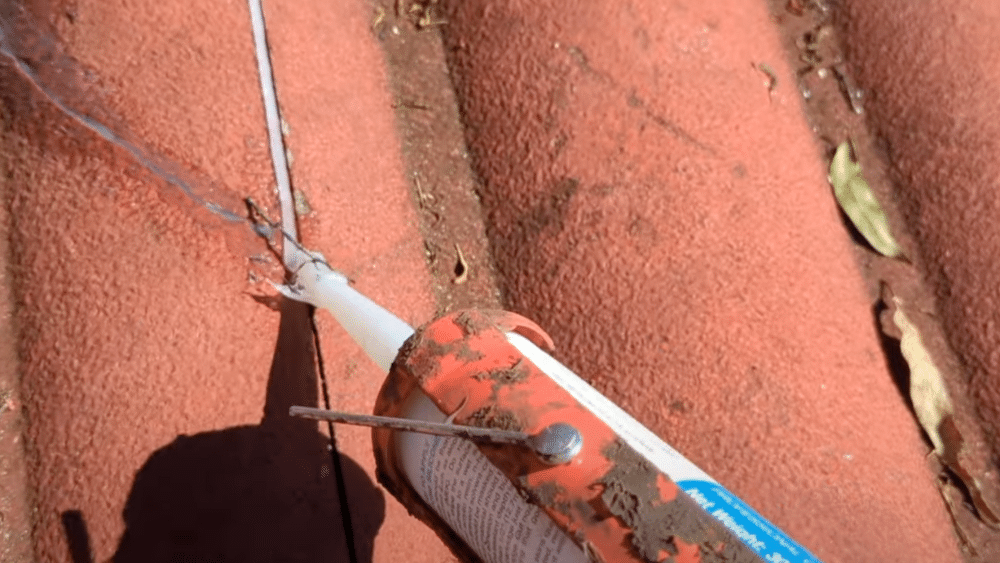
Apply silicon sealant along the entire tile lap from top to bottom, extending past the crack location. This prevents water from entering the water course and causing leaks if any silicon blocks the drainage channel.
- Seal the complete lap area, not just near the crack
- Ensure continuous coverage without gaps
- Check that the sealant extends beyond the crack zone
Pro Tip: Sealing the full lap prevents future water problems even if the water course becomes blocked with silicon.
Step 6: Replace and Secure Tiles
Carefully replace the repaired tile and all surrounding tiles in their original positions. Ensure proper overlap and alignment with adjacent tiles to achieve a seamless finish. Check that all tiles sit flat and secure.
- Position tiles exactly as they were before removal
- Maintain proper overlap with surrounding tiles
- Press tiles firmly into place for a secure fit
Pro Tip: Double-check tile alignment before moving on – misaligned tiles can create new leak points.
Video Tutorial
For a visual tutorial, refer to this video by Roofing Portal Sydney Roof Repairs YouTube channel
5 Benefits of Tile Roof Restoration
1. Extends roof lifespan by 10-15 years: Proper restoration repairs damage and applies protective coatings that help your existing tiles withstand weather conditions much longer than untreated roofs.
2. Costs 50-70% less than full replacement: Restoration typically costs $3-8 per square foot compared to $10-20 for complete roof replacement, saving thousands of dollars while achieving similar results.
3. Boosts property value and street appeal: A restored roof looks brand new, increases your home’s market value by up to 15%, and creates an excellent first impression for potential buyers.
4. Enhances energy efficiency with protective coatings: Special reflective coatings reduce heat absorption by up to 30%, lowering cooling costs and maintaining a more comfortable indoor environment year-round.
5. Prevents costly structural damage: Early restoration stops water leaks, wood rot, and foundation problems that can cost tens of thousands to repair if left untreated.
Tile Roof Restoration & Cost Considerations
Understanding the risks, benefits, and costs helps you make the right choice for your tile roof restoration project.
DIY vs. Professional Comparison
| Factor | DIY Approach | Professional Service |
|---|---|---|
| Safety Risk | High Falls, improper equipment, and electrical hazards | Low – Licensed, insured, safety-trained crews |
| Quality Results | Variable – Limited experience, basic tools | Guaranteed – Specialized equipment, proven techniques |
| Warranty Protection | Voids manufacturer warranties | Maintains warranties, adds workmanship guarantee |
| Time Investment | Weeks/months of weekend work | 3-7 days professional completion |
| Cost Range | $2-4 per sq ft (materials only) | $5-12 per sq ft (complete service) |
| Hidden Problems | Often missed structural issues | Professional assessment identifies all problems |
Cost Breakdown and Variables
| Cost Factor | Budget Range | Premium Range | Impact on Price |
|---|---|---|---|
| Roof Size | $3,000-6,000 (1,500 sq ft) | $8,000-15,000 (2,500 sq ft) | Larger roofs cost more per project |
| Tile Type | Concrete: $5-8/sq ft | Slate/Terracotta: $8-12/sq ft | Material complexity affects labor time |
| Repair Extent | Minor cleaning: $3-5/sq ft | Major repairs: $10-15/sq ft | Structural damage increases costs |
| Location | Rural areas: Lower rates | Urban areas: Higher rates | Local labor costs vary significantly |
| Coating Quality | Basic sealers: +$1-2/sq ft | Premium coatings: +$3-5/sq ft | Better protection costs more upfront |
Maintenance Tips After Restoration
- Schedule annual professional inspections: Have a licensed roofer check your tiles, flashing, and gutters every year to catch small problems before they become expensive repairs.
- Clean gutters twice a year: Remove leaves, debris, and buildup in spring and fall to prevent water backup that can damage tiles and cause leaks around the roof edges.
- Replace damaged tiles immediately after storms: Inspect your roof after high winds or hail and replace any cracked or broken tiles within days to prevent water damage to underlying structures.
- Apply anti-moss treatments every 2-3 years: Use zinc or copper strips, or schedule professional moss prevention treatments to stop algae and moss growth that can lift tiles and hold moisture.
- Reapply protective coatings as recommended: Most roof coatings last 10-15 years, so plan for recoating to maintain energy efficiency and weather protection benefits.
Conclusion
Tile roof restoration offers a smart solution for homeowners facing roof problems. Instead of spending thousands on a complete replacement, restoration repairs damage, improves appearance, and extends your roof’s life by decades.
The key takeaway? Professional restoration costs 50-70% less than replacement while delivering similar results. You get better energy efficiency, increased property value, and peace of mind knowing your roof is properly protected.
Don’t wait until small problems become major repairs. Cracked tiles, ceiling stains, and moss growth are warning signs that need immediate attention. Early restoration prevents costly structural damage and protects your biggest investment.
Ready to restore your tile roof? Contact licensed roofing professionals for a free assessment. Your roof has served you well – now give it the care it deserves.
What’s your biggest concern about your tile roof? Please share your questions in the comments section below.