

That ugly gap between your house and driveway isn’t just an eyesore; it’s a direct path for water to reach your foundation.
Most homeowners overlook these gaps until they notice water pooling near their foundation or weeds growing through the cracks.
By then, what started as a simple $50 fix has become a major headache involving foundation repairs, basement flooding, or expensive landscaping damage.
The good news? Sealing these gaps is surprisingly simple when you know the right techniques and timing.
Even if your current gaps look beyond repair, determining whether immediate action can still save your driveway helps you make the right decision.
This guide covers everything you need to know about when to seal, what materials work best, and step-by-step instructions for lasting results.
Why Gaps Form Between House and Driveway
Gaps between your house and driveway develop naturally over time due to several common factors that affect every property.
- Natural soil settling and weather changes: The ground underneath concrete shifts as the backfilled soil compresses, while temperature swings cause materials to expand and contract.
- Driveway material expansion and contraction: Concrete and asphalt expand and contract with seasonal temperature changes, creating stress points along the foundation edges.
- Improper initial installation: Poor construction practices, such as missing expansion joints or inadequate base preparation, can lead to premature gap formation.
- Why monitoring cracks early saves money: Small gaps cost $50 to seal today, but can turn into thousands in foundation or water damage if left untreated.
Regular inspections and prompt repairs protect your investment and prevent costly structural issues down the road.
When Should You Seal the Gap?
Seal gaps as soon as you notice visible cracks, water pooling near the foundation, or widening separation between surfaces. These are clear signs that sealing is overdue.
The best time for sealing work is during spring or fall, when temperatures consistently range between 40°F and 80°F, avoiding winter freezes and summer heat that can affect curing.
For new driveways, wait at least 30 days after installation to allow the concrete to fully cure and settle before applying any sealant.
Don’t delay. Once you spot problems, sealing small gaps promptly prevents water damage, foundation issues, and costly repairs that can reach thousands of dollars if left untreated.
Step-by-Step: How to Seal the Gap Between Driveway
Sealing the gaps between your driveway and garage prevents water damage and keeps weeds at bay. Here’s how to do it in 5 simple steps.
Tools and Materials You’ll Need
| Tool / Material | Use | Tips |
|---|---|---|
| Caulk gun | Applies sealant smoothly | Pick a heavy-duty gun for control |
| Concrete sealant | Seals and protects gaps | Polyurethane lasts longer; latex is easier to apply |
| Backer rod | Fills deep gaps | Choose a snug fit to save sealant |
| Broom/blower | Clears dirt and dust | Surface must be clean and dry |
| Putty knife/trowel | Levels the sealant | Smooths edges for a neat finish |
| Gloves & safety gear | Protects hands and eyes | Use nitrile gloves and goggles |
Step 1: Remove Old Material
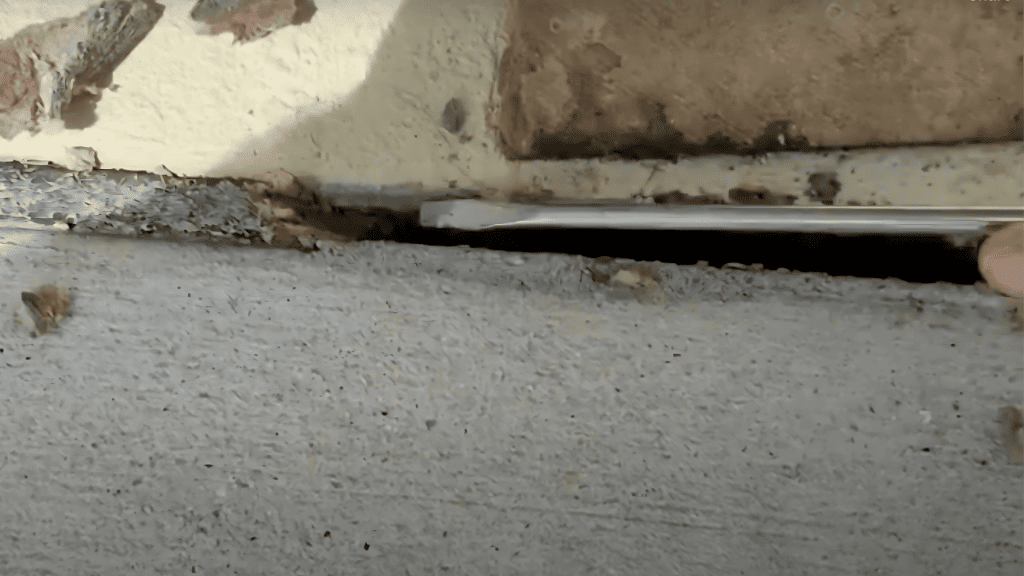
Use the screwdriver to dig out loose material from the gap. Start by removing larger chunks that come up easily, then work on stubborn areas that need more effort.
Builder-grade sealant often fails after just 2 years, so don’t be surprised if removal takes time. Sweep up debris by hand first, then vacuum thoroughly to get smaller particles.
Finish with a leaf blower on high setting to remove all loose material and dust from the gap.
Materials needed:
- Flathead screwdriver
- Small broom and dustpan
- Shop vacuum
- Leaf blower
Step 2: Clean the Surface
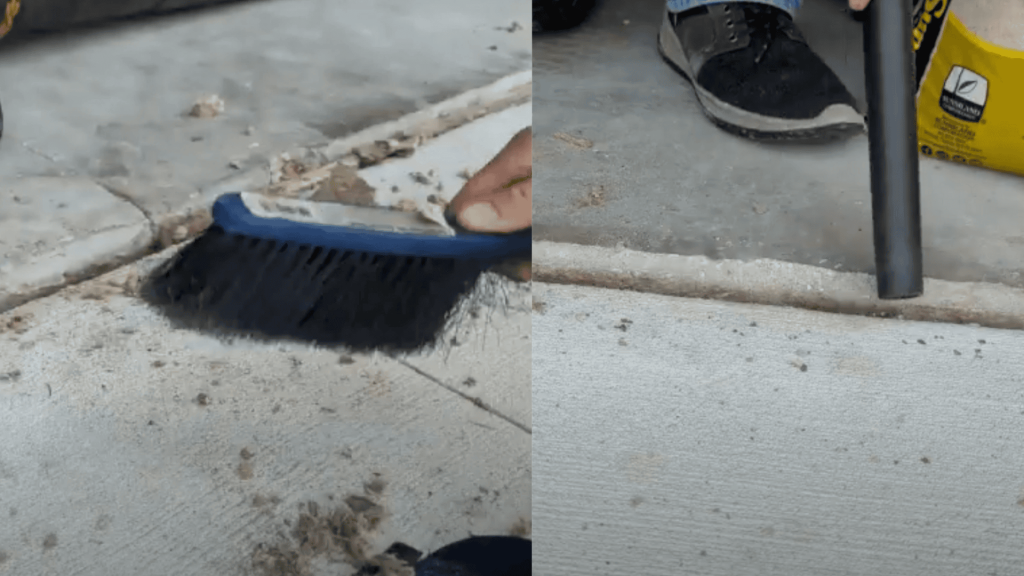
Scrub the gap walls with the wire brush to remove loose dirt and old adhesive residue. This step is critical because sealant needs clean concrete to create a strong bond.
Take your time and work systematically on both sides of the gap. After brushing, use your leaf blower again to remove all dust and particles you’ve loosened.
The gap should look clean and feel solid to the touch before moving forward.
Materials needed:
- Small wire brush
- Leaf blower
Step 3: Fill with Sand
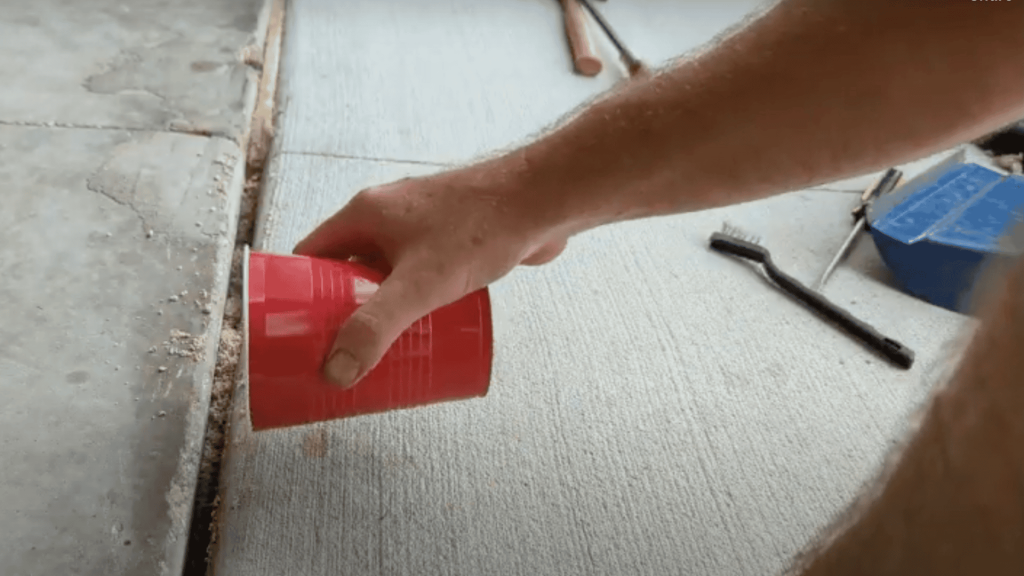
Fill the gap slightly more than halfway with dry sand to create a firm foundation. Ensure your sand is completely dry, as wet sand can cause issues later.
Pour the sand carefully to avoid overfilling, then use a screwdriver to gently level and compact it.
You need enough space above the sand for both the backer rod and the sealant layer. The sand prevents the sealant from sinking too deeply and wasting material.
Materials needed:
- Dry sand (P sand works well)
- Screwdriver for leveling
Step 4: Install Backer Rod

Push the backer rod down into the gap, starting from one end and working your way along. The rod should fit snugly without being compressed too much or sitting too loosely.
Leave a 1/4 to 1/2 inch space from the top surface for the sealant layer. Take your time with this step and don’t rush – proper backer rod placement is key to a long-lasting seal.
The rod acts as a backstop, helping the sealant maintain its shape.
Materials needed:
- 5/8 inch backer rod (measure your gap first)
Step 5: Apply Sealant and Finish

Apply sealant in a steady, continuous line along the entire gap. The material flows like thick syrup, so work carefully and have towels ready for cleanup.
Unlike regular silicone, this self-leveling formula will settle on its own, so there’s no need to worry about smoothing it perfectly.
Immediately sprinkle clean sand over the wet sealant to achieve a natural appearance that blends seamlessly with your concrete. This sand layer also helps protect the sealant and provides better traction.
Materials needed:
- Self-leveling sealant (Sika Pro Series recommended)
- Clean sand for topping
- Shop towels or paper towels
Video Tutorial
Special thanks to The Suburban Home Nut for providing valuable insights in their video, which I referenced while creating this guide.
Expert Tips for Perfect Driveway Sealing
Simple tricks professionals use to get a cleaner finish, stronger seal, and longer-lasting driveway protection.
- Timing matters: Allow 3-4 days for full cure time before heavy use. Please refrain from walking or driving on the sealed area during this period.
- Weather considerations: Work on dry days with temperatures above 40°F. Avoid rainy or extremely hot conditions, as they can affect curing.
- Quality materials: A good sealant lasts significantly longer than builder-grade options. Investing in proper tools and materials saves money in the long term.
- Measure twice: Check your gap width before buying backer rod – 5/8 inch is a common, but not universal, measurement.
For homeowners tackling multiple concrete projects, understanding the complete driveway sealing process helps you handle various maintenance tasks with confidence.
Common Driveway Sealing Mistakes to Avoid
Avoid these costly errors to keep your driveway seal strong, clean, and long-lasting.
| Mistake | Why It’s a Problem | Better Approach |
|---|---|---|
| Sealing without cleaning | Dirt and weeds block adhesion. Sealant peels fast. | Clean and dry the gap fully before sealing. |
| Wrong sealant for the climate | Unsuitable sealant cracks or shrinks. | Pick polyurethane or climate-ready sealant. |
| Overfilling or underfilling | Too much looks messy. Too few leaves leave gaps open. | Use a backer rod and apply an even bead. |
| Skipping maintenance | Cracks return, allowing water and pests to enter. | Check seasonally and reseal every few years to maintain optimal performance. |
Driveway Sealing Maintenance Made Easy
Keep your driveway seals in top condition with these simple maintenance practices that prevent costly repairs.
- Regular inspection schedule (after heavy rain or seasonal changes): Check your sealed gaps every 3-6 months and always after heavy storms or freeze-thaw cycles when damage is most likely to occur.
- Resealing frequency: Plan to reseal gaps every 3-5 years with quality materials, or sooner if you notice cracking or separation in the existing sealant.
- Other preventive measures (gutters, proper drainage, edging): Install proper gutters to direct water away, maintain good yard drainage, and add landscape edging to prevent soil erosion around sealed areas.
These simple steps help your sealing work last longer and protect your property from water damage and foundation issues.
Looking Ahead
Sealing the gap between your house and driveway is one of the most effective preventive maintenance tasks you can undertake.
With just a weekend and basic materials, you can protect your foundation from water damage, eliminate unsightly weeds, and improve your home’s curb appeal for years to come.
Remember, the key to success lies in proper preparation and the use of high-quality materials. Take your time with each step, especially cleaning and installing the backer rod.
Good sealant may cost more upfront, but it saves money by lasting 5+ years instead of failing after just two seasons.
Don’t wait until small gaps become major problems. Grab your tools this weekend and tackle this project
Ready to get started? Share your sealing success stories in the comments below!