

“Can a door be the star of a home?”
Installing a barn door often feels like an overwhelming task for many homeowners.
Professional installation costs run high, and concerns about wall damage or incorrect installation can stop many from trying.
The fear of ending up with an improperly sliding door makes the project seem risky.
But here’s something interesting: barn door installation is a manageable home project that saves both time and money.
This guide simplifies the installation process by describing its steps, covering everything from hardware selection to smooth operation.
The methods shared here match professional standards while being easy to understand and follow.
Tools and Materials You’ll Need
| Category | Items |
|---|---|
| Tools | Drill, screwdriver, level, measuring tape, saw, pencil, wrench |
| Hardware | Barn door track system, screws, anchors, spacers |
| Door Components | Barn door slab, rollers, door handle, floor guide |
| Optional Materials | Paint or stain, sandpaper, wood filler |
Step-by-Step DIY Barn Door Installation Guide
Step 1: Prepare Your Materials
Start by selecting quality dimensional lumber for your door. Wood needs time to settle into its new environment, so store it overnight in your workspace.
Measure your door opening and add two inches to both height and width. This extra space ensures proper overlap when the door is mounted.
Step 2: Cut Vertical Pieces
Make square cuts on each board end to ensure perfect 90-degree angles. Measure and mark your boards at 84 inches before cutting.
Look at each board carefully and mark the best-looking side for the visible face. Set out your boards to reach your total door width—in this case, 35 inches.
Step 3: Add Detail Work
Take your palm router fitted with a 1/8-inch chamfer bit and run it along the edges where the vertical pieces will meet.
This step serves two purposes: it makes the door more visually appealing and helps mask any small flaws in the wood. The subtle detail creates shadow lines that enhance the overall look.
Step 4: Assemble the Base Structure
Set out your vertical boards on your workbench in their final arrangement. Place your 5.5-inch horizontal pieces at the top and bottom.
The middle horizontal piece should sit about one-third down from the top. Use clamps to hold everything firmly in position while you work.
Step 5: Secure the Structure
Using your brad nailer, work from the back side to secure all pieces together. If you choose to use wood glue, apply it between the boards for added strength.
Keep checking that everything stays square and aligned as you attach each piece.
Step 6: Add Decorative X-Pattern
The X-pattern requires careful measurement and marking. Use a straight edge to mark your corners and determine your angles.
Cut your pieces and test their fit before making the final attachment. A combination of wood glue and super glue will help hold pieces in place while you secure them.
Step 7: Complete Edge Work
Run your router with the chamfer bit along all visible edges of the completed door. Use a chisel to clean up the corners where the router can’t reach.
Follow up with a flush trim bit to make sure all surfaces are even and smooth.
Step 8: Add Bottom Guide
Create a groove along the bottom of your door using a quarter-inch router bit. The depth will depend on your specific hardware requirements.
Make sure to test the fit with your floor guide component before moving forward.
Step 9: Finishing
Start with thorough sanding of the entire door. Work through your sandpaper grits, moving to finer grades up to 320.
Spray the wood with water between grits to raise the grain for a smoother finish.
Apply your chosen finish in thin, even coats, allowing proper drying time between applications.
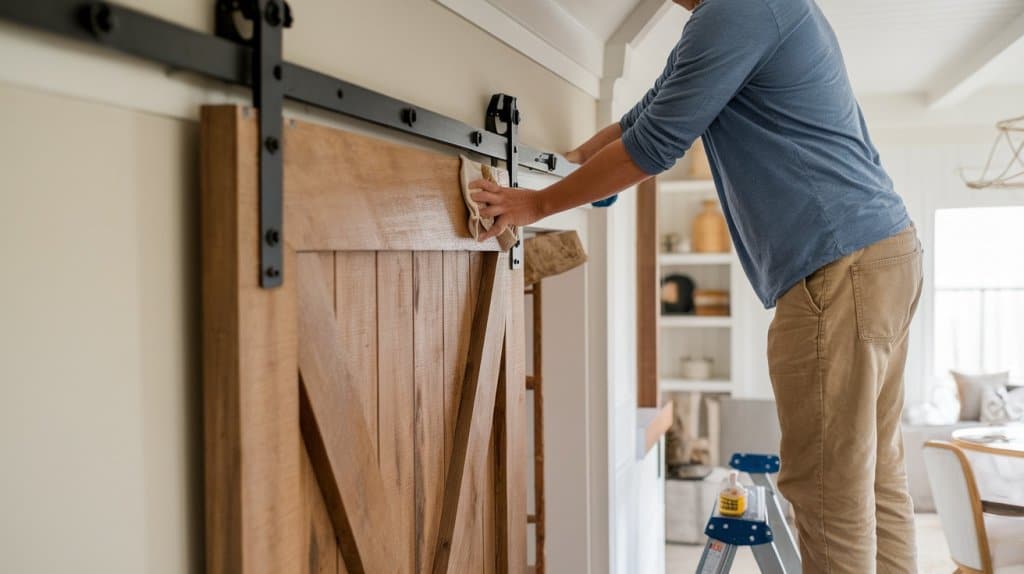
Step 10: Hardware Installation
Mount your wheel assemblies to the door top. Find and mark your wall studs—they’re essential for secure mounting.
Position your track one inch above the door height, using a level to ensure perfect alignment. Install your floor guide and test the door’s movement.
Make any needed adjustments to ensure smooth operation.
Remember that each hardware kit may have specific requirements. Read through the provided instructions and double-check all measurements before making permanent attachments.
Watch this step-by-step video tutorial by Sam Macy Designs to see the DIY barn door installation process in action and make your project even easier!
Common Mistakes to Avoid
1. Track System Installation
Proper track placement requires using a level.
Measure twice: once from the floor up and again across the opening width.
An uneven track causes sliding problems that no amount of adjustment can fix.
2. Wall Support Issues
Don’t rely on wall anchors alone – they can’t support door weight long-term.
Mark and use every wall stud. If studs don’t align with track holes, install a mounting board first to ensure solid support.
3. Door Space Planning
Consider all space needs before installation:
- Wall offset distance
- Hardware depth
- Handle clearance
- Floor guide space
- Outlet and switch locations
4. Hardware Setup
Follow the spacing guide for mounting brackets.
Poor spacing leads to sagging or weak support. Check measurements for:
- Edge overlap
- Track length
- Door height
- Floor guide position
Remember: careful planning now prevents problems later.
Maintenance and Care Tips
- Wipe the track clean monthly with a dry cloth. This prevents dirt build-up and helps maintain smooth operation.
- Regularly inspect all mounting hardware. Check screws and brackets every few months to ensure they remain tight and secure.
- Watch out for squeaking sounds. If you hear them, apply a small amount of dry lubricant to the roller bearings, not the track itself.
- Look for roller wear. Clean rollers using a soft brush every six months to remove debris or build-up.
- Keep the floor guide area clear. Sweep or vacuum around the door base to prevent debris from getting stuck in the guide.
- Monitor door alignment. If the door starts dragging or leaving gaps, adjust the mounting brackets to correct the hang.
- Pay attention to the sliding movement. If the door becomes more difficult to slide, check the track for obstacles or debris.
- Inspect the floor guide regularly. Replace it if you notice wear or damage to maintain proper door operation.
- Train household members on proper door use. Gentle sliding prevents strain on hardware and extends its life.
Conclusion
Building your own barn door adds a special touch to your home. A well-made door, properly installed and maintained, serves as both a functional piece and a statement feature.
While the project requires attention to detail, the steps remain straightforward: careful planning, precise measurements, and patient assembly.
The key to success is avoiding common installation mistakes and following proper maintenance routines.
By taking time with each step and paying attention to the small details, you can create a door that slides smoothly and looks great.
Remember that proper installation and regular care make all the difference. A barn door isn’t just a door – it’s a piece of craftsmanship that adds value and style to your living space.