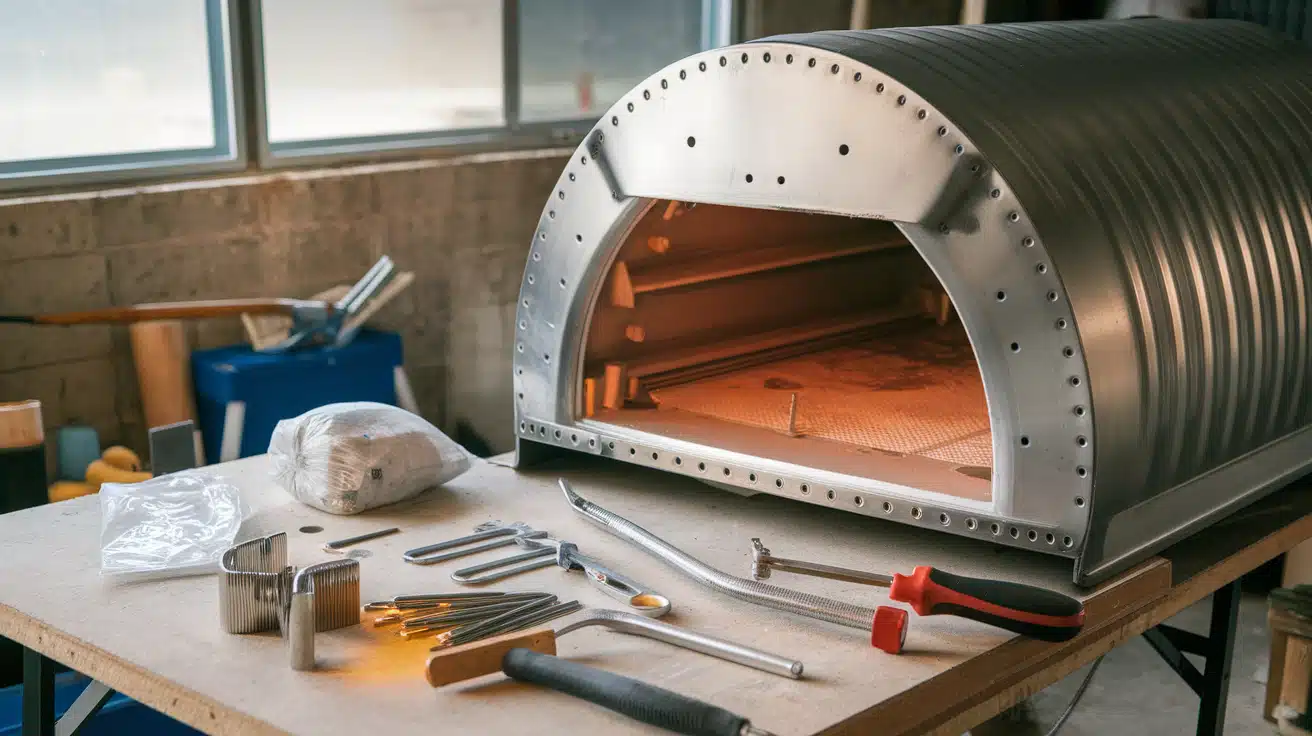
Have you ever wanted to make your own knives or metal crafts? Heat treating is the secret that turns ordinary metal into strong, durable tools. But here’s the catch: most heat-treating ovens cost hundreds or even thousands of dollars.
This puts many hobbyists in a tough spot. You want to create quality metalwork, but the equipment seems way too expensive. Store-bought ovens often come with features you don’t need, making them even more costly.
What if you could build your own heat-treating oven for a fraction of the cost? You can, and it’s easier than you think.
This guide will show you how to build a simple, effective heat-treating oven using basic materials from hardware stores. No special skills required, just follow the steps and you’ll have a working oven for all your metal projects.
Why Build Your Own Heat Treating Oven?
Building your heat-treating oven offers significant advantages for metalworkers, blacksmiths, and hobbyists. Commercial heat treating ovens can cost thousands of dollars, making them prohibitively expensive for small shops or individual craftspeople.
A DIY approach can reduce costs by 60-80% while providing equivalent functionality. Custom-built ovens allow precise control over your specific needs.
You can design the chamber size for your typical workpieces, incorporate specialized atmosphere controls, and select heating elements that match your power supply and temperature requirements.
This level of customization is rarely available in commercial units within reasonable budgets.
Key Benefits
- Cost Efficiency – Materials typically cost $200-800 versus $2,000-10,000 for commercial units
- Learning Experience – Understanding heat treating principles through hands-on construction
- Customization – Tailor size, temperature range, and controls to your specific applications
- Maintenance Control – Easy repairs and modifications when you built it yourself
- Satisfaction – Pride in creating professional-quality tools with your own hands
The process also deepens your understanding of metallurgy, temperature control, and thermal dynamics, which directly improve your heat-treating skills and overall metalworking capabilities.
Safety Disclaimer
This project involves high-voltage and electrical parts that can cause serious harm if handled incorrectly. Always wear safety glasses and heat-resistant gloves and work in a well-ventilated area. Turn off the power before touching any wires or components.
The safety of this build rests with you, the maker. Follow local electrical codes and get help if you’re not sure about any step. Burns, shocks, and fire are real risks when building heating equipment.
This guide offers tips, not expert advice. Make this oven at your own risk.
DIY Heat Treating Oven: A Quick Guide
Learn how to build your own metal heat-treating oven in simple steps. This guide covers everything from making coils to final testing, with money-saving tips throughout.
Material
| Material | Quantity |
|---|---|
| Kanthal A1 16 American Wire Gauge | 85 Feet |
| Coiling Bar (3/8″ Bar) | 1 |
| 2×4 Wood Pieces | 2 Pieces |
| Soft Fire Bricks | 24 Bricks (may Have Extras) |
| Refractory Mortar | 1-2 Bags (depending on Brand) |
| Aluminum Flashing | 10 Feet (14” Width) |
| Kao-Wool (ceramic Insulation) | 1-2 Sheets (depending on Oven Size) |
| Metal Angle Iron | 2-3 Pieces (varying Lengths Depending on Oven Size) |
| Deck Screws | Approx. 20 Screws |
| Heat-Resistant Paint | 1 Can (enough for The Metal Frame) |
| Thermocouple | 1 |
| Fuses (20 A, 1 A, or 2 A) | 2 (1 for Circuit, 1 for PID Protection) |
| SSRs (solid-state Relays) | 2 |
| Pid Controller | 1 |
Tools
| Tool | Quantity |
|---|---|
| Drill | 1 |
| Pliers | 1 Pair |
| Router or Saw | 1 |
| Welding Equipment | 1 Set (welder, Rods, Etc.) |
| Angle Grinder | 1 |
| Measuring Tape or Ruler | 1 |
| File | 1 |
| Screwdrivers (or Drill Driver) | 1 Set |
| Riveter | 1 |
| Multimeter | 1 |
| Heat Gun or Hair Dryer | 1 |
| Crimping Tool | 1 |
| Soldering Iron (optional) | 1 |
| Safety Equipment (gloves, Goggles) | 1 set (gloves and goggles) |
Step 1: Making the Coils
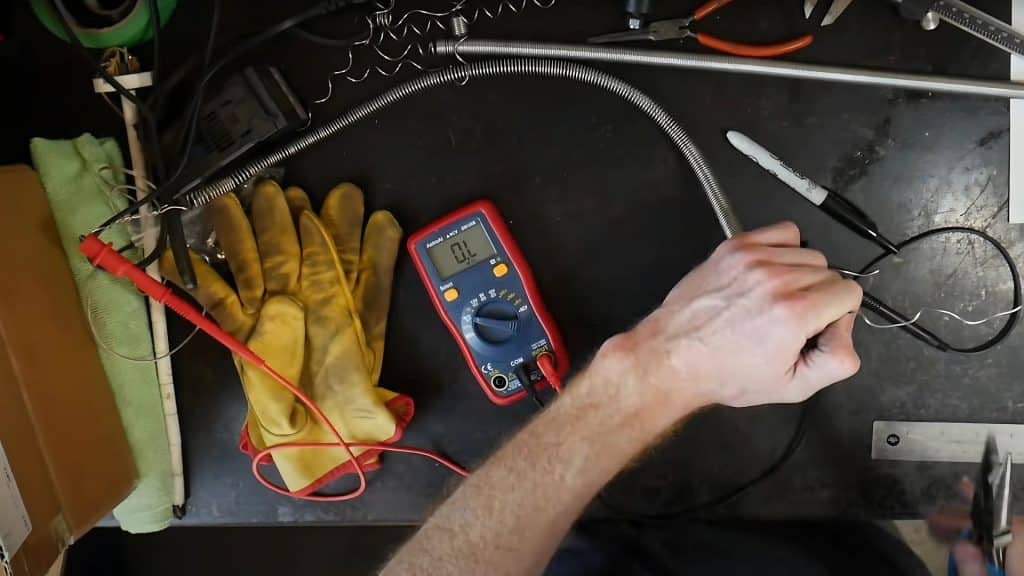
For this step, gather Kanthal A1 16-gauge wire, a 3/8″ metal bar, two 2×4 wood pieces, plus a drill and pliers. Start by drilling a small 1/8″ hole at one end of your metal bar.
Next, connect two 2x4s and drill a 15/32″ hole in the center to create a jig. Thread the wire through the small hole in the bar, then use a drill on the other end to wind tightly, even coils. You’ll need to make two coils total for the oven to work properly.
Pull away from the jig while coiling to make tighter coils. It’s wise to make your coils longer than needed so you can trim them to the exact size later.
Pro Tip:Mark the coiling bar with tape to help keep coils evenly spaced
Step 2: Electrical Design
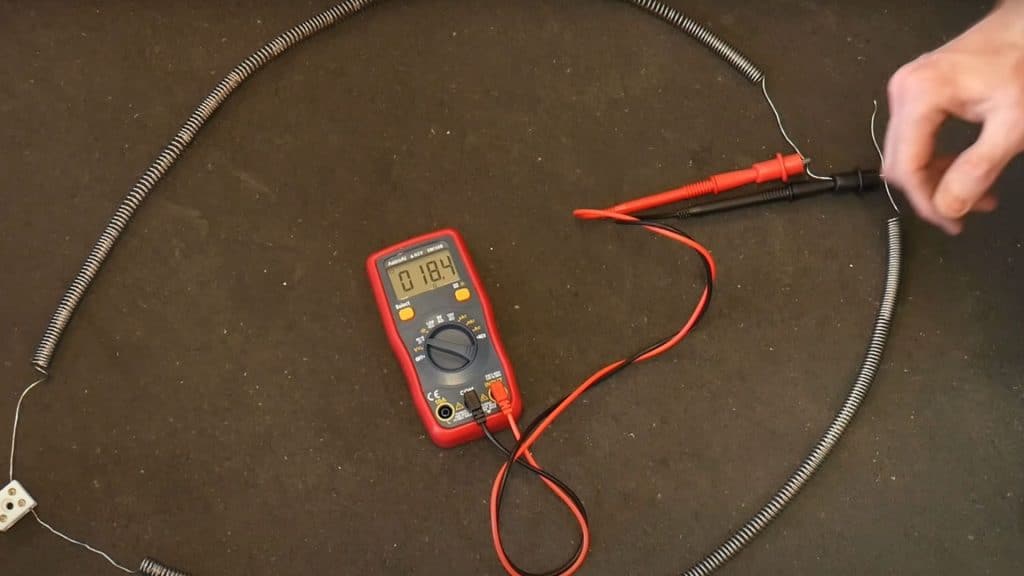
Your oven will run on 240 volts with a target of 13.3 amps for safety when using a 20-amp breaker. You should aim for 18.4 ohms total resistance, which will create about 3200 watts of heat.
This means each coil should measure around 9.2 ohms for optimal performance. Test with a multimeter and trim your coils as needed until you reach this target number.
Getting this right is key to how well your oven will heat up and maintain temperature.
Pro Tip: Calculate the minimum wire length using online Kanthal A1 resistance charts
Step 3: Preparing the Oven Structure
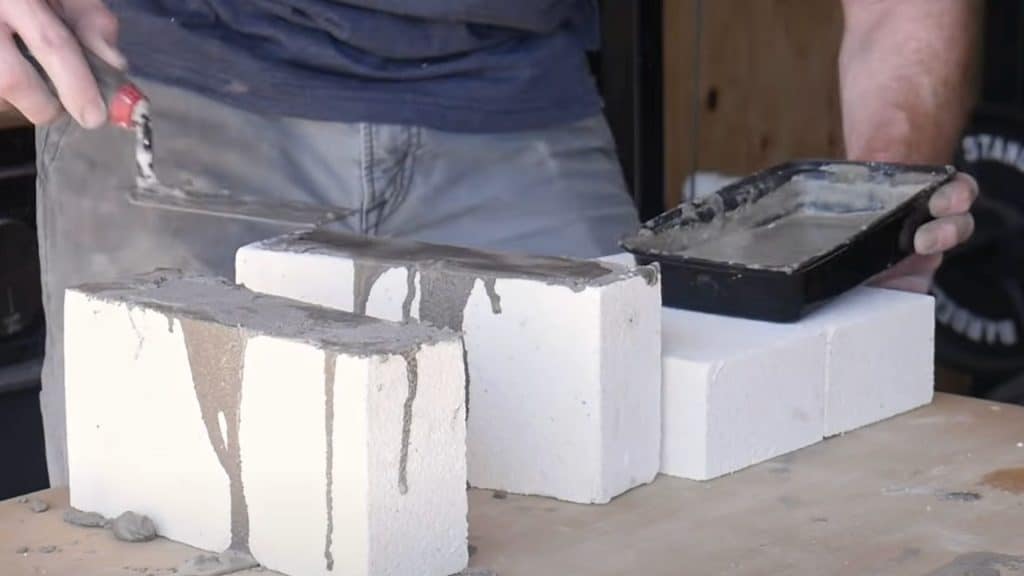
Use soft fire bricks for the walls and door of your oven, and choose good quality refractory mortar that bonds well. Cut T-shaped slots in the bricks using a router or saw to hold the heating coils.
Plan for a chamber that measures 5″ tall x 6.5″ wide x 18″ deep for the best heat-to-volume ratio.
The T-shape groove helps keep coils in place during heating. Make these grooves slightly smaller than your coils for a snug fit that prevents them from moving when hot.
Pro Tip:Pre-fit everything without mortar first to check alignment
Step 4: Building the Oven Body
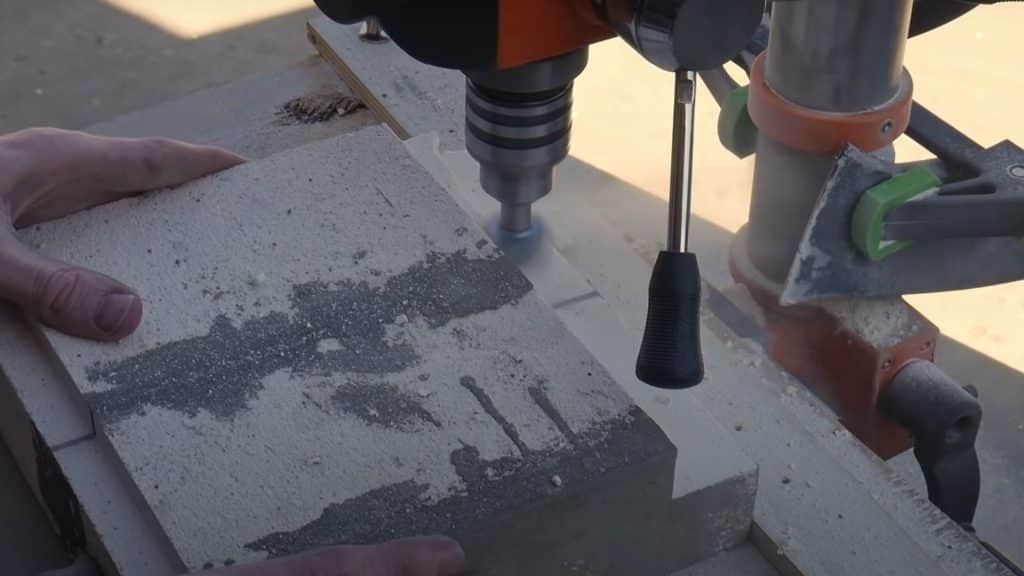
Begin by laying out the bricks and joining them with mortar. Make sure the coils fit into the slots properly for good heat transfer. Use plywood and sandpaper to keep all surfaces flat and level during construction.
Add 1-inch risers to reach the needed 5-inch height for the chamber. Create the back wall and door with two 9″ x 9″ bricks each for proper insulation. Sand down any high spots on bricks before assembly for better heat holding and fewer cracks over time.
Pro Tip:Keep a spray bottle of water handy to adjust mortar consistency
Step 5: Building the Frame
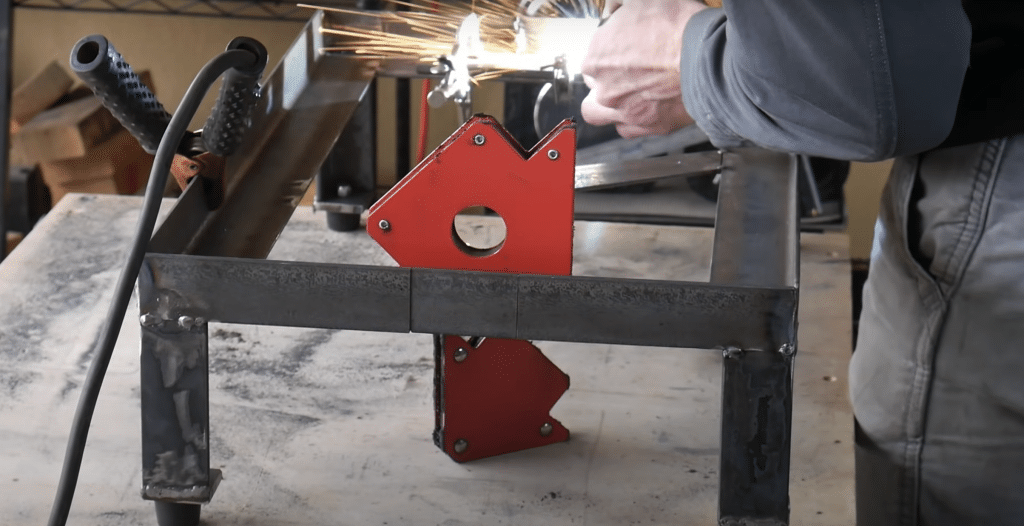
Build a base frame with angle iron to support the brick structure. Place the brick assembly on this metal base, making sure everything sits level.
Make a door frame that holds bricks securely without gaps. Weld hinges to allow smooth door movement and proper closure.
Add small metal tabs inside the frame to keep the bricks from shifting over time with repeated heating and cooling cycles. These small details will extend the life of your oven.
Pro Tip:Add extra support under the heaviest parts of the brick structure
Step 6: Installing Electrical Parts
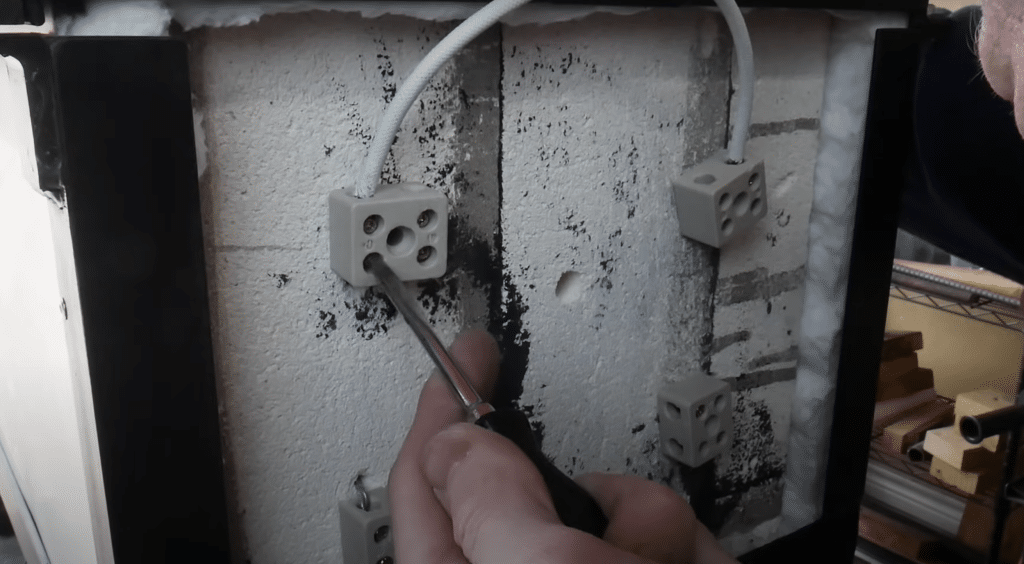
Connect the coils in series to reach the target 18.4 ohms total resistance. Test this total with a multimeter before going further. Install a thermocouple to monitor oven temperature during use.
Add a limit switch that cuts power when the door opens for safety. Mount the thermocouple tip so it doesn’t touch the coils or walls directly, which gives more true temperature readings of the air inside rather than the surface temps.
Pro Tip:Mount the limit switch where it won’t be exposed to extreme heat
Step 7: Adding the Control Box
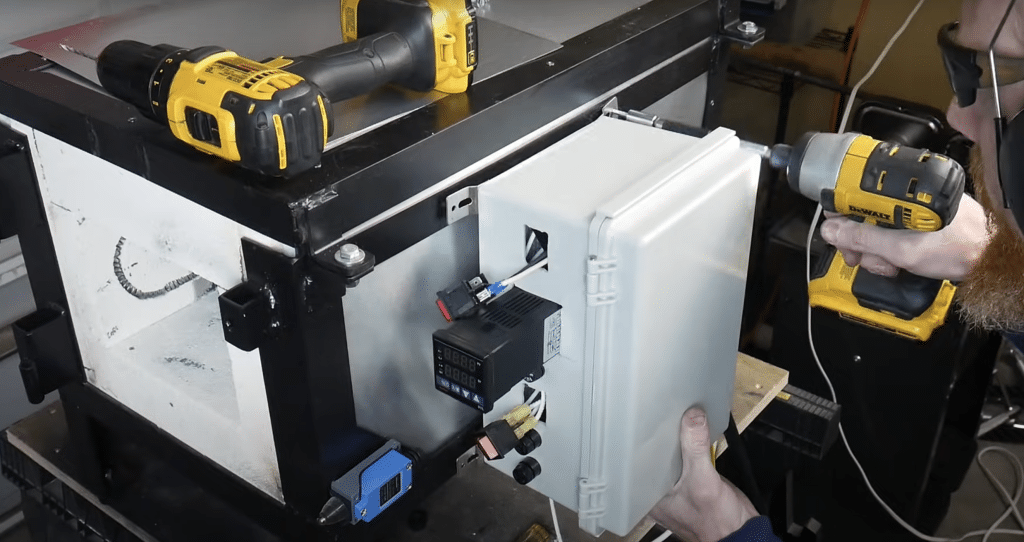
Install solid-state relays (SSRs) in your control box to manage power to the heating elements. Connect these to the PID controller that will maintain your set temperature.
Add proper fuses for safety to prevent electrical problems. Use heat-resistant wire for all connections inside the oven, as regular wire insulation will melt when exposed to the high temperatures your oven will reach during operation.
Pro Tip:Mount SSRs on heat sinks to keep them cool
Step 8: Testing the Oven
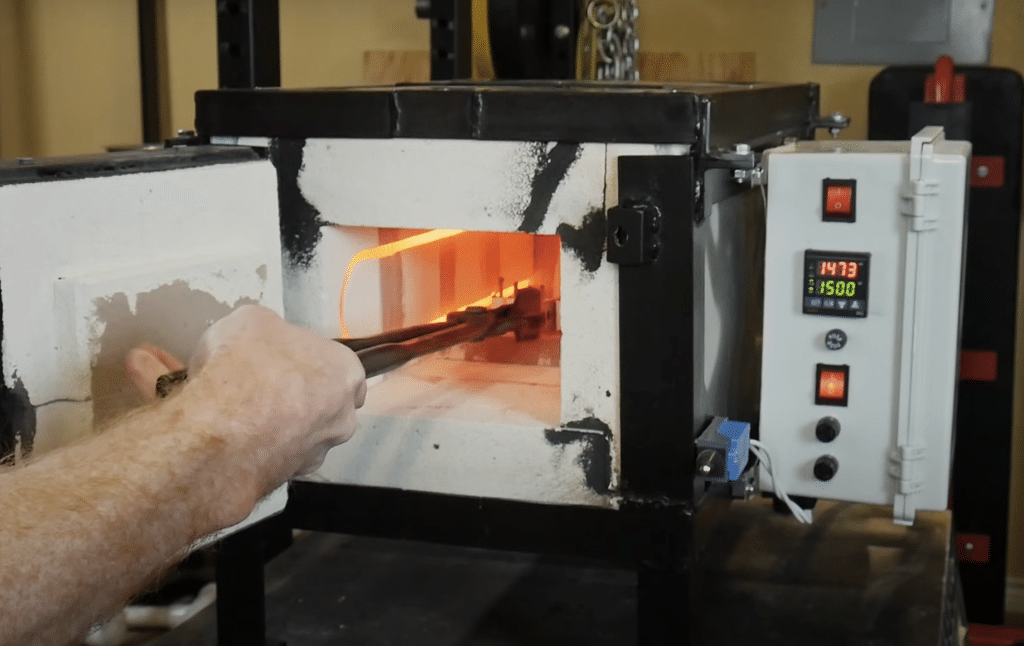
Mount the door with proper hinge alignment to ensure a good seal. Double-check all wiring connections before first power-up. Test the system by heating to 1500°F and watching how it performs.
Make adjustments to the door latch and seal as needed based on this test. Run the oven empty for a full heating cycle before actual use. This burns off any oils or residues from construction that could affect your work pieces.
Pro Tip:Start with a low temp test (500°F) before going full heat
Step 9: Final Thoughts
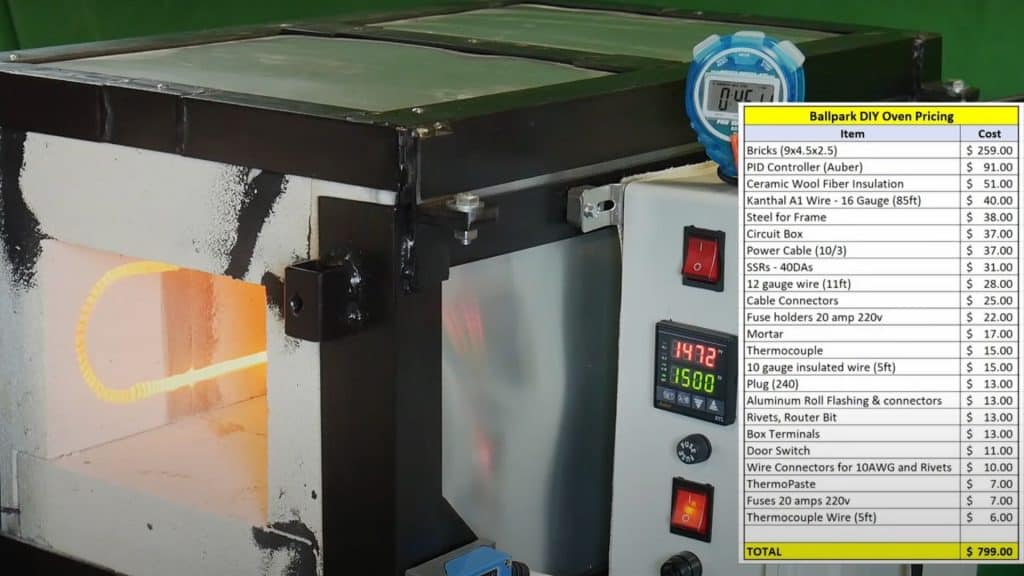
Your completed oven can reach temperatures up to 1500°F and maintain steady heat within a few degrees, perfect for precise metal work.
The total cost runs around $800, which is far less than the $1700+ price tag of store-bought models with similar performance. This oven is ideal for knife making and various metal projects requiring careful heat control.
Write down temperatures, times, and results to keep a log of your heat treatments. This simple habit will help you improve your skills over time.
Pro Tip:Consider adding wheels to the base for mobility
I’d like to give credit to Red Beard Ops for their informative video, which served as a reference for this guide.
Common Mistakes When Building a DIY Heat Treating Oven
1. Incorrect Coil Resistance Calculations – Not testing coils with a multimeter to achieve the required 9.2 ohms per coil, leading to poor heating performance or electrical hazards.
2. Inadequate Electrical Safety Measures – Using regular wire instead of heat-resistant wire and skipping essential safety features like limit switches and proper fuses.
3. Poor Brick Preparation and T-Slot Cutting – Making T-slots the wrong size or forgetting to number bricks during cutting, causing coil shifting and confusing reassembly.
4. Insufficient Mortar Curing Time – Testing the oven before the 24-48 hour mortar cure period, resulting in cracked joints and structural problems.
5. Skipping the Empty Burn-In Cycle – Using workpieces before running an empty heating cycle to burn off construction residues and contaminants.
6. Inadequate Door Seal and Alignment – Poor hinge alignment and latch adjustment cause heat leaks that make temperature control difficult and waste energy.
Conclusion
Building your own heat-treating oven opens up a whole new world of metalworking possibilities. You now have the knowledge to create a functional oven that costs much less than store-bought options.
This DIY approach gives you complete control over your heat-treating process. You can adjust temperatures, timing, and features to match your specific projects. Whether you’re making knives, tools, or decorative metal pieces, your homemade oven will handle the job.
The best part? You built it yourself, so you understand exactly how it works. This knowledge helps you maintain it properly and make improvements over time.
Start gathering your materials and begin building your heat-treating oven today. Your future metalworking projects will benefit from having this essential tool in your workshop.
Have you built your own heat-treating oven?

