
Tired of staring at those outdated, boring countertops that make your kitchen look stuck in the past? Your dream of luxurious marble surfaces doesn’t have to remain just a wish.
What if you could achieve that high-end marble look without hiring contractors or waiting weeks for installation? Professional-quality results are within your reach using simple techniques that anyone can master.
Imagine walking into your kitchen and feeling that surge of satisfaction every time you see your stunning marble countertops. Your friends will ask who did the work, and you’ll smile knowing you created this beauty yourself. The natural veining, the smooth finish, the luxurious appeal – all achieved in just one weekend.
This complete guide shows you exactly how to create gorgeous faux marble countertops using a proven method that delivers professional results every single time.
Why Do We Need Marble Countertops
Marble countertops offer homeowners a combination of natural beauty, durability, and practical benefits that make them a valuable addition to any kitchen or bathroom.
These natural stone surfaces provide both functional and visual advantages that justify their investment.
Key Reasons Why Marble Countertops Are Essential
- Heat resistance – Natural stone withstands hot pots and pans without damage
- Unique patterns – Each slab features one-of-a-kind veining and color variations
- Increased home value – Quality marble surfaces boost property resale value
- Easy maintenance – Simple cleaning with mild soap keeps surfaces looking fresh
- Long-lasting durability – Properly maintained marble lasts for decades
- Cool surface temperature – Natural properties make marble ideal for baking and food prep
- Timeless appeal – Classic look never goes out of style
- Scratch resistance – Hard surface resists most kitchen wear and tear
Marble countertops change ordinary spaces into sophisticated areas while providing practical benefits for daily use. The natural stone’s ability to maintain cool temperatures makes it perfect for food preparation, especially baking tasks.
With proper care and sealing, marble surfaces maintain their beauty and functionality for generations, making them a smart long-term investment for any home.
Step-by-Step Guide to DIY Marble Countertops
Change ordinary countertops into incredible marble masterpieces using simple paint or epoxy techniques that deliver professional results at DIY prices.
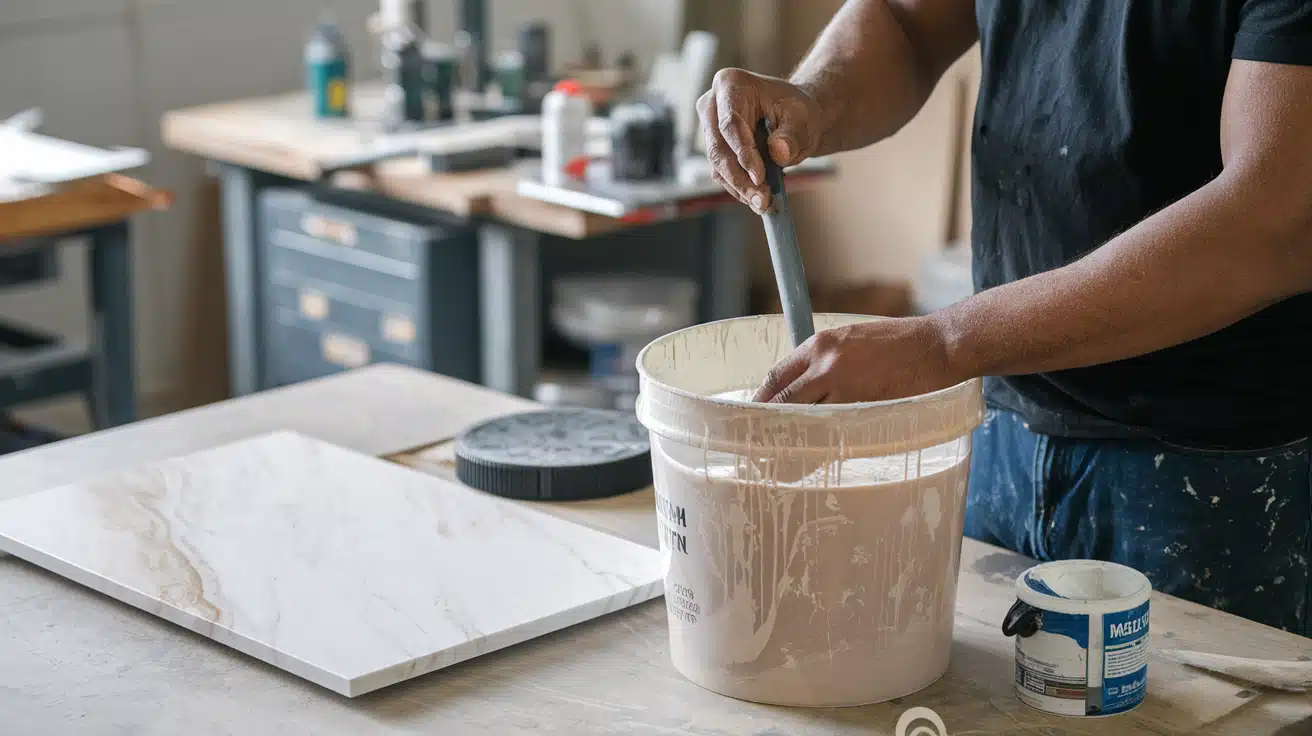
Tools Required
| Tool | Purpose |
|---|---|
| Mixing Sticks | Stirring epoxy and colorants |
| Torch | Initial heating for fluidity |
| Bondo Spreader | Blending veins and patterns |
| Spray Bottles | Applying alcohol and fusion spray |
| Heat Gun | Controlled heating if needed |
| Protective Gloves | Hand protection during application |
| Drop Cloths | Surface protection |
Materials Needed
| Material | Purpose |
|---|---|
| Art Coat Epoxy | Base epoxy system |
| Alumalite White Dye | Primary white color |
| Alumalite Black Dye | Creating gray tones |
| Clear Epoxy | Adding depth and sparkle |
| Diamond Dust | Mica sparkle effect |
| Fusion Spray (Blue) | Color accents |
| Brown Opaque Dye | Vein coloring |
| Relax Spray | Bubble removal |
| 91% Isopropyl Alcohol | Creating texture effects |
Step 1: Prepare Base Colors
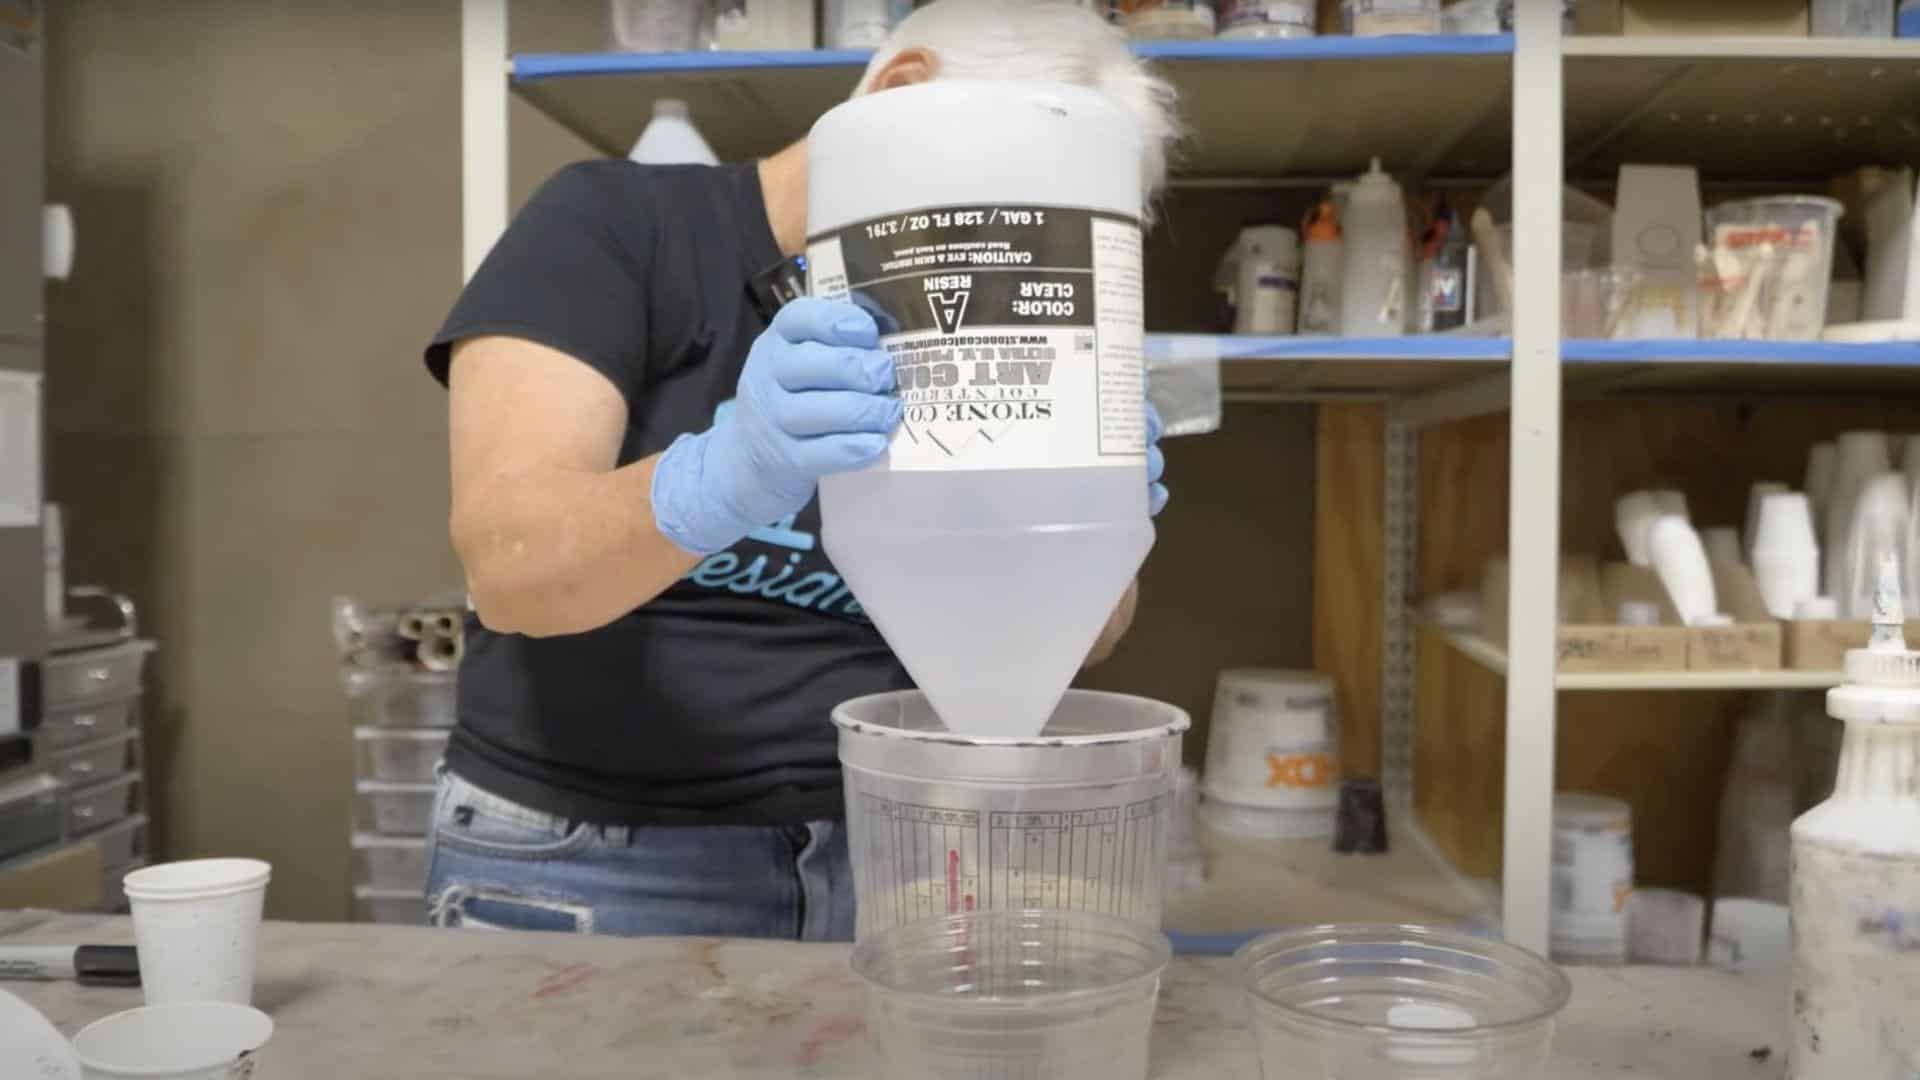
Mix 4 oz per square foot of Art Coat epoxy. Create light gray by adding tiny amounts of black dye to white dye. Create a darker gray accent color by adding more black. Keep pure white for lighter areas. Mix clear epoxy with diamond dust for depth and sparkle effects.
Pro Tip: Start with minimal black dye – you can always add more, but removing excess color is impossible once mixed into epoxy.
Step 2: Apply and Blend Base Colors
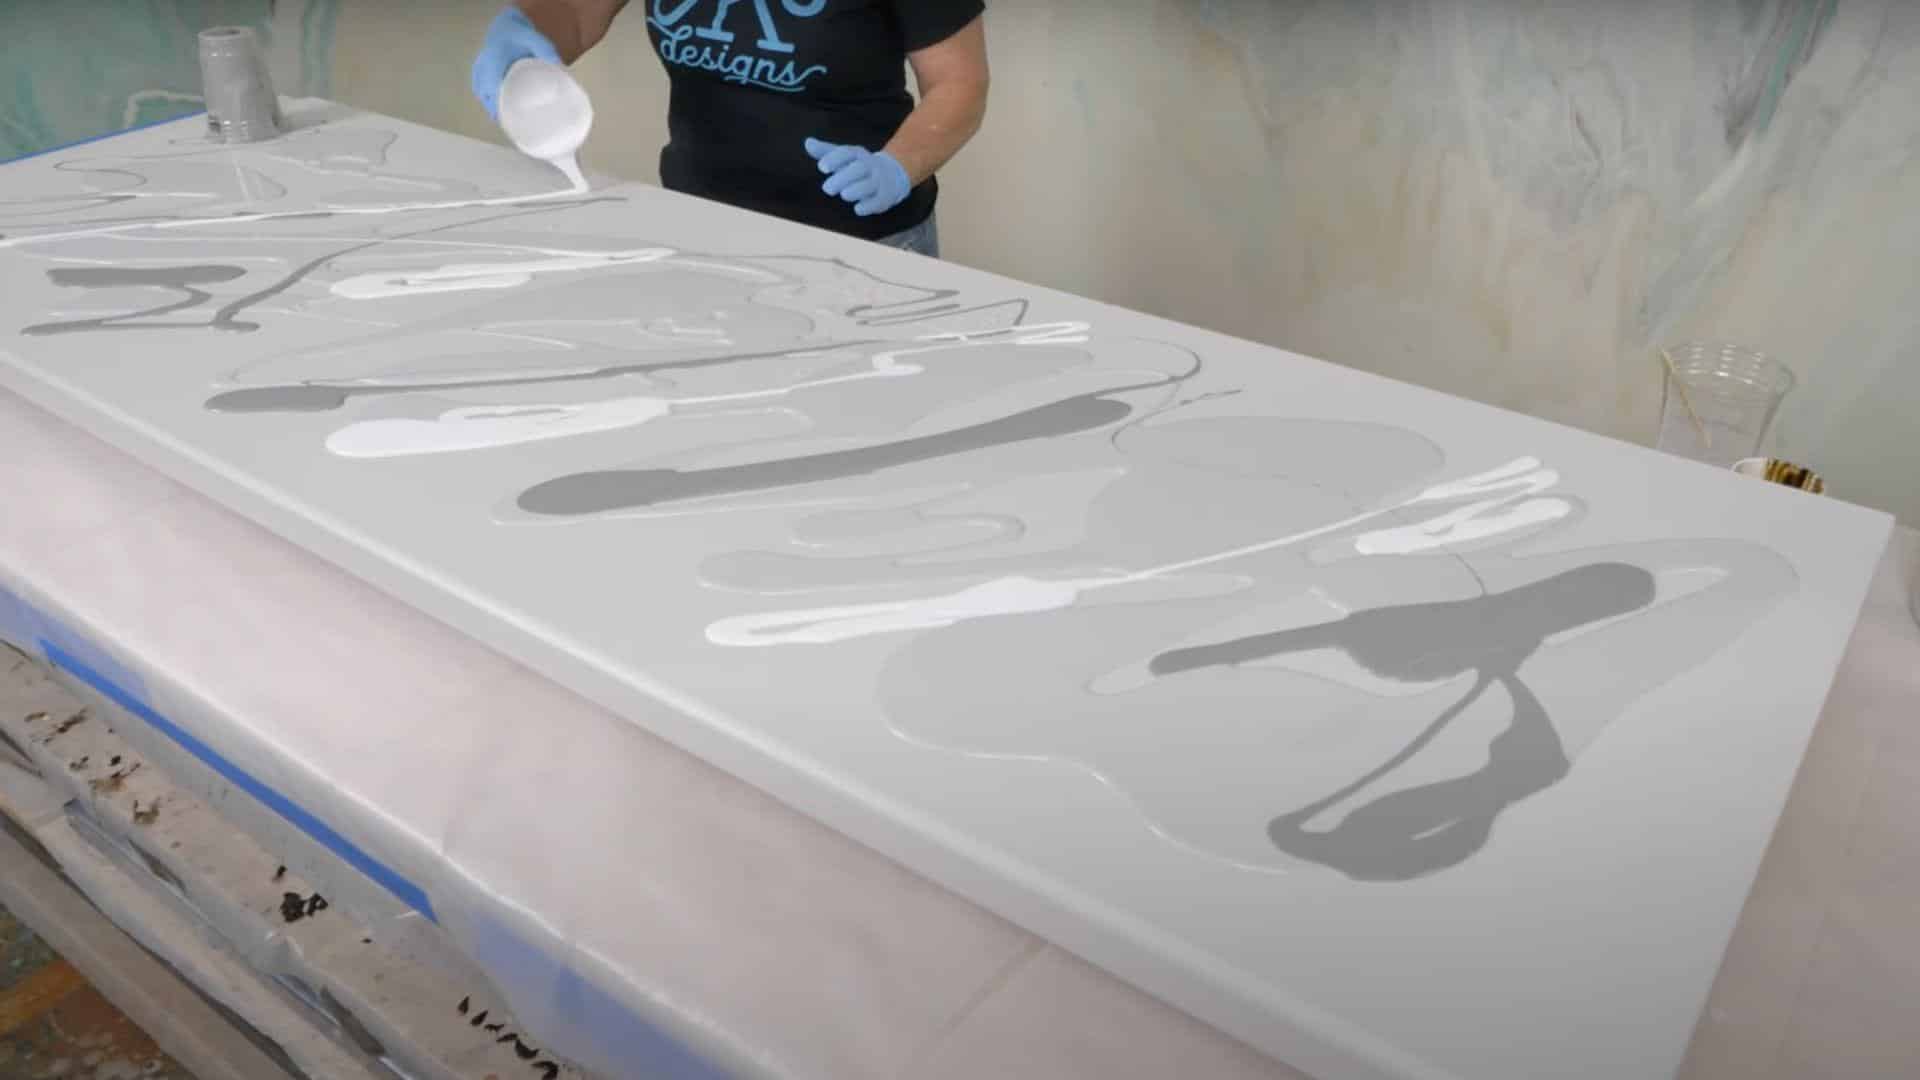
Pour different gray tones and white onto a surface. Use your hand at a 45-degree angle to gently meld colors together. Work carefully to avoid over-blending into one solid gray color. The epoxy will self-level at this thickness, so don’t overwork the material.
Pro Tip: Less is more when blending – stop before you think you’re finished to maintain natural color variation and depth.
Step 3: Handle Edges Properly
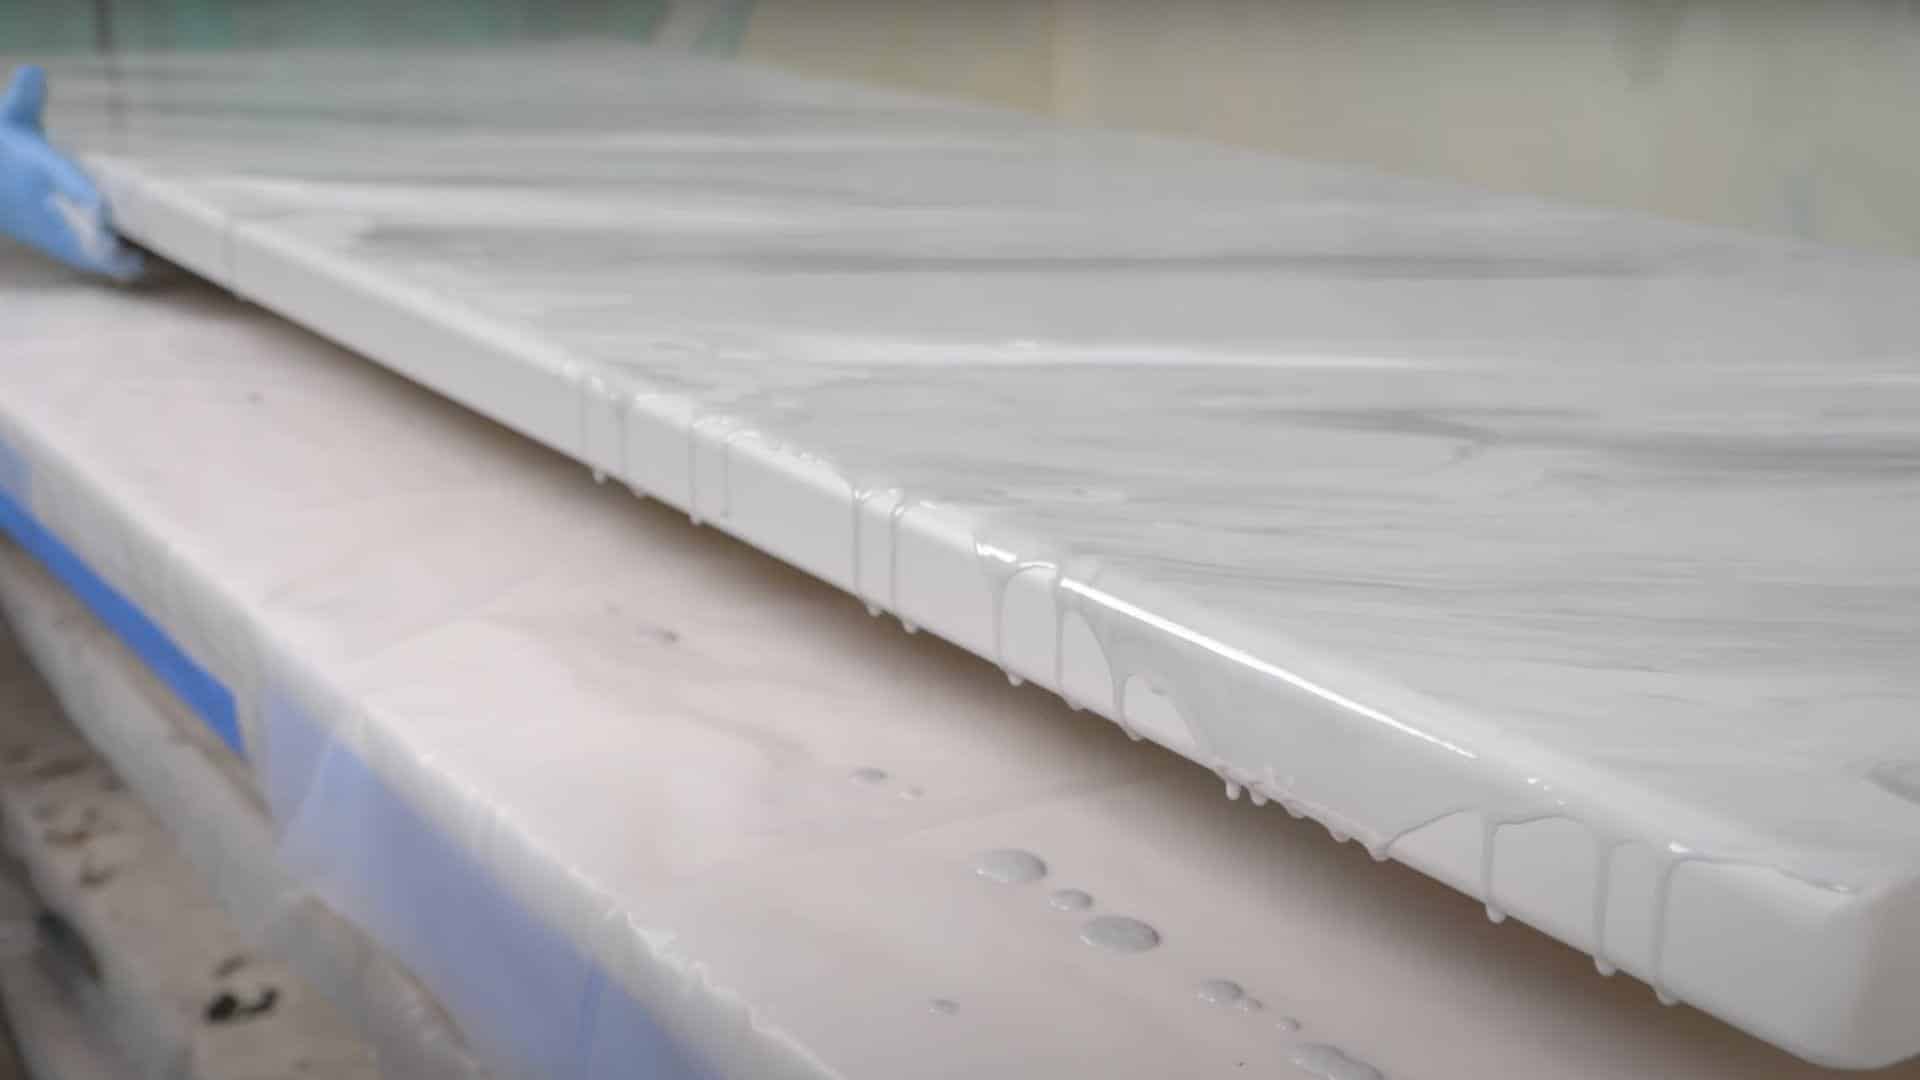
Bring epoxy over the edges and push up underneath to encourage even flow. Don’t tape edges when using only 3-4 oz per square foot. Use minimal heat on edges to prevent excessive dripping. Ensure edges stay wet for proper adhesion.
Pro Tip: Avoid taping edges with thin applications – insufficient material volume won’t create proper edge flow, leading to uneven results.
Step 4: Add Fusion Spray Accents
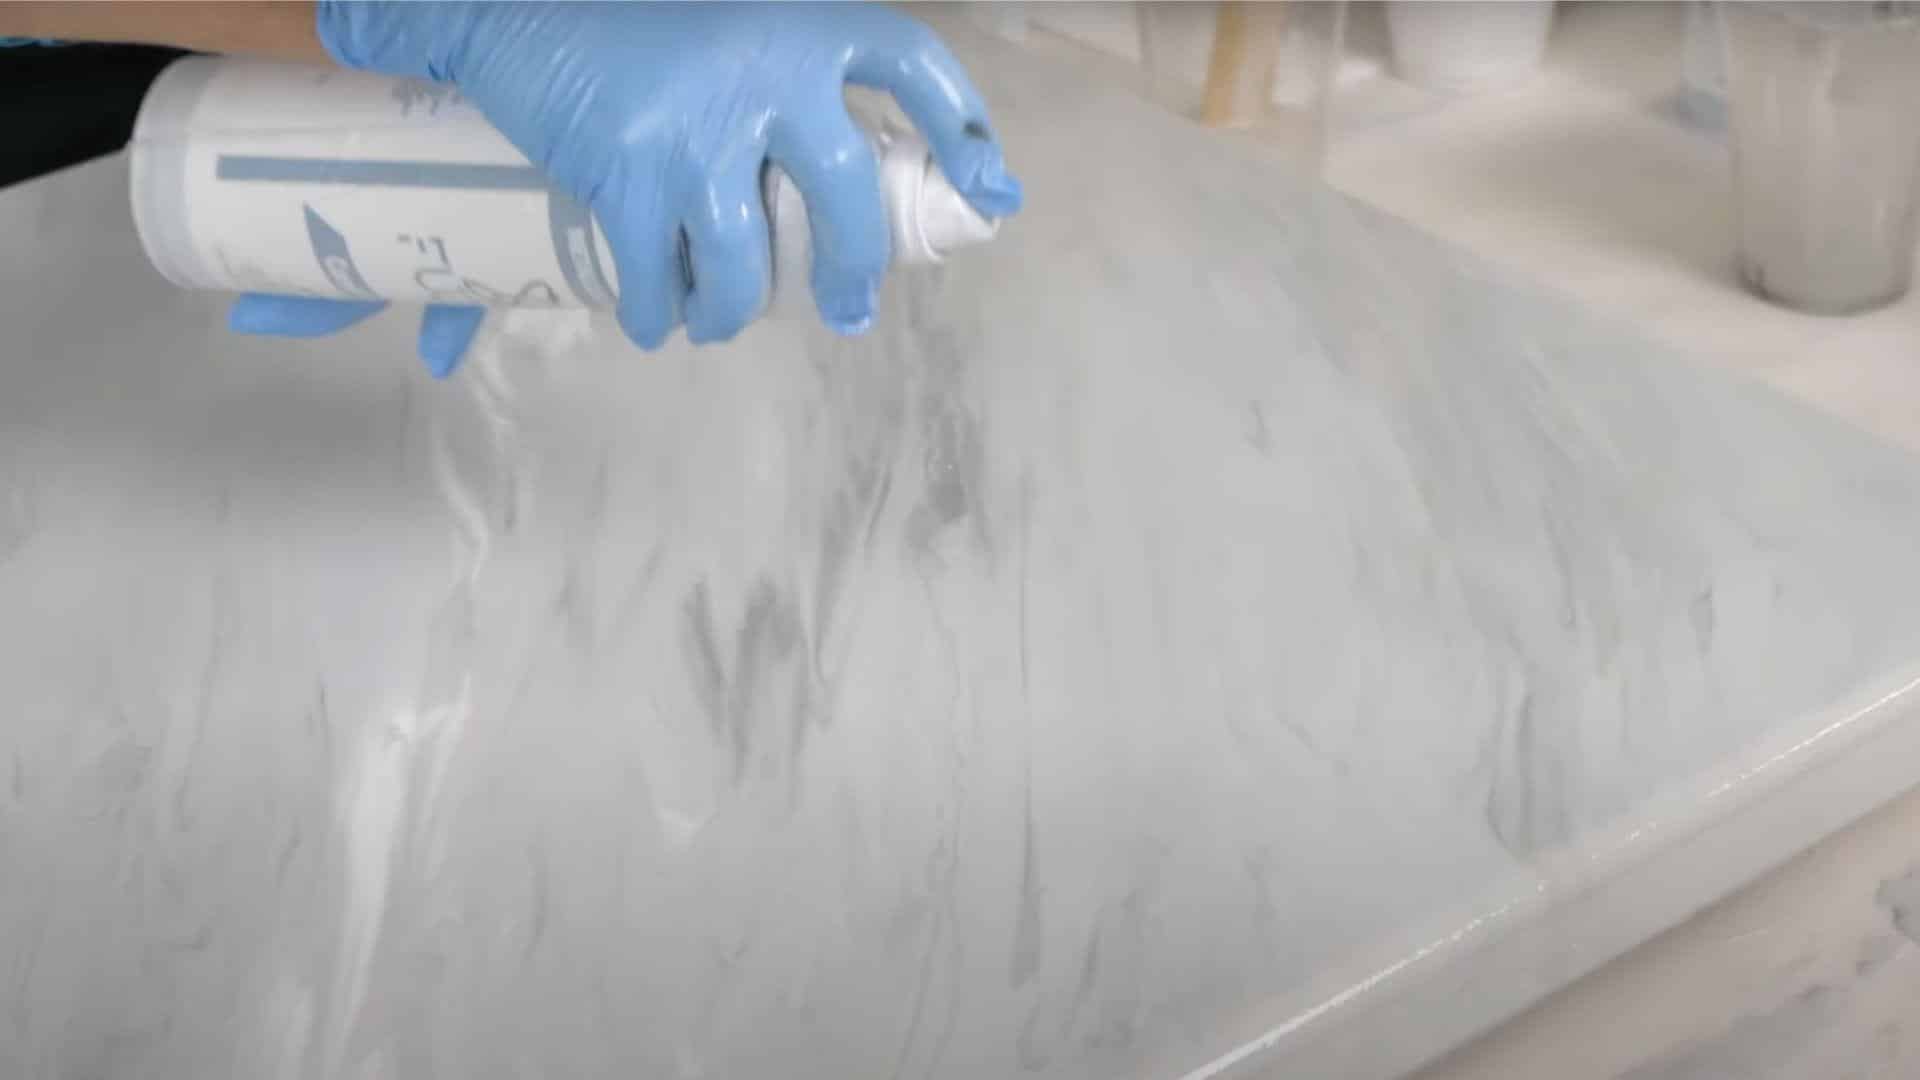
Shake fusion spray lightly and apply sparingly for color hints. Don’t concentrate spray in one area – use quick, light passes. The compressed mica powder pops bubbles while adding color. Let the epoxy set slightly before applying for better control.
Pro Tip: Hold spray can at a consistent distance and move continuously – stationary spraying creates concentrated color spots that look unnatural.
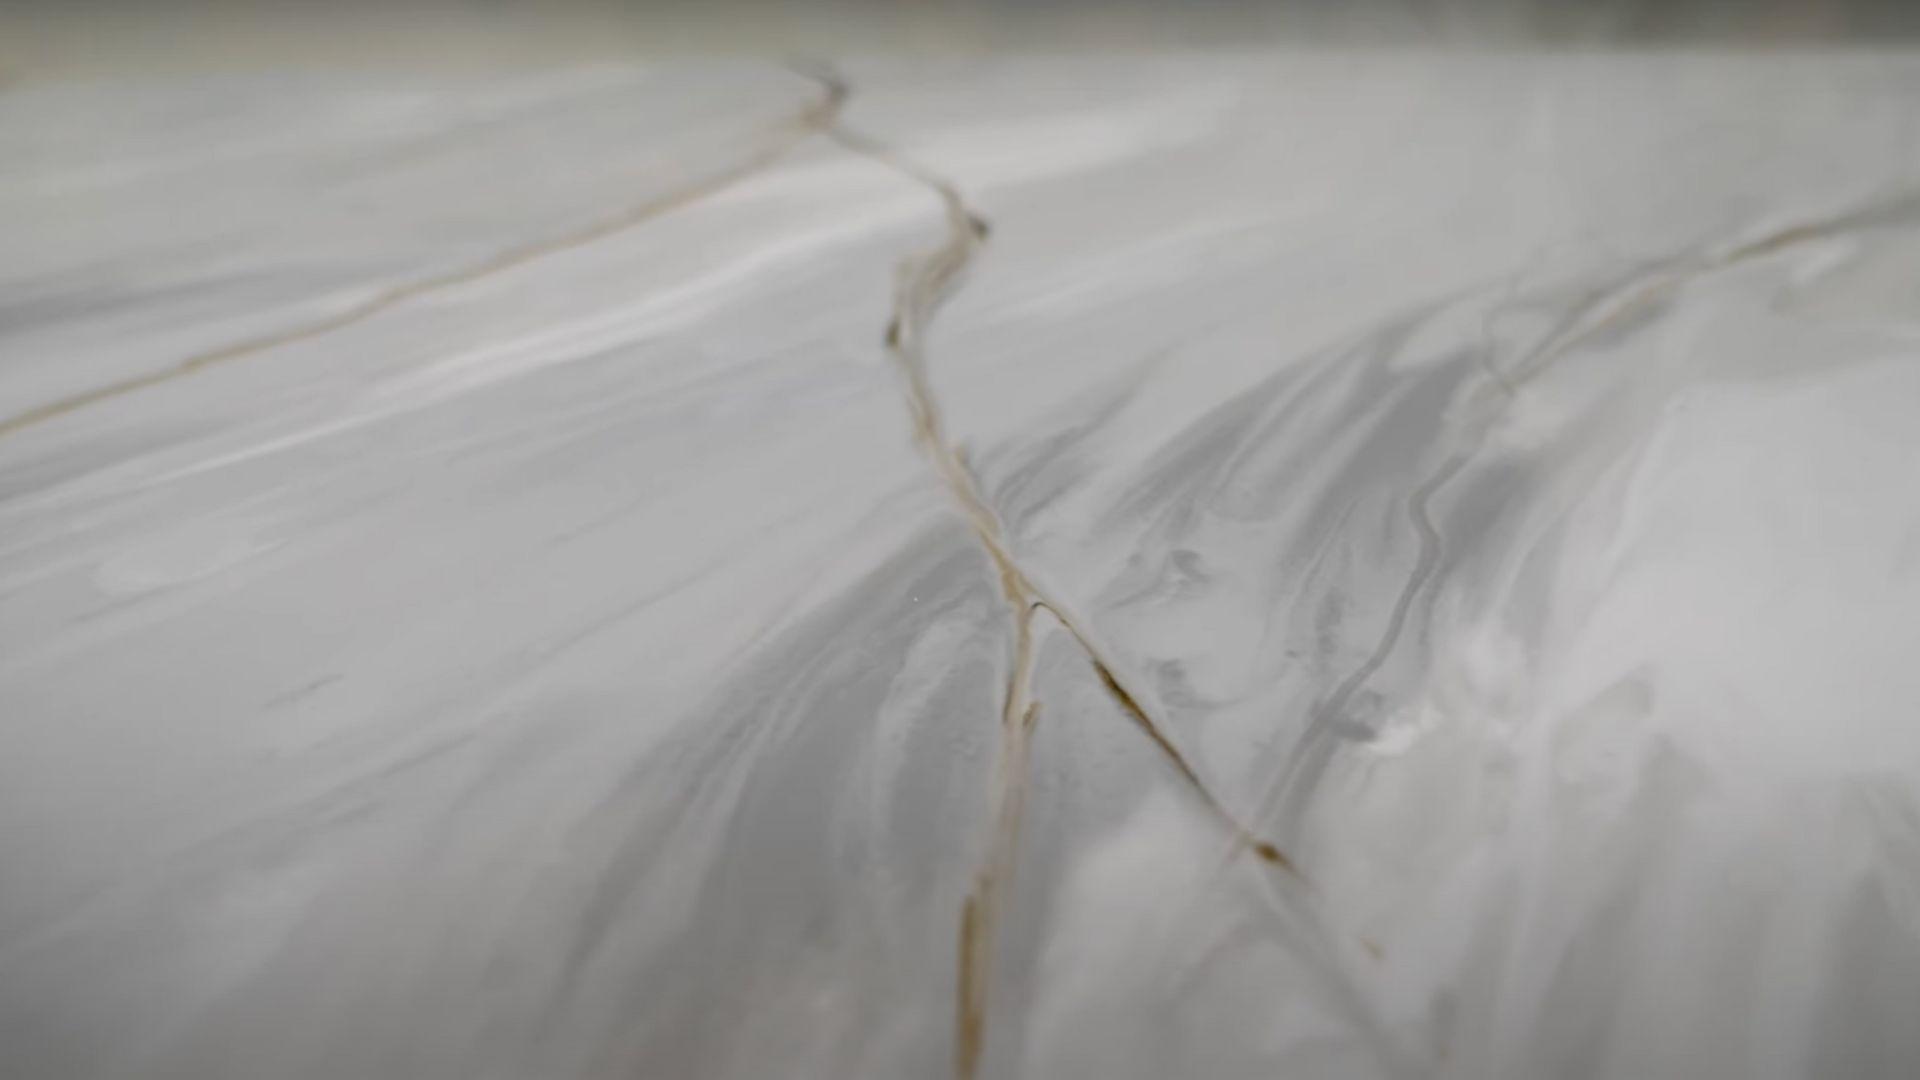
Step 5: Create Natural Veins
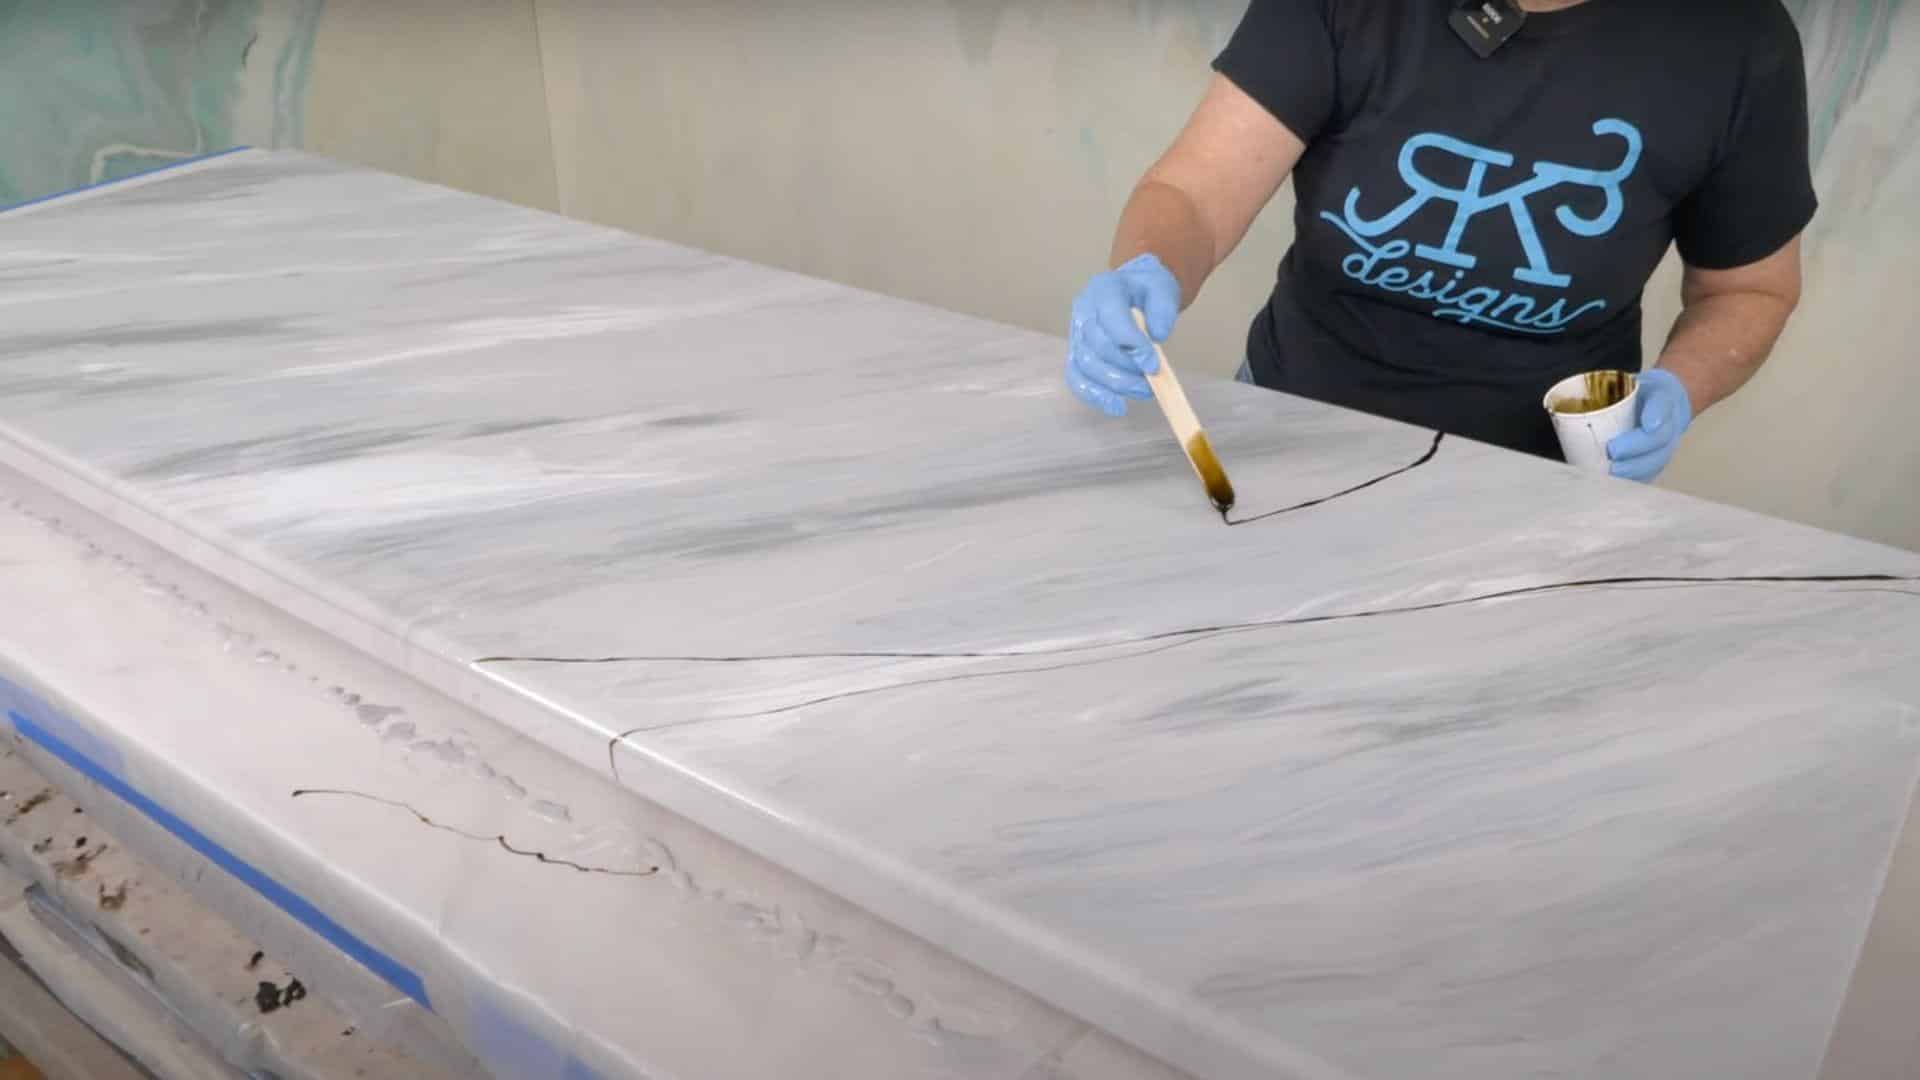
Mix brown and a tiny bit of black dye for vein color. Apply veins starting from different sides to avoid repetitive patterns. Use a Bondo spreader to soften and widen veins by dragging and twisting motions. Connect some veins while splitting others naturally.
Pro Tip: Vary your starting points and don’t make veins too uniform – natural stone has irregular, branching vein patterns.
Step 6: Add Texture with Alcohol
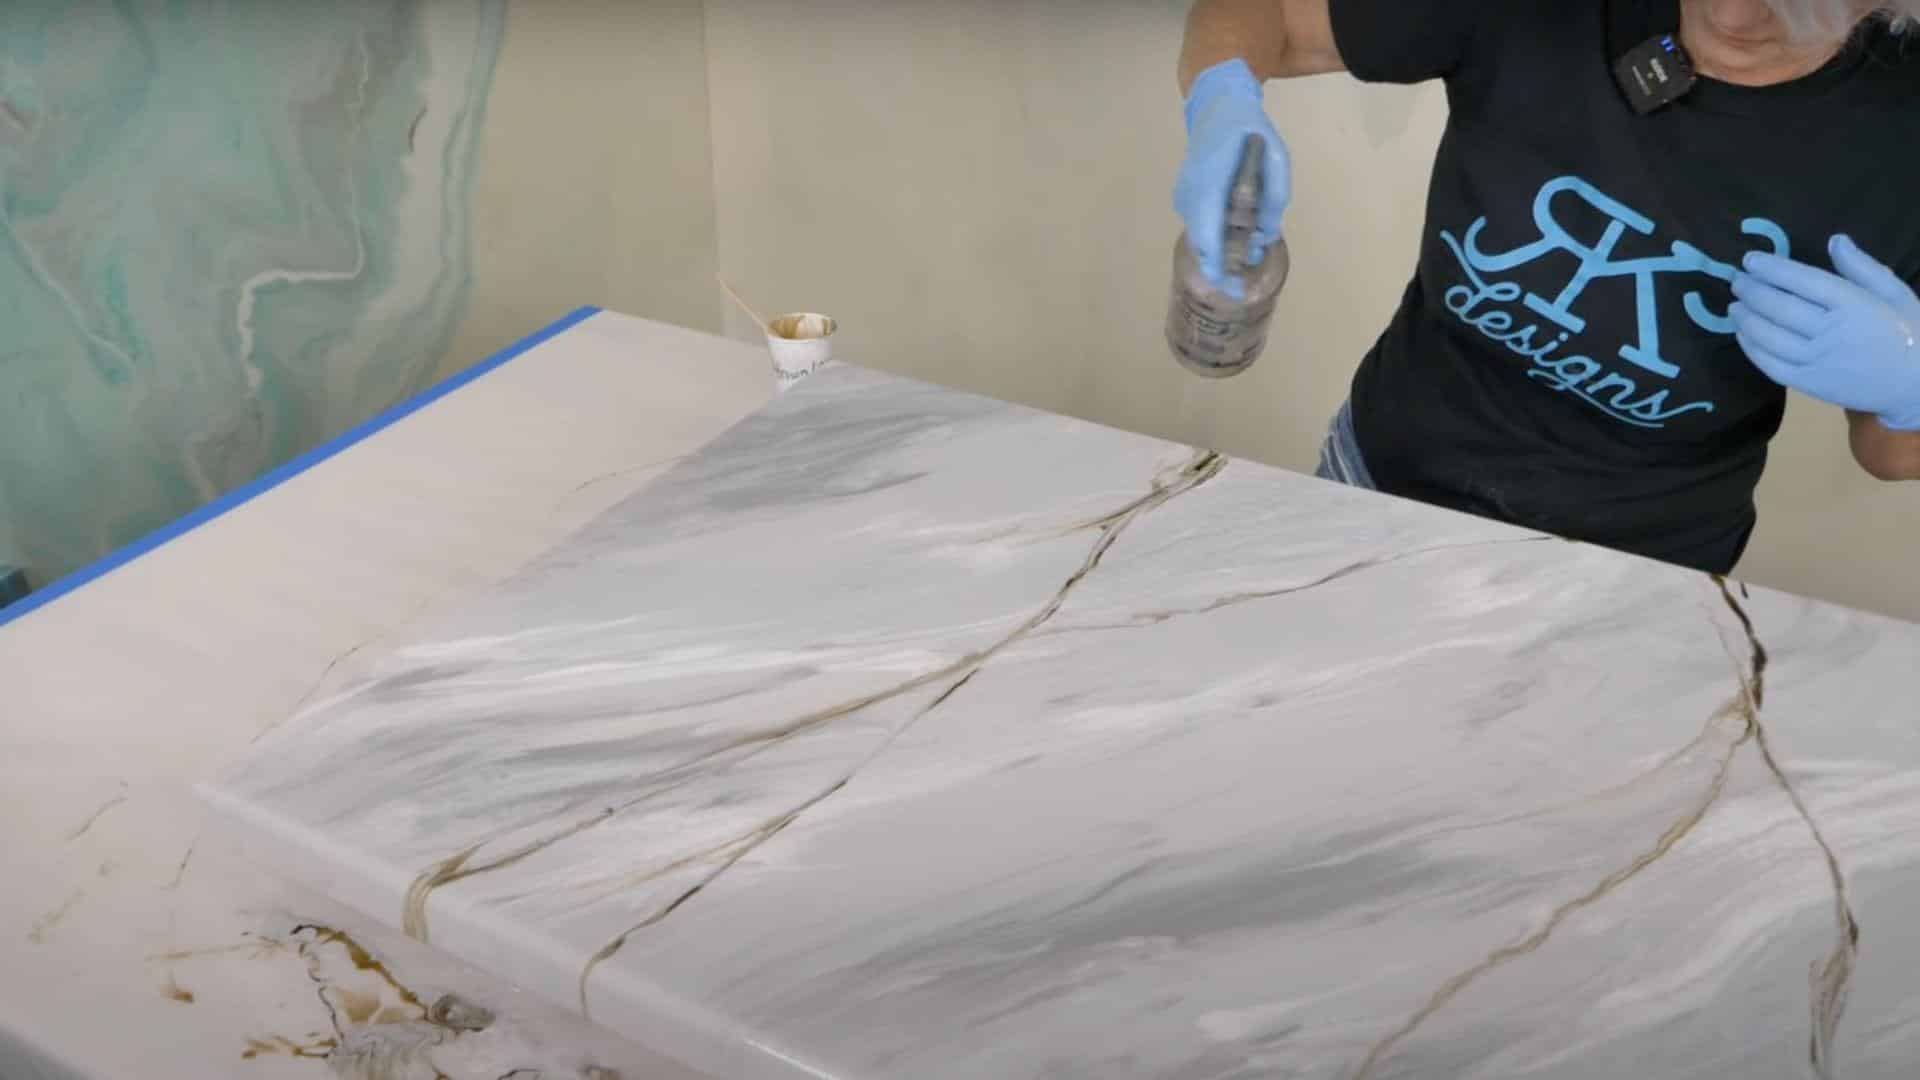
Adjust the spray bottle for medium-sized drops of 91% isopropyl alcohol. Hit veins lightly after epoxy slows its self-leveling. Create fracture effects over diamond dust areas for a 3D appearance. Use fingers to flick alcohol for precise placement.
Pro Tip: Wait until epoxy movement slows before alcohol application – too early and your effects will disappear as epoxy continues leveling.
Step 7: Create Diamond Dust Veins
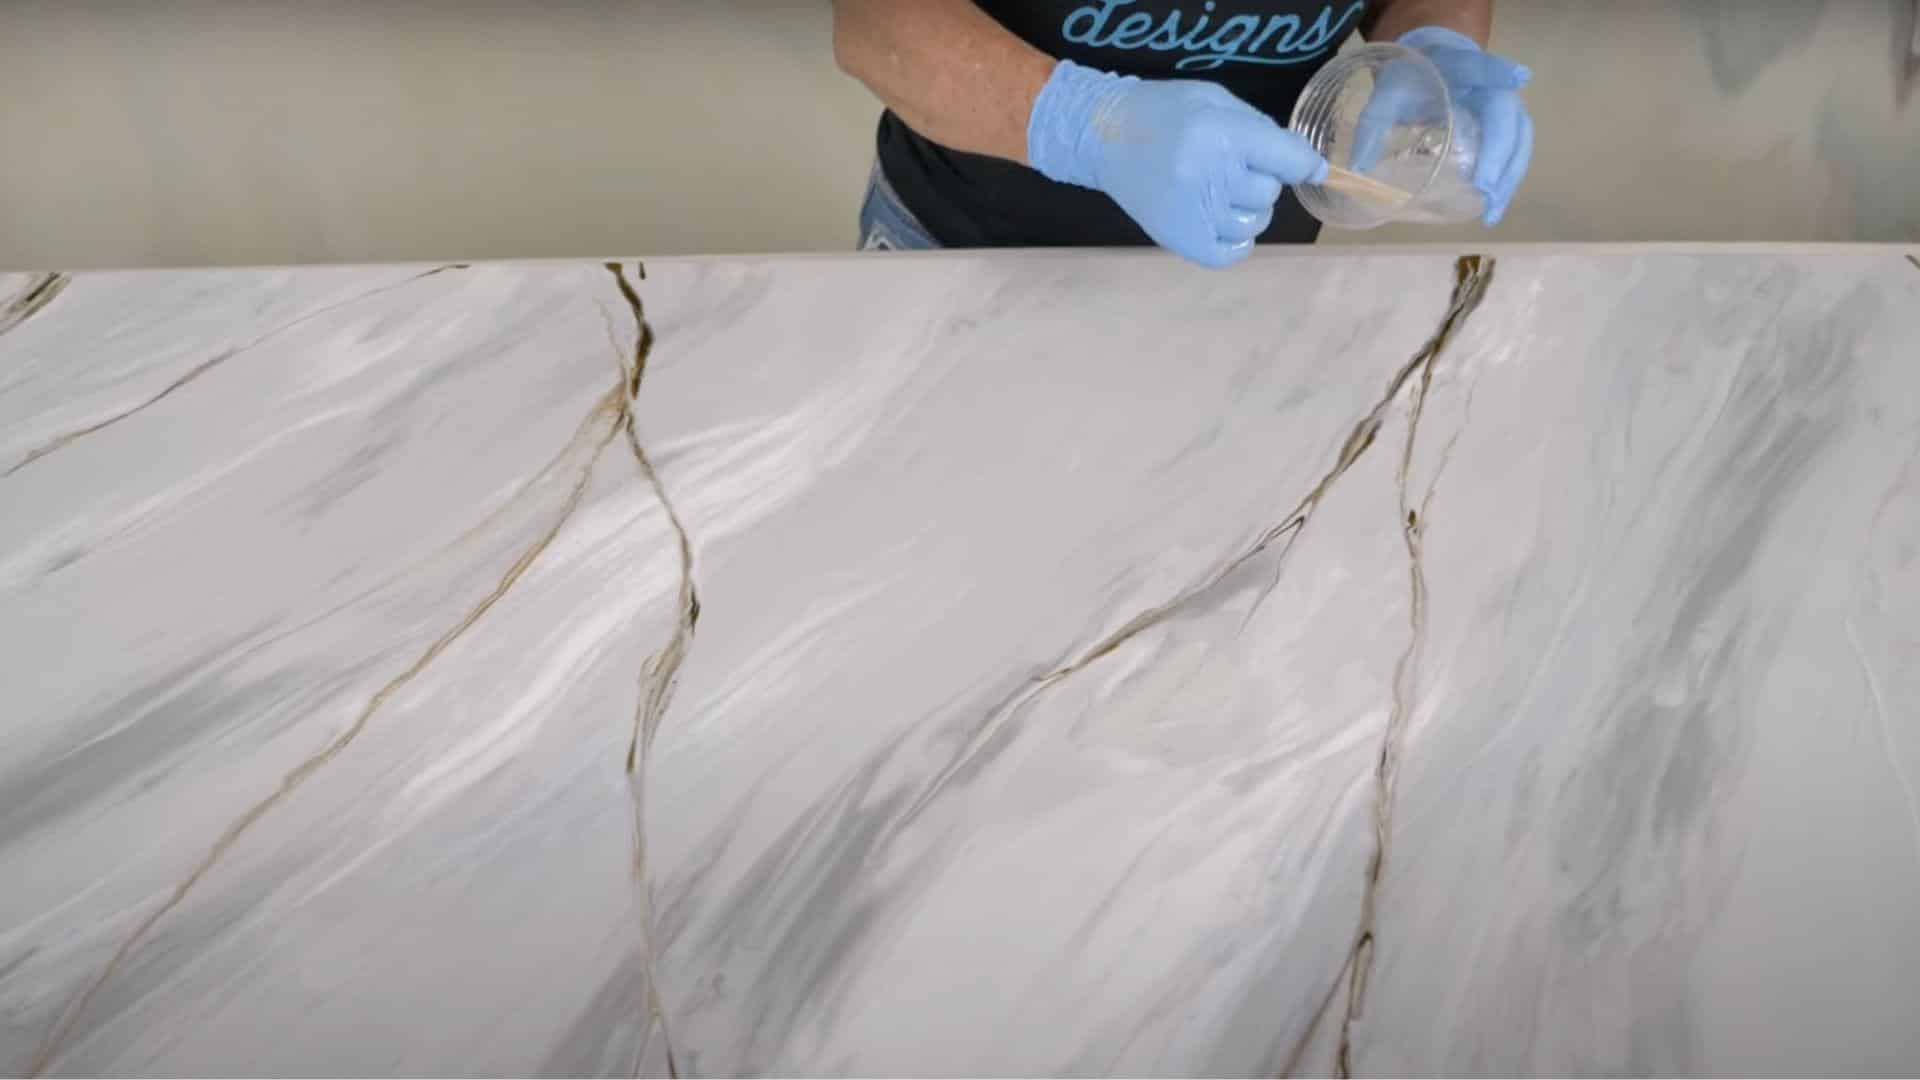
Use clear epoxy with diamond dust that has thickened slightly. Turn the stick flat and drag across the surface to create mineral-like veins. Add small fractured veins quickly – they’ll sink and become subtle, natural-looking cracks within an hour.
Pro Tip: Work quickly on fine veins, rapid application creates thin lines that sink naturally, mimicking stone fracture patterns.
Step 8: Final Application and Finish
Apply the relax spray to remove all bubbles and promote self-leveling. Give final light mist with fusion spray if desired. Allow to cure according to the manufacturer’s instructions. The piece will continue developing depth as it sets completely.
Pro Tip: Use a relax spray instead of the torch for final bubble removal – heat can disturb your carefully created patterns and color placement.
Video Tutorial
Special thanks to RK3 Designs for providing valuable insights in their video, which I referenced while creating this guide.
Faux vs. Real Marble Countertops Comparison
Faux marble offers budget-friendly customization and easy diy installation, while real marble provides long-term durability and luxury appeal at significantly higher costs.
| Feature | Faux Marble DIY | Real Marble |
|---|---|---|
| Cost | $65-155 per Project | $60-120 per Sq Ft |
| Installation | DIY Friendly | Professional Required |
| Time | 2-3 Days | 1-2 Weeks |
| Durability | 3-5 Years | 50+ Years |
| Maintenance | Low | High (sealing required) |
| Heat Resistance | Moderate | Excellent |
| Stain Resistance | Good | Poor (porous) |
| Scratch Resistance | Good | Moderate |
| Repair Options | Easy Touch-Ups | Professional Repair |
| Customization | Full Color Control | Limited Natural Options |
| Weight | Lightweight | Heavy (structural Support Needed) |
| Resale Value | Moderate | High |
Faux Marble Countertop Mistakes to Avoid
Don’t let these common errors turn your dream kitchen into a DIY disaster! Here are the mistakes that separate beautiful results from expensive do-overs
- Racing Against Time – Your paint won’t wait for you! Once mixed, you have limited working time before it becomes impossible to blend smoothly.
- Going Thick with Paint – Chunky, thick mixtures create fake-looking textures that scream “DIY gone wrong” instead of natural stone beauty.
- Skipping the Foundation – Poor prep work is like building a house on sand – your beautiful finish will chip and peel within months.
- Playing Beat the Clock – Impatience kills marble magic. Each layer needs proper drying time or you’ll create a muddy mess.
- Blending Into Oblivion – Over-mixing turns your marble masterpiece into plain gray concrete. Stop before you think you’re done!
- Biting Off More Than You Can Chew – Large sections set too fast. Work small and work smart.
- Playing with Fire – Too much heat scrambles your patterns faster than you can say “oops.”
Conclusion
Your kitchen makeover is just one weekend away. This step-by-step guide proves that professional-looking marble countertops don’t require professional skills or expensive contractors. You now have all the knowledge needed to create stunning surfaces that rival high-end installations.
So what’s your next move? Start by gathering your materials and practicing the blending technique on a test surface. Remember, patience beats speed every time – rushing leads to mistakes that ruin your hard work.
Ready to start your countertop project? Your friends will be asking for your secret when they see those gorgeous new surfaces.
The satisfaction of completing this yourself makes every minute of effort worthwhile.