

Tired of boring walls and bland party decorations? Tassel garlands offer the perfect solution for instant color and charm.
These handmade decorations cost just pennies to make but look like expensive store-bought pieces. You can create them in any color scheme you want. The best part? You probably have most supplies at home already.
Making tassel garlands feels almost too easy. Wrap yarn around a book. Cut and tie. String them together. Within an hour, you’ll have beautiful decorations that transform any space.
This guide shows you two foolproof methods – cozy yarn tassels for home decor and lightweight tissue paper versions for parties. You’ll also learn creative ways to customize colors, add special touches, and store your garlands for future use.
Ready to turn basic materials into stunning decorations? Let’s create something beautiful together.
Why Tassel Garlands Are the Perfect DIY Decoration
Tassel garlands are more than just colorful strands they’re a versatile, creative, and budget-friendly way to elevate any space or celebration. Whether you’re hosting a party, decorating a child’s room, or simply adding a touch of flair to a wall or mantel, tassel garlands bring texture, movement, and personality wherever they hang.
Here’s Why They’re a DIY Favorite
1. Super Customizable: You can make tassel garlands in any color scheme, length, and material. Go bold with rainbow yarn, pastel tissue paper for baby showers, or metallic foil for a glam vibe. The possibilities are endless — and completely up to you.
2. Budget-Friendly Craft: Most materials, like yarn, tissue paper, or scrap fabric, are inexpensive or already available at home. That means you can get a gorgeous handcrafted look without breaking the bank.
3. Beginner-Friendly & Fun: No fancy tools or advanced skills required. Tassel-making is simple enough for kids and adults alike. It’s a great weekend project or even a group activity for parties or craft nights.
4. Works for Any Occasion or Setting: Tassel garlands are perfect for any occasion, from parties and showers to everyday home decor. They add a festive, handmade touch to walls, nurseries, or even workspaces.
5. Reusable & Adaptable: If made with durable materials like yarn or fabric, you can reuse your garlands year after year. Swap out tassels, add accents, or re-style them for a whole new look.
Step-by-Step Tutorial: Yarn Tassel Garland
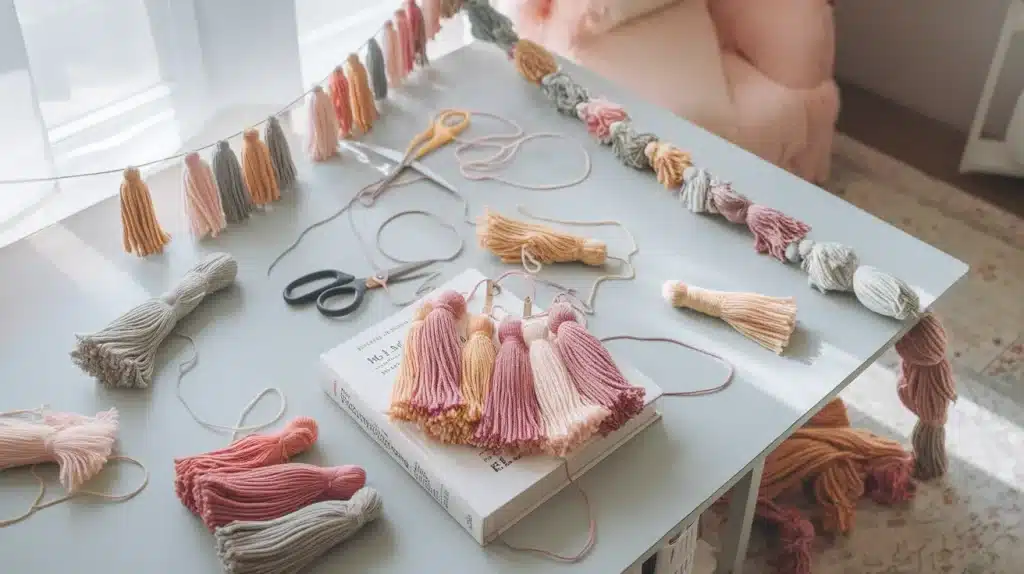
Follow this simple method to create perfect yarn tassels every time. This technique comes from real crafters who make these regularly.
What You’ll Need:
- Yarn in your chosen color
- Sharp scissors
- A book or rectangular object (determines tassel size)
- Optional: Crochet hook (makes stringing easier)
Step 1: Prepare Your Base- Choose a book or rectangular object for your template. The size determines your tassel length. A regular book creates medium tassels. A shoebox lid makes extra large ones.
Step 2: Cut Your Tie Piece- Cut a piece of yarn about 6 inches long. Place this piece on top of your book before you start wrapping. This will become your tie string.
Step 3: Wrap the Yarn- Hold the cut piece in place on top. Start wrapping yarn around the book, going over the tie piece. Wrap about 40 times for full tassels. More wraps make thicker tassels.
Step 4: Tie the Top- Take the piece you cut first. Tie it tight around all the wrapped yarn with a double knot. This creates the top of your tassel and the hanging loop.
Step 5: Cut the Bottom Loops- Slide scissors under the wrapped yarn at the bottom edge of your book. Cut through all the loops. Books work great because they have an edge for easy cutting.
Step 6: Trim the Yarn Ball End- Cut the piece still attached to your yarn ball. Make it even with the other strands.
Step 7: Create the Tassel Head Cut another small piece of yarn. Wrap it around the tassel about 1 inch from the top. Wrap it several times and tie with a double knot. This creates the classic tassel shape.
Step 8: Final Trimming- Trim the bottom to make all strands even. Your tassel is complete!
See the complete process in this video tutorial by Holly Homebody on Easy DIY Yarn Tassel Garland Tutorial that demonstrates each step from cutting to assembly
Step-by-Step Tutorial: Tissue Paper Tassel Garland
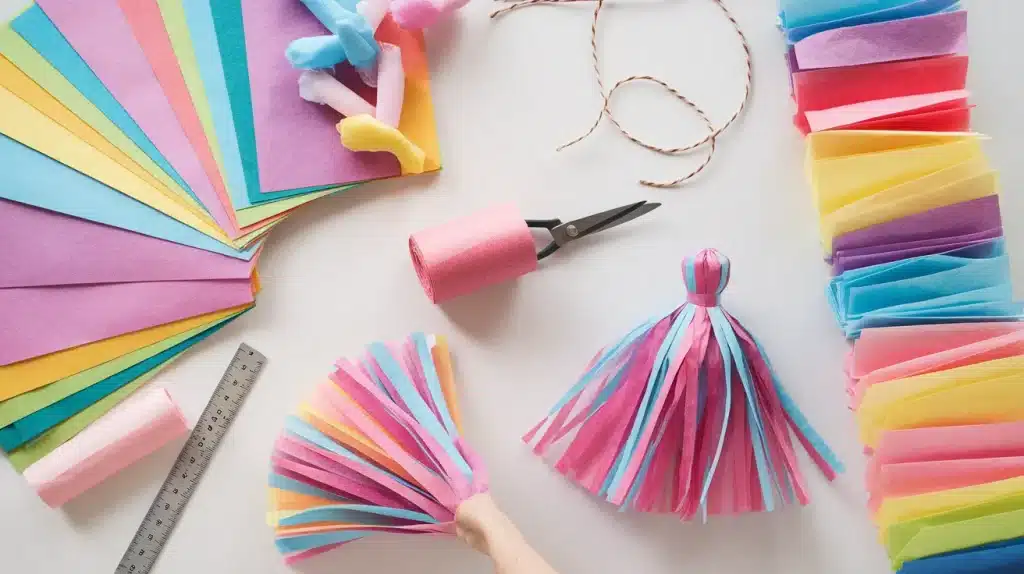
Ideal for parties, baby showers, or vibrant decor themes
This method creates beautiful, lightweight tassels that move and “whisper” in the breeze. Perfect for celebrations!
Materials:
- Tissue paper (standard 75cm x 50cm sheets)
- Sharp paper knife or scissors
- Ruler
- Hot glue gun
- Pack thread or string for base
- Multiple colors for variety
Step 1: Prepare Your Tissue Paper Start with standard tissue paper packages of 10 thin sheets. Unfold all sheets completely. Divide them into two piles of 5 sheets each for easier cutting.
Step 2: Fold and Cut Take one pile of 5 sheets. Fold the entire pile in half. Each half will give you 5 tassels, so you’ll get 10 total from this pile.
Step 3: Create the Fringe Measure 4 centimeters from the edge. This will be your uncut section. Cut all tissue layers into strips 1 centimeter wide. Leave that 4cm border uncut – this becomes your tassel top.
Step 4: Separate the Sheets Each sheet in your pile makes one tassel. Carefully separate the top layer to work with.
Step 5: Shape Your Tassel Unfold your cut piece completely. Place it flat and even out any wrinkles. This step ensures your tassel looks neat.
Step 6: The Rolling Technique Lift the bottom edge toward the top, but don’t match the edges exactly. Repeat this move, lifting the bottom edge to the top again without matching edges. This creates bulk.
Step 7: Roll It Up Starting from the bottom, roll the tassel tightly. Keep the roll even and compact.
Step 8: Twist the Center Use some effort to twist the uncut part (your 4cm border) very tight. This creates the tassel neck and hanging loop.
Step 9: Fold and Secure Fold the twisted tassel in half. The twisted part forms a loop. Fix it in place with a small drop of hot glue.
Step 10: Attach to Garland Put tassels on pack thread or string. Fix each tassel with a little drop of hot glue. Wait 20 seconds for the glue to grip properly.
Step 11: Space and Arrange Space tassels about 15 centimeters apart on your base string. Use 4 different colors for the best visual effect.
Want to see this technique in action? Check out this helpful video tutorial by AmyFamily DIY that walks you through each step of making a Tassel garland DIY easy
Yarn or Tissue: Which One Should You Choose?
| Material | Look & Style | Best For | Durability | Ease of Making | Budget-Friendly |
|---|---|---|---|---|---|
| Yarn | Soft, fluffy, cozy | Boho decor, nurseries, and all-season garlands | High – reusable | Very easy | Yes |
| Tissue Paper | Light, flowy, colorful | Parties, showers, one-time events | Low – tears easily | Easy | Yes |
Choose Yarn If You Want:
- A garland that lasts longer and can be reused or gifted
- A cozy or handmade aesthetic
- Something sturdy for home or nursery decor
Choose Tissue Paper If You Want:
- A lightweight, colorful look for a one-time event
- Fast mass production for large party setups
- Something that’s easy to dispose of or recycle after use
Tips & Customization Ideas
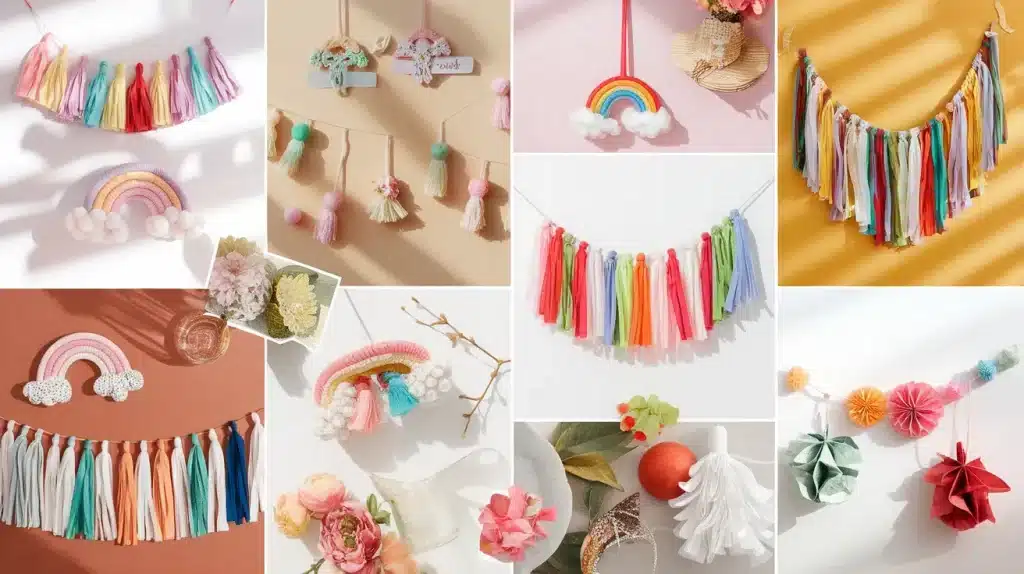
Tassel garlands are endlessly customizable, letting you match any theme, space, or celebration. Here are a few creative ways to boost your design:
1. Color-Blocked vs. Rainbow Themes:
Choose a bold color-block style by grouping tassels in solid color sections, or go playful and vibrant with a rainbow sequence. Both are eye-catching, it just depends on your vibe!
2. Add-Ons: Beads, Pom-Poms, or Paper Flowers:
Thread beads between tassels for texture, mix in pom-poms for a soft touch, or attach mini paper flowers to the garland for a floral, whimsical feel. These little extras can make your garland truly unique.
3. Adjust the Length to Fit Your Space:
Make shorter garlands for table runners or high-impact party backdrops. For wall hangings or long mantels, go extra long and let the tassels drape naturally. You can also vary tassel lengths within one garland for a layered look.
4. Seasonal or Holiday Color Palettes:
Customize tassels to reflect the time of year, pastels for spring, earth tones for fall, or red and green for the holidays. It’s a fun way to reuse the same design with fresh seasonal updates.
Storing & Reusing Your Tassel Garlands
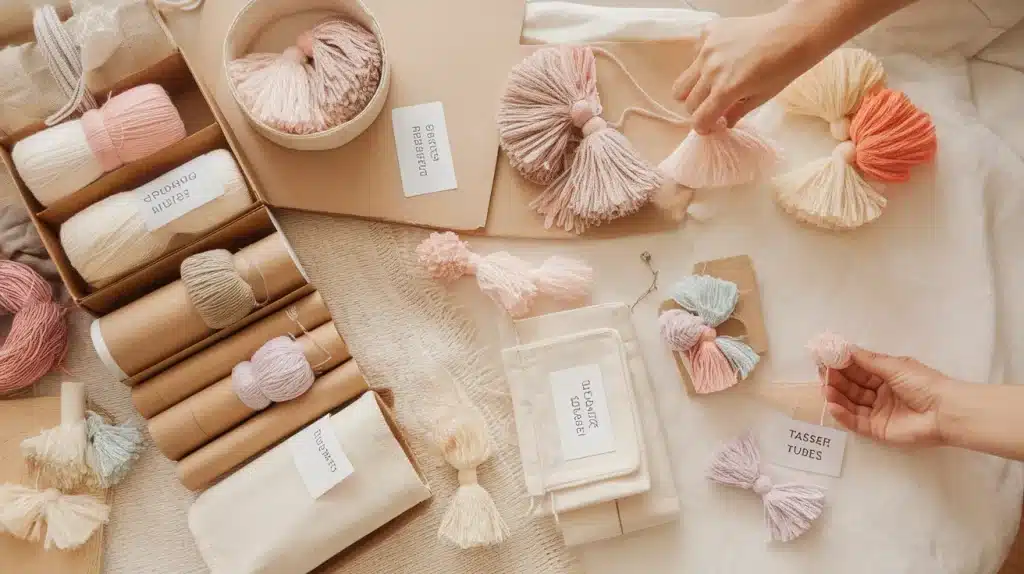
Tassel garlands are too beautiful to toss after one use, especially if you’ve spent time crafting them! Here’s how to store, refresh, or repurpose them with care:
How to Store Without Tangling
- Loosely wrap around cardboard or a paper tube: Use an empty wrapping paper tube or cut cardboard into a long rectangle. Wrap the garland around it gently, spacing the tassels so they don’t overlap.
- Use a resealable plastic or cloth bag: Once wrapped, store it in a large ziplock bag, cloth pouch, or a labeled storage box to protect from dust and moisture.
- Avoid tight packing: Crushing the tassels may cause permanent wrinkles, especially with tissue paper ones.
Refreshing Flattened Tassels
For Yarn Tassels:
-
Gently comb out flattened yarn strands with your fingers or a wide-tooth comb.
-
Hang the garland for a day to let gravity pull the strands straight.
-
Lightly mist with water if needed, then reshape.
For Tissue Paper Tassels:
-
Carefully fluff by separating each layer with clean, dry hands.
-
If they’re deeply creased, hang in a steamy bathroom for a few minutes (not wet!), then gently reshape.
When to Recycle or Repurpose
-
Recycle if damaged: If tissue paper tassels are torn or faded, they can go straight into your paper recycling (if clean and dye-free).
-
Repurpose scraps: Use old tassels for gift wrapping, party favors, bookmarks, or new mini garlands.
-
Refresh with a twist: Mix old tassels with a few new ones for a brand-new color combo or theme.
Conclusion
Making tassel garlands brings instant charm to any space without breaking your budget. These simple techniques work with materials you already have at home. Whether you choose soft yarn for cozy rooms or bright tissue paper for celebrations, the results always impress.
The beauty lies in the flexibility. Mix colors however you like. Make them long or short. Add your own creative touches. Each garland becomes uniquely yours.
Remember that small details matter most. Take time with the twisting and cutting steps. Space your tassels evenly. These little efforts make the difference between homemade and handcrafted.
Your walls, parties, and seasonal displays will never look the same. Simple materials plus a bit of patience equals decorations that friends will ask about every time they visit.
Ready to start your first tassel garland project? Share your colorful creations in the comments below and inspire others to try this fun craft!