

Have you ever looked at a building’s structure and wondered what keeps the roof in place? Most people only see the finished product and miss the vital components underneath.
I’ve noticed that many homeowners struggle with roof issues because they don’t understand the key parts that support it. When storms hit or when building a new structure, this lack of knowledge can lead to costly mistakes.
Good news, the right information about roof purlins can save you time, money, and stress. These horizontal beams play a crucial role in ensuring the stability and longevity of your roof.
In this post, I’ll explain what roof purlins are, the various types available, and how they benefit your building’s structure.
What is a Roof Purlin?
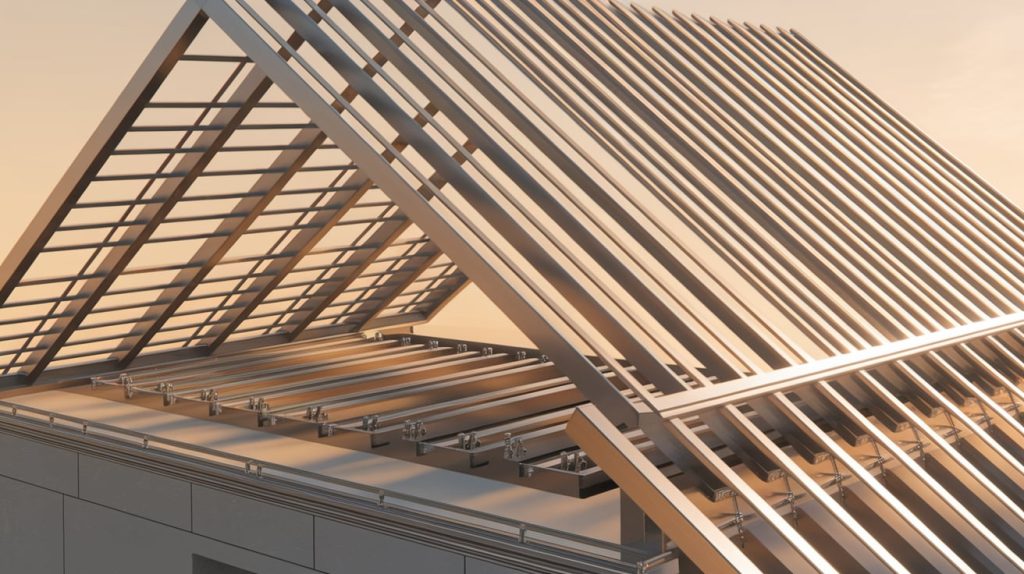
Horizontal beams that run across your roof structure to support the outer roof covering. They create the middle layer of your roof system. Purlins connect to the main roof frame and transfer the weight of your roof to the walls and foundation of your building.
These structural elements provide stability to your roof by preventing movement and spreading the load across multiple points. Properly installed purlins help maintain the roof’s shape over time and protect against sagging, which can lead to leaks.
Rafters run diagonally from the roof peak to the walls, while purlins run horizontally across these rafters, creating a perpendicular support system.
Trusses are complete triangular frames that span the entire building width, but purlins are single beams that connect these larger structures. Ridge beams form the highest point of your roof where sides meet, while purlins sit along the slope at regular intervals below this peak.
What is the Purpose of Roof Purlins?
Roof purlins form the backbone of many roofing systems, creating a strong connection between the main structure and the outer covering. They work silently behind the scenes, holding everything together while fighting against the forces of gravity, wind, and time. Without these horizontal supports, most roofs would quickly fail under pressure.
The importance of purlins extends beyond just keeping the roof attached. They allow for proper spacing, create points for fastening, and maintain the roof’s shape over the years of weather exposure.
- Load distribution – Purlins spread the weight of the roof across multiple points, preventing any single area from bearing too much pressure.
- Weather resistance – They help the roof maintain its shape during high winds, heavy snow, or rain by providing continuous support.
- Cost efficiency – Using purlins often reduces the amount of material needed compared to other roofing methods.
- Flexibility in design – They allow for various roof pitches and shapes while maintaining structural integrity.
- Support for insulation – Purlins create spaces that can house insulation materials, improving energy efficiency.
- Longevity – By preventing sagging and movement, they extend the life of the entire roof system.
- Compatibility – They work well with various covering materials, ranging from lightweight metals to heavy concrete tiles.
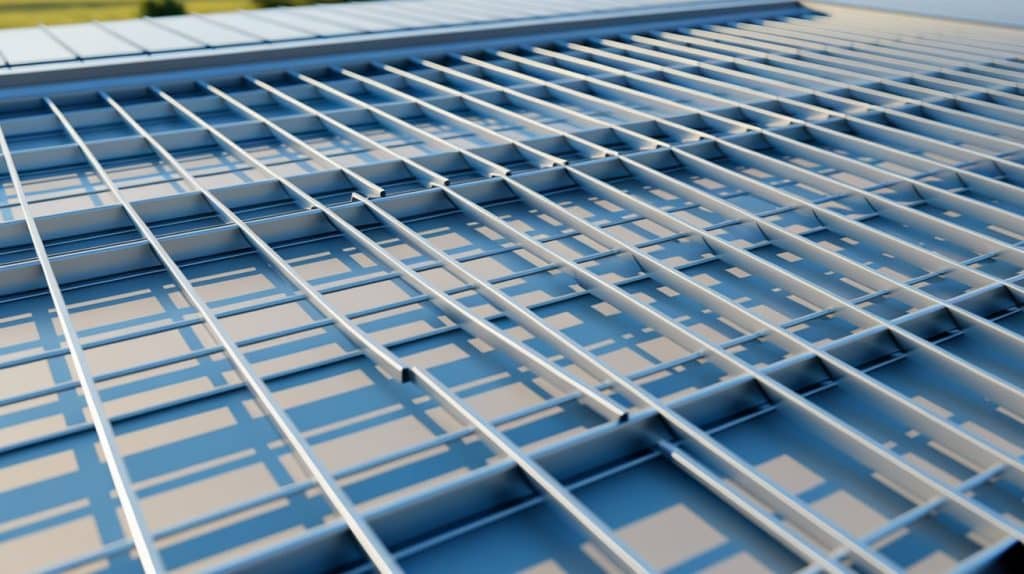
Types of Roof Purlins: A Complete Breakdown

Selecting the right purlin type can significantly impact your roof’s performance and lifespan. The shape, material, and placement of purlins all contribute to how well they handle the specific demands of your building. Most modern structures utilize either C-shaped or Z-shaped purlins, each offering distinct benefits for various situations.
When selecting purlins, consider factors like your local climate, the weight of your roof covering, and your building’s overall design. The right choice depends on balancing cost, strength requirements, and the complexity of installation. Many builders have personal preferences based on their experience with different purlin types.
| Feature | C Purlins | Z Purlins |
|---|---|---|
| Shape | C-shaped cross-section | Z-shaped cross-section |
| Strength | Good strength-to-weight ratio | Superior strength in longer spans |
| Installation | Easier to install and align | More complex installation |
| Cost | Usually less expensive | Typically higher cost |
| Best for | Walls, smaller roofs, light loads | Large roofs, heavy loads, wide spans |
| Typical Materials | Galvanized steel, aluminum | Cold-formed steel, hot-rolled steel |
| Common Uses | Residential, small commercial | Industrial, large commercial |
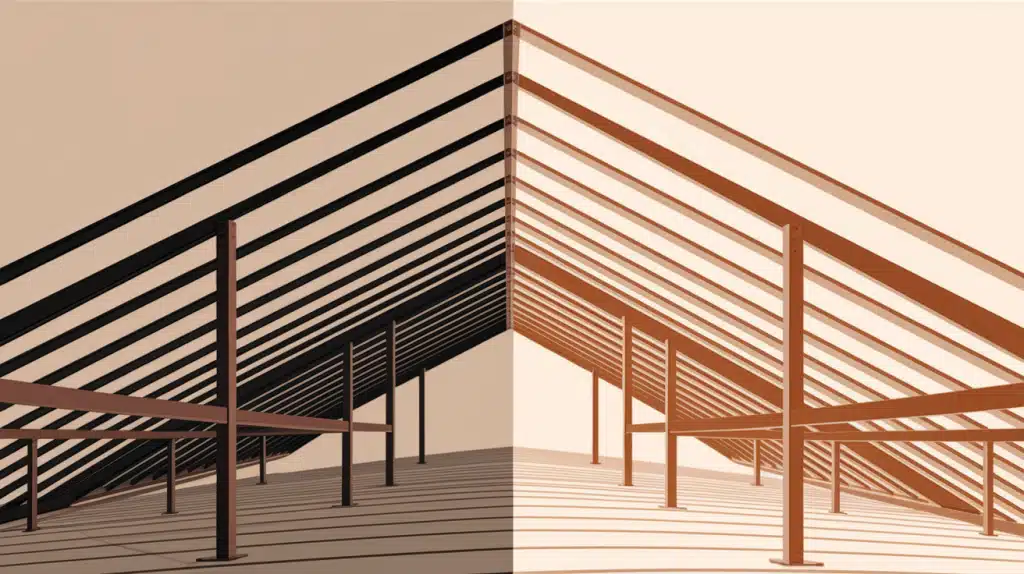
How are Purlins Installed on Different Roof Designs?
The installation process for roof purlins varies significantly depending on your roof style, materials, and local building codes and regulations. Each roof design presents unique challenges and opportunities for purlin placement.
Getting this part right is crucial; proper installation ensures your roof will stand strong for decades, while poor installation can lead to sagging, leaks, or even structural failure.
Most purlin installations follow a standard sequence: measuring and marking, securing supports, placing purlins, and final fastening. However, the specifics change based on roof geometry and load requirements. Professional roofers develop specialized techniques over the years of experience to handle different situations efficiently.
1. Installation on Gable Roofs
- Purlins typically run horizontally, perpendicular to rafters or trusses
- Spacing usually ranges from 2-4 feet apart, depending on the roof covering weight
- Installation begins at the eave and works upward toward the ridge
- Each purlin must align perfectly with its counterpart on the opposite roof slope
- Special attention is paid to proper alignment at the ridge point
2. Installation on Hip Roofs

- More complex layout due to multiple roof planes meeting at different angles
- Purlins must be cut at precise angles where they meet at hip lines
- Often requires custom cutting and fitting at intersections
- Main purlins run parallel to the eaves with special connectors at hip junctions
- May use shorter purlin sections that connect to hip rafters
3. Installation on Flat Roofs
- Purlins generally run in a single direction across supporting beams
- A slight slope is built into the purlin layout to ensure proper drainage
- Spacing is determined by the membrane type and expected loads
- Often uses larger, more substantial purlins due to the potential for standing water
- More frequent fastening points to prevent movement
4. Horizontal vs. Vertical Purlin Setups
- Horizontal installations run perpendicular to the main roof slope
- Vertical (or longitudinal) systems run parallel to the roof slope
- Horizontal systems are typically easier to install but may use more material
- Vertical systems excel with certain metal roofing profiles
- Choice often depends on the main structural framing direction
Advantages and Disadvantages of Using Roof Purlins
Roof purlins offer significant benefits for building stability and longevity, but they also come with certain limitations that should be considered during the planning phase. Understanding both sides helps you make informed decisions about your roofing system, tailored to your specific needs and budget constraints.
| Advantages of Using Roof Purlins | Disadvantages of Using Roof Purlins |
|---|---|
| Increased Structural Strength: Helps roofs withstand heavy snow loads and high winds. | Additional Weight: This adds to the total roof system weight, requiring stronger support. |
| Cost Efficiency: Reduces material needs by supporting lighter roof coverings. | Higher Initial Cost: Increases upfront building expenses for materials and labor. |
| Flexible Design Options: Supports a variety of roof shapes and pitches. | Maintenance Challenges: Harder to access for maintenance or repairs. |
| Simplified Installation: Creates a systematic layout that saves labor time. | Thermal Bridging Concerns: Metal purlins can reduce insulation effectiveness. |
| Extended Roof Lifespan: Maintains drainage slopes and prevents sagging. | Complex Connections: Requires careful design at joints to prevent weak spots. |
When chosen and installed correctly, the advantages of purlins typically outweigh their disadvantages for most construction projects.
Signs Your Roof Purlins Need Repair or Replacement
Is your roof making strange noises during storms?
This might be your first indication that something is wrong with your purlins. When these critical supports begin to fail, they often send warning signals before a complete collapse occurs.
Look up at your ceiling; visible sagging or uneven areas typically point to purlin problems. Water stains appearing on interior ceilings suggest that purlins may have shifted, allowing moisture to penetrate through gaps in your roof covering.
Rust spots on metal purlins indicate advancing corrosion that weakens the entire structure. Even small rust patches can spread quickly, especially in coastal or humid areas where salt and moisture accelerate the damage.
Wooden purlins often show different warning signs. Darkened areas, visible cracks, or a powdery surface texture suggest rot or insect damage has compromised their strength. Press firmly against suspicious areas if the wood feels soft or spongy; replacement is likely needed.
Excessive creaking or popping sounds when wind hits your building mean your purlins may no longer be properly secured. These noises occur when fasteners loosen and components begin moving independently instead of working as a unified system.
Conclusion
Your roof’s purlins work tirelessly to keep everything above your head stable and secure. As we’ve seen, these horizontal supports distribute weight, resist weather forces, and extend the life of your roof.
What should you take away from all this?
First, when building or renovating, don’t cut corners on purlin quality or installation. The small extra cost upfront prevents much larger expenses down the road.
Second, be aware of the warning signs of purlin problems. Early detection can mean the difference between simple repairs and complete roof replacement.
Finally, consider having your roof professionally inspected every few years, especially after major storms. This small investment protects both your building and everything inside it.
Frequently Asked Questions
Are Roof Purlins Load-Bearing?
Yes, roof purlins are load-bearing components. They distribute the weight of the roof covering and external forces like snow and wind to the main structural frame of the building.
Where Do You Put Purlins on A Roof?
Purlins are placed horizontally across rafters or trusses. They run perpendicular to the roof slope, spaced 2-4 feet apart.
How Do You Support Roof Purlins?
Roof purlins are supported by connecting them to rafters, trusses, or main structural beams using brackets, bolts, screws, or welding.