

Florists charge hundreds of dollars for arrangements you can put together yourself in under an hour. All it takes is the right flowers, a few basic tools, and a little technique.
If you are making a bridal bouquet for your wedding day, a heartfelt gift for someone special, or a fresh display for your living room, knowing how to make a flower bouquet from scratch gives you total creative freedom.
You choose the colors, the flowers, the style, and the size. This is not as complicated as it looks.
Once you understand the basics of layering, balancing, and securing stems, the whole process clicks into place.
By the end, you will have a bouquet that looks like it came straight from a professional florist.
Why Learn How to Make a Flower Bouquet? (Benefits & What You Can DIY)
Making your own flower bouquet gives you full control over how it looks, what goes in it, and how much you spend.
You can match it to any theme, color palette, or occasion without paying florist prices.
If you are putting together a wedding arrangement, a birthday gift, or a simple home display, DIY bouquets let you add a personal touch that store-bought flowers rarely deliver.
It is also a genuinely fun and creative skill to learn.
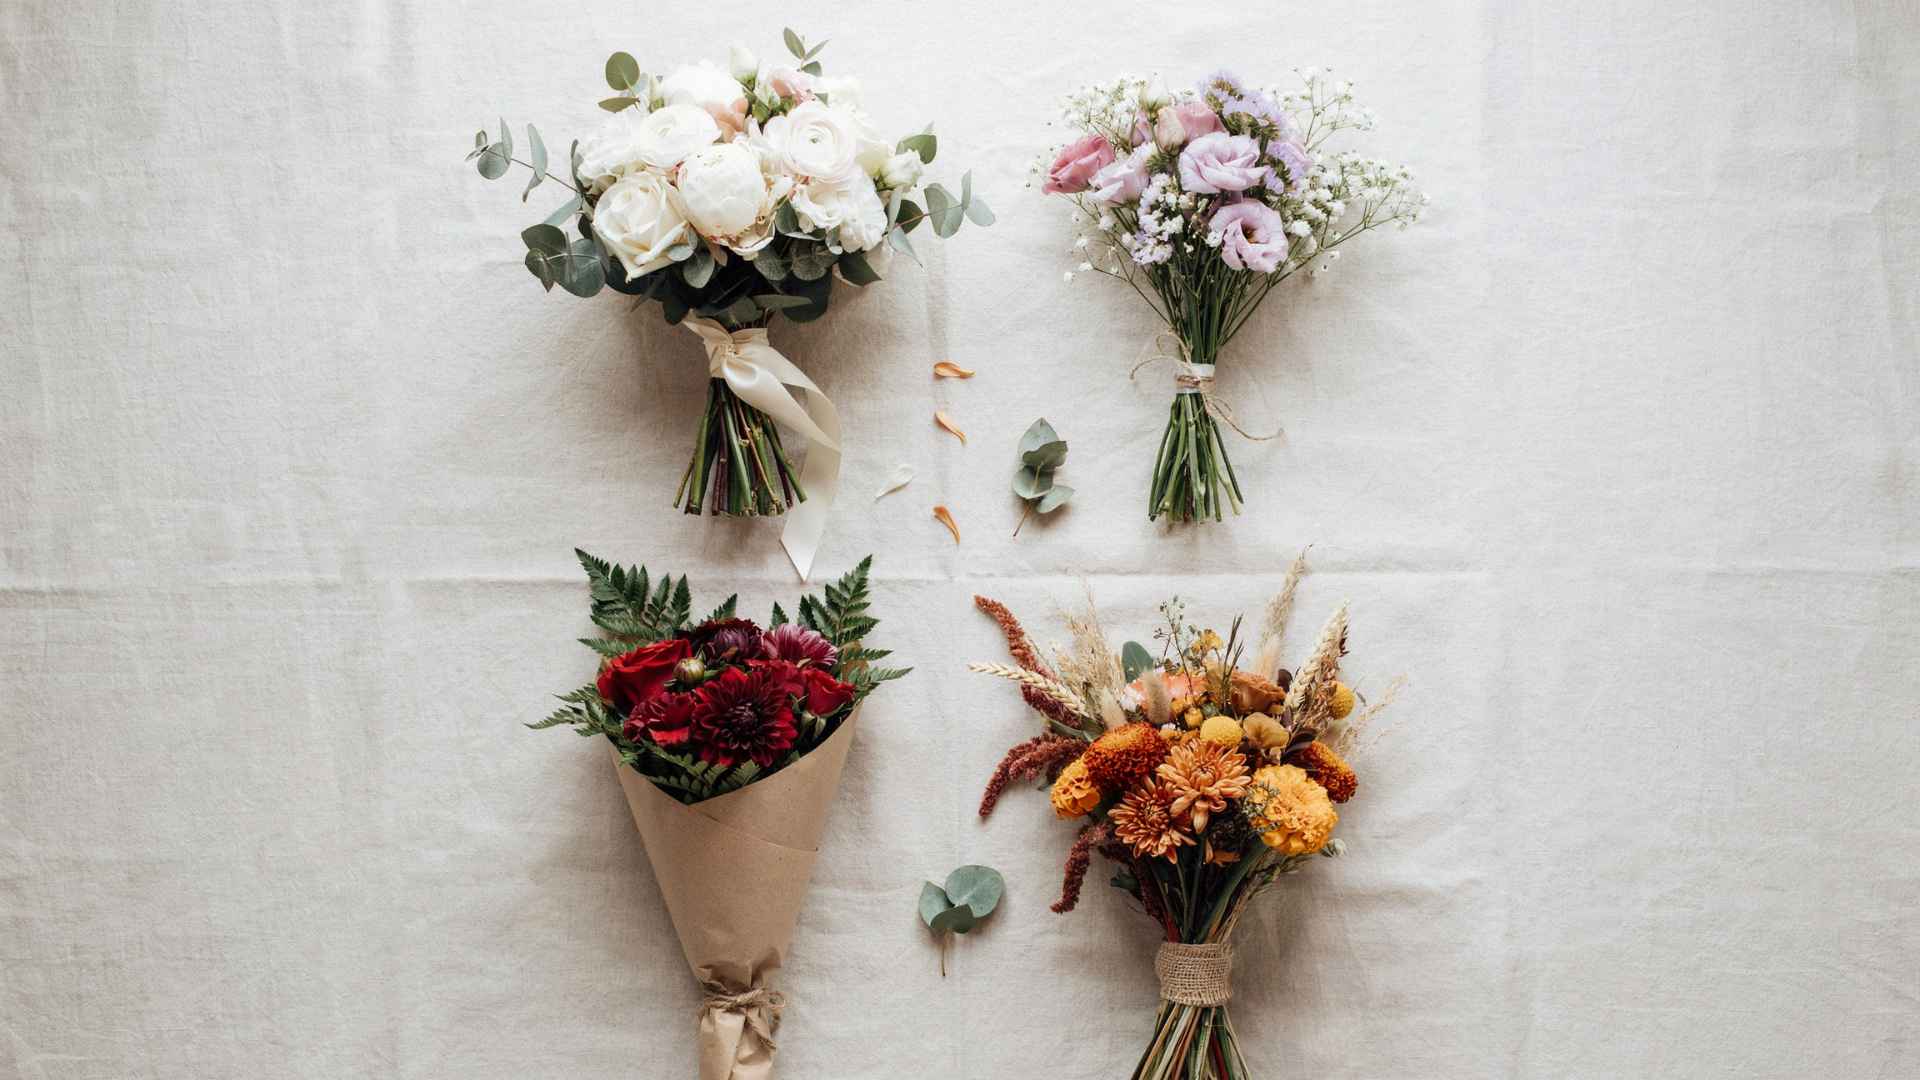
Making your own bouquet saves money and adds a personal touch. Here are the main types to know before you get started.
| Bouquet Type | Description | Category | Popular Style |
|---|---|---|---|
| Bridal bouquet | Held by the bride. Usually, the largest and most elaborate arrangement of the day. | Wedding | Classic dome |
| Bridesmaid & flower girl | Smaller, matching bouquets that complement the bridal look without competing with it. | Wedding | Cascading |
| Gift bouquet | Perfect for birthdays, anniversaries, or just because. Easy to customize by season or occasion. | Gifting | Hand-tied |
| Seasonal bouquet | Built around what’s fresh and in bloom. Budget-friendly and naturally cohesive. | Décor | Hand-tied |
Essential Supplies for a DIY Flower Bouquet
You do not need a lot to get started. Here is what to gather before you begin:
- Focal blooms like roses, sunflowers, or peonies
- Secondary flowers to fill in the mid-layer
- Filler flowers like baby’s breath for texture
- Greenery or foliage for a natural, layered look
- Floral shears, floral tape, and ribbon
- Optional: floral wire, pins, and wrapping paper
Choose flowers with firm petals and no browning at the edges. Mix textures and colors intentionally so nothing looks too matchy or too random.
Set up in a clean, well-lit area, fill buckets with fresh water, and sort your flowers by type and size before you begin.
Strip any leaves from the lower stems, cut each stem at an angle, and let the flowers sit in water for at least an hour before you start arranging.
How to Make a Flower Bouquet?
Follow these steps to put together a beautiful bouquet from scratch, for a wedding, a gift, or everyday home décor.
Step 1: Select a Focal Flower
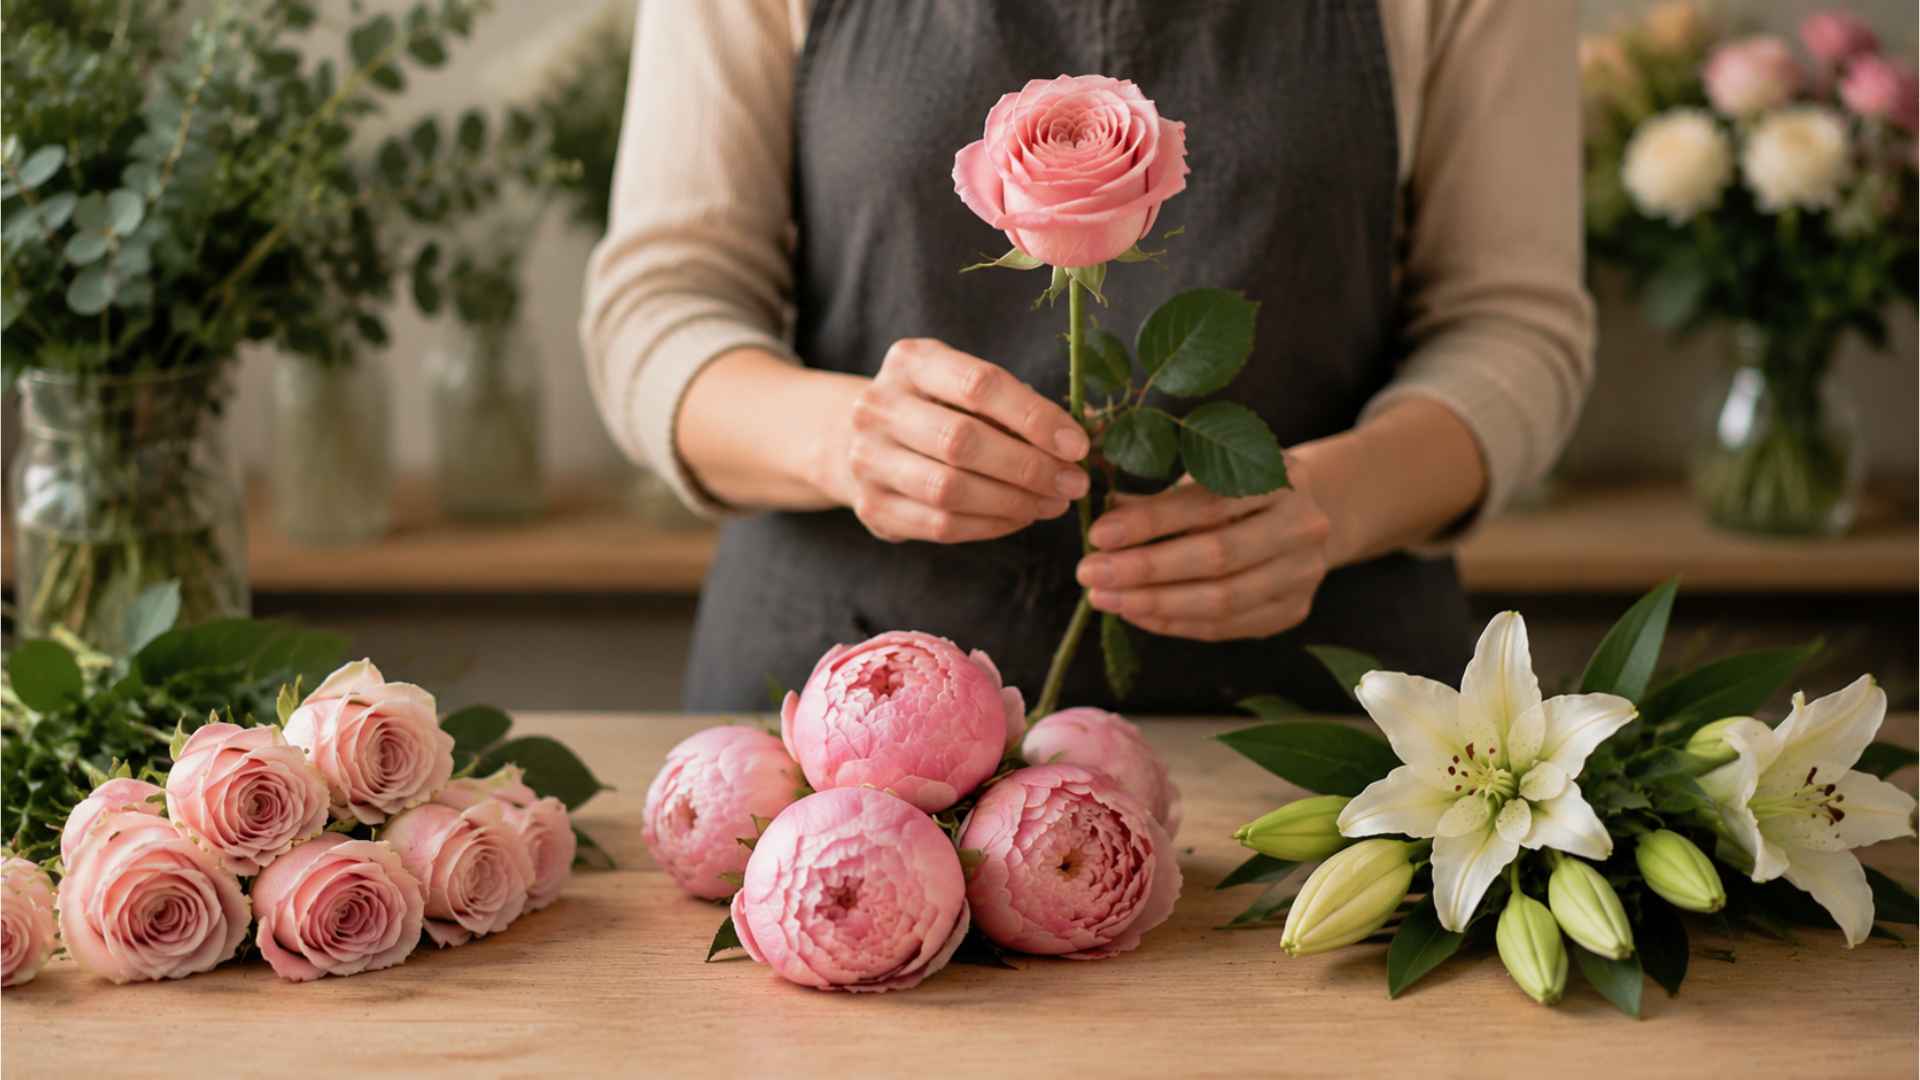
Your focal flower is the centerpiece around which everything else is built.
Roses, peonies, and lilies are popular choices because they are large, eye-catching, and available in a wide range of colors.
Pick one variety or mix two complementary ones. Choose blooms that are just starting to open rather than fully open, as they will last longer and look fuller as the arrangement comes together.
Start here, and the rest of the design will follow naturally.
Step 2: Build the Bouquet Base
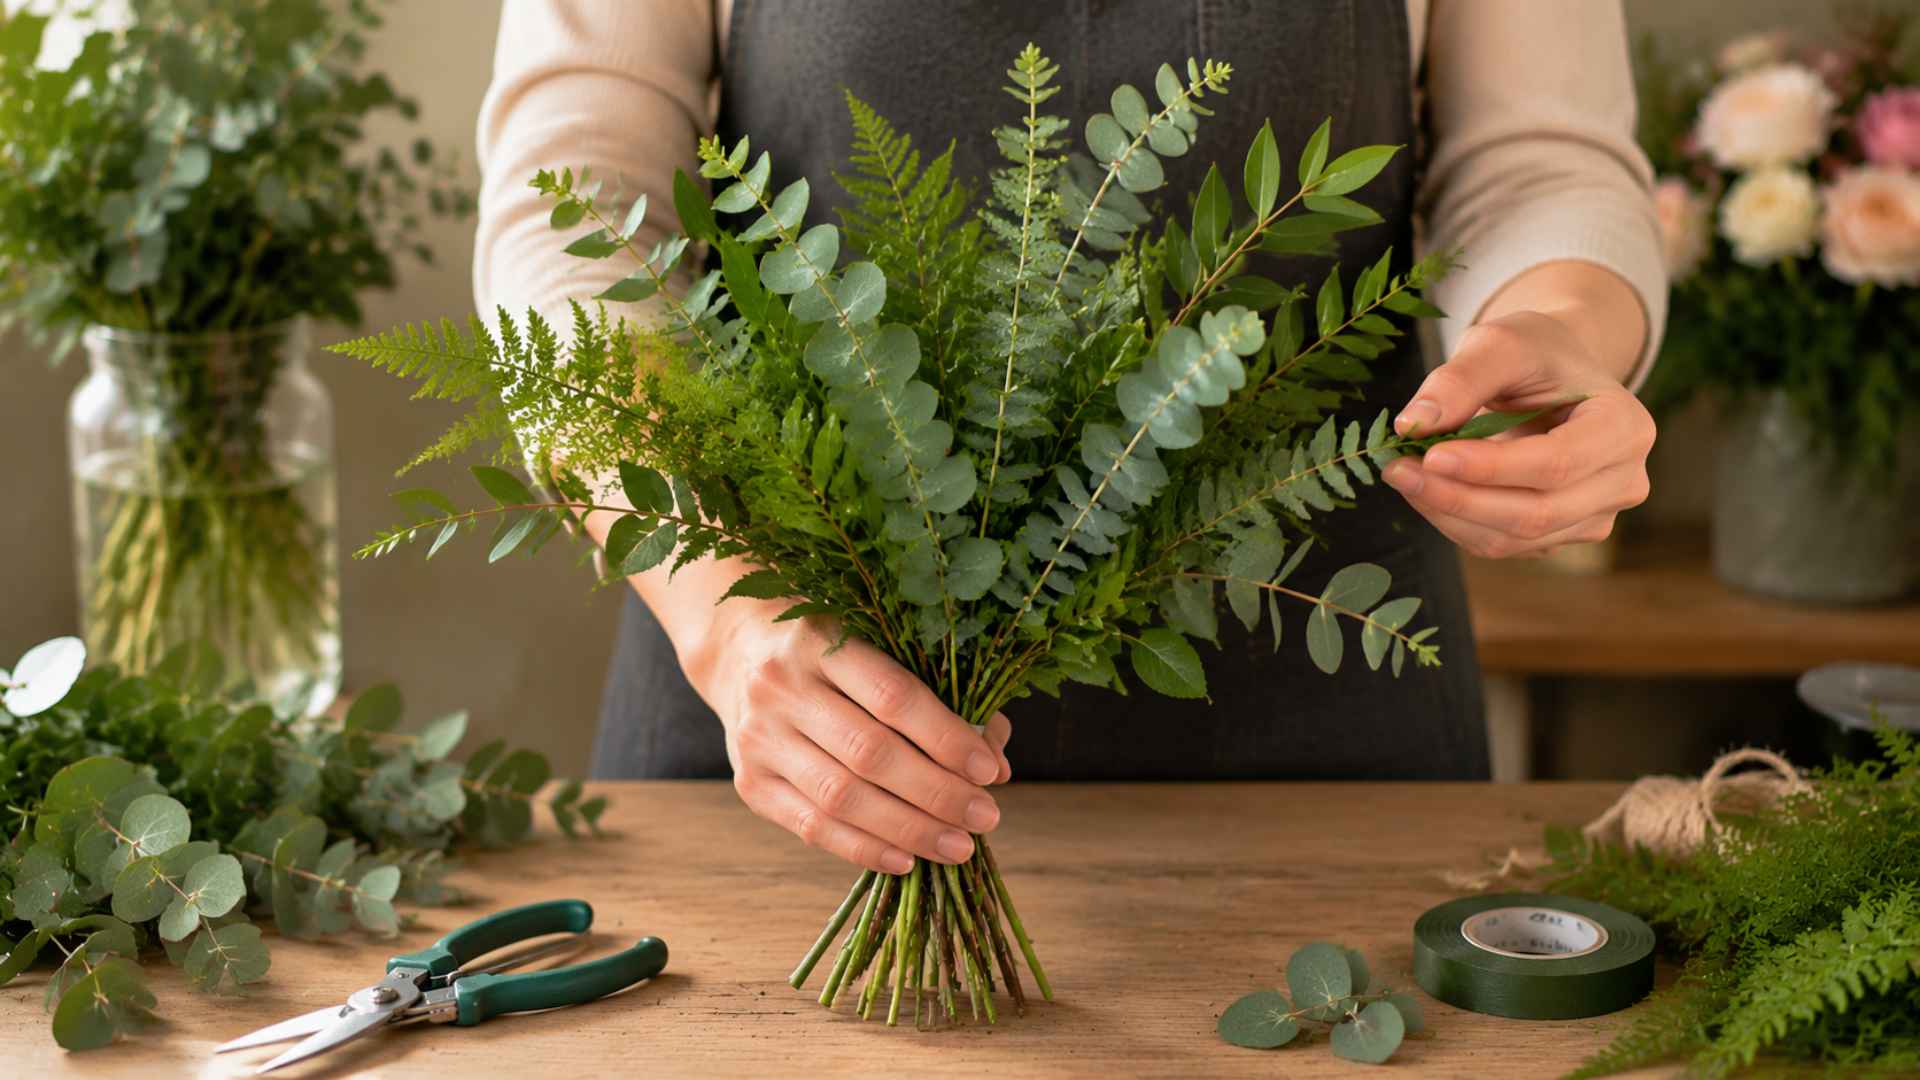
Begin with greenery to create the shape and structure of your bouquet. Eucalyptus, ferns, or ruscus work well as a base.
Hold a few stems loosely in one hand and arrange them in a fan or circular shape.
This green skeleton provides a visual guide to where each flower should sit and prevents the final bouquet from looking flat or uneven.
A strong base makes every step after this much easier.
Step 3: Arrange Focal Flowers First
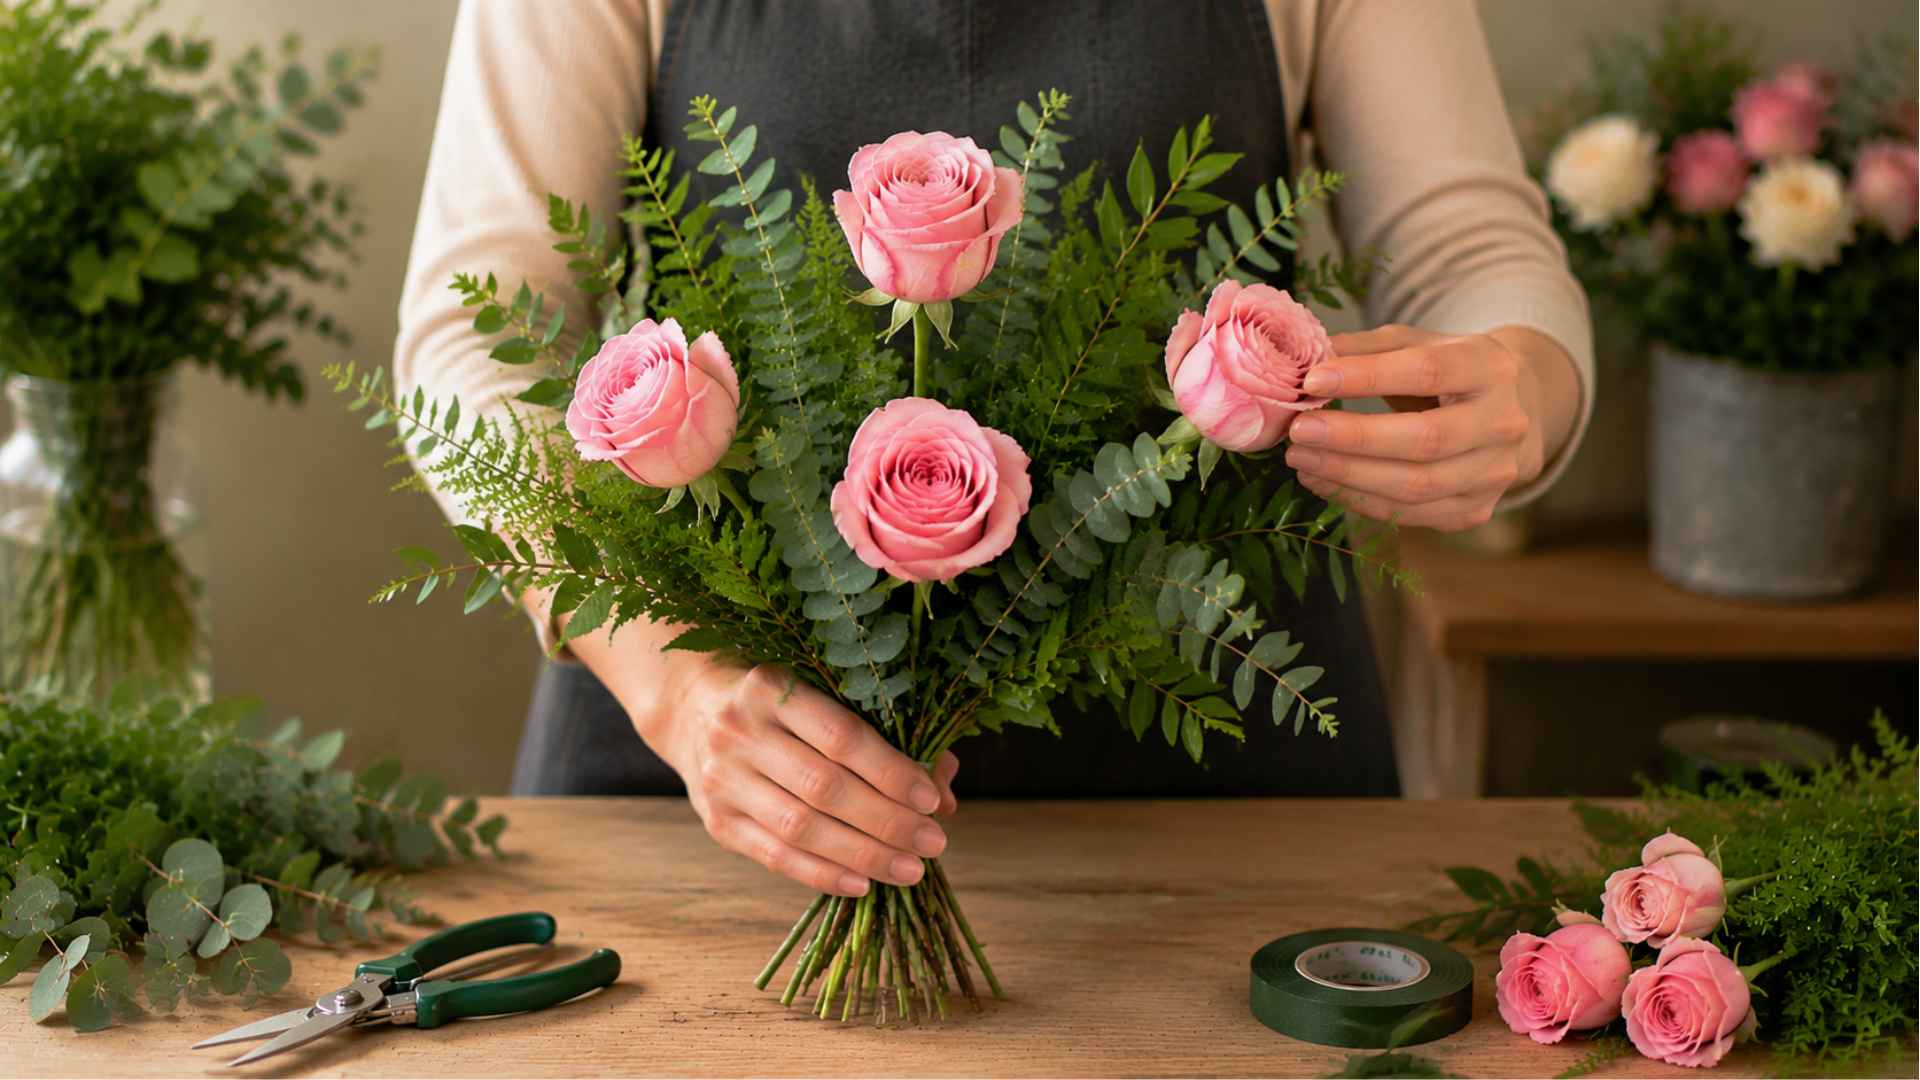
Place your focal blooms evenly across the base, spacing them out so no single area feels too heavy.
Work in odd numbers, three or five blooms, as this tends to look more natural than even groupings.
Hold the stems loosely as you go and keep rotating the bouquet in your hand so you can check the balance from every angle before moving on.
Step back and assess before adding anything else.
Step 4: Add Secondary Flowers and Fillers
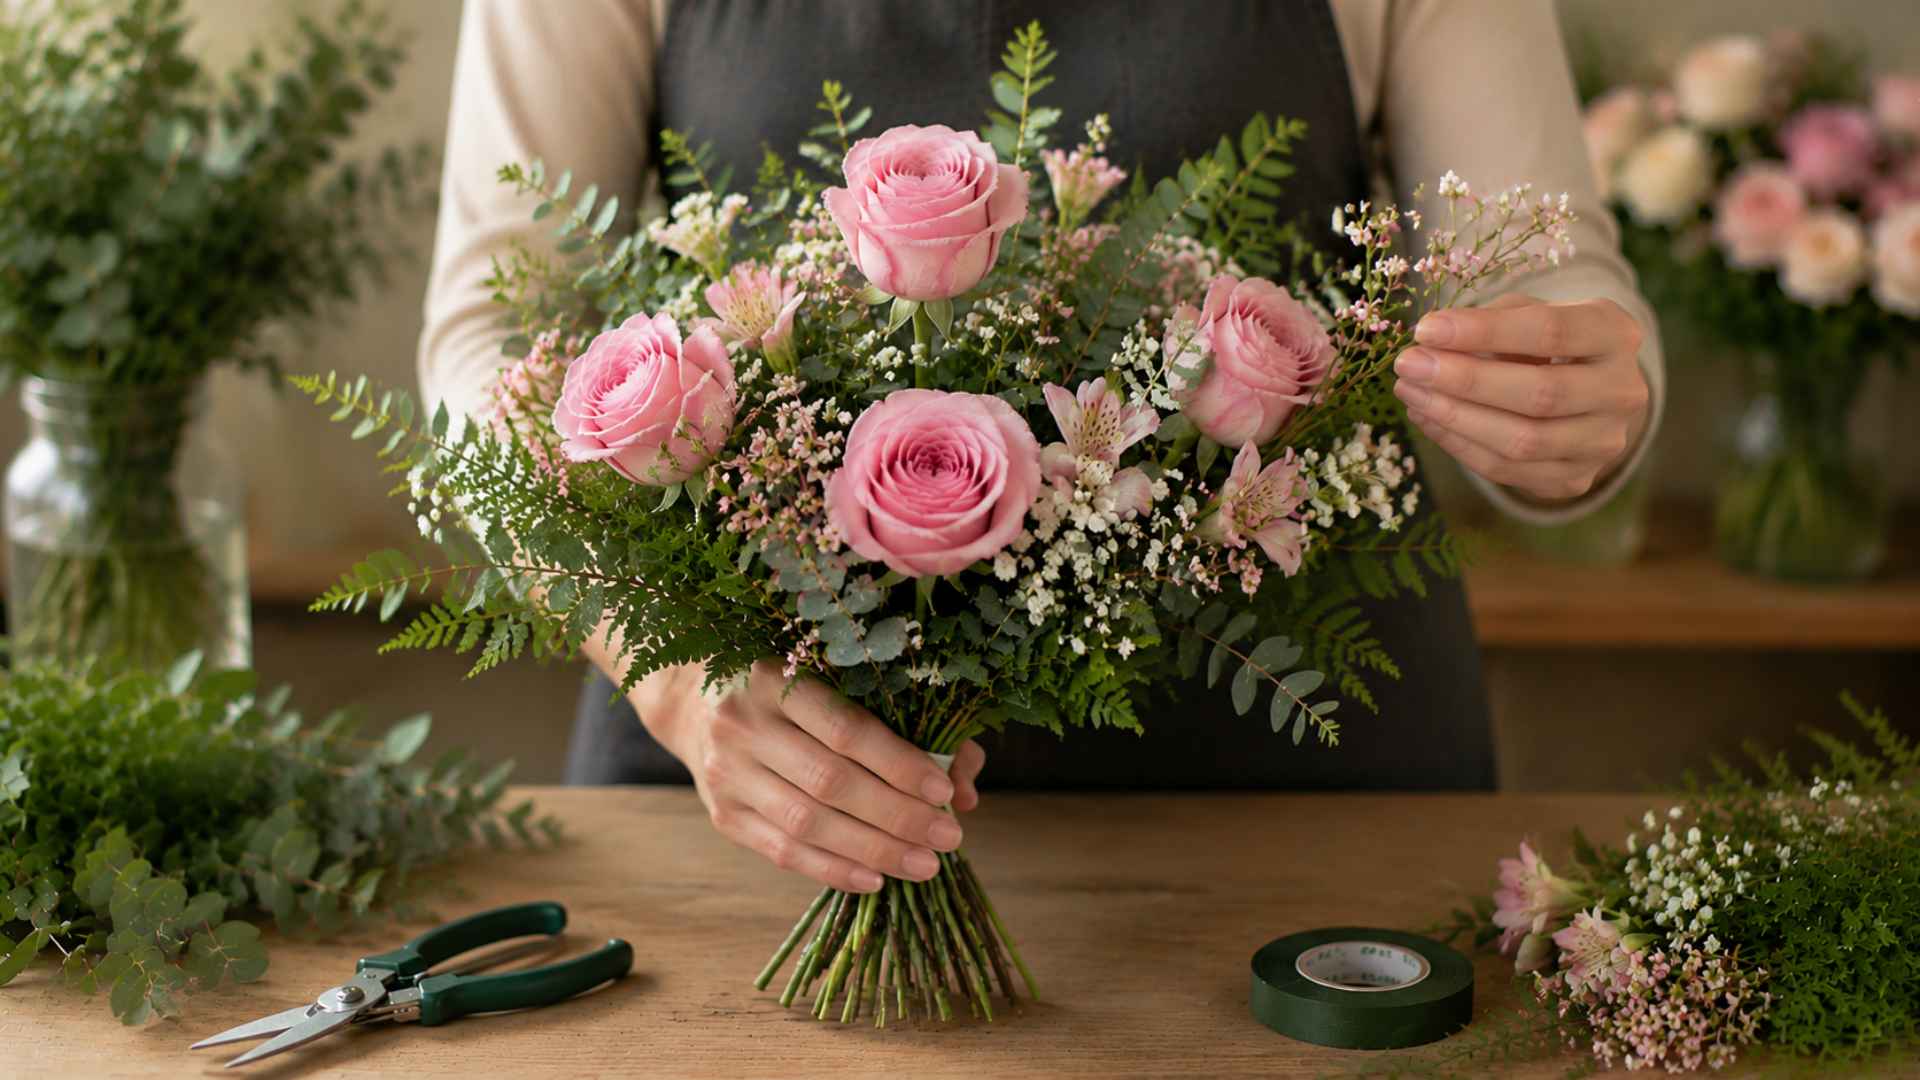
Layer your secondary flowers in the gaps between the focal blooms, then tuck filler flowers like baby’s breath or wax flowers around the outer edges.
These smaller blooms soften hard lines and add depth without drawing attention away from the focal flowers.
Build this layer gradually; you can even cut the flowers and add a stem or two at a time, so you stay in control of the overall shape.
Fullness comes from patience, not from cramming stems in all at once.
Step 5: Use the Spiral Technique for a Professional Look
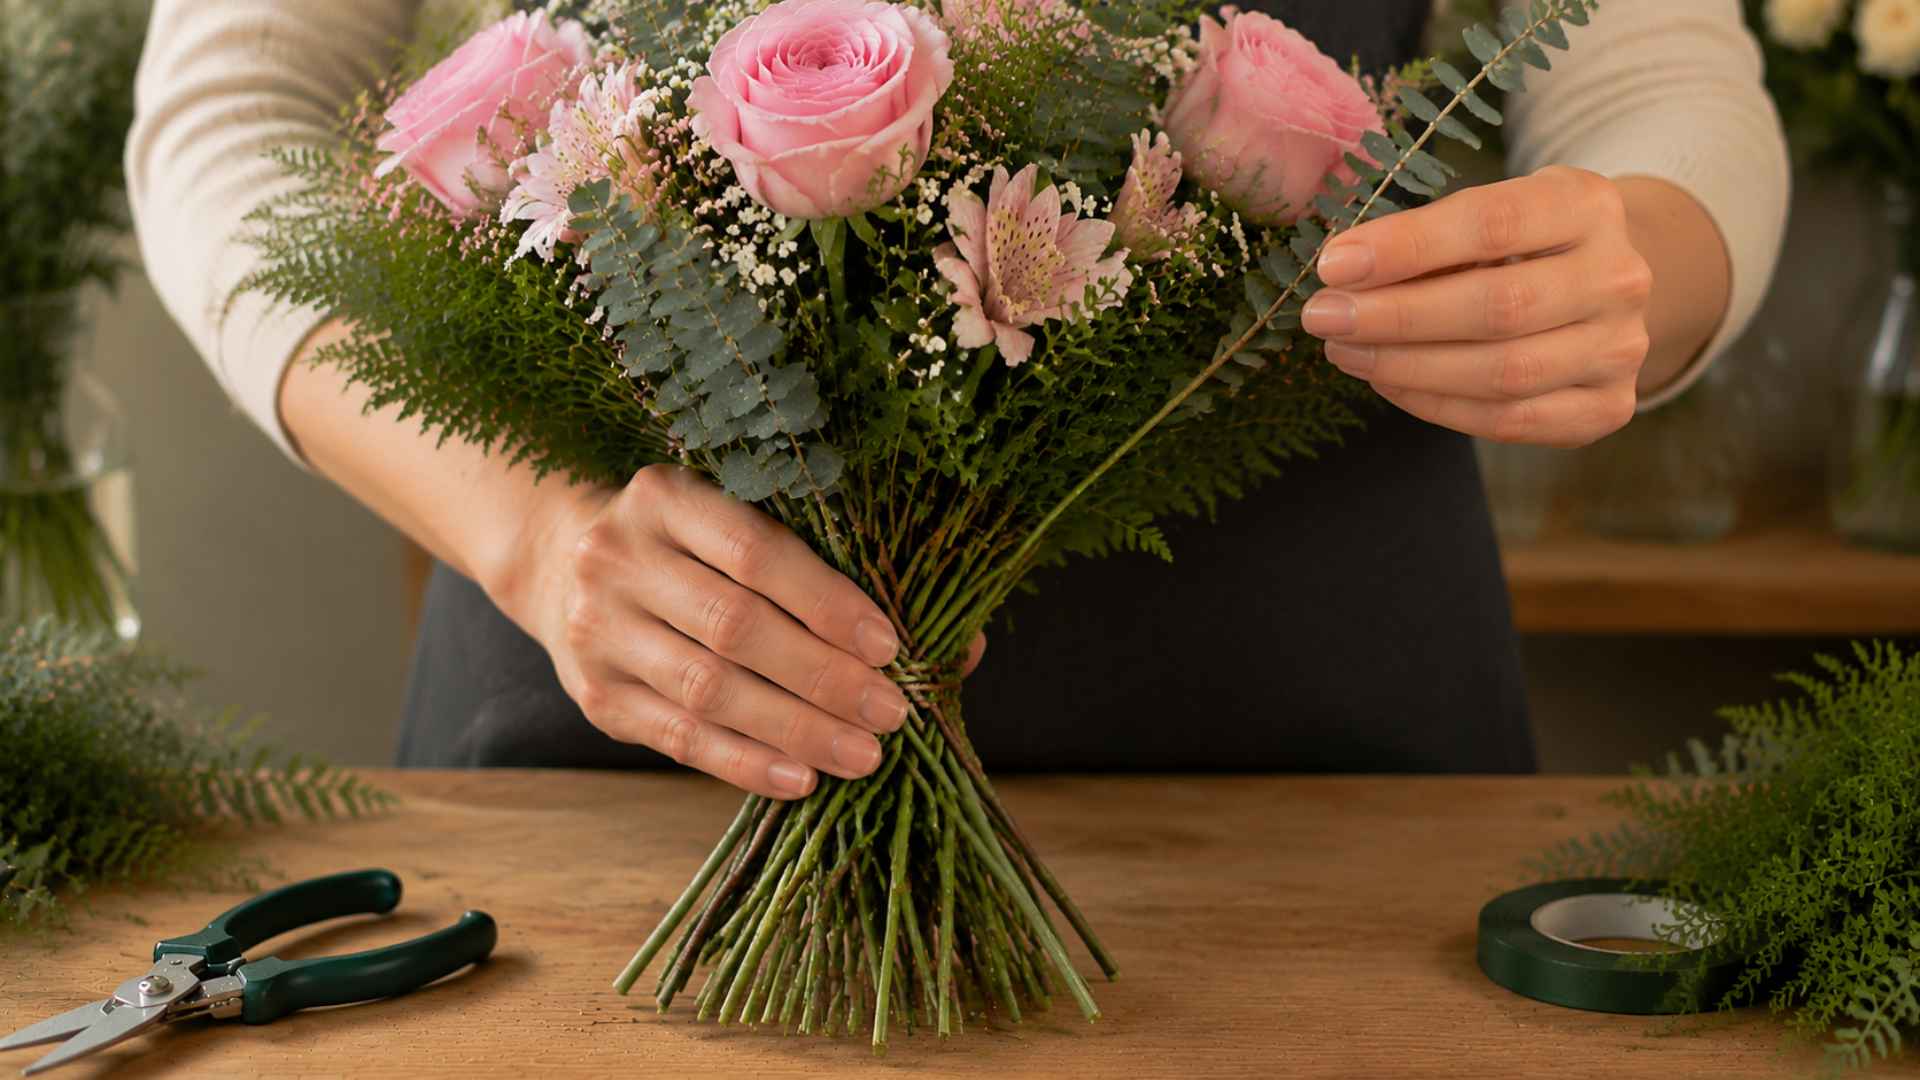
As you add each new stem, angle it slightly and rotate the entire bunch in your hand in the same direction.
Every stem should cross the others at roughly the same point, creating a spiral pattern at the base.
This keeps the bouquet open and rounded at the top rather than bunched and tight. It also makes it easier to trim the stems evenly at the end.
Once you get the rhythm, it feels natural quickly.
Step 6: Secure the Bouquet
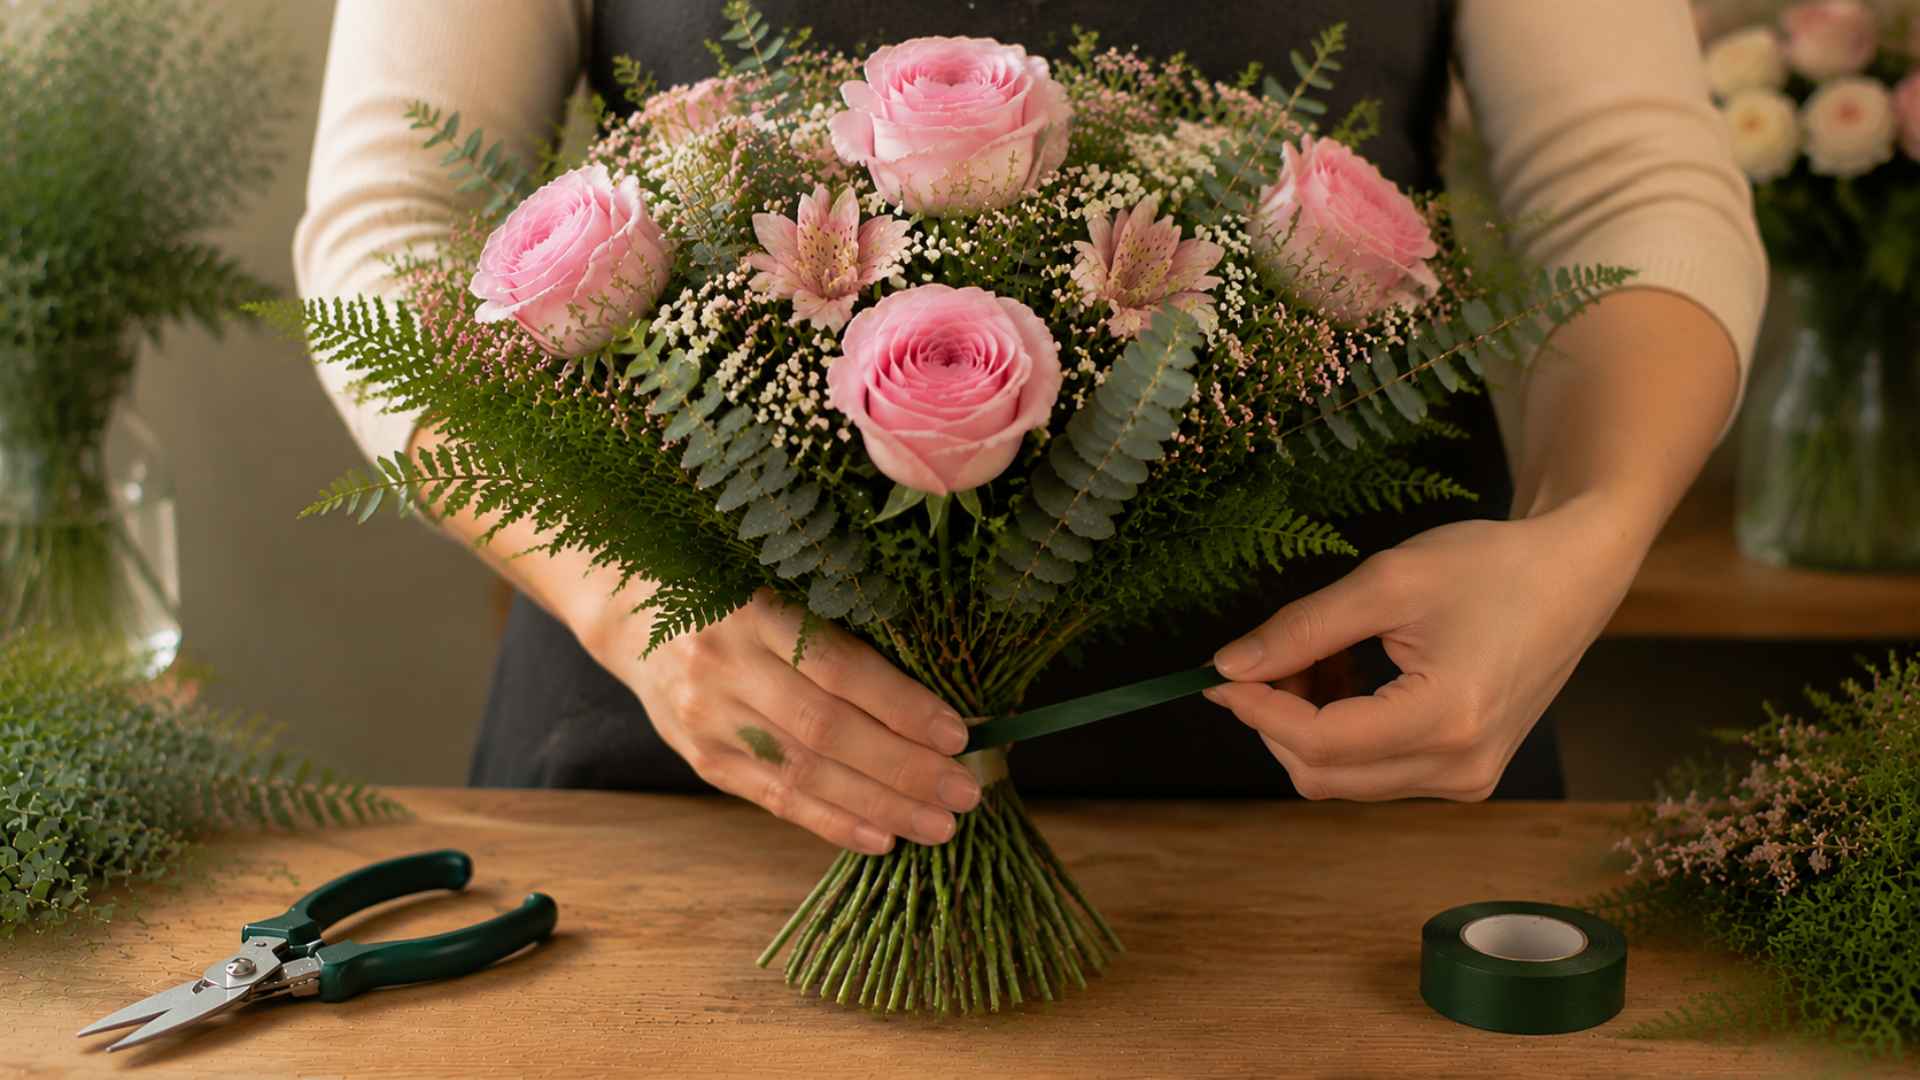
Wrap floral tape or a rubber band firmly around the stems just below where you have been holding them.
Do not wrap too high, or the bouquet will lose its shape. Once secured, use floral shears to trim all the stems to an even length at the bottom, cutting at a slight angle.
This gives the bouquet a clean, finished look and helps the flowers continue drinking water properly.
Step 7: Add Finishing Touches

Wrap the stem handle with ribbon, lace, or twine, depending on the occasion. Start just below the blooms and wind downward, overlapping slightly as you go.
Secure the end with a floral pin or a small piece of tape hidden underneath. For weddings, add decorative pins, brooches, or charms that match the theme.
Your bouquet is now ready to gift, carry, or put in a vase as a beautiful display.
How to Store and Preserve Your Finished Bouquet
Once your bouquet is complete, keep it in a cool place away from direct sunlight and heat.
If you have a refrigerator with enough space, store it there until you need it, as the cold slows wilting and keeps petals firm.
Lightly mist the flowers with water every few hours to maintain freshness. Avoid sealing them in a bag or box without airflow, as trapped moisture can cause the blooms to rot faster than you expect.
Wedding Bouquet Tips and Common Mistakes to Avoid
A little planning and the right habits make a big difference when putting together a wedding bouquet.
- Start arranging 24 to 48 hours before the event, so flowers have time to settle.
- Choose flowers that are in season for better quality and lower cost.
- Practice the full process at least once beforehand, using inexpensive flowers.
- Avoid overcrowding stems together, as it bruises flowers and makes the bouquet look heavy.
- Do not skip the hydration step, as it significantly shortens the life of your arrangement.
- Never wrap stems too tightly, as it cuts off water flow and causes faster wilting.
Keep these points in mind, and you will avoid the most common pitfalls that trip up first-time bouquet makers.
Final Thoughts
Making your own flower bouquet is more rewarding than most people expect.
Once you learn the basics of selecting blooms, building a base, and using the spiral technique, the whole process starts to feel natural.
If you are arranging flowers for a wedding, a gift, or your own home, the skills you pick up carry over every time. Start simple, practice with affordable flowers, and you will get better with every bunch you make.
Frequently Asked Questions
How Long Does it Take to Make a DIY Flower Bouquet?
Most DIY bouquets take between 30 minutes and an hour, depending on the size and complexity of the arrangement.
What Flowers are Best for Wedding Bouquets?
Roses, peonies, ranunculus, and garden roses are the most popular choices as they are hardy, widely available, and photograph beautifully.
Can I Make a Bridal Bouquet the Night Before?
Yes, just store it in a cool place or in the refrigerator overnight, then give it a light mist before the ceremony.