

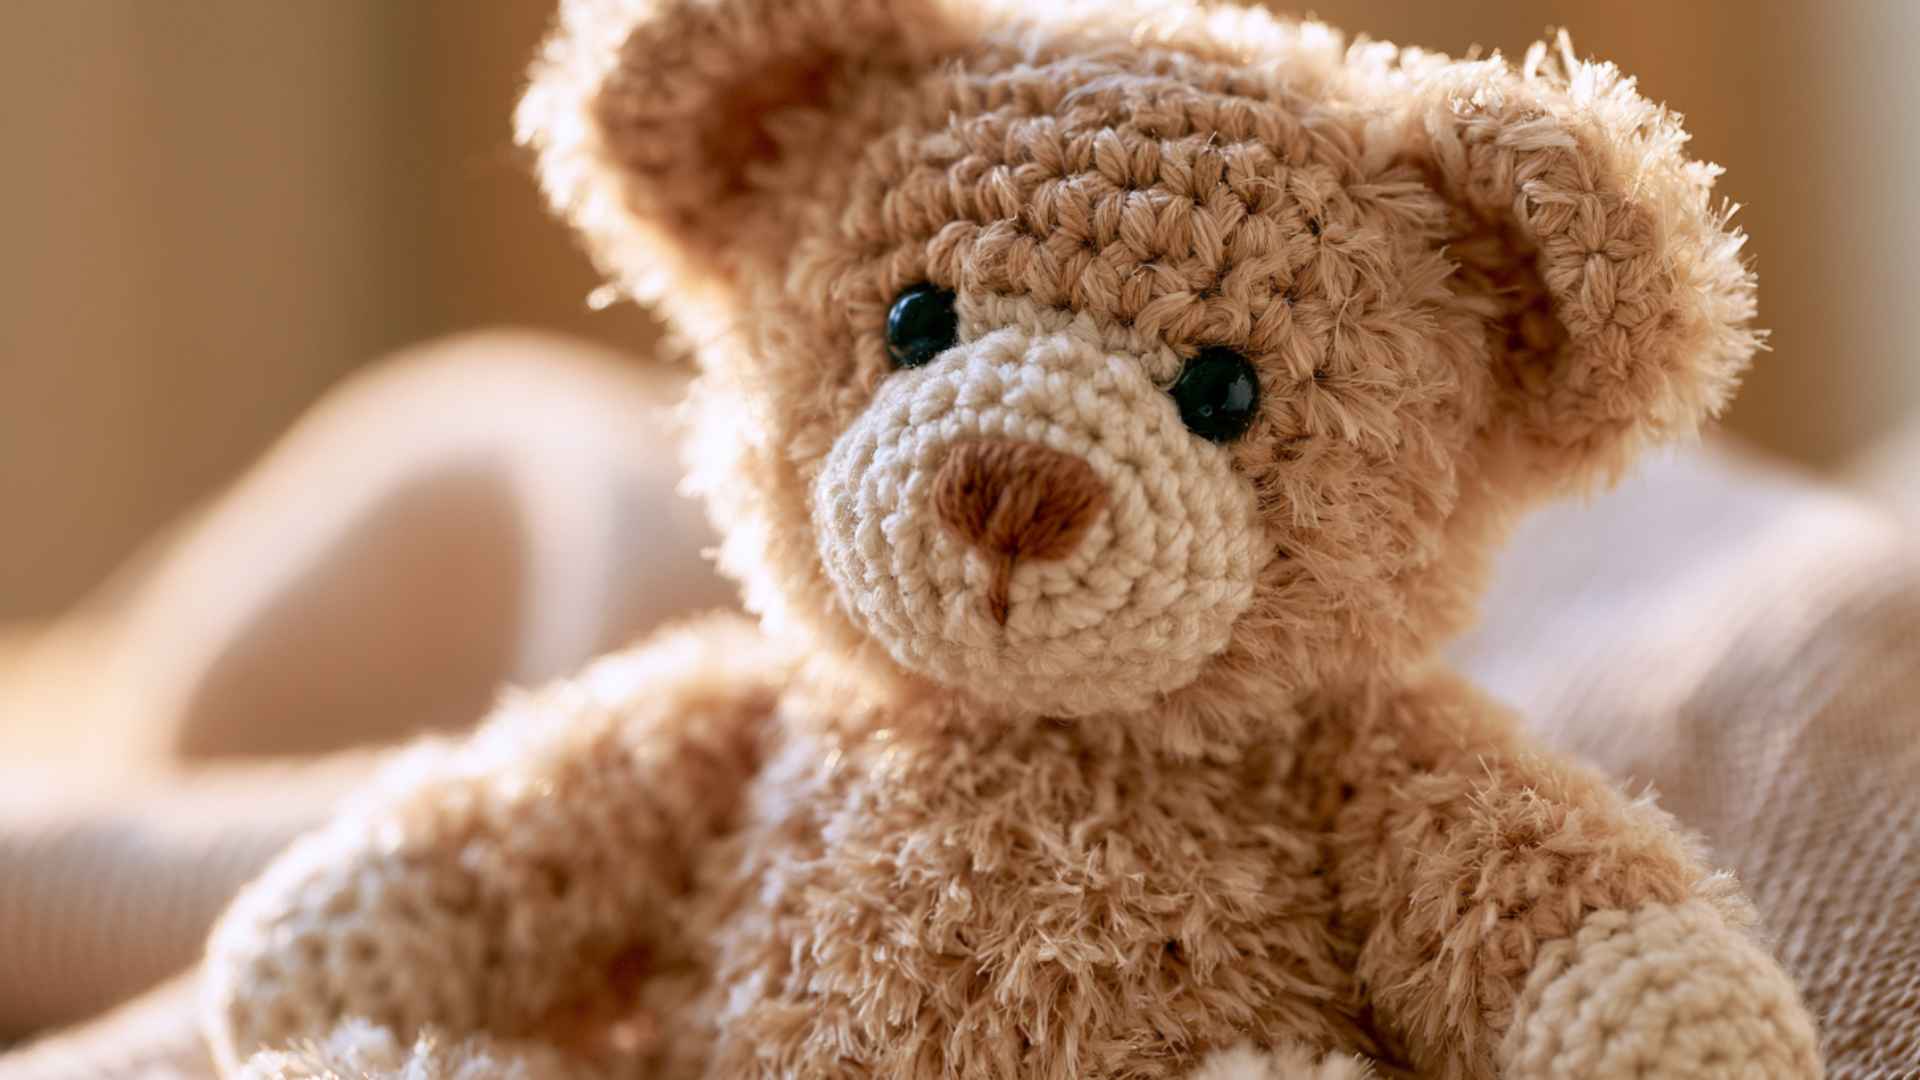
There is something quietly rewarding about crocheting a stuffed animal. It starts with yarn, a hook, and a few simple loops that slowly take shape into something soft and meaningful.
Learning how to crochet a stuffed animal can feel a bit unfamiliar at first, but the process becomes easier once the basic rhythm of the stitches starts to make sense.
Amigurumi, the Japanese style of making small crocheted toys, relies on simple forms like circles and tubes, which are shaped and joined with small details to bring them to life.
What Exactly Is Amigurumi?
The word “amigurumi” blends two Japanese terms: ami (meaning crocheted or knitted) and nuigurumi (meaning stuffed doll).
The craft has roots in Japan but caught on in the United States in the early 2000s, and it has only grown since, largely because it rewards beginners very quickly.
Unlike a blanket or a sweater, where you might work for weeks before seeing a finished object, a small amigurumi animal can be done in an afternoon.
That fast feedback loop is one of the reasons people get hooked (no pun intended) so easily. You also only need a single crochet stitch to make most of them; everything else is just a variation of increasing or decreasing that one stitch.
Note: Amigurumi isn’t limited to crochet; it can also be knitted, but crochet is more popular because it creates a tighter, more structured fabric that holds stuffing securely without visible gaps.
The Supplies You Actually Need
The good news is that the starting kit for crocheting an animal is short and inexpensive. Here is what every beginner should have before casting on:
| Supply | What to Get | Why It Matters |
|---|---|---|
| Yarn | Worsted-weight acrylic or cotton | Easy to work with, affordable, machine washable |
| Crochet Hook | 3.5–4mm (go 0.5–1mm smaller than yarn label) | Tighter hook = tighter stitches = stuffing stays inside |
| Polyfil Stuffing | Standard polyester fiberfill | Soft, washable, safe for children’s toys |
| Tapestry Needle | Blunt-tip, large eye | For sewing parts together and weaving in yarn ends |
| Stitch Markers | Locking plastic markers (or even a scrap of yarn) | Marks the beginning of each round, so you never lose your count |
| Safety Eyes | Plastic snap-in eyes, various sizes | Quick, clean finish — must be placed before closing the head |
| Scissors | Small, sharp craft scissors | For cutting yarn cleanly between pieces |
Choosing the Right Yarn: Worsted-weight acrylic yarn is ideal for beginners: soft, widely available, colorful, durable, and easy to work with. Cotton yarn offers a firmer finish but less stretch.
On Hook Sizing: For amigurumi, use a hook 0.5–1mm smaller than recommended to create tight stitches that prevent stuffing from showing through, while still keeping your hand movement smooth and comfortable.
Now you can confidently start crocheting stuffed animals, turning simple yarn into meaningful handmade creations.
The Stitches Worth Knowing
Most amigurumi patterns are built on a surprisingly small set of techniques. You do not need to master every crochet stitch; you need to be comfortable with these five, and the rest tends to fall into place.
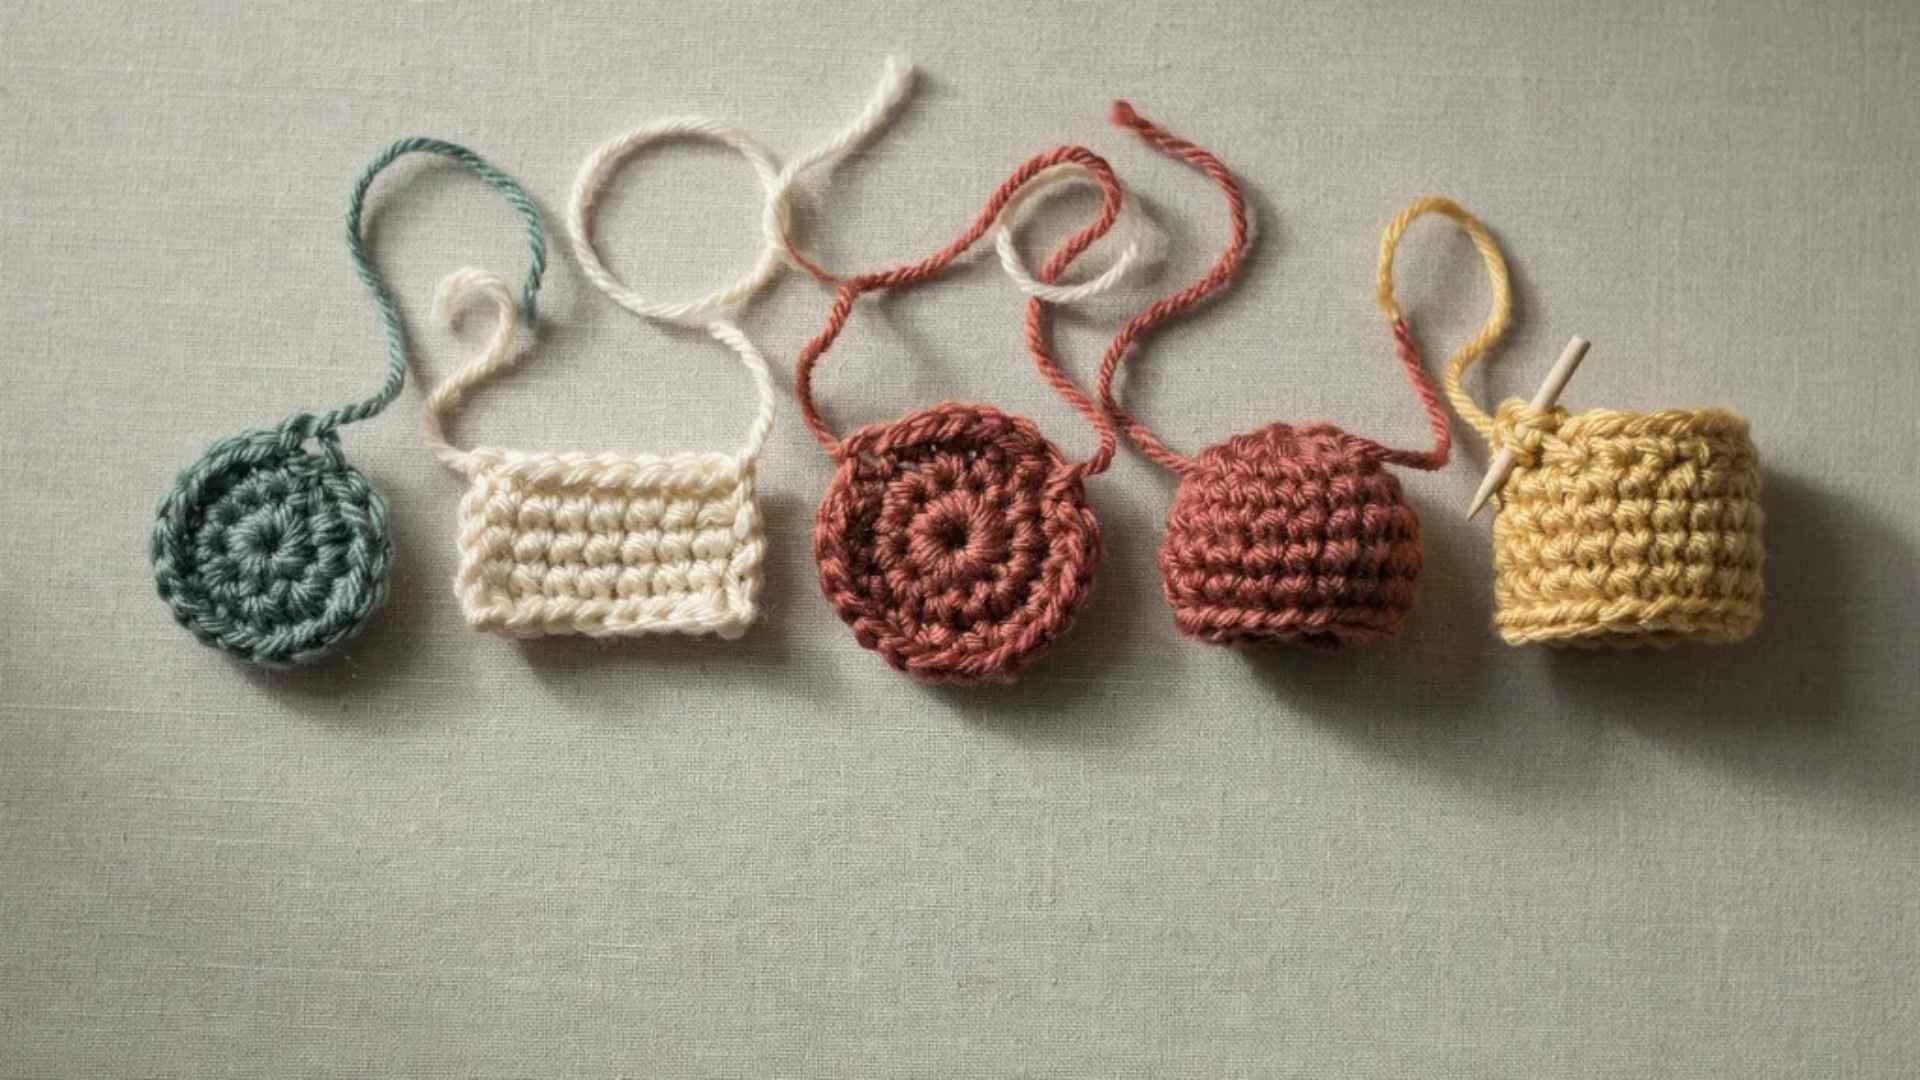
- The Magic Loop (Magic Ring): Most stuffed animals begin with a magic loop, creating a tight center that closes cleanly with no hole. It looks tricky at first, but becomes easy after a few slow video demonstrations.
- Single Crochet (sc): Single crochet is the foundation of almost every amigurumi project. It builds dense, even stitches that form the structure of stuffed animals and is essential for beginners to master confidently.
- Increases: Increases are made by placing two single crochets into one stitch. This simple technique evenly expands your work, helping to shape rounded parts like heads, bodies, and limbs naturally.
- Invisible Decrease (invdec): Invisible decreases reduce stitches cleanly by working through front loops only. This method keeps the surface smooth and prevents gaps, making it the preferred choice for most stuffed-animal patterns.
- Working in Continuous Rounds: Amigurumi is worked in a spiral without joining rounds. A stitch marker is essential for tracking progress and maintaining shape consistency throughout the project.
Find Your First Video Tutorial
Refer to the video for more details by the B. Hooked Crochet channel.
Before attempting any pattern, spend 10–15 minutes watching the magic loop and single crochet being done on video. Seeing the hook angle and yarn tension in real time makes written instructions click much faster.
How to Crochet a Stuffed Animal, Step by Step
Every animal pattern crochet follows its own specific stitch counts, but the overall sequence is nearly always the same. Here is how the process flows from start to finish:
Step 1: Start the Shape

Make a magic loop, work 6 single crochets into it, and pull the tail tight to close the center. Place your stitch marker, then work increase rounds, working 2 stitches into every second stitch until the piece reaches the desired width. Follow with straight rounds (no increases or decreases) to build the height of the head or body.
Step 2: Add the Eyes and Stuff
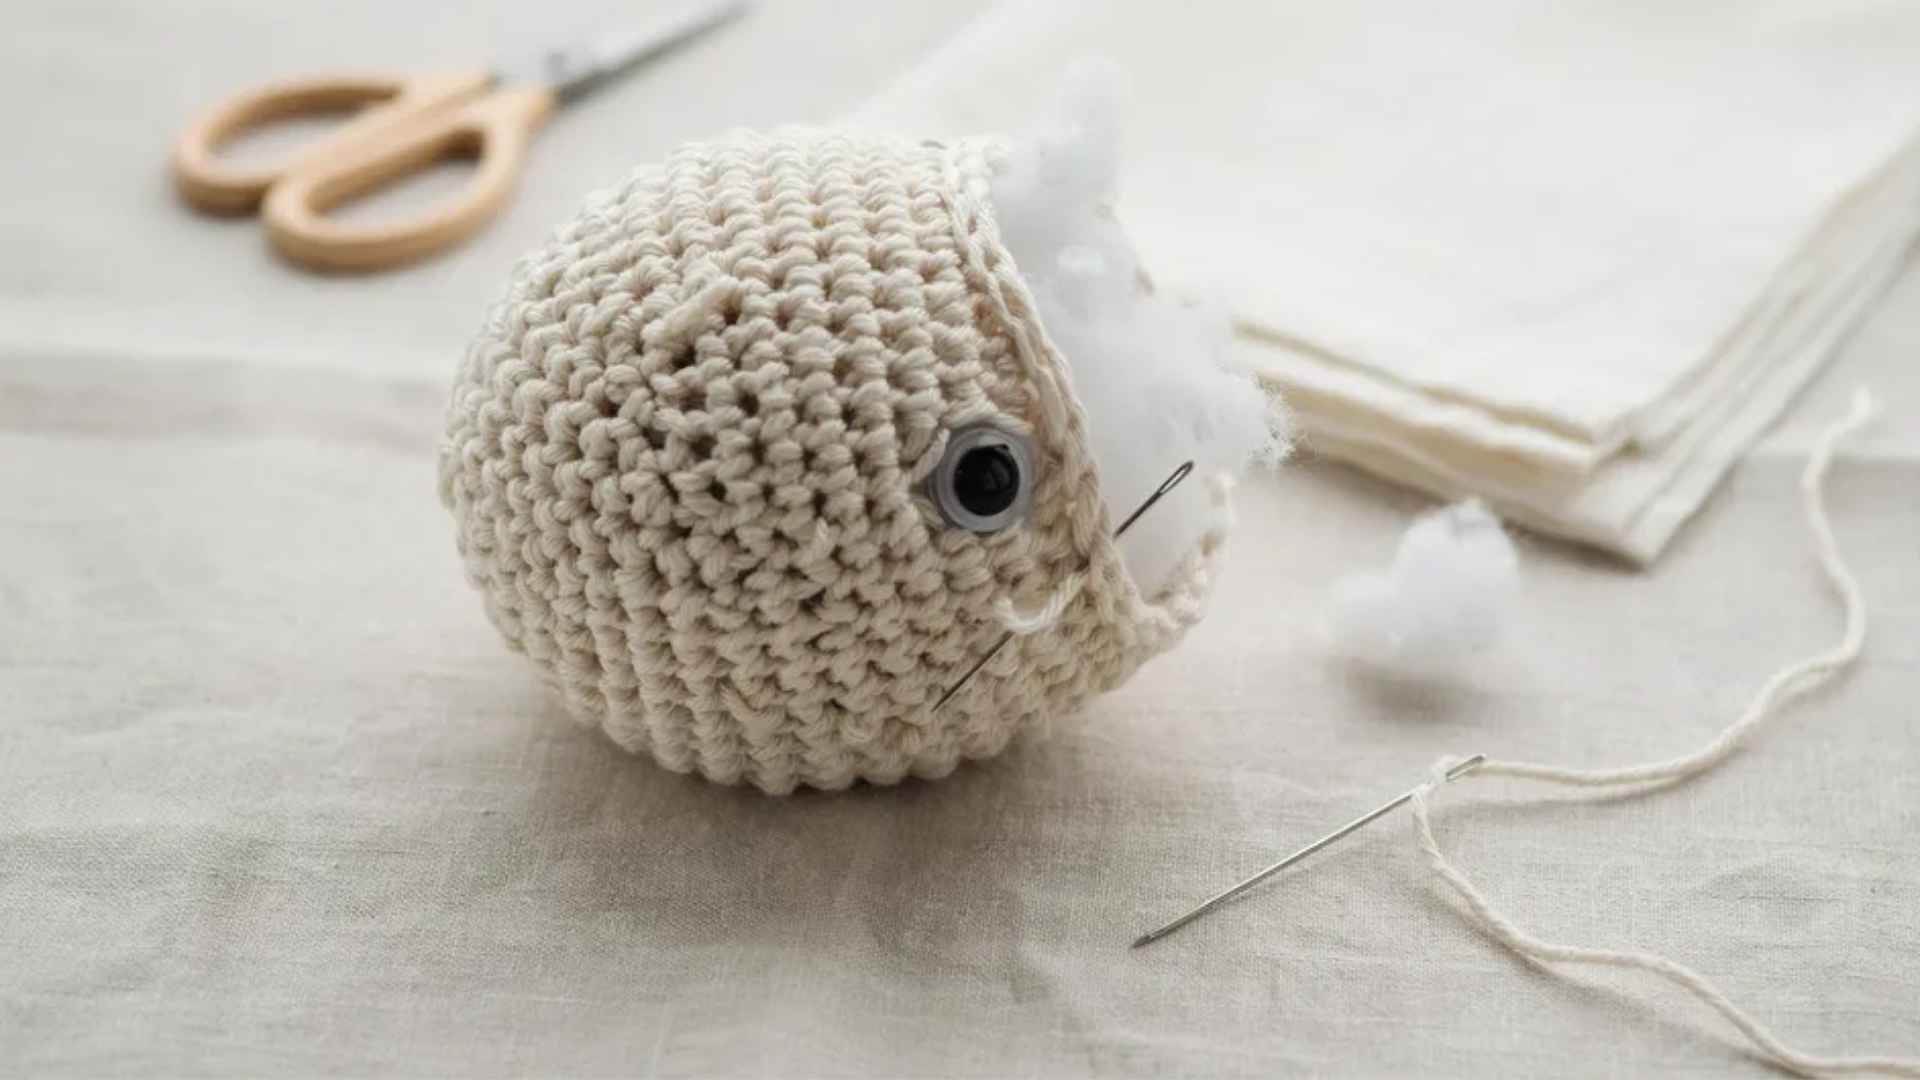
Before the opening gets too small, snap in your safety eyes and press the backing firmly from the inside. Then begin stuffing gradually as you work your decrease rounds a little at a time, smoothing as you go.
Aim for firm, not tight. Once the opening is small enough, weave the yarn tail through the remaining loops to close completely.
Step 3: Make the Small Parts
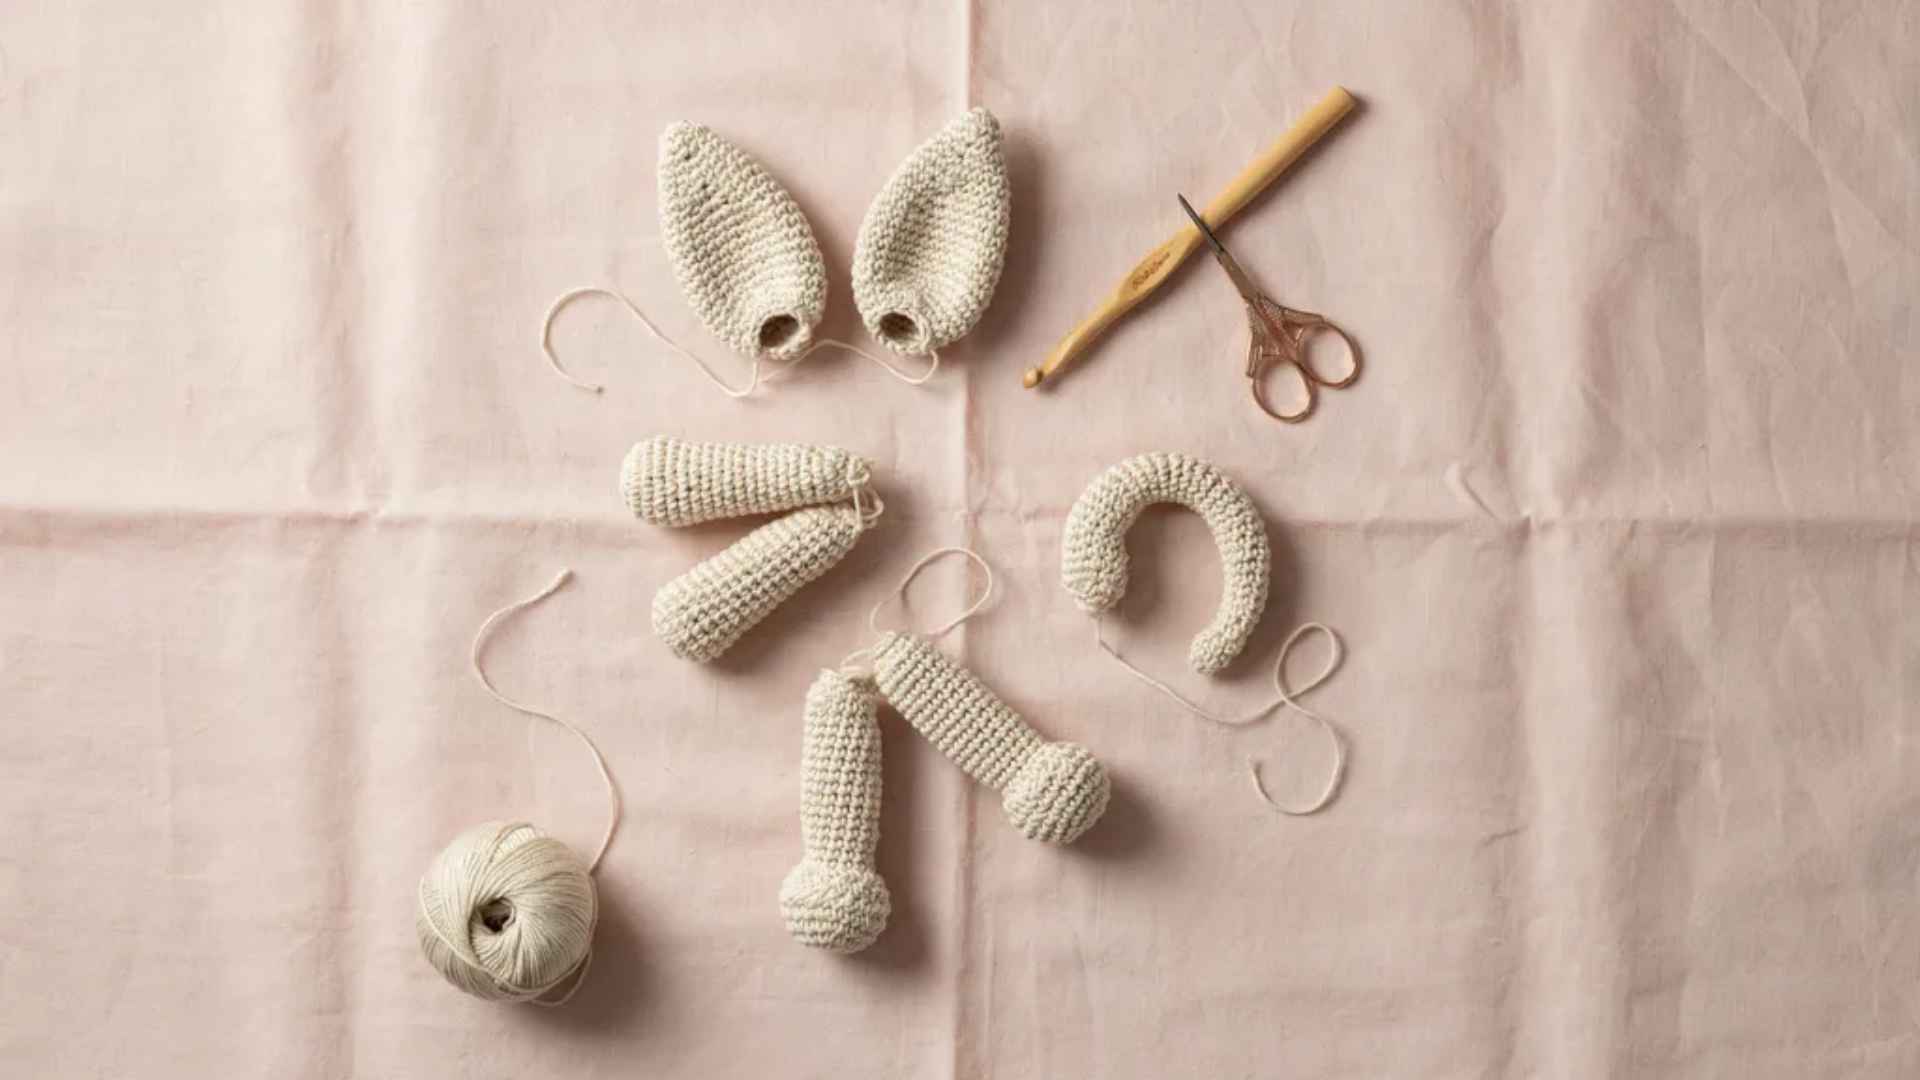
Each ear, limb, and tail starts with its own magic loop and follows the same increase/decrease logic on a smaller scale. Fasten off, but leave a long yarn tail on each piece; that tail is what you will use to sew them on.
Step 4: Assemble
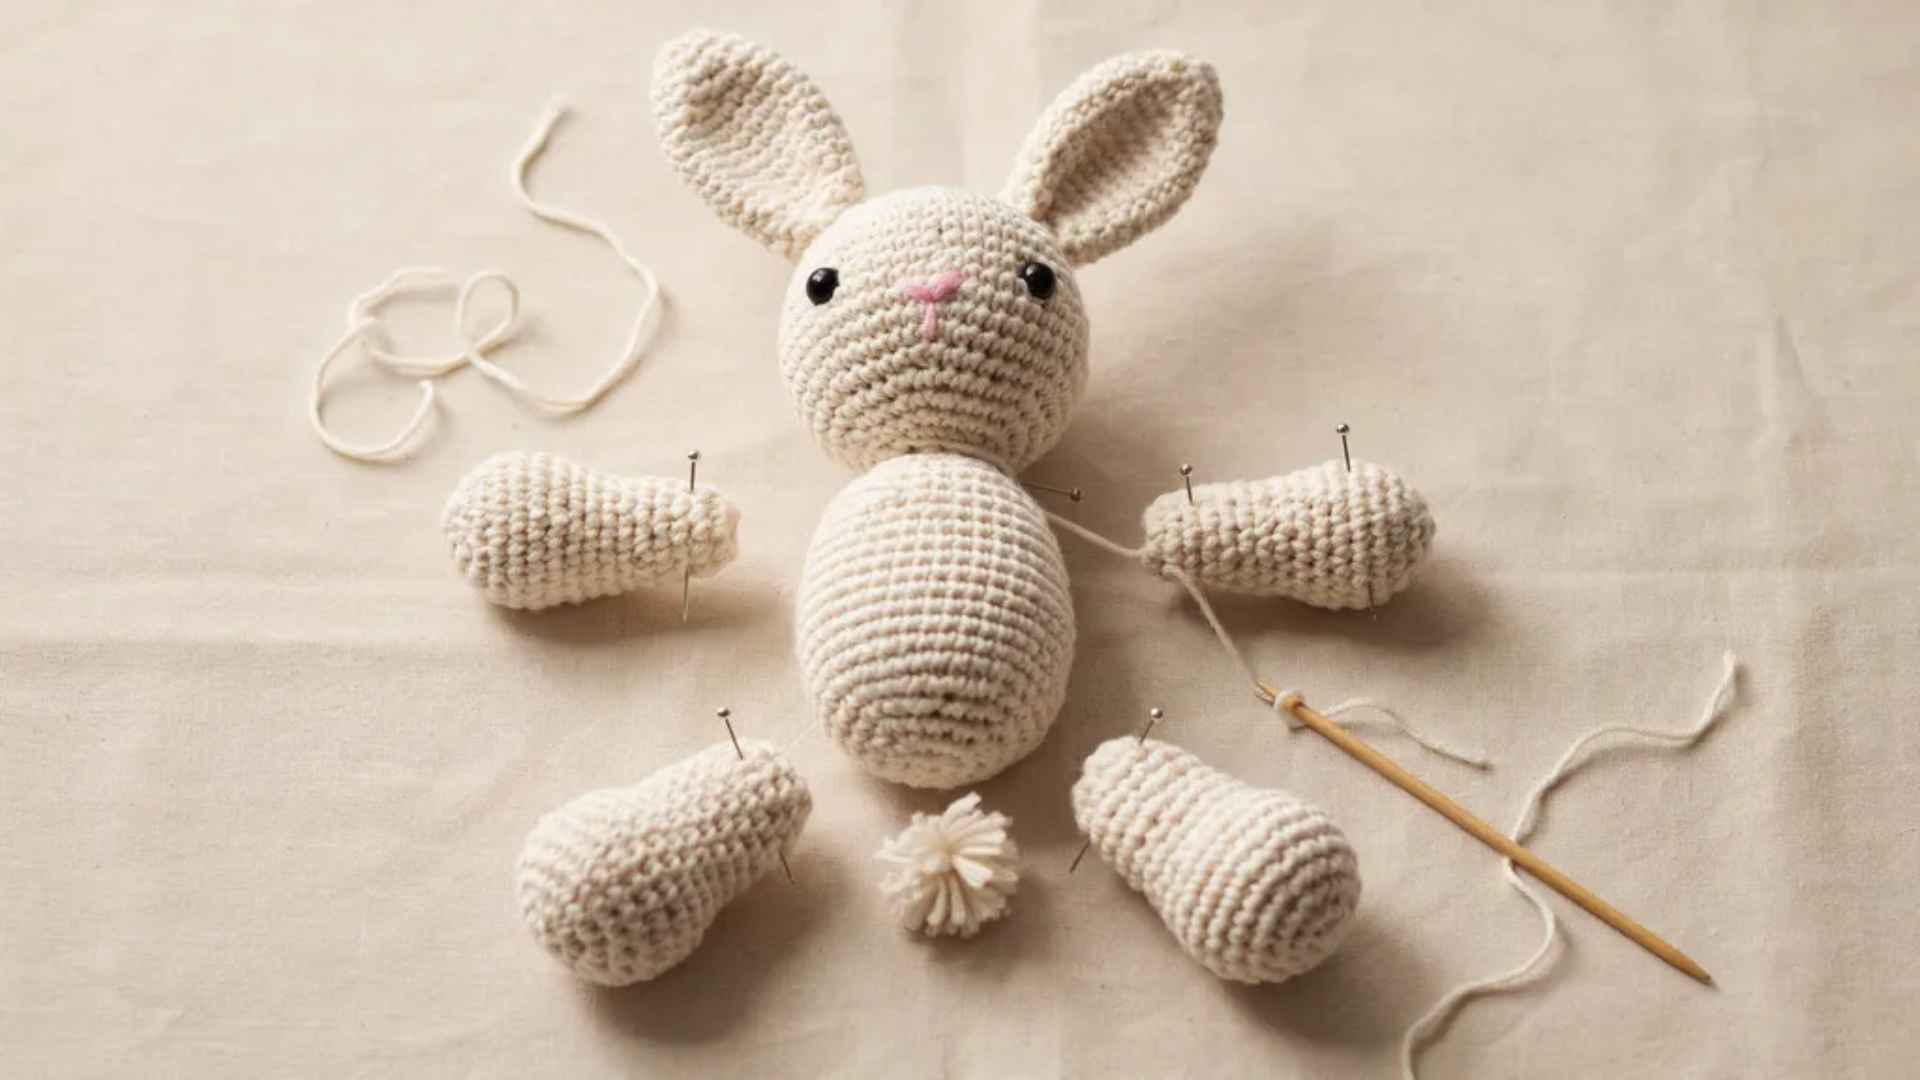
Pin every piece into position before touching the needle. Step back, check for symmetry, then sew each part onto the body using the yarn tail and a whipstitch or mattress stitch. For anything a child will tug on, sew through several times, and knot firmly.
Step 5: Finish the Face and Weave In Ends

Embroider the nose, mouth, and any blush marks last; this is where the animal’s expression comes to life, so take your time.
Then thread every remaining yarn tail through the body in a few directions so it cannot pull back out, and trim close to the surface.
Refer to this video on the Mahum channel for more details.
Some beginner-friendly patterns crochet the head and body as a single continuous piece, eliminating the sewing step entirely.
If you are nervous about assembly, look specifically for patterns labeled “no-sew” or “head-and-body-in-one” for your first attempt.
Stitch Abbreviations Cheat Sheet
Stitch abbreviations are essential for reading crochet patterns easily, helping you understand instructions and complete amigurumi projects correctly.
| Abbreviation | Full Name | What It Does |
|---|---|---|
| ch | Chain | Starting the foundation of most projects |
| sl st | Slip Stitch | Joins rounds or moves yarn without adding stitches |
| sc | Single Crochet | The main stitch used in almost every amigurumi round |
| inc | Increase | Two sc in one stitch makes the piece wider |
| invdec | Invisible Decrease | Reduces stitches cleanly with no visible gap outside |
| MR / ML | Magic Ring / Magic Loop | The starting circle that pulls completely closed |
| BLO / FLO | Back / Front Loop Only | Works one loop only, creates texture or a shaping ridge |
| rnd | Round | One complete pass around the piece |
| rep | Repeat | Repeat the following instruction as stated |
| hdc / dc | Half / Full Double Crochet | Taller stitches, used for manes, wings, and soft shaping |
| sk | Skip | Skip the next stitch without working into it |
| FO | Fasten Off | Cut the yarn and secure the final loop to finish |
Mastering these abbreviations makes it simple to follow crochet patterns, improves accuracy, and helps you confidently create finished stuffed animals.
Crochet Ideas: Beginner Level
Beginner crochet ideas are simple, quick projects that help you learn basic stitches while building confidence and creative skills.
They also give you fast results, keeping motivation high as you improve your technique step by step.
1. Octopus (20–40 min)
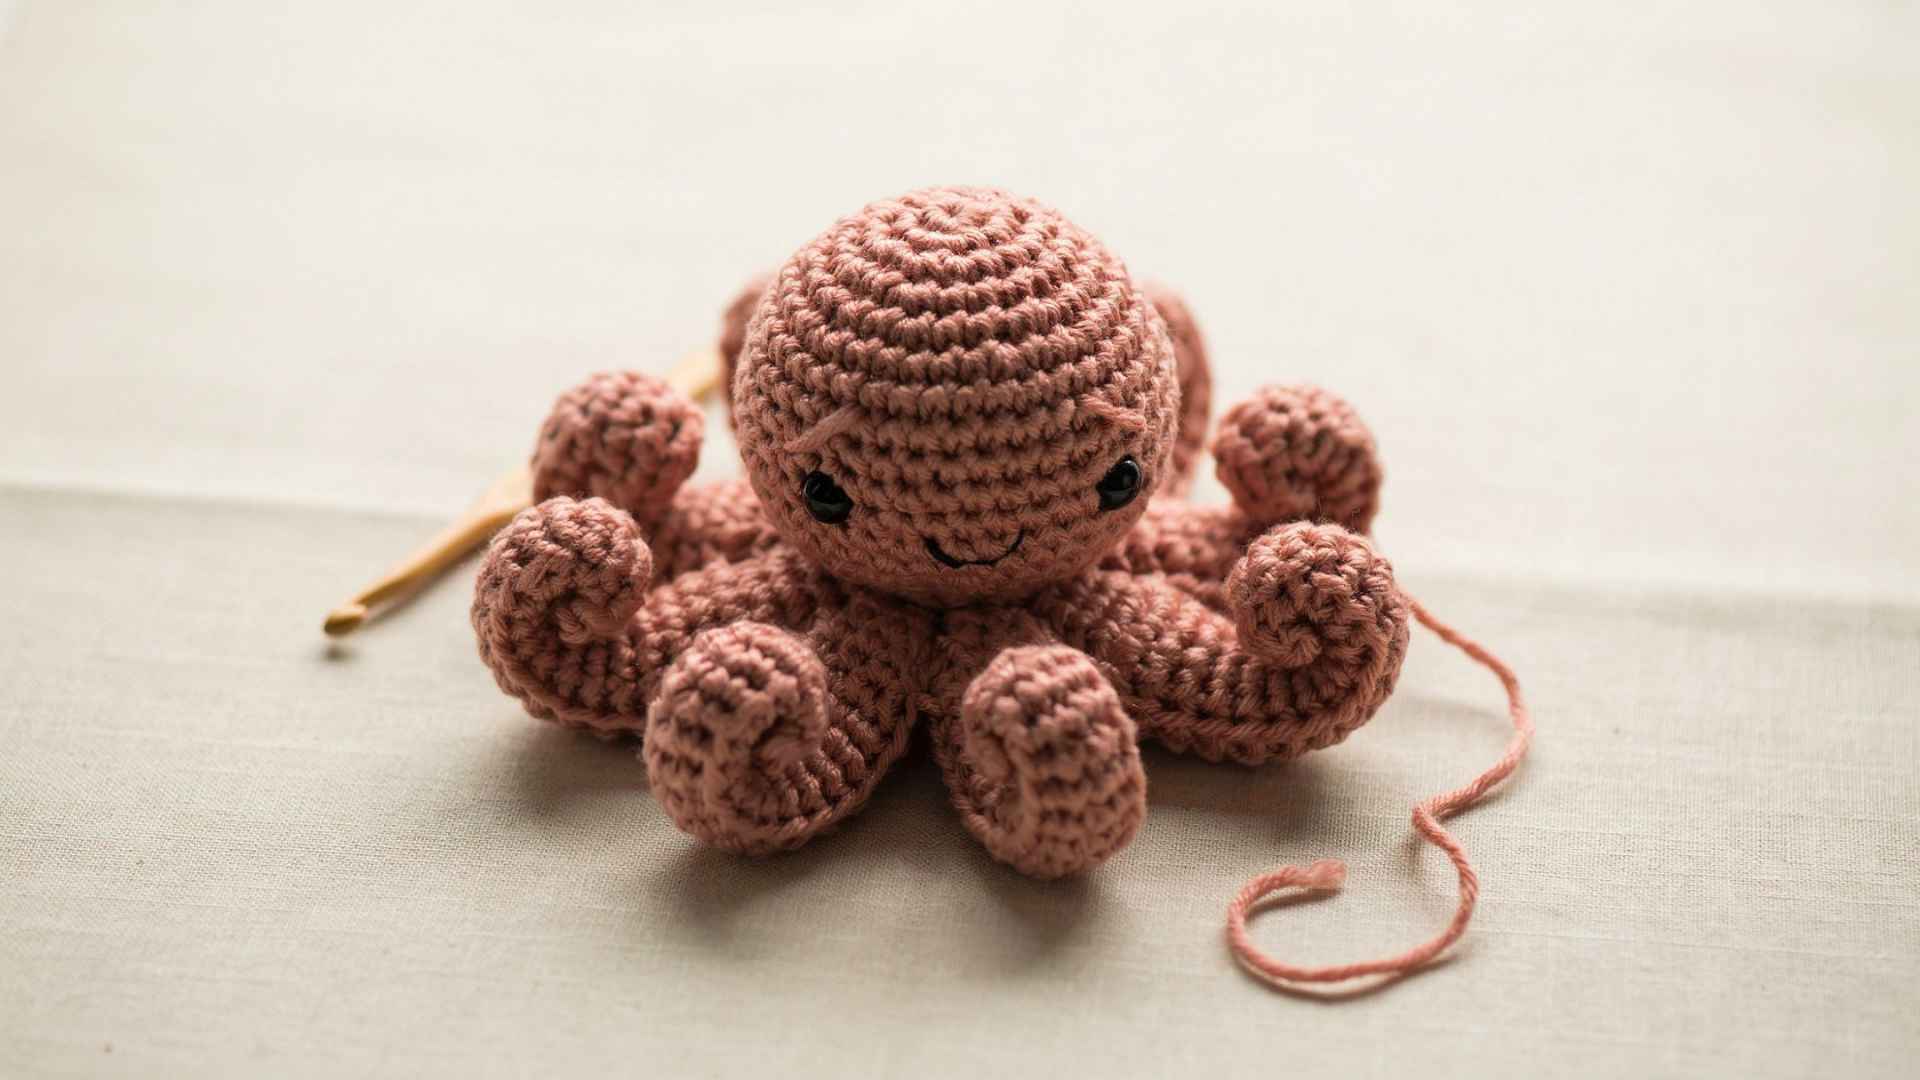
No separate head is needed; the body and tentacles are worked as a single continuous shape, which eliminates the most stressful part of amigurumi entirely.
Tension mistakes blend in easily, and the whole thing comes together faster than you expect. A good sit-down evening is all the time this one asks for.
2. Whale (30–60 min)
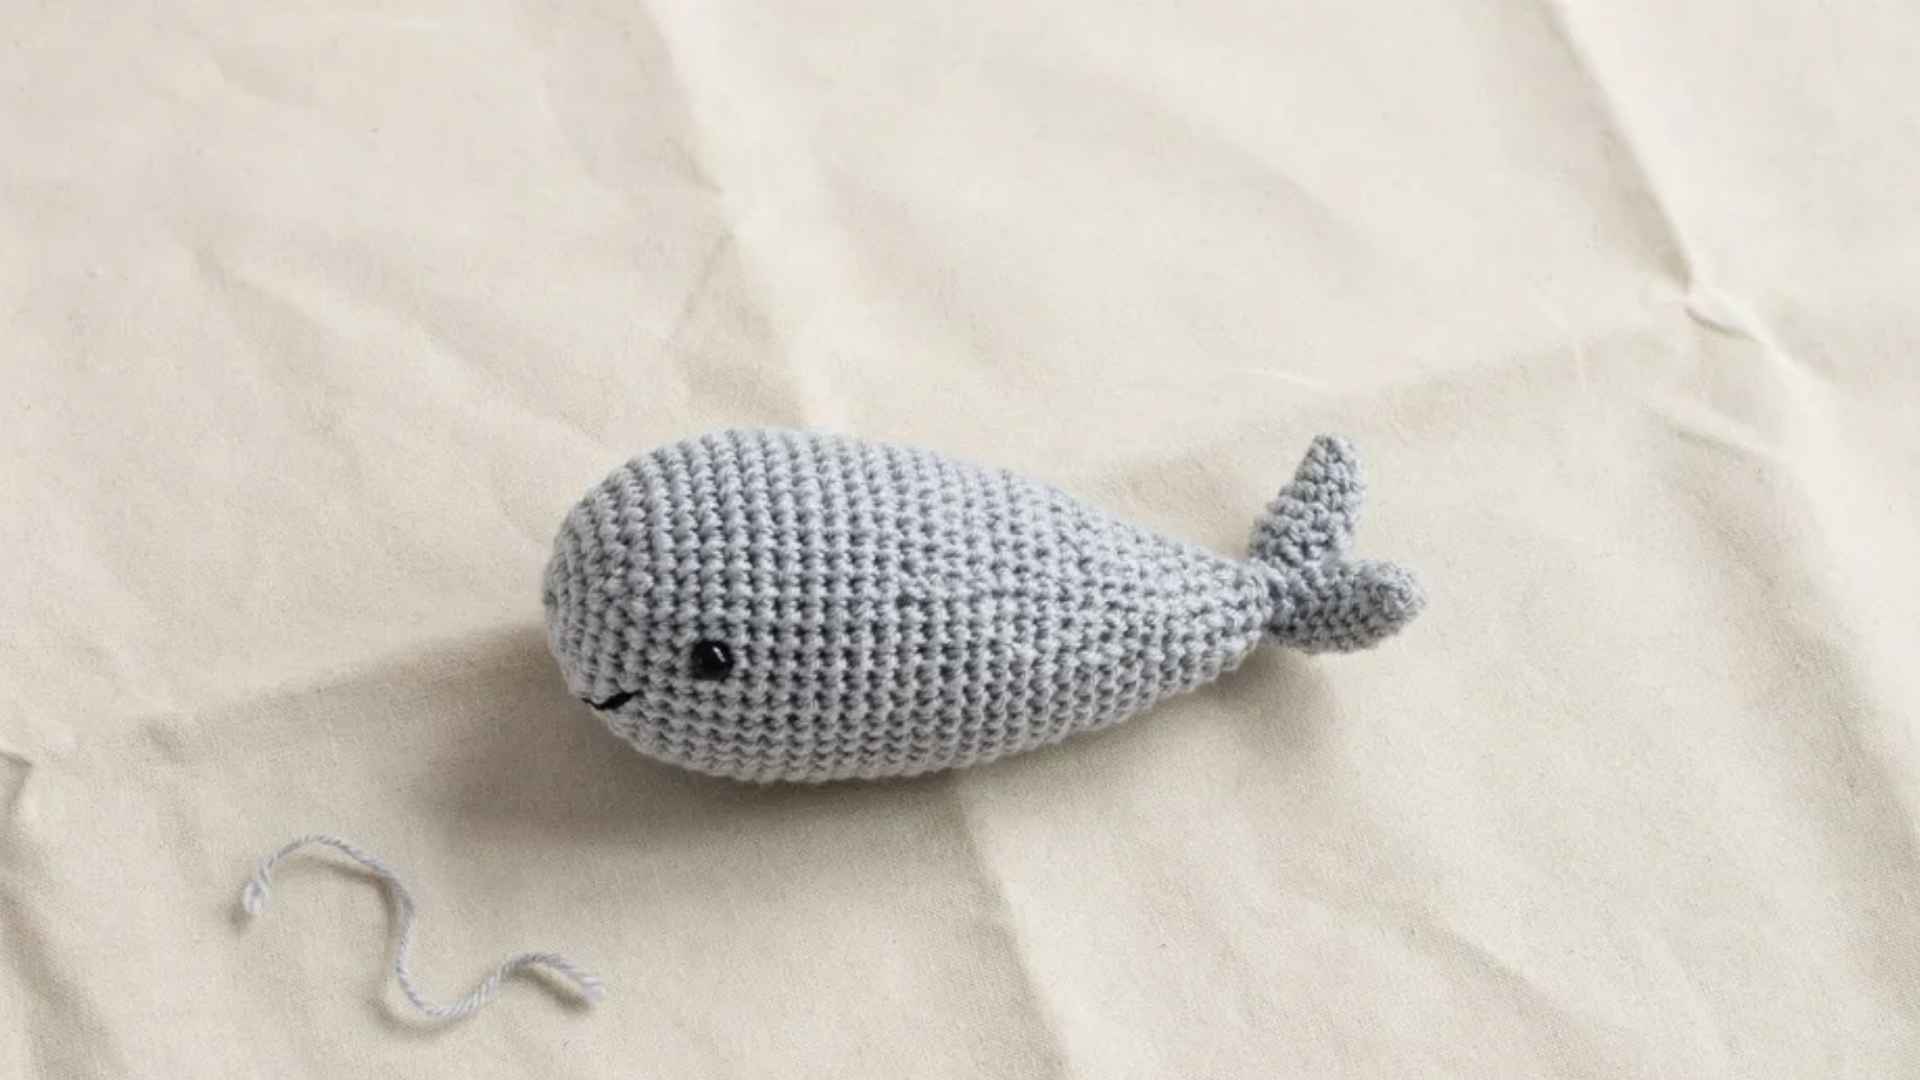
The oval body is one of the simplest shapes in crochet, and many whale patterns skip the sewing step completely.
It is the kind of project that feels almost too easy, until you are holding a finished stuffed animal and wondering why you waited so long to start.
3. Penguin (1–2 hrs)
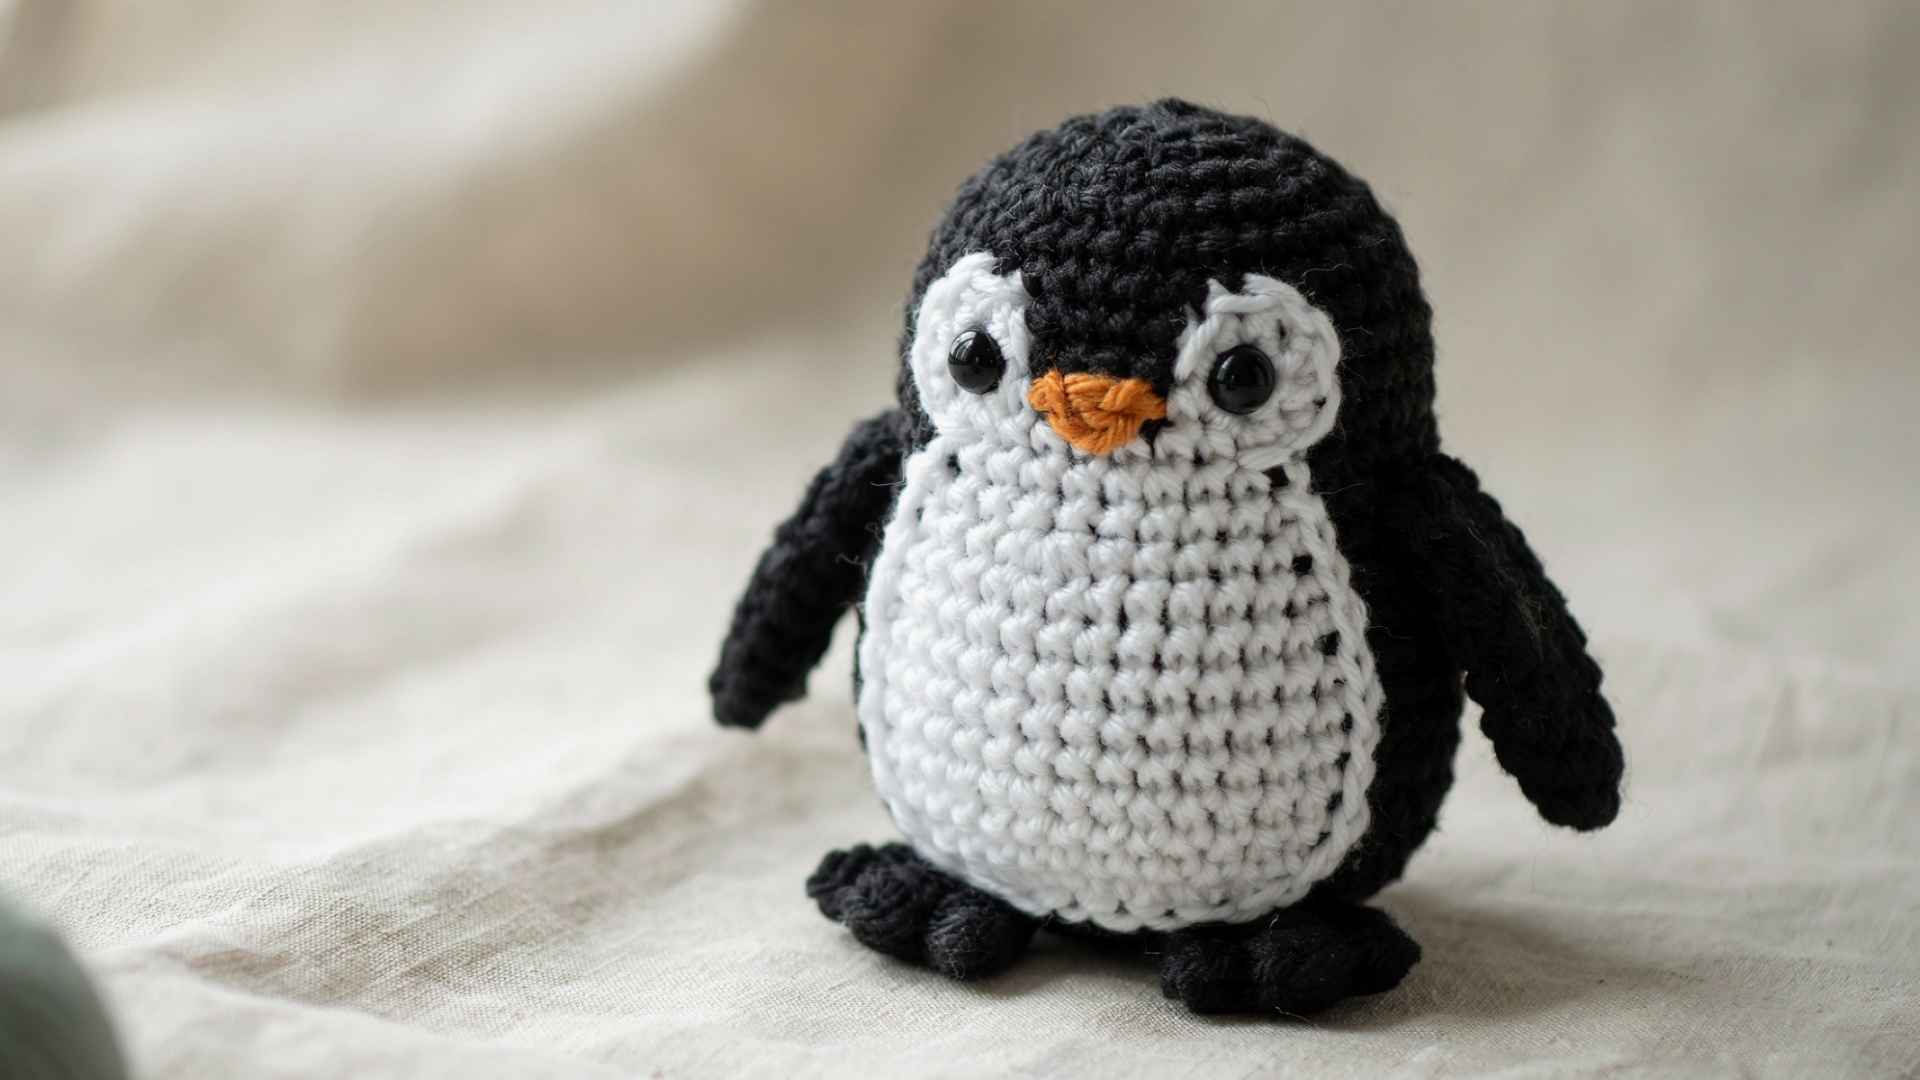
Two colors, minimal sewing, and a forgiving round body make this a strong second project after the octopus.
The construction teaches you how head-and-body proportions actually work in amigurumi without adding anything complicated. Block out an afternoon, and you will have a penguin sitting on your shelf before dinner.
4. Bunny (2–3 hrs)

This is where ear attachment enters the picture for the first time, and it is a skill that transfers directly to almost every animal you make after this.
The shape is classic, and the instructions are easy to find. Plan for a slow weekend morning and a second cup of coffee.
Start with the octopus, finish it in one sitting, and you will understand why beginners get hooked so fast. Beginner crochet ideas are just the first step in your creative journey, helping you build skills you’ll use in every project ahead.
To make an octopus or any crochet animal, refer to the video by VivCrochet for clear step-by-step instructions.
Crochet Ideas For Intermediate Level
Once the magic loop feels automatic, intermediate projects push you into multi-piece construction and more expressive animals.
Intermediate crochet ideas introduce more shaping, colorwork, and multi-piece projects that help you refine your skills and improve your stitches control.
5. Teddy Bear (4–6 hrs)
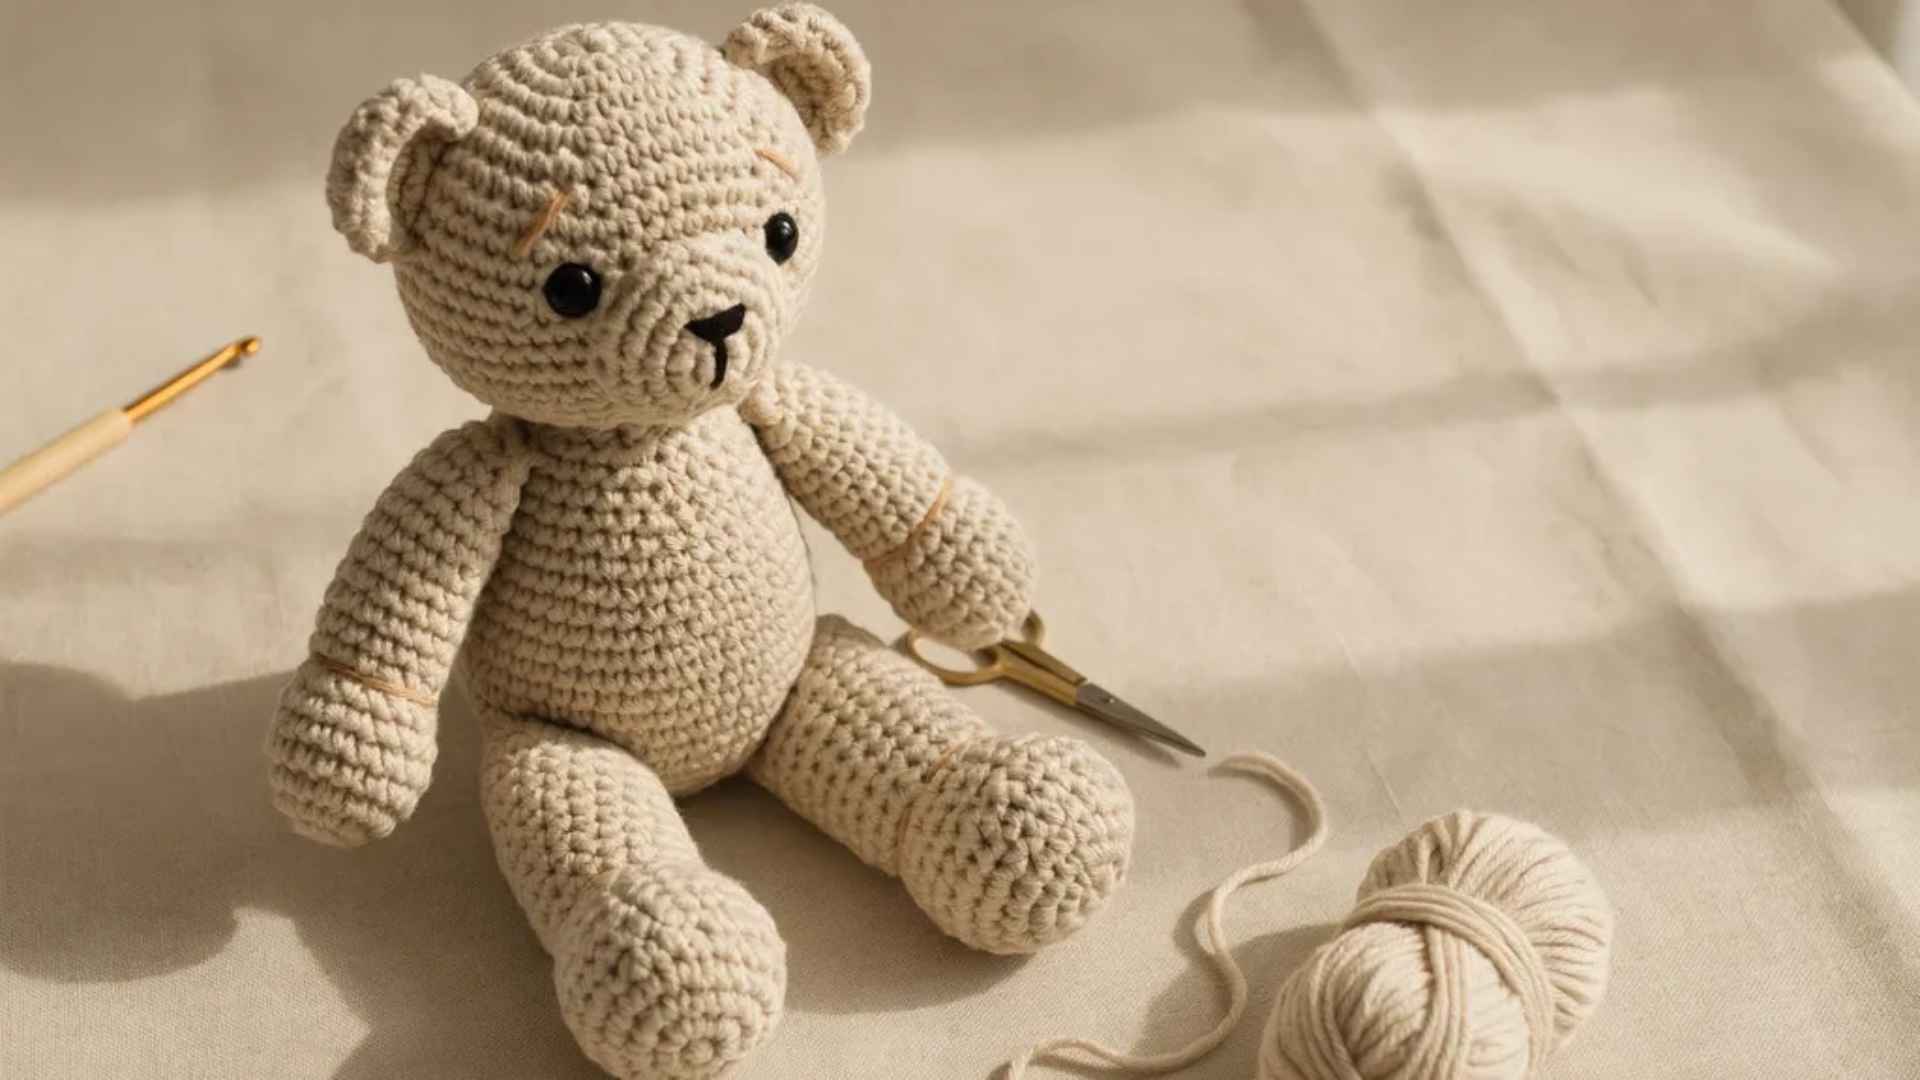
Every fundamental assembly skill lands in this one project: a separate head, a body, four limbs, and two ears all need to be sewn together in the right order.
It is the most complete workout the intermediate level offers. Set aside a full weekend and do not rush the sewing stage.
6. Fox (4–7 hrs)
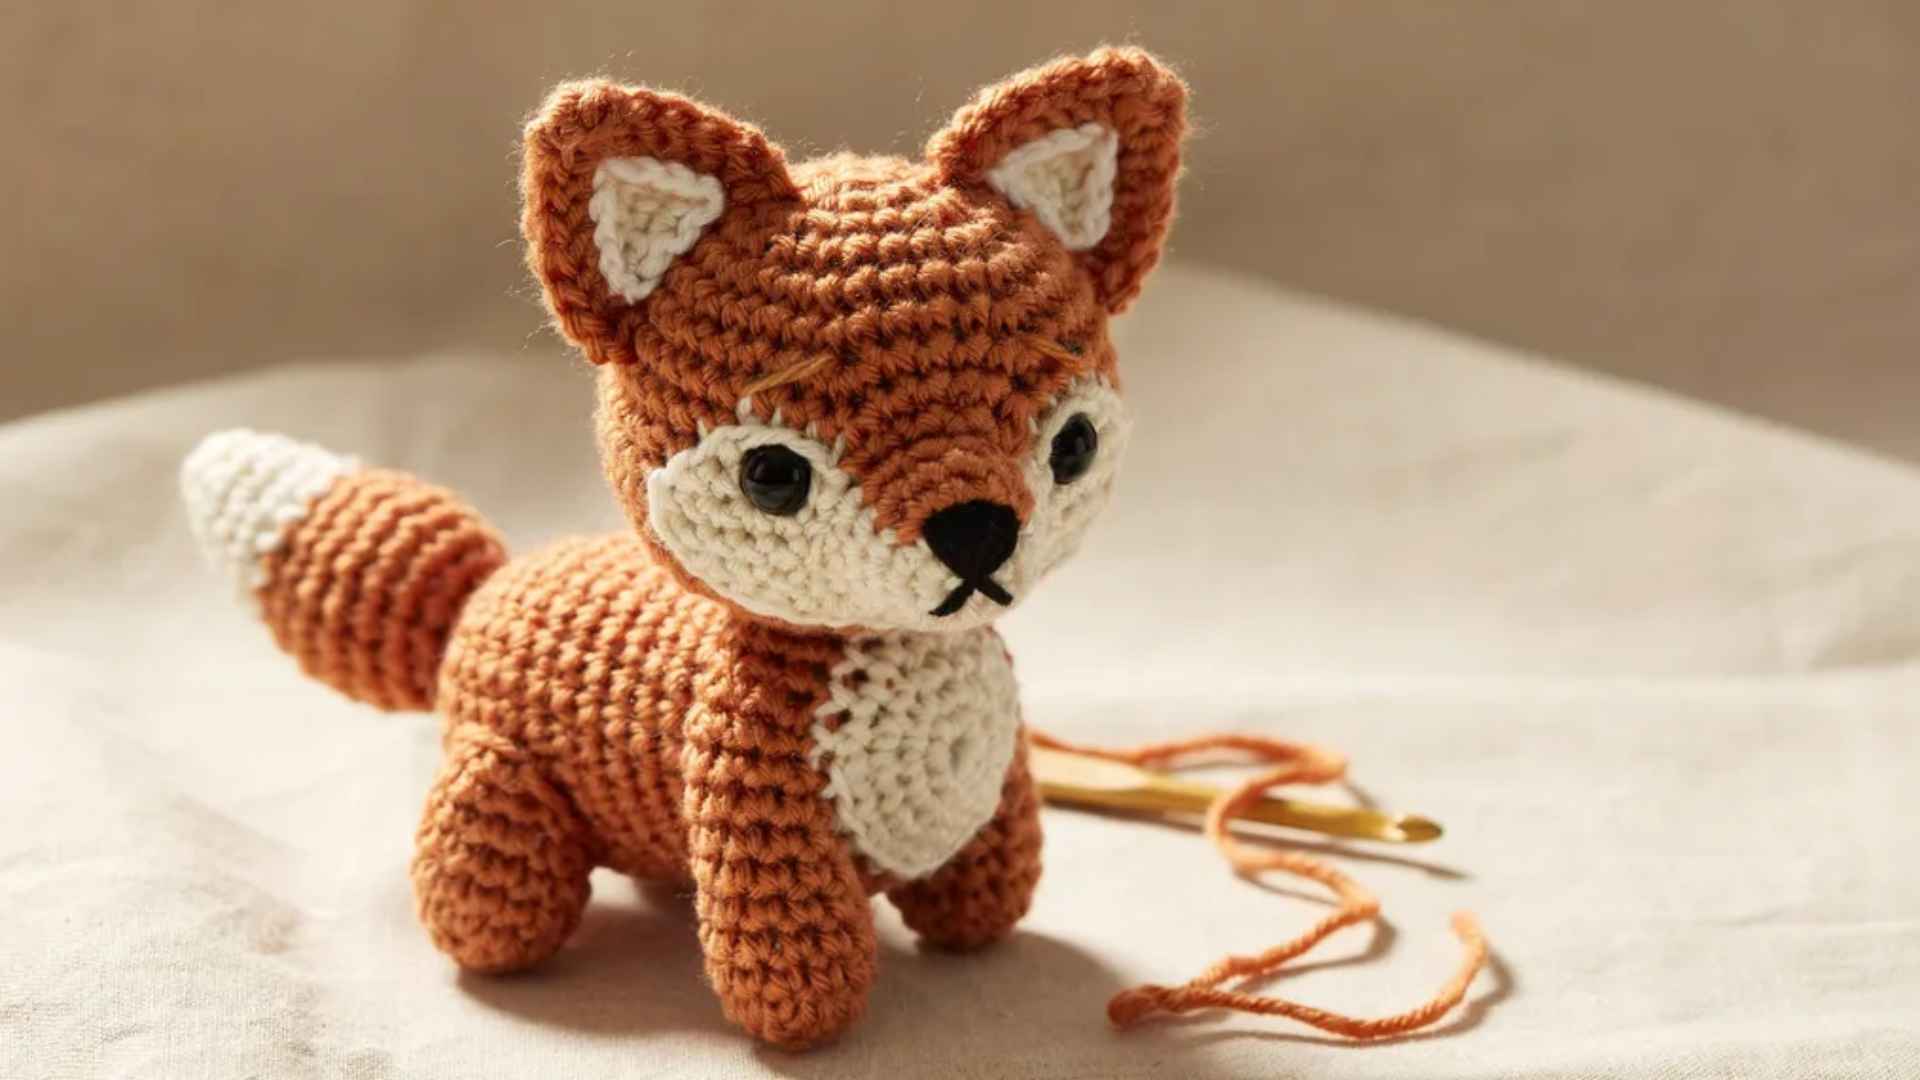
The pointed muzzle requires shaping that you have not done at the beginner level, and the multi-color face requires cleanly managing two yarn strands.
Both skills come up constantly in more complex animals, so this project is genuinely useful preparation. Expect a few focused evenings before this one is sitting on your shelf.
7. Unicorn (5–8 hrs)
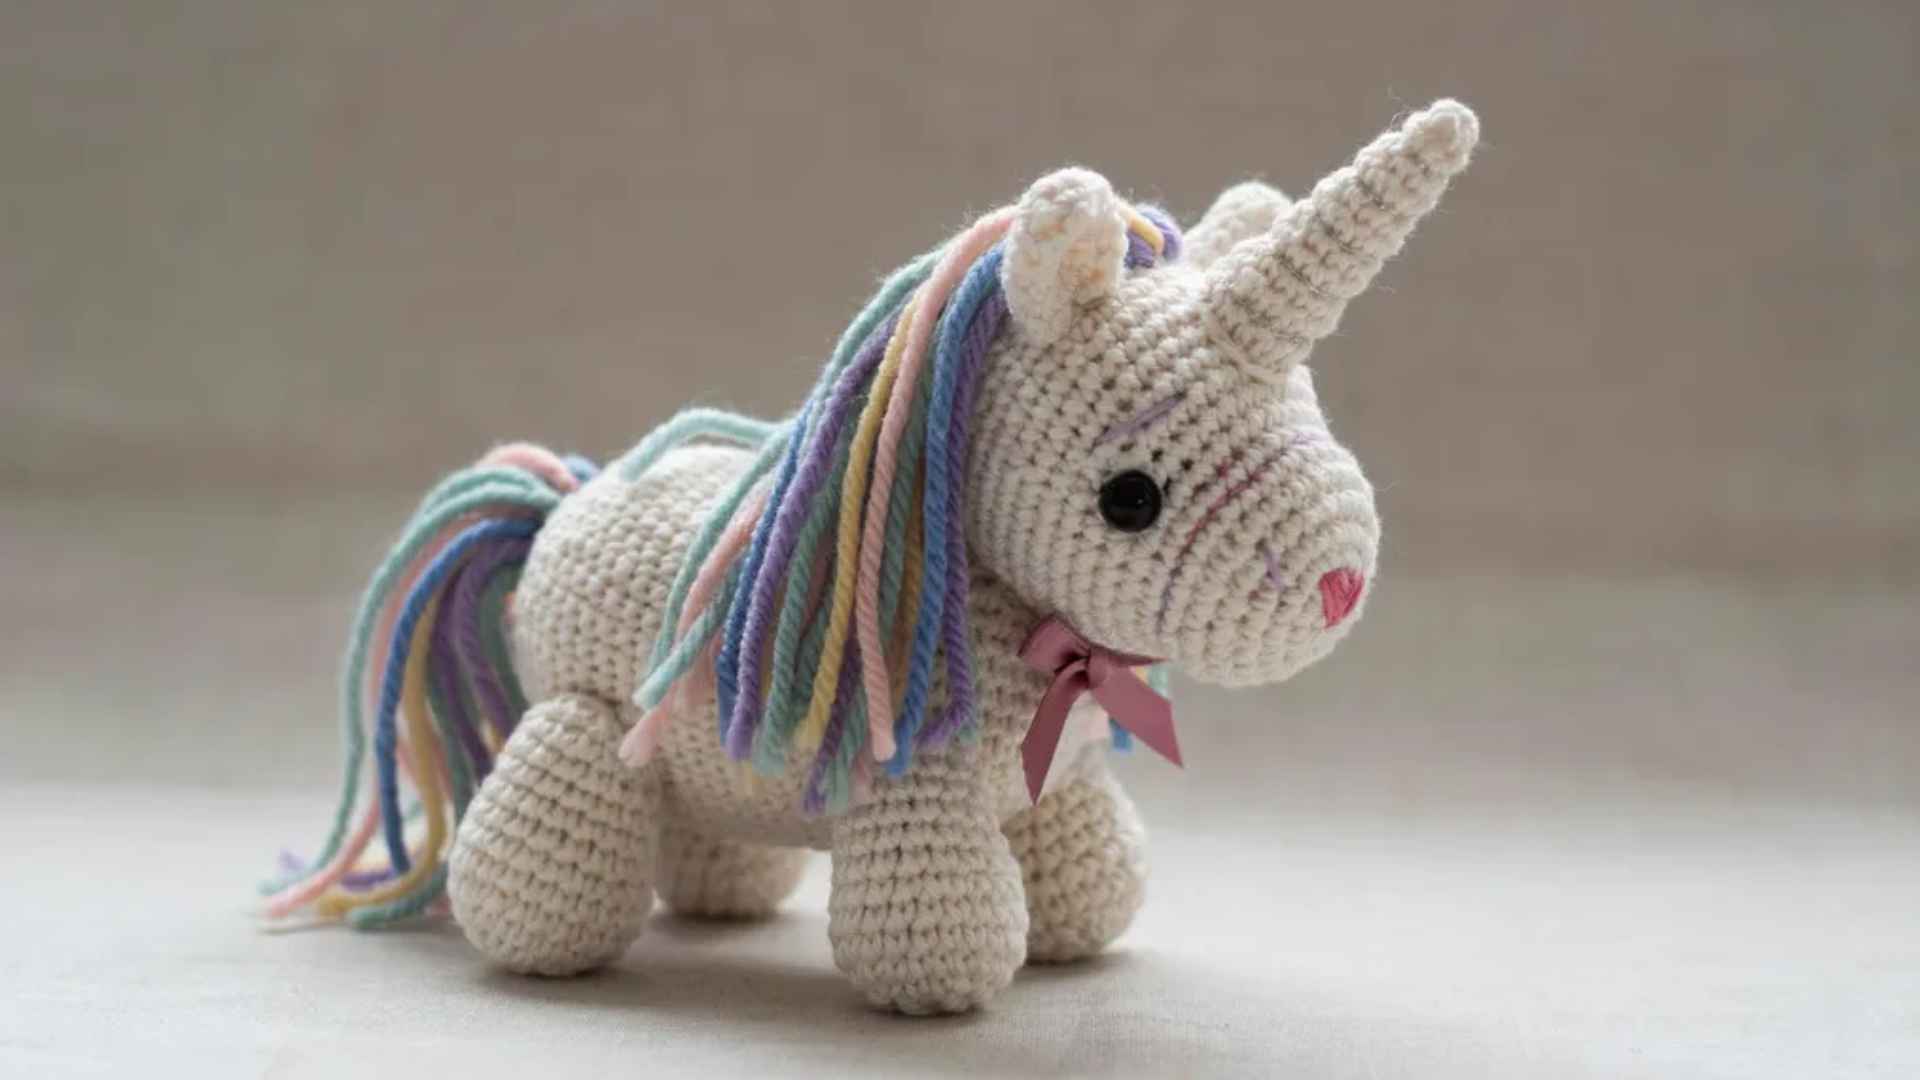
Horn construction and a flowing yarn mane bring two new techniques into the same project, which sounds like a lot, but the pattern flow keeps them manageable.
The finished animal is detailed enough to impress people genuinely. This is a two- to three-evening project, depending on how quickly you work.
8. Sloth (5–8 hrs)
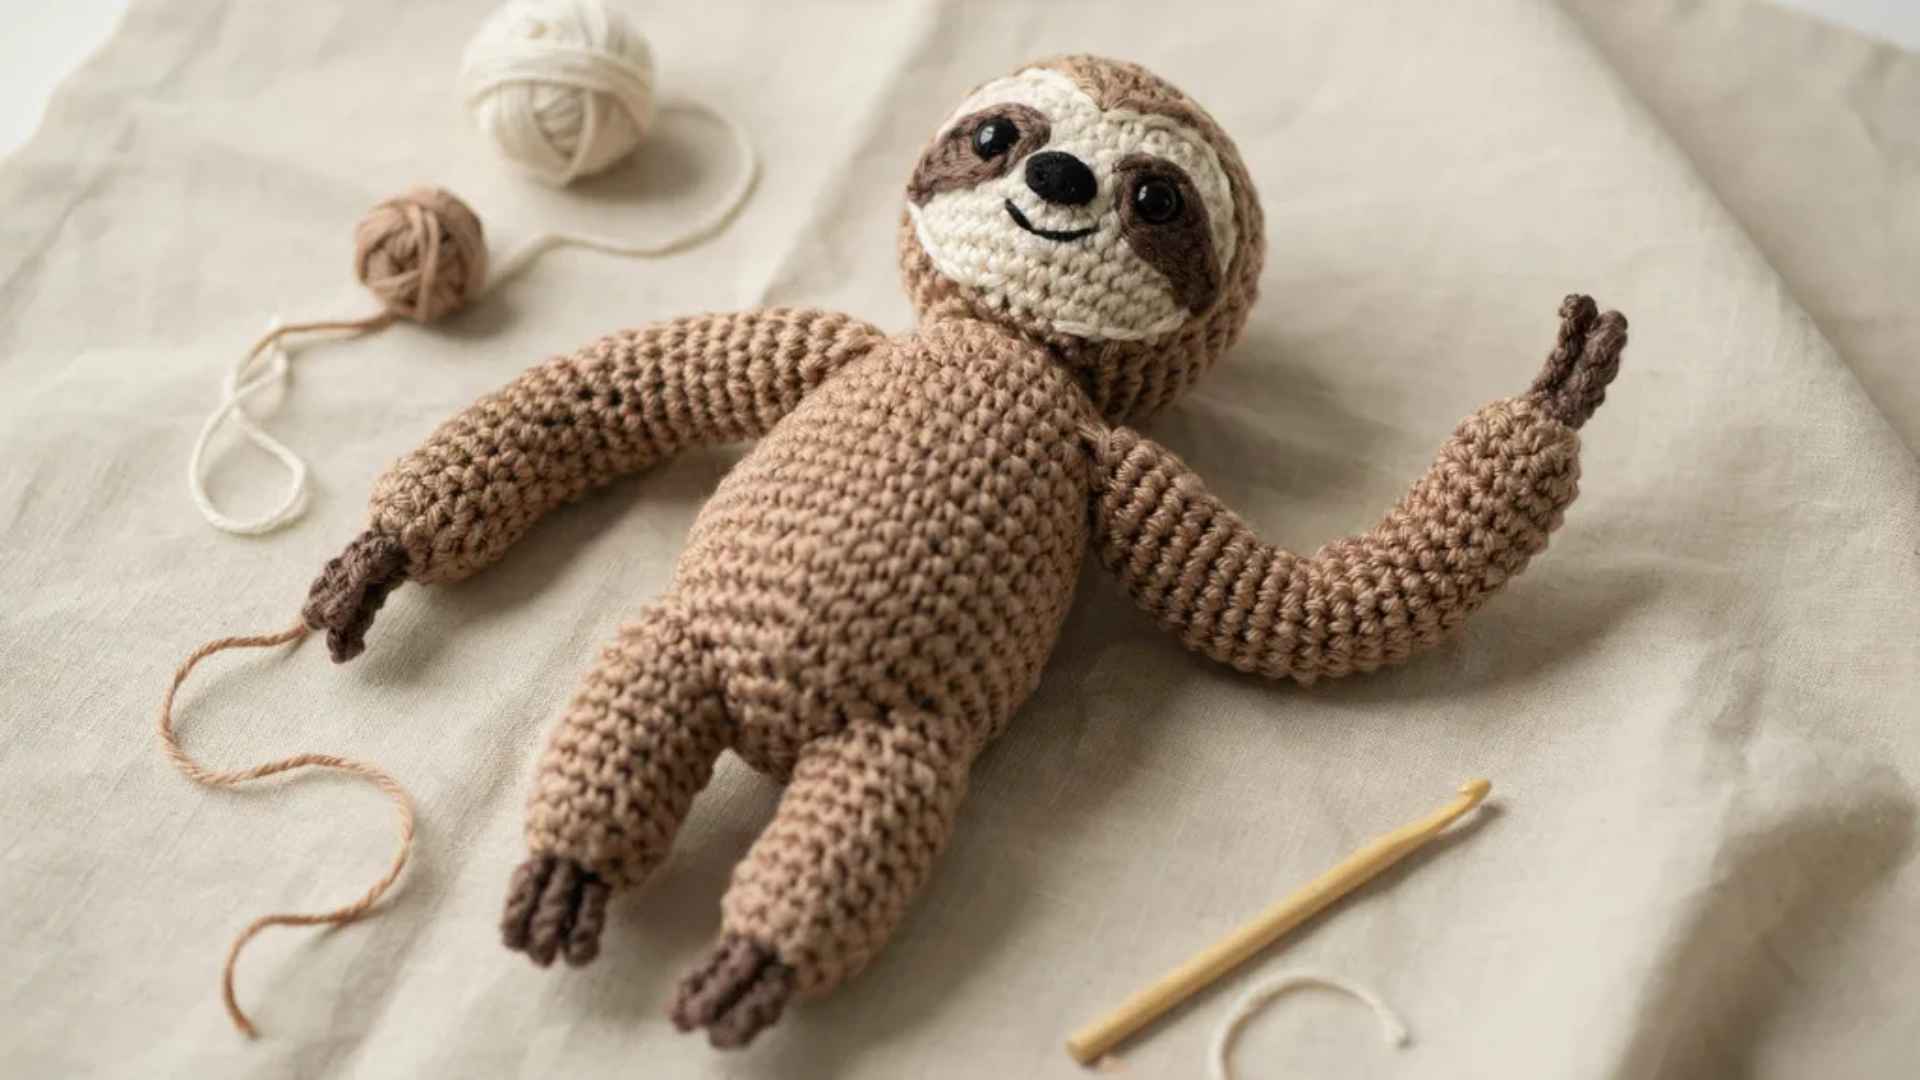
Long limbs, a relaxed posture, and a brushed or textured yarn finish make this noticeably more involved than anything at the beginner level.
The limb shaping alone introduces a kind of freeform thinking that most beginner patterns never require. Budget a full weekend and enjoy the slower, more deliberate pace it demands.
Pick whichever animal appeals most; the skills you build here apply directly to everything at the advanced level.
Intermediate projects help you move beyond the basics, giving you the confidence to handle more detailed patterns and complex crochet designs with ease.
To learn to crochet a stuffed animal, refer to this video by B. Hooked Crochet.
Crochet Ideas For Advanced Level
Advanced amigurumi rewards patience; the finished animals look genuinely professional and are worth every extra session they take.
Advanced crochet ideas focus on complex shaping, detailed assembly, and creative techniques that challenge your precision and patience in every stitch.
9. Realistic Cat or Dog (8–12 hrs)
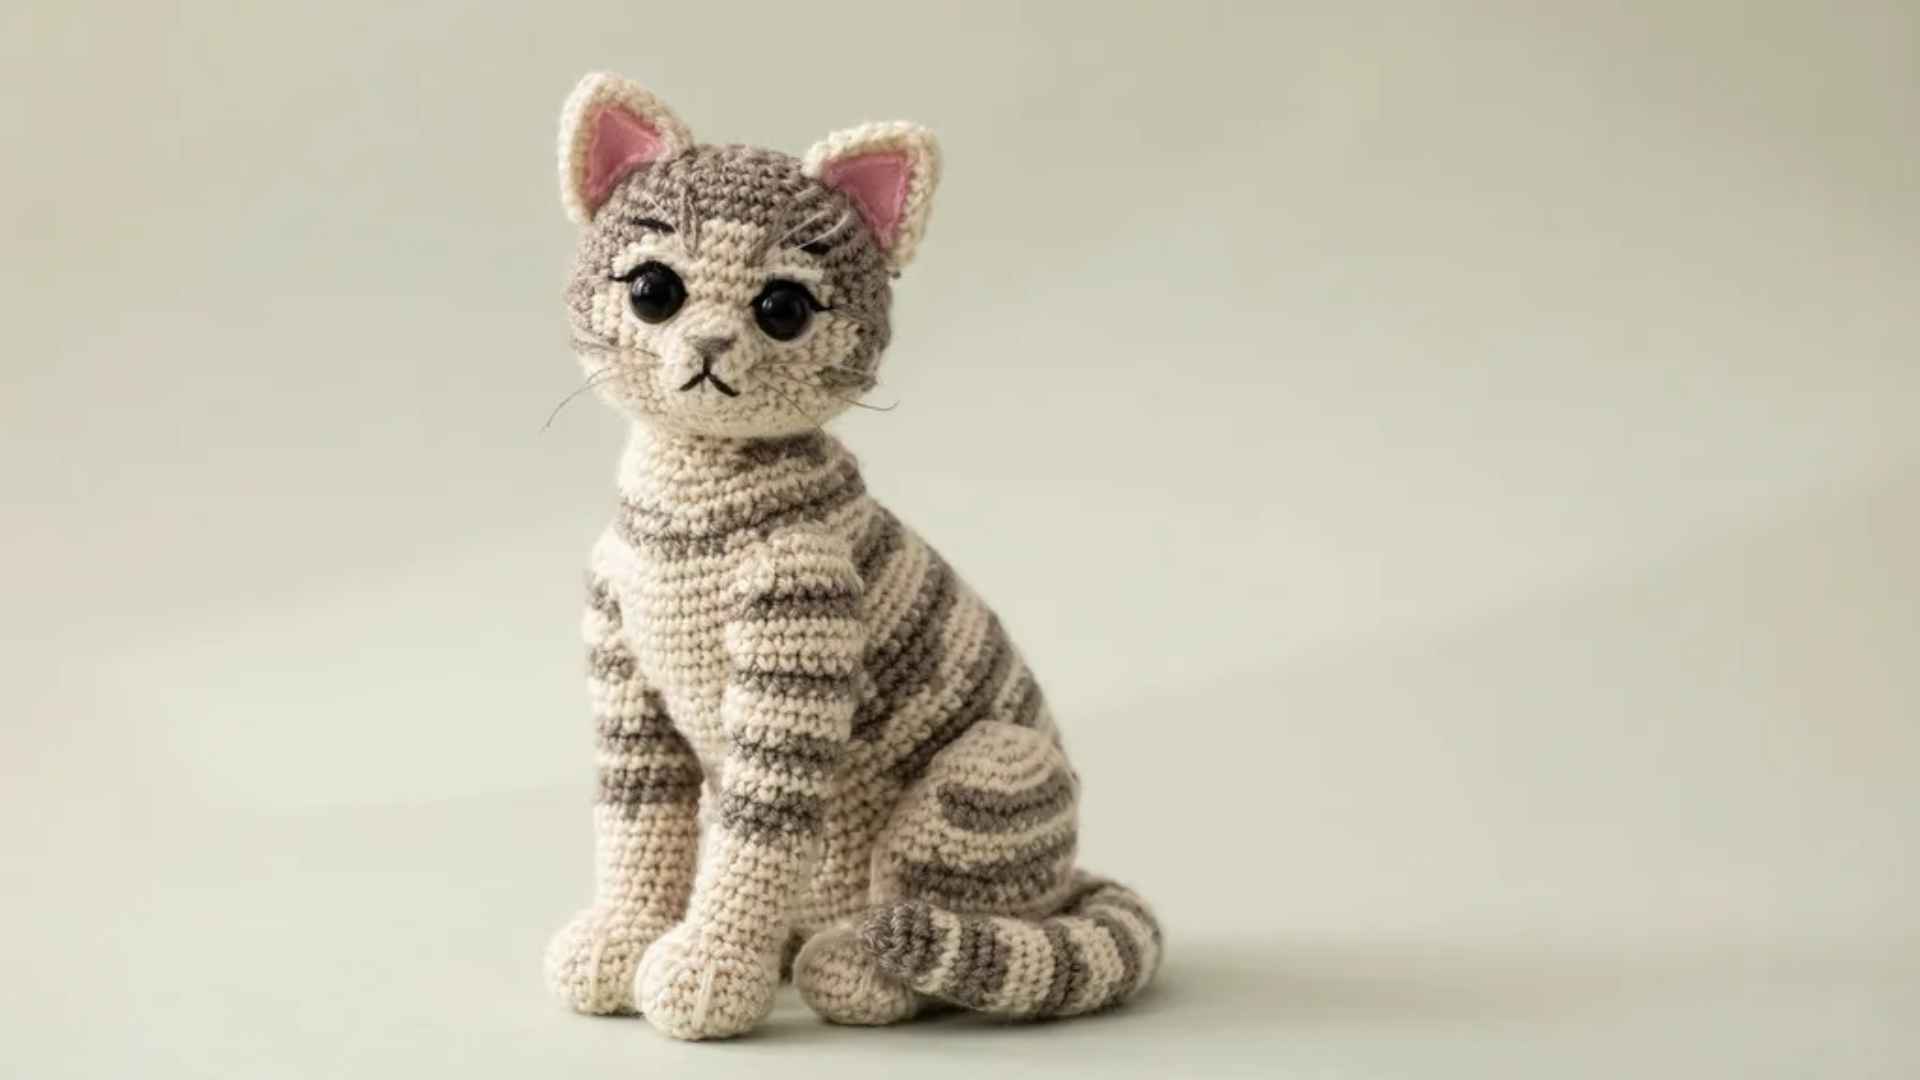
Proportional shaping at this level means every increase and decrease placement is deliberate, and the facial expression depends entirely on stitch precision.
There is very little room for guesswork. This project requires multiple focused sessions over several days, and it shows in the finished result.
10. Fluffy Bear (Brush-Out Technique: 8–15 hrs )
After crocheting with a natural-fiber blend yarn, a stiff slicker brush is used to raise the fibers into a genuinely plush, soft coat.
The crocheting itself is not harder than intermediate work; the technique that follows is what earns this its advanced label. Clear your schedule for a full weekend at minimum.
11. Dragon (10–20 hrs)
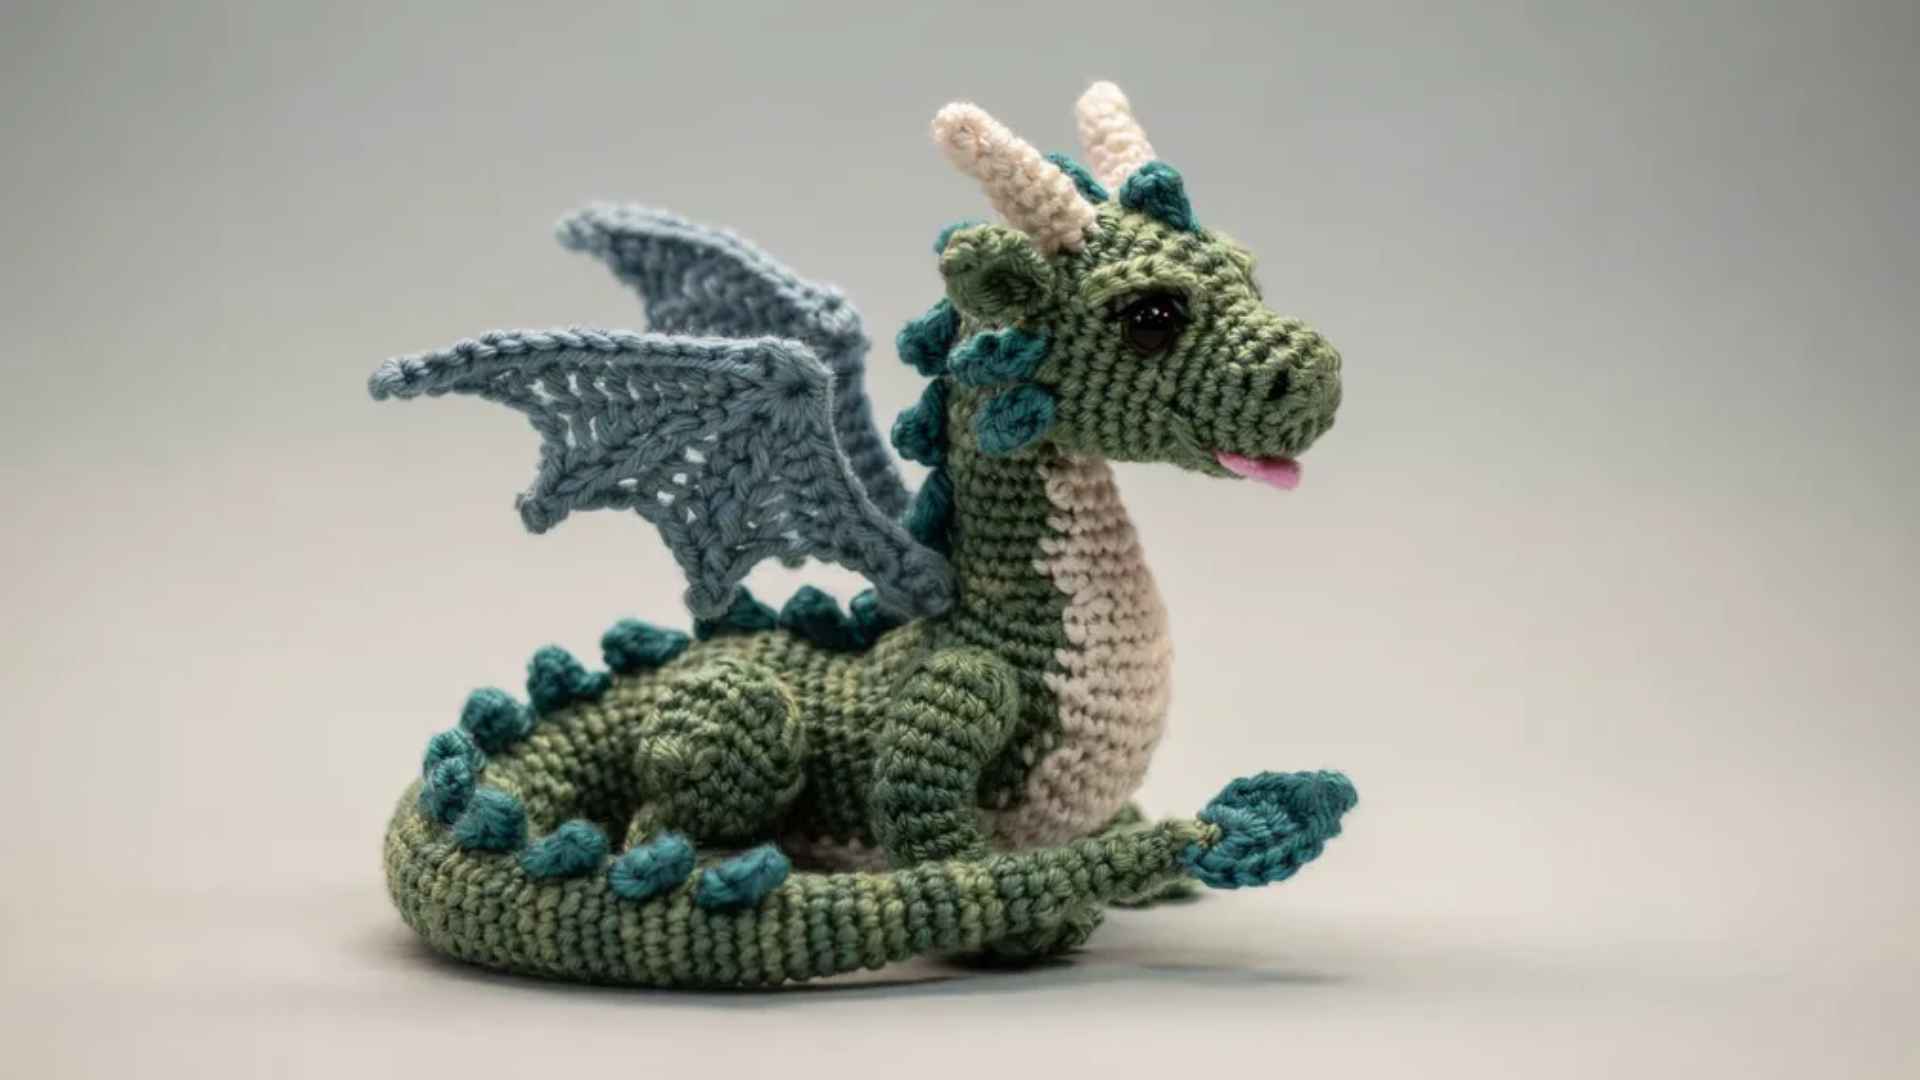
Multiple color changes, wing construction, and fantasy shaping give you real creative freedom, but that freedom comes with a responsibility to keep proportions consistent across many separate pieces.
It is the kind of project that lives on your desk in stages for a week before it finally comes together.
12. Miniature Animal Set ( time varies)
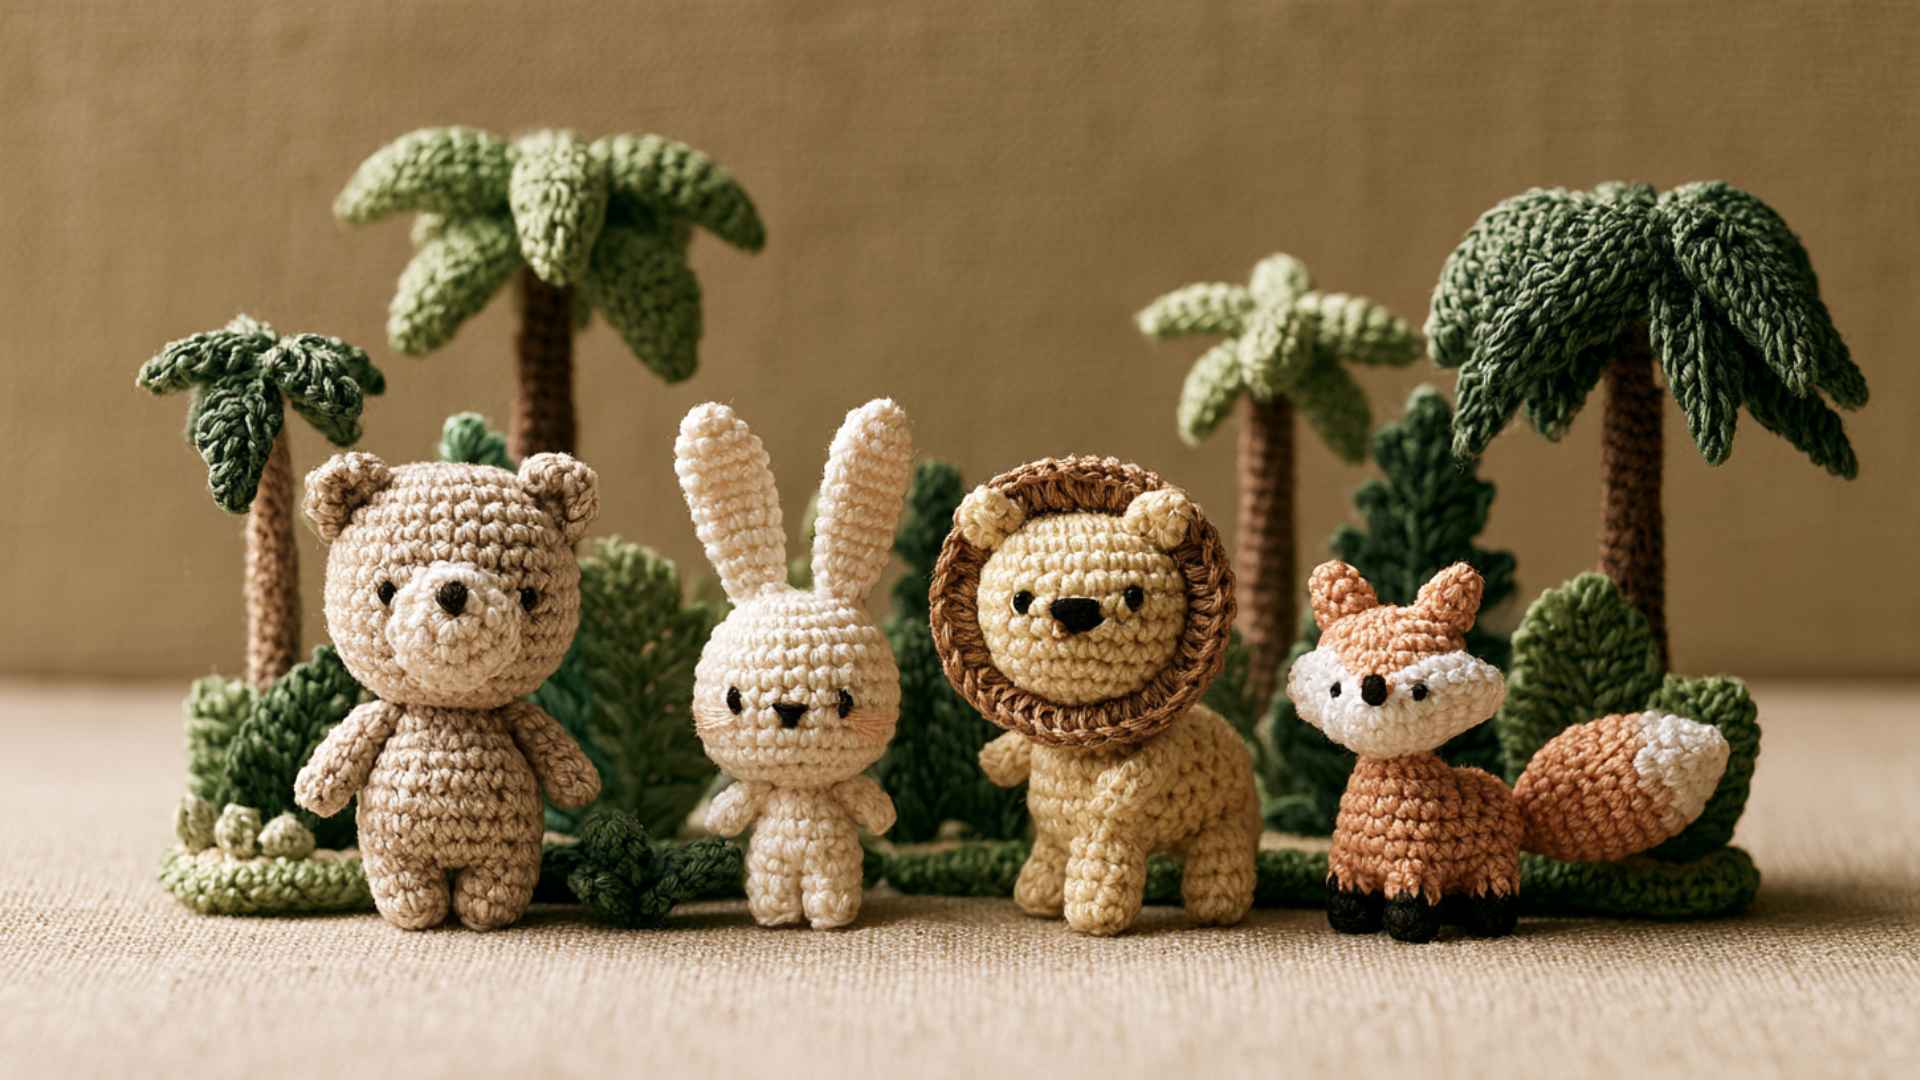
Working at a very small scale means tight tension, fine yarn, and almost no margin for error; mistakes that disappear on a larger piece are impossible to hide here.
Each tiny animal might take only a couple of hours, but completing a full matching set is a days-long commitment worth every stitch.
At this level, the process slows down considerably, and that is exactly the point. Advanced projects push your skills to a professional level, helping you create highly detailed pieces that reflect mastery and creativity in crochet.
Refer to the video to learn to crochet at an advanced level by CrochetByGenna
Common Mistakes to Avoid
Every beginner makes these; knowing them ahead of time saves you from having to unpick hours of work.
- Using the hook size on the yarn label: Loose stitches create gaps where stuffing becomes visible. Always use a smaller hook for tighter, cleaner amigurumi structure.
- Skipping the stitch marker: Without a stitch marker, you easily lose track of rounds, leading to uneven shaping and incorrect stitch counts throughout the project.
- Adding safety eyes too late: Placement becomes difficult when the opening is small. Insert eyes early to ensure secure and proper positioning.
- Stuffing all at once at the end: Adding stuffing at the end creates lumps and an uneven shape. Gradually stuff during decrease rounds for a smooth structure.
- Overstuffing the finished animal: Too much stuffing stretches stitches and permanently distorts shape. Stop when firm but still soft and flexible.
None of these mistakes is difficult to avoid once you know to watch for them; they catch beginners off guard the first time.
Bottom Line
Learning how to crochet a stuffed animal often feels intimidating at first, but it quickly becomes manageable once you start practicing. The magic loop may seem tricky, yet it becomes simple with repetition.
Begin with small, easy projects, such as a whale or an octopus, to build confidence.
Watch tutorials before trying each stitch, and count every round carefully. Always use a stitch marker to stay on track.
Mistakes like uneven shapes or loose stitches are normal in the beginning and part of the learning process. With each project, your skills improve, and your future stuffed animals will look noticeably better.
Frequently Asked Questions
How Long Does It Take to Finish a Stuffed Animal?
Small beginner projects take 20–60 minutes, medium ones take 3–6 hours, and complex designs may require several days to complete.
What Is the Best Yarn for A First Stuffed Animal?
Worsted-weight acrylic is the safest starting choice. It is widely available, inexpensive, machine washable, comes in a wide range of colors, and holds its shape well.
Are Safety Eyes Safe to Use for Babies and Toddlers?
Not for children under three years old. Despite the name, plastic snap-in safety eyes can come loose with determined tugging and pose a choking hazard.
Can I Make the Animal Bigger or Smaller than The Pattern Says?
Easily. Use thicker yarn and a proportionally larger hook for a larger animal, or thinner yarn and a smaller hook for a miniature version.