
I still remember how satisfying it felt to turn a few strands of embroidery floss into something colorful and wearable.
Friendship bracelets have been a favorite craft for generations because they are simple, creative, and full of personality. With so many friendship bracelet patterns available today, it’s easy to find designs that match your skill level and style.
From basic stripes to detailed geometric shapes, there’s always a new pattern to try. All you need are a few supplies, some patience, and a pattern that catches your eye.
Before long, you’ll have a handmade bracelet ready to wear or share.
Why Friendship Bracelet Patterns Are So Popular
Friendship bracelet patterns remain popular because they are easy to make, affordable, and enjoyable for people of all ages. Most designs require only a few basic supplies, making them a budget-friendly craft that anyone can try.
They are also a popular choice for summer activities, camps, and creative afternoons with friends.
Many people enjoy making a string bracelet as a thoughtful handmade gift that feels more personal than something bought from a store.
Another reason for their popularity is the endless variety of colors and designs available. Simple patterns work well for beginners, while more detailed designs give experienced makers plenty of new challenges to enjoy.
How to Make Friendship Bracelets?
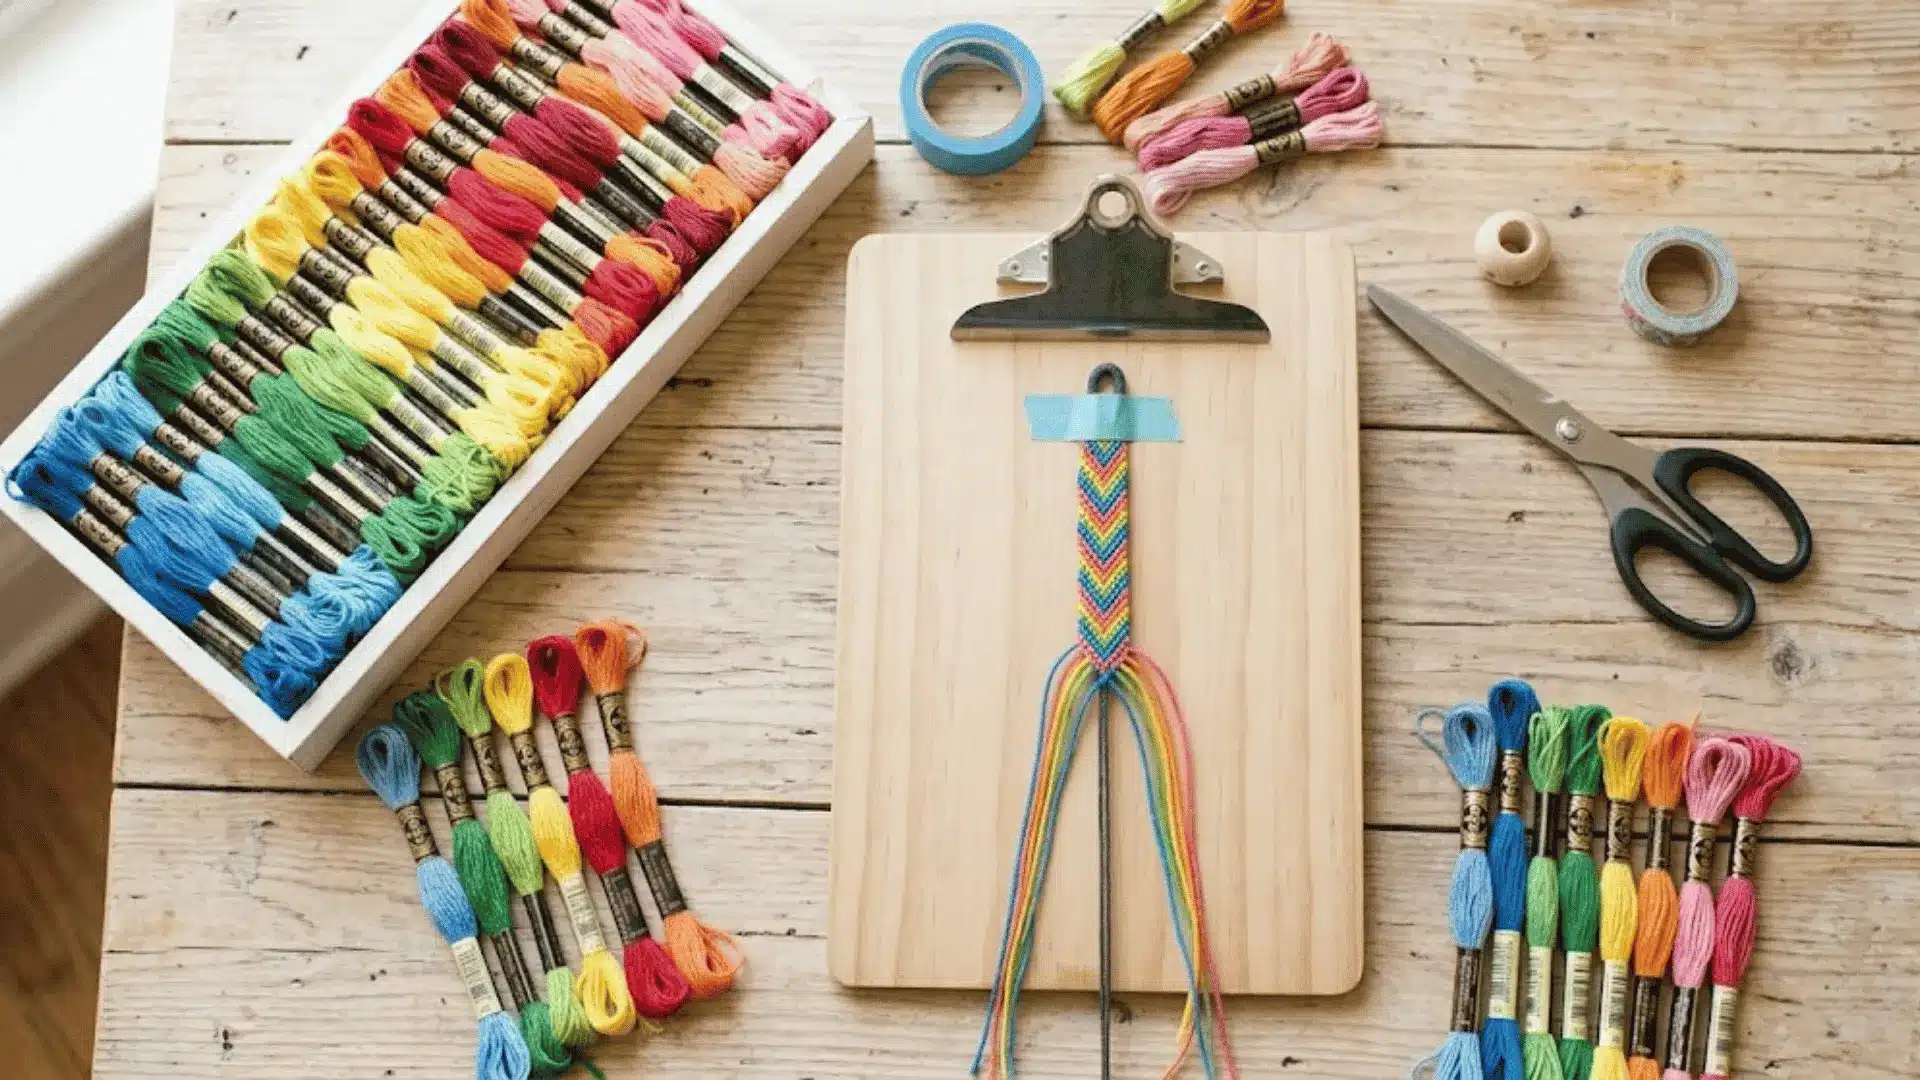
Making friendship bracelets is easier than many people think. Once you learn the basic process, you can create a wide range of designs using simple knots and colorful embroidery floss.
| What You’ll Need: Embroidery floss, scissors, tape or a clipboard, and an optional safety pin. |
- Choose a Pattern: Pick a friendship bracelet pattern that matches your skill level. Simple designs are a great place to start.
- Cut and Arrange the Threads: Cut your embroidery floss to the needed length and place the colors in the correct order for the pattern.
- Secure the Bracelet: Tie a knot at one end and use tape, a clipboard, or a safety pin to hold the threads in place while you work.
- Tie the Pattern Knots: Follow the pattern carefully, tying each knot in the correct direction and keeping the tension even.
- Finish and Tie Off the Bracelet: When the bracelet is long enough, tie a secure knot at the end and trim or braid the remaining threads.
With a little practice, these basic steps become second nature. Once you’re comfortable with them, you can try more detailed friendship bracelet patterns and create unique designs for yourself or friends.
Easy Friendship Bracelet Patterns Every Beginner Should Try
If you’re new to bracelet making, these friendship bracelet patterns are a great place to start. They teach basic knotting techniques while helping you create colorful bracelets with simple, easy-to-follow designs.
1. Candy Stripe Pattern
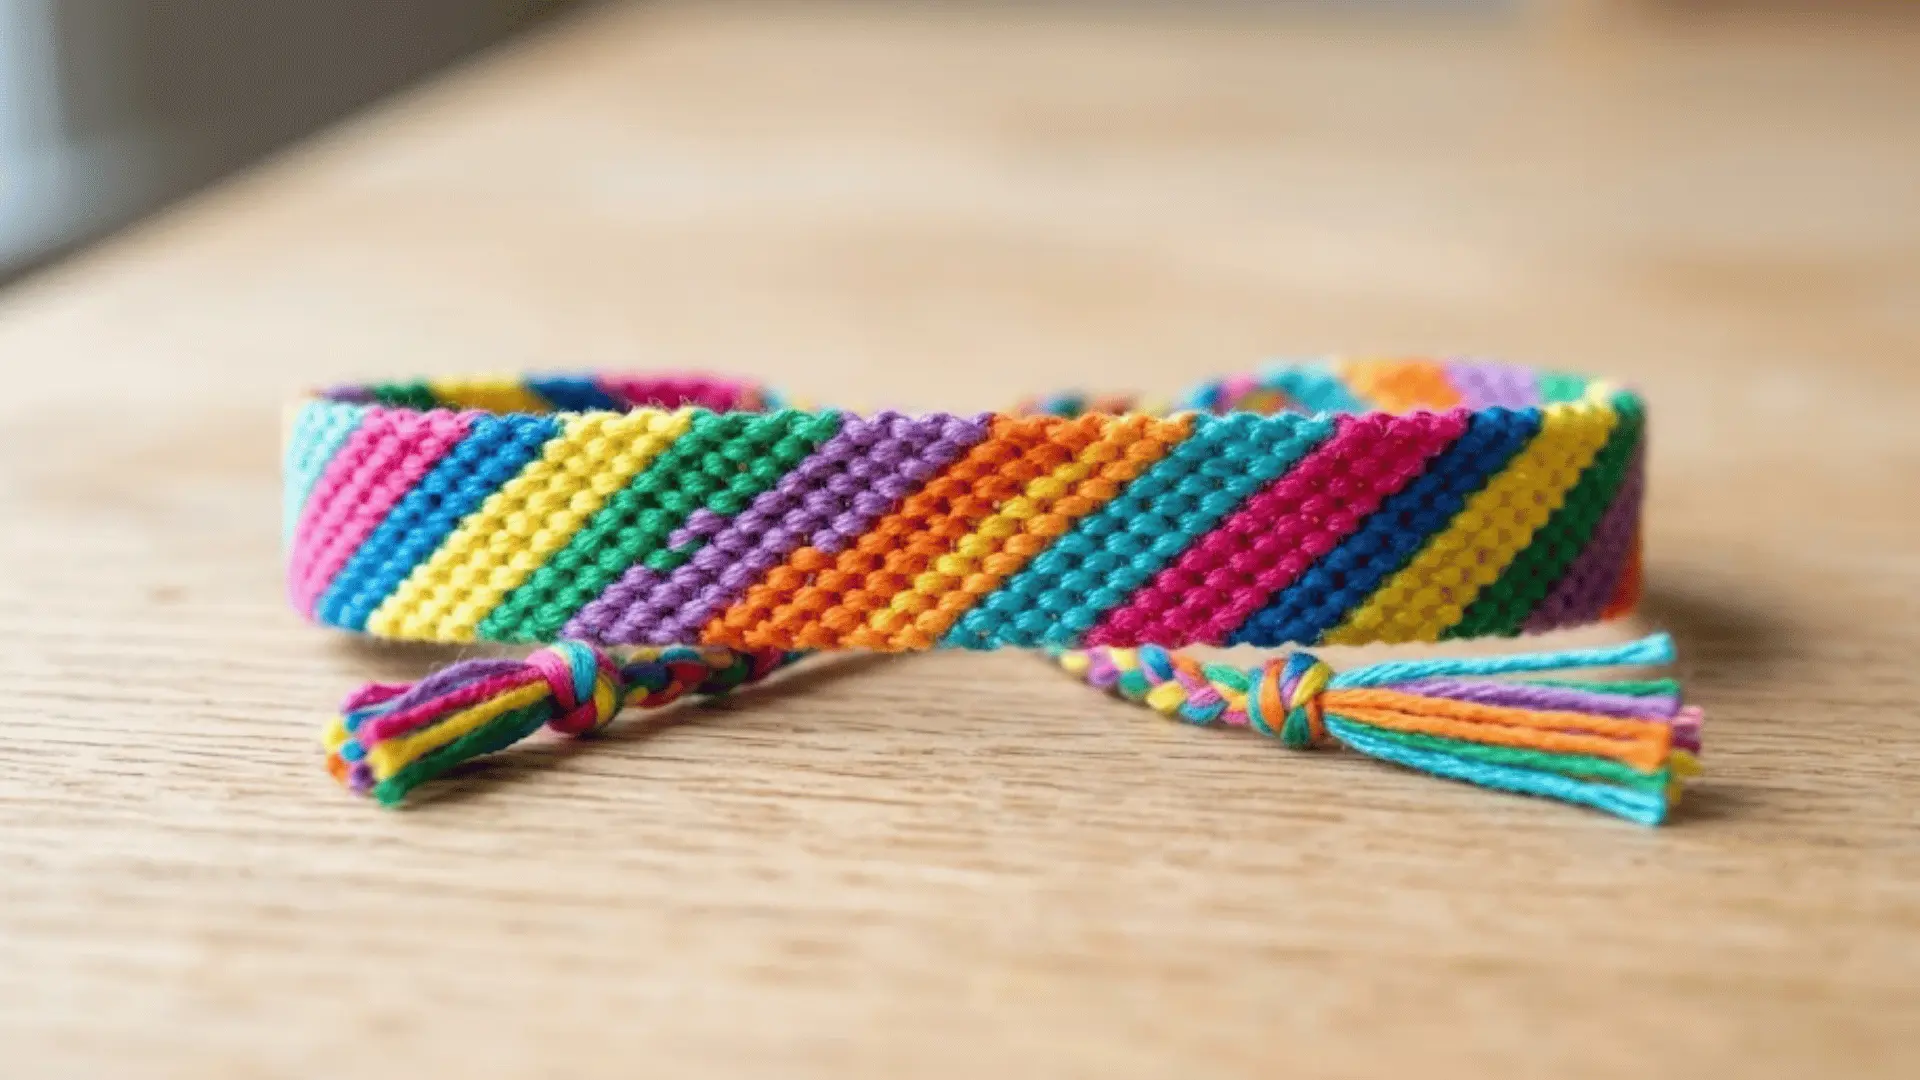
The Candy Stripe pattern is often the first bracelet many people make. It uses only forward knots, making it easy to learn and practice. The finished bracelet features colorful diagonal stripes that can be customized with any color combination.
Since the pattern is simple and repetitive, beginners can focus on improving knot consistency while creating a bracelet that looks neat and cheerful.
Number of Threads Needed: 4–8
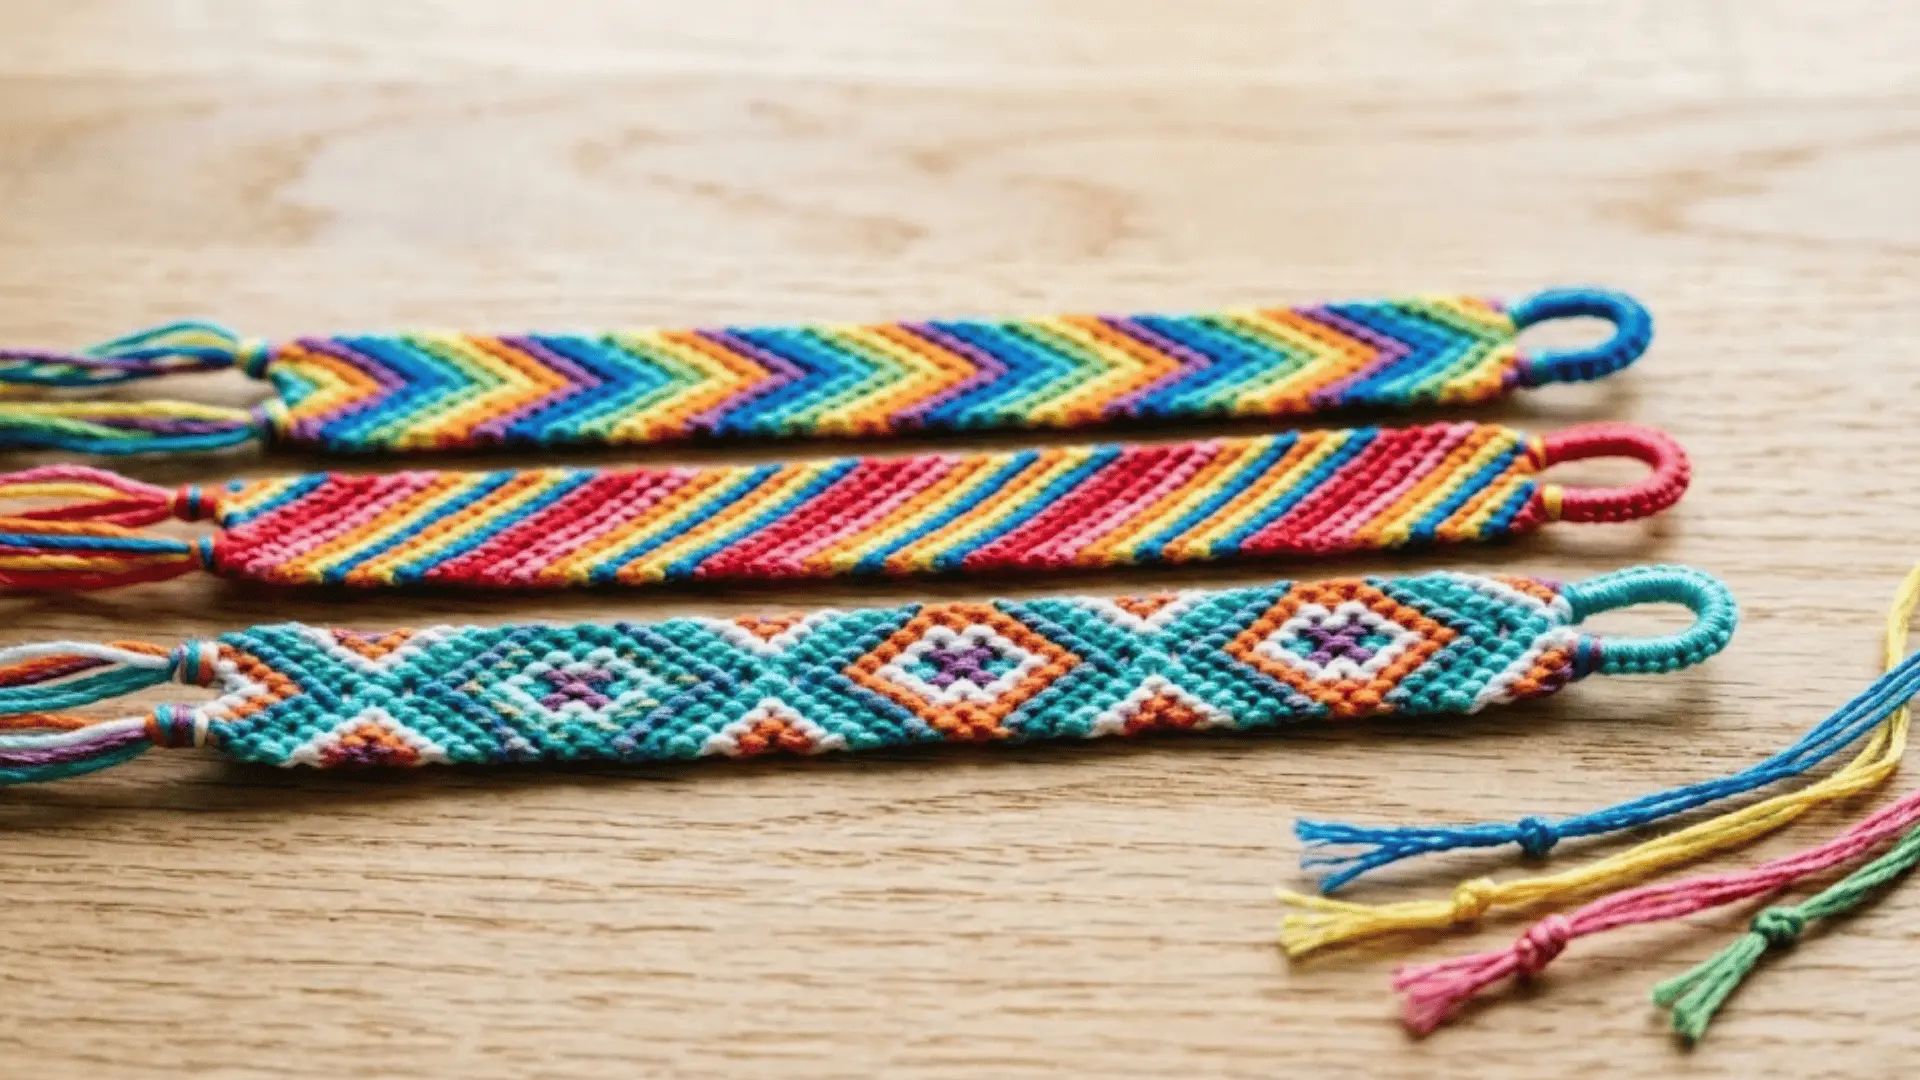
2. Chevron Pattern
![]()
The Chevron pattern is one of the most popular friendship bracelet patterns. It creates a series of V-shaped stripes that meet in the center of the bracelet.
This design teaches beginners how to use both forward and backward knots, making it a great next step after the Candy Stripe pattern.
Different color combinations can completely change the final look, giving you plenty of creative options.
Number of Threads Needed: 6–12
3. Simple Braid Pattern
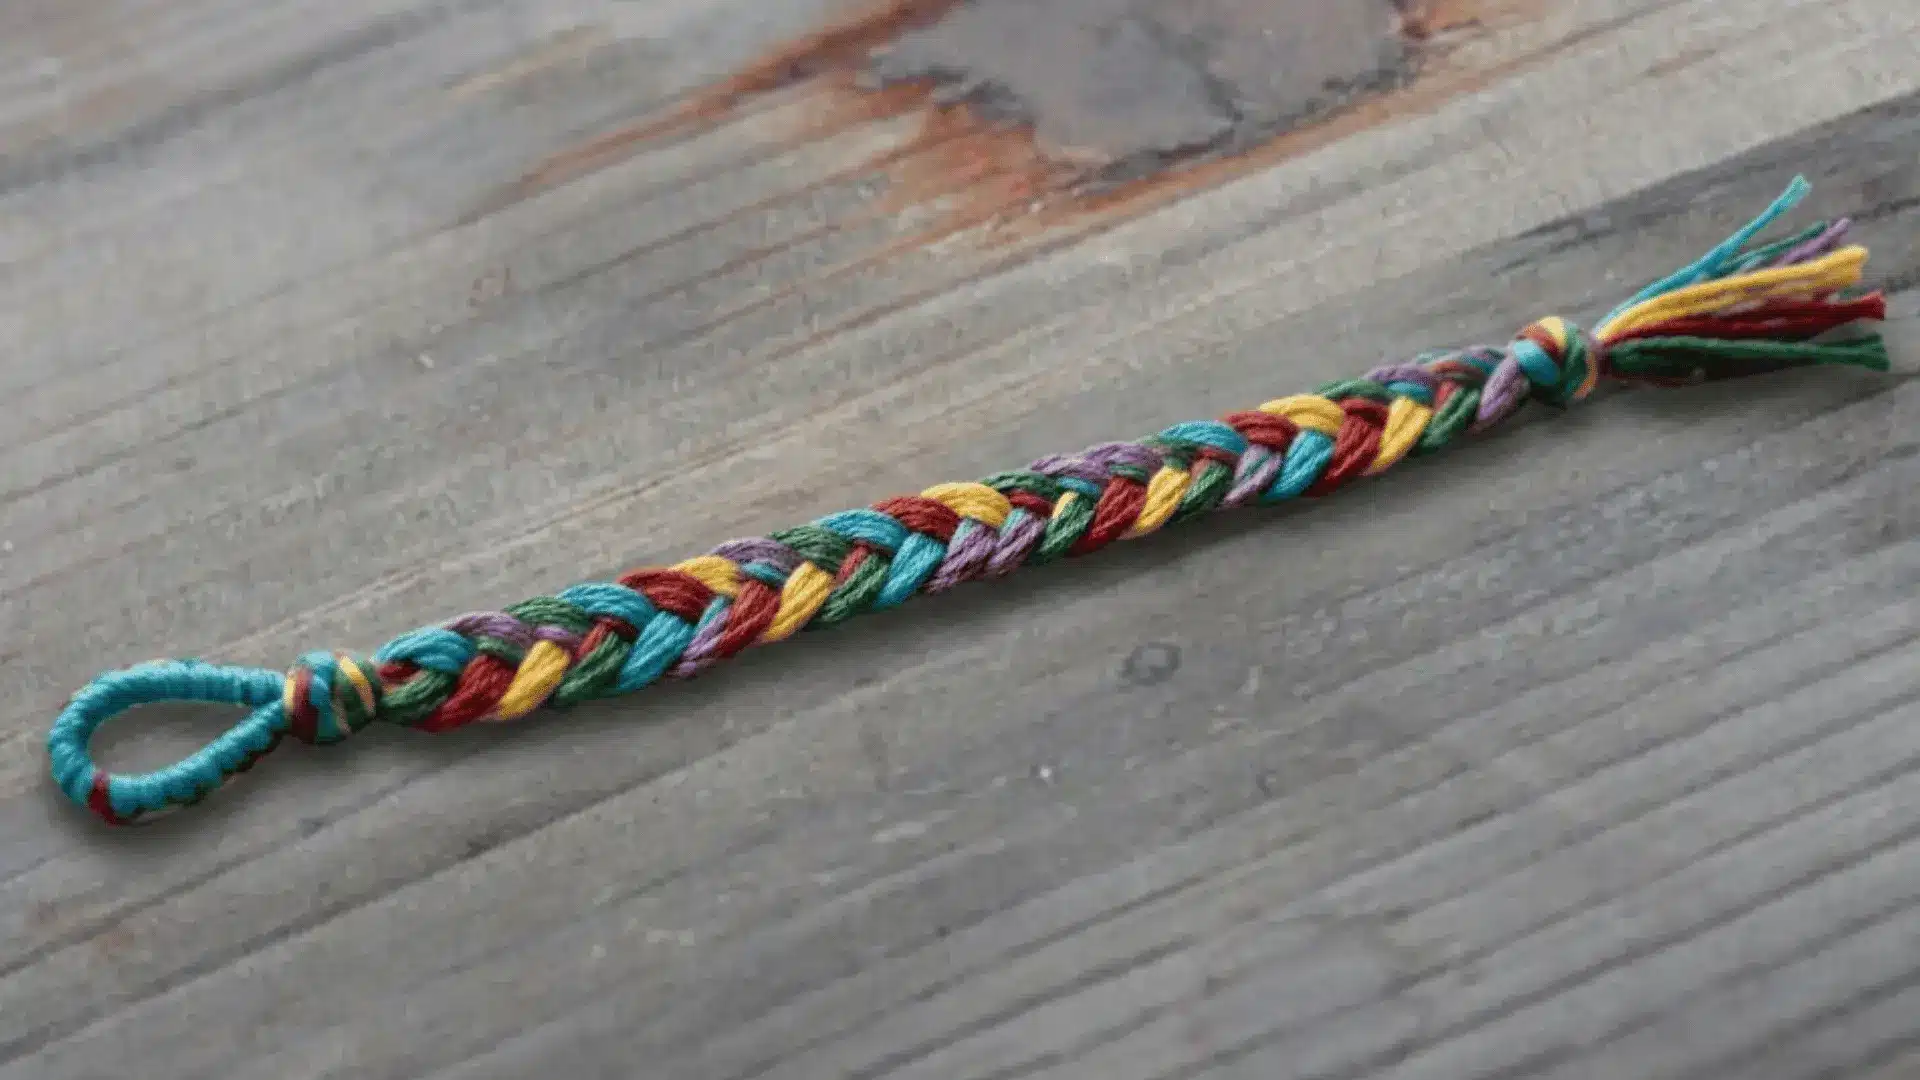
A Simple Braid Pattern is perfect for anyone looking for a quick and easy project. Instead of using friendship bracelet knots, the threads are braided together to create a classic woven design.
It is a good choice for younger crafters who also enjoy paper-folding crafts, or for anyone building basic hand coordination through repetitive steps. You can use two or more colors to create a fun bracelet in just a few minutes.
Number of Threads Needed: 3–9
4. Spiral Staircase Pattern
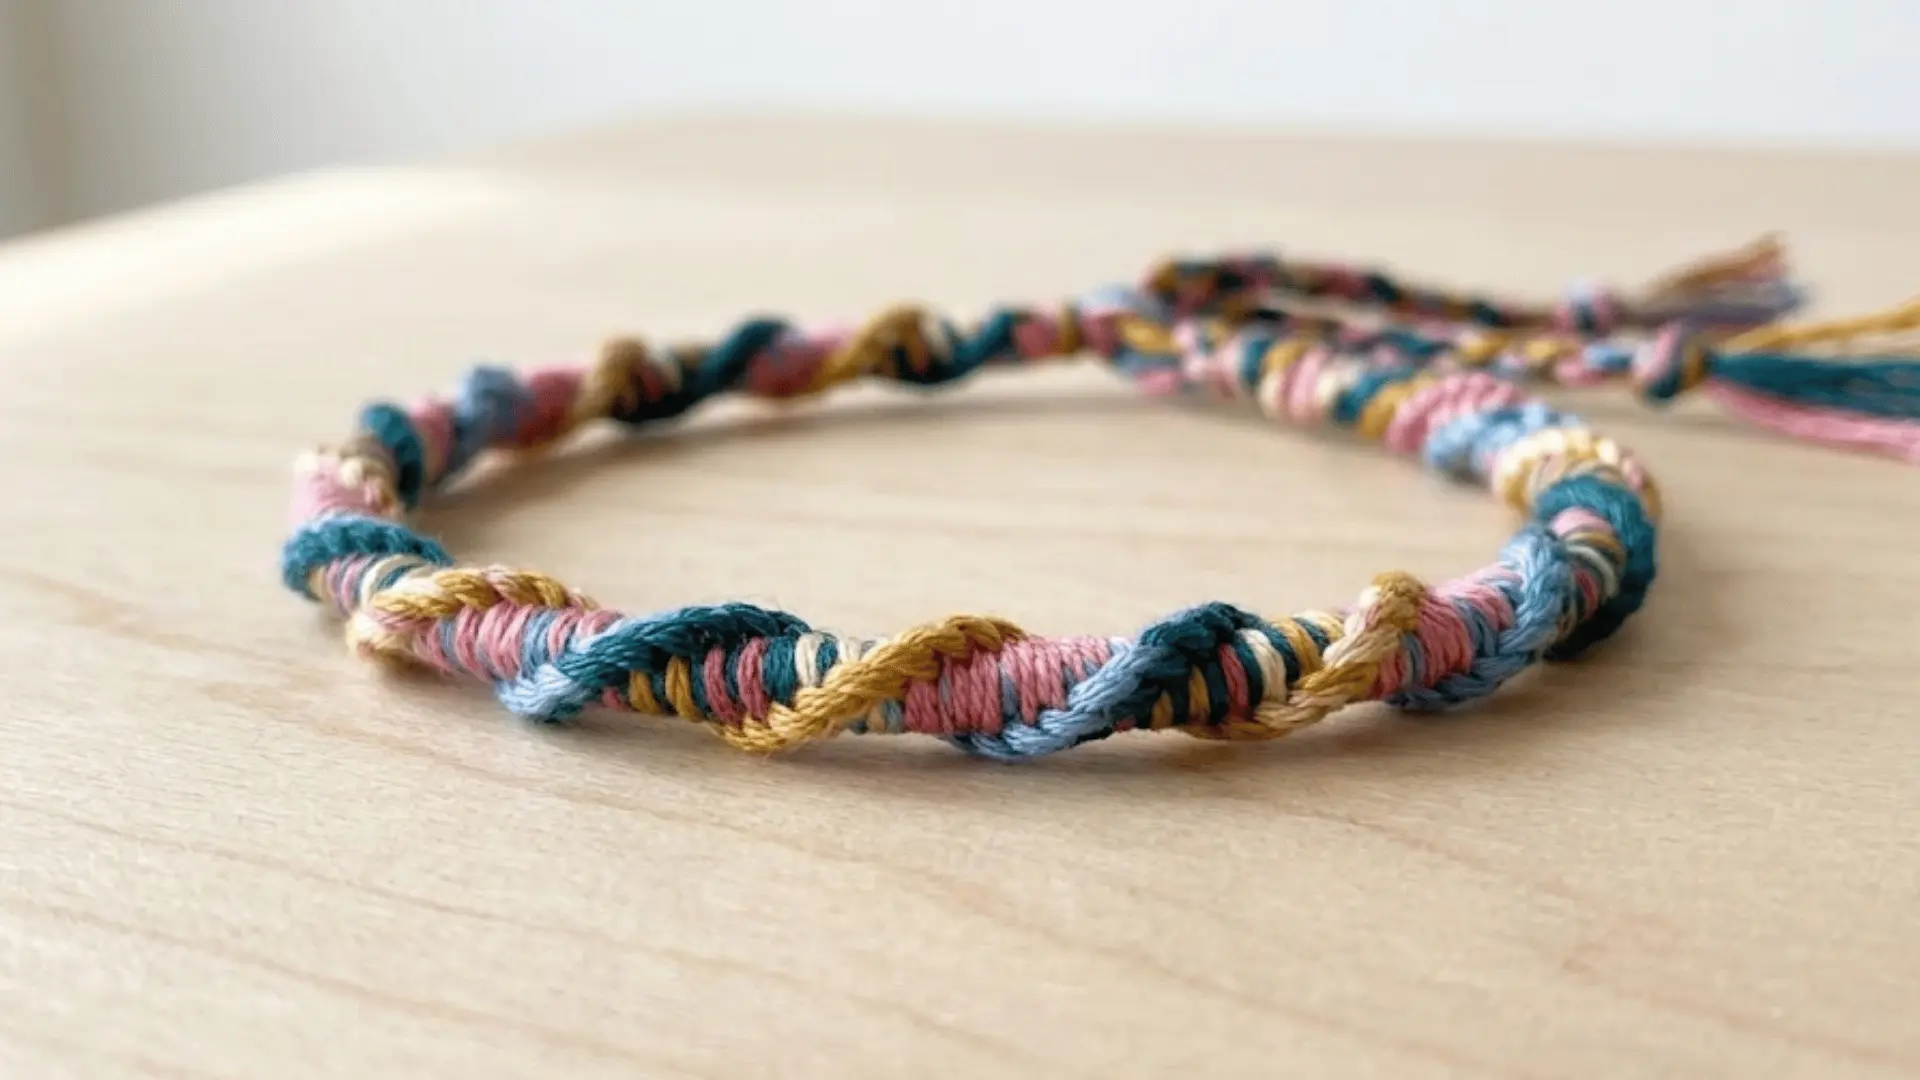
The Spiral Staircase pattern creates a twisted bracelet that looks like a colorful rope. It is made by repeating the same knot with one working thread around the others.
Although the finished bracelet looks more detailed than a basic braid, it is actually very simple to make. This pattern is a great way to practice knotting while creating a bracelet with a fun spiral effect.
Number of Threads Needed: 4–8
5. Zig-Zag Pattern
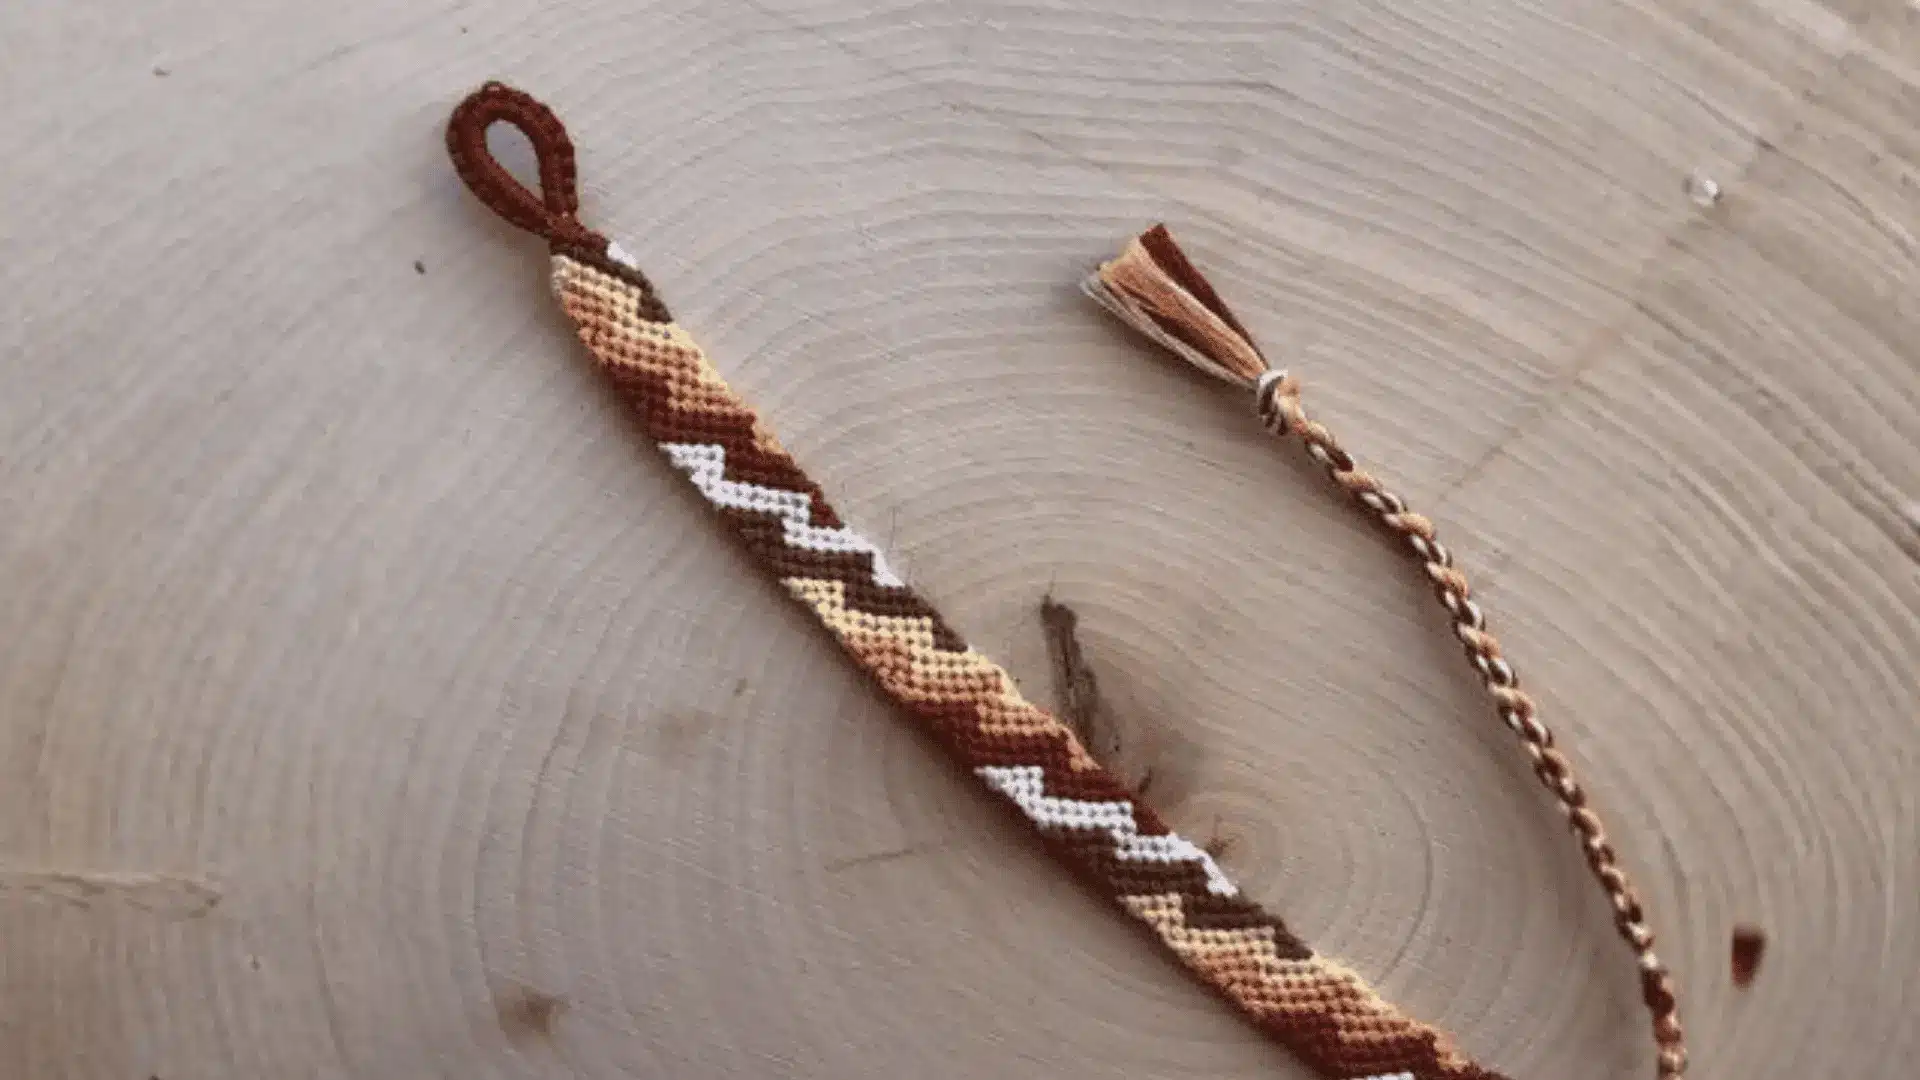
The Zig-Zag pattern adds a little more movement to a bracelet design. Instead of straight stripes, the colors shift direction to create a repeating zig-zag effect.
This pattern helps beginners become more comfortable following knot sequences and color placement. It takes a bit more attention than simpler designs, but the finished result is still beginner-friendly and rewarding to make.
Number of Threads Needed: 6–10
6. Diamond Pattern
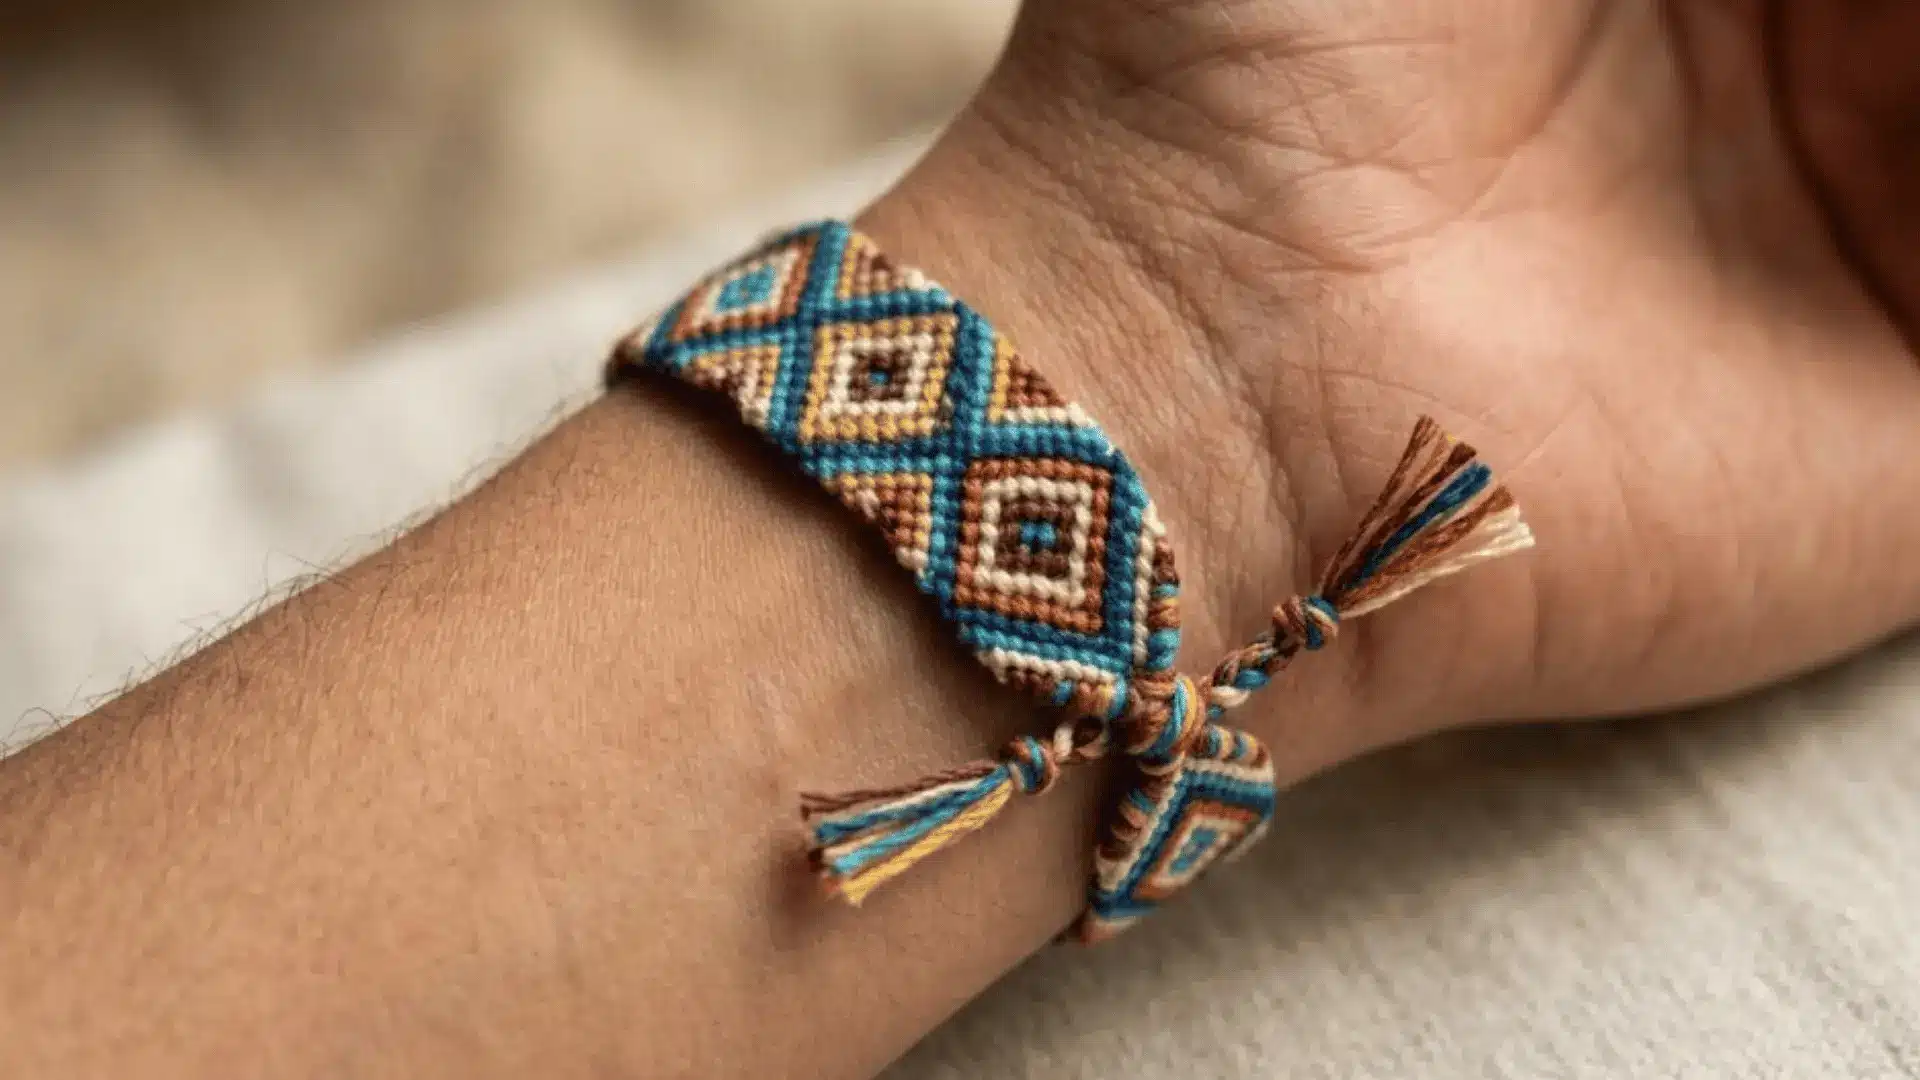
The Diamond pattern is a great introduction to more detailed friendship bracelet designs. It uses a combination of knots to create repeating diamond shapes across the bracelet.
While it requires more focus than basic patterns, it is still suitable for beginners who know the basic knots. Using contrasting colors helps the diamond shapes stand out and gives the bracelet a clean, organized look.
Number of Threads Needed: 8–12
Thread Bracelet Patterns that Look Hard but are Easy
Some thread bracelet patterns look advanced, but they are easier to make than they appear. Once you know the basic knots, they are a great next step beyond beginner-friendly bracelet patterns.
7. Double Chevron
![]()
The Double Chevron pattern takes the classic chevron design and adds an extra layer of V-shaped stripes. It looks more detailed than a standard chevron but follows a similar knotting method.
Most crafters can complete this bracelet in about 1 to 2 hours, depending on its length. The repeated pattern makes it easier to remember as you work.
Best Thread Color Combinations: Blue and white, pink and purple, rainbow colors
8. Broken Ladder
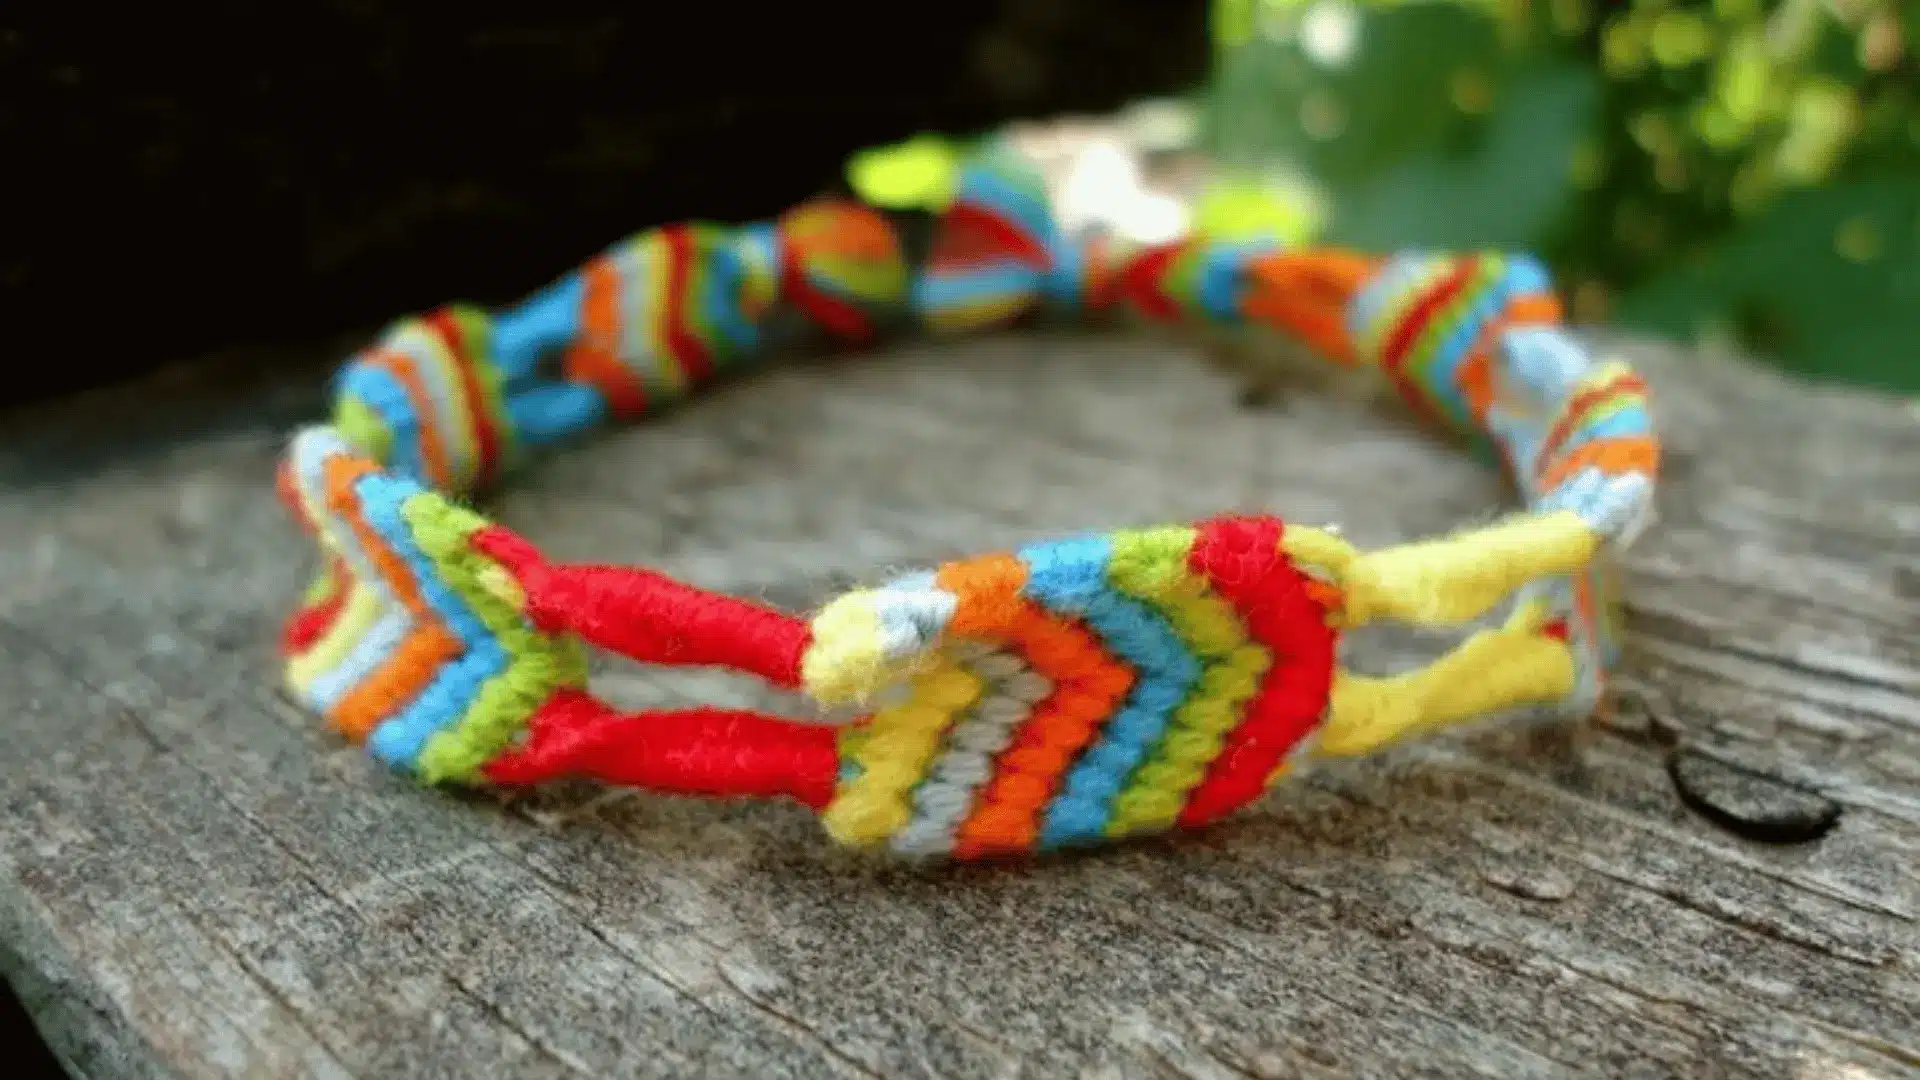
The Broken Ladder pattern creates a fun design with sections that appear to twist around the bracelet. It uses simple knot repetitions, making it easier than its appearance suggests.
Most bracelets can be finished in 1 to 1.5 hours. This pattern is a good choice for anyone ready to move beyond basic stripes while still using familiar knotting techniques.
Best Thread Color Combinations: Black and red, teal and white, purple and gray
9. Fishbone Pattern
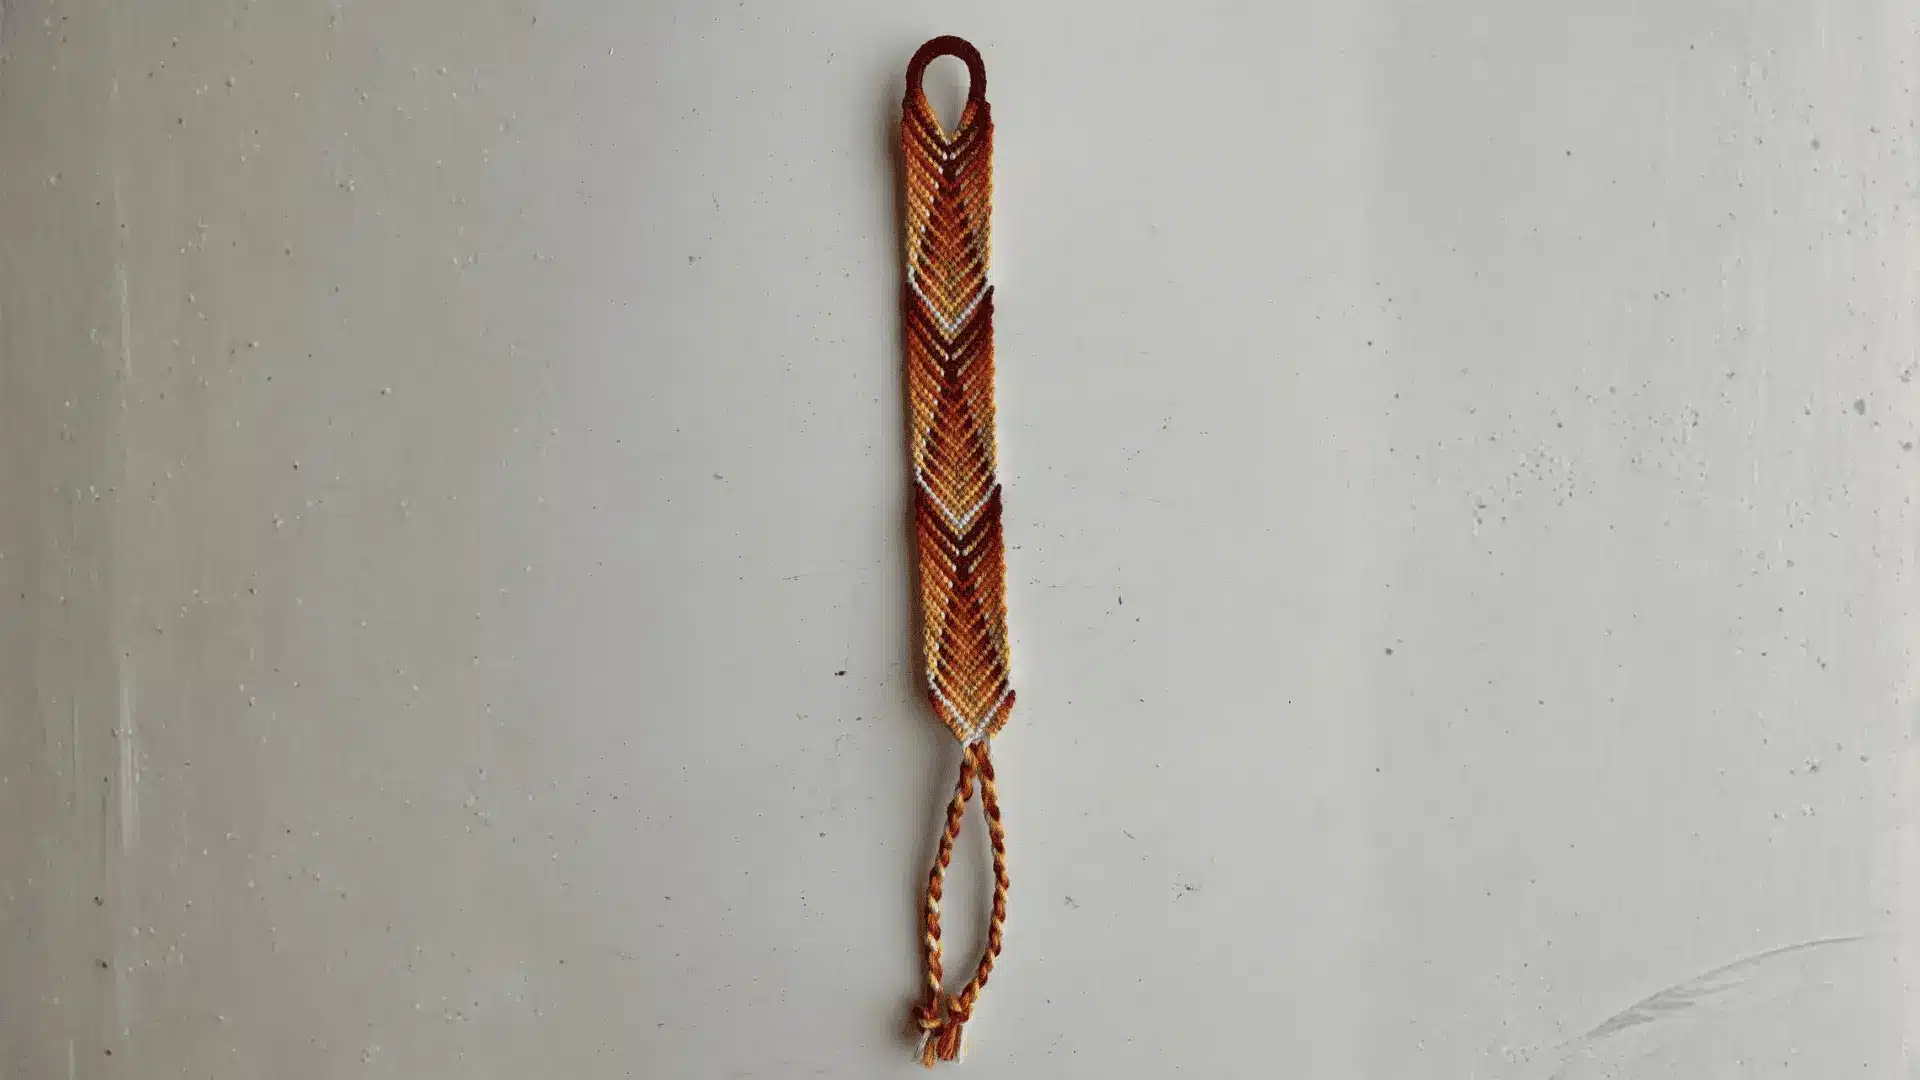
The Fishbone pattern creates a braided effect that resembles the bones of a fish running down the center of the bracelet.
While the design appears detailed, it primarily relies on repeated knot sequences. Most people can complete it in about 1.5 to 2 hours. Careful color placement helps the pattern stand out and gives the bracelet a neat finish.
Best Thread Color Combinations: Navy and silver, green and yellow, pink and white
10. Skinny Chevron
![]()
The Skinny Chevron pattern offers a slimmer version of the traditional chevron design. With fewer threads and narrower stripes, it works up faster while still creating the classic V-shape look.
Most bracelets take around 45 minutes to 1 hour to complete. It is a great option for beginners who want a polished design without spending too much time.
Best Thread Color Combinations: Blue and yellow, black and white, coral and mint
11. X and O Pattern
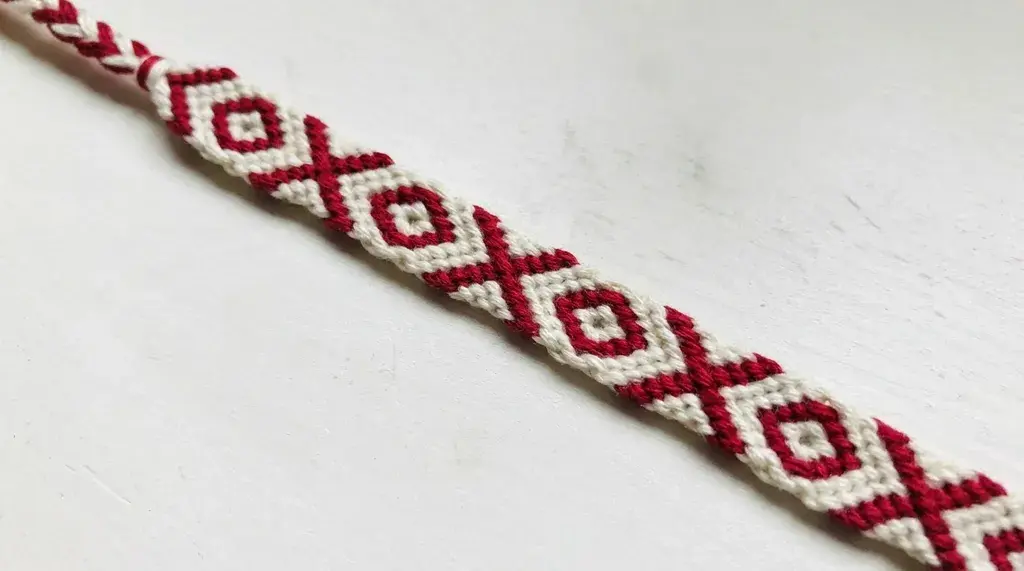
The X and O Pattern forms repeating X and O shapes across the bracelet, creating a playful and eye-catching design. Although it appears complex, the pattern becomes easy once you understand the sequence of knots.
Most bracelets can be completed in about 2 to 3 hours. Using contrasting colors helps the letters stand out and makes the design easier to see.
Best Thread Color Combinations: Red and white, purple and pink, black and gold
The Best Websites for Friendship Bracelet Patterns
If you’re looking for new friendship bracelet patterns, several websites offer large collections of designs, tutorials, and inspiration.
Some focus on pattern libraries, while others provide step-by-step instructions that are ideal for beginners.
| Website | Best For | Pattern Selection |
|---|---|---|
| BraceletBook | Searching and filtering patterns | A massive collection of normal and alpha patterns |
| Sarah Maker | Beginner tutorials | Curated collections of easy and intermediate patterns |
| Instructables | Visual learning | User-created bracelet projects with step-by-step instructions |
| Gathered | Pattern inspiration | Handpicked friendship bracelet ideas and tutorials |
Each website has its own strengths, from beginner-friendly tutorials to large collections of bracelet designs. Trying a few different resources can help you find patterns that match your skill level and creative interests.
How to Read Friendship Bracelet Patterns?
Many friendship bracelet websites use pattern grids, knot symbols, and charts instead of written instructions. At first, these diagrams can seem confusing, but they become much easier to understand with practice.
Start by checking the string order at the top of the pattern, as this shows where each thread should be placed.
Row numbers help you follow the design step by step, while knot symbols indicate which type of knot to tie and in which direction.
Pay attention to pattern repeats, since many designs use the same sequence multiple times. It is also helpful to know the difference between normal patterns and alpha patterns before starting a new project.
Common Friendship Bracelet Mistakes and How to Avoid Them
Even experienced bracelet makers make mistakes from time to time. The good thing is that most problems are easy to fix once you know what causes them.
Here are some common friendship bracelet mistakes and simple ways to avoid them.
| Mistake | How to Avoid It |
|---|---|
| Uneven knot tension | Pull each knot with consistent pressure to keep the bracelet even. |
| Using a thread that’s too short | Cut longer strands than you think you’ll need, especially for larger patterns. |
| Mixing up string order | Double-check thread placement before starting each row. |
| Skipping rows | Follow the pattern carefully and mark completed rows if needed. |
| Choosing overly complex patterns too early | Start with beginner-friendly designs before moving to advanced patterns. |
A little patience and attention to detail can prevent many common mistakes. As you gain experience, reading patterns and tying consistent knots will become easier, helping your bracelets look cleaner and more polished.
Final Thoughts
Friendship bracelets are a fun way to spend time, practice new skills, and create something meaningful with your own hands. From beginner designs to more detailed friendship bracelet patterns, there are countless options to keep you inspired.
The more patterns you try, the more comfortable you’ll become with different knots, color combinations, and techniques. Start with a simple design, take your time, and enjoy the process.
Do you have a favorite friendship bracelet pattern or a website you love using for ideas? Share your thoughts and recommendations in the comments below; I’d love to hear them!
Frequently Asked Questions
What is the Cultural Origin of Friendship Bracelets?
The craft originated in Central American Native handcrafts and became popular in the US during the 1970s–80s, spreading from political rallies to summer camps as a symbol of teen friendship.
How Can I Make My Friendship Bracelet Adjustable?
To make a bracelet adjustable, create a large loop at the start of the bracelet. When finished, braid the loose ends at the bottom. The wearer can then pull the braided end through the starting loop and tie a simple overhand knot to secure it, acting as a sliding closure.
How Do I Calculate How Much Thread I Need for a Bracelet?
While lengths vary by pattern, a standard rule for beginners is to cut strands roughly 30 to 40 inches long. It is better to cut extra length than to run out mid-project.