
Making friendship bracelets has always been a fun and relaxing craft, and embroidery floss bracelet patterns make it even more interesting.
With just a few thread colors, simple knots can turn into beautiful designs like stripes, chevrons, and twists. I enjoy how each pattern feels like a small creative project that grows row by row.
These patterns do not require special tools or skills, making them great for beginners. You only need patience, basic steps, and a bit of time. Once you start, it becomes easy to try new designs and build your own style.
Why Embroidery Floss Bracelets are Perfect for Beginners
Embroidery floss bracelet patterns are great for beginners because they are easy to start and don’t require fancy tools. You only need embroidery floss, scissors, and a way to hold your threads in place.
The knotting steps repeat in a clear pattern, so you can learn quickly by doing the same motions again and again. This helps you build confidence as you practice.
These bracelets are also a fun way to try different color combinations and see how they look together. Since the materials are low-cost and easy to find, you can make many designs without worrying about mistakes or waste.
Materials You Need for Embroidery Floss Bracelet Patterns
Before starting, gather a few simple supplies. Most of these are easy to find at home or in any craft store. You don’t need expensive tools, just basic items to help you hold, cut, and shape the threads while working on your bracelet.
| MATERIAL | WHAT IT’S USED FOR |
|---|---|
| Embroidery Floss | Main thread for making patterns and color designs |
| Scissors | Cutting floss to the right length |
| Tape or Clipboard | Holding threads in place while you knot |
| Beads/Charms (optional) | Adding decoration and personal style |
| Safety Pin or Pin Cushion | Securing threads to fabric or a stable surface |
Once you have these materials ready, you can easily start making different bracelet patterns without interruptions.
How to Make an Embroidery Floss Bracelet?
Making an embroidery floss bracelet becomes easy when you follow a clear step-by-step process. Each step builds on the one before it, so it is important to stay patient and keep your work organized.
1. Cut and Prepare Your Embroidery Floss
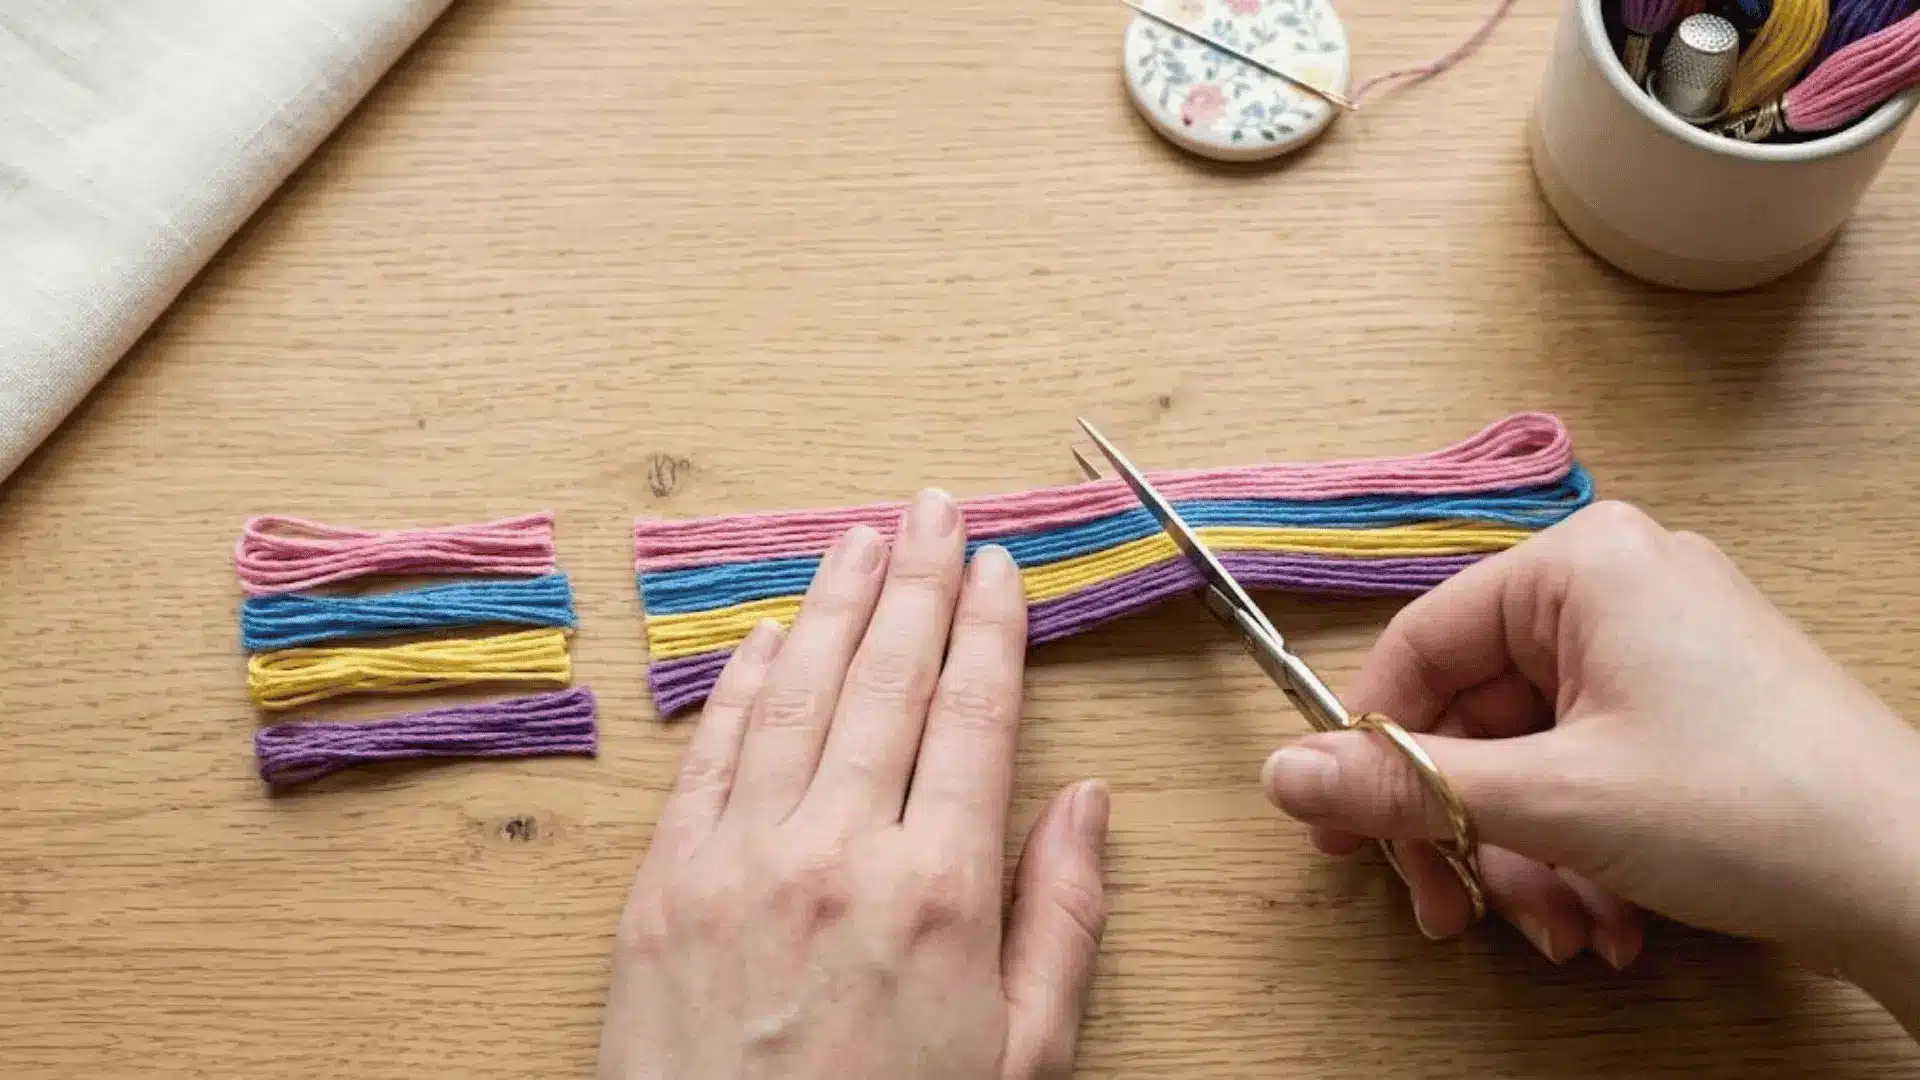
Start by choosing 3–6 colors of embroidery floss for your bracelet. Cut each strand about 24–30 inches long, so you have enough length to work with. Try to make all strands equal in size so the final bracelet looks balanced.
After cutting, line them up neatly and hold the ends together.
This step helps prevent uneven patterns and makes the starting process smoother and easier to manage.
2. Secure the Strands in Place
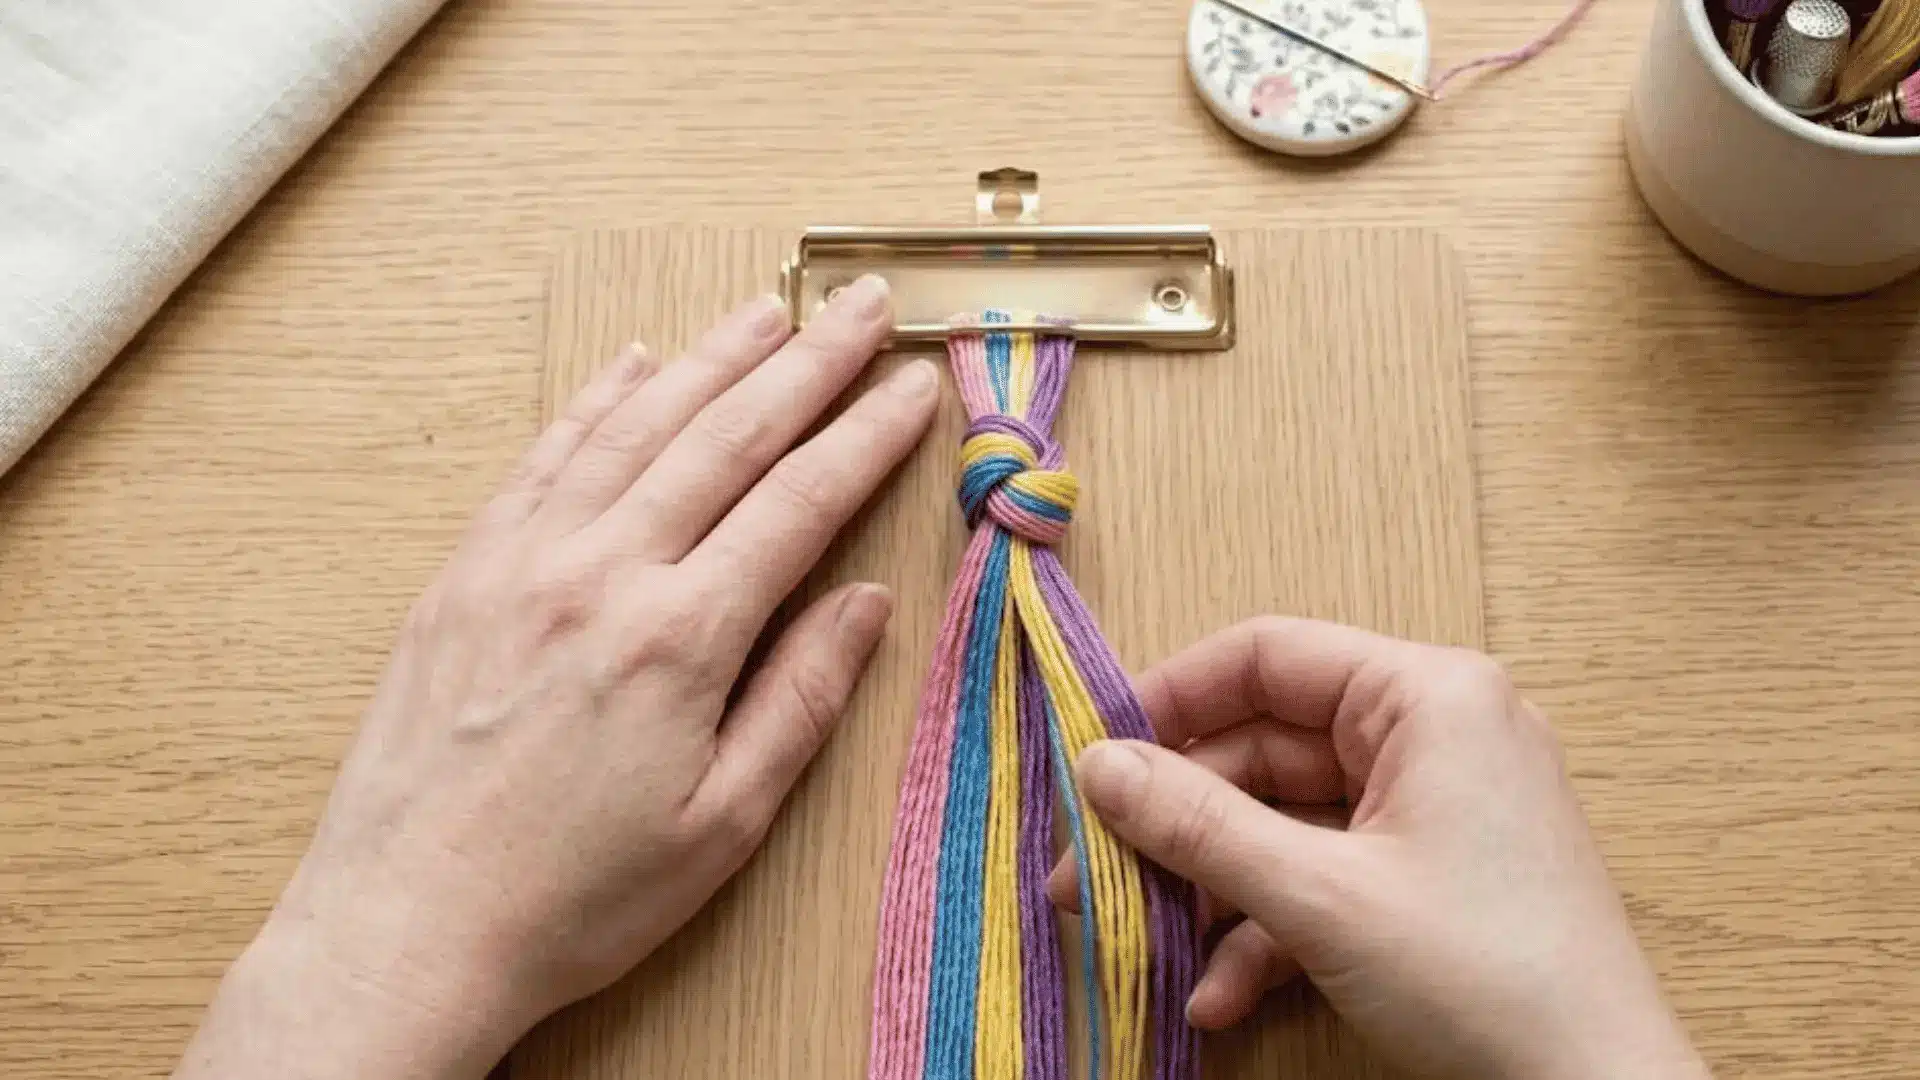
Once your threads are ready, tie a simple knot at one end to keep them together. Then secure that end to a flat surface with tape or attach it to a clipboard.
This keeps the strands from moving while you work. A stable setup is very helpful because it allows you to focus on knotting without worrying about the threads slipping or tangling during the process.
3. Arrange Your Color Pattern
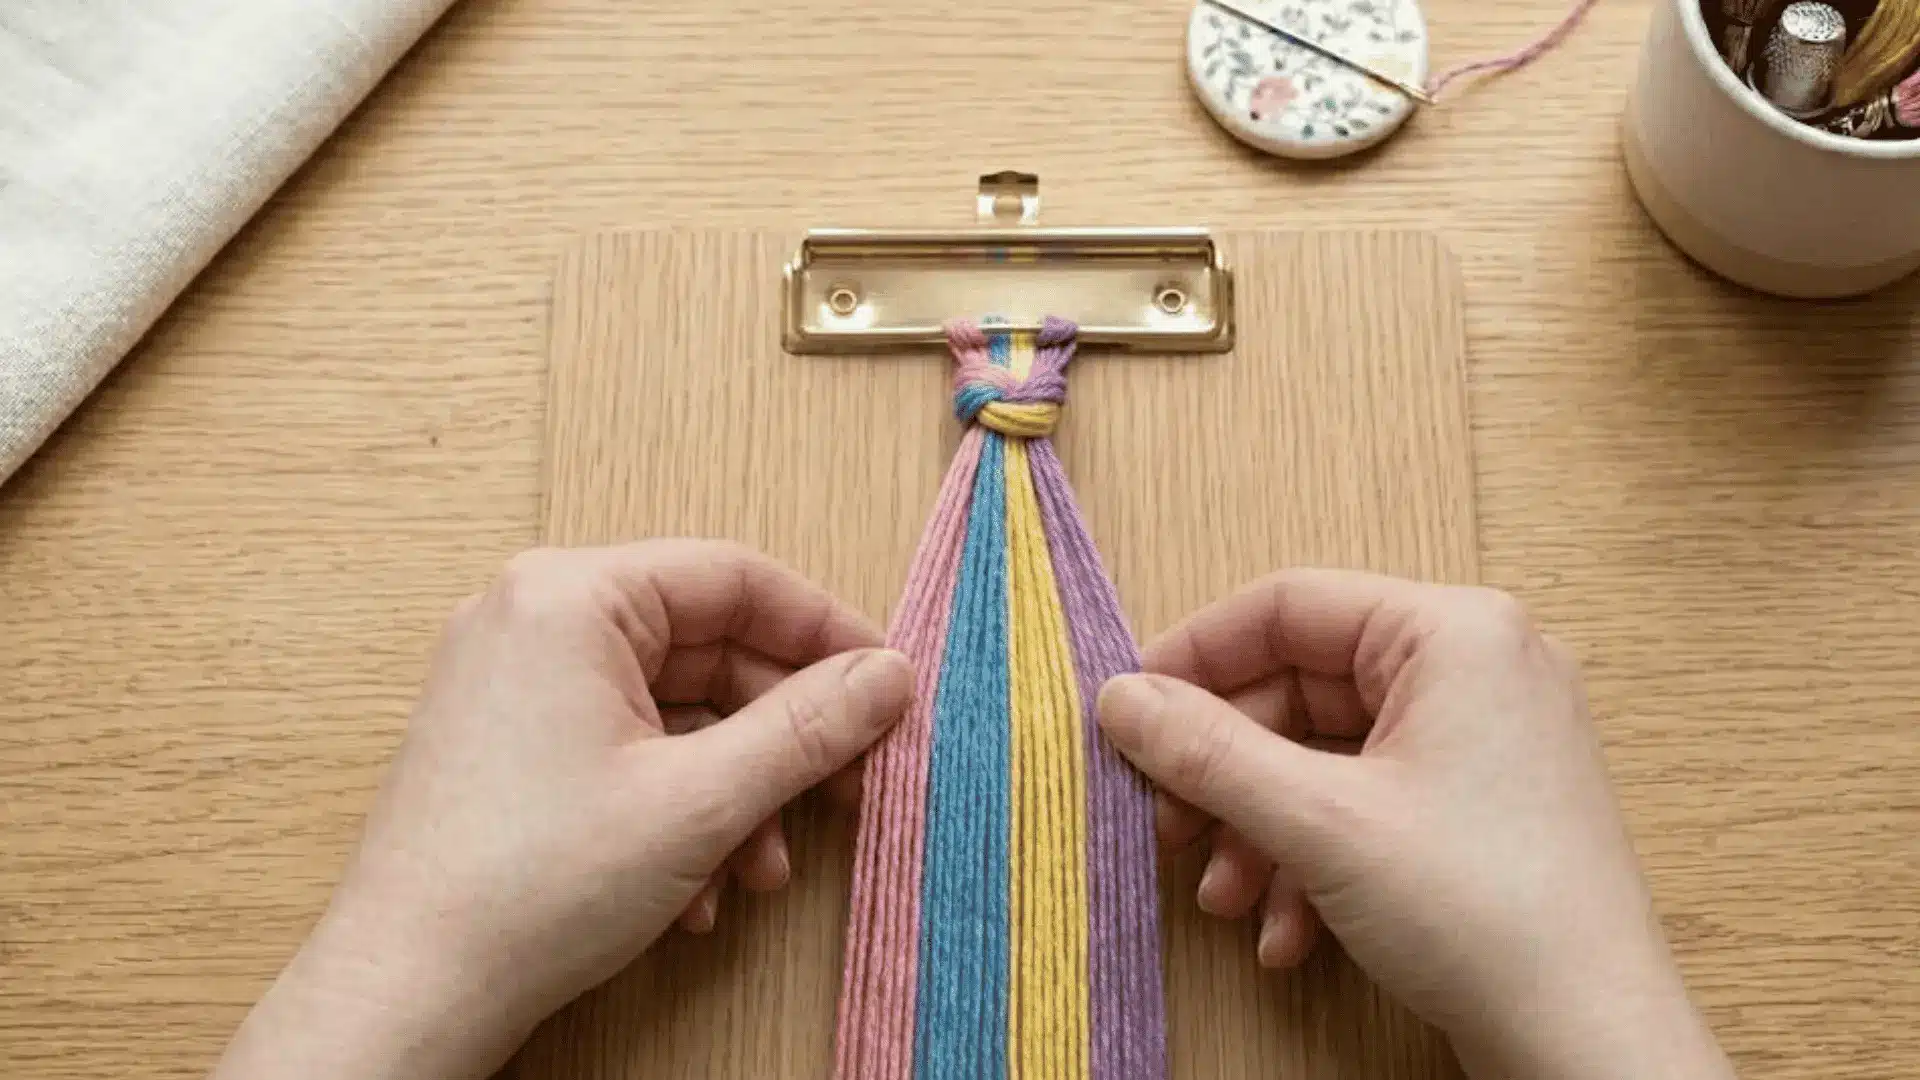
Before you begin knotting, take time to arrange your colors in the order you want. Place each strand carefully so the sequence matches your planned design.
This step is important because it decides how your bracelet will look at the end. Double-check the arrangement to make sure the colors flow smoothly. A clear color order helps you avoid confusion and keeps the pattern neat.
4. Start Knotting the Pattern
Now begin making knots using either forward or backward knot techniques, depending on your design. Work with one strand at a time, looping it over the others in a steady motion.
Pull each knot firmly so it stays tight and secure. Repeat the same steps across each row. Going slowly at first helps you maintain even spacing and keeps the pattern consistent and clean.
5. Finish and Secure the Bracelet
When your bracelet reaches the right length, tie a strong final knot to hold everything in place.
After that, you can braid the loose ends or create a small loop and knot closure so it can be worn easily. Trim any extra thread carefully with scissors.
Finally, check all knots to ensure they are tight and secure before wearing or gifting your finished bracelet.
Embroidery Floss Bracelet Patterns to Try Today
These embroidery floss bracelet patterns are great for beginners who want to start making bracelets right away. Each design uses simple knotting steps that repeat clearly, so you can learn as you work.
1. Diagonal Stripes
Diagonal Stripes usually take around 30 to 45 minutes and are one of the simplest embroidery floss bracelet patterns for beginners. You create slanted lines by knotting one strand across the others in the same direction repeatedly.
Each row shifts slightly, forming a clean diagonal flow across the bracelet. Keep your knots tight and even so the lines stay straight. This pattern is great for learning basic control and rhythm in knotting.
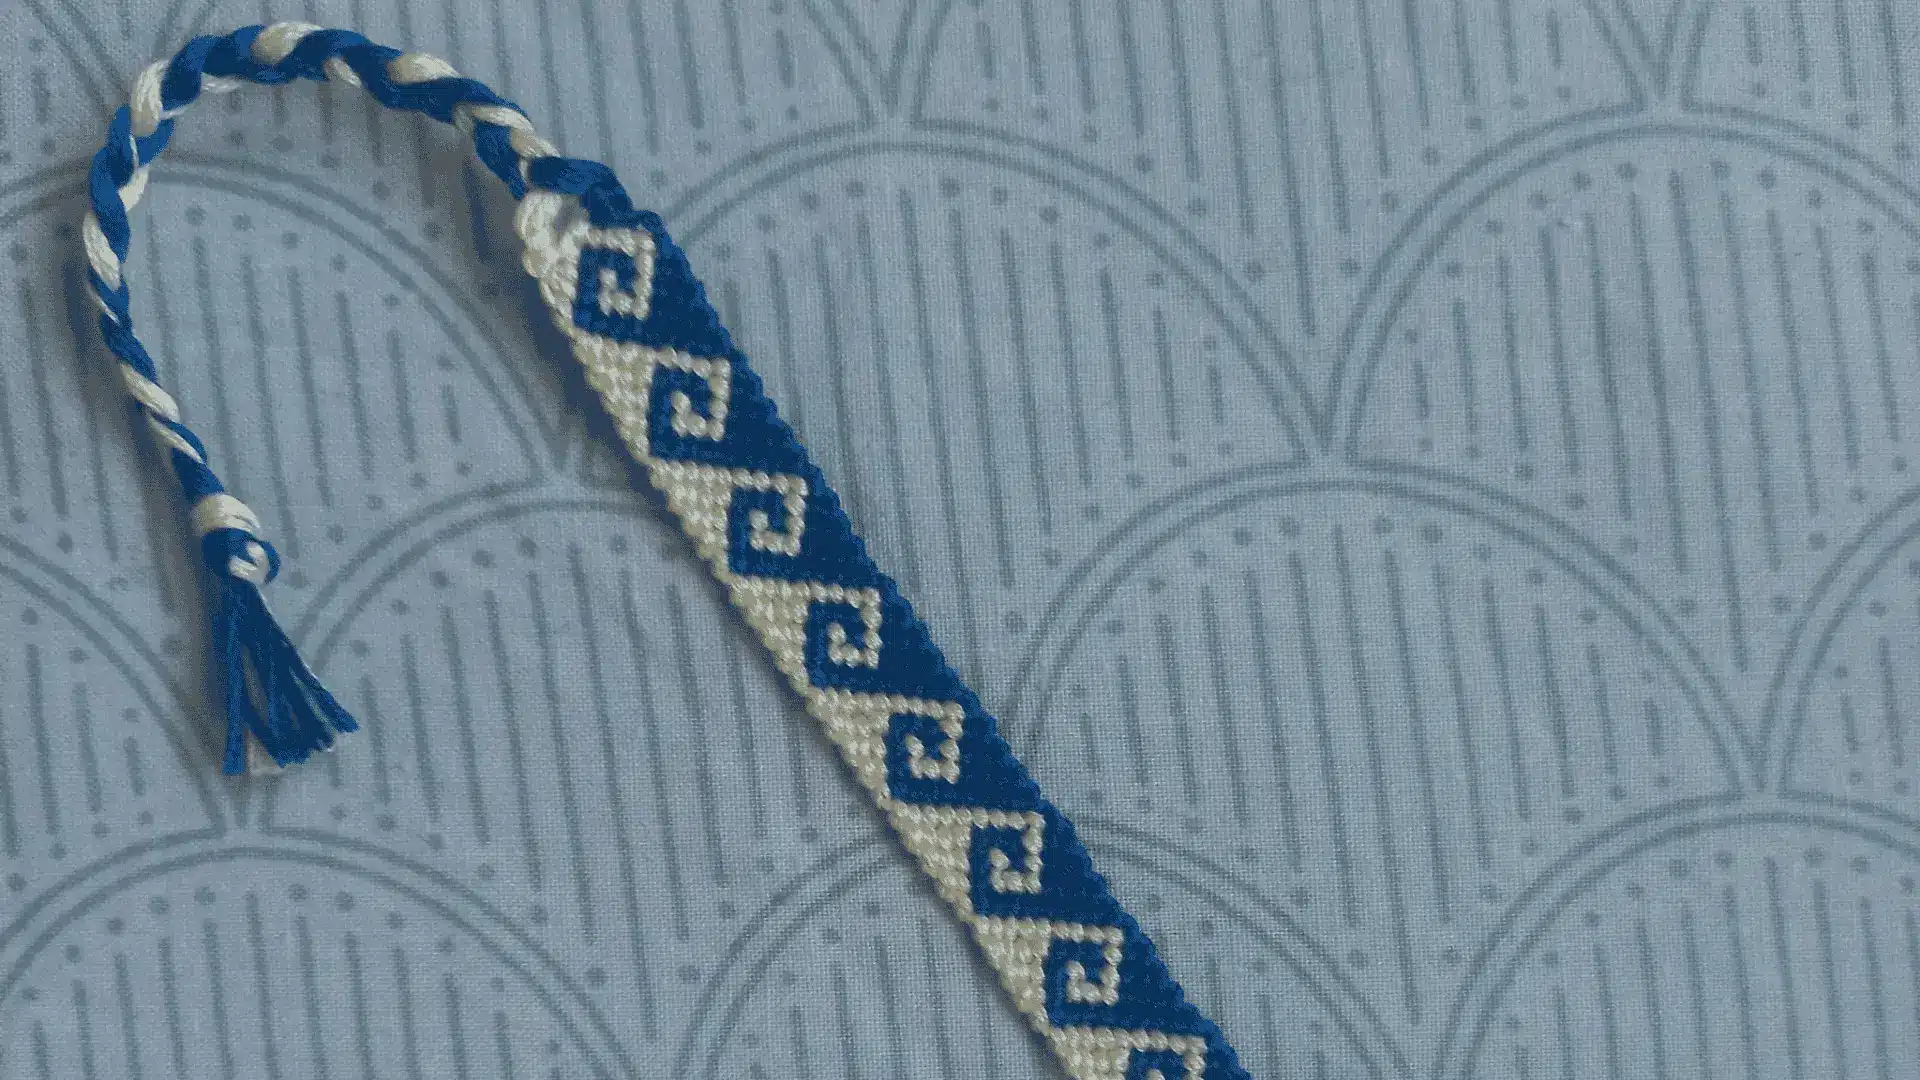
2. Arrow Pattern
![]()
Arrow Pattern takes about 45 to 60 minutes and creates repeated arrow shapes pointing along the bracelet.
You use forward and backward knots to bring strands toward the center, then mirror the same steps on both sides.
This builds a clear arrow effect. The pattern helps improve your focus and symmetry skills. Work slowly through each section so the arrow shapes stay sharp, even, and well-aligned.
3. Diamond Chain
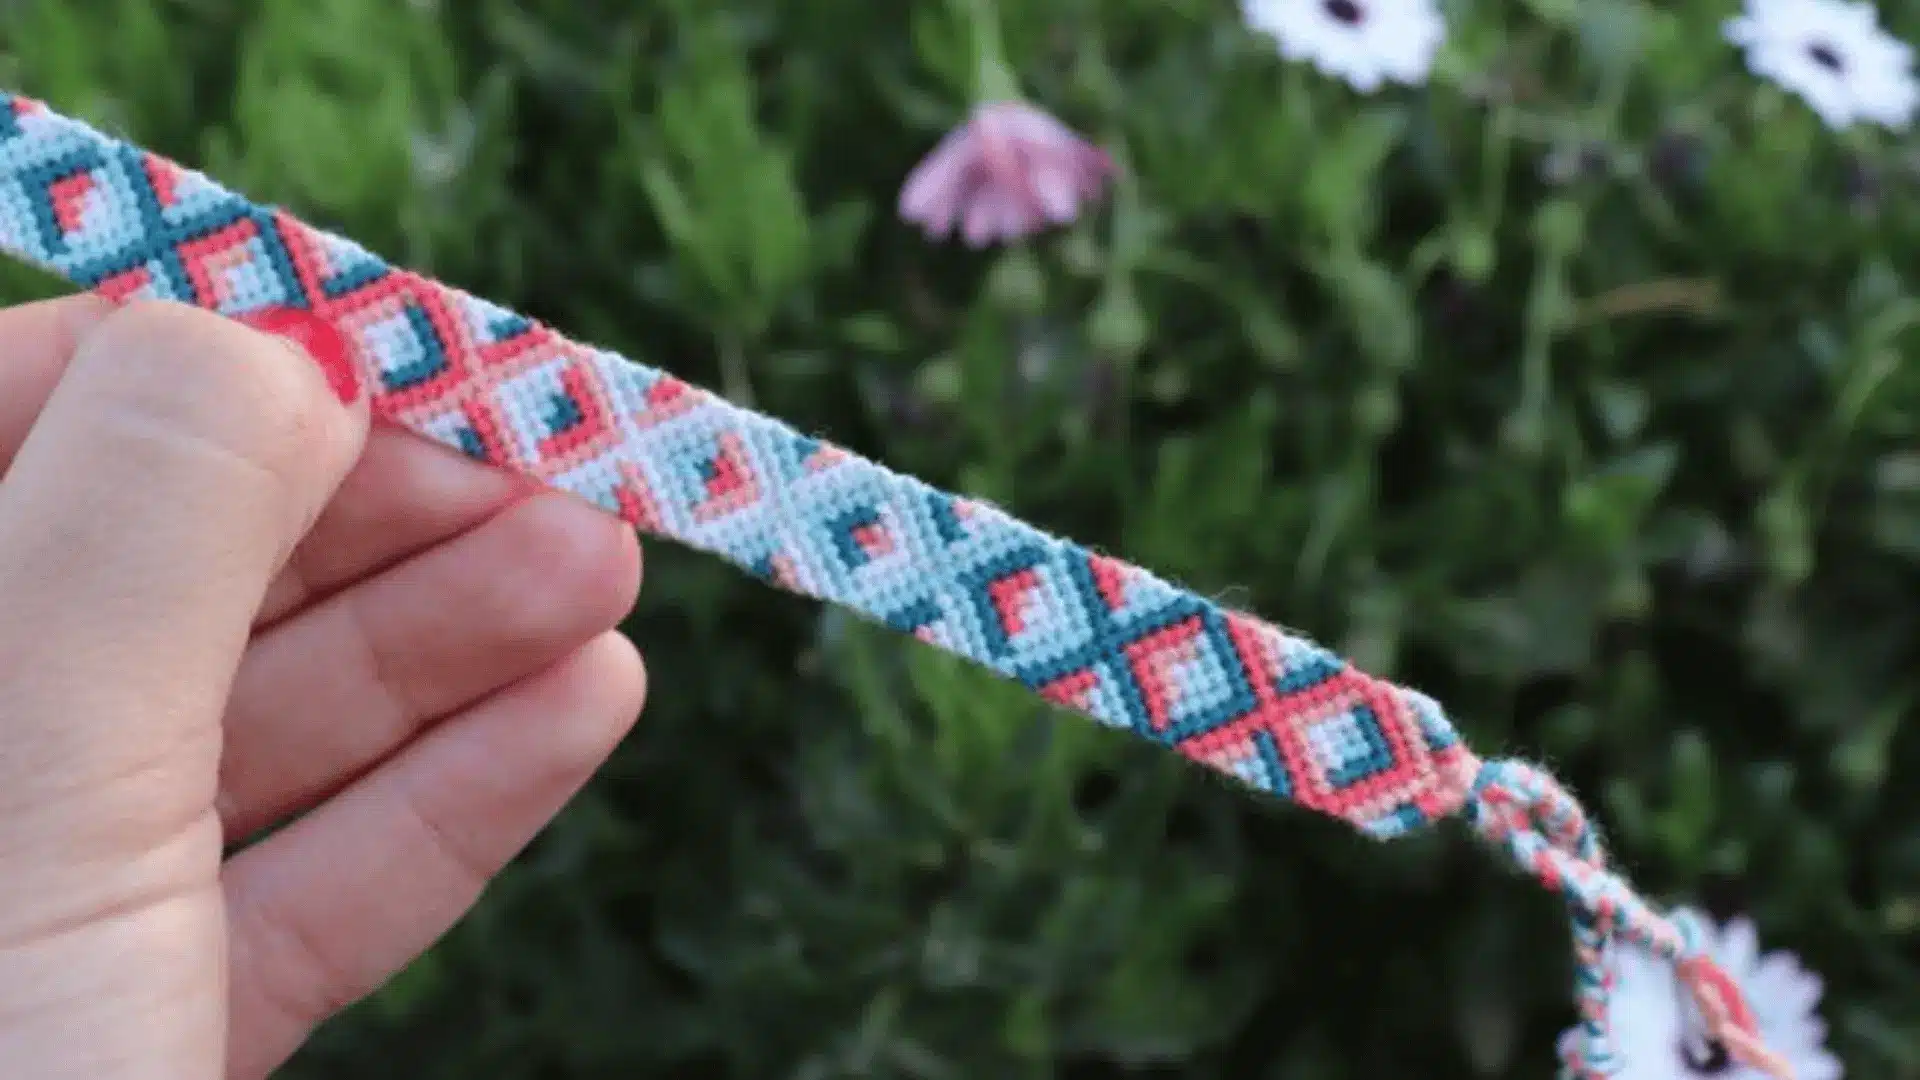
Diamond Chain takes about 60 to 75 minutes to complete and forms connected diamond shapes across the bracelet. You start by bringing outer strands inward using knotting techniques, then reverse the steps to complete each diamond.
The design builds row by row, creating a chain of diamonds. It needs patience, but the result looks structured and neat. Keep knots firm so the diamond edges stay clear and well-shaped.
4. Wave Pattern
Wave Pattern takes about 60 to 80 minutes to form soft, flowing curves across the bracelet. You alternate knot directions to create a wave-like motion that moves from side to side.
With each row, the colors shift slightly, building smooth curved lines. This pattern requires attention to order and spacing. Keep your knots even so the waves look natural, smooth, and well-balanced across the bracelet.
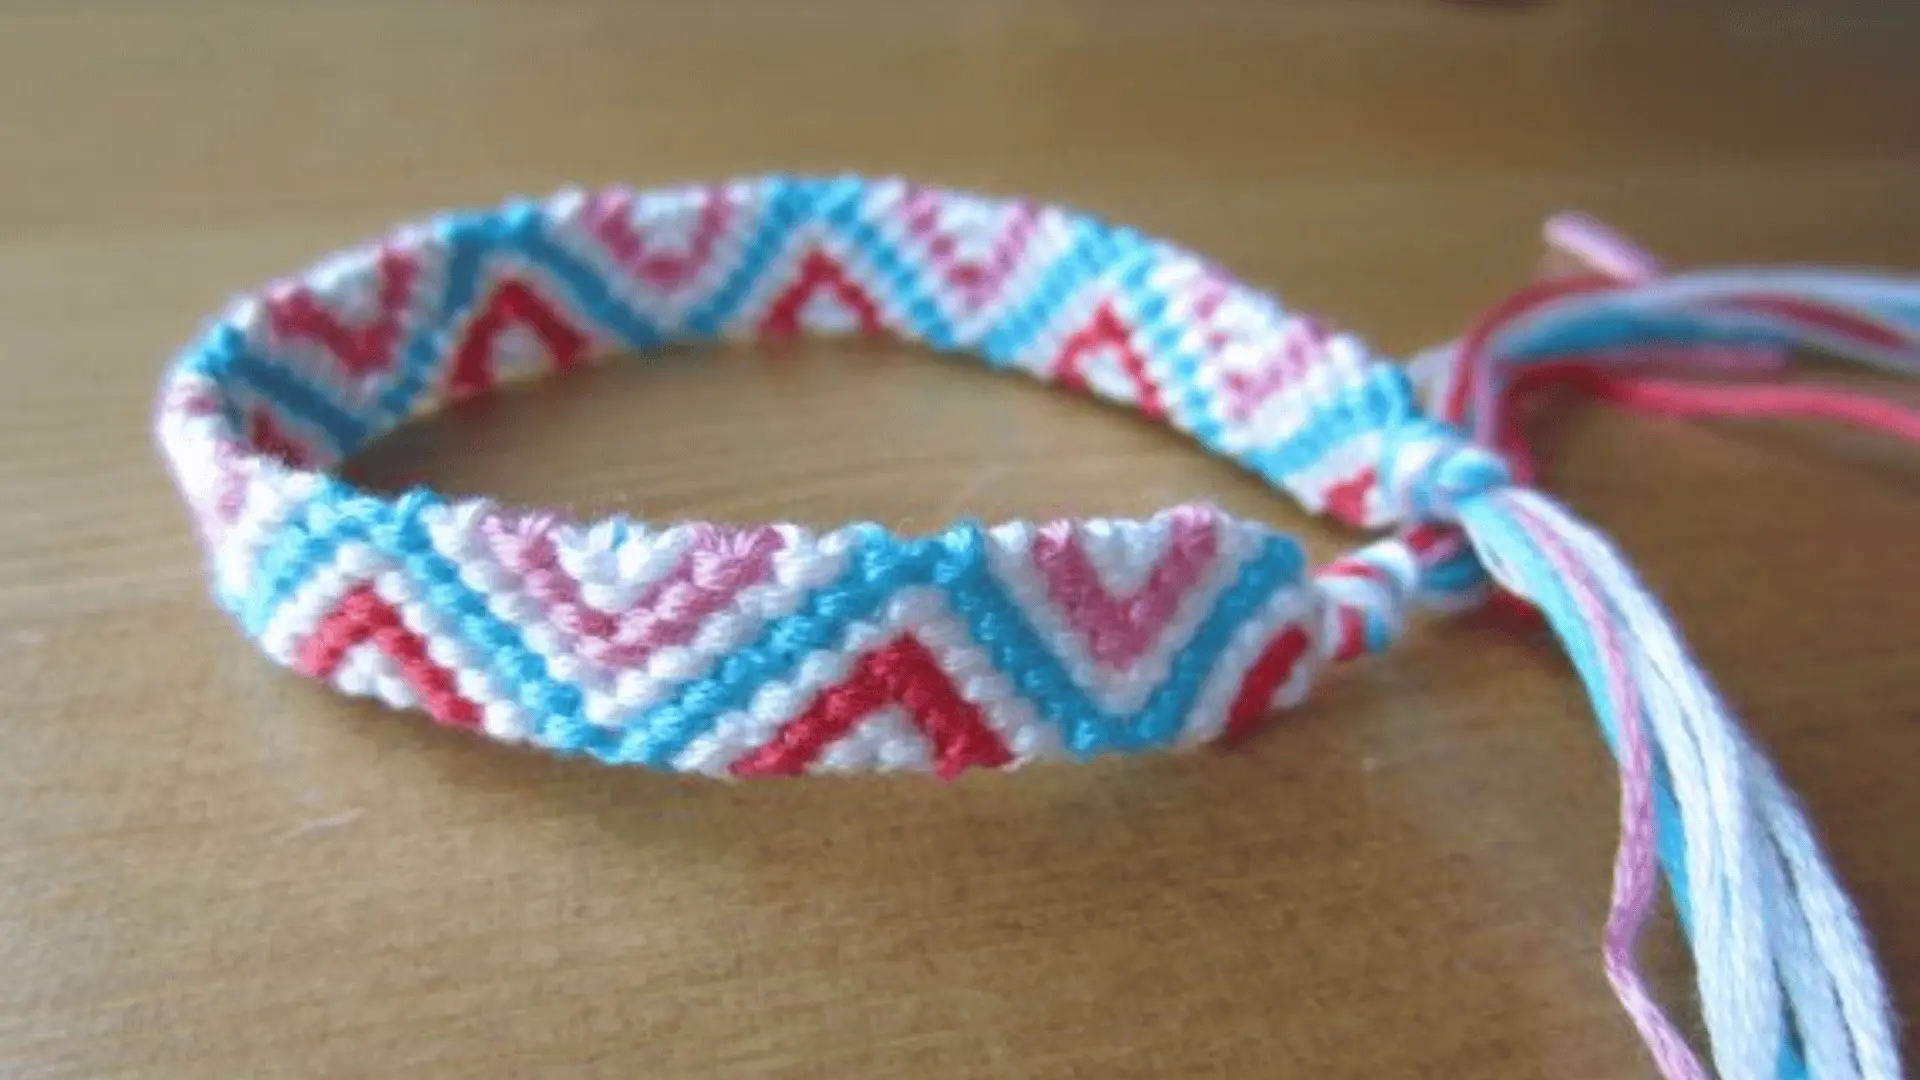
5. Hearts Pattern
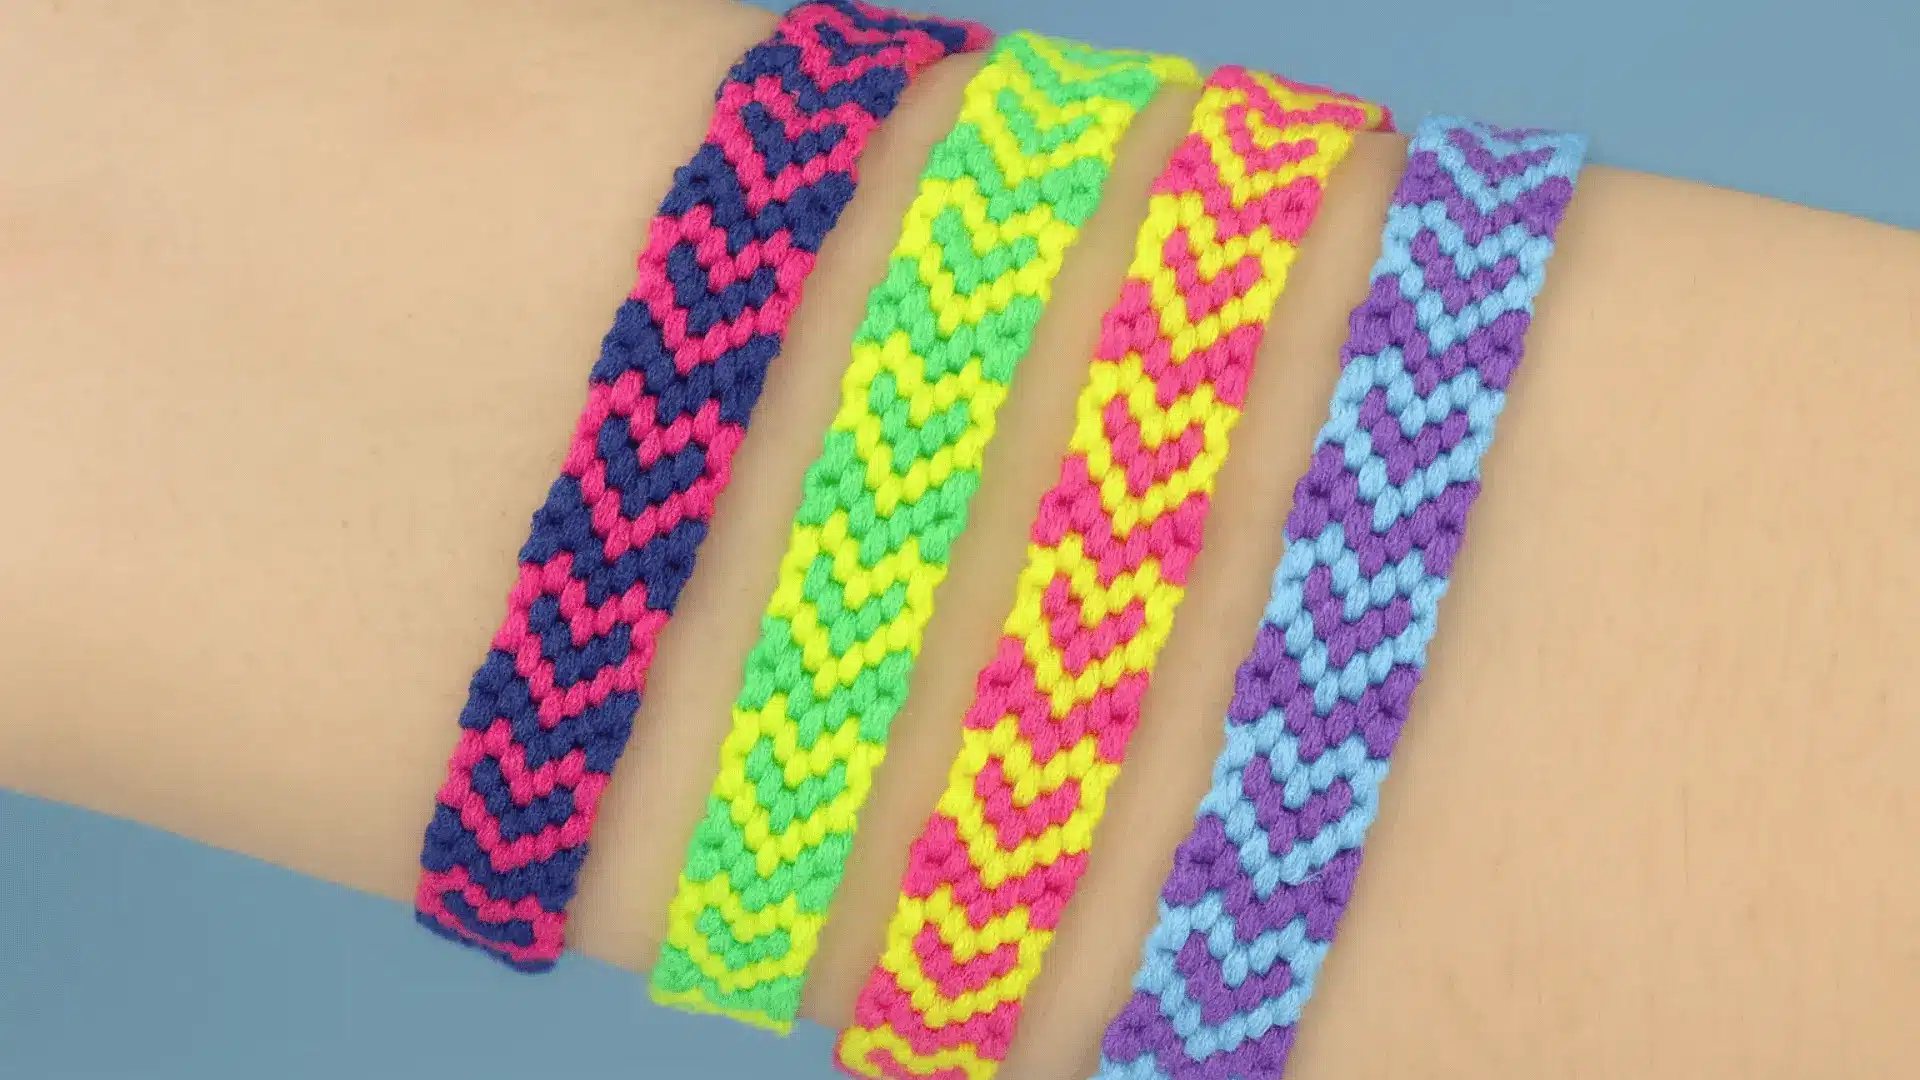
Hearts Pattern takes around 75 to 90 minutes and creates repeating heart shapes along the bracelet. You combine forward and backward knots carefully to form each heart structure.
The pattern needs planning so both sides stay even and balanced. It takes more time than basic designs, but the result is detailed and neat. Move slowly through each section to keep the heart shapes clear and well-formed.
6. Starburst Design
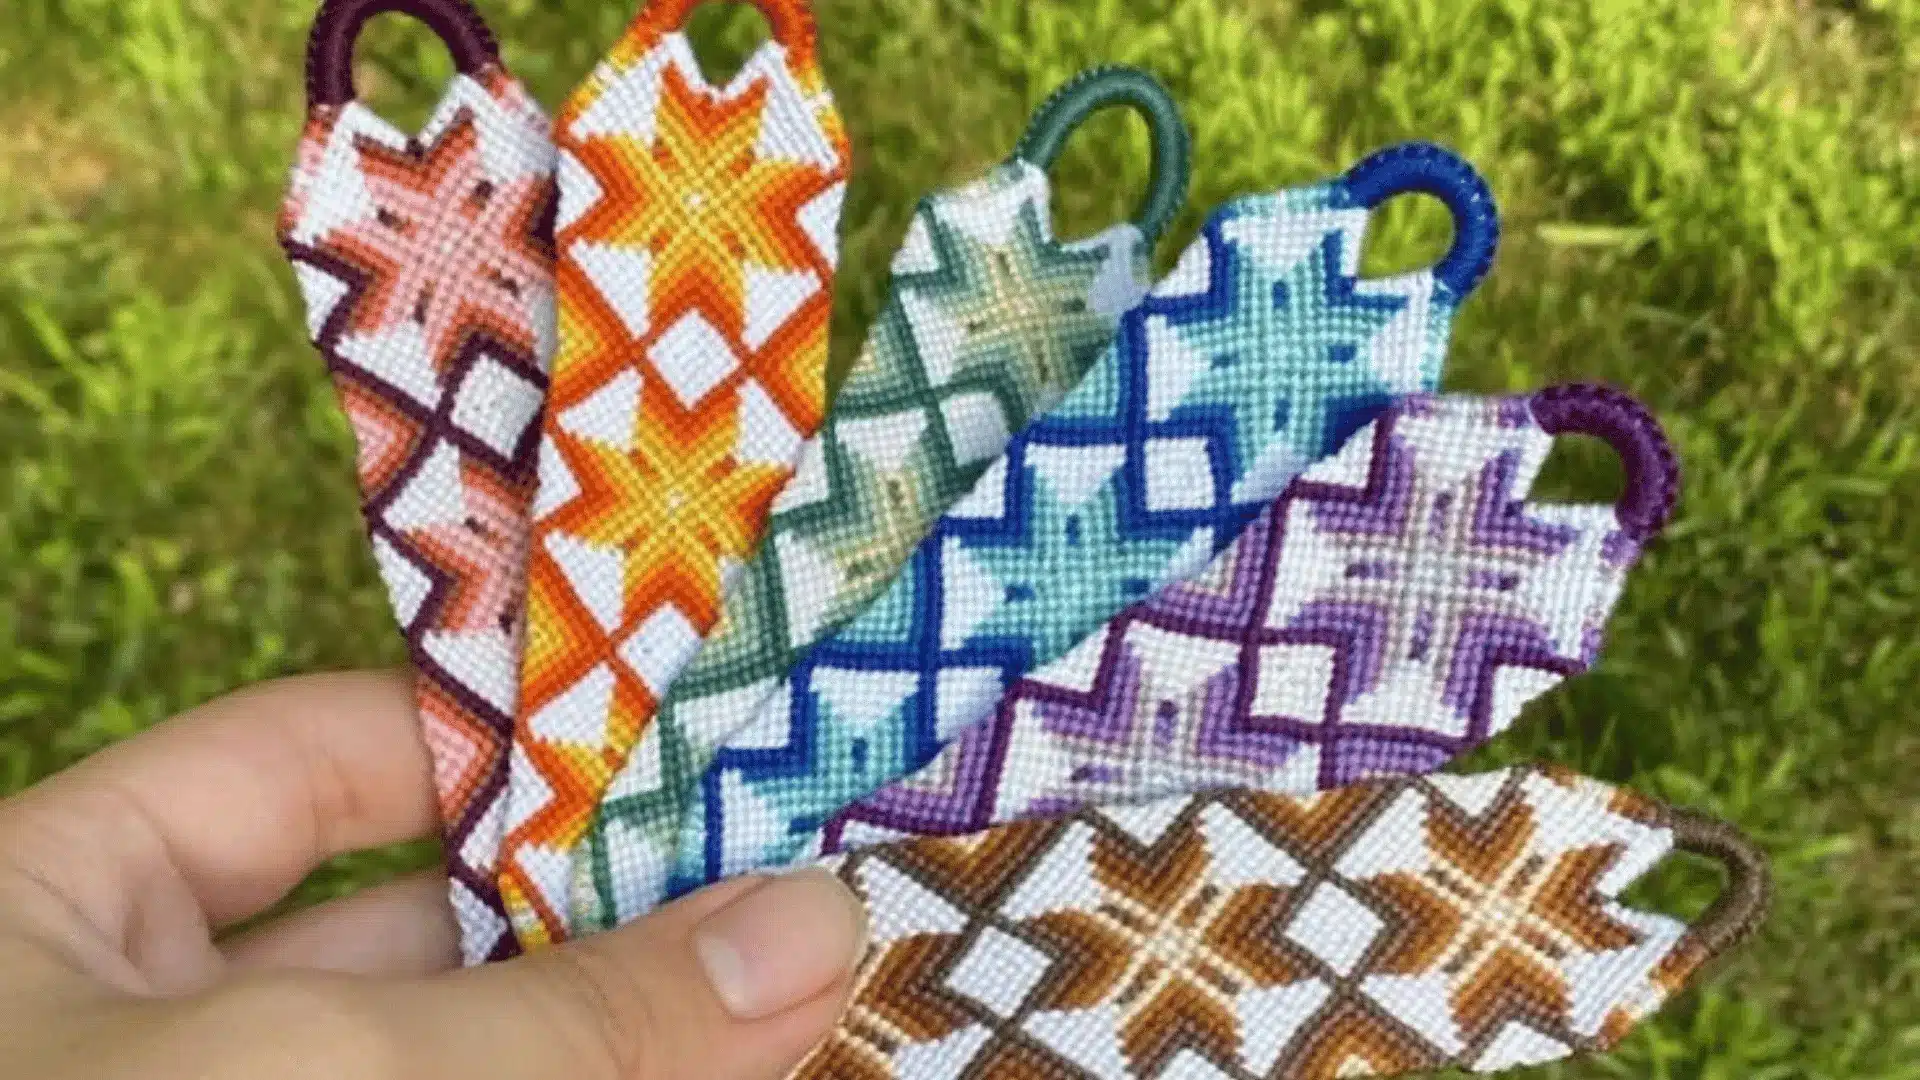
Starburst Design takes about 75 to 90 minutes and creates a bold burst pattern starting from the center. You begin in the middle and work outward using structured knotting steps.
Each section builds the star shape gradually as the design expands. This pattern needs focus because alignment is important. Keep your knots tight and consistent so the starburst lines remain sharp and clearly visible.
7. Fishbone Pattern
Fishbone Pattern takes around 60 to 75 minutes and forms repeated V-shaped lines resembling a fish skeleton. You alternate knot directions to bring strands toward the center and create angled layers.
As you continue, the pattern becomes more defined. This design is slightly more advanced but still easy to learn with practice. Keep your rows aligned so the fishbone structure stays balanced.
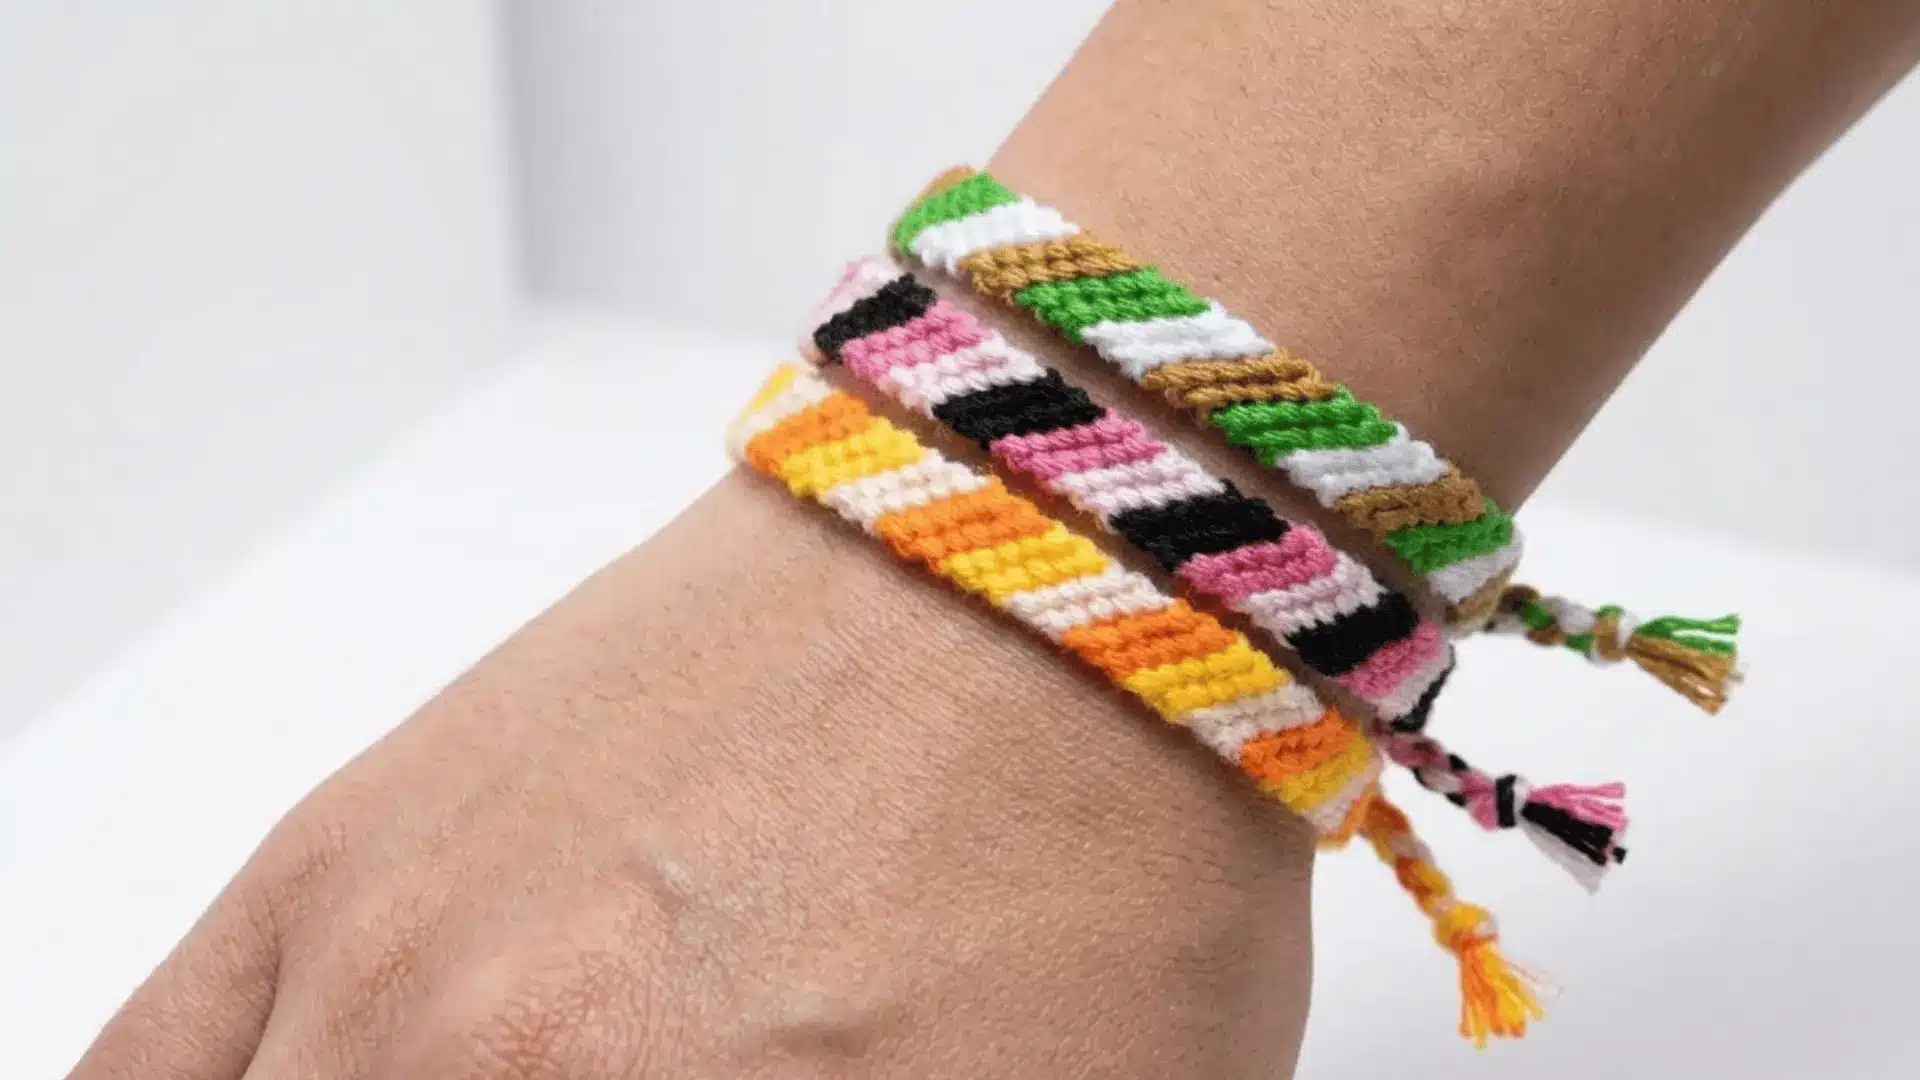
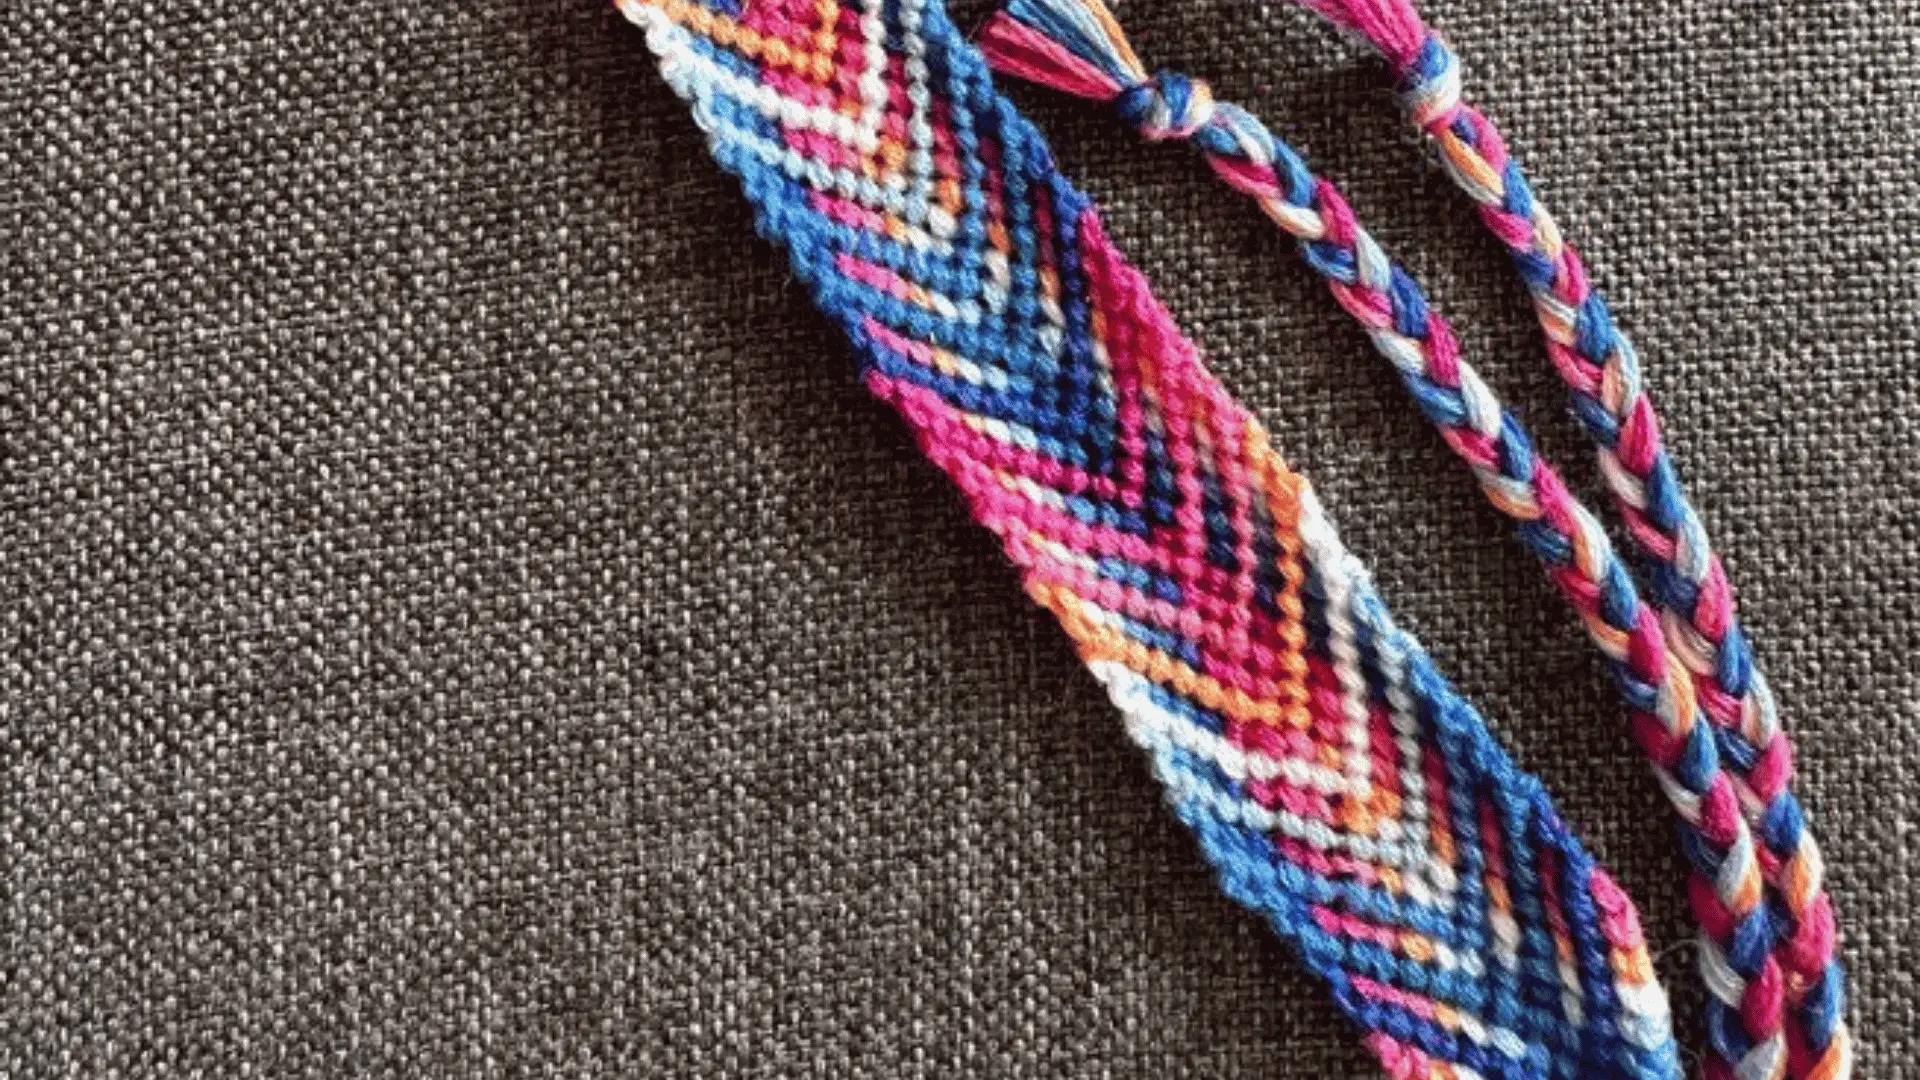
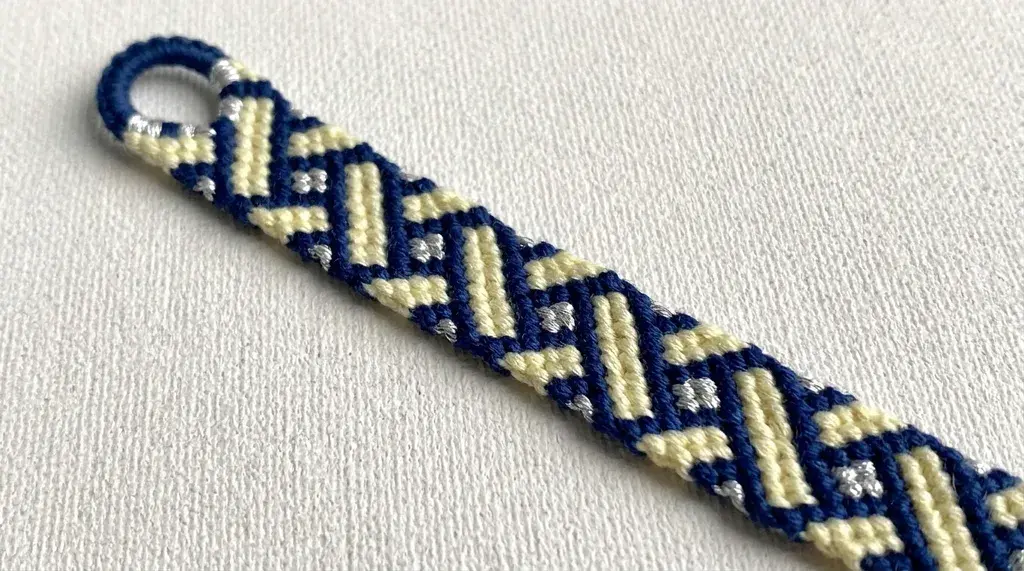
8. V-Shape Bold Chevron
![]()
V-Shape Bold Chevron takes about 60 to 90 minutes and creates strong V-shaped patterns across the bracelet.
You bring outer strands inward using forward and backward knots, then repeat the process in reverse to form each V. The pattern builds a bold zig-zag effect that repeats across the bracelet.
Keep your tension even so each V shape stays sharp, clean, and well-defined.
9. Tiny Dot Bead Pattern
Tiny Dot Bead Pattern takes about 60 to 80 minutes to complete and adds small, bead-like dot effects to a simple bracelet base.
You weave floss normally, then place small knots or beads at regular gaps to create dotted spacing.
This pattern looks light and detailed without being hard to make. Keep spacing even between dots so the design stays balanced and clean across the bracelet.
10. Monochrome Minimal Stripe
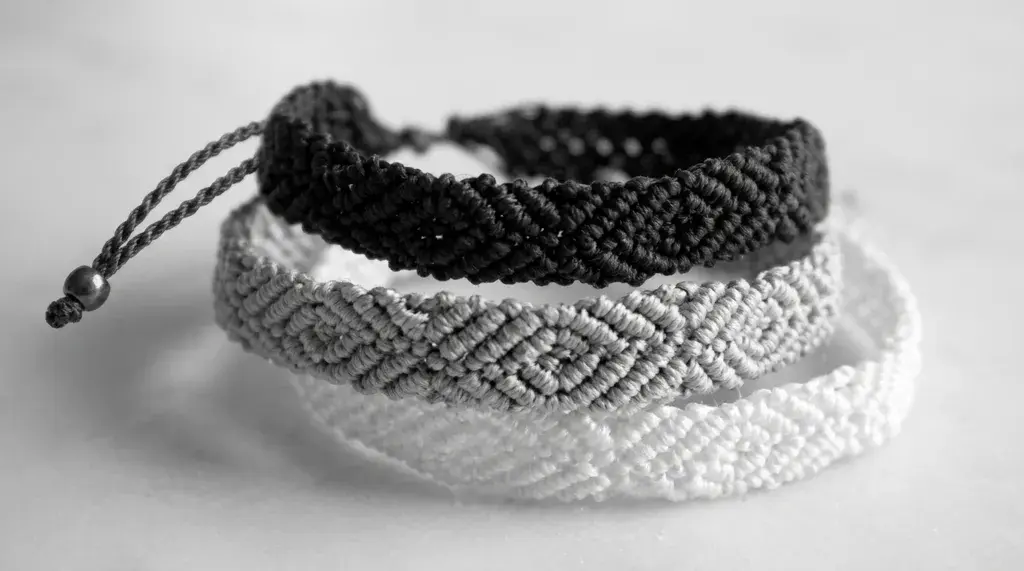
Monochrome Minimal Stripe usually takes around 40 to 60 minutes and uses only one color family, such as shades of blue, black, and grey.
You create simple straight stripe lines using repeated forward knots.
The design looks clean and calm. Keep knot tension steady so the stripes stay smooth and straight. This pattern is perfect for beginners who prefer a simple and neat style.
11. Criss-Cross Pattern
Criss-Cross Pattern takes about 60 to 80 minutes and forms overlapping diagonal lines that cross.
You alternate knot directions to build a layered X-shaped effect across the bracelet.
Each row shifts slightly, creating a woven look. This pattern needs attention to order and spacing. Keep your knots tight so the criss-cross structure stays clear and does not look messy.
12. Ladder Bracelet
A ladder bracelet usually takes 60 to 75 minutes to make and features small rungs running across the bracelet.
You create two strong side lines first, then connect them with short knots in between.
This forms a ladder-like structure. The design is easy to follow once you understand the base setup. Keep spacing equal so each rung looks straight and evenly placed.
13. Triangle Chain
Triangle Chain takes about 70 to 90 minutes to make and forms repeating triangular shapes along the bracelet.
You use forward and backward knots to bring strands inward and build pointed edges.
Each triangle connects to the next, creating a chain effect. This pattern needs patience but gives a structured look. Keep knots tight so triangle points remain sharp and clear.
14. Floral Stitch Pattern
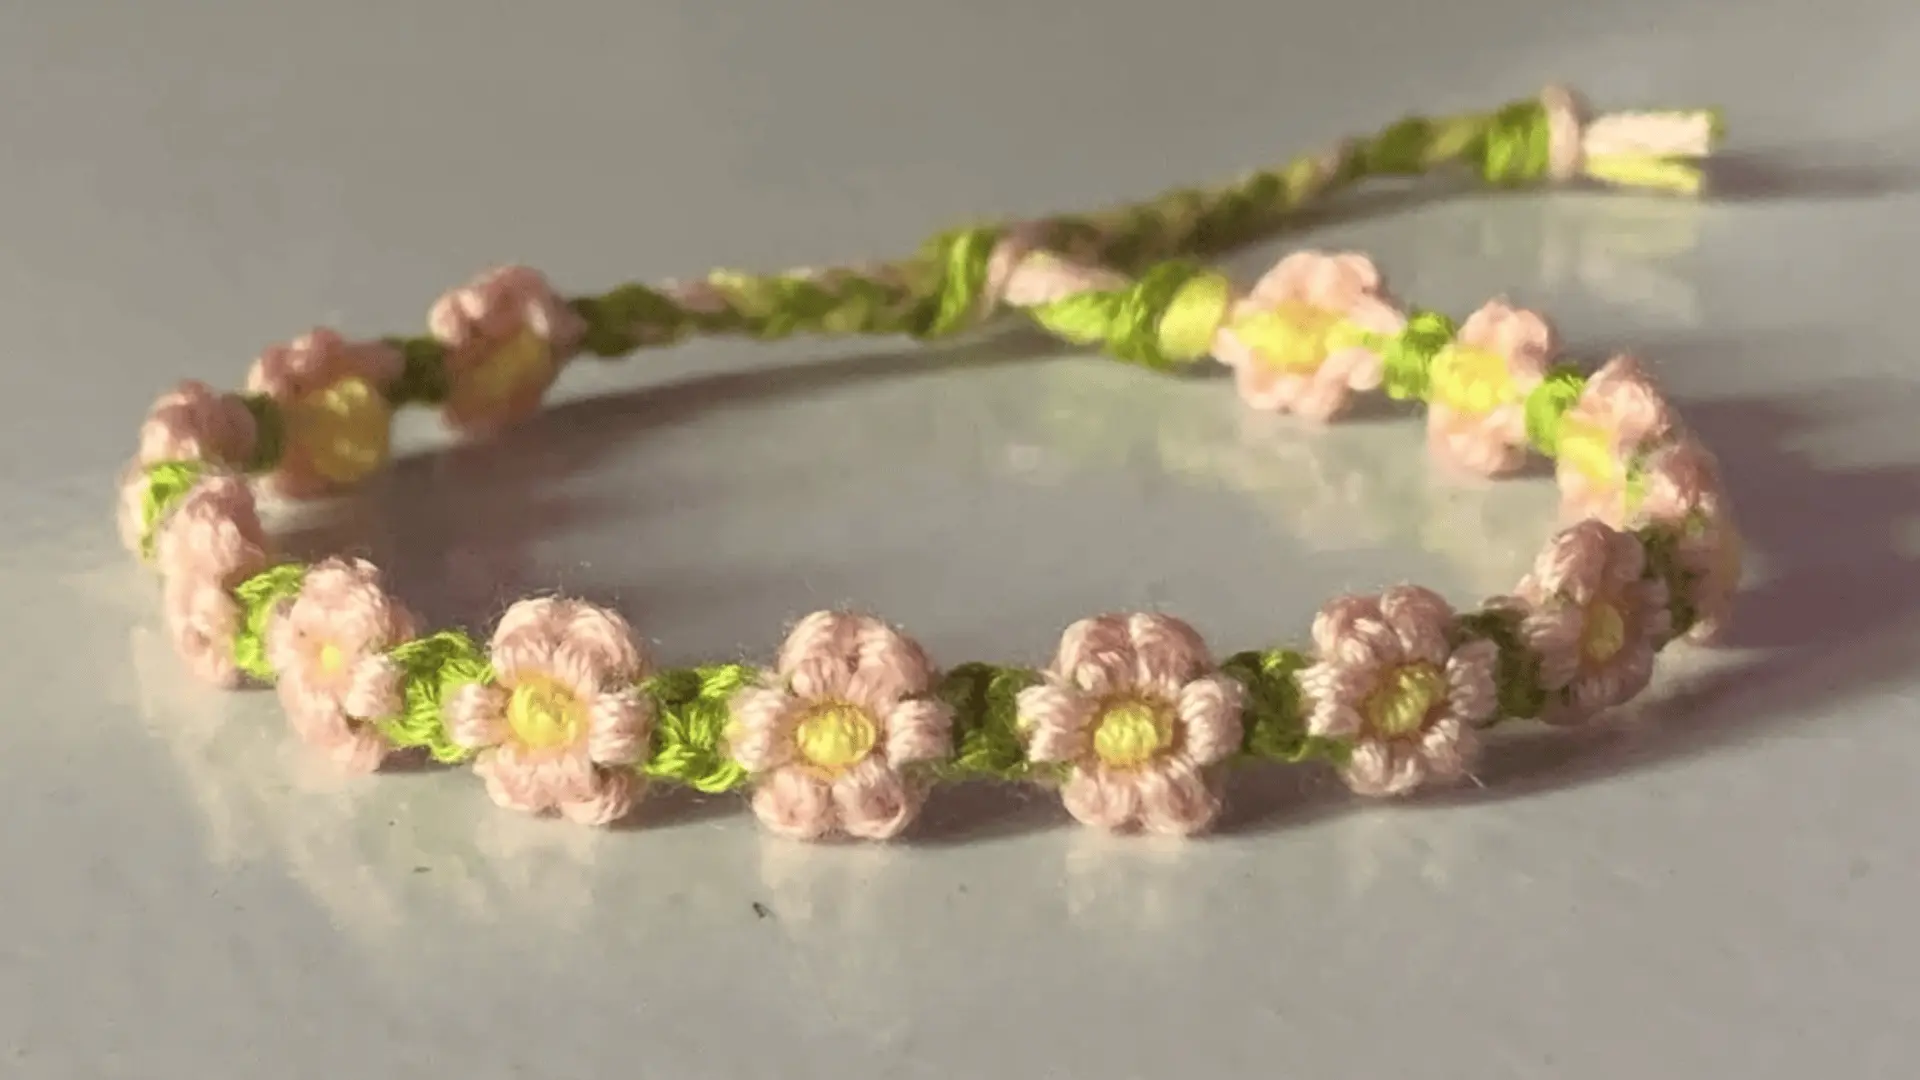
Floral Stitch Pattern takes around 75 to 90 minutes and creates small flower-like shapes along the bracelet.
You combine knot directions to form petal shapes that repeat across the design.
Each section builds a soft floral look. This pattern requires careful planning but is very rewarding. Keep spacing even so each flower shape stays balanced and easy to see.
15. Checkerboard Style
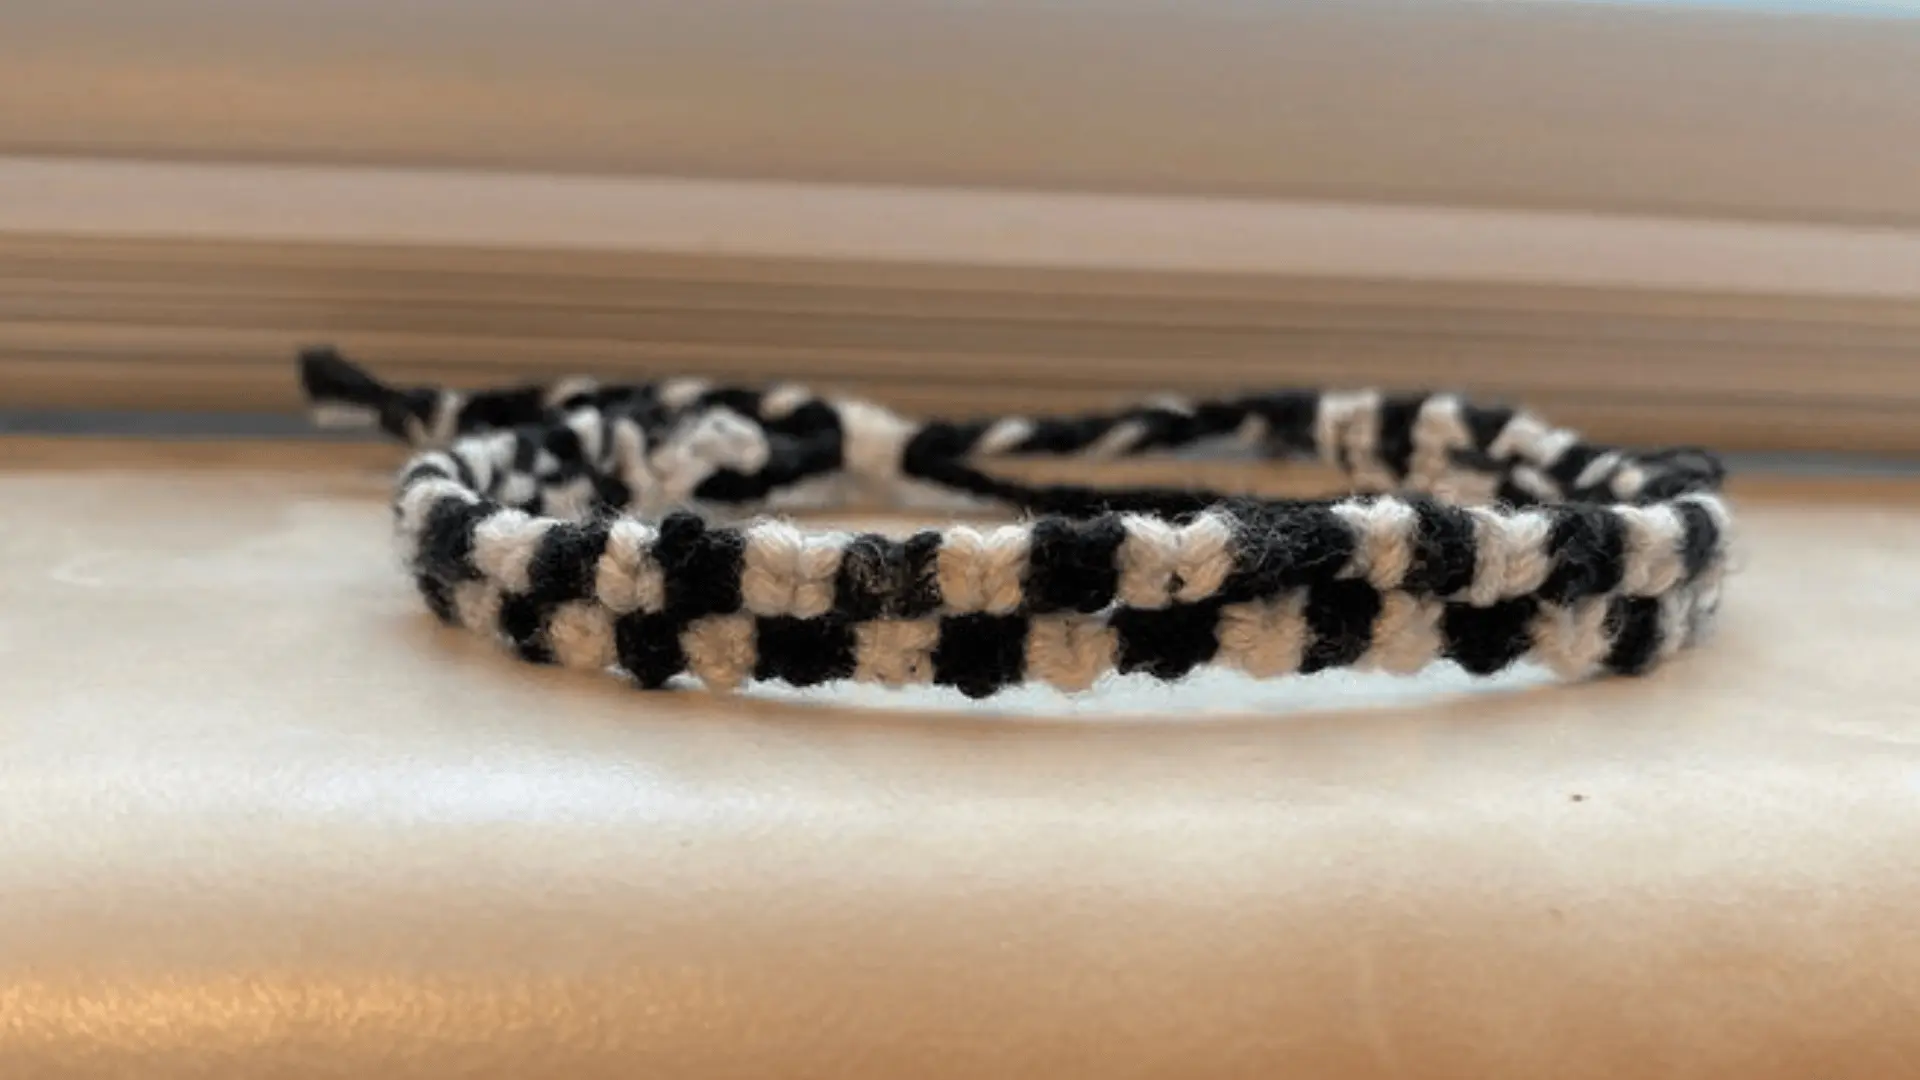
Checkerboard Style usually takes 60 to 90 minutes and creates a square grid pattern similar to a chessboard.
You alternate colors in small sections using structured knotting. Each square must match in size for a clean look. This pattern needs patience and attention to detail.
Keep your rows aligned so the checkerboard effect stays neat and even.
16. Chunky Wide Band Pattern
Chunky Wide Band Pattern takes around 75 to 90 minutes and uses more strands to create a thick, bold bracelet.
You build it with repeated rows of knots that form a wide band structure. The result looks strong and solid on the wrist. Keep your tension steady so the bracelet stays even and does not twist or curl.
Careful knotting helps maintain a smooth, balanced finish.
17. Wave Beach Macrame Bracelet
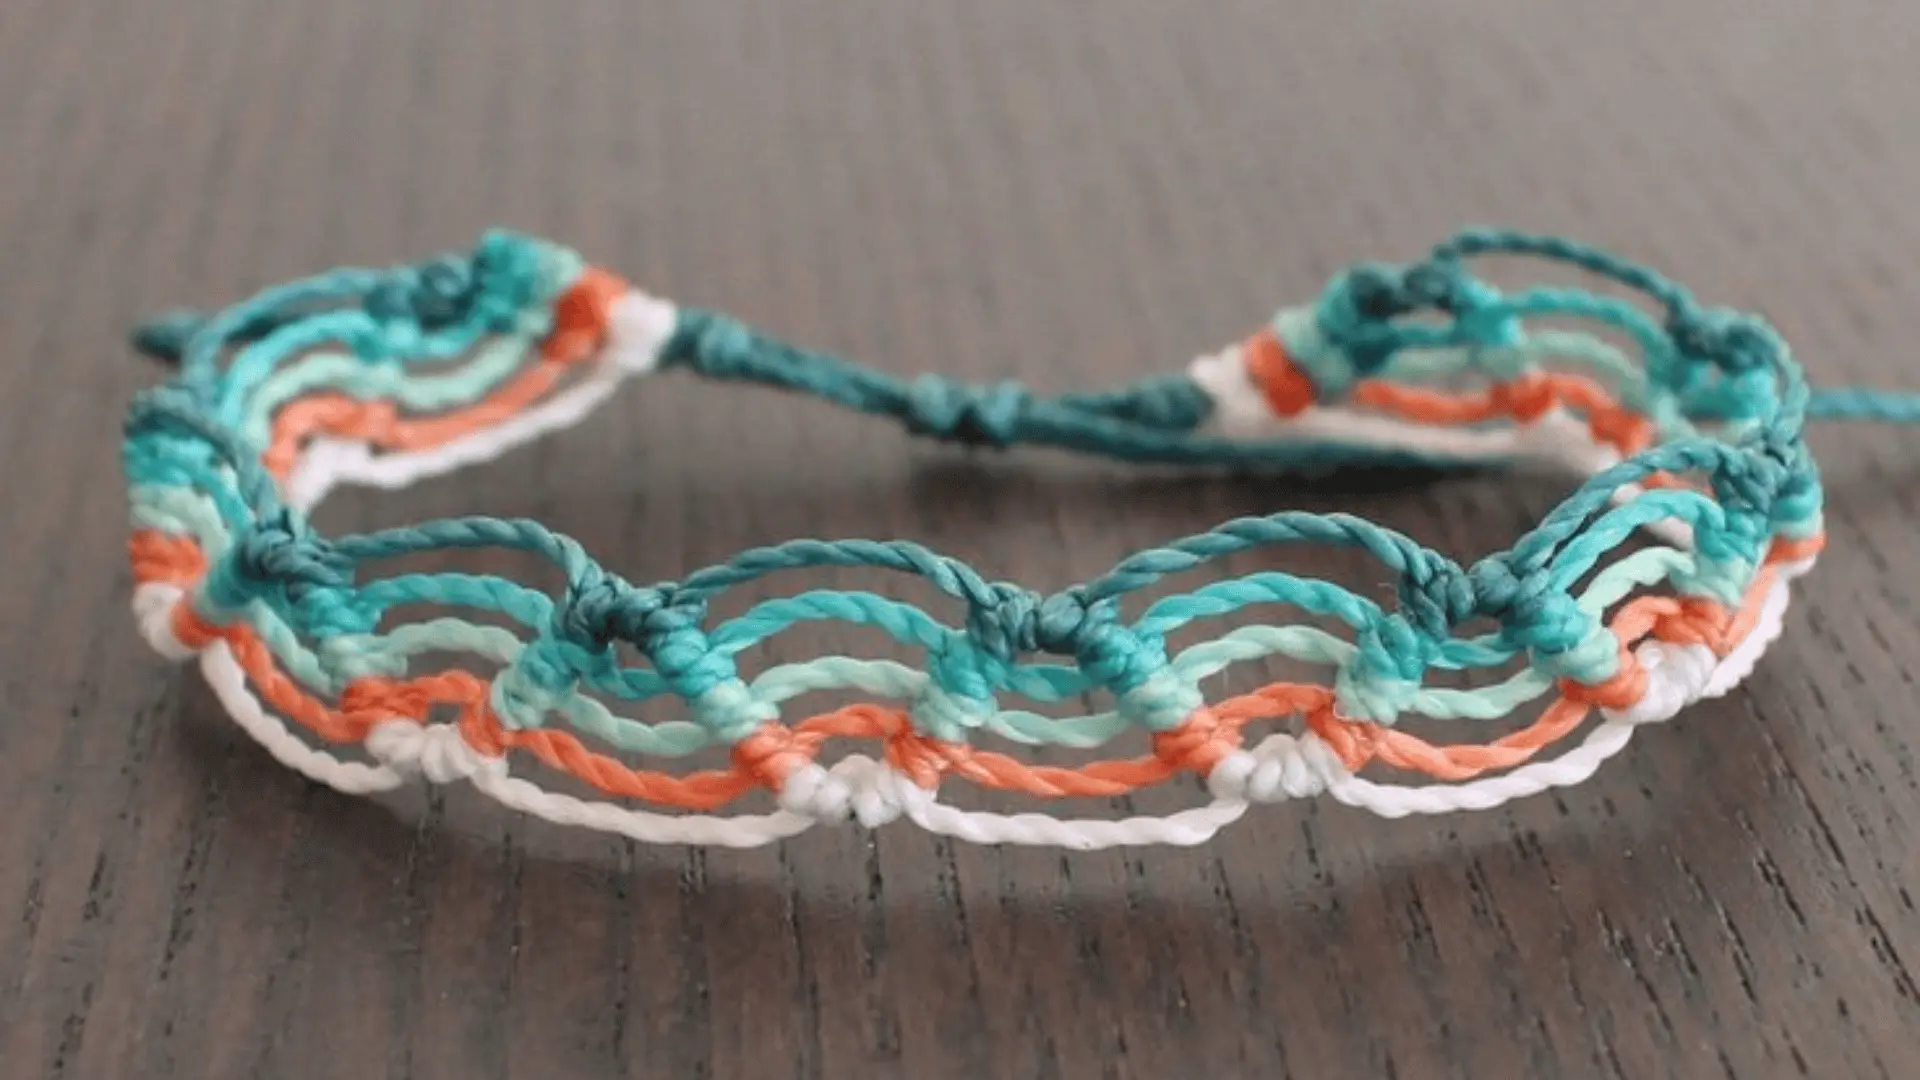
The Wave Beach Macrame Bracelet takes around 60 to 85 minutes to make and uses flowing knot techniques to create soft, wave-like lines inspired by ocean movement. You work with light and dark blue shades, mixed with white, to create a natural water effect.
The pattern is built by repeating curved knot sequences that slowly form waves across the bracelet. Keep your tension steady so the curves stay smooth, even, and clearly shaped throughout the design.
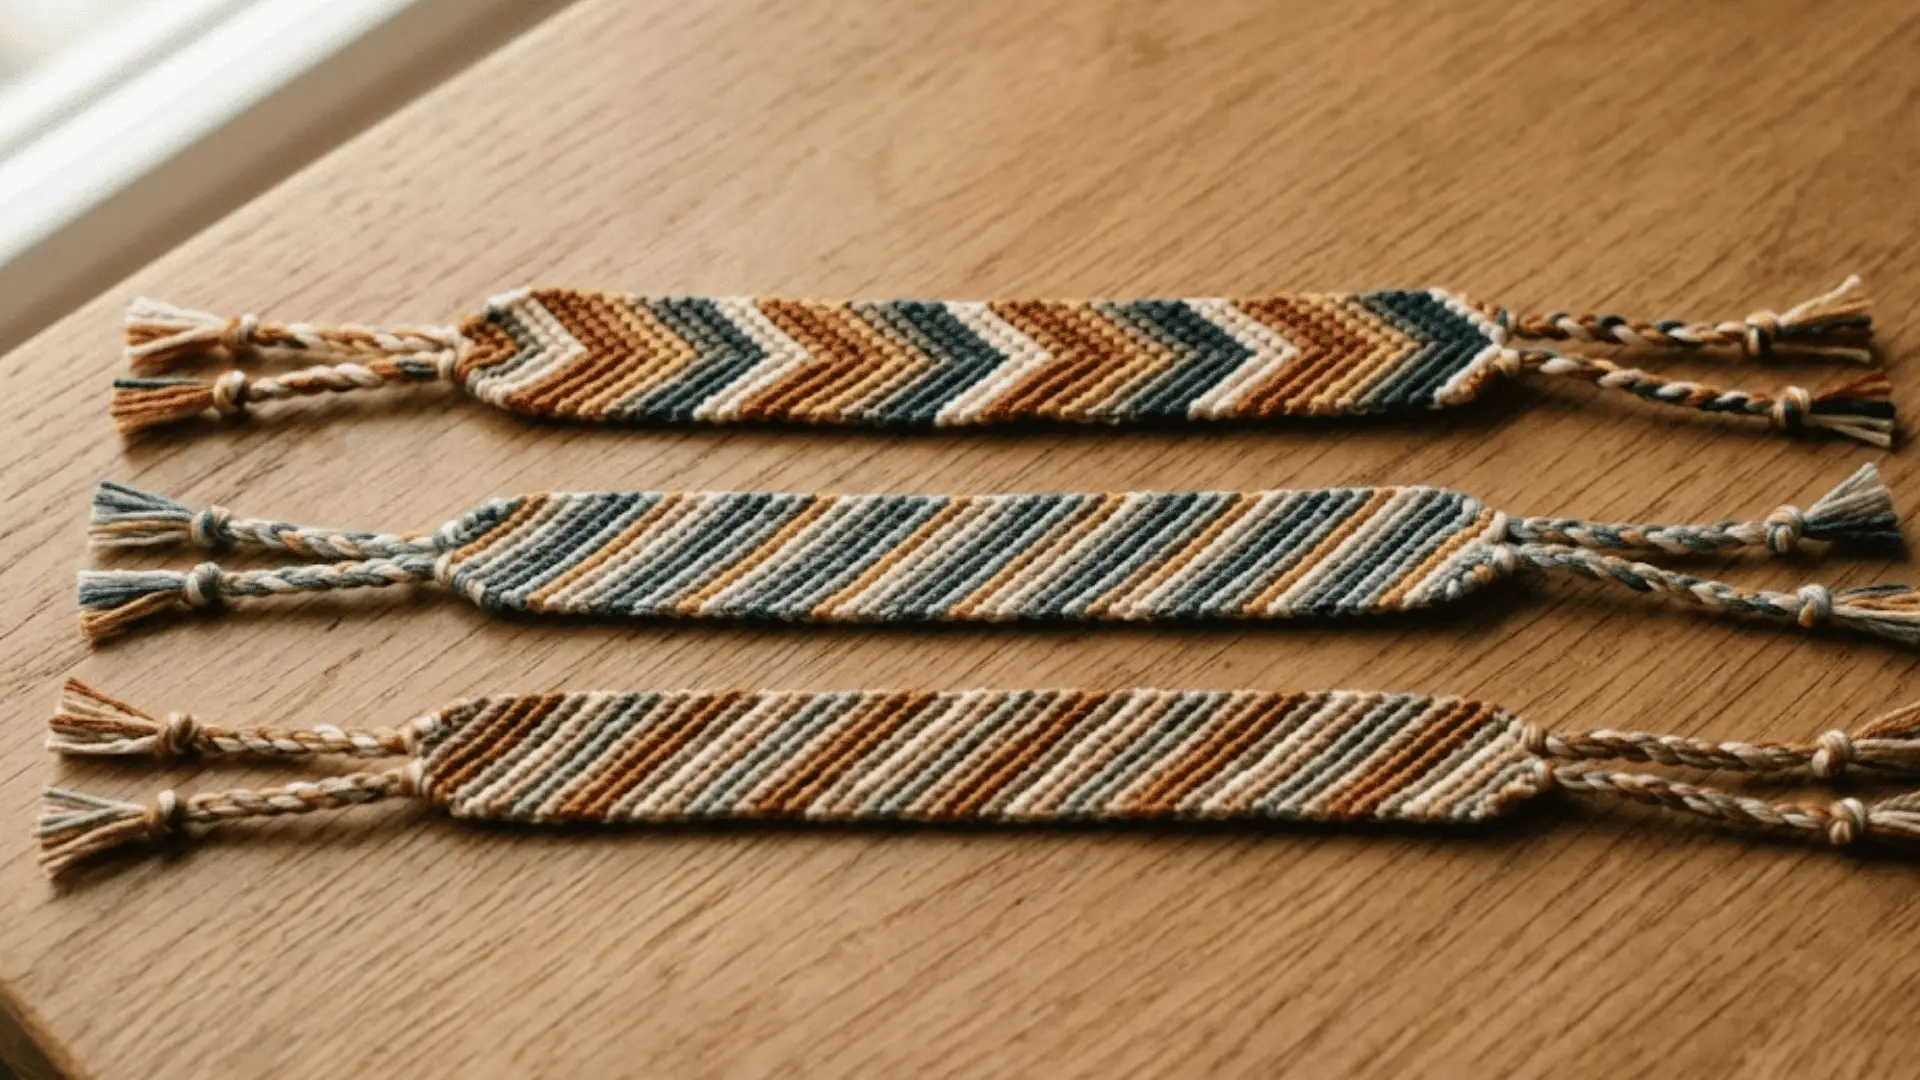
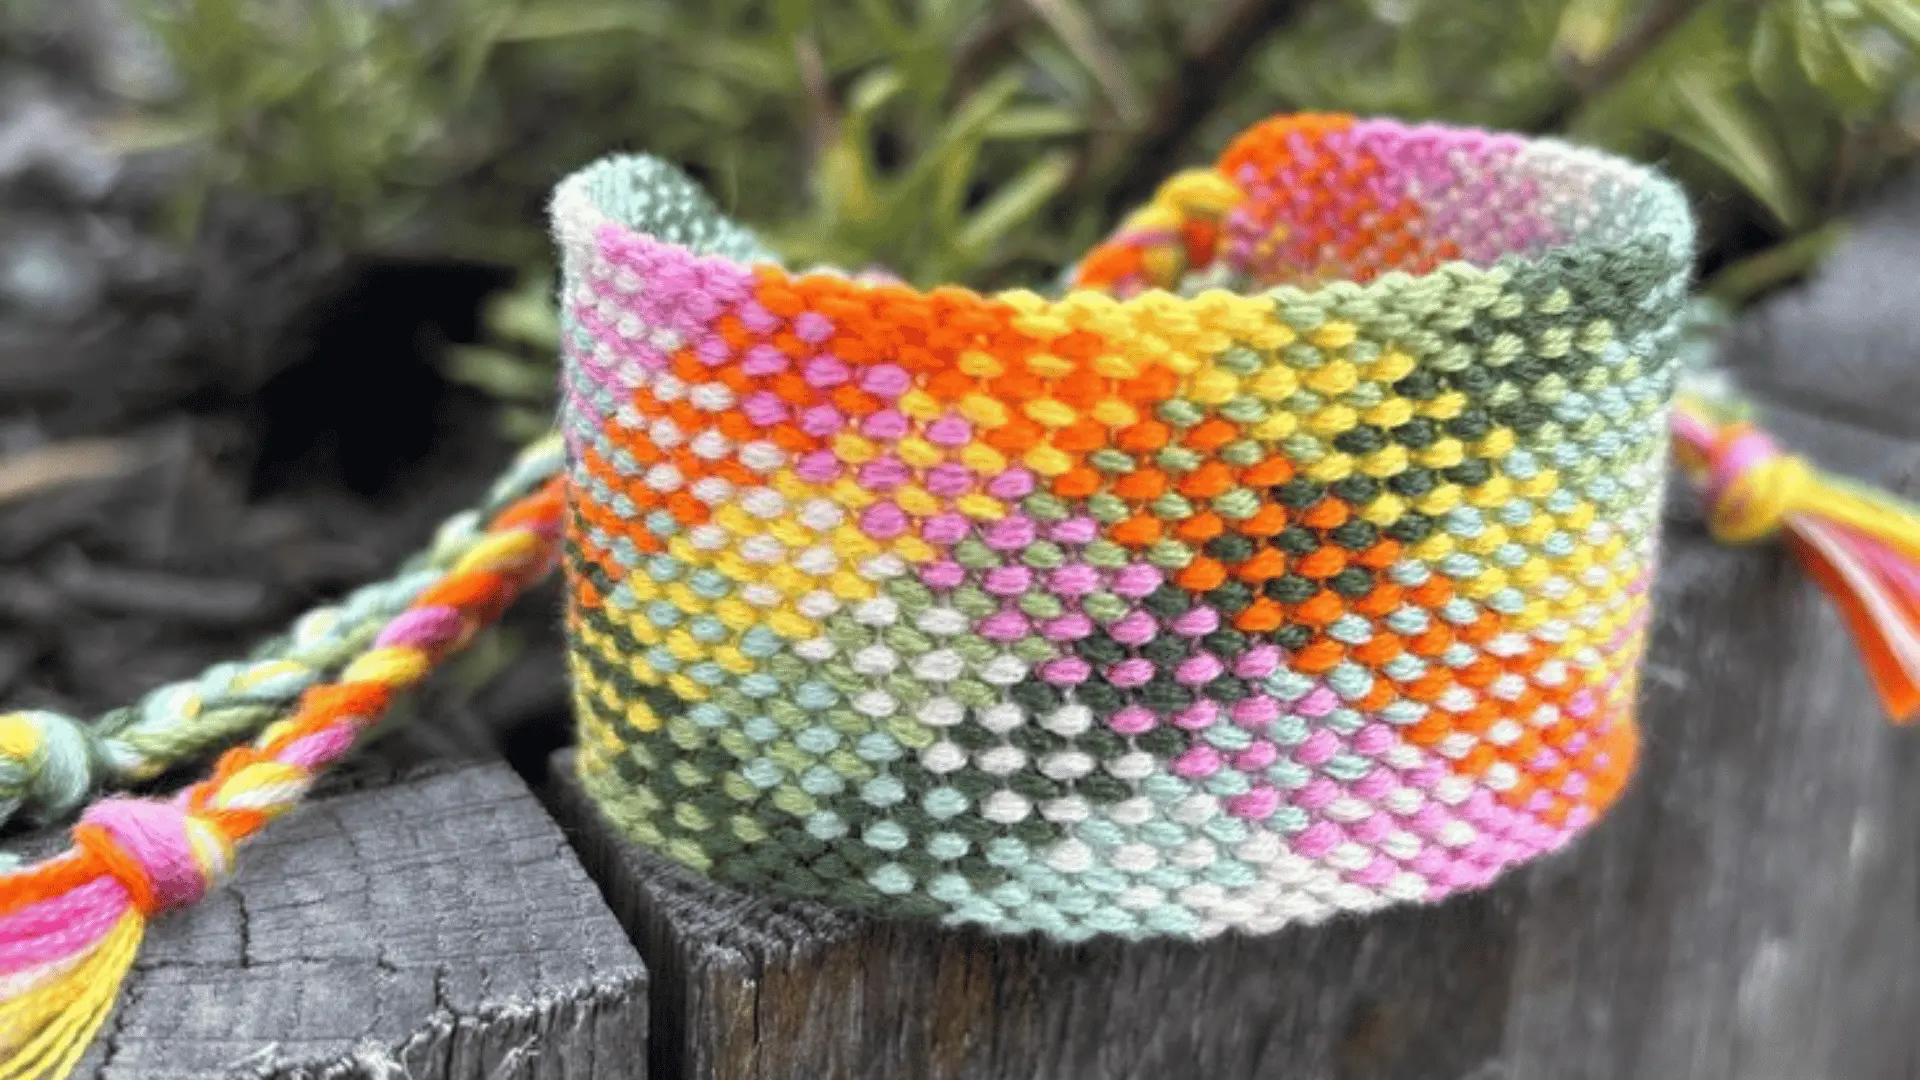
18. Earth Tone Weave
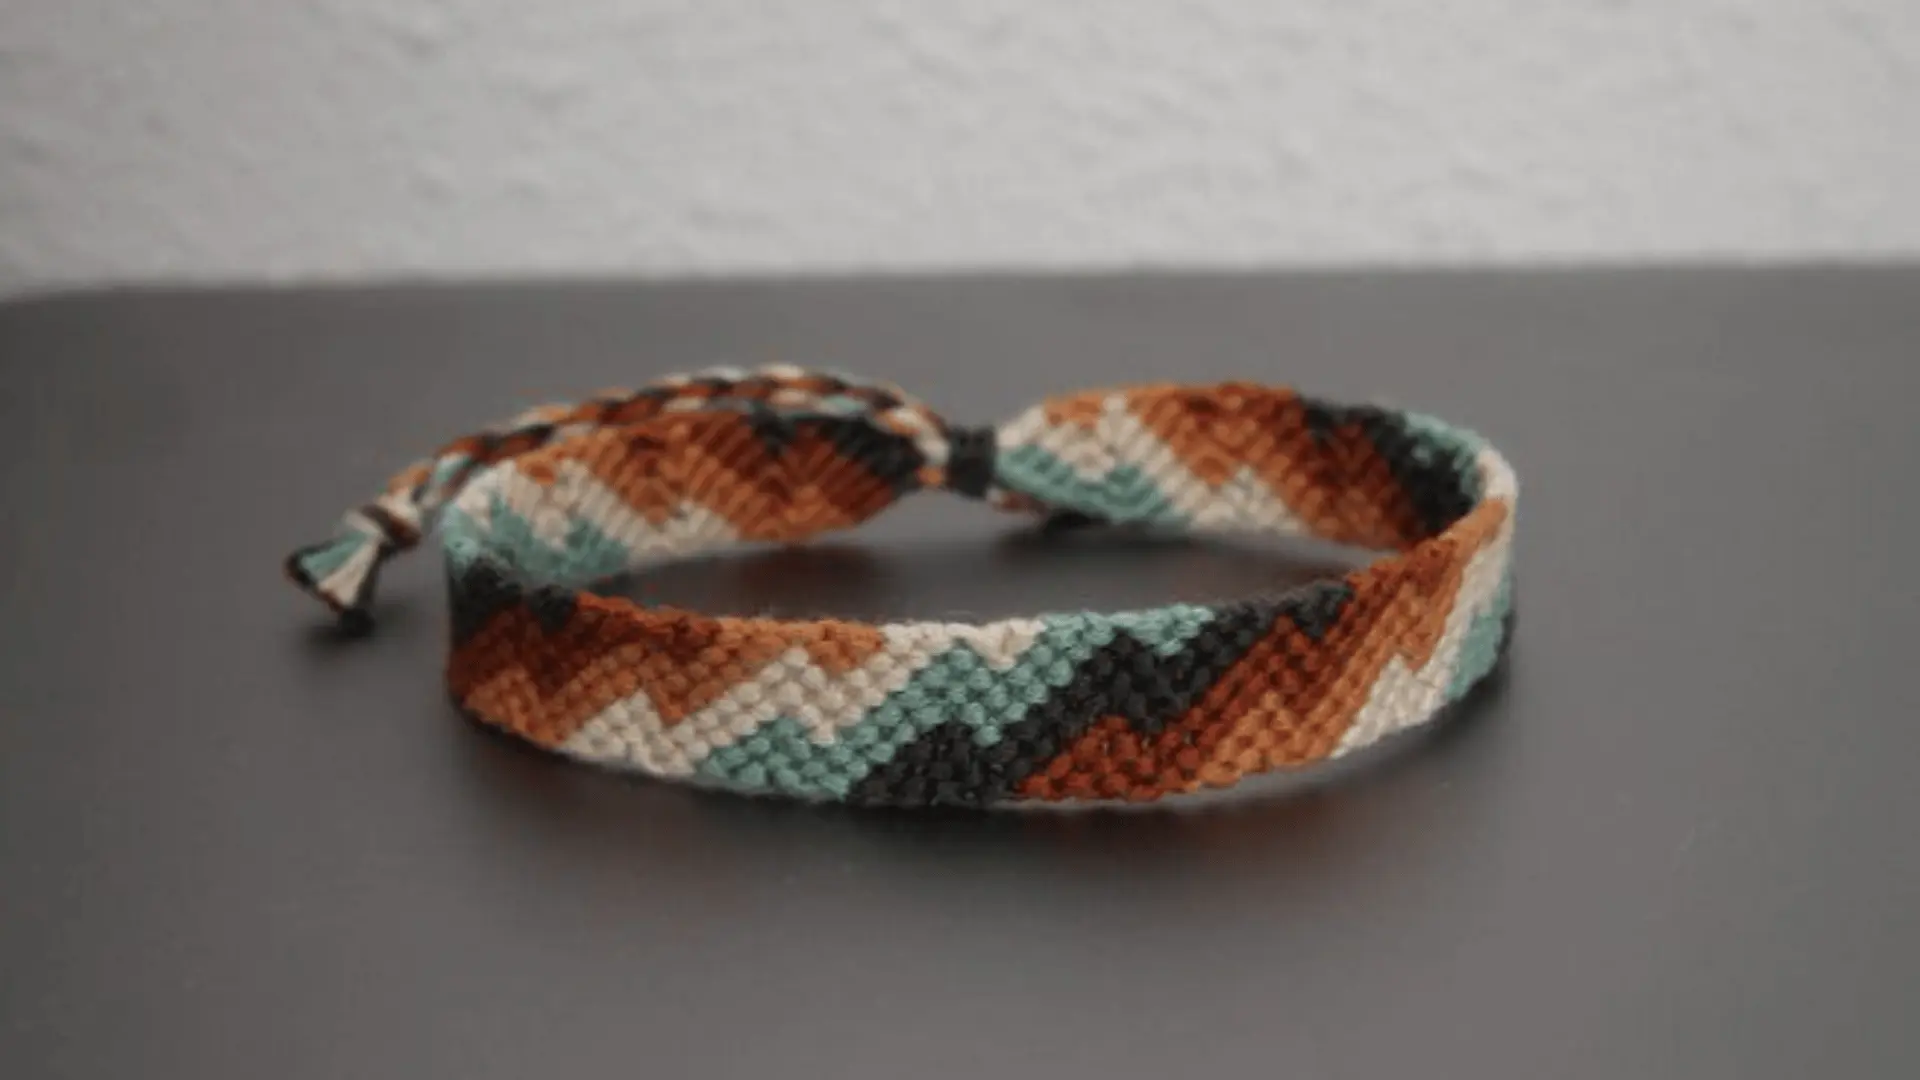
Earth Tone Weave takes about 60 to 80 minutes and uses natural shades like brown, olive green, beige, and soft orange. You weave the strands using basic knotting steps to create a grounded, organic pattern.
The design feels simple yet rich in texture thanks to the color mix. Keep spacing even and tension steady so the weave stays balanced and the earthy tones look smooth and well-organized.
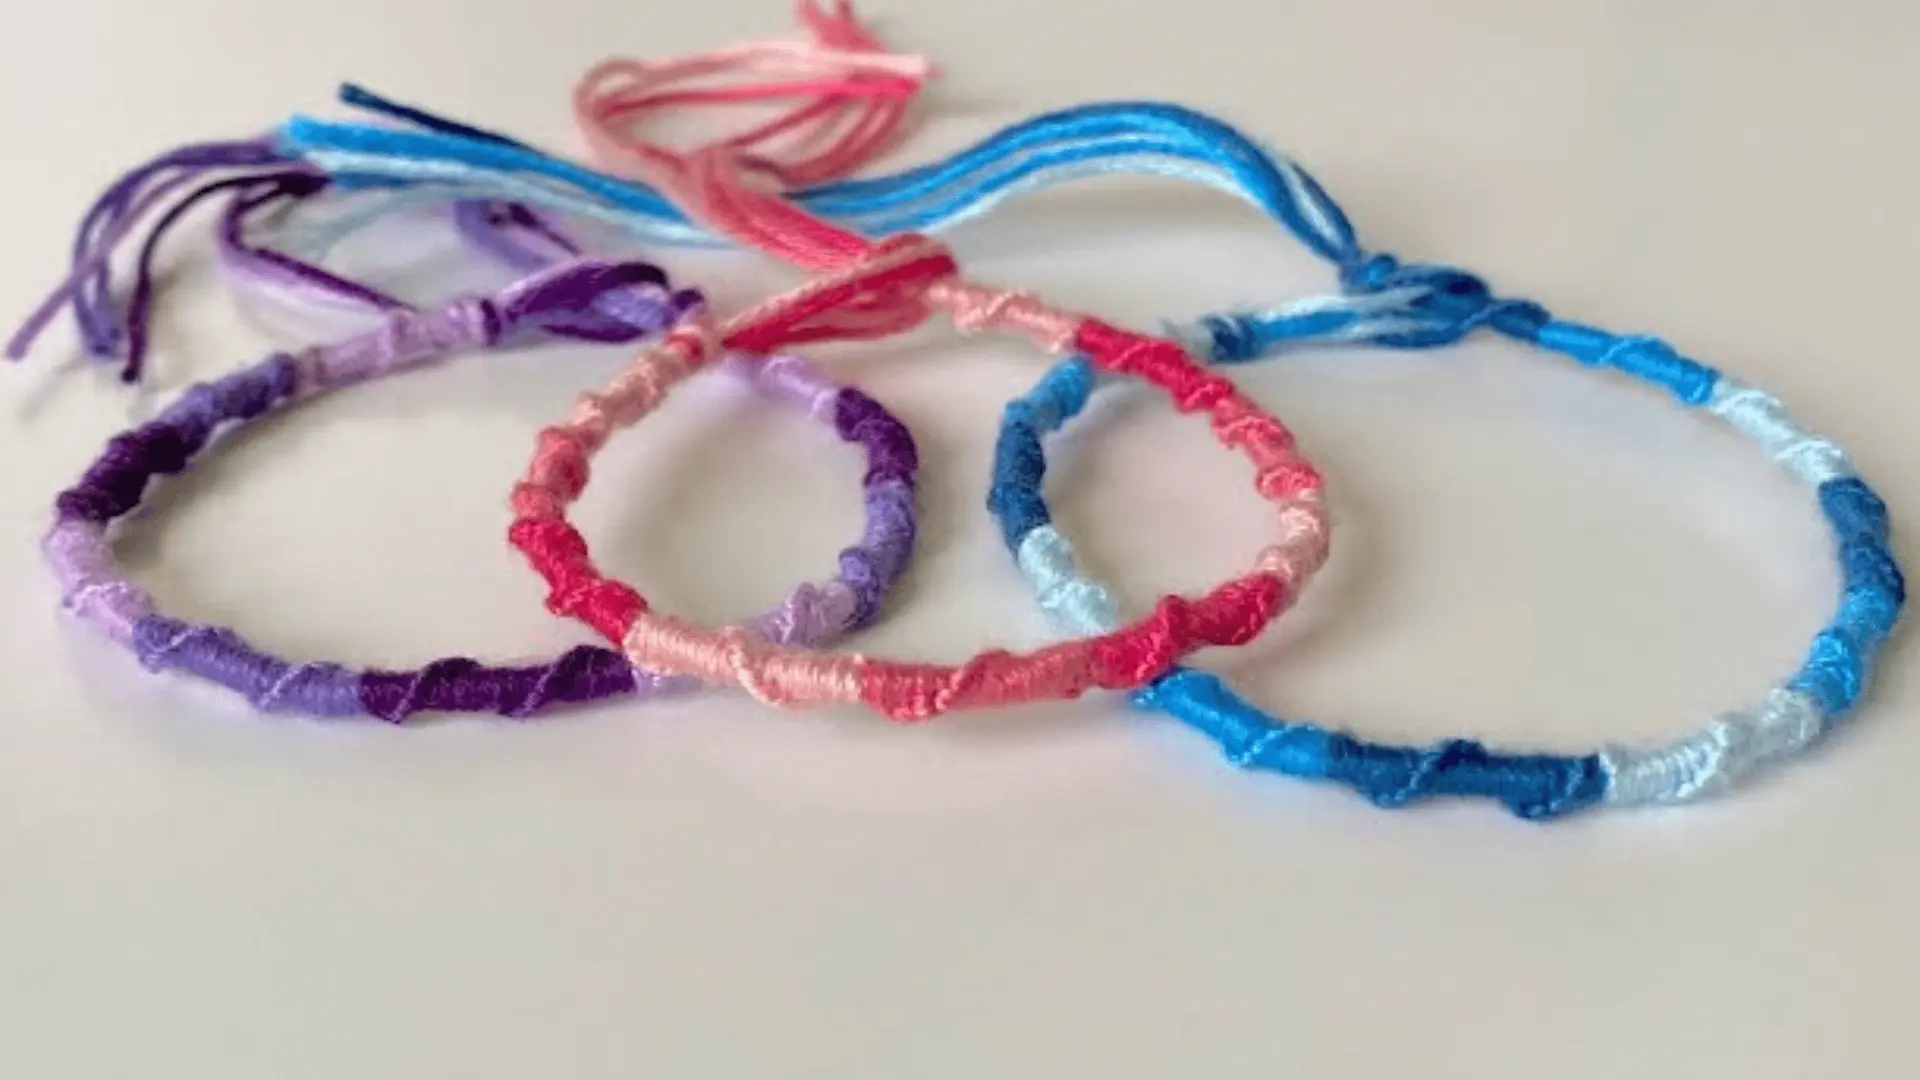
19. Thin Line Minimal Bracelet
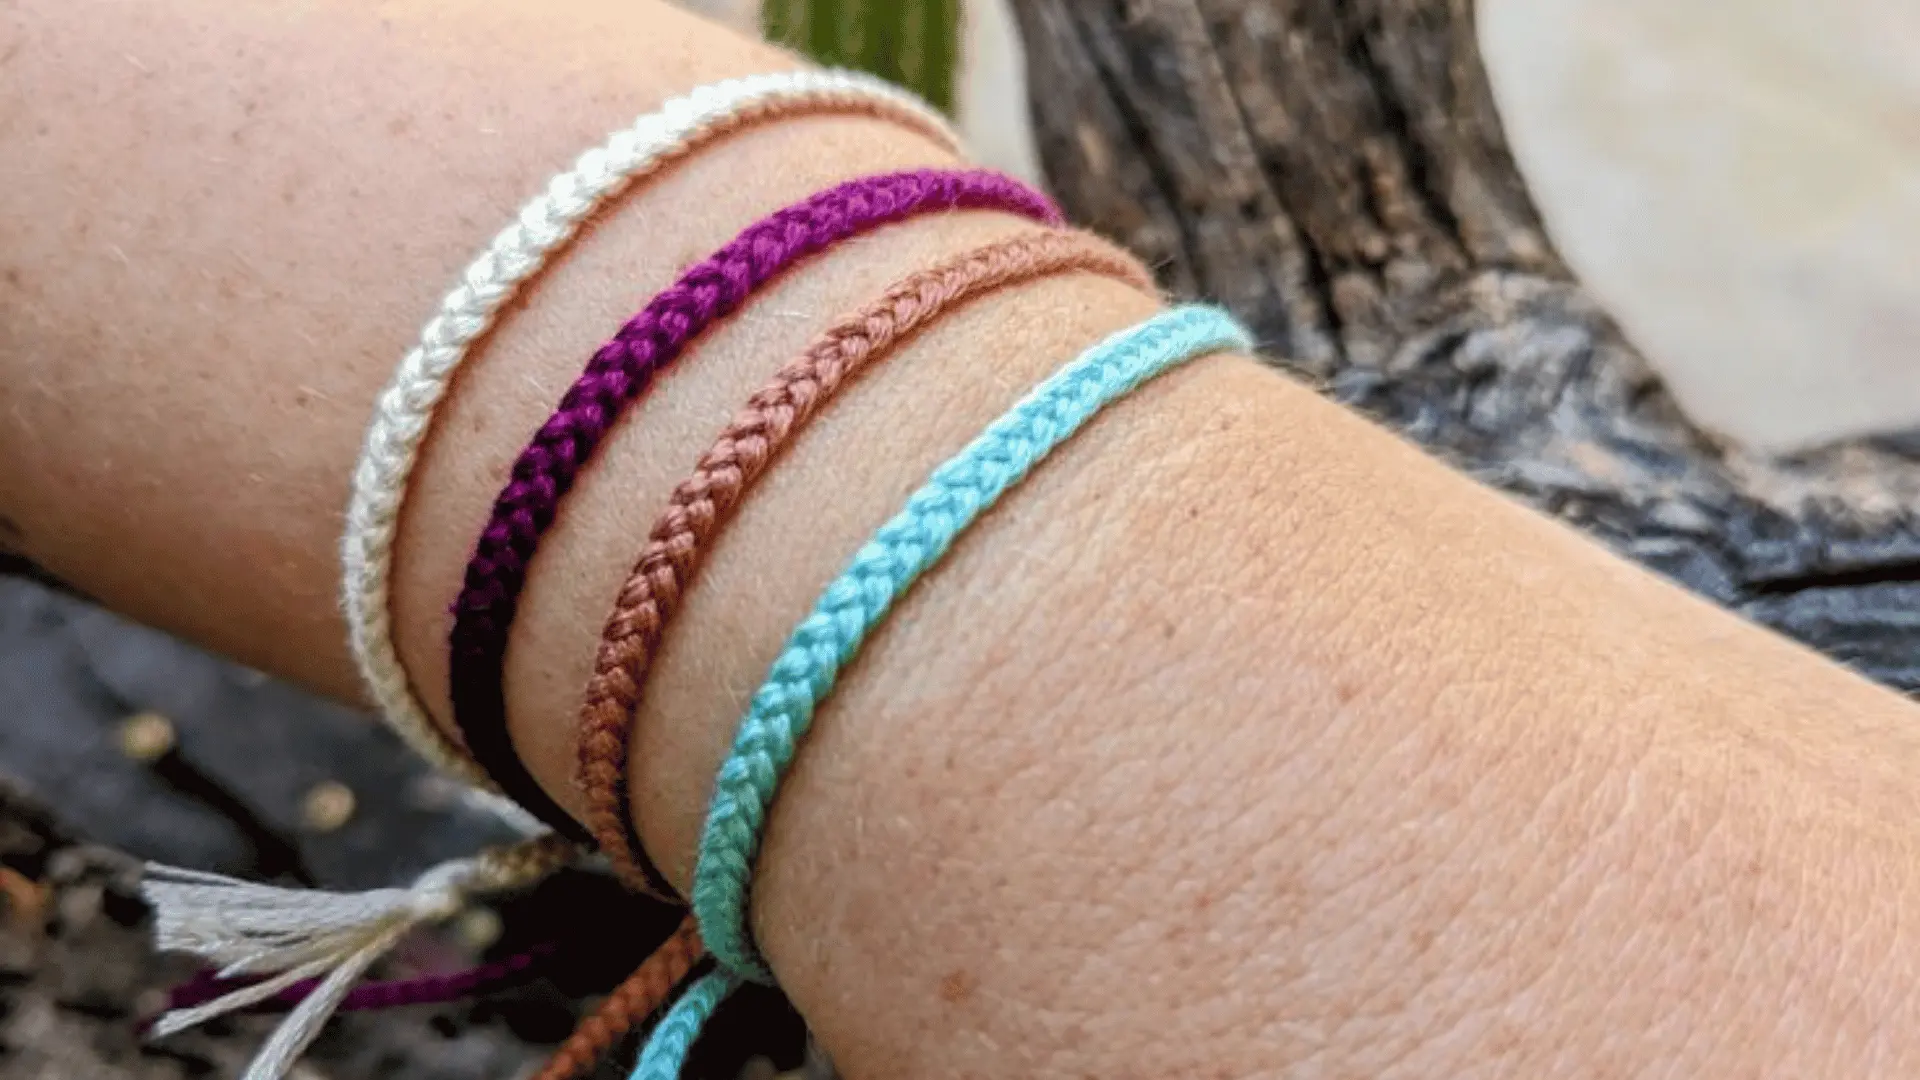
Thin Line Minimal Bracelet takes about 40 to 55 minutes and uses fewer strands to create very fine, clean stripe patterns.
You use basic knotting steps to form thin lines that stay neat and simple.
The design feels modern and minimal. Keep knots small and evenly spaced so the lines stay smooth and consistent. This pattern is ideal for a light and clean bracelet style.
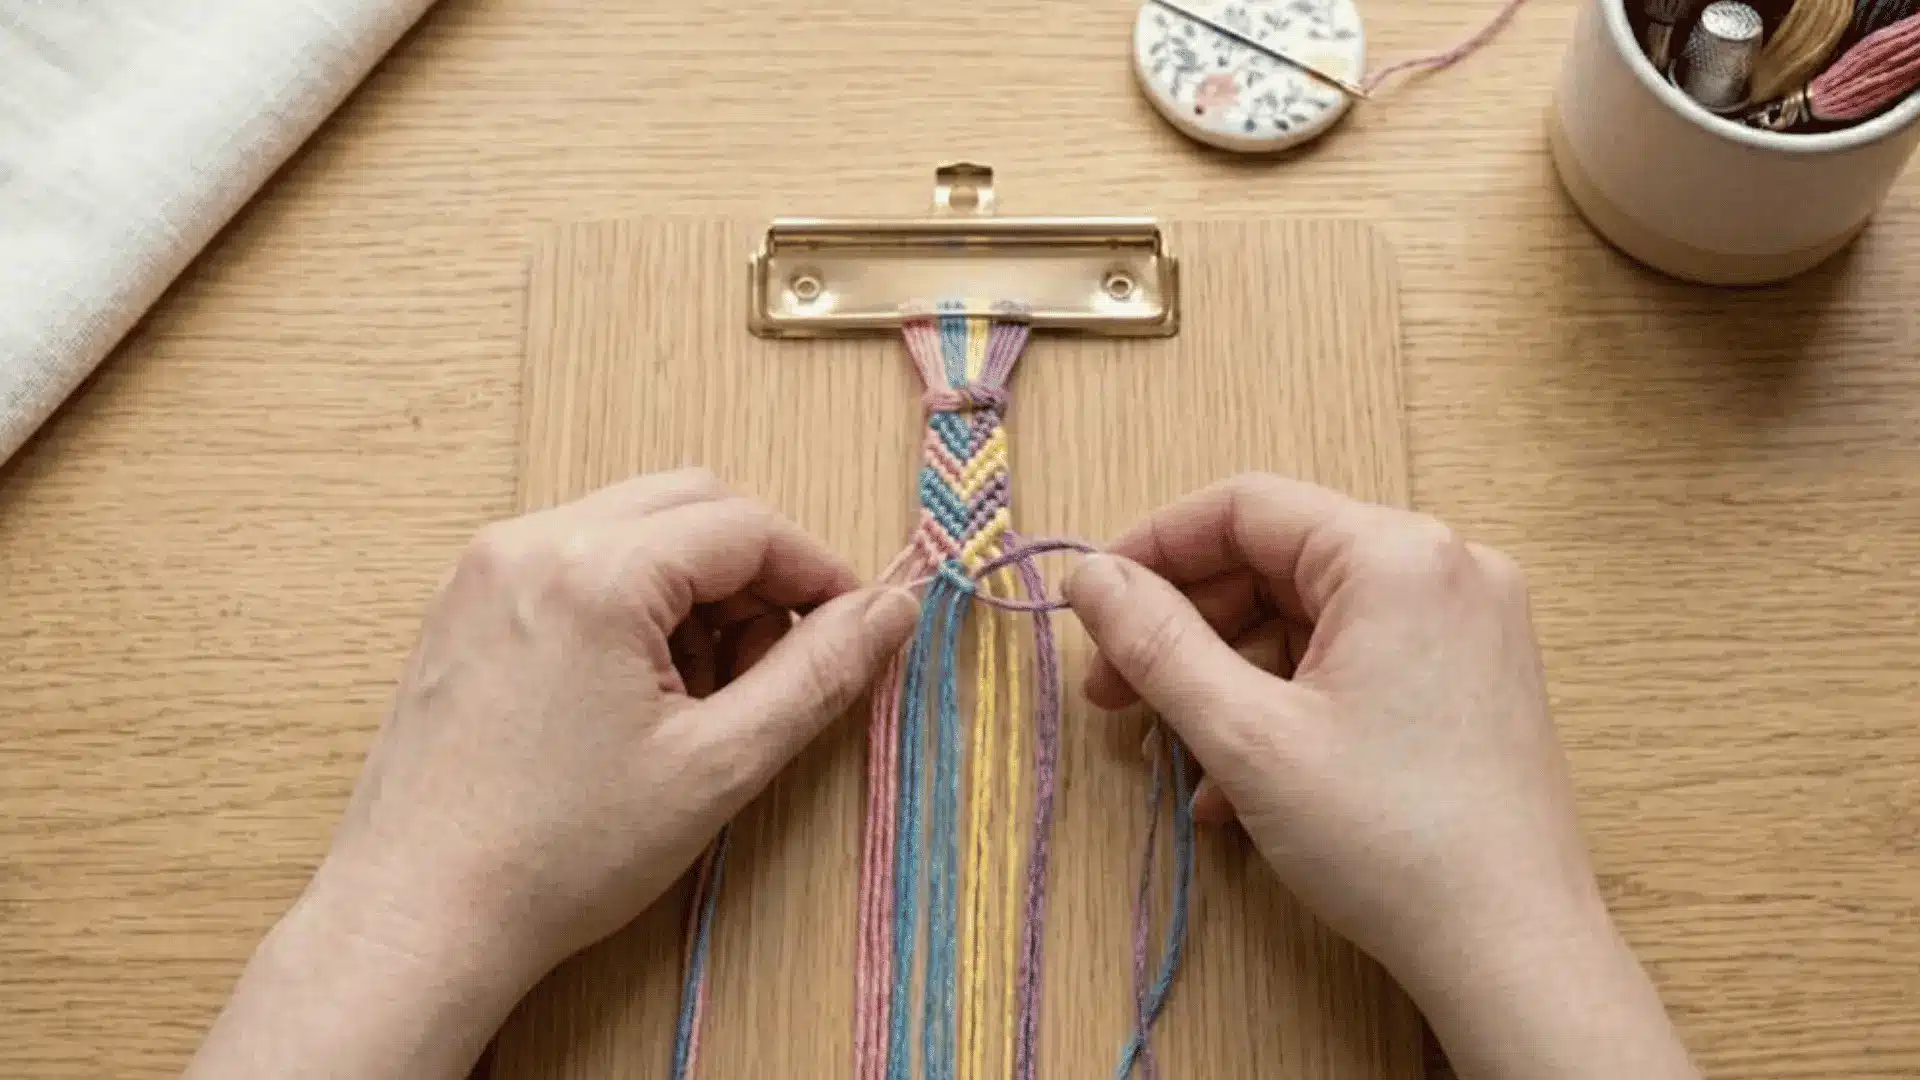
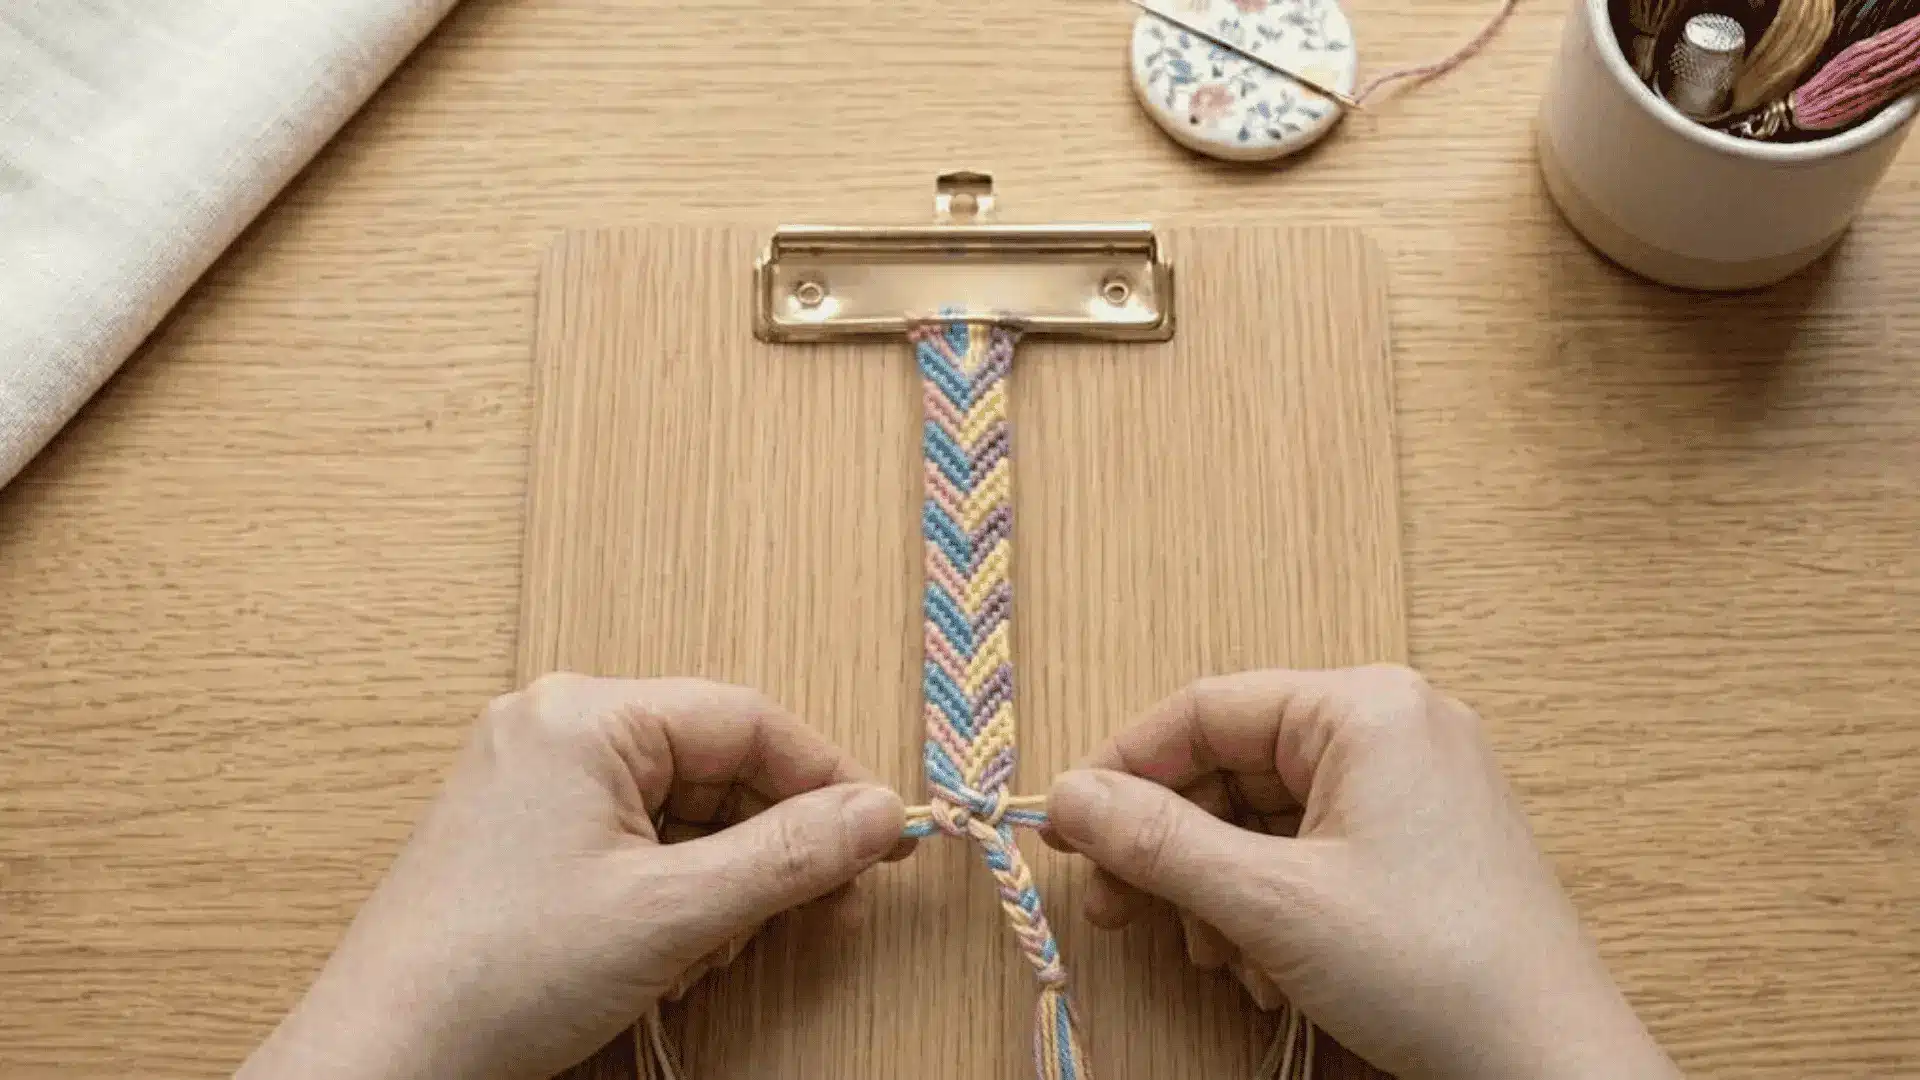
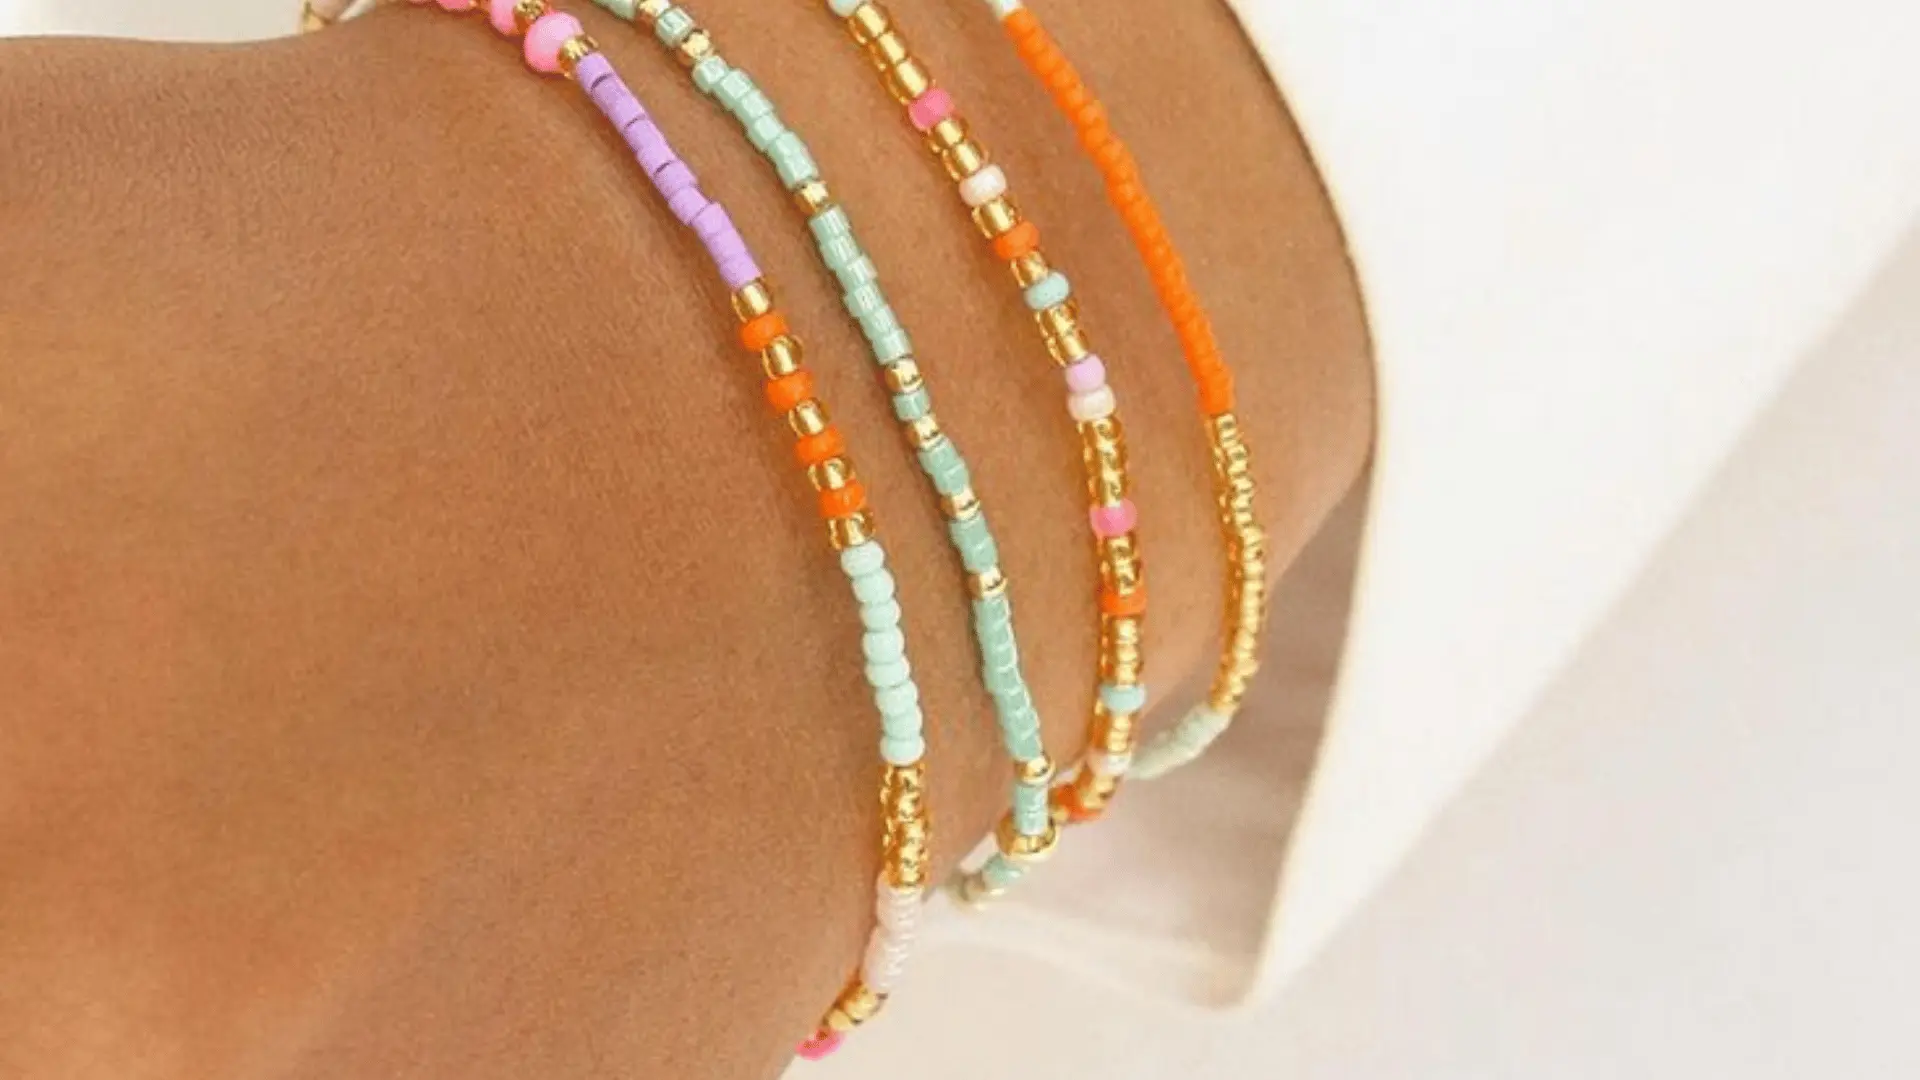
20. Candy Pastel Chevron
![]()
Candy Pastel Chevron takes about 60 to 80 minutes and uses soft pastel shades such as pink, mint, lavender, and baby blue.
You form repeated V-shaped chevron patterns using forward and backward knots. The soft colors create a light, sweet look. Keep each row aligned so the chevrons stay sharp and evenly spaced.
Maintain steady knotting speed to keep the pattern clean and smooth across the bracelet.
How to Style and Wear Your Handmade Bracelets?
Handmade embroidery floss bracelets can be worn in many simple and creative ways. You can mix different colors, patterns, and sizes to match your mood or outfit.
These bracelets are not just for wearing alone, but also look better when combined in different styles.
- Stack Multiple Bracelets: Wear two or more bracelets together on one wrist. This creates a fuller, more interesting look with minimal effort.
- Mix Patterns and Thickness: Combine thin and thick designs or different patterns like stripes and chevrons for a balanced style.
- Gift Ideas for Friends: Handmade bracelets make thoughtful birthday or special-moment gifts. You can choose colors based on your friend’s favorite shades.
- Seasonal Color Combos: Use bright colors for summer, warm tones for autumn, or soft pastels for spring to match the season.
These small styling ideas can make your bracelets look more personal and fun. Try different combinations to find what suits your style best, including embroidery floss bracelets and other string bracelets.
Final Thoughts
Embroidery floss bracelet patterns give a simple way to enjoy hands-on creativity while making something you can wear or share.
From basic stripes to detailed shapes, each design helps build better knotting skills with practice. I like how small changes in color or pattern can create a totally new look.
You can start with easy styles and slowly try more detailed ones as you get comfortable.
If you enjoyed these ideas, leave a comment and tell me which embroidery floss bracelet patterns you want to try first or what design you created on your own.
Frequently Asked Questions
What String to Use If I Don’t Have Embroidery Floss?
If you lack embroidery floss, you can substitute thin yarn, crochet thread, narrow ribbon, or even metallic thread for a glossy effect. Just ensure the material is pliable enough to hold tight knots without slipping.
How to Tie a Sliding Knot Closure for a Bracelet?
To make an adjustable closure, braid the loose ends at the end of your bracelet. Then tie a square knot with these braids to form a sliding loop, allowing the wearer to easily adjust the bracelet size.
How to Store and Organize Embroidery Floss?
Use a portable organizer with clear compartments to sort floss by color. Labeling each section helps you quickly find specific shades for future bracelet projects without tangling your threads.