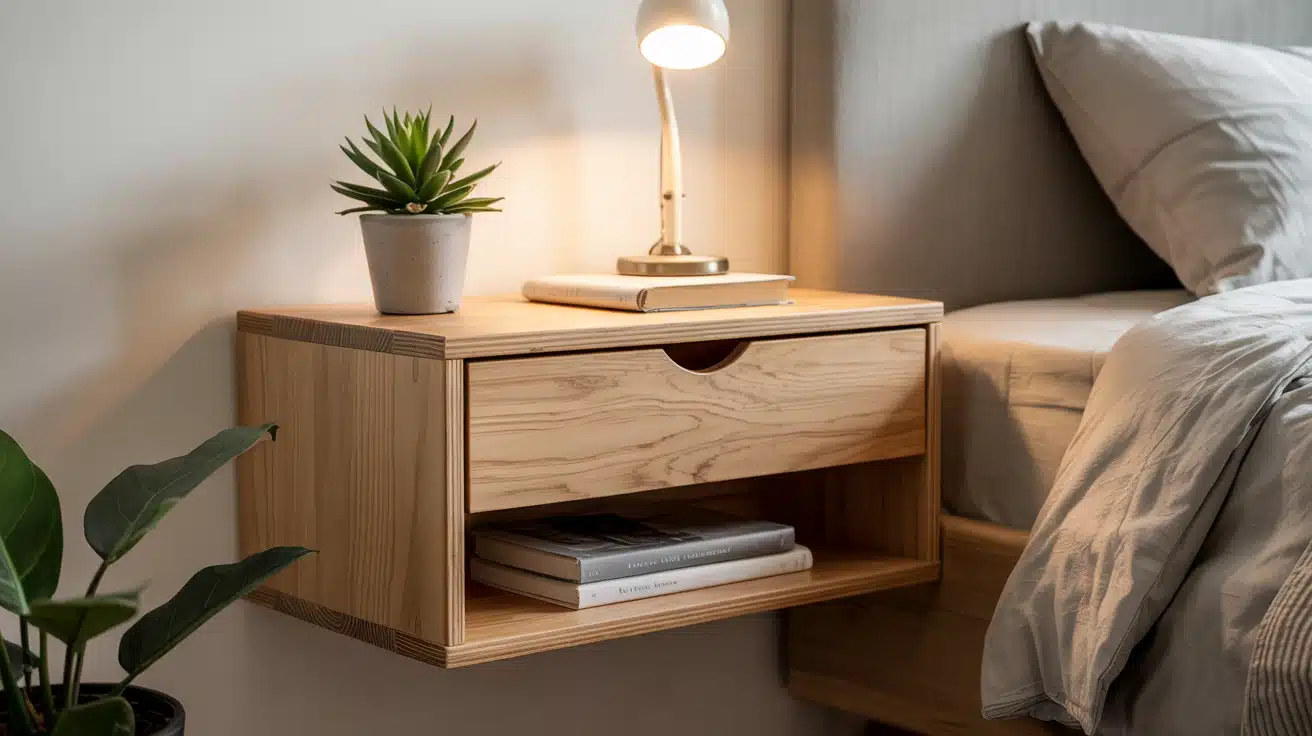
Ever wondered how a simple piece of wood can float beside your bed like magic? A floating nightstand isn’t just furniture—it’s a conversation starter, a space-saver, and a sleek addition to any room.
With no legs to clutter the floor and a clean, modern vibe, it seems like something out of a designer’s sketchbook. But here’s the twist: you can build it yourself.
No carpentry degree required. Just a few basic tools, a spark of creativity, and a free afternoon. As the nightstand quietly hovers, holding your essentials with grace, you’ll find yourself admiring not just its function—but the fact that your own hands brought it to life.
Ready to learn the steps behind the illusion?
What Materials and Tools Will You Need?
Before starting into the build, let’s gather everything you’ll need. The beauty of this project lies in its simplicity—most of the items are easy to find, and you may already have some at home.
Materials
Here’s what you’ll need to gather for your materials:
| Material | Description |
|---|---|
| ¾-inch plywood | The main structure of the nightstand; durable and easy to work with. |
| 1¼-inch pocket hole screws | Perfect size for securing ¾” wood joints using a pocket hole jig. |
| Wood glue | Adds extra strength to joints; essential for long-lasting results. |
| Drywall anchors | Used for mounting; supports the nightstand on walls without studs. |
| Paint or stain (optional) | For finishing; choose colors that match your room or create contrast. |
| Sandpaper (120-grit) | Used to smooth edges and prep surfaces before finishing. |
Tools
Now for the tools you’ll want to have on hand:
| Tool | Description |
|---|---|
| Circular saw or jigsaw | For cutting plywood to size; a table saw can also be used if available. |
| Drill/driver or impact driver | Needed to drive in screws and pre-drill mounting holes. |
| Pocket hole jig (Kreg K5 or R3) | Allows you to make strong, hidden joints between wood pieces. |
| Measuring tape | Ensures all cuts and placements are precise. |
| Clamps | Helps hold pieces in place during gluing and screwing. |
| Sander or sanding block | Smooths rough surfaces and rounds off sharp corners. |
| Level | Ensures your mounted nightstand is perfectly straight. |
What are the Step-by-Step Instructions?
Building your floating nightstand is all about stacking simple wins. Each stage builds on the last, turning raw wood into something sleek, stylish, and practical.
Step 1: Cut Your Wood to Size
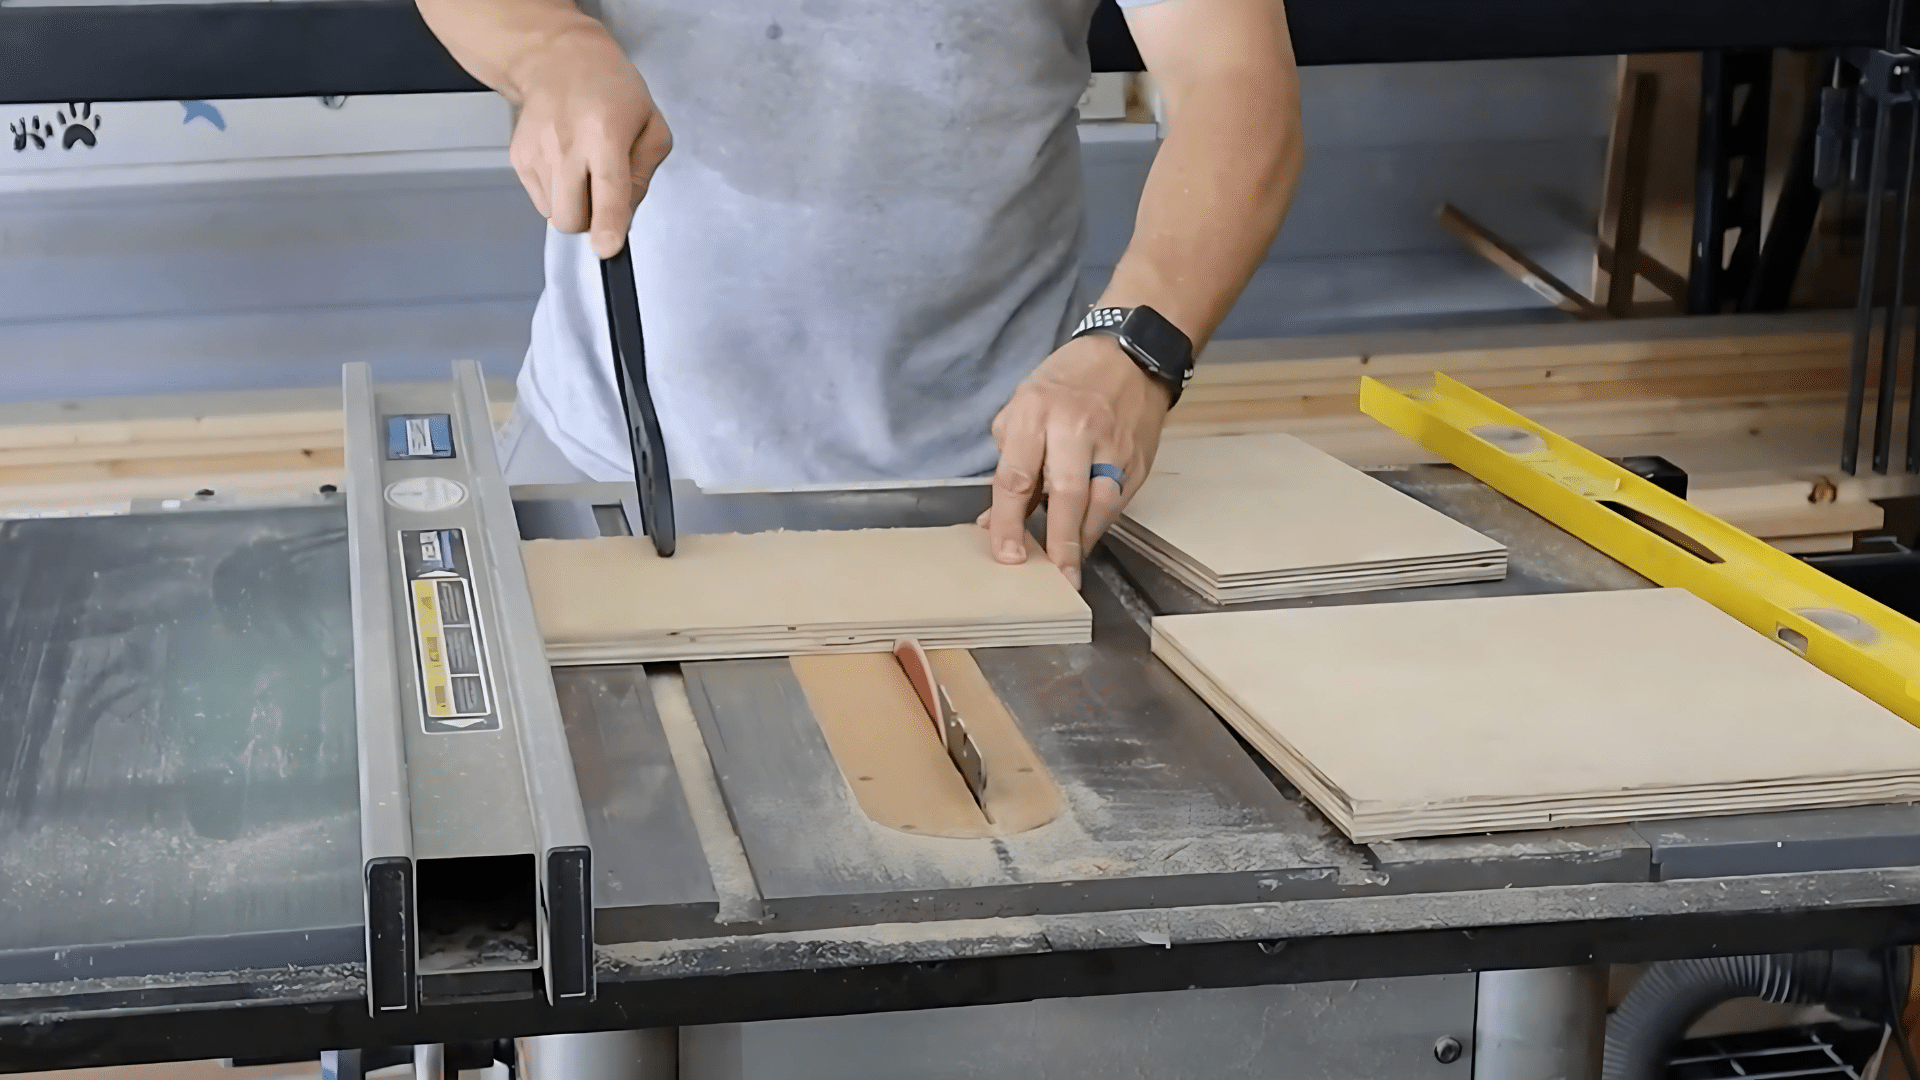
Begin by shaping the core structure of your nightstand with clean, accurate cuts.
Start with a full sheet of ¾-inch plywood. Cut your back panel to 18 inches wide by 12 inches tall—this will eventually be the anchor on your wall.
Next, cut two identical side pieces measuring 7⅛ inches square and then the top and bottom pieces to 16⅝ by 7⅛ inches. Straight, consistent cuts are key here, so use a circular saw with a guide or a table saw if available.
Step 2: Drill the Pocket Holes
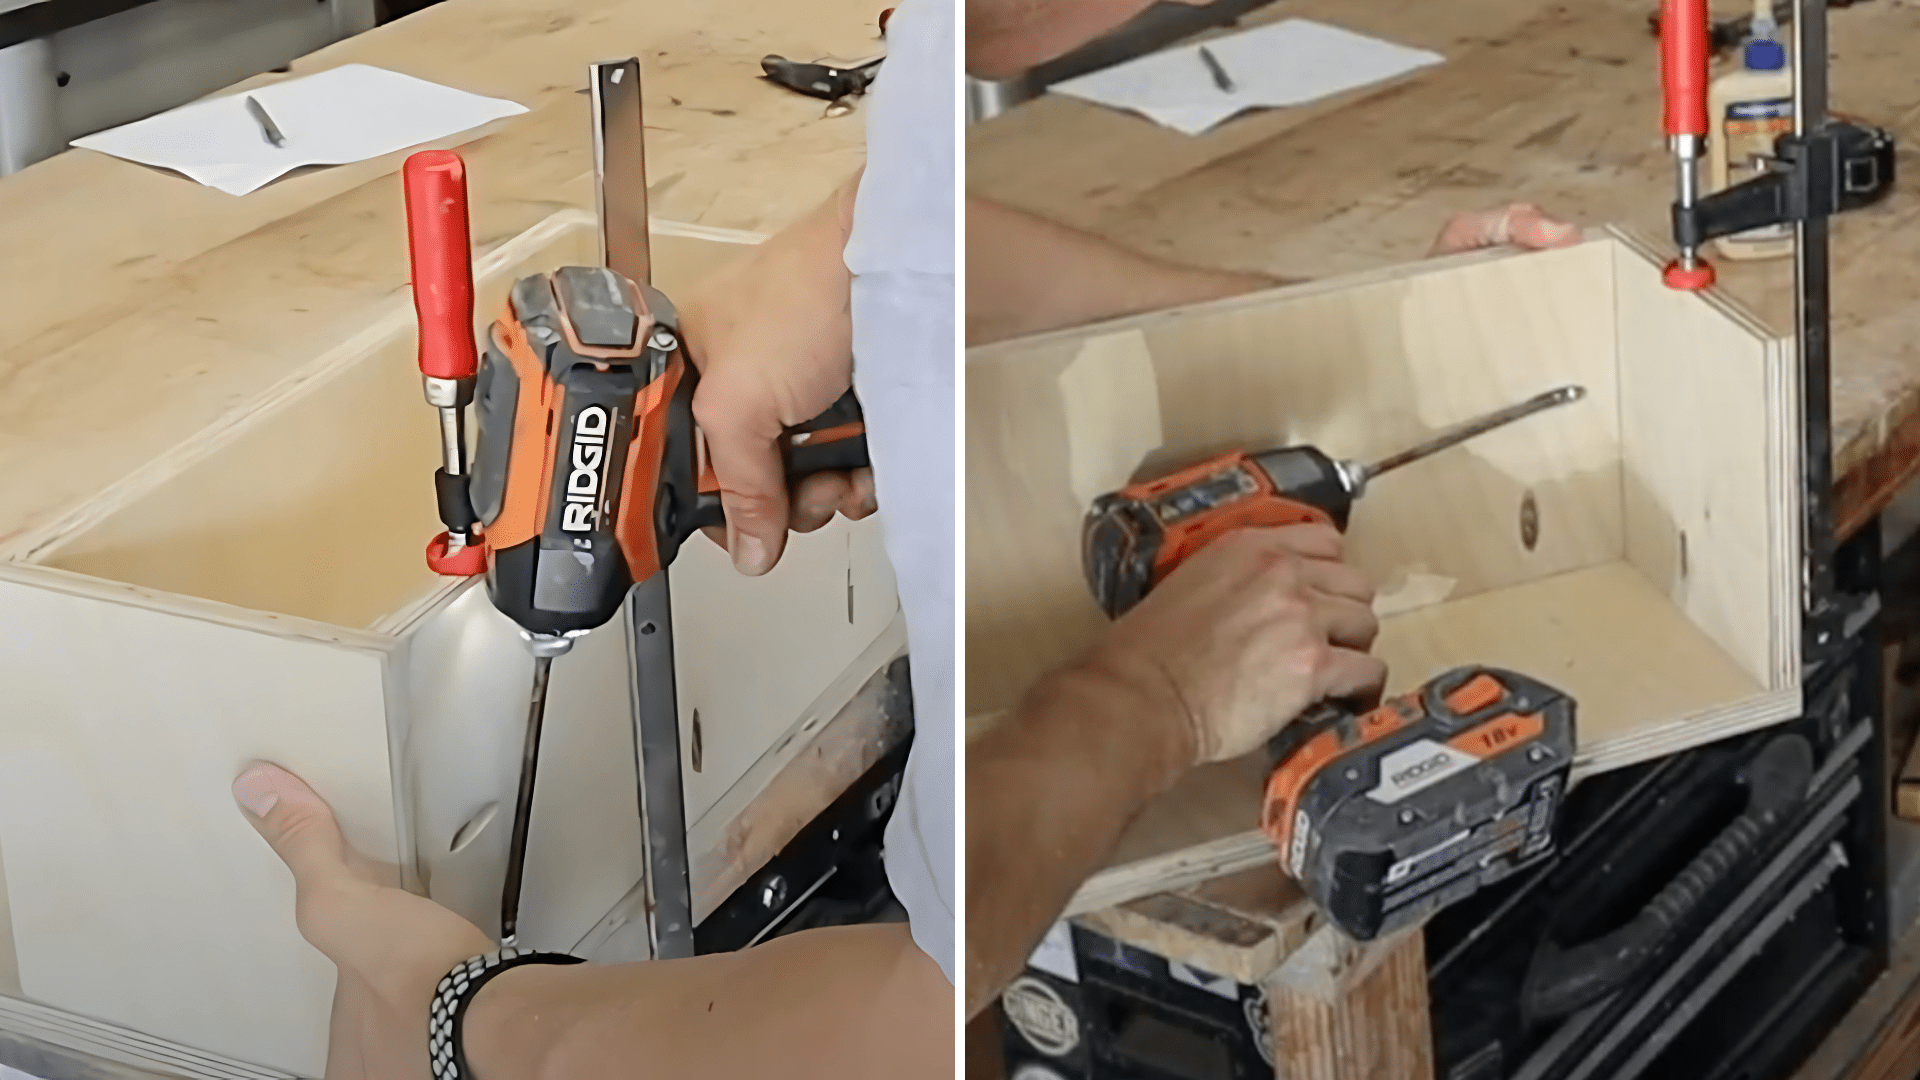
Next, prepare the joints that will hold everything tightly together without visible screws.
Use a pocket hole jig to create angled holes that allow for hidden screw connections. On each end of the top and bottom panels, drill three pocket holes—one in the center and one about 2 inches from each edge.
For the side panels, drill one centered hole and one near each end. These holes let you join your box securely while keeping the outer surfaces smooth and screw-free.
Step 3: Assemble the Box Frame
Now it’s time to bring your cut pieces together and form the floating box.
Apply wood glue to the joining edges of the side panels and align them with the top panel. Clamp everything firmly in place and drive in pocket screws. Repeat the process for the bottom panel.
Keep a level and square handy to double-check your angles. A snug, flush fit on all edges will ensure the box is strong and looks professionally built once mounted.
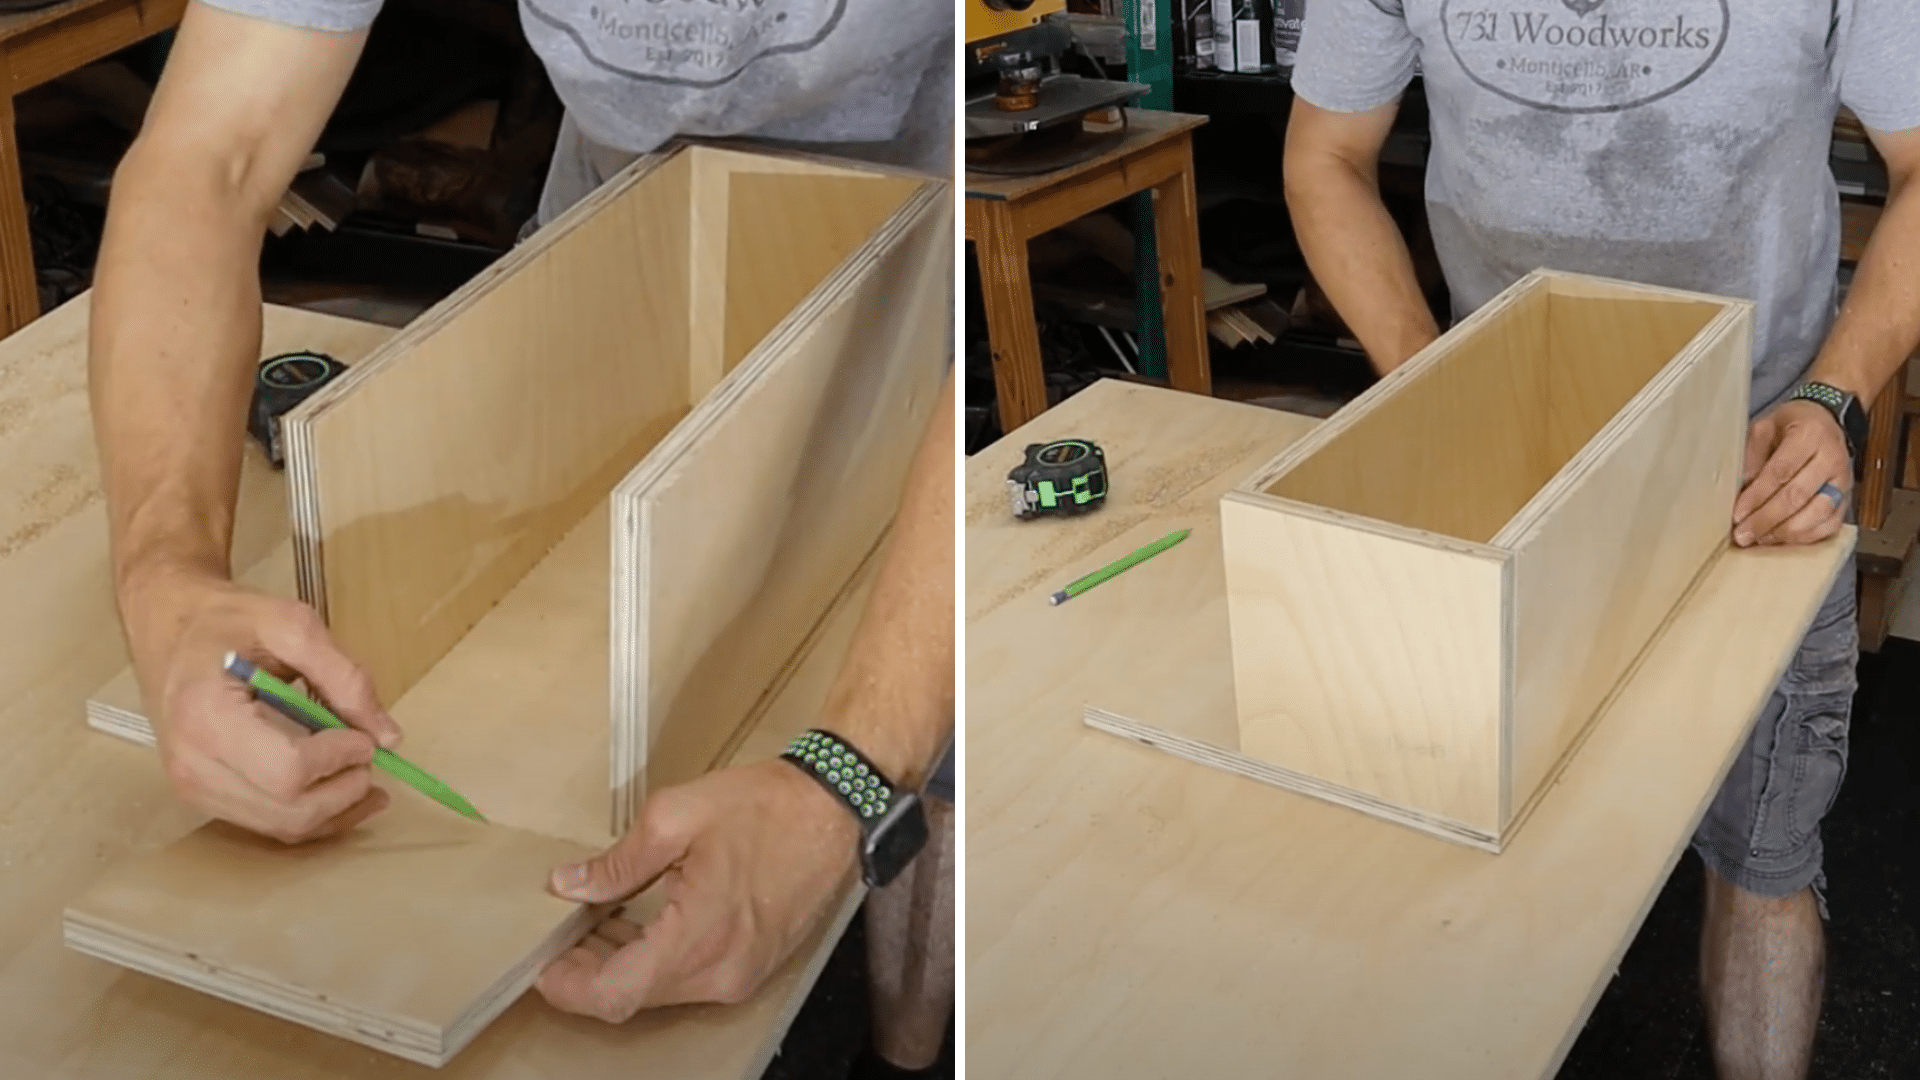
Step 4: Attach the Back Panel
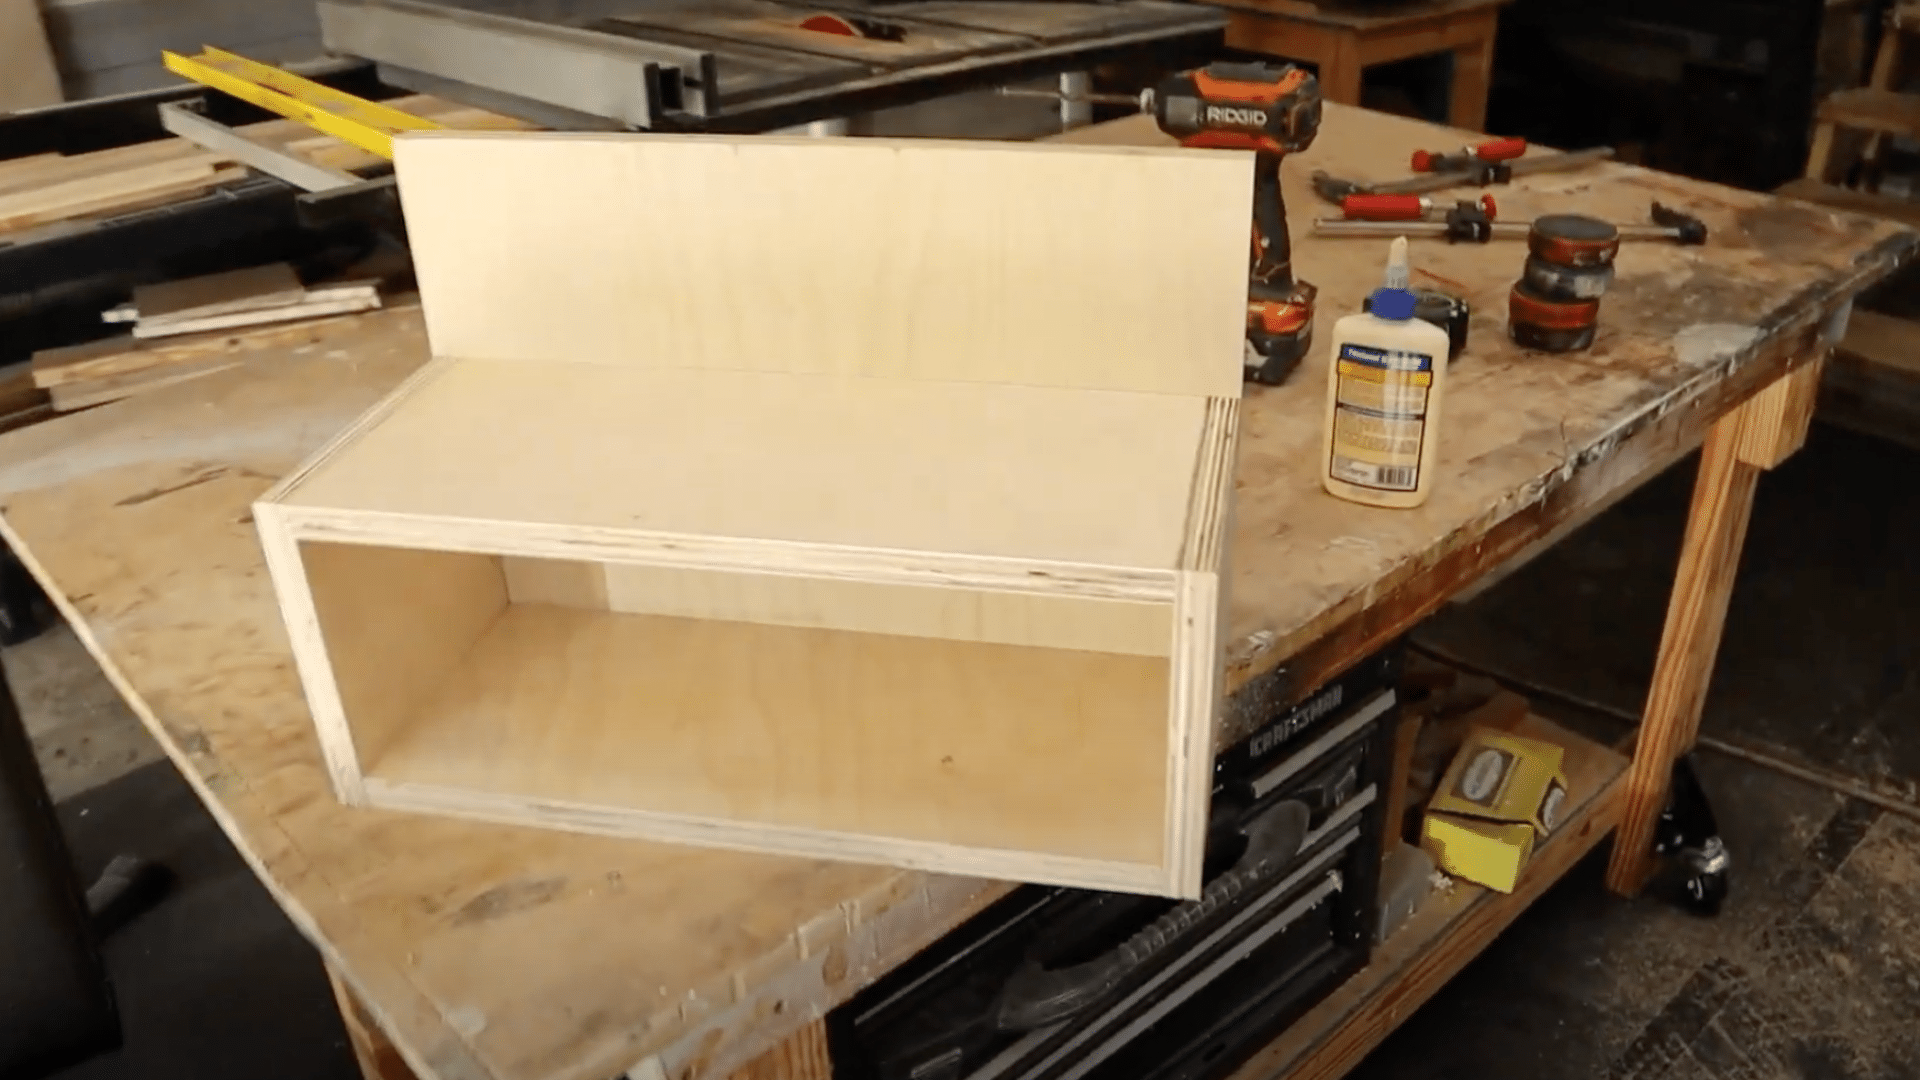
This panel will mount to the wall, giving your nightstand its signature floating look.
Lay the back panel flat and center the assembled box on top. Apply glue along all touching edges, then clamp the box in place. From inside the box, drive screws through the top, bottom, and side panels into the backboard.
This gives your nightstand solid rear support and sets it up perfectly for wall installation—just make sure everything is centered and flush before tightening the screws.
Step 5: Sand the Surfaces
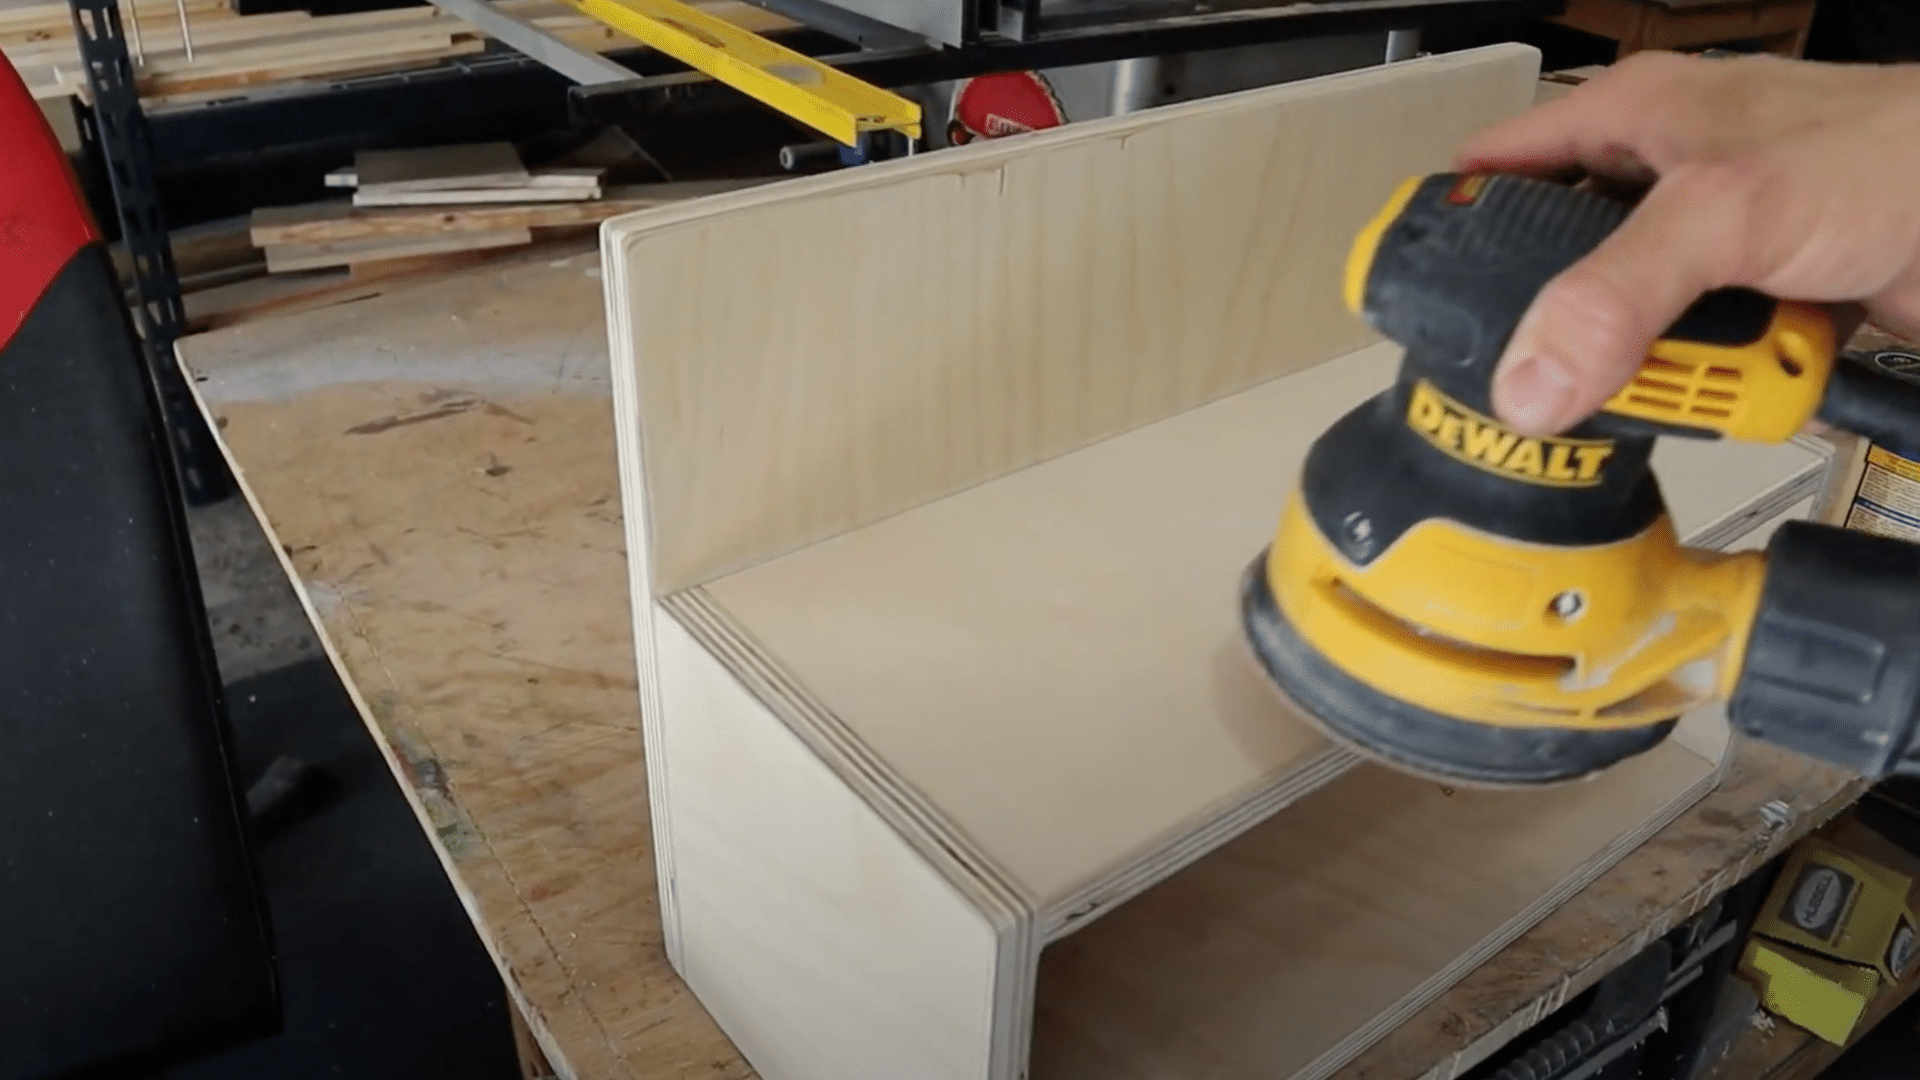
Give your nightstand a smooth, finished feel that’s pleasing to both the eyes and hands.
Using 120-grit sandpaper (or a power sander), go over all exposed surfaces to remove rough spots and splinters. Gently round off the sharp corners for a softer, more finished appearance.
Sanding also helps prep the wood for painting or staining. If you’re going for a distressed look, allow some of the edges or veneer layers to peek through—you’ll enhance that aged, handmade charm.
Step 6: Paint or Stain the Nightstand
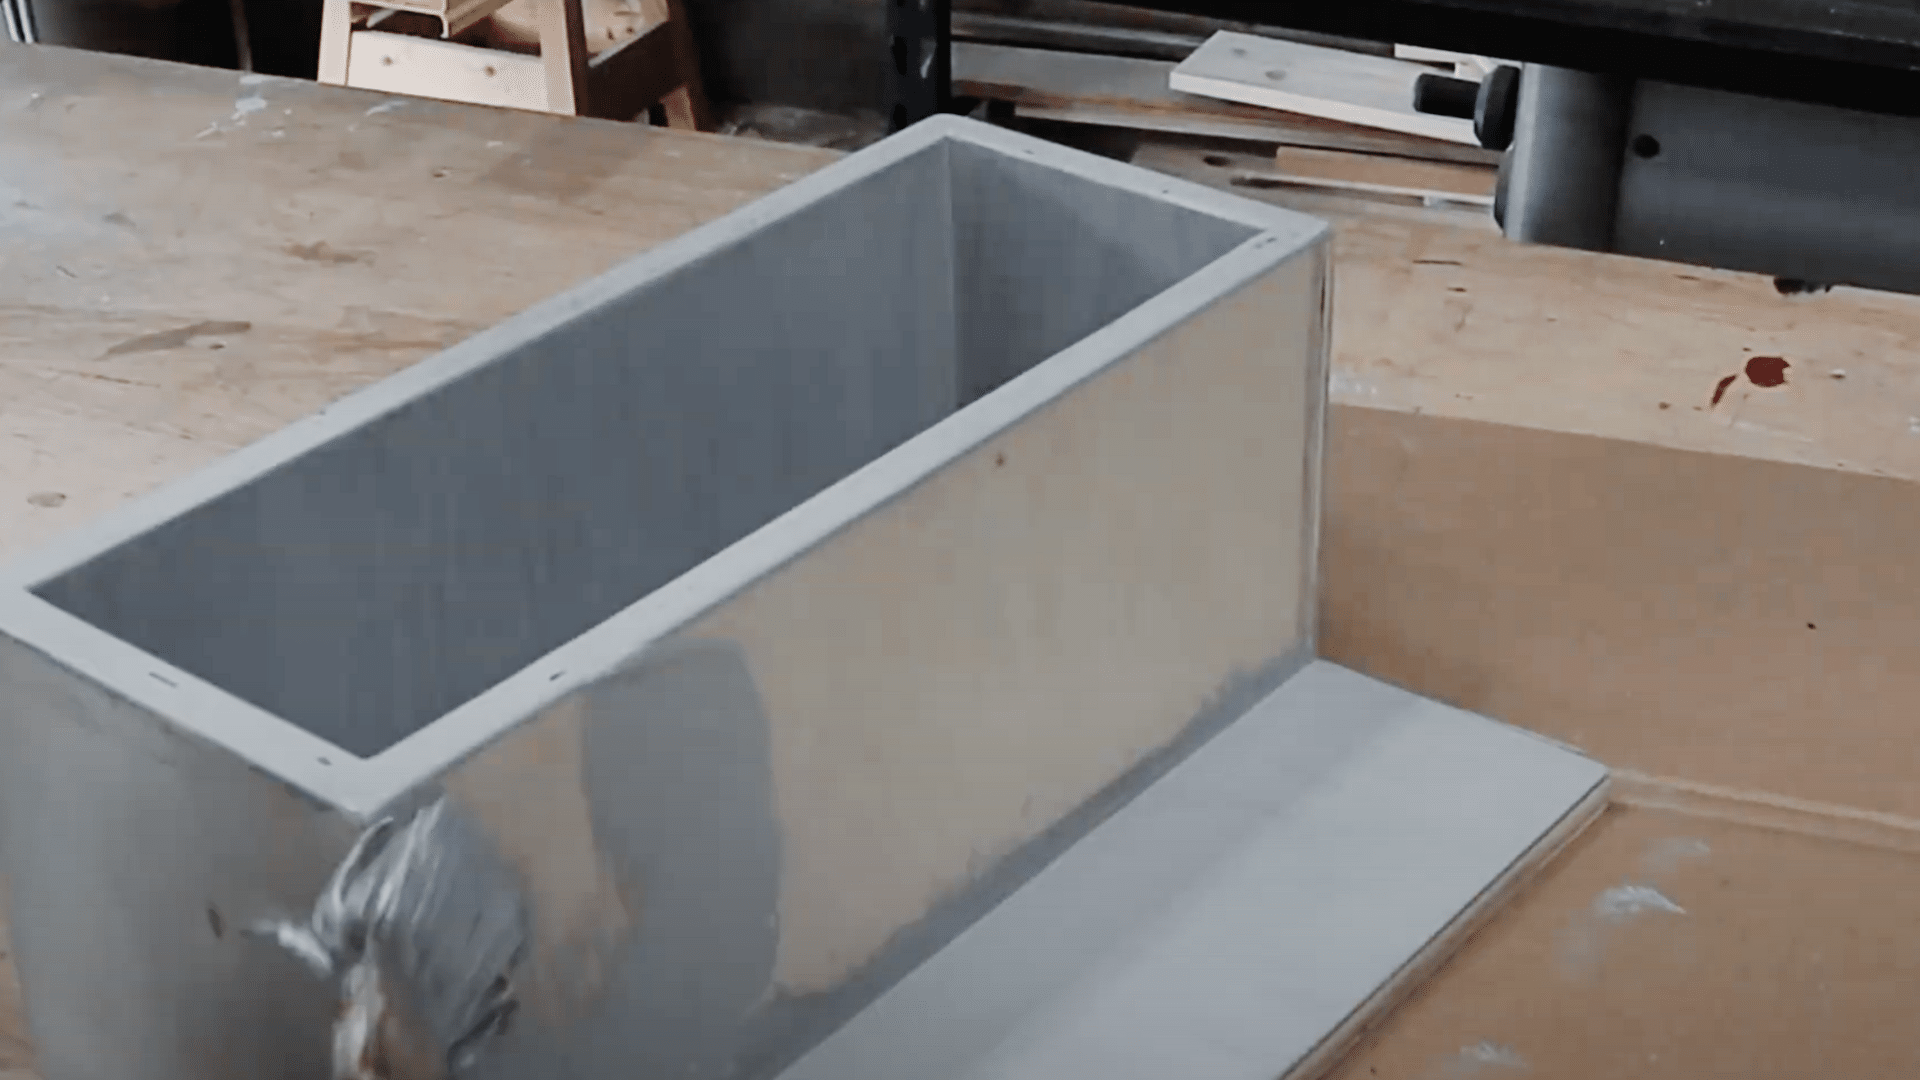
This is where your nightstand truly takes on character—choose a finish that fits your space.
Before painting or staining, make sure the surface is fully sanded and dust-free. For a layered, distressed finish, start with two coats of a gray base paint, followed by two coats of white. Lightly sand the edges to reveal some of the gray or even the bare wood.
Prefer a cleaner look? Stick to a solid color or natural stain. A brush, roller, or even Q-tips for tight corners will do the trick. Let each coat dry thoroughly before adding the next.
Step 7: Mount It to the Wall
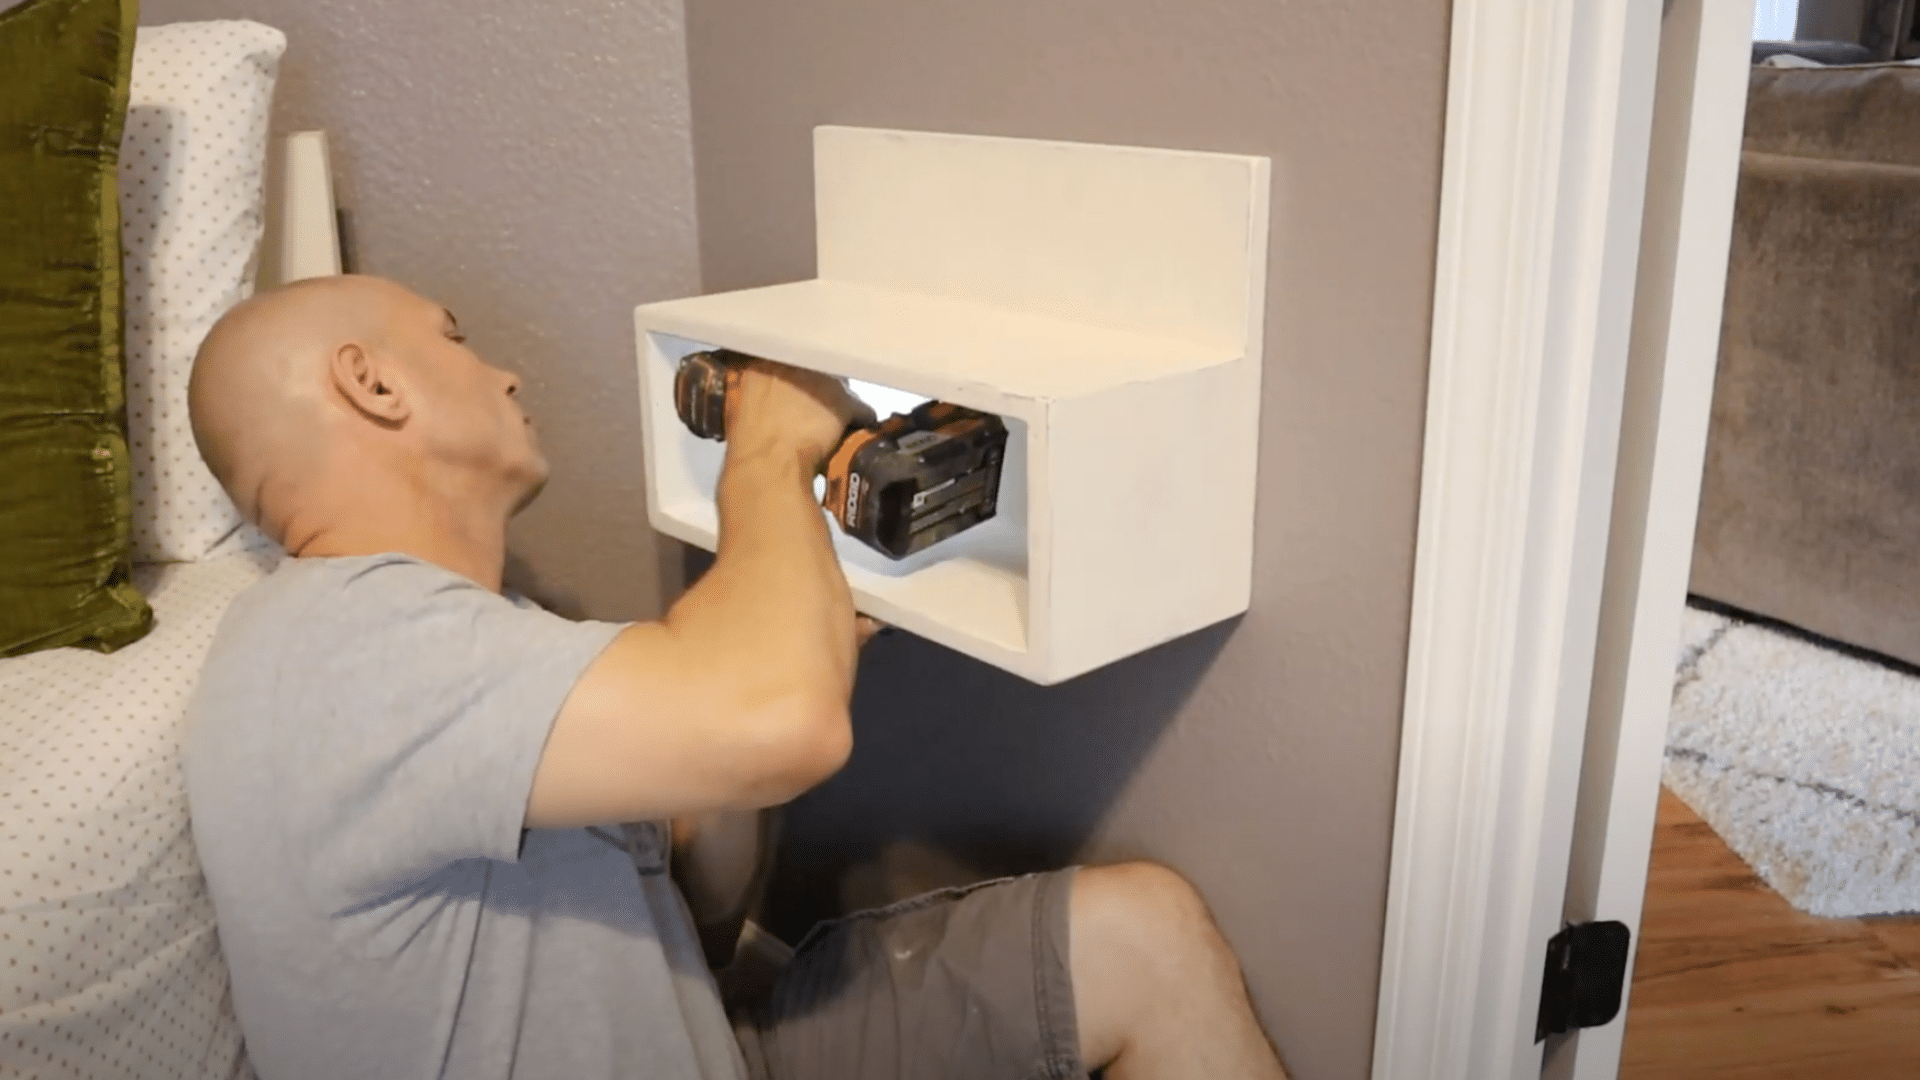
The final step—watch your nightstand “float” into place with a sturdy, seamless install.
Pre-drill two holes in the back panel of your nightstand. Use a level to position it against the wall at the desired height, then mark the drill points. If you’re not hitting a stud, insert heavy-duty drywall anchors rated for at least 80 lbs.
Once the anchors are in, attach the nightstand using screws through the pre-drilled holes. When done right, the shelf appears to float effortlessly, holding your essentials in minimalist style.
Video Tutorial
Special thanks to 731 Woodworks for providing valuable insights in their video, which I referenced while creating this guide. For more information, refer to this video:
Design Ideas to Make It Unique
A floating nightstand doesn’t have to be basic. Once the structure is built, the possibilities for personalization are endless.
No matter your style- rustic, modern, or playful- here are creative ways to improve your nightstand from simple to standout:
1. Add a Built-In Phone Charging Station: Drill a hole in the back panel for charging cables, then mount a wireless charging pad on top or inside, keeping cords hidden and your phone accessible—no more searching for chargers at bedtime.
2. Go Bold with Color or Patterns: Instead of neutrals, paint it navy blue, deep green, or a bright mustard. For more texture, use stencils, wallpaper cutouts, or decals to add personality.
3. Use Reclaimed or Distressed Wood: For a rustic vibe, skip the paint and use aged or reclaimed wood for your nightstand. The imperfections add charm, and you won’t worry about scratches.
4. Install LED Strip Lighting: Attach motion-activated LED strip lights for a soft glow. It provides a sleek look and serves as a subtle nightlight, ideal for guests, kids’ rooms, or midnight snacks.
5. Add a Drawer or Hidden Compartment: If you’re up for a slightly more advanced build, add a shallow drawer inside the box frame. It’s a clever way to keep clutter out of sight—perfect for storing remotes, books, or earbuds.
Heads-Up: What Not to Do!
|
Wrapping It Up
Building your own DIY floating nightstand is more than just a weekend project—it’s a chance to create something functional, stylish, and uniquely yours. Cutting, assembling, customizing, and mounting the frame adds a personal touch to your space.
You can opt for a straightforward approach or enhance with creative features like lighting or concealed storage; this compact design shows that impressive style doesn’t require much space.
Ready to give your room a modern twist with your own floating creation?
Grab your tools, pick your style, and get building. And if you enjoyed this guide or want more DIY inspiration, don’t forget to share, bookmark, or drop a comment with your favorite design idea—we’d love to see what you make!
