“Need somewhere to hang your towels?”
I know the frustration of having damp towels with no good place to put them. My small bathroom had the same problem until I found a simple fix.
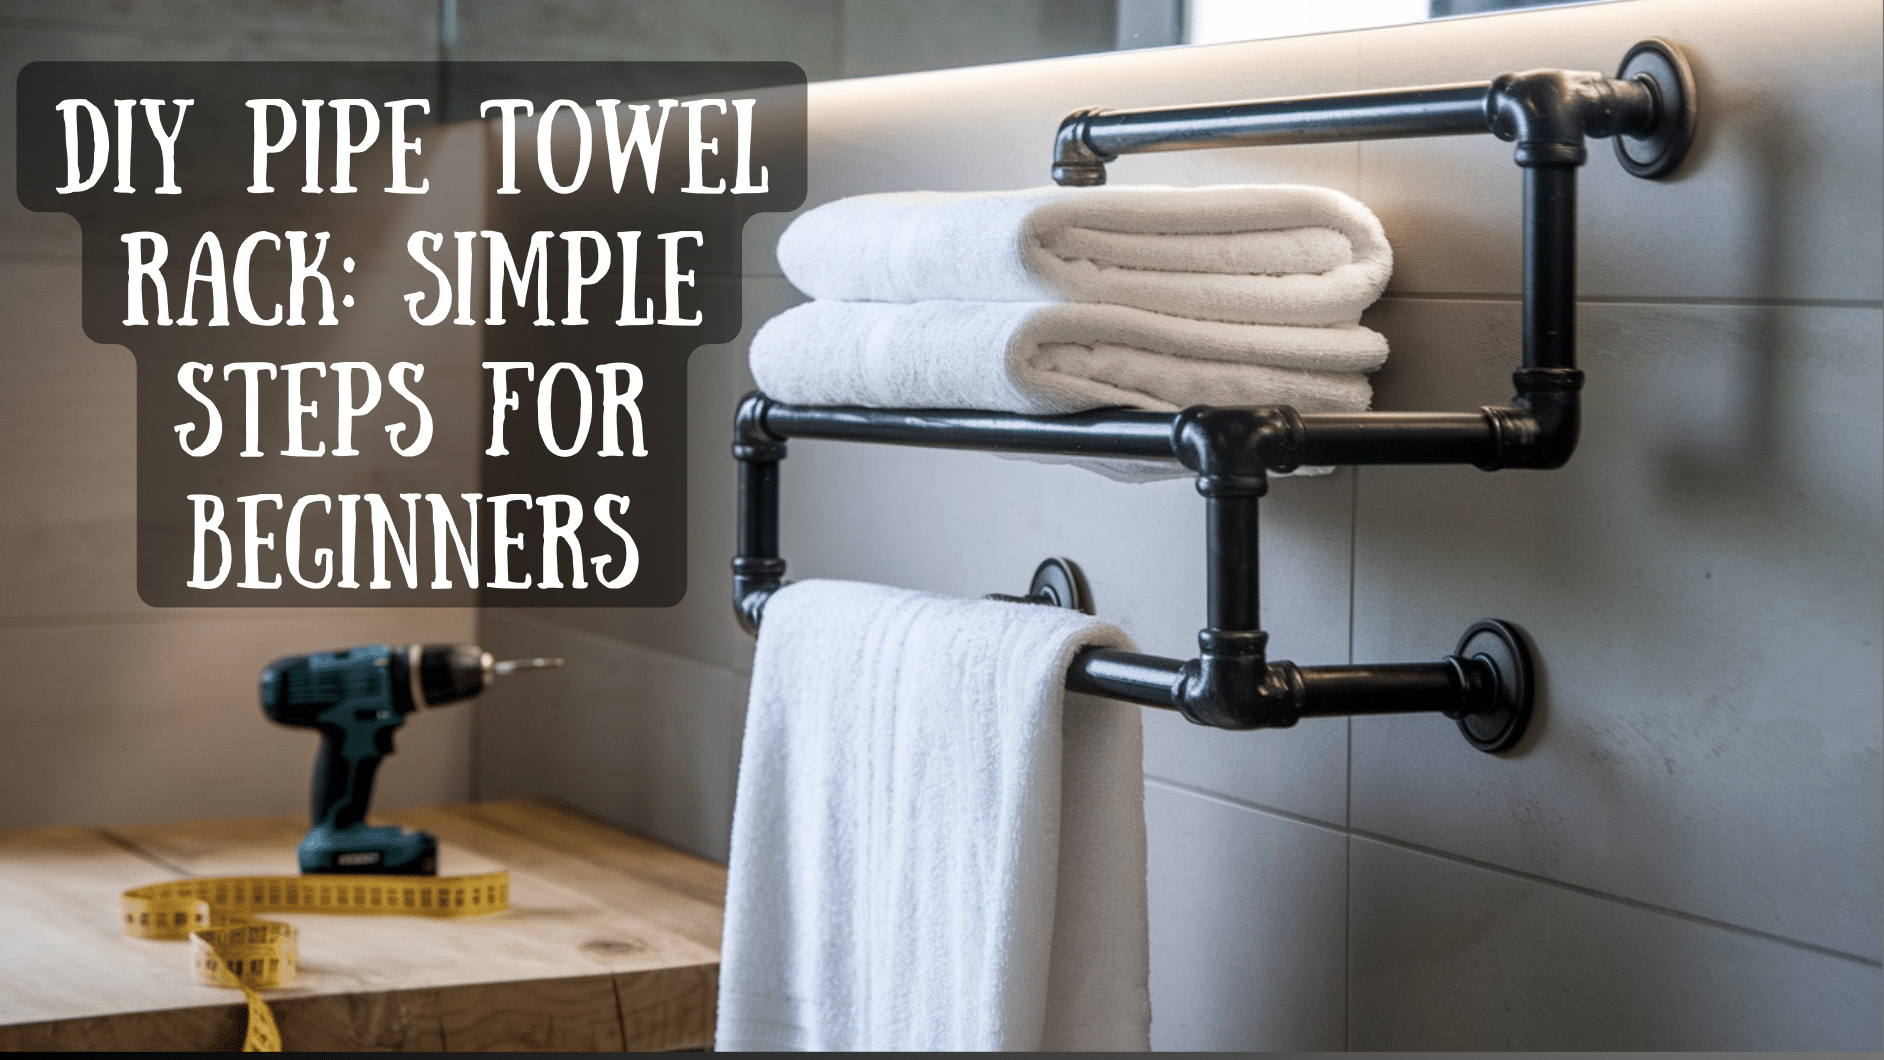
With just a few pipes and basic tools, you can build a stylish towel rack that looks like it came from a fancy home store – but costs way less.
I’ll show you how to make this towel rack step by step. You don’t need any special skills or expensive equipment.
By the end of this guide, you’ll have a beautiful, sturdy towel holder you made yourself. Plus, your friends will ask where you bought it!
Why Choose a DIY Pipe Towel Rack?
Cost-Effective Alternative to Store-Bought Racks
- Store-bought racks: $100+
- DIY pipe racks: Under $30 (as low as $5 per piece).
- Save money to use elsewhere in your home!
Customizable to Your Style and Space
- Tailor the rack to your needs: Short, long, or double-tiered designs.
- Black iron pipes for an industrial look or chrome for modern vibes.
- Your space, your style!
Eco-Friendly and Upcycled Approach
- Reduce waste with minimal packaging.
- Use salvaged or second-hand pipes (often free).
- Durable design means fewer replacements over time.
Materials and Tools You’ll Need
| Category | Items |
|---|---|
| Materials | Metal pipes (size and type as per your design) |
| Flanges (to attach the pipes to the wall) | |
| Screws and wall anchors (for stability) | |
| Wooden board (optional for a mounted rack) | |
| Paint or finish (optional for custom designs) | |
| Tools | Drill (for creating holes in the wall) |
| Measuring tape (to ensure accuracy) | |
| Wrench (to tighten pipe fittings) | |
| Sandpaper or metal cleaner (to smooth and clean the pipes) | |
| Screwdriver (for securing screws) |
Step-by-Step Guide to Making a Pipe Towel Rack
1. Measure and Plan Your Design
Begin by examining your wall space with a measuring tape. Look where your towels will hang and mark these spots on the wall.
Measure the width and height of your rack. Make a simple sketch showing the size and shape you want. Have these numbers ready before you buy any materials.
2. Cut and Clean the Pipes
Safety matters when handling pipes. Wear work gloves and use a pipe cutter to size each piece to your measurements.
Smooth any rough areas with medium-grit sandpaper. Wash all pipes with soap and water to remove dirt and metal bits. Let them dry completely to prevent rust from forming.
3. Assemble the Rack
At one end of your rack, start putting pieces together. Turn pipes and fittings until they fit tightly. As you build, make sure each corner forms a proper right angle.
Test the fit of each part before moving to the next. When laid on a flat surface, the rack should stay straight and level.
4. Install the Rack
Find wall studs using a stud finder and mark these spots. Make small pencil marks where you’ll need to drill holes. Put wall anchors in spots without studs.
Hold the rack against the wall and check it with a level. Put screws through the mounting plates and into your marked spots. Tighten each screw bit by bit to keep things even.
5. Add Finishing Touches
Think about adding paint that fits your bathroom’s style. Wait for the paint to set fully if you use it. Place a small amount of weight on the rack to test it.
Check that all the mounting points are secure. Clean up any pencil marks or smudges on your work.
This rack will serve as a practical addition to your bathroom. Stop by your local hardware store to get the parts you need for this project.
Here’s a helpful video that provides a step-by-step guide to creating a pipe towel rack!
Unique Additions to Make Your Rack Stand Out
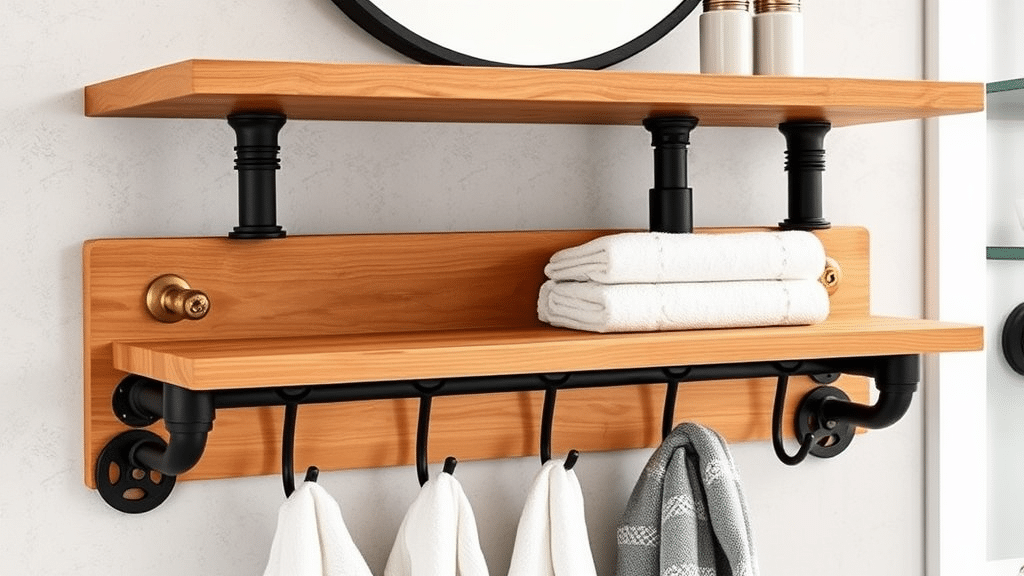
1. Combine Wood and Metal
Mix materials to create something special. For a warm touch, add a solid wood plank above your pipes. Choose pine or oak boards—they’re strong and look good.
Sand the wood until it feels smooth. Apply a wood stain that matches your room’s colors. Seal it well to handle bathroom moisture.
2. Use Decorative Pipe Fittings
Pick fittings that catch the eye. Black iron parts give a clean, modern look, while brass fittings add warmth to your space.
Make sure all fittings match in color and style. Also, check that decorative pieces can hold weight like standard ones.
3. Add Hooks Below the Rack
To make your main rack more useful, put small hooks under it. These extra spots can hold washcloths, loofahs, or robes.
Space hooks evenly for the best look. Choose hooks that match your pipe style. Test each hook’s strength before using it.
4. Adjustable Pipe Rack
You can move parts of your rack to fit your needs. Add swivel joints where pipes meet. These joints allow sections to turn when needed.
Keep moving parts tight enough to stay in place. Test the motion before mounting it on your wall.
Each change should improve your rack’s performance. Simple add-ons can transform a basic rack into something special.
Essential Tips for Beginners Building a DIY Pipe Towel Rack
1. When you start, keep things basic. A straight pipe rack with just a few pieces works well. This way, you’ll learn the basics without getting stuck on hard parts.
2. Buy pipes with threads already cut. This saves time and simplifies putting the pieces together. Most hardware stores sell these ready-made pieces in many sizes.
3. Take your time with measurements. Mark each spot twice on the wall before you drill. Wrong holes can damage walls and require repairs. Use a pencil to make marks, which you can erase if necessary.
4. Ask store staff for help picking parts. They can point you to the right pieces and tools, and many stores will even cut pipes to size.
5. Keep your tools close while you work. Having everything within reach helps you stay focused on each step. This includes your level, screwdriver, and measuring tape.
Common Mistakes to Avoid
- Don’t use pipes that are too thin; opt for pipes at least 3/4 inch thick to support the weight of wet towels. Thin pipes may bend or break under stress.
- Before use, clean pipes thoroughly with soap and water. Remove labels and factory oils, and ensure pipes are fully dry to prevent rust.
- Secure flanges properly using the right wall anchors and wall studs for stability. Test the strength of each mount to avoid rack failure.
Quick Tips:
- Test weight limits before full use
- Check mounting points monthly
- Clean pipes yearly
- Replace rusty parts immediately
Conclusion
Building your own pipe towel rack can add both function and style to your space.
We covered the steps from planning to final touches, noting key mistakes that might trip up new builders.
This project shows how simple materials can create useful home additions.
Remember that success comes from careful planning and the use of proper materials. Taking the time to measure and clean will save you trouble later.
The right pipe thickness will ensure that your rack stays strong through daily use.
Your well-built rack will serve as more than just a towel holder. It proves that home projects don’t require complex tools or skills.
With basic materials and attention to detail, you’ve created something that works well and fits your needs.
