You’ve always wanted a wood-fired pizza at home, but restaurant bills keep adding up.
What if you could make restaurant-quality pizzas in your backyard? A DIY pizza oven lets you create perfectly crispy crusts and melted toppings everyone loves.
Building your pizza oven will save money, help you develop cooking skills, and turn your backyard into everyone’s favorite gathering spot.
Plus, you’ll be satisfied by cooking something you built with your hands.
This guide will show the exact steps to build a reliable backyard pizza oven. We’ll cover materials, tools, construction methods, and expert tips to help you succeed.
Let’s start building!
Materials Required
| Material | Description | Quantity |
|---|---|---|
| Concrete (for slab and capstone) | Used for the foundation pad and capstone. | Sufficient for 8″ thick slab and capstone |
| Concrete Blocks | Used for the oven base. | Enough for base structure |
| Rebar | Used to reinforce concrete and blocks. | As per structure needs |
| Fire Bricks | Used for the cooking floor and oven arch. | Enough for base and arch |
| Refractory Mortar | Special mortar for high heat applications (for fire bricks). | Enough for arch and floor installation |
| Regular Mortar | Standard mortar for exterior brick veneer. | Sufficient for outer veneer application |
| Landscape Adhesive | Adhesive to attach concrete blocks and cultured stone. | Enough for all block layers and veneer |
| Silicone Sealant | For sealing forms during capstone construction. | Small quantity for form edges |
| Melamine Board (for form) | Used for creating the capstone mold. | Sufficient for capstone mold |
| PVC Pipe | Used to screed the mortar for leveling the floor. | For screeding purposes |
| Hardboard (for arch form) | To create the arch form framework. | As needed for arch frame |
| Roofing Nails | For attaching the hardboard to the arch form. | Small quantity |
| Cardboard Shims | Used to hold cultured stone off the slab for drainage. | Small quantity |
| Cultured Stone | Veneer material for the exterior of the base. | Enough to cover the base |
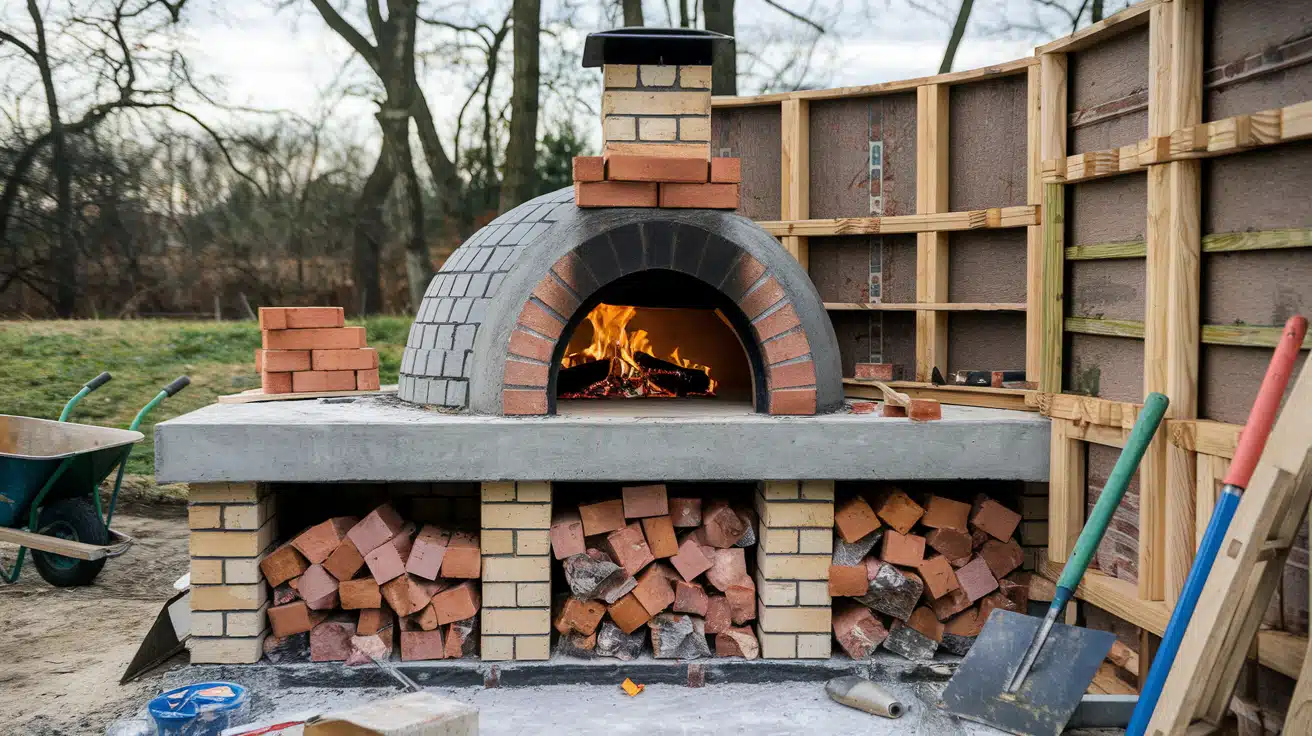
Step-by-Step Guide to Building Your Pizza Oven
Step 1: Preparing the Concrete Pad
Foundation Work: The foundation comes first with a solid concrete pad. Build a wooden frame using 2×10 lumber to create an 8-inch thick base.
Add a layer of gravel and pack it firmly. Set up supports and create a slight slope for water runoff. Mix and pour concrete, then let it set for 24 hours.
Step 2: Building the Capstone
Capstone Creation: Next comes the capstone formation with melamine boards and corner seals using silicone.
Pour a lightweight concrete mix and add fiberglass rebar to keep the weight down. Use a trowel to create a smooth top surface. Give it three days to become completely solid.
Step 3: Laying the Concrete Blocks for the Base
Base Construction: The base structure needs concrete blocks placed carefully. Draw block positions on your concrete pad. Place the first row with mortar, making sure to account for the pad’s slope.
Use construction adhesive for additional rows. Keep checking that everything stays straight. Add concrete and rebar inside the blocks for strength.
Step 4: Installing the Capstone
Capstone Installation: It’s time to set the capstone with the base ready. Put construction adhesive on top of your block structure.
Place the capstone with help from another person. Add bricks around the edges using mortar. Cover any open spaces with matching brick pieces for a clean look.
Step 5: Constructing the Oven Floor
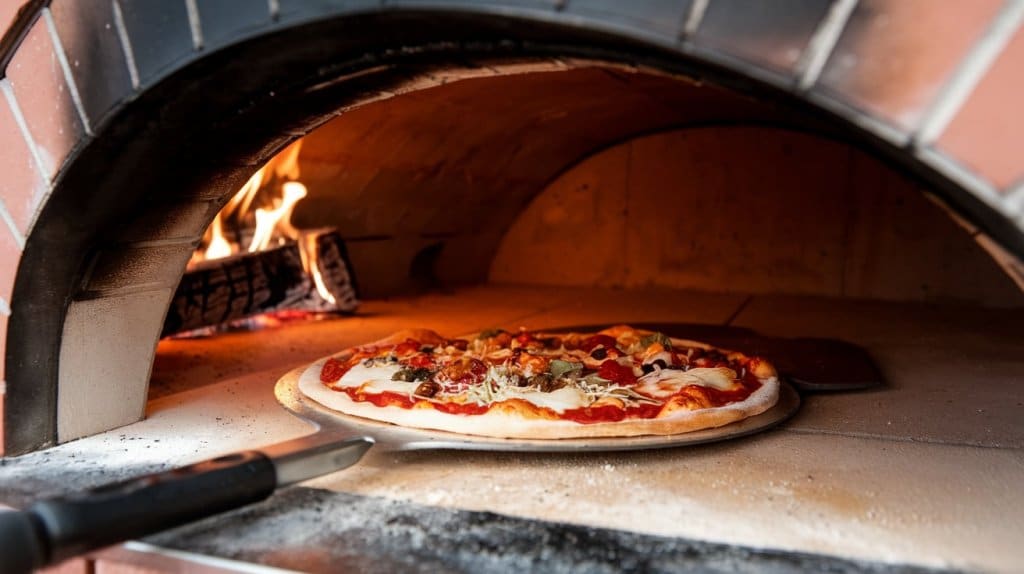
Cooking Floor Assembly: The cooking floor needs special attention. Create the surface with fire bricks set in mortar. Use PVC pipes as guides to spread the mortar evenly.
Make sure the fire bricks line up perfectly with the edge bricks. This creates the smooth surface you’ll need for sliding pizzas.
Step 6: Building the Arch for the Oven
Oven Opening Construction: Your oven needs a proper opening. Make a support frame from plywood and 2x4s. Cover it with hardboard using roofing nails.
Apply heat-resistant mortar and place fire bricks from the sides toward the middle. Spread a thin layer of mortar over the surface to make it smooth.
Step 7: Adding the Outer Brick Veneer
Exterior Layer Application: The outer layer adds protection and style. Let the inner structure dry completely. Apply mortar and start setting outer bricks around your oven.
Use a special bag to put mortar in tight spots. Make a chimney opening if you want one. Put the bricks in place and fill gaps with mortar.
Step 8: Final Steps and Curing
Structure Completion: Finishing touches make the structure complete. Remove the support frame with care. Add fire bricks to close the back wall. Put a thin coat of mortar over it.
Add outer bricks to finish the back section and around the chimney area. Make sure all spaces between bricks have mortar.
Step 9: Veneering the Concrete Block Base
Base Finishing: The base needs proper finishing. Apply stone pieces using construction adhesive instead of mortar for faster results.
Put each stone in place, working in sections around the base. Cut stones as needed with a special cutting wheel. This gives your oven a finished look.
Preparing for First Use
Start small fires in your new oven over several days. This helps strengthen the mortar and gets your oven ready for cooking. Begin with low heat and slowly increase the temperature each day.
Video Tutorial
Check out this YouTube video for a detailed step-by-step tutorial on making a pizza oven.
Tips for Maintaining Your DIY Pizza Oven
1. Regular Cleaning
Good cleaning habits will keep your pizza oven working well for years. Wait until your oven cools down after cooking. Take a small brush and remove leftover ash and bits of food.
Clean both inside and outside surfaces with a slightly wet cloth to remove black marks and oil. Check your chimney often and clean it to keep the smoke flowing properly.
2. Preventing Cracks
Your oven needs gentle treatment to last longer. Let it cool down slowly when you’re done cooking – quick temperature drops can harm the structure.
Look at your oven’s walls and floor regularly to spot any small breaks early. Fix any gaps you find with fresh mortar right away. When you first build the oven, give the mortar plenty of time to set properly.
3. Weatherproofing
Protection from weather makes a big difference in how long your oven lasts. Put a protective coating on the outside to guard against rain and snow. Keep your oven under a strong outdoor cover when you’re not using it.
Ensure water can run off easily and not collect anywhere on the oven. If you live somewhere cold, wrap extra material around the oven to protect it from freezing temperatures.
Follow these simple steps, and you’ll have many happy years of making pizzas in your backyard oven. Regular care prevents problems and keeps your oven cooking perfectly every time you use it.
Perfecting Your Pizza Baking Skills
1. Preheating Your Oven
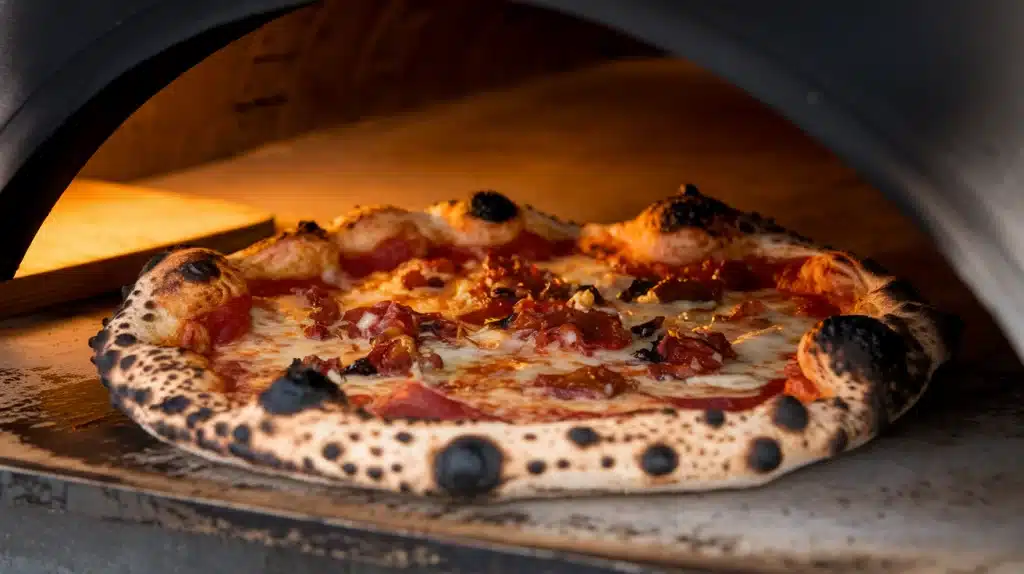
Getting the right temperature makes a big difference in your pizza’s taste. Heat your oven for at least 30 minutes before you start cooking.
Wood-fired ovens work best at 700-800°F, while home ovens need 450-500°F. Keep a thermometer handy to check the heat. This waiting time helps spread the heat evenly throughout your oven.
2. Choosing the Right Dough
Your pizza’s foundation starts with good dough. Pick flour with lots of protein to make your crust both chewy and crispy. Want more flavor?
Keep your dough in the fridge for one to two days. When you’re ready to make pizza, handle the dough gently to keep air bubbles inside. Take it out of the fridge early – warm dough stretches better and stays in shape.
3. Mastering Cooking Techniques
The way you cook matters just as much as your ingredients. In a wood-fired oven, put your pizza near the fire for a crispy bottom. Move it around so it cooks evenly on all sides. Using a regular oven?
A pizza stone helps make the crust extra crispy. Turn your pizza halfway through cooking to make sure everything cooks the same. Most pizzas need 5 to 10 minutes to cook perfectly, depending on your oven’s heat.
Common Mistakes to Avoid
1. Poor Insulation
Heat loss wastes fuel and cooking time. Put enough heat-keeping material around your oven’s base and top. Without this protection, you’ll need more wood or fuel to cook, and your pizzas might not bake evenly.
Good insulation means better pizzas with less fuel.
2. Wrong Material Choice
Not all building supplies can handle high heat. Regular bricks might crack when they get too hot. Always use special heat-resistant bricks for the cooking area.
These cost more but last much longer. The right materials keep your oven safe and working well.
3. Rushed Curing Process
Take your time when first using your new oven. Start with small fires and slowly make them bigger over several days. This helps everything set properly.
Moving too fast can cause breaks in your oven’s walls. Patient curing means your oven will work better and last longer.
Conclusion
Building a pizza oven in your backyard opens up a world of cooking possibilities. From perfectly crispy crusts to evenly melted cheese, you’ll soon notice the difference in taste compared to regular oven pizzas.
While the building process needs time and careful attention, the results make every step worthwhile.
Your homemade pizza oven will bring more than just good food – it will create a spot where family and friends gather, share meals, and make memories.
The skills you learn while building and using your oven will improve with each pizza you make.
Keep this guide handy as you work on your oven. Remember, taking time with each step and using the right materials leads to the best results.
Happy building and even happier pizza making!
