Ever wondered how seasoned woodworkers create those smooth edges, flawless grooves, and perfect joints? The secret often lies beneath the surface—literally.
Hidden under a sturdy table is a powerful tool that changes plain wood into polished pieces of art: the table router. It may look simple at first glance, but once you switch it on, you’re opening the door to a world of precision and creative freedom.
With the right touch, a router table can turn your weekend project into a masterpiece. But before you dive in, there are a few things you need to know—because mastering the router table isn’t just about power, it’s about control, safety, and a bit of woodworking magic.
Ready to unlock what this tool can really do? Let’s get started.
What is a Router Table?
A router table is a versatile tool used in woodworking to hold a router securely in place, allowing you to feed wood through the spinning bit for precise cuts and shaping.
Unlike handheld routers, a router table provides more stability and control, enabling woodworkers to make accurate edge cuts, grooves, joints, and decorative details with ease.
It consists of a flat surface with a mounted router, making it ideal for projects that require consistent and intricate results.
Router tables are essential for both beginners and experienced woodworkers, offering an extra level of safety and precision.
Key Components of a Router Table
A router table consists of several essential components that work together to provide stability, precision, and safety during routing. Understanding these parts is crucial to making the most out of your router table. Here are the key components:
-
Mounting Plate: The base where the router is mounted. It allows for easy adjustment of the router bit’s height and position.
-
Throat Plates: These are safety features that prevent wood from being caught underneath the router table. They provide a smooth surface for the wood to pass over.
-
Fence: The adjustable guide that ensures the wood stays aligned and allows for controlled cutting. The fence can be adjusted based on the router bit’s size and project requirements.
-
Miter Slots: Located on the table, these are used to hold feather boards or other guides to stabilize the wood while cutting.
Together, these components ensure that your router table functions efficiently and safely for various woodworking tasks.
Here follows the materials and steps required for a router table:
Materials and Tools Required for Using a Router Table
Before you begin using your router table, gathering the right materials is key to success. This detailed list includes everything you’ll need to work safely and effectively with your table router.
Having these items ready will make your woodworking process smooth and your results more professional.
| Item | Description |
|---|---|
| Wood pieces | Pieces of wood you will be routing in the project. |
| Router bits | Various types of router bits depending on the project. |
| Feather boards (optional) | Used for added safety and to keep the wood steady. |
| Push block | A block used to safely push the wood through the router. |
| Router | A motorized tool used to perform the routing operation. |
| Router table | A stationary table that holds the router for stability. |
| Safety glasses | Worn to protect your eyes from debris and dust. |
| Hearing protection | Used to protect ears from the loud noise of the router. |
| Felt pen | Used to mark angles and adjustments on the push block. |
| Wrenches or tools | For tightening and adjusting router bits and parts. |
| Ruler or measuring tape | Used to align the fence and set precise measurements. |
Step-by-Step Guide on How to Use a Table Router
Now that you have all your materials ready, let’s walk through the process of using a table router correctly. Following these steps will help you work safely while getting clean, exact cuts for your woodworking projects.
Pay close attention to each step for the best results!
Step 1 – Installing the Router Bit
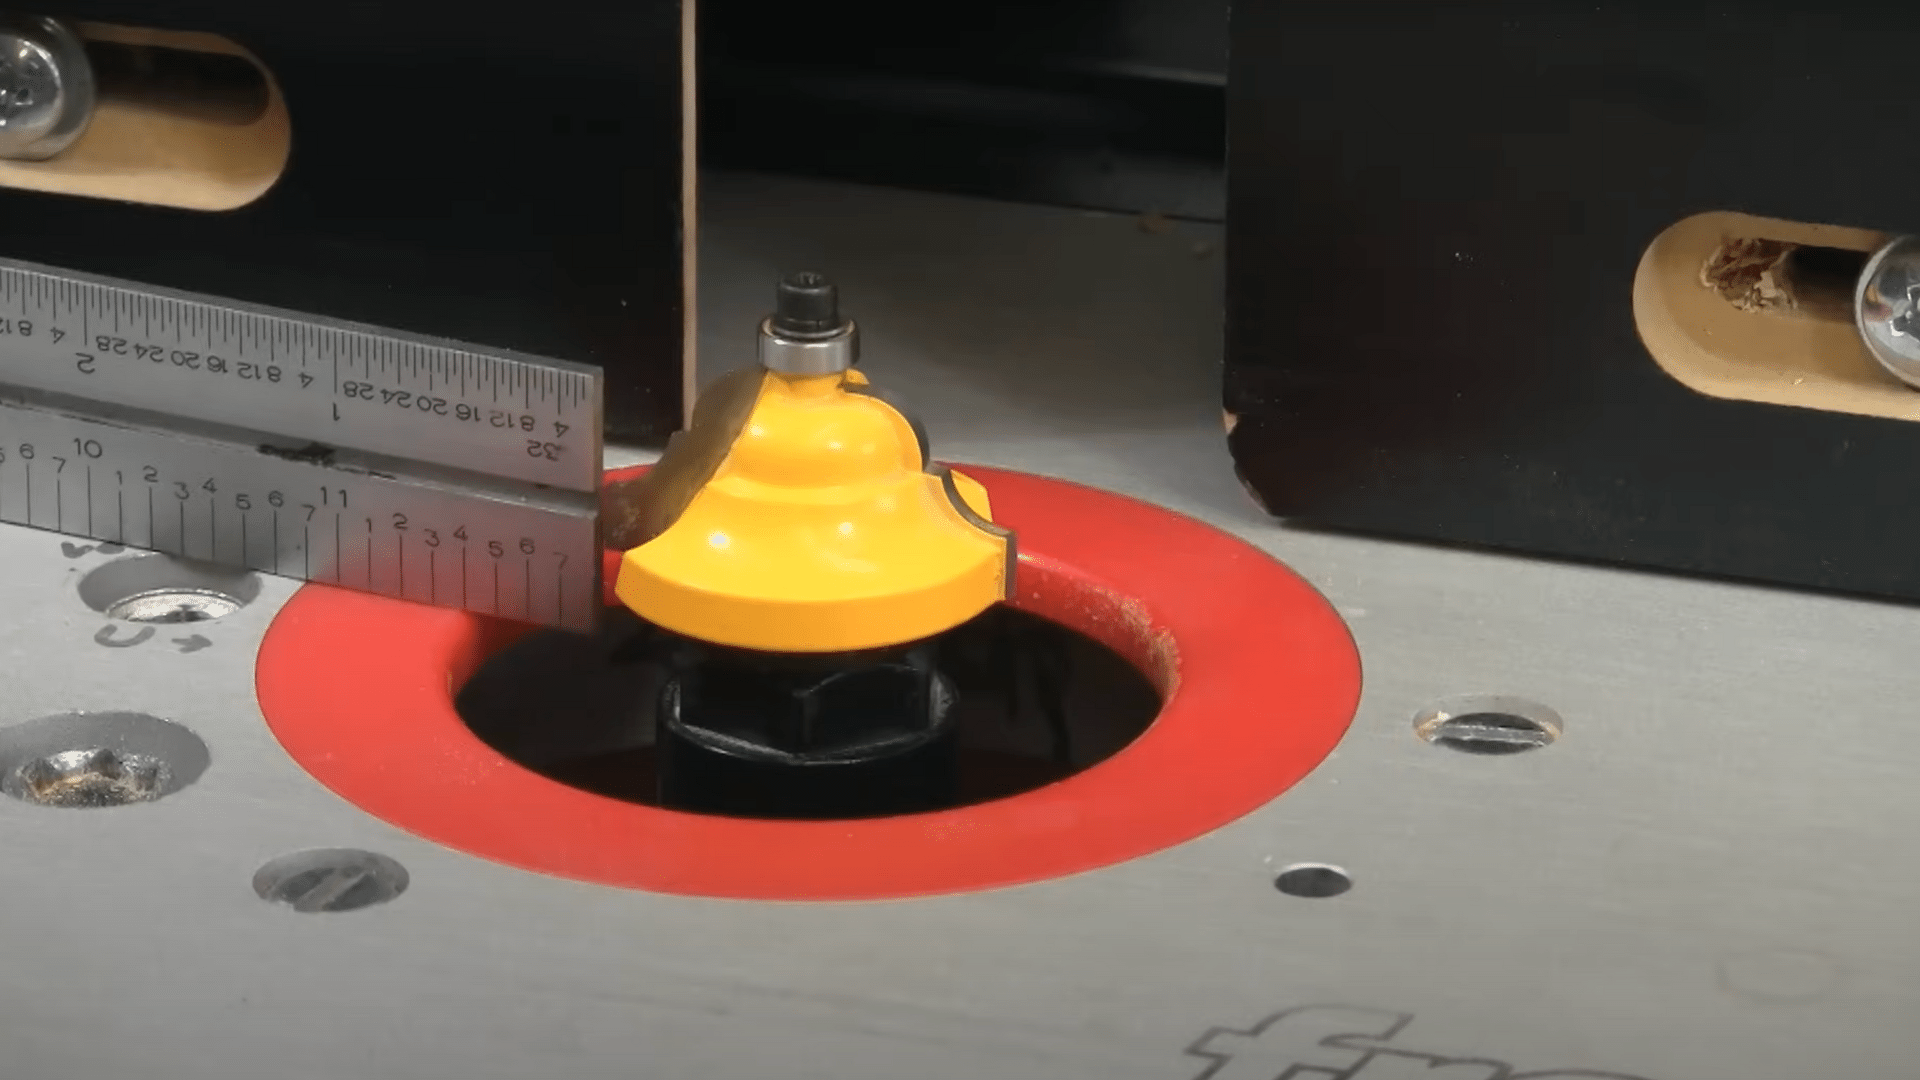
To begin routing, you need to install the correct router bit for your project.
-
Lock the Shank: Ensure the router shank is locked securely into place to prevent any movement during use.
-
Insert the Router Bit: Drop the router bit into the router and push it back until it’s about the thickness of a coin from the base.
-
Hand-Tighten: Secure the bit by hand-tightening the collet. Avoid overtightening to prevent damage.
-
Adjust the Bit Height: Set the bit height based on your desired cut. Adjusting the height will control the depth of the cut.
Step 2 – Adjusting the Router Table Fence
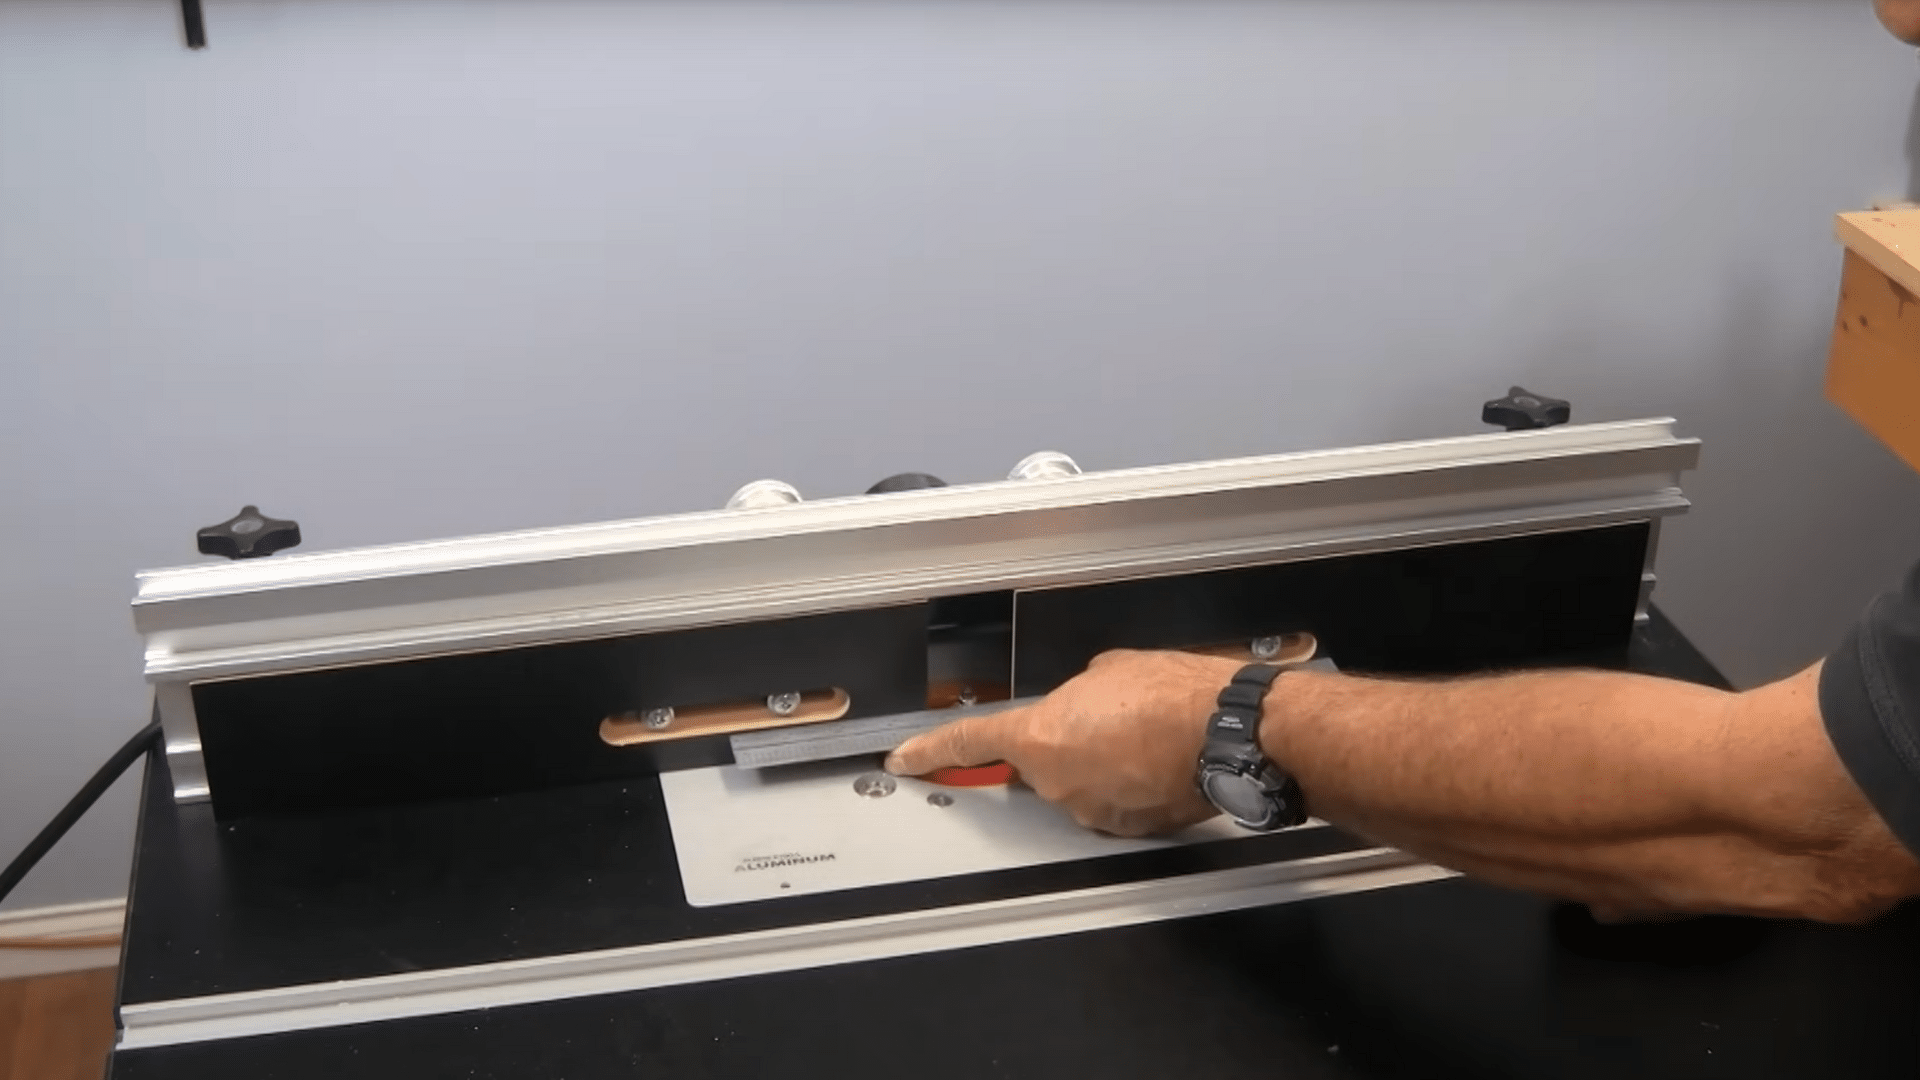
Now, it’s time to fine-tune the fence to ensure smooth, accurate routing.
-
Set the Clearance: Adjust the fence to the right clearance, allowing the bit to pass smoothly.
-
Align the Fence: For bits with bearings, align both sides of the fence to match the bearing. This ensures the fence will guide the wood properly during routing.
-
Double-Check the Alignment: Use a ruler or measuring tape to verify that both sides of the fence align perfectly with the bearing.
Step 3 – Determine the Wood Feed Direction
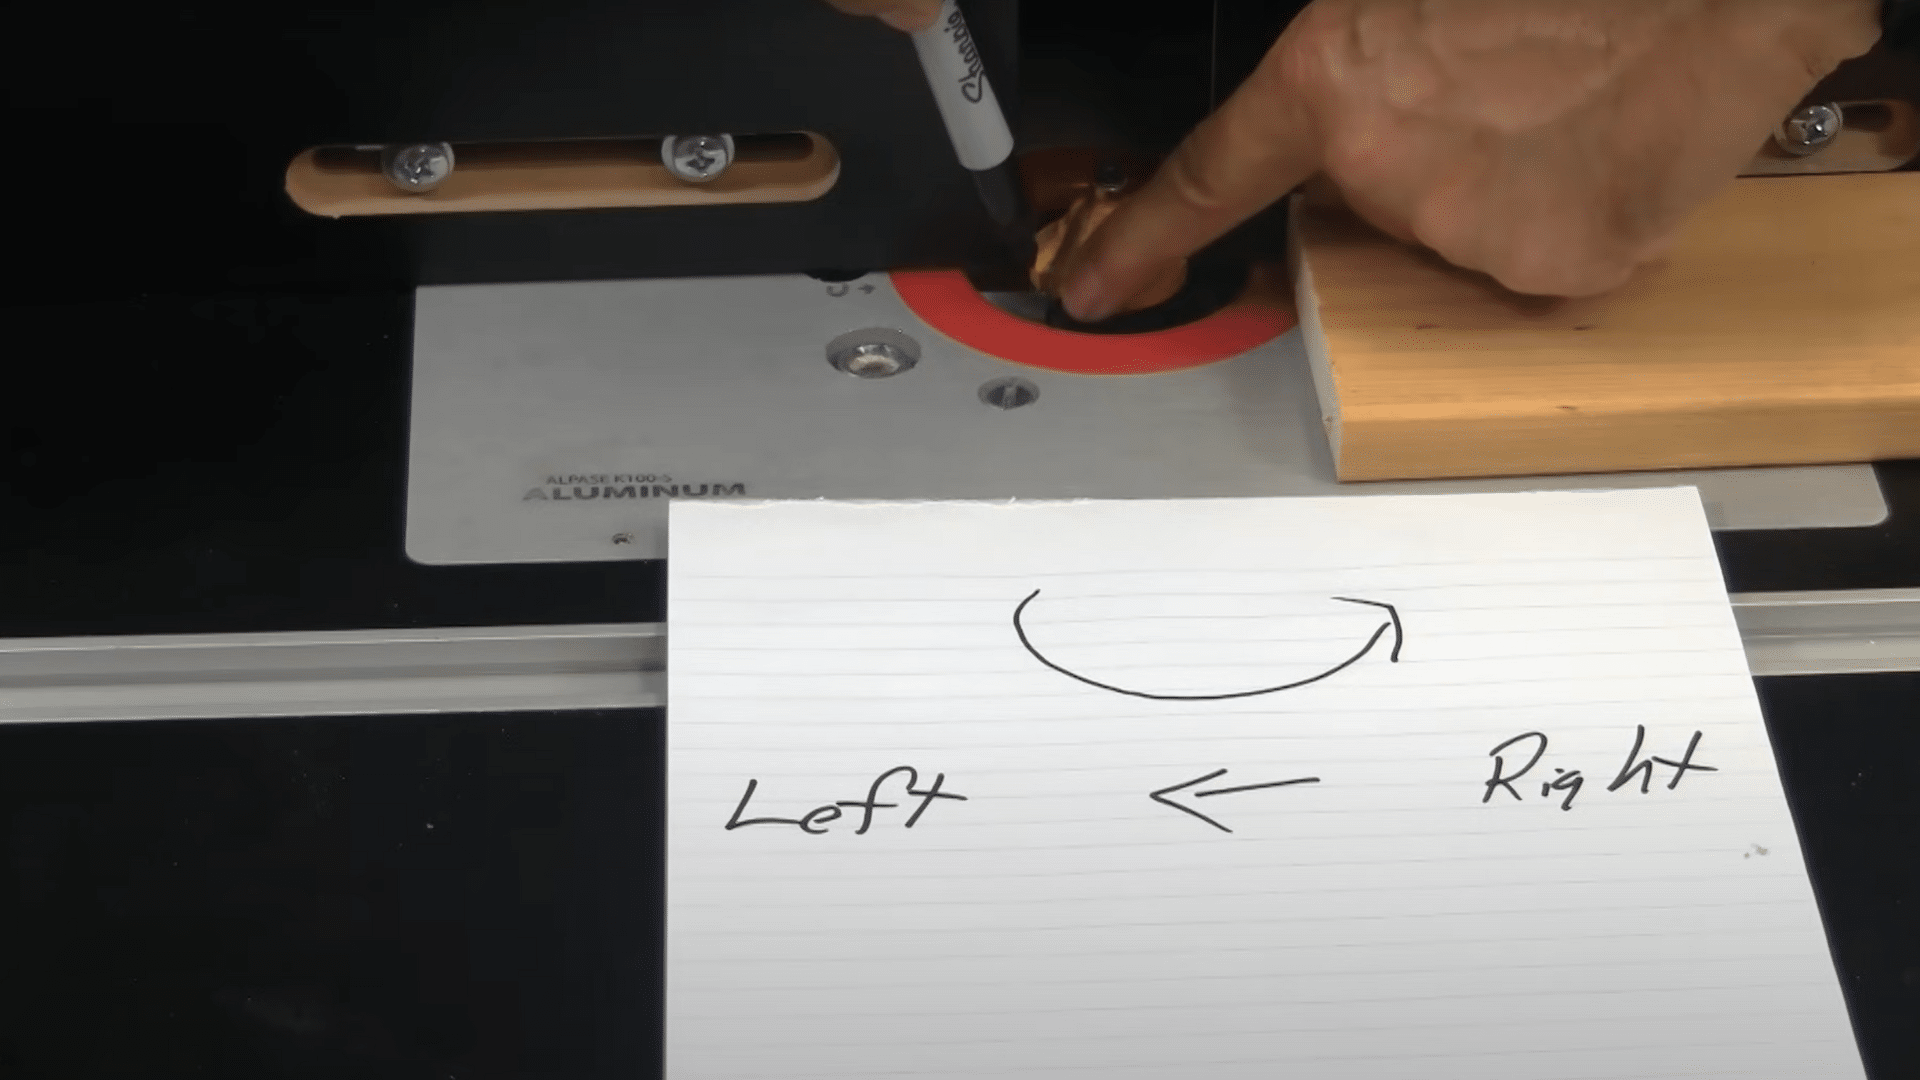
The direction you feed the wood through the router table is essential for safety and precision.
-
Feed from Right to Left: Always feed the wood from right to left, as the router bit spins in that direction. This helps control the wood’s movement and provides a smoother cut.
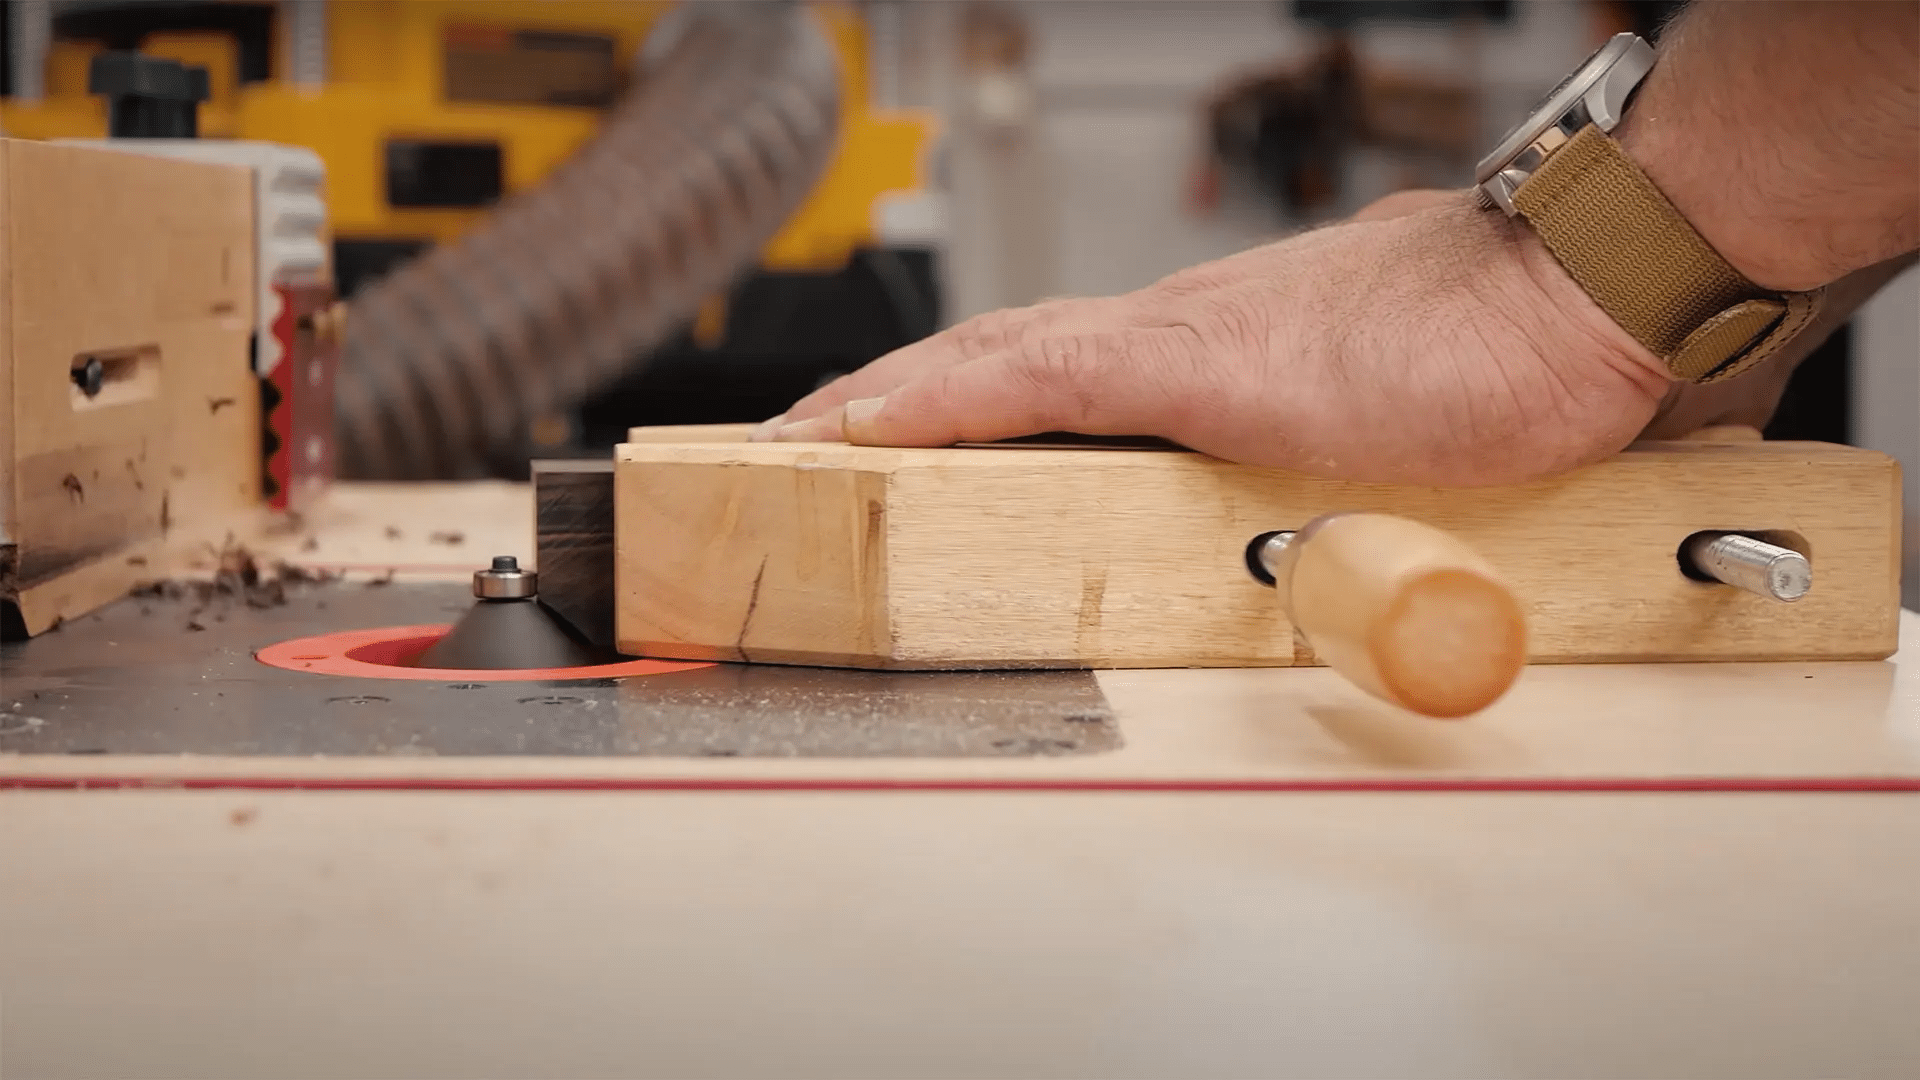
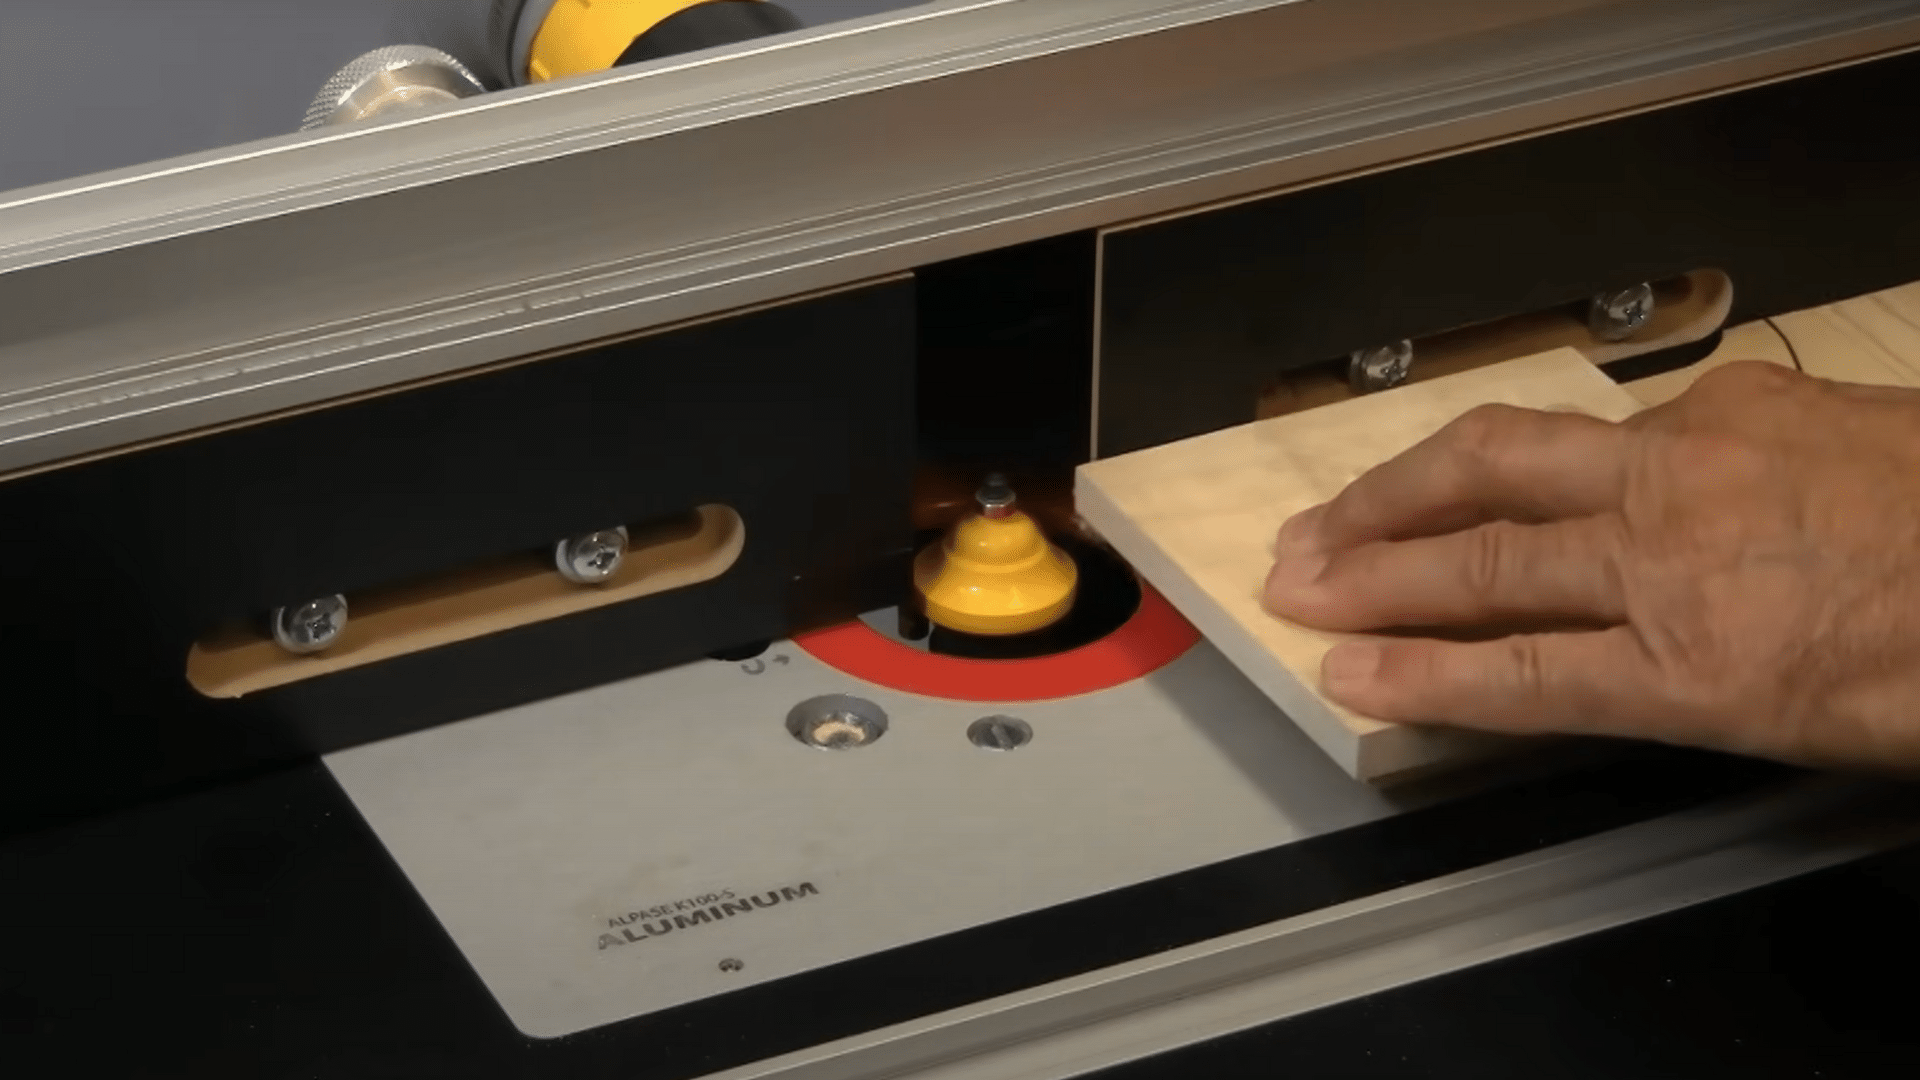
Step 4 – Use a Push Block
A push block is crucial for safety and control while routing.
-
Prepare the Push Block: Make sure your push block is square (90° angle). Mark it with a felt pen to double-check.
-
Push Wood through Safely: Always use the push block to feed the wood through the router table. This prevents direct hand contact with the router bit, ensuring safer operation.
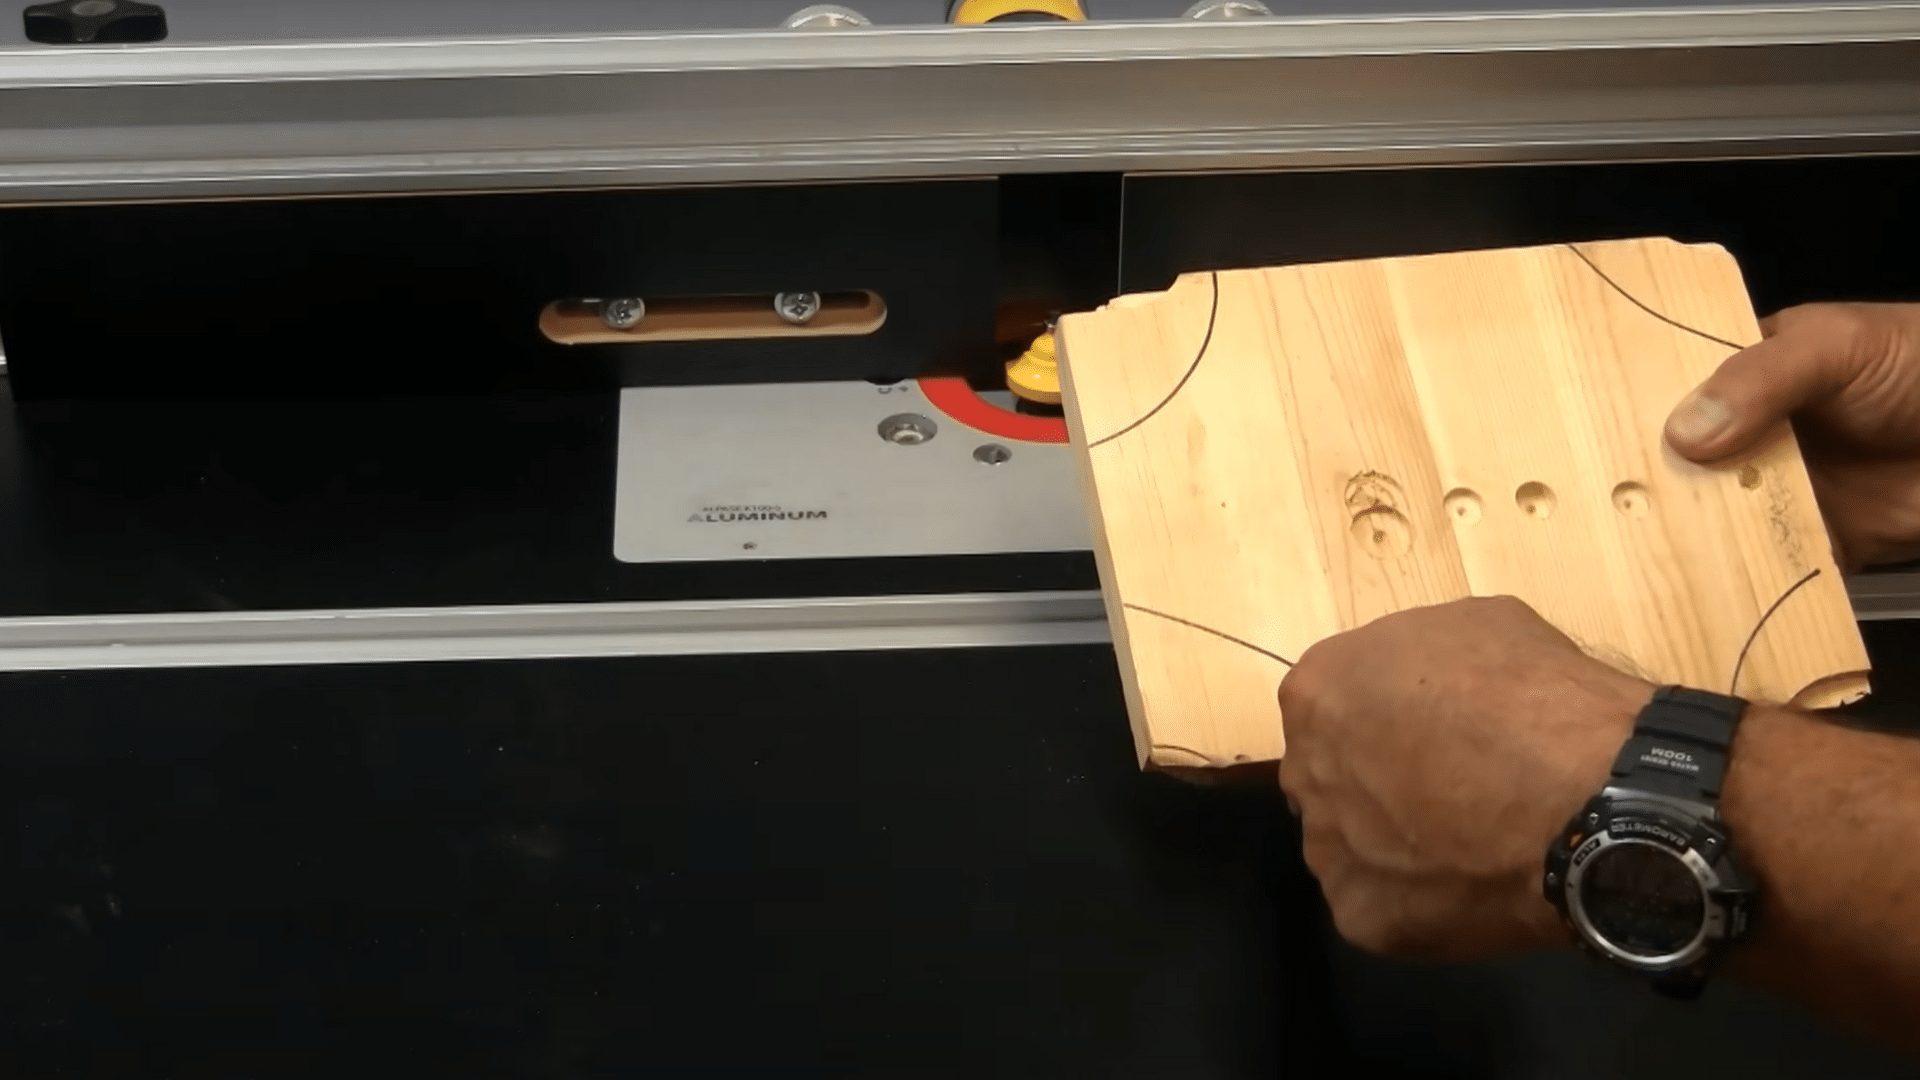
Step 5 – Begin Routing
Finally, you’re ready to start routing your wood.
-
Start with Edge Grain: Begin routing along the edge grain of the wood. This will give you better control and ensure the cut is clean.
-
Plug in the Router: Once all adjustments are complete, plug the router in and begin the routing process.
-
Make Adjustments if Needed: If the cut isn’t as expected, stop, adjust the bit or fence, and continue routing.
Safety Tips for Using a Router Table!
Following these tips will keep you safe and ensure a smooth routing experience. |
Video Tutorial
Please refer to this video by WoodWorkWeb for further guidance and support.
What are Router Tables Used for?
Router tables are incredibly versatile tools that allow woodworkers to perform a variety of tasks with precision and ease. Here are some common uses for a router table:
1. Edge Shaping: Router tables are ideal for shaping the edges of wood, whether you’re rounding, beveling, or creating custom profiles on furniture pieces, moldings, or cabinetry.
2. Grooving and Dadoing: They can be used to cut grooves, dadoes, and rabbets, making them perfect for joinery and creating spaces for shelves, panels, or inlays.
3. Inlay Work: Router tables help create intricate inlay designs by controlling the router bit and ensuring clean, accurate cuts for decorative patterns.
4. Pattern Cutting: They are used to follow templates and patterns to cut out specific shapes or designs, often used in cabinetry, furniture, and sign-making.
5. Joinery: Router tables are excellent for precision joinery techniques like making dovetails, mortises, and tenons, which are essential for strong and durable wood joints.
These are just a few of the many tasks that router tables can accomplish, making them an essential tool for both amateur and professional woodworkers.
Tips for Getting the Best Results with Your Router Table
To make the most of your router table and ensure smooth, precise cuts, here are a few valuable tips:
-
Use the Right Router Bit: Choose the appropriate router bit for the project. A dull or incorrect bit can cause uneven cuts and may damage the wood. Keep extra bits on hand for different tasks like edge shaping, dovetailing, or grooving.
-
Set the Correct Bit Height: Adjust the bit height carefully to control the depth of your cut. Ensure the height is consistent for uniform results, and always check before starting your work.
-
Align the Fence Properly: The fence should be parallel to the router bit for consistent cuts. Make sure it’s locked securely in place, and adjust it as needed for different bit sizes or cutting depths.
-
Feed Wood at a Steady Pace: Never rush the wood through the router table. Feed it slowly and steadily, allowing the router bit to do the work. This will prevent burning the wood and give you a cleaner cut.
-
Use Push Blocks and Feather Boards: Always use a push block to guide the wood through the router table safely. Feather boards can help stabilize the wood and keep it pressed against the fence for more accurate cuts.
By following these tips, you’ll achieve professional-quality results while ensuring the safety and longevity of your router table.
Wrapping Up
Becoming proficient with the router table unlocks numerous opportunities for woodworkers, regardless of their skill level. Grasping the key components and prioritizing safety with appropriate gear are vital steps in achieving accurate, clean cuts.
Choosing the right router bit, adjusting the fence just right, and using a push block are all essential steps for achieving a beautiful finish.
By feeding the wood in the right direction and keeping your focus, you can effortlessly navigate your router table with confidence!
With practice, you’ll unlock the full potential of this versatile tool. Are you excited to elevate your woodworking projects?
Start experimenting with your router table today and share your creations with us—let’s see what you can build!