

Tired of sore fingers and uneven sanding results?
I struggled with this problem for years in my workshop. My hands would cramp after just 30 minutes of sanding, and store-bought blocks never quite fit right.
They were either too bulky or too flimsy, leaving me frustrated with both the process and the results.
That’s why I created my own custom sanding block. With just a piece of wood, some cork, and basic tools, I made something that fits my hand perfectly.
Now I can sand for hours without discomfort, and my projects look better than ever. In this guide, I’ll show you exactly how to make one yourself in just five simple steps.
Before starting your sanding block project, think about creating a special work area. Our guide on DIY craft table ideas can help you set up the ideal spot for your woodworking projects.
DIY Sanding Block in 5 Easy Steps
Tools and materials needed:
| Item | Description |
|---|---|
| Hardwood (cherry) | 19 inches long, 1 inch thick, 1⅞ inches wide |
| Sticky-backed cork roll | 1/16-inch thick |
| Router | With a 7/8-inch core box bit |
| Belt sander or sandpaper | 150-grit sandpaper |
| Utility knife | For cutting materials |
| Measuring tape | For accurate measurements |
| Saw | For cutting wood |
Step 1: Cut Finger Grooves in the Wood
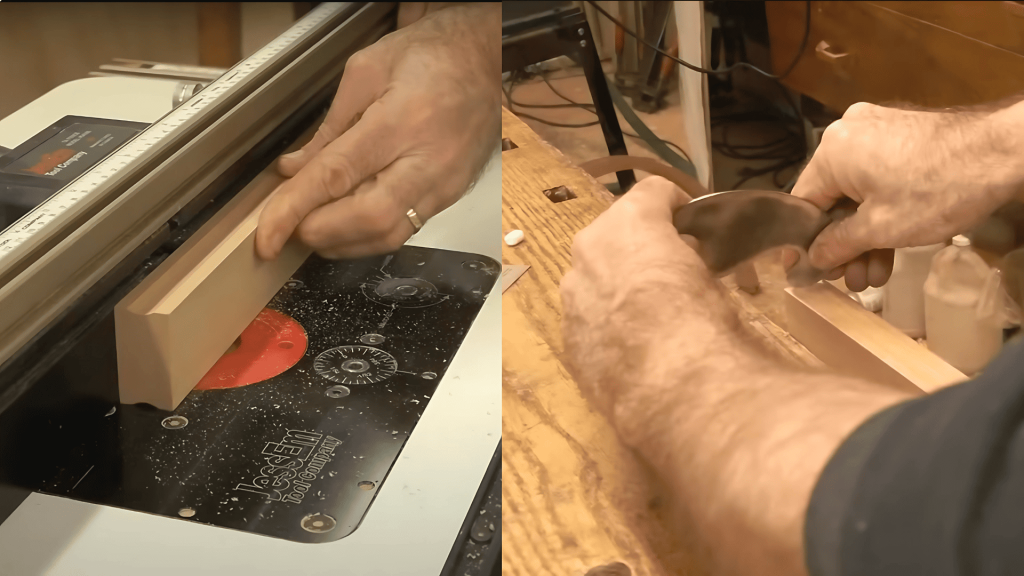
First, grab your piece of hardwood. Cherry is a good choice because it’s not too hard or too soft. Set up your router with a 7/8-inch core box bit. Adjust it to cut about 1/16-inch deep. Set the fence so the bit will make a ½-inch wide groove.
Run the wood through the router on both long sides. These grooves will fit your fingers and make the block more comfortable to hold.
After routing, smooth the grooves with a card scraper or sandpaper. This is much easier to do now while the wood is still in one piece.
Step 2: Cut Into Individual Blocks
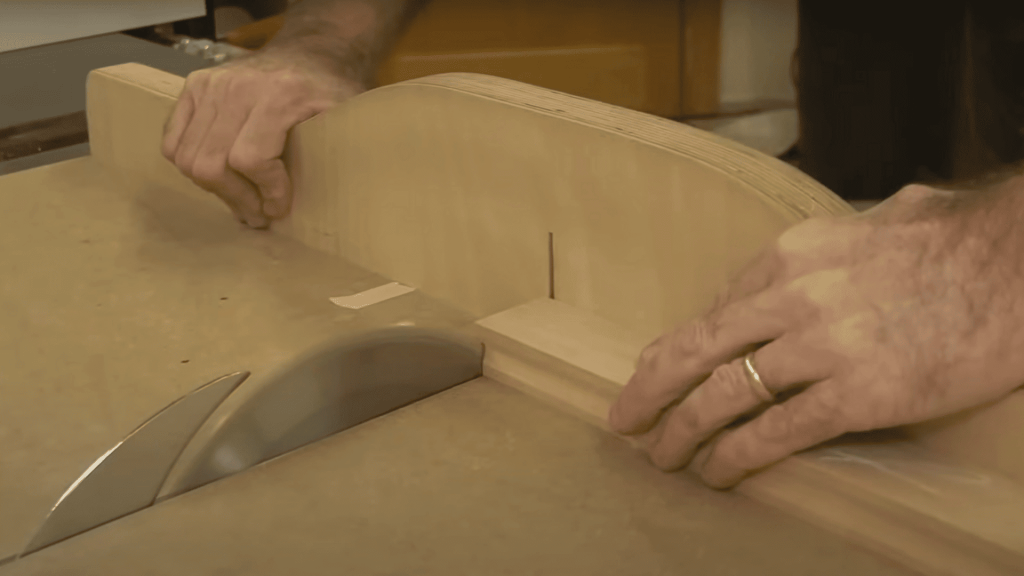
Trim one end of your long piece of wood to make a clean edge. Measure and mark every 4¼ inches along the wood. This length works perfectly with regular sandpaper when cut into quarters.
Cut along your marks to make individual blocks. You should get four blocks from a 19-inch piece of wood. Don’t worry if your cuts aren’t perfect. What matters most is that all blocks are the same length.
Step 3: Add Cork to the Bottom
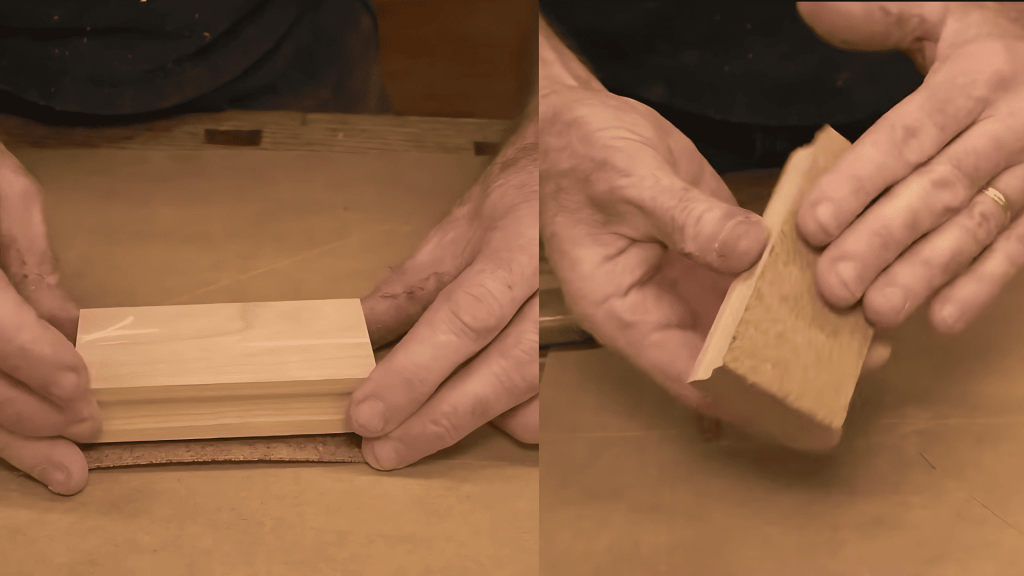
Cut a piece of sticky-backed cork to match the size of your block. Peel off the backing and stick the cork to one face of the block. Press firmly to make sure it sticks well.
Use a utility knife to trim any extra cork so it’s flush with the edges. The cork provides just enough cushion when sanding. It helps prevent the sandpaper from clogging too quickly.
Step 4: Round the Edges for Comfort
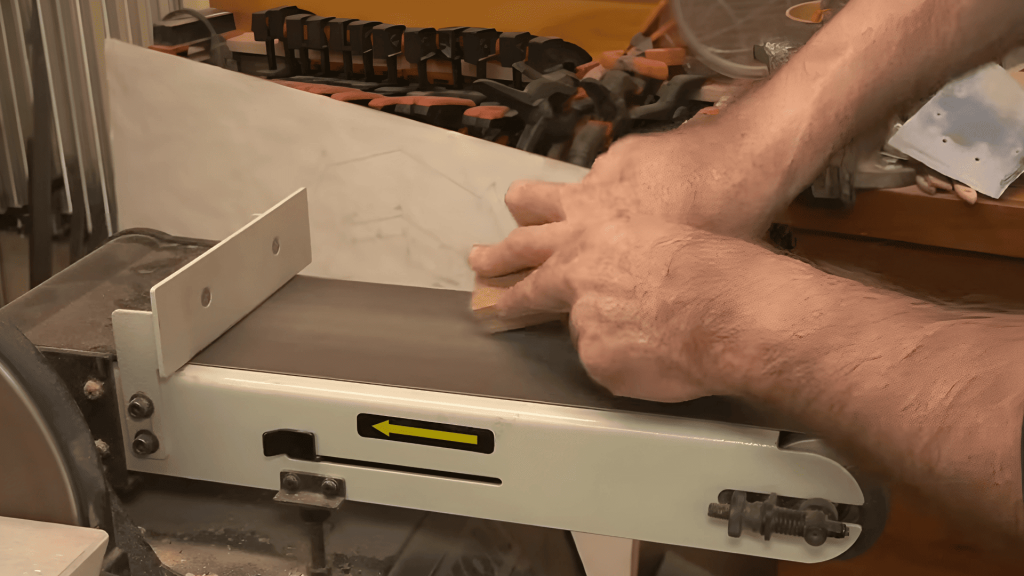
Take your block to a belt sander or use sandpaper to round all edges and corners (except the cork side). Pay special attention to the corners that will rest in your palm. These need to be very smooth so they don’t hurt your hand during long sanding jobs.
After using the belt sander, smooth any rough spots with sandpaper. Hold the block in your hand and feel for any sharp or uncomfortable spots. Sand these areas until the block feels good in your hand.
Step 5: Use Your Sanding Block
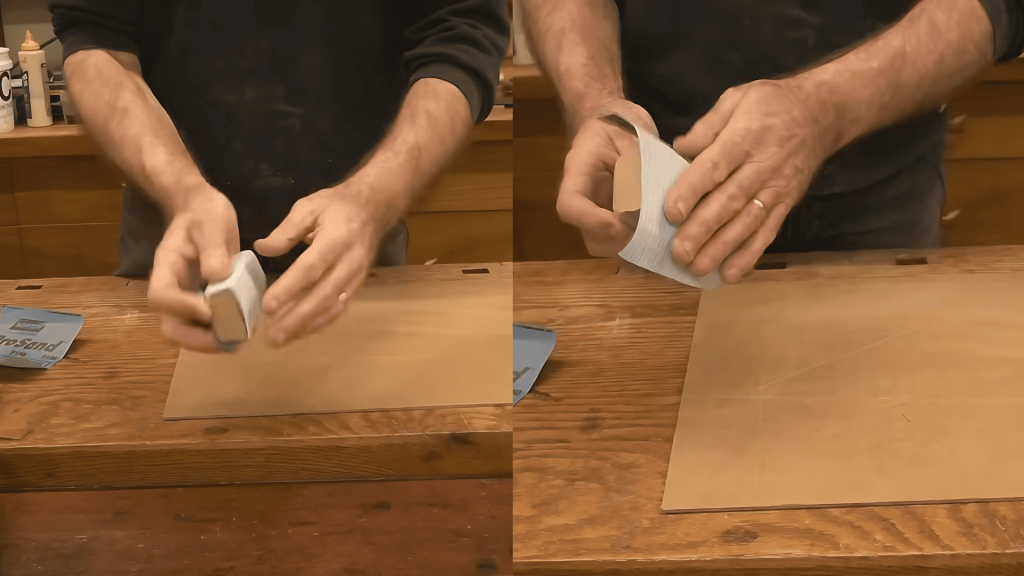
Take a full sheet of sandpaper and cut it into quarters. Place your block on the edge of the paper, not in the center. Leave about & inch of paper to wrap around.
Fold the paper over the block and hold it so your fingers rest in the grooves. When one section of sandpaper wears out, slide the paper over to use a fresh section. This way, you get two uses from each quarter sheet.
Special thanks to Epic Woodworking for providing valuable insights in their video “Make Your Own Sanding Blocks”, which I referenced while creating this guide.
Common Mistakes to Avoid
1. Wrong Wood Choice: Don’t use wood that’s too soft. It will wear down fast. Pine might feel cheap, but it won’t last.
2. Skipping the Cork: Some people skip the cork layer. This is a big error. The cork helps the sandpaper last longer and gives better results.
3. Grooves Too Deep: If you cut the finger grooves too deep, the block might break when you press hard. Stick to 1/16-inch depth.
4. Rough Edges: Not smoothing the edges enough will hurt your hands. Take time to sand all edges well.
5. Wrong Block Size: Make sure your block size works with normal sandpaper sheets. The 4¼-inch length lets you cut a sheet into four equal parts.
Pro Tips for Better Results
1. Make More Than One: Create blocks in different sizes for various jobs. Small blocks work well for tight spots.
2. Add a Finish: Apply a light coat of oil to your block. This helps keep it clean and makes it last longer.
3. Label Grits: If you keep sandpaper on your blocks, mark the grit on the side with a pencil.
4. Store Wisely: Hang your blocks on a wall or keep them in a drawer. Don’t throw them in a toolbox where they can get wet.
5. Check for Wear: Look at your blocks now and then. The wood and cork will wear down over time. Make new ones when needed.
Conclusion
Making your own sanding block isn’t just about saving money. It’s about making a tool that works just for you.
The special size, finger grooves, and smooth edges all help make sanding easier on your hands. The smart design lets you use each piece of sandpaper twice.
This simple project improves your whole woodworking process. A good sanding block helps you create smoother surfaces for stains and finishes. The patience you learn from proper sanding carries over to other tasks like joint fitting and edge work.
The skills used to make this block- measuring, cutting, and shaping- form the foundation of all good woodworking. By making your own tools, you gain better control over your craft.
Do you have questions? Please ask below, and I’ll help you resolve any issues you may encounter.
Happy sanding!
Frequently Asked Questions
How Long Does It Take to Make a Sanding Block?
With all tools ready, you can complete one block in about 30 minutes from start to finish. Making four blocks at once is more efficient, taking roughly an hour total. The time investment pays off with years of comfortable sanding and better woodworking results.
Can I Use Other Types of Wood?
Yes, several hardwoods work well for sanding blocks, with maple, oak, and walnut being excellent choices. Avoid soft woods like pine as they wear down too quickly and won’t last through many projects.
What if I Don’t Have a Router?
You can still make a useful sanding block without a router by skipping the finger grooves entirely. Another option is to cut simple grooves with a chisel or carve them with basic hand tools.
The block won’t be as comfortable but will still improve your sanding compared to using just your hands.
How Long Does a Diy Sanding Block Last?
With normal home workshop use, a well-made hardwood sanding block can last for many years. The cork backing may need replacement after about a year if you use the block often. Regular woodworkers might make new blocks every few years as part of their tool maintenance.