
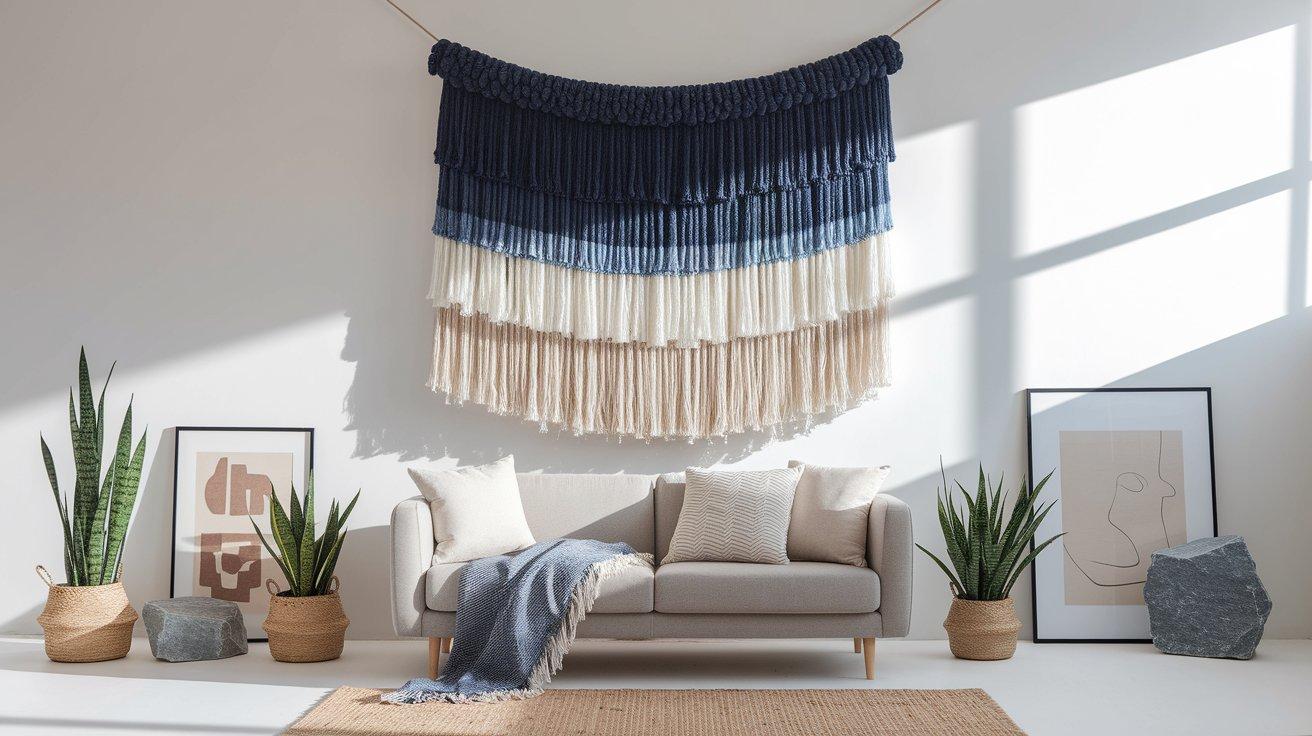
Convert your living space with a lovely DIY yarn wall hanging that adds texture, warmth, and a pop of color to any room. This beginner-friendly project creates a professional-looking piece using simple materials and techniques.
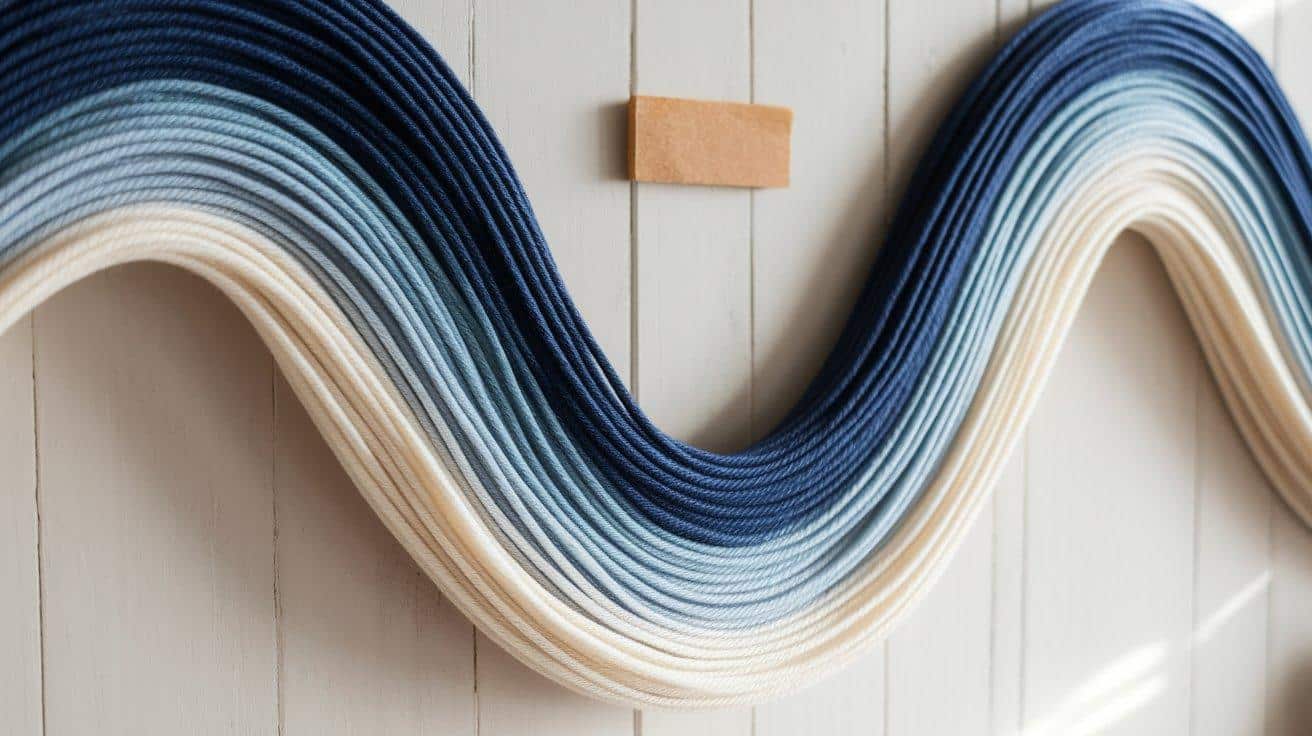
The ombré effect, transitioning from deep navy blue to crisp white, creates a calming visual flow perfect for modern, coastal, or bohemian interiors. In just a few hours, you’ll craft a statement piece that looks like it came from a high-end boutique but costs a fraction of the price.
Customize the colors and dimensions to match your décor style, making this versatile project uniquely yours. Follow our step-by-step guide to create a conversation-worthy textile art piece that instantly improves your home’s artistic appeal.
The Meaning of Colors in Your Yarn Wall Hanging
The colors you select for your yarn wall hanging influence both the visual impact and emotional atmosphere of your space.
Navy blue creates a sense of calm and stability, making it an ideal choice for bedrooms or reading nooks. Mid-tones like teals and purples add creativity and inspiration, suitable for offices or craft rooms.
White and light colors evoke freshness and openness, helping smaller spaces feel more expansive.
Your color choices can reflect:
- Seasonal themes (autumn oranges, winter whites)
- Emotional responses (energizing reds, calming blues)
- Design principles (complementary or analogous color schemes)
- Personal significance (favorite colors or meaningful combinations)
The ombré effect used in this project represents transition and flow, creating visual movement across your wall. When selecting yarn colors, consider both your existing décor palette and the specific mood you wish to create in the space where your hanging will be displayed.
Step-by-Step Guide to a Beautiful Yarn Wall Hanging
Tools and Materials Needed
| Item | Purpose |
|---|---|
| Wood strips (½ inch thick) | From the top and bottom frames of the hanging |
| Yarn (various colors) | Main material for the hanging design |
| Waverly antique paint | For finishing the wood frames |
| Staple gun | Secures yarn to wood |
| Double-sided tape | Temporarily holds yarn in place |
| Small nails | Joins the two wood pieces together |
| Wall hanging hardware | Allows for mounting on the wall |
| Scissors | For cutting yarn to length |
| Measuring tape | Ensures consistent measurements |
| Pencil | For marking placement points |
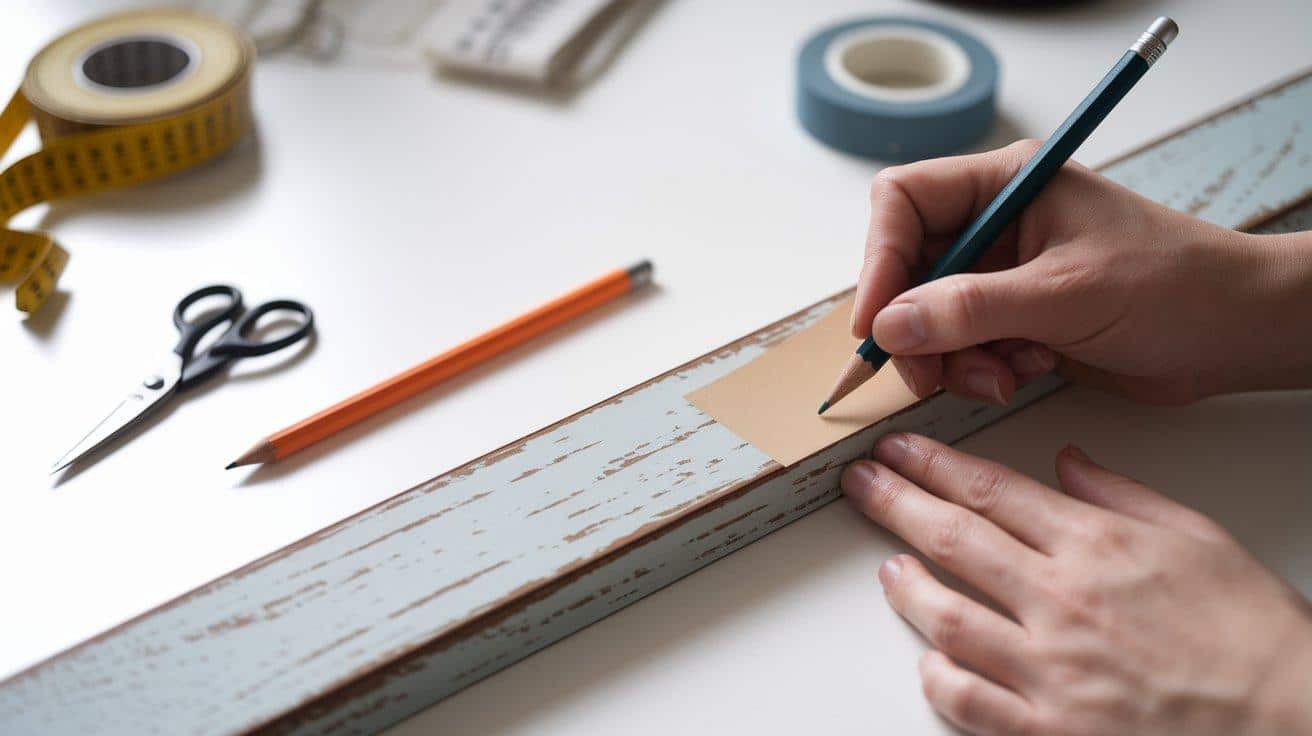
Step 1: Prepare Your Wood Frame
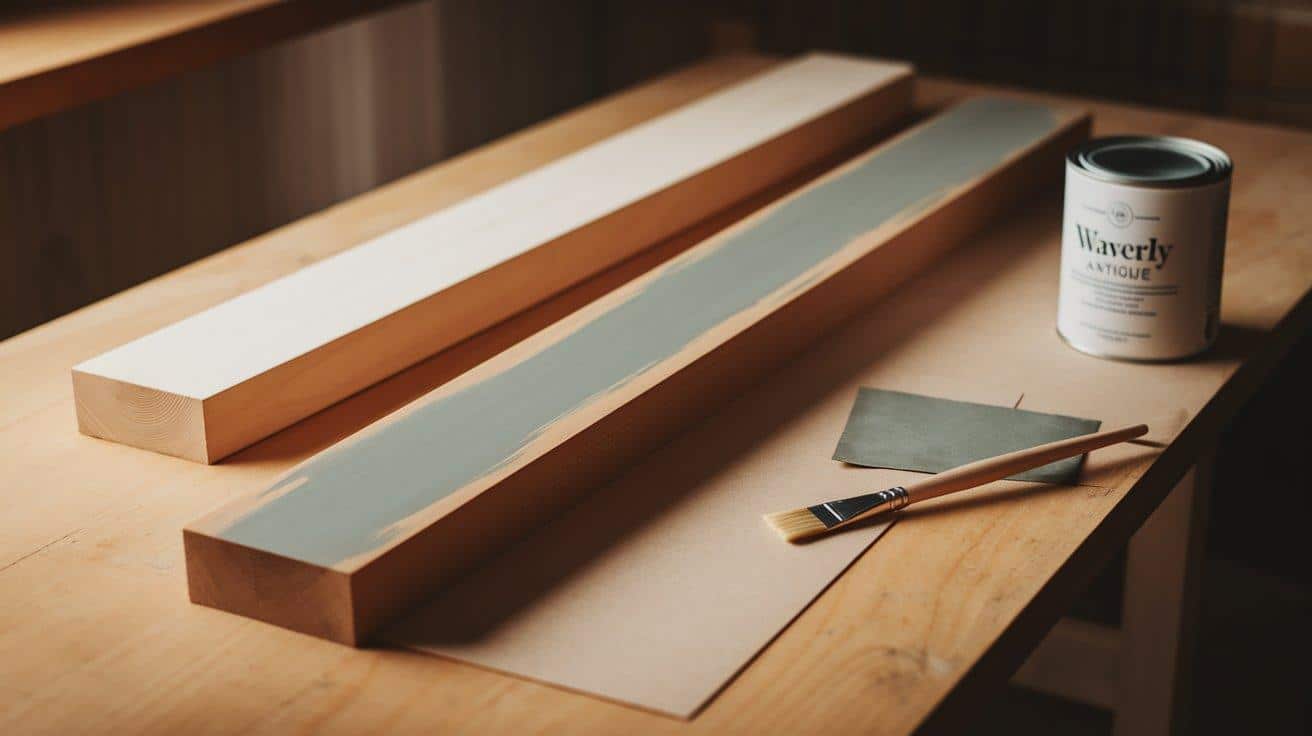
Cut two pieces of wood strips to six feet in length. These half-inch-thick strips will form the top and bottom of your wall hanging. Sand any rough edges for a smooth finish.
Apply Waverly antique paint to both wood strips and allow them to dry completely. This creates a polished look and protects the wood from damage.
The painted frame complements the yarn colors, giving your project a professional appearance. You might want to apply two coats of paint for more even coverage and a richer finish, allowing each coat to dry thoroughly before applying the next one. The color you choose can either contrast with or complement the colors of your yarn.
Step 2: Cut Your Yarn
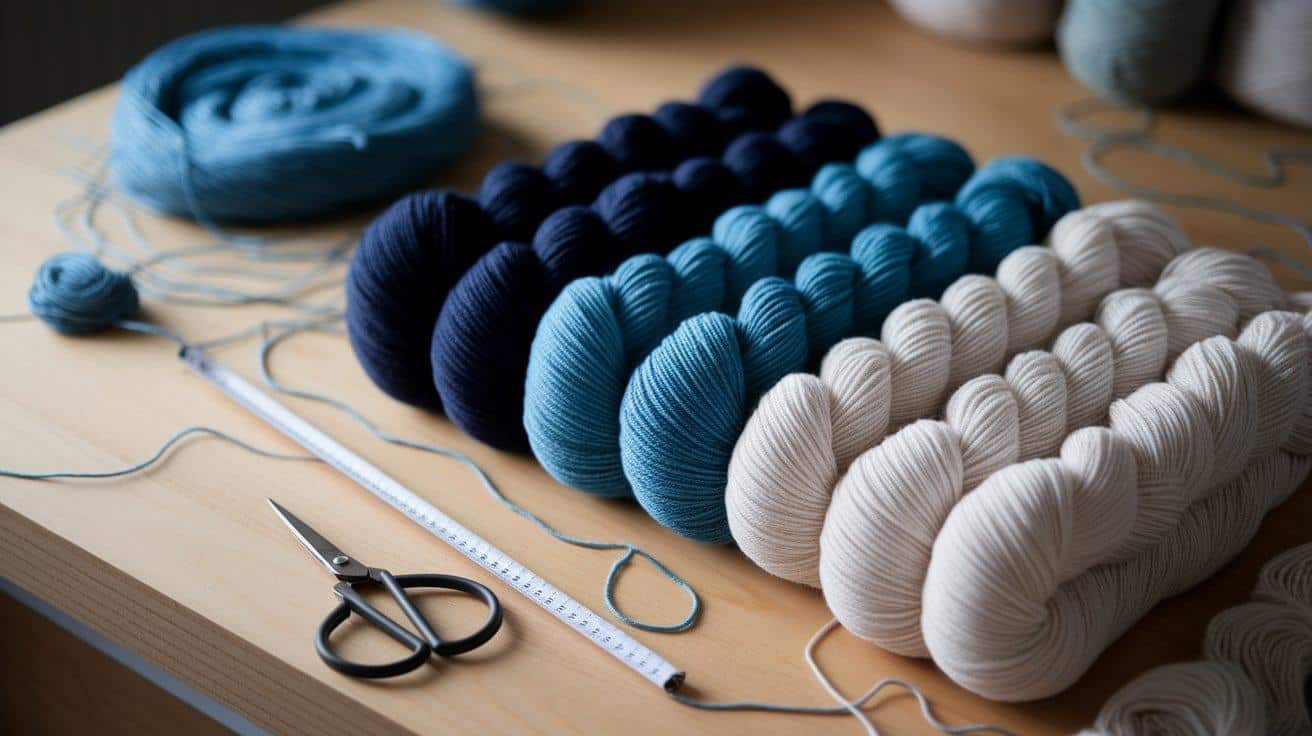
Measure and cut pieces of yarn to approximately five feet in length. The exact length depends on how low you want your wall hanging to drape in the middle.
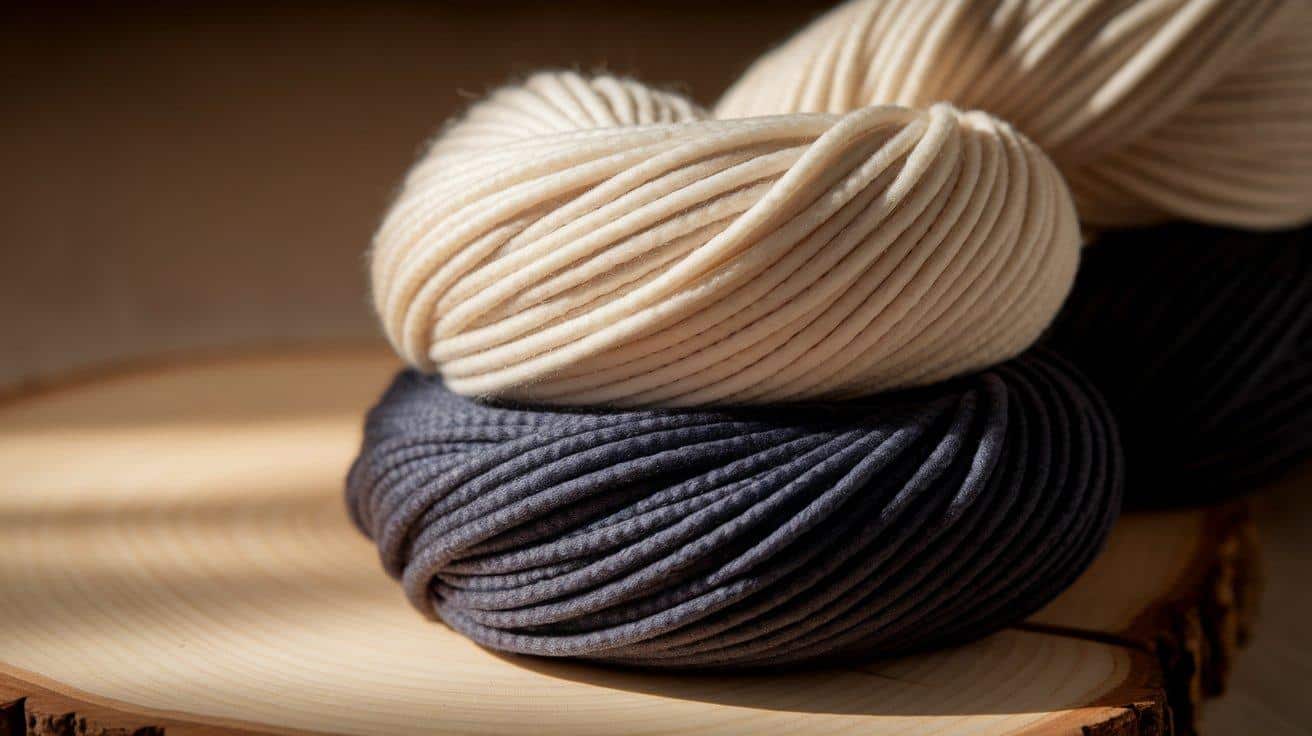
Prepare various colors if you’re creating an ombré effect, as shown in our example. Starting with navy blue and transitioning to white makes a striking gradient.
Cut enough pieces for your desired fullness – remember that more yarn results in a denser, more textured hanging. For a six-foot wide hanging, you’ll need approximately 100-150 strands, depending on the thickness of your yarn.
Cutting all your yarn at once before beginning attachment ensures consistency in length and saves time during assembly.
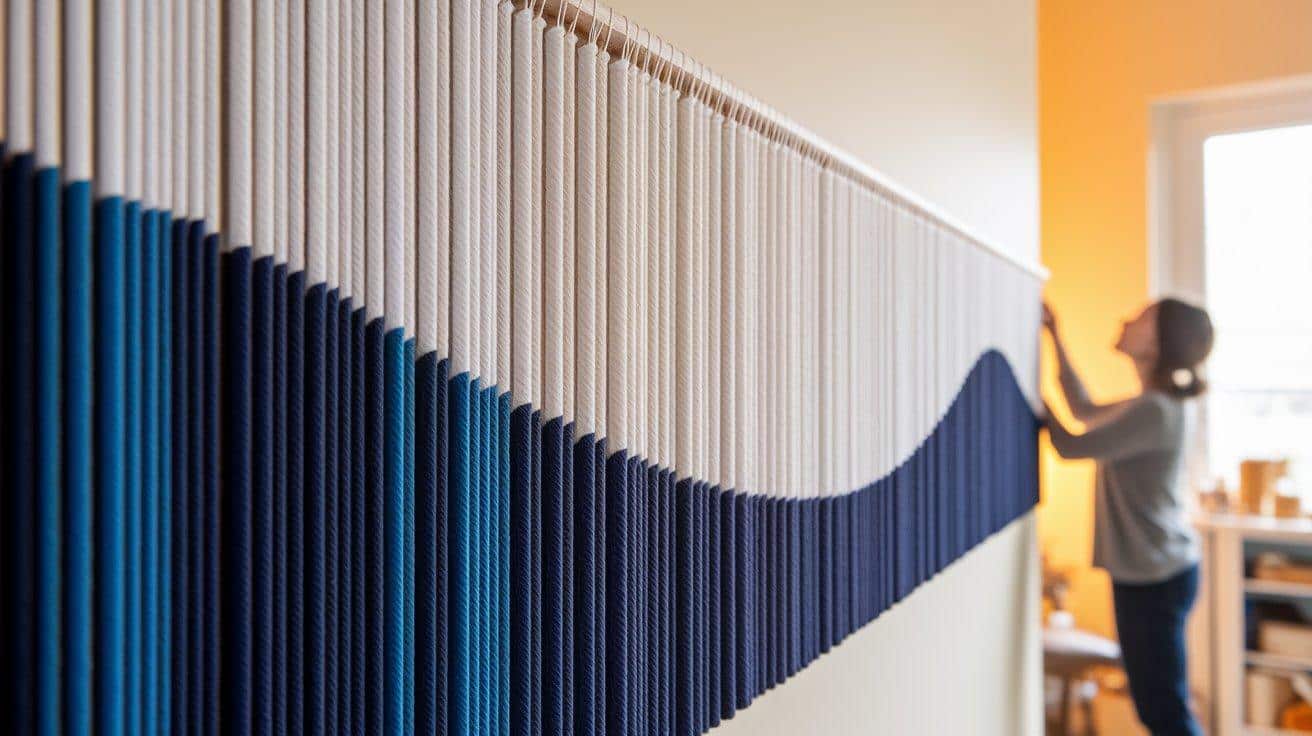
Step 3: Begin Attaching Yarn to the Right Side
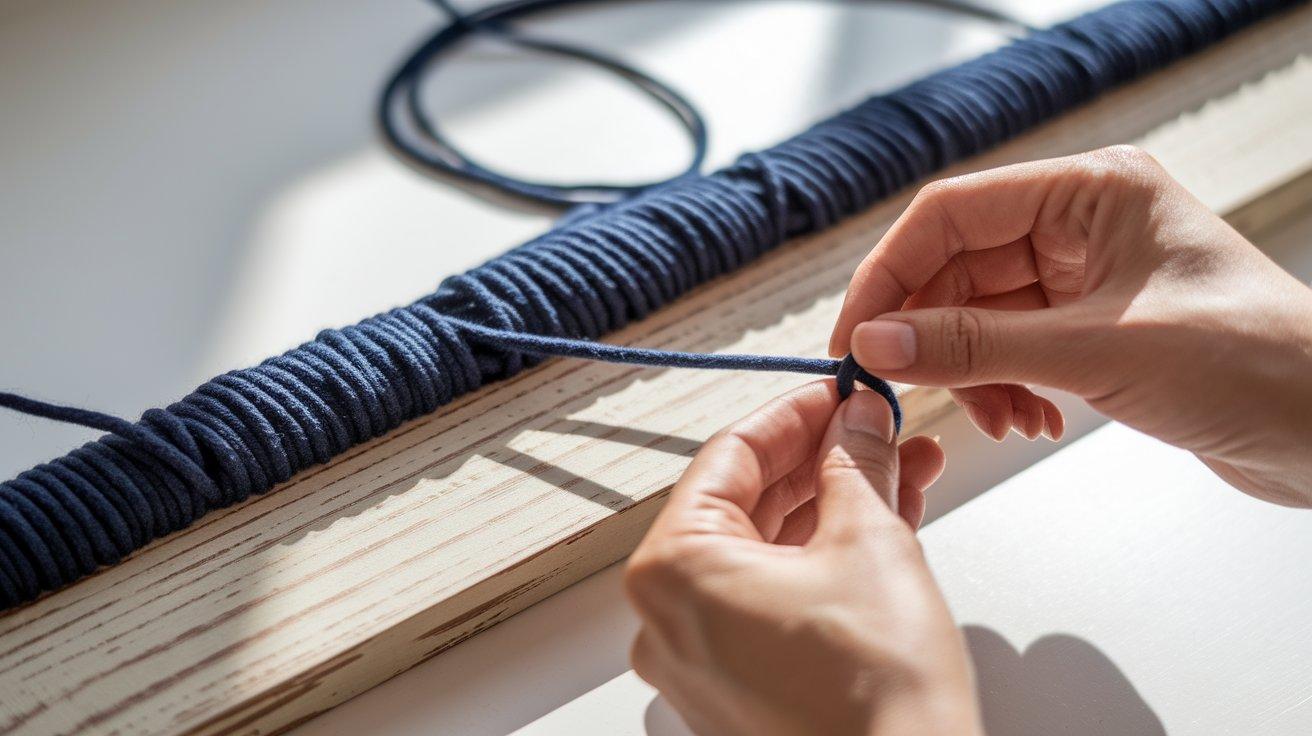
Start with your first color (navy blue in this example) on the right edge of your top wood strip. Take each piece of yarn and fold it in half over the strip, creating a loop at the top.
Pull the loose ends through this loop and tighten to secure the yarn to the wood. This technique is called a lark’s head knot. Continue adding yarn pieces side by side, working your way across the wood strip.
Maintain consistent tension to ensure all knots are positioned at the same height. Spacing your knots evenly creates a more professional appearance, so take your time with this step as it forms the foundation of your entire piece.
Step 4: Create Your Color Transition
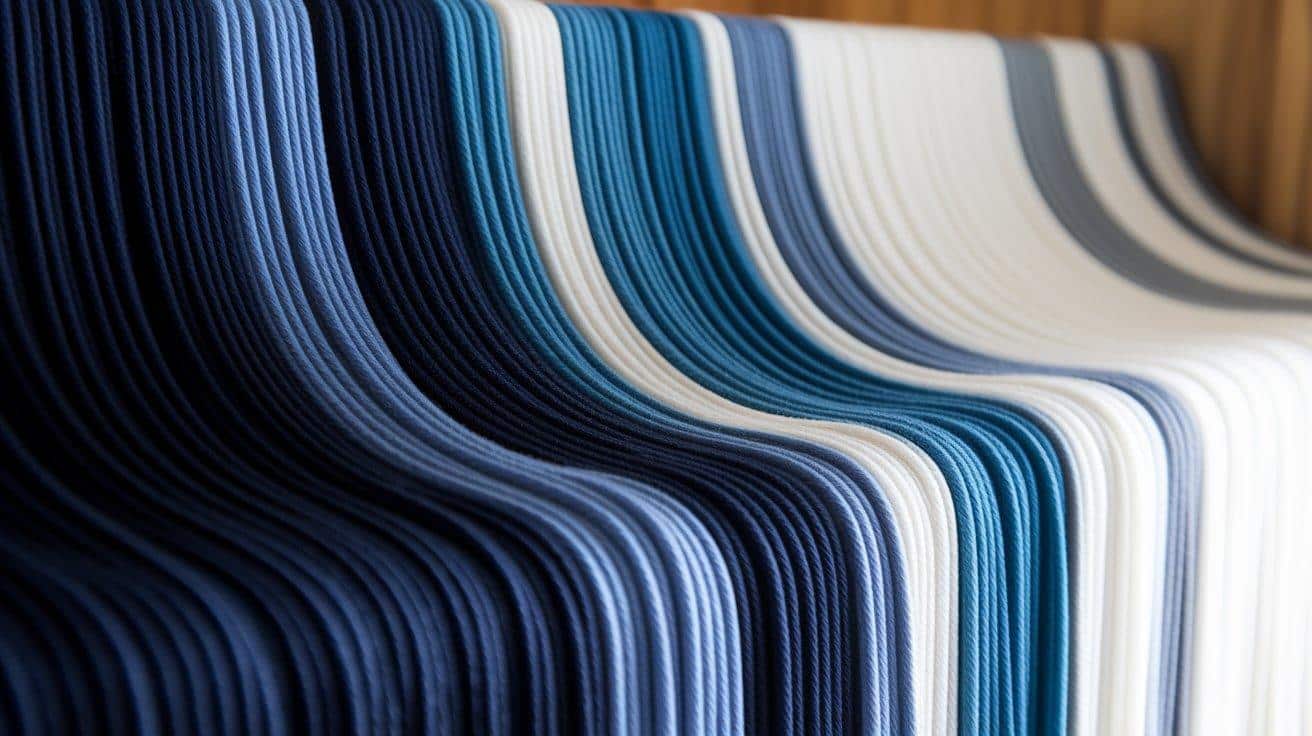
As you work across the wood, gradually introduce your next color to create a smooth transition between shades. Blend the colors by alternating strands of each color before switching completely to the new shade.
Continue this process with each color in your palette until you reach the left side of the wood strip. This gradual transition creates a beautiful ombré effect that adds visual interest to your wall hanging.
For the most natural-looking gradient, use at least three strands of mixed colors at each transition point, gradually increasing the proportion of the new color until the transition is complete. This technique avoids harsh lines between color sections.
Step 5: Mark Your Second Wood Strip
Make a mark on your bottom wood strip to align with where you started attaching yarn on the top strip. This ensures your wall hanging will have a balanced, symmetrical appearance.
Apply double-sided tape along the marked area of the bottom wood strip. This will temporarily hold your yarn in place while you work, making the next steps much easier to manage.
The tape should be strong enough to keep the weight of the yarn but not so sticky that it damages the fibers when it is removed. If you’re concerned about residue, you can place the tape on the side of the wood that will eventually be hidden against the second strip.
Step 6: Create Loops for Bottom Attachment
Take the loose end of the first piece of yarn from the right side of your top strip and bring it down to the marked area on your bottom strip. Form a loop of your desired length – this determines how much the hanging will drape in the middle.
Place this loop on the double-sided tape to hold it in position. Continue this process with each piece of yarn, working from right to left.
For a modern, curved silhouette, make the loops progressively longer toward the center of the hanging and shorter again as you approach the left side.
This creates an elegant arc shape when the piece is hung. Alternatively, for a more dramatic look, you can create multiple peaks and valleys across the width.
Step 7: Maintain Consistent Yarn Placement
When starting a new color section on the bottom strip, always begin with the leftmost strand of that color group from the top strip. This maintains the color pattern and ensures a cohesive look.
Place each new color next to the previous one, keeping the same gradient pattern you created on the top strip. The consistent placement creates a professional appearance and preserves your color transitions.
Stand back occasionally to check your work from a distance, which helps you spot any inconsistencies in the pattern or places where the color transition could be smoother. This perspective check is invaluable for creating a visually balanced piece.
Step 8: Secure Your Yarn

Once all yarn pieces are positioned to your satisfaction, use a staple gun to permanently secure them to both the top and bottom wood strips.
Staple close to the knots on the top strip and through the loops on the bottom strip. This provides durability and ensures your hanging maintains its shape over time.
The staples should be placed on the back side of the wood to keep them hidden from view. Work methodically from one end to the other, keeping tension consistent on each piece of yarn to maintain the shape of your hanging.
For extra security on the bottom strip, you can add a thin line of wood glue before stapling for a more permanent bond.
Step 9: Finish the Project
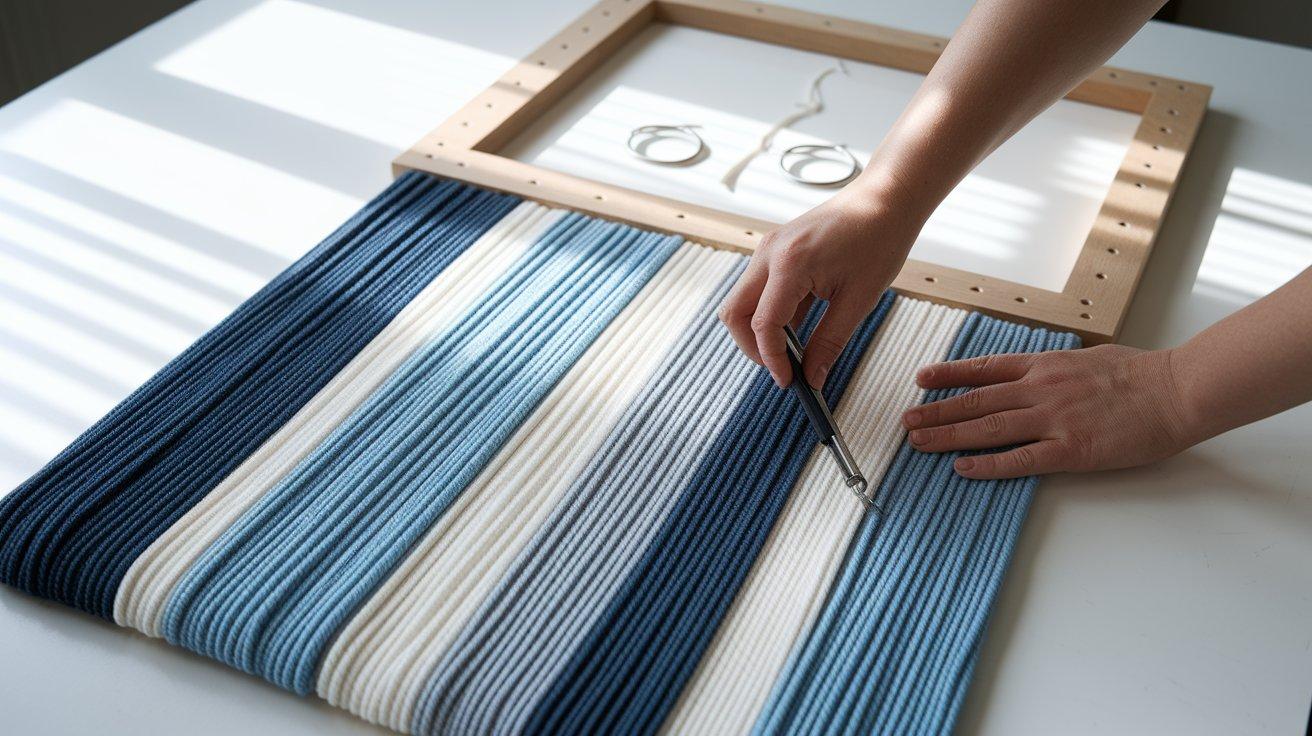
Cover the attached yarn ends with the second wood strip on both the top and bottom. Use small nails to join the wood pieces together, creating a sandwich with the yarn secured between them.
This gives your hanging a clean, finished appearance by hiding all attachment points. Attach hanging hardware to the back of the top wood frame.
Your beautiful yarn wall hanging is now ready to be displayed and admired! Before hanging, gently comb through the yarn strands with your fingers to separate any that may have become tangled during the construction process.
This final grooming step adds polish and ensures each strand hangs properly.
Step 10: Style Your Space
Position your new yarn wall hanging in a location where it can become a focal point. Consider the lighting in the space – natural light will highlight the texture and color variations in your piece.
For larger walls, you might create multiple hangings of different sizes or colors to create a gallery effect. The soft texture of the yarn contrasts beautifully with harder surfaces like wood, metal, or stone in your décor.
If your hanging is above furniture, such as a sofa or console table, ensure the bottom of the hanging element clears the furniture by at least 8-12 inches for proper proportion.
Add complementary décor elements, such as potted plants, framed art, or sculptural pieces, nearby to create a cohesive design vignette.
Video Tutorial
I want to give credit to Creations & Designs by Jessica for their informative video, which served as a valuable reference for this guide.
Budget Breakdown for DIY Yarn Wall Hanging
| Item | Approximate Cost (USD) | Purpose |
|---|---|---|
| Yarn (multi-color skeins) | $5 – $10 | Main material for the hanging |
| Wood strips (2 pieces) | $3 – $6 | Top and bottom frame |
| Waverly Antique Paint (small) | $3 – $5 | Finish for wood strips |
| Staple gun (optional but recommended) | $10 – $20 | To secure the yarn firmly |
| Double-sided tape | $2 – $4 | Temporary hold during assembly |
| Small nails + hanging hardware | $2 – $5 | For joining frames and wall mounting |
| Scissors (good quality) | $3 – $7 | For cutting yarn cleanly |
| Measuring tape & pencil | $2 – $5 | For measuring and marking points |
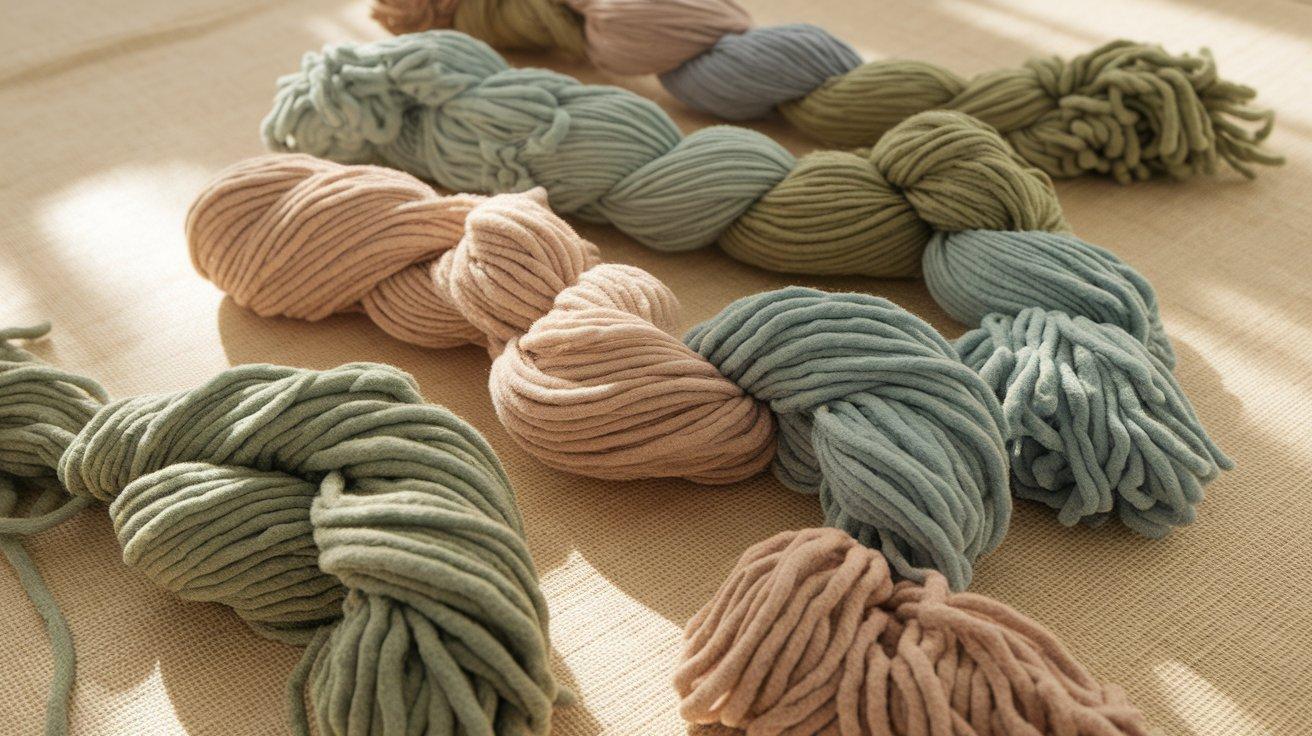
Different Yarns to Try for Your Wall Hanging
Choosing the right yarn can significantly alter the appearance, texture, and ambiance of your wall hanging. Whether you want something soft and flowing or bold and dramatic, the type of yarn you pick makes all the difference. Here are some beautiful yarn options to experiment with:
1. Cotton Yarn
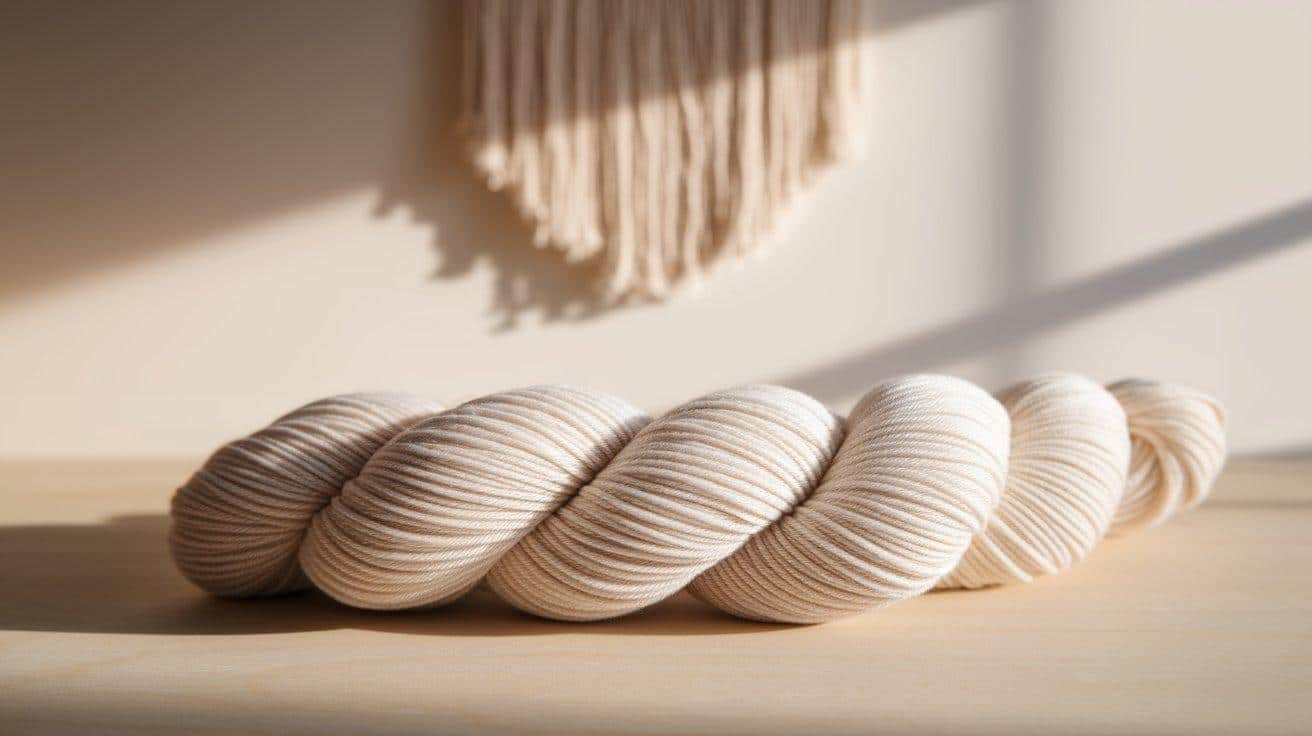
Cotton yarn gives a clean, structured look to your wall hanging. It drapes beautifully without much fuzziness, making it perfect for sleek, modern spaces. Additionally, cotton comes in a vast range of colors, making it easy to find the ideal shade.
Texture: Smooth, crisp, and lightweight
Best For: Minimalist and modern designs
2. Wool Yarn
Wool yarn brings natural warmth and softness to your project. It adds a slightly fluffy, textured effect that feels comforting — ideal for fall and winter décor or spaces that need a touch of cozy charm.
Texture: Warm, fuzzy, and slightly stretchy
Best For: Cozy, rustic, and boho styles
3. Acrylic Yarn
Acrylic yarn is affordable, easy to work with, and available in just about every color imaginable. It’s great for beginners or for pieces where you want bright, cheerful colors without worrying about cost.
Texture: Soft, smooth, and vibrant
Best For: Budget-friendly projects with bold colors
4. Chunky or Roving Yarn
If you want your wall hanging to stand out, try chunky or roving yarn. The thick strands create a bold texture and a luxurious feel, making your artwork instantly eye-catching, even from across the room.
Texture: Thick, plush, and dramatic
Best For: Statement pieces or oversized wall art
5. Metallic or Glitter Yarn
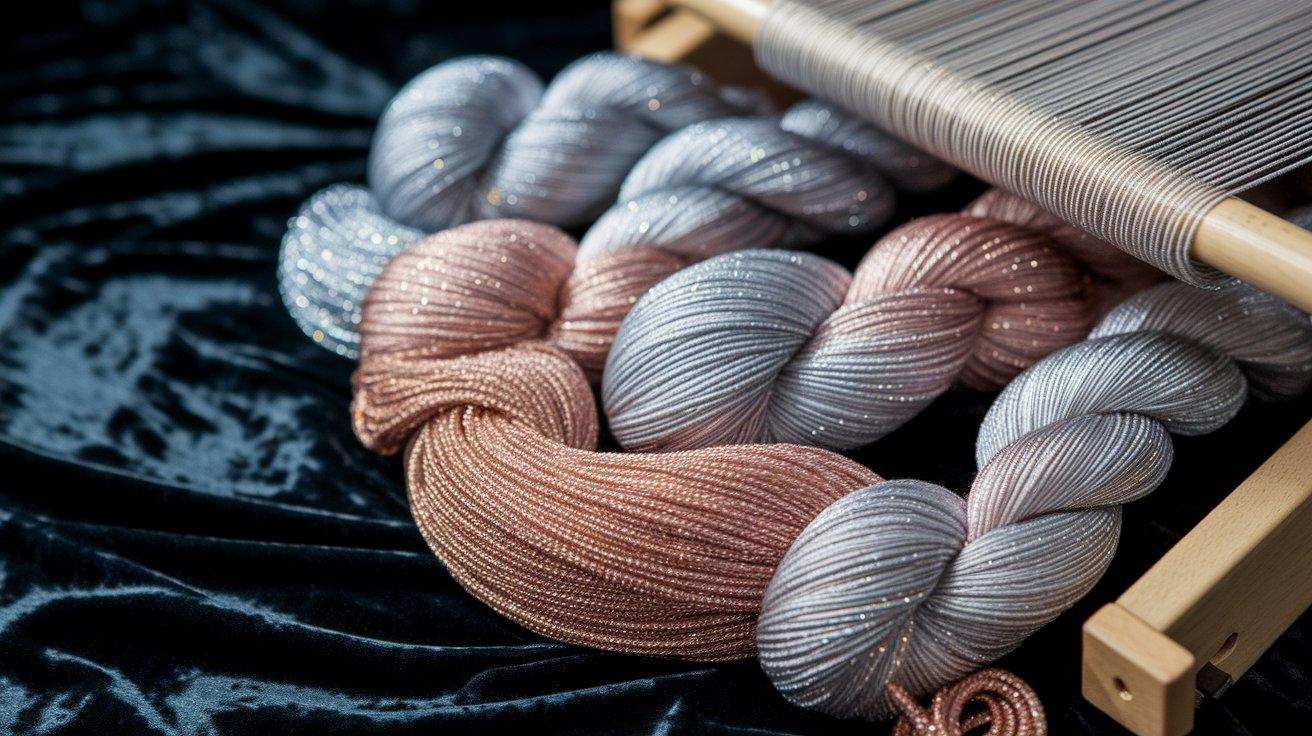
Add a little sparkle! Metallic yarns or glitter-infused threads can be woven into your design to catch the light and create a dazzling effect, perfect for special occasions or to add a pop of glamour to your décor.
Texture: Smooth with a shiny finish
Best For: Glamorous and festive designs
6. Textured or Bouclé Yarn
Bouclé and other textured yarns add beautiful movement and dimension. They create interesting patterns even with simple knots, giving your wall hanging a soft, artsy vibe that’s full of character.
Texture: Bumpy, curly, and playful
Best For: Whimsical and artistic designs
Yarn Wall Hanging Care and Maintenance Tips
- Dust Removal- Gently blow dust off with a hairdryer on a cool setting from 12 inches away. Shake outside on a dry day. Use a lint roller or makeup brush for delicate cleaning. Avoid vacuums.
- Color Preservation – Keep out of direct sunlight and away from smoke or kitchen vapors—air outdoors in the shade for mild odors, or mist with diluted vodka for stronger ones. Rotate décor seasonally and consider UV-filtering window films.
- Structural Maintenance- Check monthly for loose yarn or knots; secure with clear-drying fabric glue. Tighten stretched yarn carefully. Treat wooden frames with wood conditioner annually, and use fishing line supports to prevent sagging.
- Stain Treatment- Blot water stains immediately. For oil stains, apply cornstarch, then brush off. Use mild wool wash for stubborn stains, always spot-testing first. Treat food and drink stains with a wool-safe detergent and cool water.
- Seasonal Storage – Store by rolling around a cardboard tube, wrapped in acid-free tissue, and place it in a breathable cotton bag. Avoid folding. Store in a cool, dry place with cedar blocks or lavender to deter pests.
- Professional Restoration- For major damage, consult a certified textile conservator. Local fiber artists or weaving guilds can assist with minor repairs. Document your piece with photos for future reference.
Things to Avoid for DIY Yarn Wall Hanging
| Mistake to Avoid | Consequence |
|---|---|
| Using heavy yarn for large hangings | Excessive weight can pull away from the wood frame |
| Irregular yarn cutting | Creates an uneven bottom edge and an unprofessional appearance |
| Insufficient attachment points | Yarn comes loose over time |
| Mixing yarn weights within the piece | Causes uneven draping and texture |
| Skipping the bottom wood frame | Hanging loses structure and shape |
| Using water-soluble glue | Fails during cleaning or in humid environments |
| Hanging in the bathroom or kitchen | Steam and moisture damage fibers |
| Overhandling during creation | Yarn becomes fuzzy and loses definition |
| Using too few yarn strands | Results in sparse, incomplete-looking hanging |
| Painting wood after yarn attachment | Paint transfers to yarn fibers |
Conclusion
Bring a burst of creativity and warmth into your home with a DIY yarn wall hanging that’s as unique as you are. With just a few simple materials and easy-to-follow techniques, you can create a professional-looking piece that converts any blank wall into a lovely focal point.
Whether you prefer calming ombré gradients, bold color pops, or soft neutral tones, this project allows you to customize your design to match your space and mood fully.
The beauty of this DIY lies in its flexibility — change the colors, adjust the size, or experiment with different yarn textures to create a masterpiece that reflects your unique style. Plus, with proper care and maintenance, your wall hanging will stay beautiful and vibrant for years to come.
Ready to turn a simple bundle of yarn into an impressive work of art? Roll up your sleeves, unleash your imagination, and start weaving a piece that will instantly upgrade your space.
