Building a catapult sounds like something out of a history book. But it is actually one of the easiest and most fun projects kids can do at home or in class.
No expensive supplies or complicated tools. Just a few popsicle sticks, rubber bands, and a plastic spoon.
Learning how to make a catapult teaches real science without feeling like a lesson. Kids get to build, test, and launch. Something always flies across the room. That is the best part.
The popsicle stick catapult is perfect for rainy days, classroom STEM projects, or just a fun afternoon activity. It takes only a few minutes to build and works on the very first try.
What Is a Catapult?
A catapult is a simple device that stores energy and releases it to launch an object through the air.
You’ve actually seen one in action before. Ever pressed down on a spoon and watched it fling food across the table? That’s a catapult. A goalkeeper launching a ball down the field? Same idea.
What makes building one so exciting is that kids don’t just read about force and energy; they feel it the moment they let go and watch a marshmallow fly across the room.
It’s hands-on, it’s loud, and something always goes flying. That’s way better than a worksheet.
The Science Behind a Popsicle Stick CatapultA popsicle stick catapult may look like a simple craft, but each launch shows real physics in action. Elastic potential energy turns into kinetic energy When the stick or rubber band bends, it stores energy. When you let go, that energy changes into movement and launches the object. Newton’s First Law The marshmallow remains still until the catapult arm applies force to it. Newton’s Third Law The arm pushes the marshmallow forward. The marshmallow also pushes back on the arm. The lever arm The stick works like a lever. A longer arm can create a wider arc and may help the object travel farther. Let kids test different spoon angles, rubber band tightness, and projectile sizes. It turns a quick craft into a simple STEM experiment that helps children understand force and motion, energy transfer, and basic engineering concepts. |
Materials You Need to Make a Popsicle Stick Catapult
You only need a few inexpensive supplies to build a simple popsicle stick catapult. Most of these materials can be found at home, in a classroom, or at a local craft store.
| Material | Purpose |
|---|---|
| 10–15 Popsicle sticks | From the base and launching arm |
| 3–5 Rubber bands | Hold the sticks together and create tension |
| 1 Plastic spoon | Holds and launches the projectile |
| Marshmallows, pom-poms, or foil balls | Safe projectiles for testing |
| Bottle cap (optional) | Alternative launcher cup |
| Glue (optional) | Adds extra stability |
| Paint or markers (optional) | Decorates the finished catapult |
These simple materials are easy for kids to handle and fit neatly into a small bag, making this project a great choice for classrooms, STEM activities, and rainy-day crafts at home.
How to Make a Popsicle Stick Catapult Step by Step
Follow these simple steps to build a popsicle-stick catapult using basic craft supplies. Each step is easy for kids to follow with light adult supervision.
Step 1: Gather Your Supplies

Collect two popsicle sticks, one plastic spoon, four rubber bands, and a few small foil balls or soft projectiles. Place everything on a flat table before starting.
Keeping supplies ready makes it easier for kids to follow the project from beginning to end.
Step 2: Stack the Popsicle Sticks
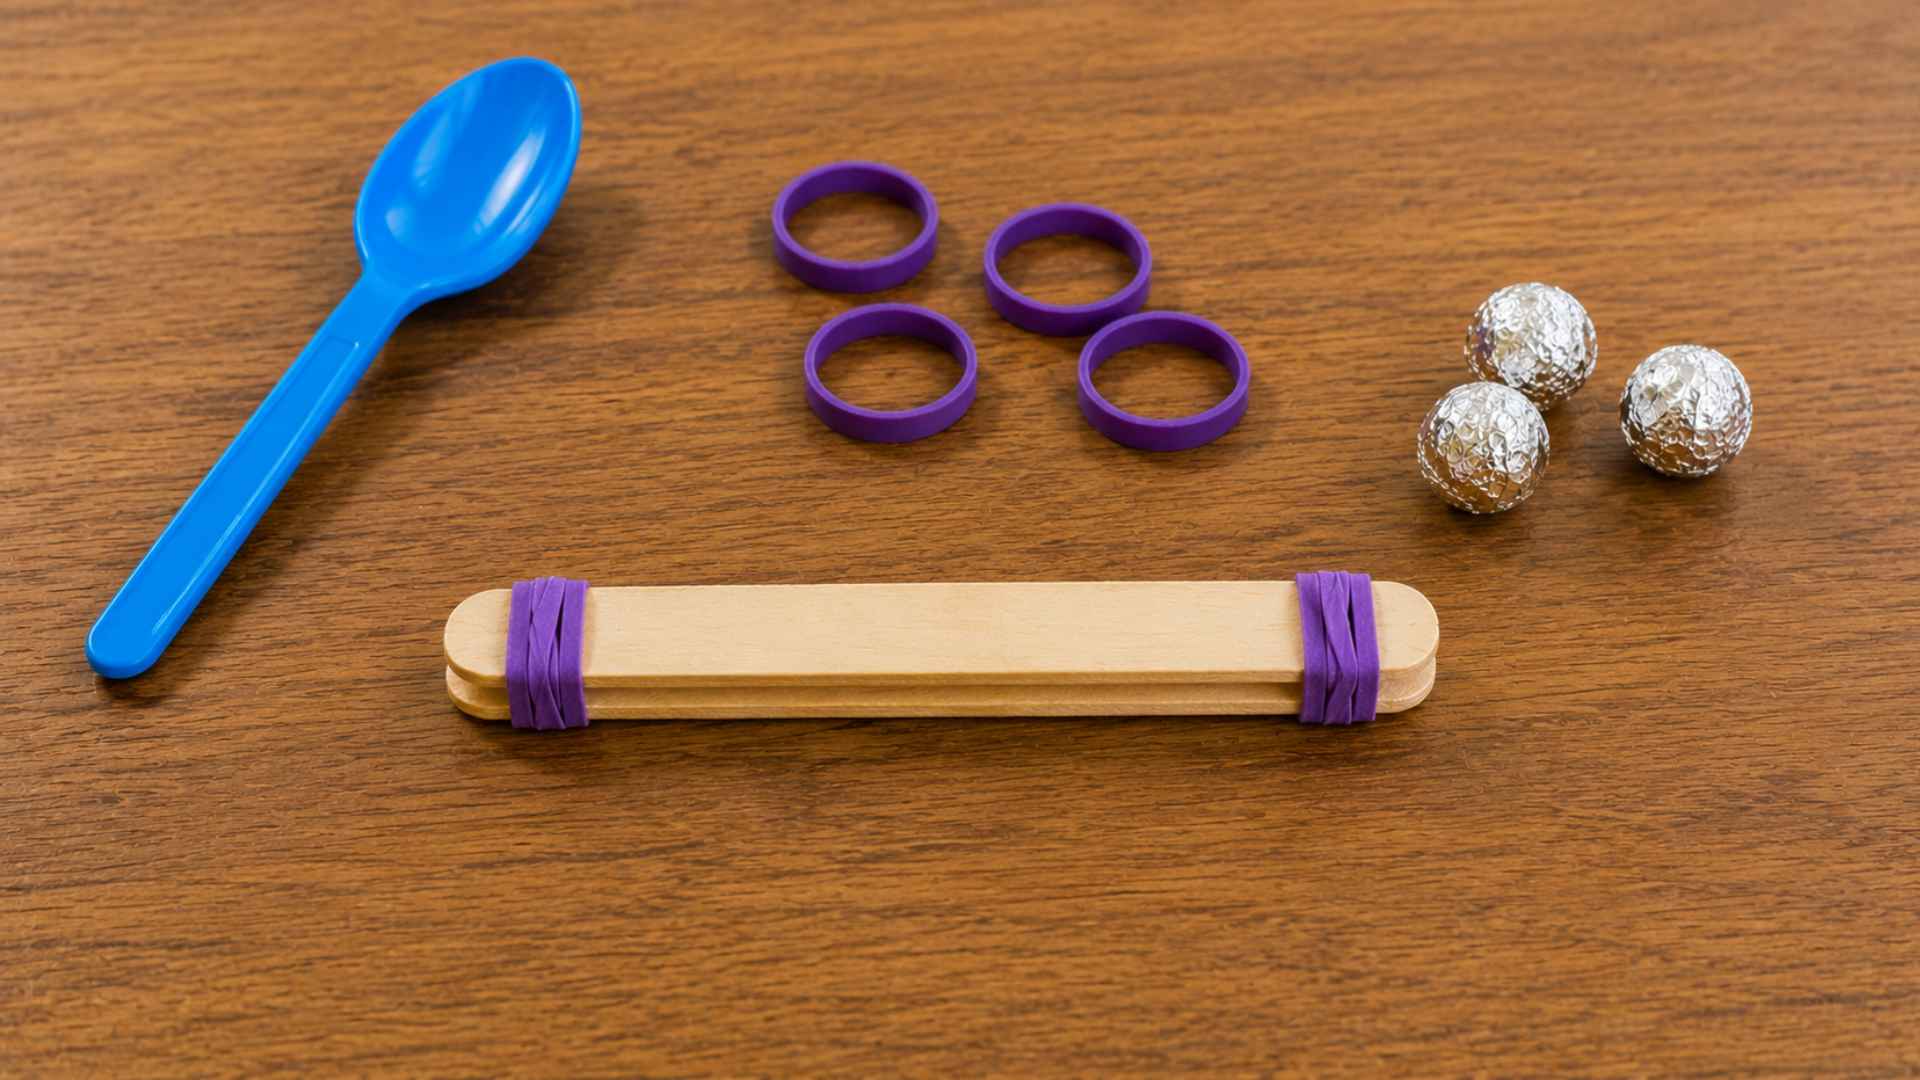
Place the two popsicle sticks directly on top of each other. Line up the ends so they sit evenly.
This stacked pair will serve as the base of the catapult and support the spoon when it is pulled back and released.
Step 3: Secure Both Ends

Wrap one rubber band tightly around one end of the stacked sticks. Add another rubber band around the opposite end. The sticks should stay firmly together without sliding.
This gives the catapult a strong base before the spoon is attached.
Step 4: Place the Spoon

Lay the plastic spoon diagonally across the stacked popsicle sticks to form an X. Keep the spoon bowl facing upward so it can hold the projectile.
Make sure the spoon crosses the center of the sticks, not too close to either end.
Step 5: Attach the Spoon

Wrap rubber bands around the center where the spoon crosses the popsicle sticks. Secure it tightly so the spoon does not wobble.
The handle should stay fixed to the sticks, while the spoon bowl remains open and ready to hold a small projectile.
Step 6: Load the Catapult

Place a small foil ball, marshmallow, or pom-pom into the bowl of the spoon. Hold the popsicle stick base steady with one hand.
Make sure the projectile sits in the spoon without rolling out before you pull it back.
Step 7: Pull Back and Launch

Gently press the spoon bowl backward with one finger, then release it to launch the projectile. Start with a light pull so kids can test how it works safely.
Try different projectiles and pulling angles to see how the distance changes.
Popsicle Stick Catapult with a Spoon vs. Without
Both versions work. But the right choice depends on what you are building for: speed, accuracy, or the age of the kid doing the building.
| Feature | With Spoon | Without Spoon |
|---|---|---|
| Holds projectile? | Yes, securely | Needs balancing |
| Best for | Younger kids (3–7) | Older kids (8+) |
| Launch accuracy | High | Low–Medium |
| Build difficulty | Easy | Very Easy |
| Best projectile | Marshmallow, foil ball | Pom pom, small ball |
| Distance | Medium | Medium–Long |
| Recommended? | Best for beginners | Good for experiments |
The spoon wins for younger kids since it is forgiving and easy to load. Older kids who want to experiment with distance and angles can skip the spoon and test raw designs instead.

Safety Tips When Using a Popsicle Stick Catapult
Building is all fun. But a few simple rules ensure nobody gets hurt and the activity stays enjoyable for everyone in the room.
- Use soft projectiles only: Marshmallows, pom poms, and foil balls are perfect. Hard objects like coins or stones can cause injury on impact.
- Never aim at people or animals; set up a target, such as a paper cup or cardboard box. Always launch toward an open, clear space.
- Adult supervision for kids under 5: Small parts like rubber bands can be a choking hazard. Keep a grown-up close during the build and launch.
- Check rubber bands before use: Old or thin rubber bands can snap during launch. Replace any that look worn or stretched out.
- Clear the area before launching: Remove any breakable objects nearby. A marshmallow flying off course can still knock something over.
Keeping it safe does not mean keeping it boring. A clear target, soft ammo, and a quick adult check are all it takes.
Final Thoughts
A popsicle stick catapult is one of those rare projects that feels like play but teaches like a lesson. Kids build something with their hands, test it, break it, and rebuild it better. That is exactly how real engineers think.
Now it is your turn. Build one today, run a distance challenge, and see who launches the farthest in your house or classroom.
Tried this project? Drop a comment below and tell us how far your marshmallow flew. We would love to hear how it went.
Frequently Asked Questions
Can I Use a Plastic Spoon Instead of A Wooden One?
Yes. Plastic spoons are lightweight, easy to find, and work perfectly well for indoor catapult builds.
How Many Rubber Bands Do I Need to Make the Catapult Launch Farther?
Adding one extra rubber band at the center increases tension and gives noticeably more power to each launch.
Is a Popsicle Stick Catapult Safe for Young Kids?
Yes, with light adult supervision. Use only soft projectiles like marshmallows, pom-poms, or foil balls, and remind kids not to aim at people, pets, or breakable items.