
Building a shower niche seems tricky when you don’t know where to start. You want this built-in storage space to complement your tile work, be the right size for your needs, and remain free from water issues.
I understand this challenge completely. I can show you how to create a shower niche that fits your exact needs, with proper sizing that complements your tile pattern, and one that is built with the correct slopes for effective water runoff.
No more plastic racks or hanging caddies needed! In this guide, I’ll walk you through selecting the right spot, cutting into your wall safely, creating a sturdy frame, applying waterproofing correctly, and finishing with precise tile work.
Let’s create a shower niche that’s both functional and aesthetically pleasing.
What Is a Shower Niche?
A shower niche is a built-in shelf or cubby that is created in the shower wall. It provides a convenient spot to store shampoo bottles, soap, and other shower essentials without occupying floor space or requiring additional storage options.
Think of it as a small alcove that sits flush with your shower wall but has depth for holding items.
These niches come in a few main types:
- Recessed niches sit between wall studs and are the most common type
- Shelf niches are simpler versions that offer a flat surface without much depth
- Corner niches fit into shower corners to use space that might otherwise be wasted
- Multi-level niches have two or more sections for extra storage and style
Why Should You Install a Shower Niche?
The primary reason for adding a shower niche is its pure functional value. No more bottles sitting on the floor or hanging from caddies that rust or get in your way.
A niche puts all your items at the right height where you need them.
From a design perspective, a well-crafted niche appears clean and integrated rather than added as an afterthought. It can be tiled to match your shower or made to stand out as a focal point.
For small bathrooms, a shower niche helps save space. You won’t need to find room for a shower caddy or worry about bottles cluttering the edges of your tub. Everything has its place, making your shower area look neat and well-planned.
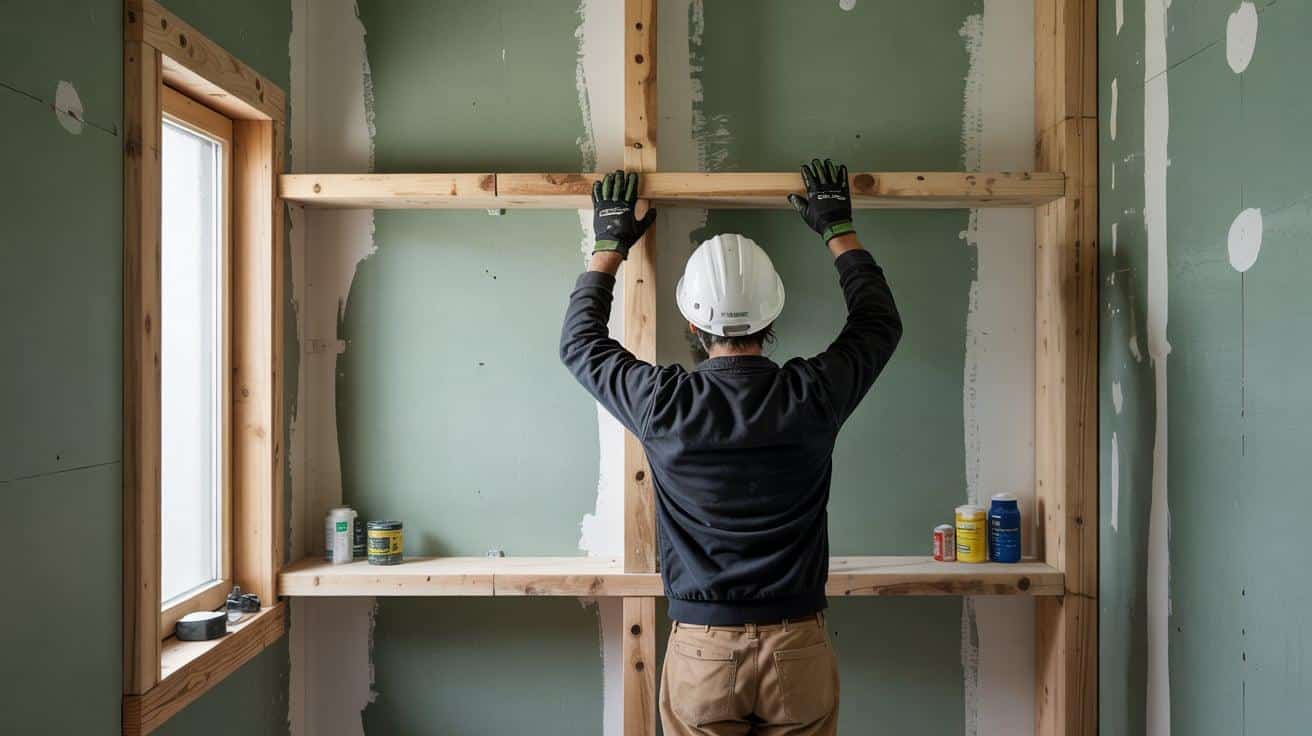
Planning Your Shower Niche Installation
Finding the perfect spot for your niche means checking for pipes and wires first. Tap the wall to listen for hollow sounds between studs. Choose a place that’s easy to reach while showering, usually at elbow to chest height.
Your niche size should match your tile pattern to avoid tiny cut pieces. Measure your tiles and plan the niche to fit full tiles with normal grout lines. If using 4-inch tiles with grout lines, aim for a height of 16 inches for a standard niche.
Mark your wall with a level line where the bottom of the niche will sit.
Account for your 2×4 framing (1½ inches), plus the drywall thickness (½ inch), tile thickness (¼-⅜ inch), and a small margin for flexibility.
This careful planning ensures your niche lines up perfectly with the surrounding wall tiles.
Tools Required
| Tool | Purpose |
|---|---|
| Laser Level | To mark level lines on the wall for accurate niche placement |
| Measuring Tape | For taking precise measurements of niche dimensions |
| Saw (Reciprocating or Oscillating) | To cut through wall studs and drywall |
| Drill/Screwdriver | For securing new 2×4 framing |
| Rotozip Tool | For cutting drywall precisely (“remember this green cutting tool” with a pilot bit) |
| Utility Knife | For scoring and cutting drywall |
| Level | To ensure your niche frame has the proper slope |
Materials Required
| Material | Quantity | Purpose |
|---|---|---|
| 2×4 Lumber | 3-4 pieces | For framing the niche structure (top, bottom, sides) |
| Screws | 1 box | To secure the 2×4 framing |
| Water-Resistant Drywall | 1 sheet | For lining the niche interior (“water resistant and mold treated drywall”) |
| Regular Drywall | Small piece | For building depth in the nook where waterproofing will be applied |
| Waterproofing Membrane | 1 quart | To waterproof the niche (the transcript mentions Mapai Aqua Defense) |
| Paintbrush | 1 | For applying the waterproofing membrane |
| Tile | As needed | For finishing the niche (shown as 4×16-inch tiles in the transcript) |
| Thinset Mortar | 1 bag | For adhering tile to the niche |
| Grout | 1 box | For filling spaces between tiles (1/8-inch grout lines mentioned) |
Step-by-Step Process for Building a Shower Niche
Step 1. Mark Your Measurements

Use a laser level to mark a horizontal line on your wall. Measure 20 inches up from the tub for the bottom line, then add a total of 38 inches for your cutting lines.
Step 2. Cut out the Drywall Section
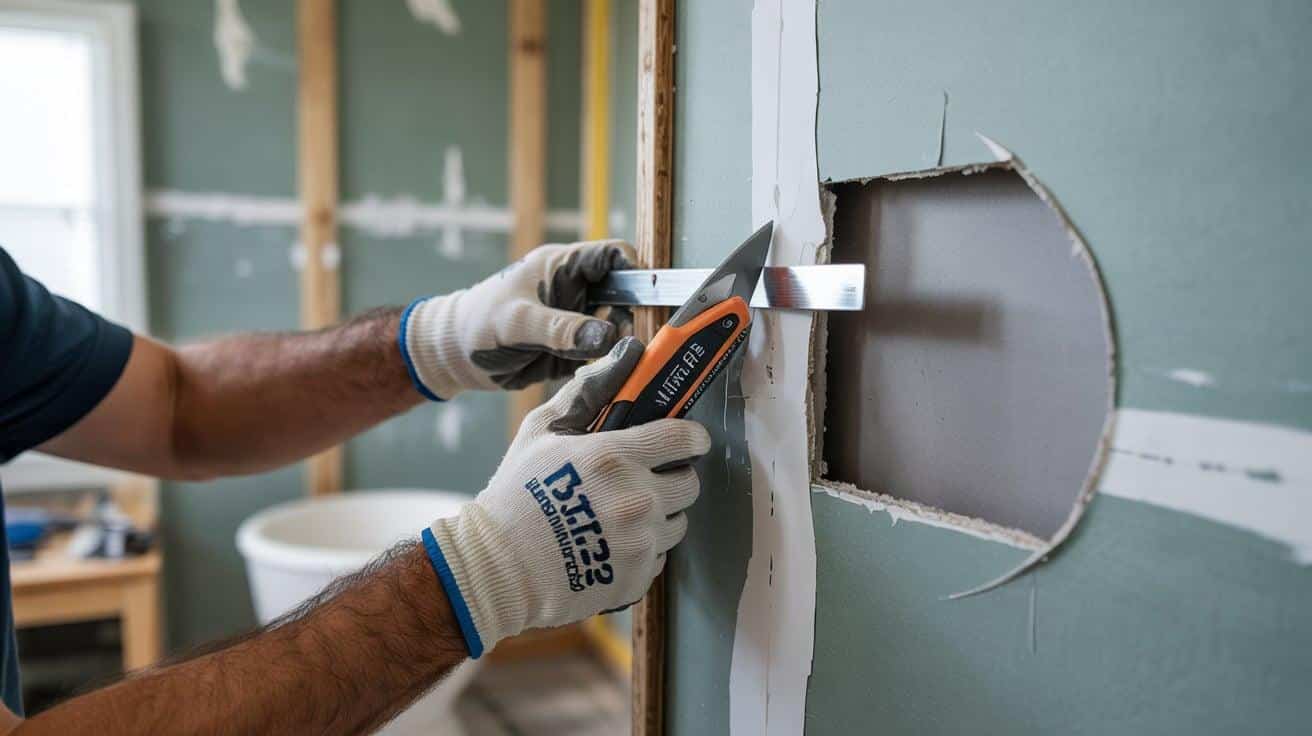
Score along your marked lines with a utility knife, then carefully remove the section of drywall to expose the wall cavity and studs.
Step 3. Remove the Stud
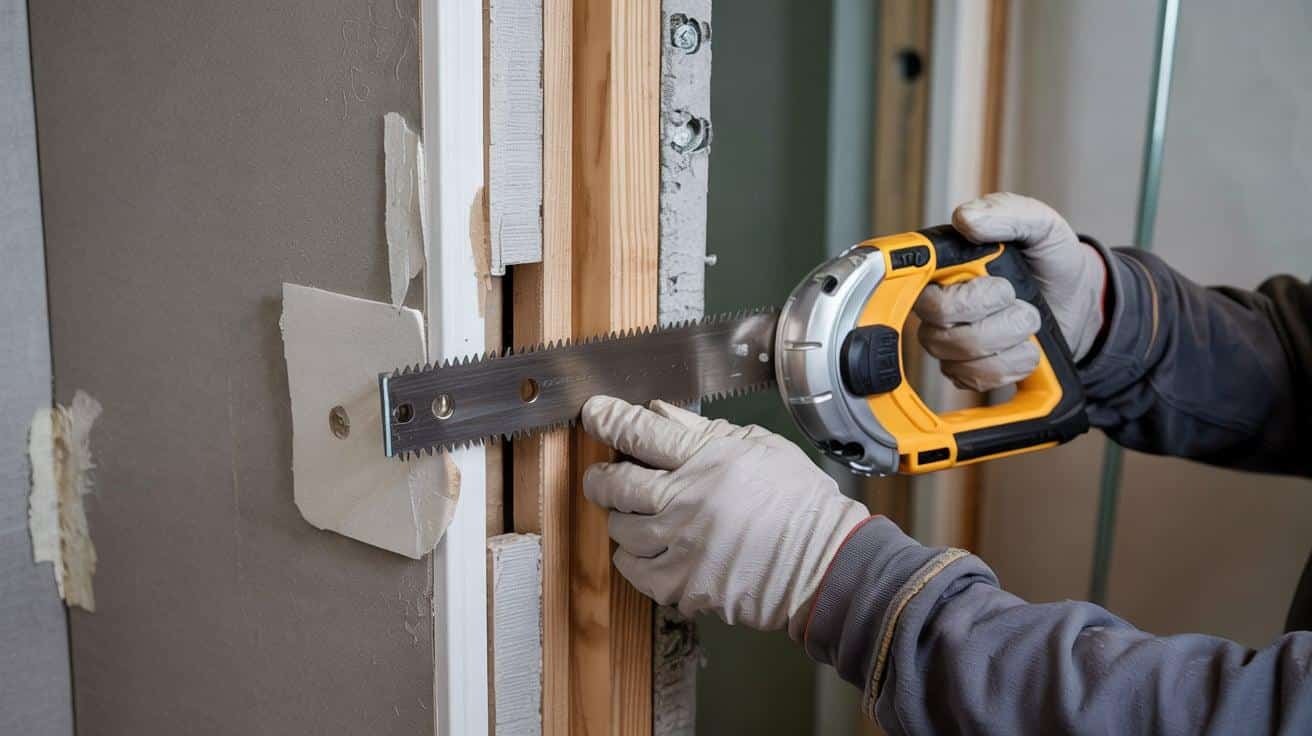
Cut through the middle stud with a saw. Ensure that you cut deeply and clean, then twist out the stud while unscrewing it from the surrounding frame.
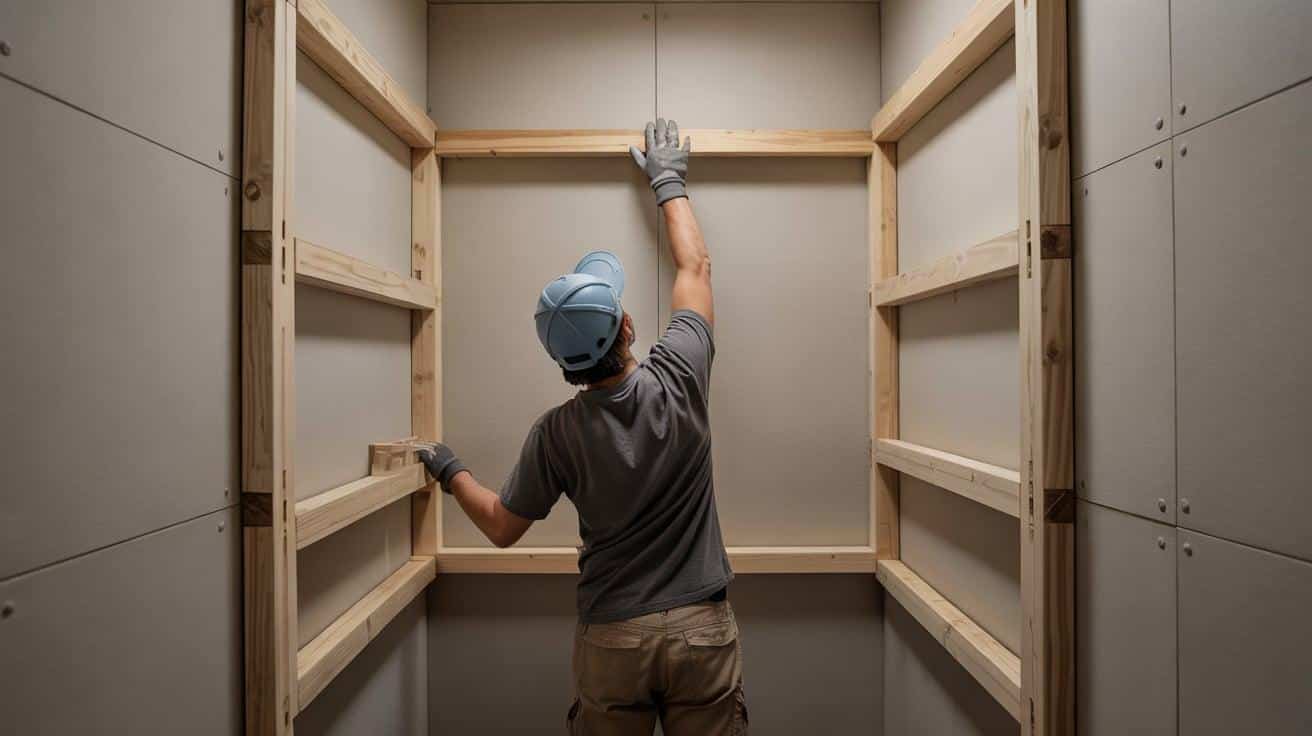
Step 4. Build the New Frame
Install new 2×4s for the top and bottom of your niche. Create a slight downward slope, directed toward the shower, to ensure proper water drainage.
Step 5. Check Your Measurements
Confirm your niche has the right dimensions. It should be able to hold 360 pounds of weight with plenty of structural integrity.
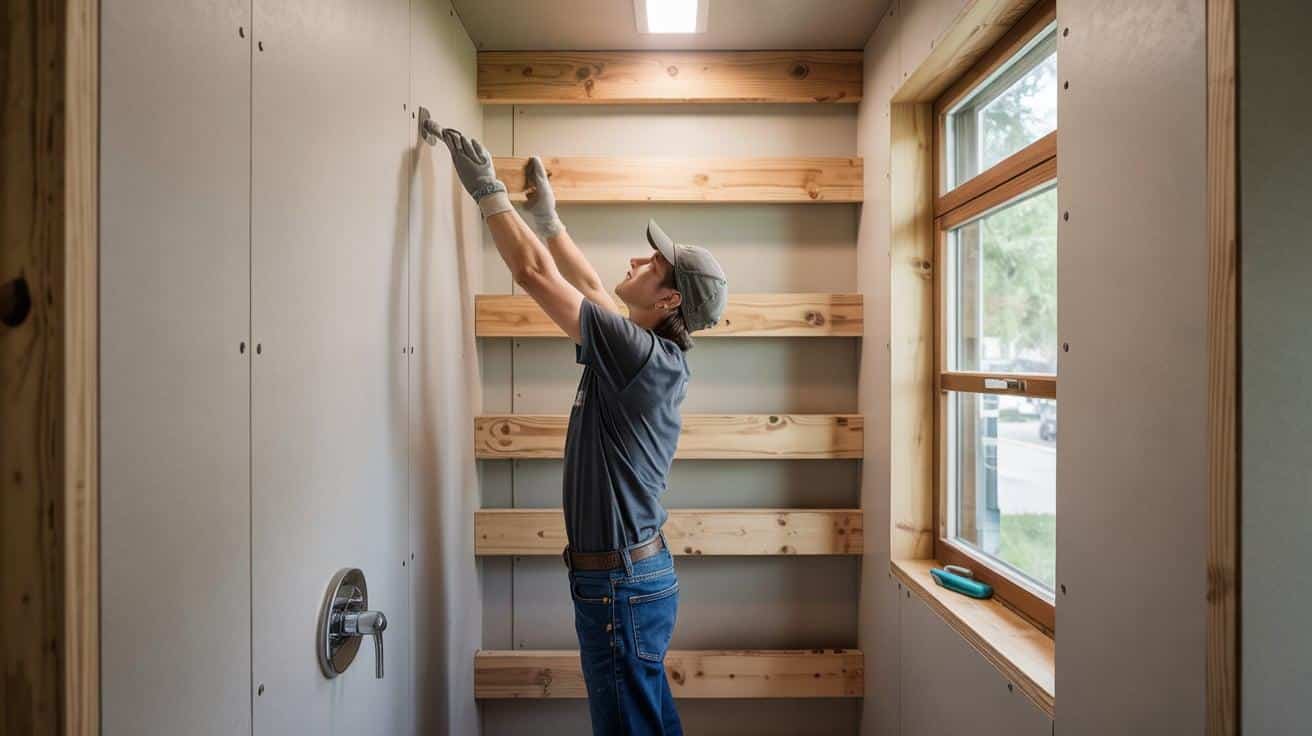
Step 6. Install Water-Resistant Drywall
Line the inside of the niche with green water-resistant and mold-treated drywall. Don’t attach the waterproofing membrane directly to wood.
Step 7. Cut out the Excess Drywall

Use a rotozip tool with a pilot bit to trim the drywall flush with your frame, moving in a counterclockwise motion.
Step 8. Cap All Wood with Drywall.
Cover any exposed wood with drywall to prevent expansion and contraction issues that could affect the waterproofing.
Step 9. Apply the First Coat of Waterproofing
Apply a generous layer of waterproofing membrane (such as Mapai Aqua Defense) to all niche surfaces.
Step 10. Apply a Second Coat of Waterproofing
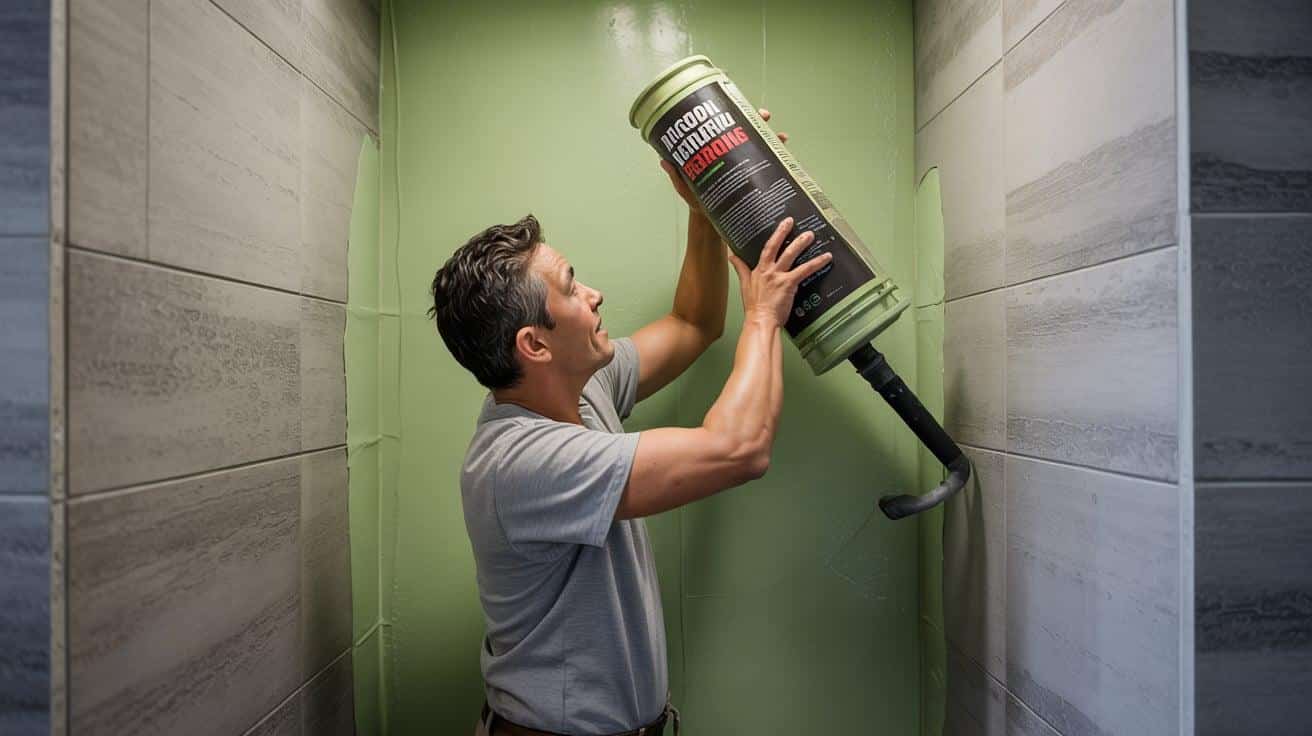
Once the first coat is dry, apply a second, thicker layer.
Check out this YouTube video for detailed step-by-step guidance for Building a Shower Niche
Adding the Finishing Touches
Tiling the Niche
Start tiling with the back wall first, then move to the sides, top, and bottom. Use full tiles whenever possible to create a clean look. Cut tiles with a wet saw for precise edges.
Apply thinset mortar evenly using a notched trowel, then press the tiles firmly into place with 1/8-inch spacers to ensure consistent grout lines.
Ensure the tiles inside your niche align with the wall tile pattern. This careful alignment prevents odd-looking cuts and creates a smooth flow across your shower wall.
Ensuring Proper Drainage
The slope built into your frame is vital for water runoff. As mentioned in the transcript, “the waterproofing membrane that you’re using in your shower needs to have a slope for drainage.” Without this slope, water gets trapped behind the tiles, causing mold and unpleasant odors.
The slight downward pitch (toward the shower) prevents water from sitting on your shelf. This small detail makes a big difference in how long your shower niche stays problem-free.
Understanding Different Types of Shower Niches
1. Recessed Shower Niche
A recessed niche, situated between wall studs, creates a storage space that doesn’t protrude from the wall. It uses the empty cavity space within your wall for a clean, built-in look.
Advantages:
- Saves bathroom space by using the wall cavity rather than taking up the shower area
- Creates a seamless look that integrates with your shower wall design
- Allows for custom sizing to fit your specific storage needs
Installation Considerations: To install a recessed niche, locate wall studs using a stud finder. As shown in the transcript, you’ll often need to remove a stud to create width.
Ensure that no plumbing or electrical lines run through your chosen spot. Build a frame with 2×4s, ensuring a slight slope toward the shower.
The most common mistake is not waterproofing thoroughly; apply two coats of waterproofing membrane to all surfaces before tiling.
2. Shelf Shower Niche
A shelf niche is a simple horizontal ledge built into or attached to your shower wall. It’s more of a protruding shelf than a recessed cubby, offering a flat surface for items.
Benefits:
- Easier to install than recessed niches since you don’t need to cut into wall studs
- Can be added to any wall regardless of stud placement or plumbing location
- Offers flexibility in height, width, and placement options
Installation Process: For a floating shelf niche, secure a 2×4 frame to wall studs, ensuring it has a slight downward slope. Cover the area with water-resistant drywall, then apply a waterproofing membrane.
Tile the shelf to match your shower or create a contrasting accent. For a modern look, use a single piece of stone, quartz, or marble as the shelf surface.
Make sure the front edge is slightly lower than the back to prevent water from pooling.
3. Corner Shower Niche
A corner niche fits into the 90-degree angle where two shower walls meet. This style often utilizes underutilized corner space and can work well in smaller showers.
Installation Process: Building a corner niche requires framing out both adjoining walls. Cut back the drywall in a triangular or curved shape. Install blocking between studs to create support for your triangular shelf.
Apply water-resistant drywall and two coats of waterproofing membrane. When tiling, use bullnose or finished edge tiles for exposed corners.
Small mosaic tiles are well-suited for corner niches, as they can bend around corners more easily than large-format tiles.
Maintaining Your Shower Niche After Installation
1. Cleaning and Maintaining the Niche
To ensure your shower niche remains in top shape, clean it regularly. A soft cloth and mild cleaner will keep the surface free from buildup. Avoid using harsh chemicals, as they can damage the grout or tile finishes.
Grout lines tend to collect soap scum. Use a small brush and a mixture of baking soda and water to scrub away any buildup. After cleaning, be sure to rinse the area thoroughly to prevent residue from accumulating.
To prevent mold, ensure your niche remains dry. After each shower, use a towel or squeegee to wipe down the surfaces.
Proper ventilation also plays a crucial role, so run your bathroom fan for at least 30 minutes after showering to help reduce moisture.
2. Inspecting for Water Damage
Regularly inspect your niche for signs of water damage. Look for discolored grout, loose tiles, or any soft areas in the wall nearby. The bottom corners of your niche are particularly vulnerable to water buildup, so give them extra attention.
Tap gently on tiles to see if any feel loose or make a hollow sound, as this could indicate water has gotten behind them. Cracks in the grout can also allow moisture to enter, so be on the lookout for these signs.
If you notice early signs of damage, address them right away. A small touch-up on grout or caulking can save you from larger repairs in the future. For more serious issues, it’s best to get professional advice before the problem worsens.
3. Re-Grouting and Sealing Your Niche
To maintain your niche’s water resistance, consider resealing the grout annually. Use a small brush to apply sealer to the grout lines, and wipe off any excess before it dries on the tiles.
If the grout starts to stain or crack, it may be time to reapply the grout. Use a grout removal tool to remove the old grout, clean the gaps thoroughly, and then apply fresh grout.
Be sure to follow the curing instructions on the product for the best results.
For a consistent finish, try to match the new grout with the existing color of the tile. When re-grouting only a section of your shower, mix small batches of grout to check for a good color match.
Once the new grout has cured (usually within 48-72 hours), apply a sealer to ensure it’s fully protected.
Cost Considerations for Building a Shower Niche
Budgeting for Materials and Tools
| Materials | Estimated Cost | Purpose | Notes |
|---|---|---|---|
| 2×4 Lumber (3-4 pieces) | $15-25 | Framing the niche | You may have scraps available |
| Screws | $8-12 | Securing the frame | Basic construction screws work fine |
| Water-resistant drywall | $15-20 per sheet | Lining the niche | You’ll only use a portion of a sheet |
| Waterproofing membrane | $40-60 | Preventing water damage | “Pennies a glass” in long-term value |
| Tile | $3-15 per sq ft | Finishing the niche | Can match your shower or use accent tile |
| Thinset mortar | $15-25 | Adhering tiles | Small bag is sufficient for a niche |
| Grout | $15-25 | Filling tile gaps | Color-matched to your shower |
| Caulk | $5-10 | Sealing edges | Silicone for water resistance |
| Total Materials | $116-192 | Varies based on tile choice |
| Tools | Estimated Cost | Already Owned? | Rental Option? |
|---|---|---|---|
| Laser level | $30-100 | Possibly | Yes – $15/day |
| Measuring tape | $5-15 | Likely | No need |
| Saw | $50-150 | Possibly | Yes – $25/day |
| Drill/screwdriver | $30-80 | Likely | Yes – $15/day |
| Utility knife | $5-15 | Likely | No need |
| Level | $10-25 | Possibly | No need |
| Tile cutter/wet saw | $50-300 | Unlikely | Yes – $40/day |
| Tool Cost (If Buying) | $180-685 | ||
| Tool Rental (If Needed) | $55-95 | One-day rental |
Hiring a Professional vs. DIY
| Factor | DIY Approach | Professional Installation |
|---|---|---|
| Labor Cost | $0 | $300-800 depending on complexity |
| Time Investment | 1-2 full days | 4-6 hours of professional time |
| Materials Cost | $116-192 | $150-250 (pros may charge markup) |
| Tool Cost | $55-95 (rental) or $180-685 (purchase) | Included in labor |
| Learning Curve | Significant – first-time mistakes are likely | None – paying for expertise |
| Quality Assurance | Depends on skill level | Professional results guaranteed |
| Warranty | None | Often 1 year on workmanship |
| Hidden Issues | May uncover problems you can’t fix | Pro can handle unexpected issues |
| Total Cost Range | $171-877 | $450-1,050 |
| Best For | Handy homeowners with some tool knowledge | Busy homeowners or complex installations |
Conclusion
Building your shower niche takes planning and patience, but the results can truly enhance your bathroom.
With proper measuring, framing, waterproofing, and tiling, you’ll create a functional storage space that appears to have always been in place.
Remember the key takeaways: plan your niche to align with your tile pattern, build in a slight slope for drainage, and never skimp on waterproofing.
These small details make the difference between a niche that lasts for years and one that causes headaches in the long run.
Whether you tackle this project yourself or hire a pro, you now understand what goes into creating a proper shower niche.
Your shampoo bottles will have a home, your shower will look cleaner, and you’ll gain that sense of satisfaction from a well-designed bathroom feature.
