
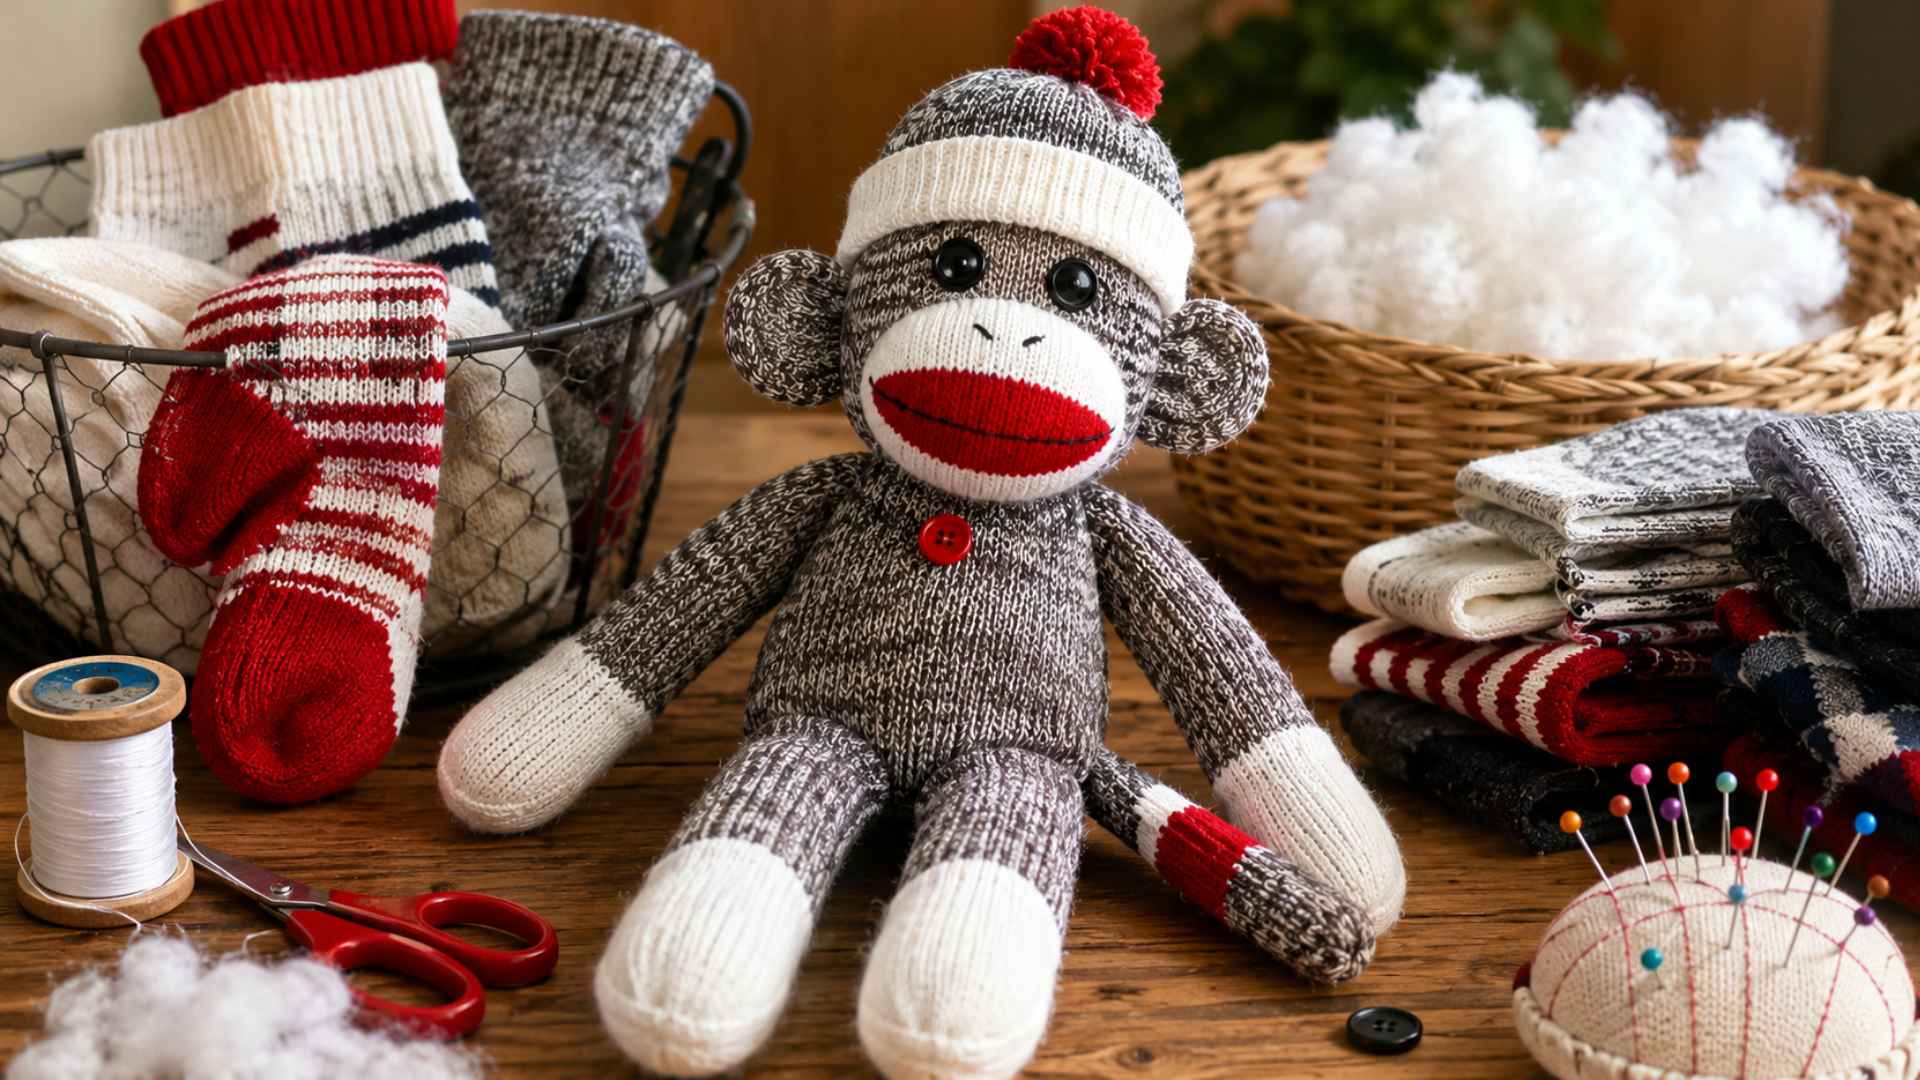
Got a pair of old socks lying around? Do not throw them away just yet.
If you’re wondering how to make a sock monkey, you’ll be happy to know it’s one of the easiest craft projects to try at home.
Sock monkeys have been a beloved handmade toy for generations. Kids adore them. Adults enjoy making them. And honestly, finishing one almost always leads to making another.
This sock monkey tutorial covers every part of the process. Picking the right socks, cutting the pieces, sewing the parts together, and adding the finishing touches. Each step is broken down in plain, simple language so nothing feels confusing or overwhelming.
Ready to make a sock monkey that looks adorable and costs almost nothing?
What Is a Sock Monkey?
The sock monkey is a classic handmade toy with roots going back to the Great Depression era in Rockford, Illinois. It was born from the iconic Rockford Red Heel sock, made by the Nelson Knitting Company.
Families with little money would repurpose these socks to craft stuffed toy monkeys for their children, and a tradition was born.
The bright red heel became the monkey’s signature feature, used to shape its mouth and give it that cheerful, goofy grin. Rockford takes its sock monkey legacy seriously.
The Midway Village Museum even houses the original patent for both the red-heeled sock and the sock monkey, earning the city its official title: “Home of the Sock Monkey.”
Today, sock monkeys are still a beloved handmade gift. Timeless, budget-friendly, and full of charm.
Best Socks to Use for a Traditional Sock Monkey
The right socks give your sock monkey its shape, color, and personality. Choose socks that are long enough to cut, sew, stuff, and turn into clear body parts.
| Sock Type | Best For | Why It Works |
|---|---|---|
| Rockford Red Heel socks | Classic sock monkey look | The red heel naturally forms the monkey’s mouth, giving it a vintage look. |
| Regular crew socks | Beginners | They are easy to find, simple to cut, and work well for the body, arms, tail, and ears. |
| Colorful patterned socks | Creative designs | Stripes, dots, animal prints, and seasonal patterns make each sock monkey look different. |
Start with regular crew socks if this is your first project. Once you know the basic steps, try red heels or patterned socks for a more personal design.
How to Make a Sock Monkey Step-by-Step
Learning how to make a sock monkey becomes much easier when each stage is completed separately. This sock monkey tutorial breaks the project into seven simple steps, helping you create a neat and balanced handmade toy from start to finish.
Tools and materials required
Before you start making your sock monkey, gather all the necessary tools and materials. Having everything ready in one place makes the project easier to follow and helps you complete each step without interruptions.
| Tools | Materials |
|---|---|
| Fabric scissors | 2 crew socks or Rockford Red Heel socks |
| Sewing needle | Polyester fiberfill stuffing |
| Sewing machine (optional) | Thread |
| Straight pins | Buttons for eyes (optional) |
| Fabric chalk or washable fabric pen | Felt pieces for facial features (optional) |
| Ruler or measuring tape | Embroidery thread for eyes and mouth (optional) |
Most of these supplies are inexpensive and easy to find at craft stores or around the house. Once your tools and materials are prepared, you’re ready to start cutting, sewing, and creating your own handmade sock monkey.
Step 1: Prepare Your Socks
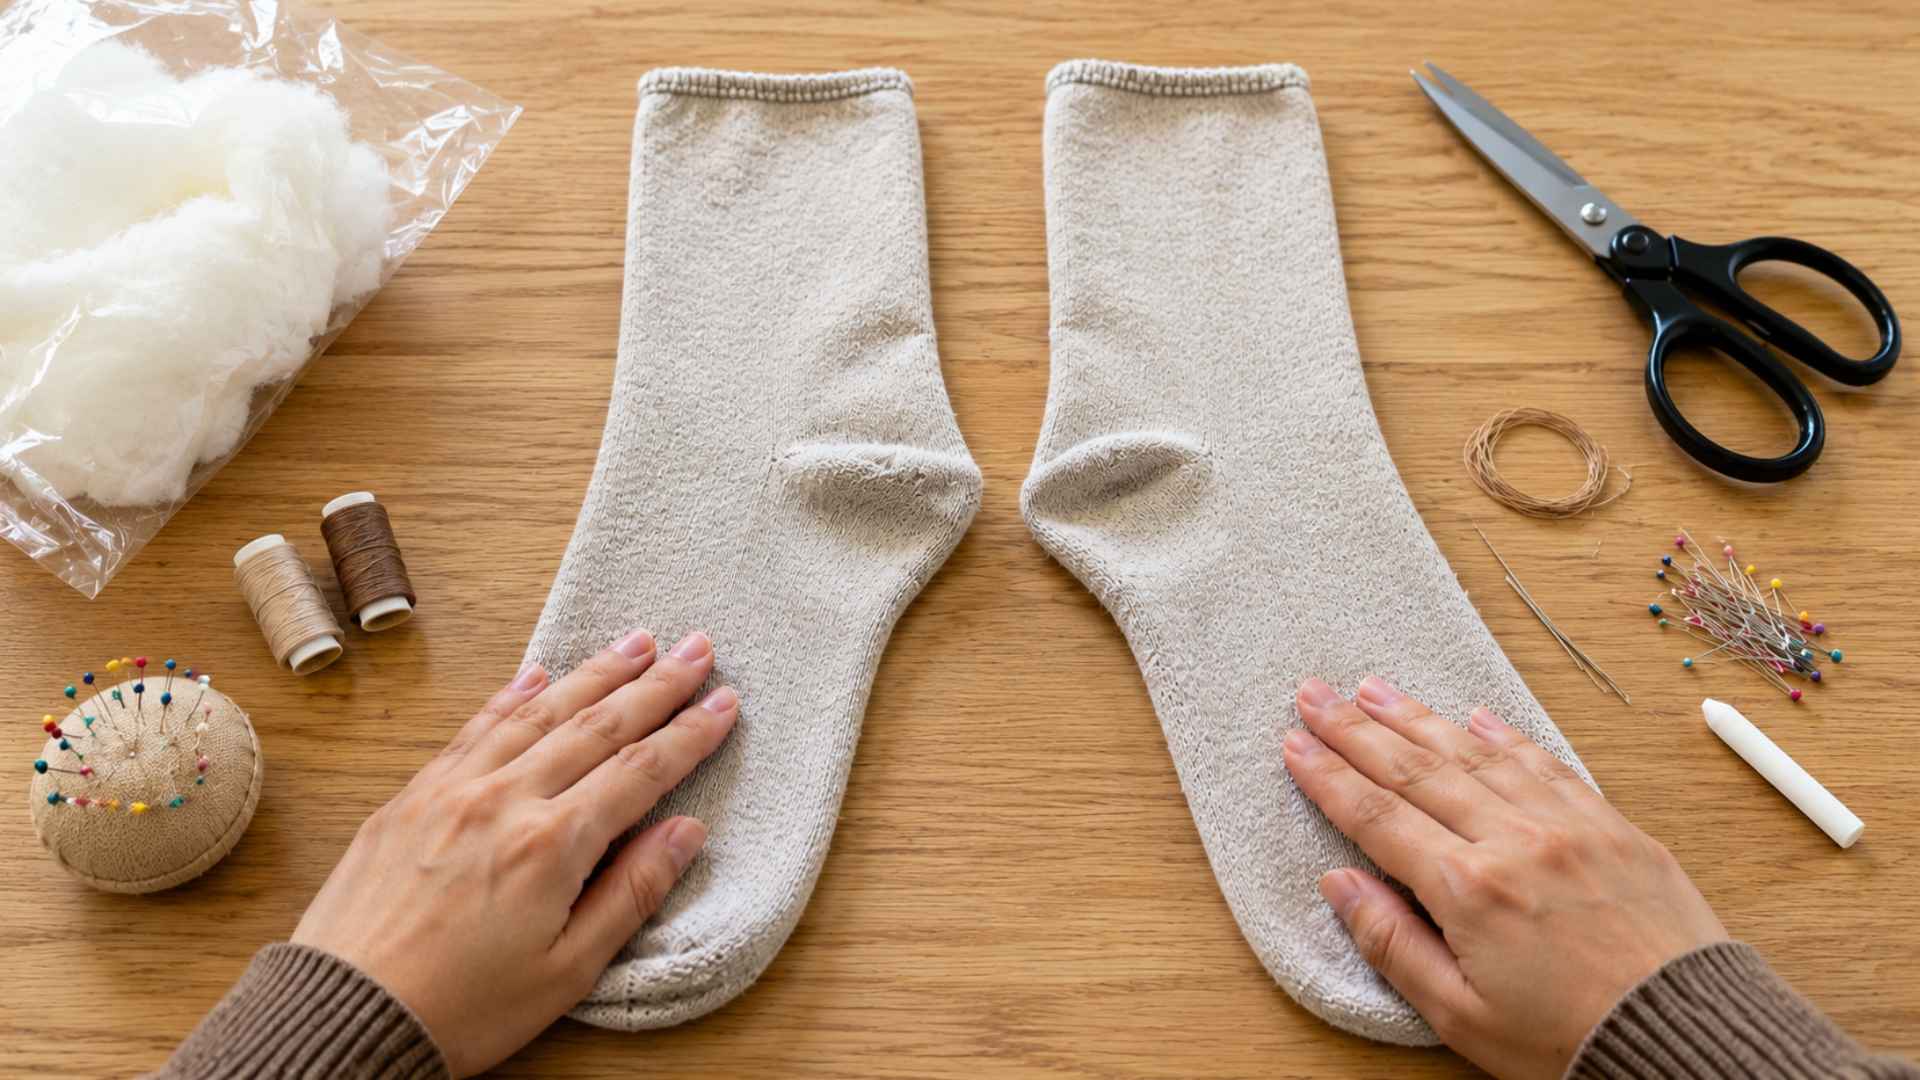
Start by washing and drying both socks to remove dirt and lint and prevent shrinkage. Turn them inside out and lay them flat on a clean work surface. Smooth out wrinkles and carefully align the fabric.
One thing I always do first: if the socks have a thick folded cuff, trim it off or unfold it, since that bulky band is hard to sew through evenly and can throw off the monkey's shape.
Proper preparation makes cutting and sewing easier and helps create a more symmetrical sock monkey.
Step 2: Cut the Body and Legs
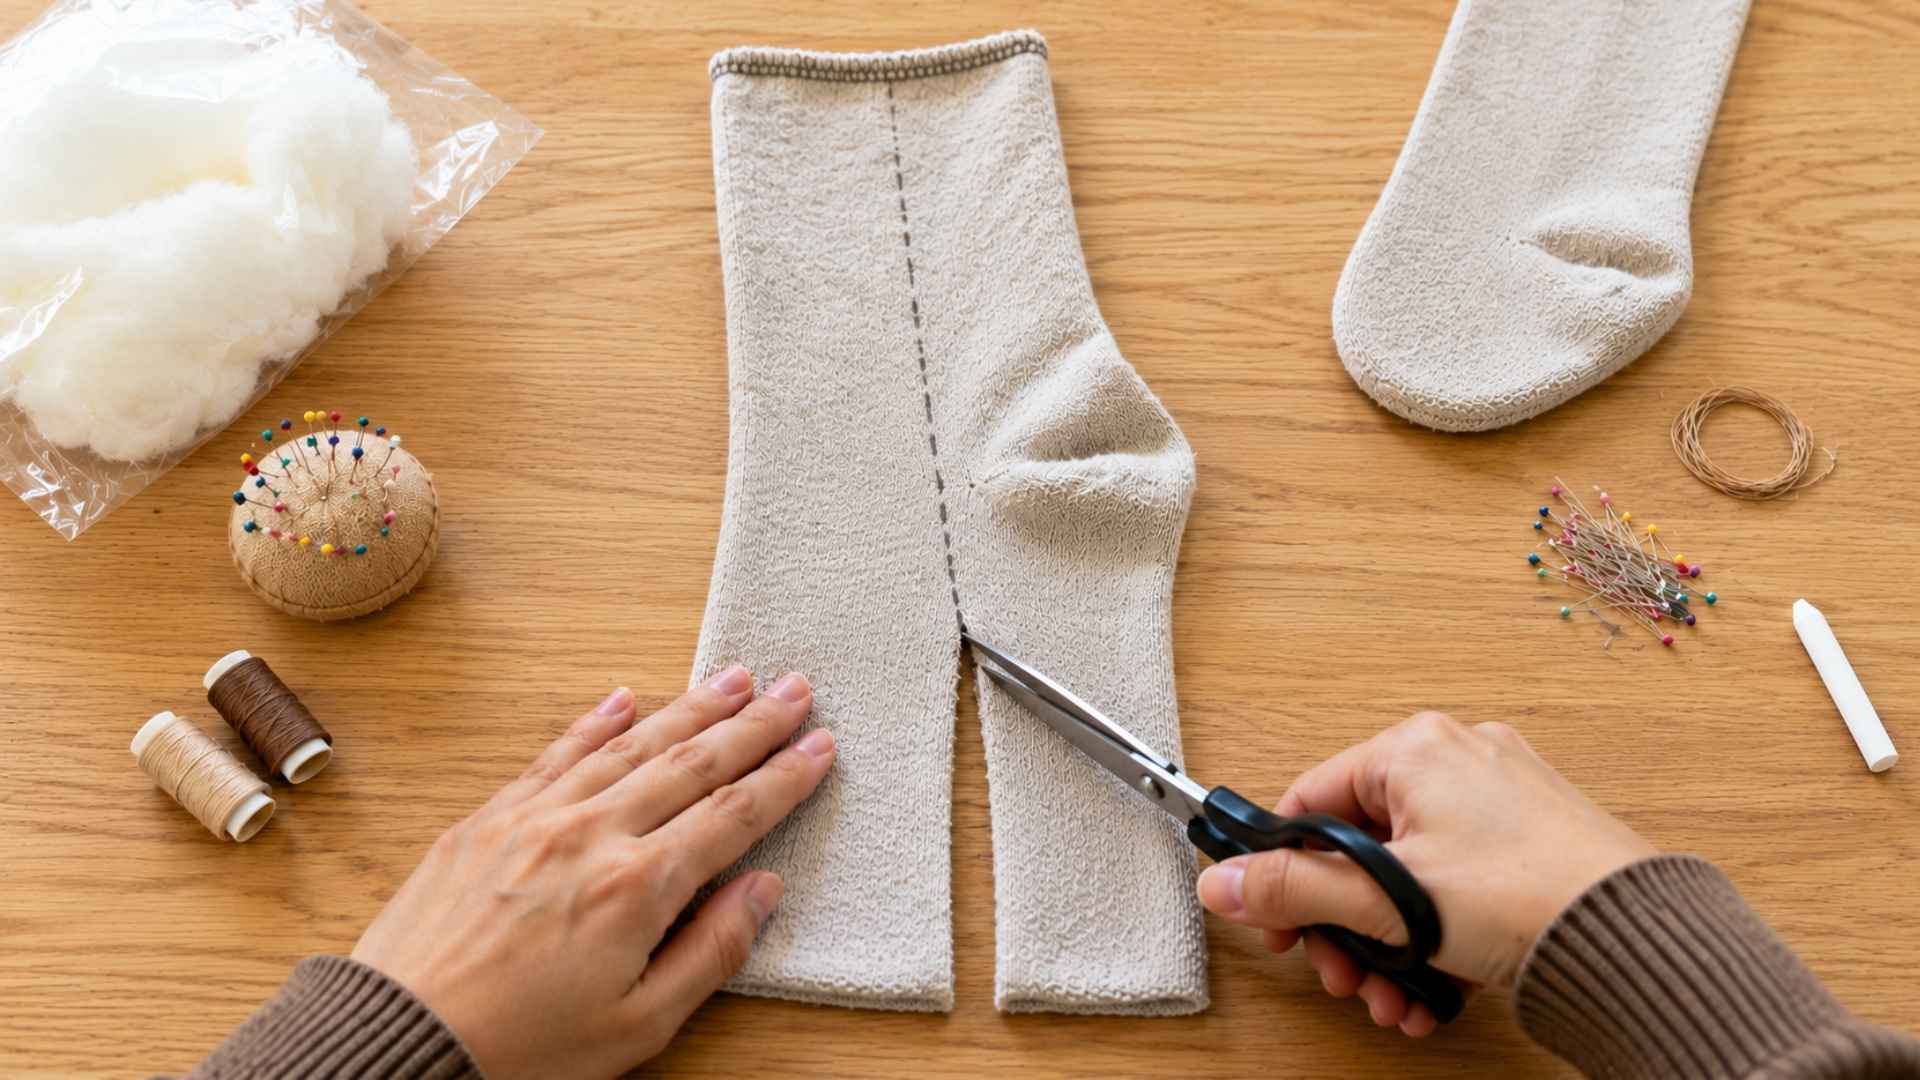
Take the first sock and use it for the main body. Mark a straight line from the cuff toward the heel, piding the lower section into two legs.
Carefully cut along the marked line while keeping the heel untouched. The heel area will later form the monkey’s bottom and body shape.
Step 3: Sew and Stuff the Body
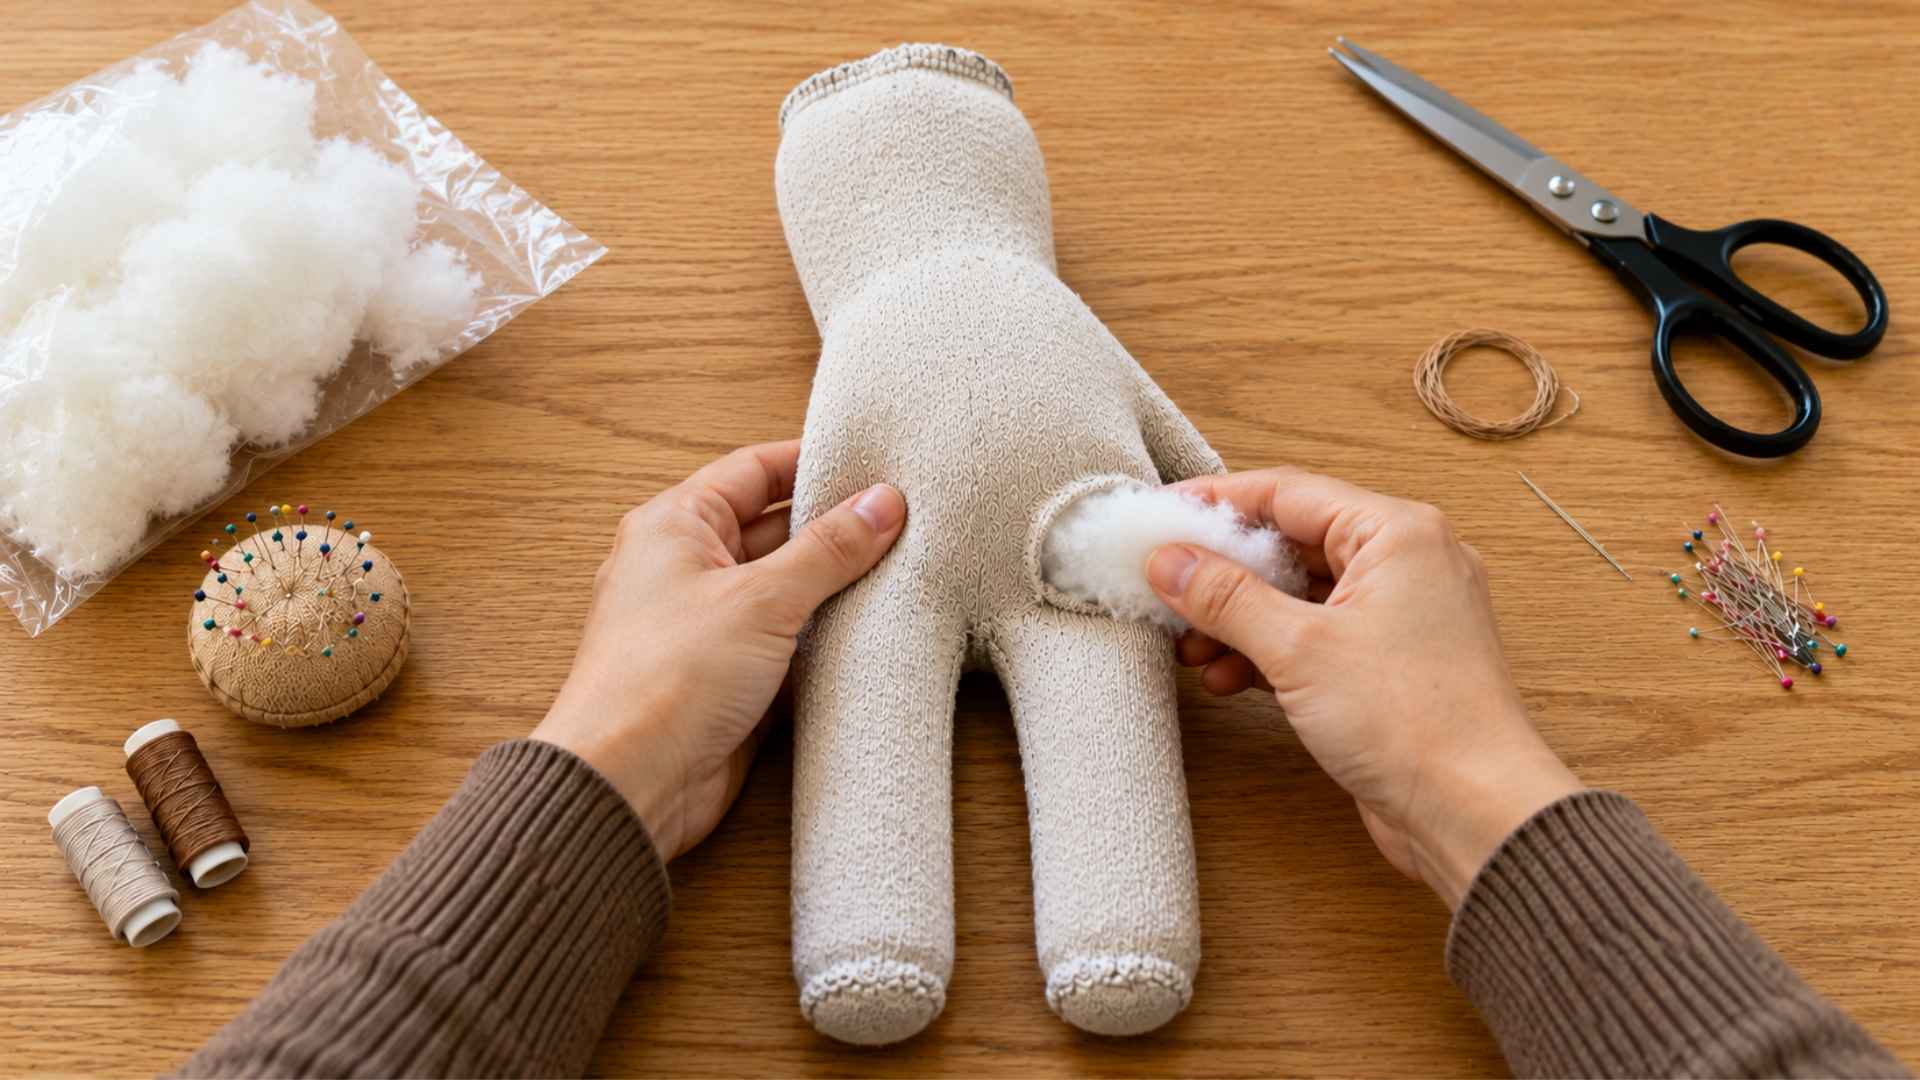
Sew along the edges of both legs, leaving an opening between them for turning and stuffing. Turn the sock right side out through the opening.
Add stuffing gradually, working from the legs upward into the body and head. Fill evenly to create a firm shape without stretching the fabric.
Step 4: Cut the Arms, Tail, Ears, and Mouth
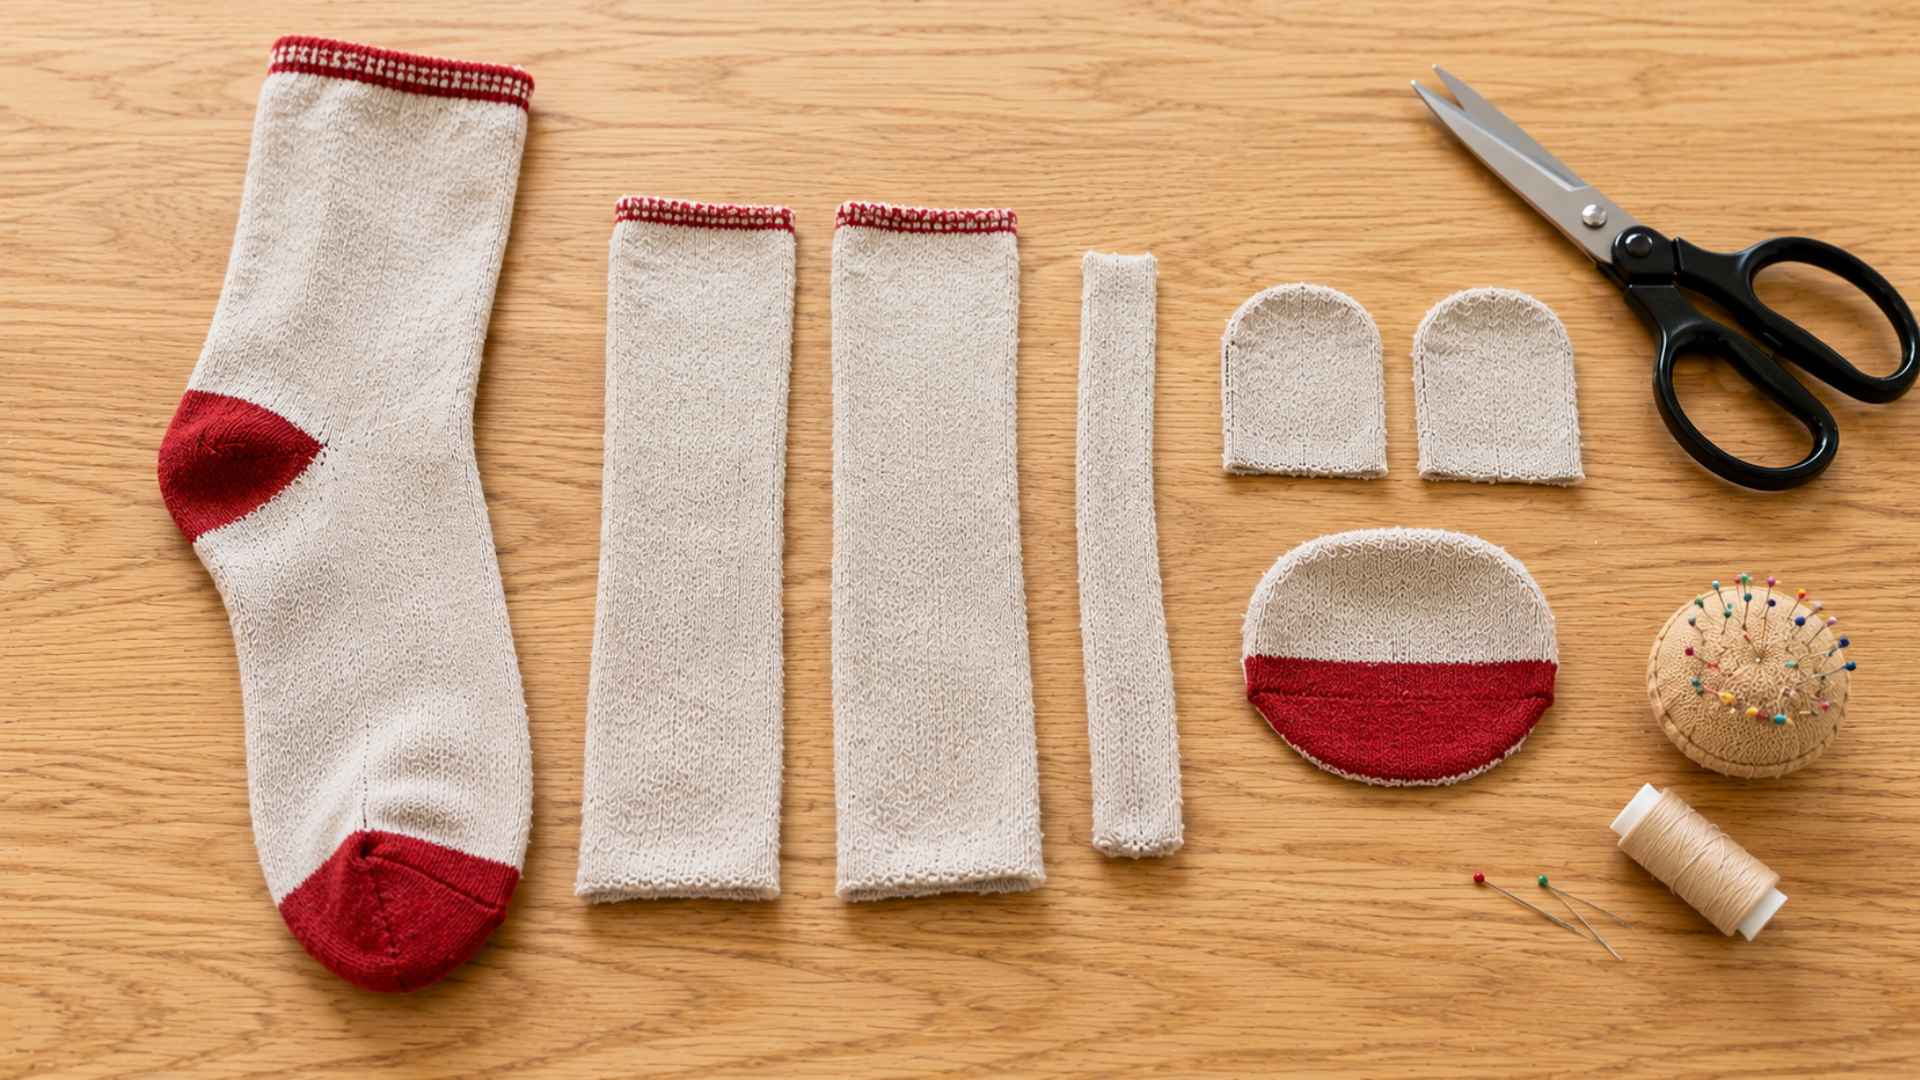
Use the second sock to create all remaining body parts. Cut two long strips for the arms, one narrow strip for the tail, two small rounded pieces for the ears, and one section for the mouth.
If using traditional red heel socks, save the heel area for the face.
Step 5: Sew and Stuff the Small Pieces
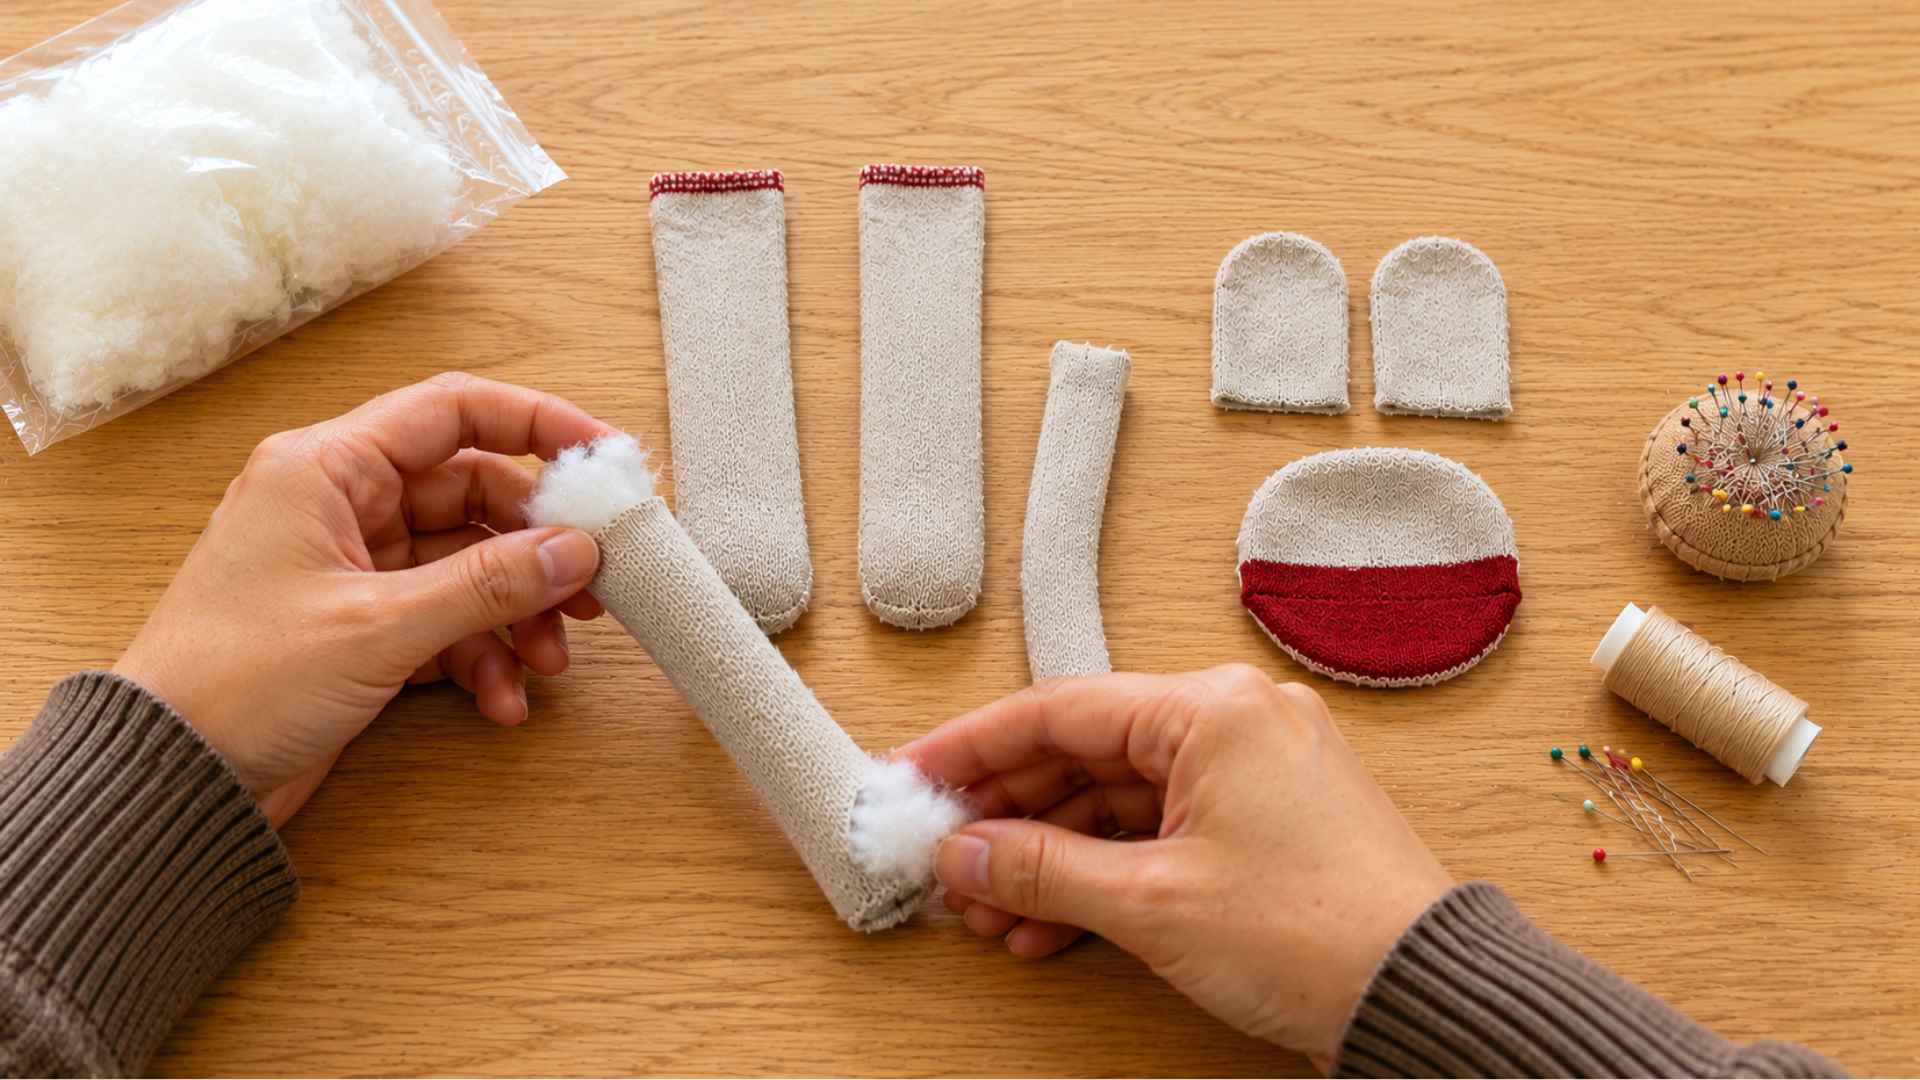
Sew each arm and tail piece inside out, then carefully turn them right side out. Add a small amount of stuffing so they hold their shape while remaining flexible.
The ears usually need very little, if any, stuffing. Keep all pieces evenly sized for a balanced appearance.
Step 6: Attach the Arms, Tail, and Ears
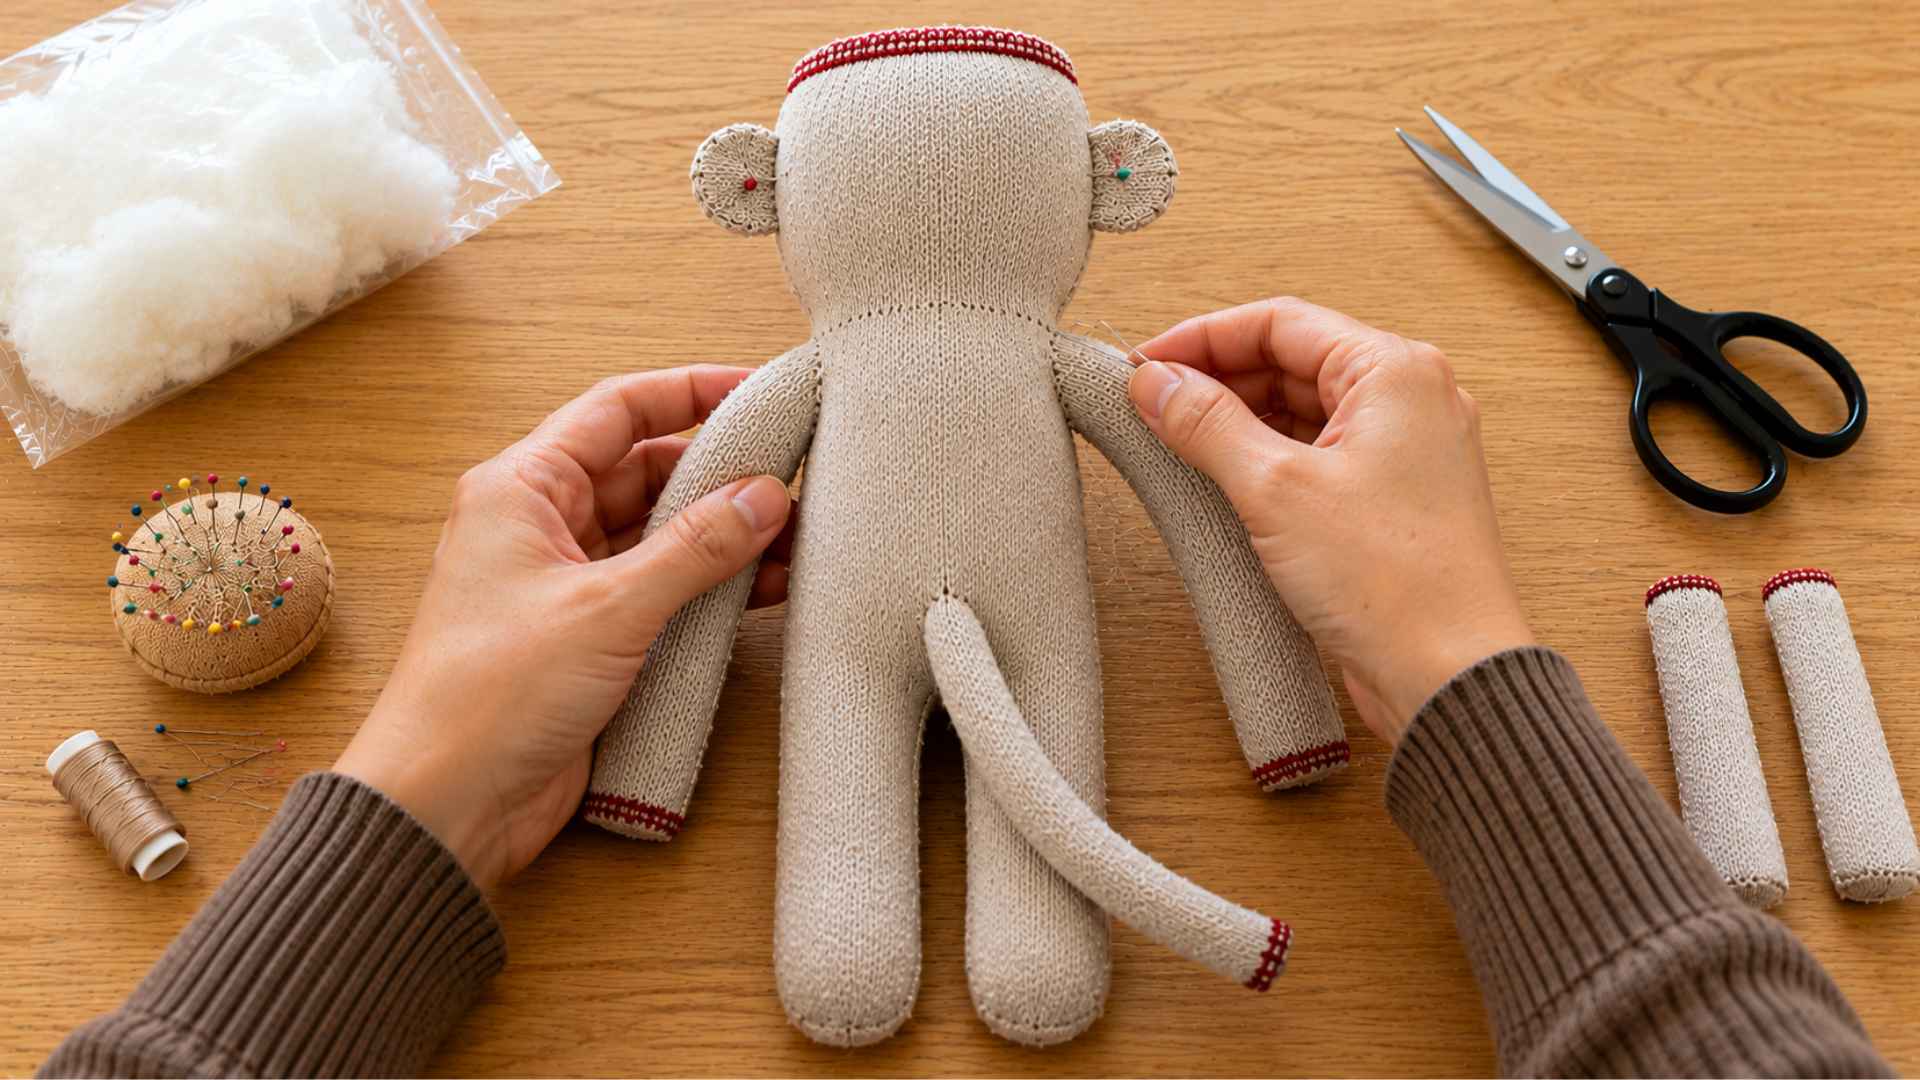
Position each piece before sewing permanently. Attach the arms evenly to both sides of the body, and sew the tail to the lower back.
Fold and shape the ears before securing them near the top of the head. Small, tight stitches help keep every piece firmly attached.
Step 7: Create the Face and Finish the Monkey
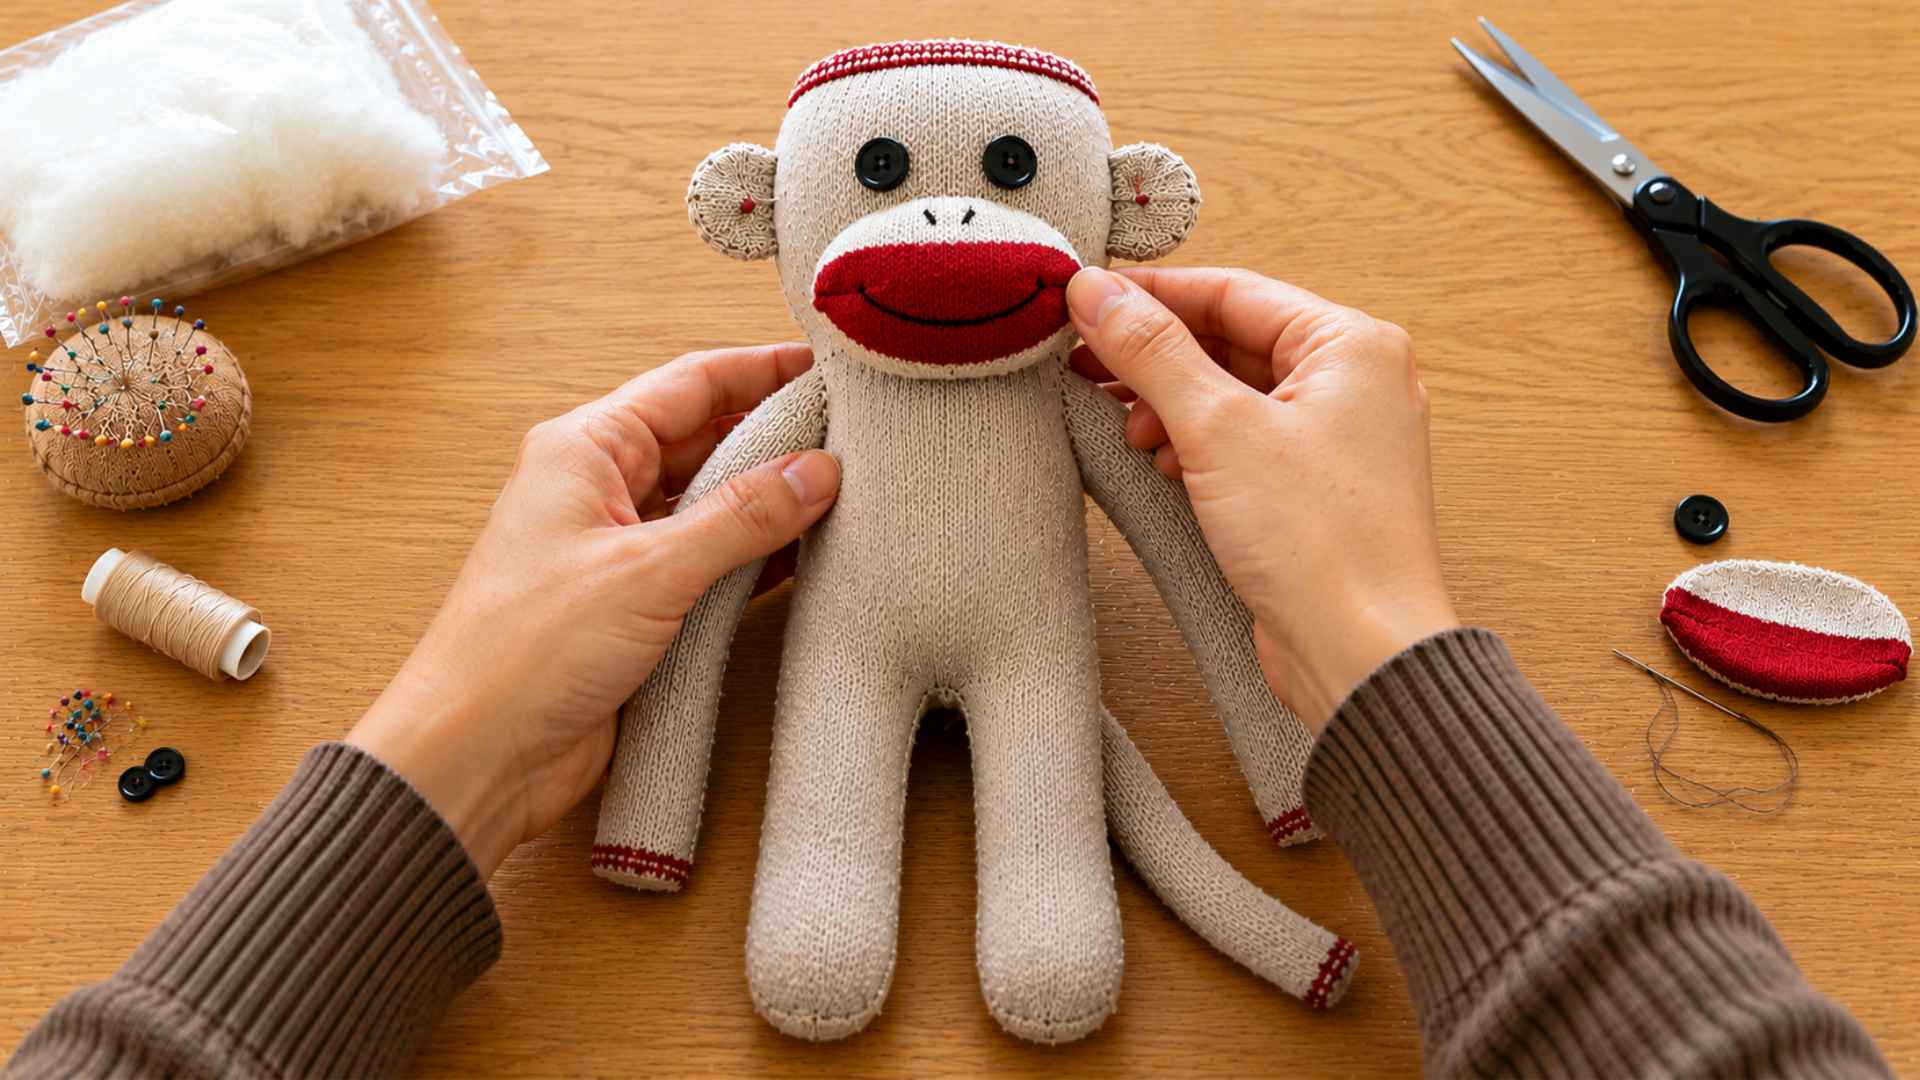
Attach the mouthpiece to the front of the head and lightly stuff it for dimension. Add eyes using buttons, felt pieces, or embroidery thread.
Stitch a simple smile if desired. Inspect all seams, trim loose threads, and gently reshape the body to complete your finished sock monkey.
Safety NoteIf you are using a sewing machine, sharp needles, pins, or scissors, work carefully and keep your hands away from moving parts and sharp edges. Children should complete this project only with close adult supervision and assistance when sewing or cutting fabric. If the sock monkey is meant for a baby or a young child, skip button eyes entirely, since they are a choking hazard. Embroider the eyes or stitch on small felt pieces very securely instead, and check that every seam is tight so no stuffing can work loose. |
Sock Monkey Cutting Pattern Guide
Before cutting, plan which part of each sock will become the body, legs, arms, tail, ears, and mouth. This keeps your sock monkey even and easier to sew.
| Sock Part | What It Becomes |
|---|---|
| First sock toe | Head |
| First sock middle | Body |
| First sock open end | Legs |
| First sock heel | Bottom |
| Second sock long side pieces | Arms |
| Second sock narrow piece | Tail |
| Second sock small rounded pieces | Ears |
| Second sock heel | Mouth |
Mark each section with chalk or a washable fabric pen before cutting. Leave a small seam allowance around every piece so your stitches hold firmly.
Common Sock Monkey Mistakes and How to Fix Them
Even when following a sock monkey tutorial carefully, small mistakes can happen. The good news is that most problems are easy to correct before you finish sewing and stuffing.
- Uneven legs: Fold the sock evenly before marking the center line. Measure both sides first to keep the legs symmetrical.
- Loose seams: Use short, tight stitches and secure thread ends properly. Reinforce high-stress areas like the arms and tail.
- Overstuffed body: Add stuffing gradually instead of all at once. The monkey should feel soft while holding its shape.
- Crooked face placement: Pin facial pieces before sewing permanently. Check alignment from different angles to ensure balance.
- Lopsided ears: Attach both ears at the same height. Measuring from the top of the head helps maintain symmetry.
Taking a few extra minutes to check measurements, stuffing, and placement can greatly improve the finished result. Careful adjustments throughout the project help create a neat, balanced sock monkey.
Sock Monkey Variations You Can Try
Once you finish your first sock monkey, you can create different versions using the same basic pattern. These fun variations are great for gifts, holidays, decorations, and beginner-friendly craft projects.
1. Mini Sock Monkey
A mini sock monkey uses baby or toddler socks to create a smaller version. It works well as a keychain, desk decoration, or party favor.
Thank you to Make Do With Mrs. Murphy for sharing this easy mini sock monkey tutorial.
2. No-Sew Crochet Sock Monkey
A no-sew crochet sock monkey combines a crochet-style look with a sock monkey design, making it a fun option for crafters who prefer not to sew.
Most versions use crochet techniques or pre-made crocheted pieces to create the monkey’s features and accessories.
Video tutorial by Weecrochetcreations, featuring beginner-friendly no-sew craft ideas.
3. Personalized Sock Monkey
Add a name tag, favorite colors, custom clothing, or small accessories to make your sock monkey unique and more meaningful as a gift.
Video tutorial by The Sock Monkey Guy, focused on custom handmade gift projects.
How to Care for a Handmade Sock Monkey
A handmade sock monkey can last for years with proper care. Simple cleaning, storage, and repair habits will help keep it looking neat and prevent unnecessary wear.
Cleaning Tips
- Spot clean small stains with a damp cloth and mild soap to avoid damaging stitches or stuffing.
- Hand-wash gently in cool water when deeper cleaning is needed, then allow it to air-dry completely.
- Avoid harsh detergents or bleach, which may fade colors and weaken the fabric over time.
Storage Tips
- Store your sock monkey in a clean, dry area away from direct sunlight to prevent fading.
- Keep it in a breathable fabric bag if storing for long periods to reduce dust buildup.
- Avoid placing heavy items on top, as they can flatten the stuffing and alter its shape.
Repairing Small Tears
- Fix small tears as soon as you notice them to prevent the opening from getting larger.
- Use matching thread and small stitches to blend repairs into the original design.
- Add a little extra stuffing before closing a tear if the filling has shifted or escaped.
Regular care takes only a few minutes and helps preserve your handmade creation. With proper cleaning, storage, and repairs, your sock monkey can remain a favorite keepsake for years.
Make Your First Sock Monkey
Learning how to make a sock monkey is one of those projects that looks impressive but is surprisingly simple once you start.
No two sock monkeys ever look exactly the same. Each one carries a little personality of its own, which makes it a meaningful handmade gift for any occasion.
Start with a basic crew sock, get comfortable with the steps, and then experiment with colors and variations.
Tried this sock monkey tutorial? Drop a comment below with a photo of your finished sock monkey.
Frequently Asked Questions
Can I Make a Sock Monkey without Any Sewing Experience?
Yes. Basic hand stitching is enough. No special skills needed. Just follow each step carefully and go slowly.
How Much Does It Cost to Make a Sock Monkey?
Very little. Most supplies cost under $10. You may already have socks, scissors, and thread at home.
Can I Sell Handmade Sock Monkeys?
Yes. Handmade sock monkeys sell well on platforms like Etsy. They make popular gifts for babies, kids, and collectors.