
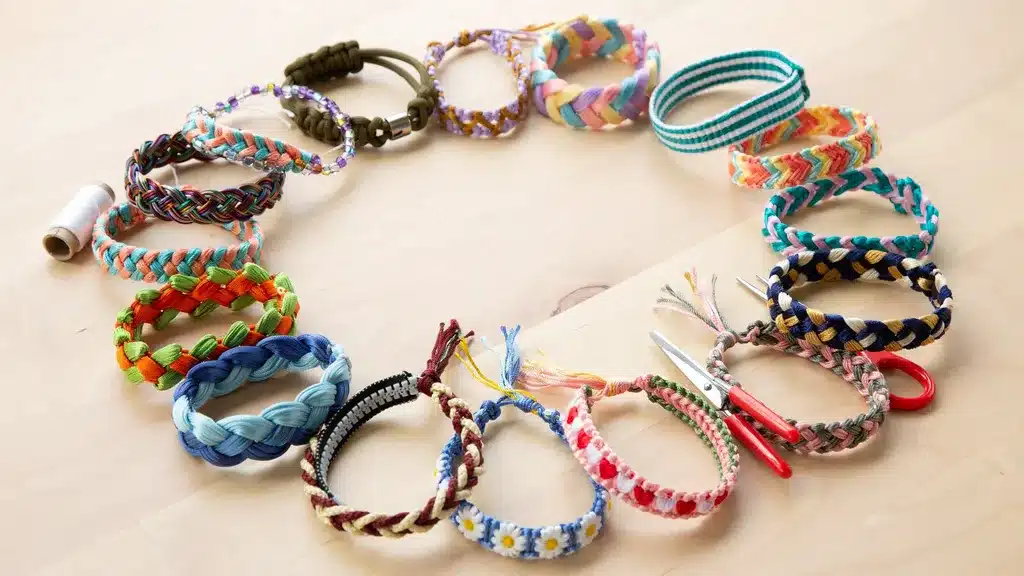
I still remember sitting with a pile of colorful strings, thinking every friendship bracelet would look the same. After making a few, I realized that even small changes in colors, knots, or beads could create something completely different.
Some patterns felt quick and simple, while others took a little more patience. Over time, trying new designs became one of my favorite parts of the process because each bracelet had its own look and personality.
If you are curious about the different types of friendship bracelets, this article covers popular styles, what makes each one unique, and which patterns might be worth trying next.
Friendship Bracelet Knots Used in These Patterns
The forward knot was the first knot I learned. It moves the working string from left to right and appears in many beginner bracelets, especially Candy Stripe patterns.
If you’re just getting started and learning how to make friendship bracelets, this is usually one of the first knots you’ll use.
The backward knot works in the opposite direction. I often noticed it in patterns with shapes, points, and color changes. Once I understood it, more detailed bracelet designs felt easier to follow.
The forward-backward knot starts in one direction and finishes in the other. I came across it more in patterns with small details, and it helped create smoother color changes.
The backward-forward knot is similar but starts from the opposite side. It helped create cleaner direction changes in some of the bracelets I tried.
Quick Reference for Friendship Bracelet Patterns
Use this table to quickly match your skill level with a suitable pattern and the recommended number of strings.
| Skill Level | Pattern | Recommended Strings |
|---|---|---|
| Beginner | Braided | 3–6 strings of embroidery floss |
| Beginner | Candy Stripe | 4–6 strings of embroidery floss |
| Beginner | Spiral Staircase | 4–6 strings of embroidery floss |
| Beginner | Diagonal Stripe | 4–6 strings of embroidery floss |
| Beginner | Ladder Stitch | 4–6 strings of embroidery floss |
| Beginner | Beaded | 4–6 strings of embroidery floss |
| Beginner | Letter Bead | 4–6 strings of embroidery floss |
| Intermediate | Chevron | 6–8 strings of embroidery floss |
| Intermediate | Wave | 6–8 strings of embroidery floss |
| Intermediate | Zig Zag | 6–8 strings of embroidery floss |
| Intermediate | Daisy Chain | 6–8 strings of embroidery floss |
| Intermediate | Zipper | 6–8 strings of embroidery floss |
| Intermediate | Arrowhead | 6–8 strings of embroidery floss |
| Intermediate | Sliding Knot | 6–8 strings of embroidery floss |
| Advanced | Diamond | 8–10 strings of embroidery floss |
| Advanced | Heart | 8–10 strings of embroidery floss |
| Advanced | Chain Link | 8–10 strings of embroidery floss |
| Advanced | Kumihimo | 8–12 strings of embroidery floss or thread |
| Advanced | Paracord | 8–12 strings of paracord or thick cord |
This table makes it easier to see your options at a glance and plan which bracelet to create next.
Easy Friendship Bracelet Patterns for Beginners
These beginner-friendly patterns helped me learn different knots, color arrangements, and bracelet styles without feeling overwhelmed.
1. Braided Friendship Bracelet Pattern
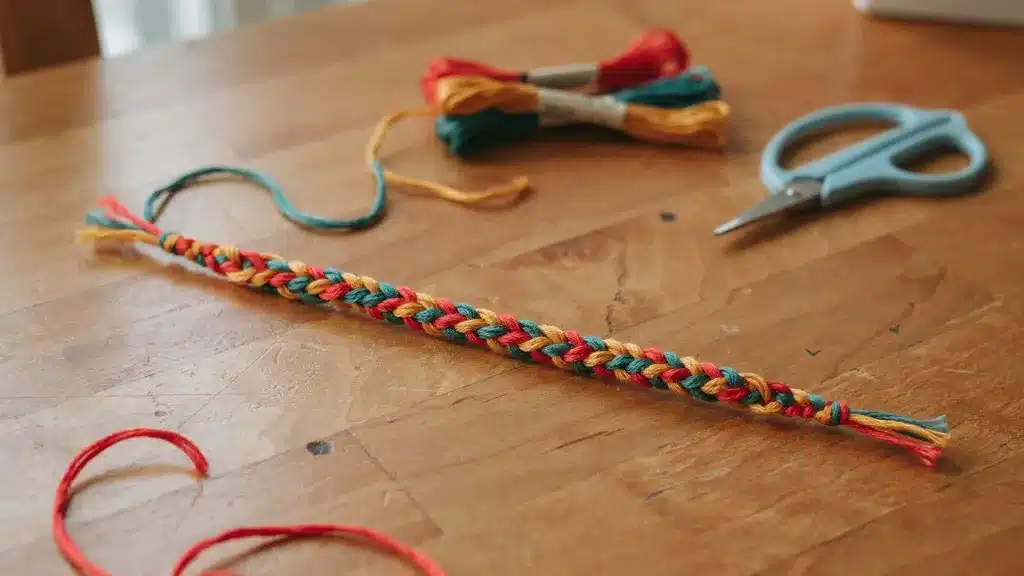
A braided bracelet was one of the first styles I tried because it felt familiar and easy to follow. Divide the strings into sections and braid them together until you reach the desired length.
Secure the ends with a knot. I like this pattern when I want a quick bracelet that does not require tracking knot sequences.
2. Candy Stripe Friendship Bracelet Pattern

The Candy Stripe pattern was one of the first knotted bracelets I learned. Arrange your strings in the desired color order, then use the far-left string to tie forward knots across the row.
Repeat with the new left string each time. The finished diagonal stripes make this pattern feel colorful without being difficult.
3. Spiral Staircase Friendship Bracelet Pattern

I tried the Spiral Staircase bracelet after learning a few basic knots. Start with several strings and repeatedly tie knots around the center strands using the same working string.
As the bracelet grows, it naturally forms a spiral shape. The repeating steps make it easy to continue without checking instructions often.
4. Diagonal Stripe Friendship Bracelet Pattern
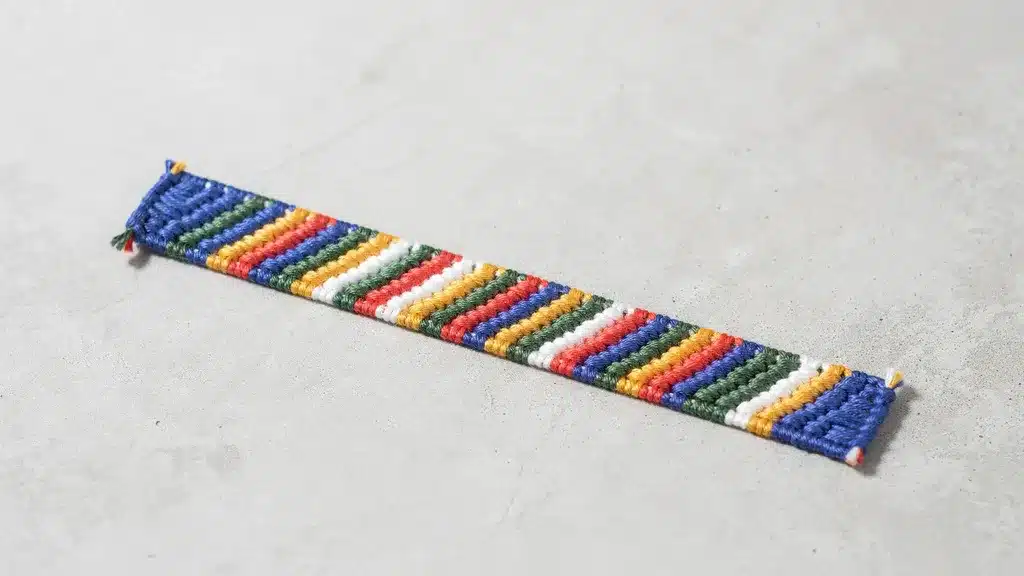
The Diagonal Stripe bracelet felt similar to Candy Stripe but gave me more room to play with colors. Arrange the strings in your chosen order and work forward knots across each row.
The angled stripes appear as the bracelet grows. I like how the colors remain easy to see from start to finish.
5. Ladder Stitch Friendship Bracelet Pattern

I first tried this pattern when I wanted something with a different texture. Tie knots in a repeating sequence while leaving small spaces between sections.
The result creates a ladder-like appearance down the center of the bracelet. It looks detailed, but the steps are fairly simple once you get started.
6. Beaded Friendship Bracelet Pattern
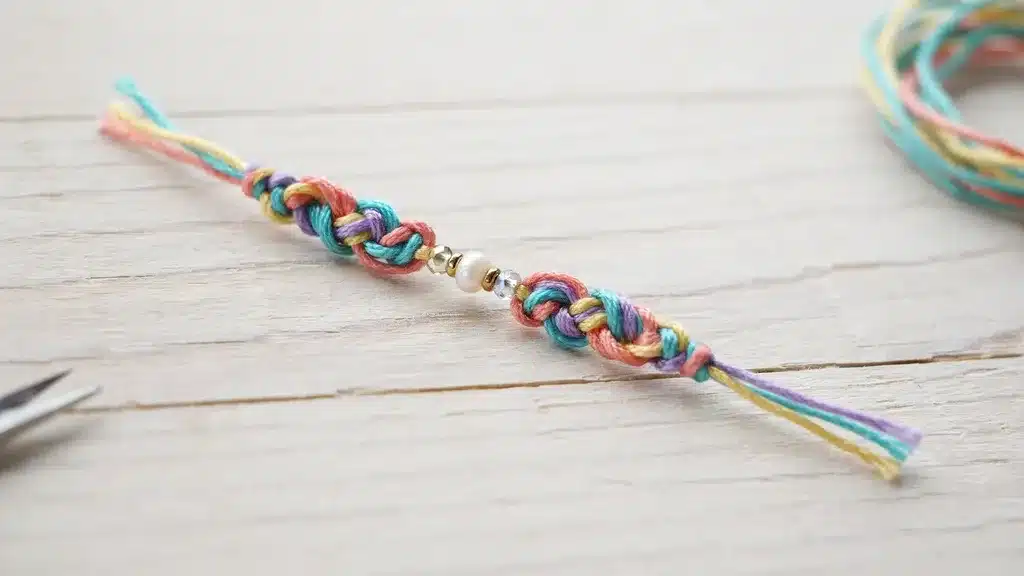
Adding beads was one of the easiest ways I found to change the look of a bracelet. Begin with a basic friendship bracelet pattern and slide beads onto the strings at different points.
Continue knotting between them to keep everything in place. Even a few beads can make the bracelet feel more personal.
7. Letter Bead Friendship Bracelet Pattern

I liked making letter bead bracelets when I wanted to include names or short messages. Thread the beads onto the center strings before continuing the pattern around them.
Planning the letters ahead of time helps keep everything aligned. These bracelets always felt thoughtful without requiring a complicated design.
Intermediate Friendship Bracelet Patterns
After making a few beginner bracelets, I started trying patterns with more intricate details and shapes. They took a bit longer to finish, but the results felt worth it.
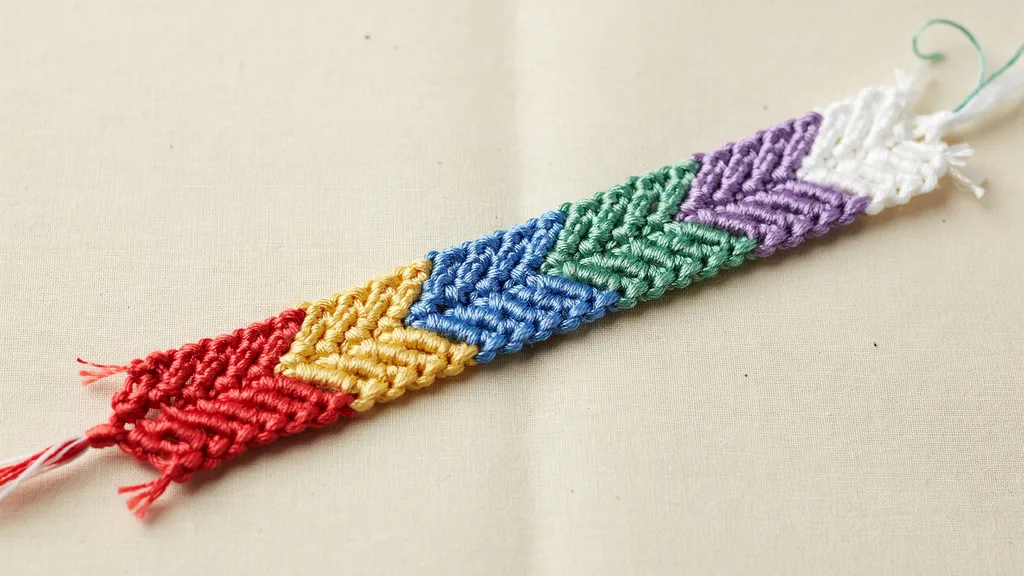
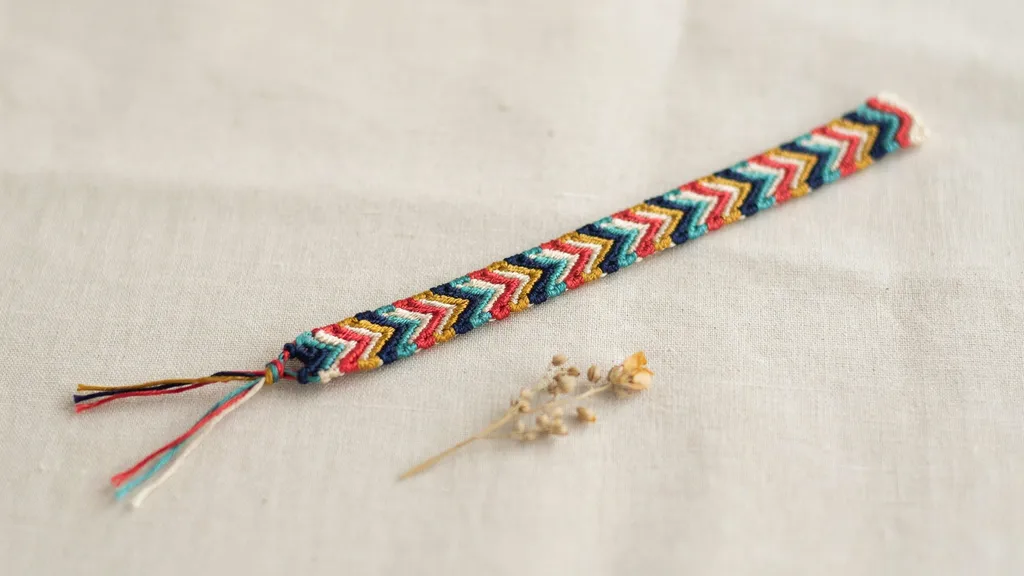
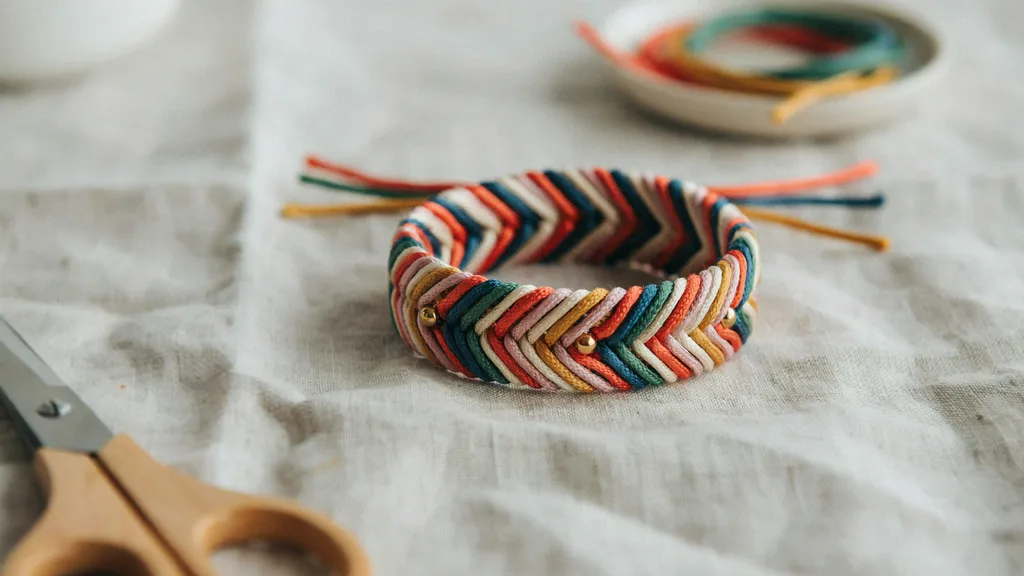
8. Chevron Friendship Bracelet Pattern
![]()
The Chevron bracelet was one of the first patterns that felt different from basic stripes. Arrange matching colors on both sides, then tie knots toward the center from each direction.
The rows gradually form a repeating V shape. I liked this pattern because it looked detailed without adding too much extra work.
9. Wave Friendship Bracelet Pattern
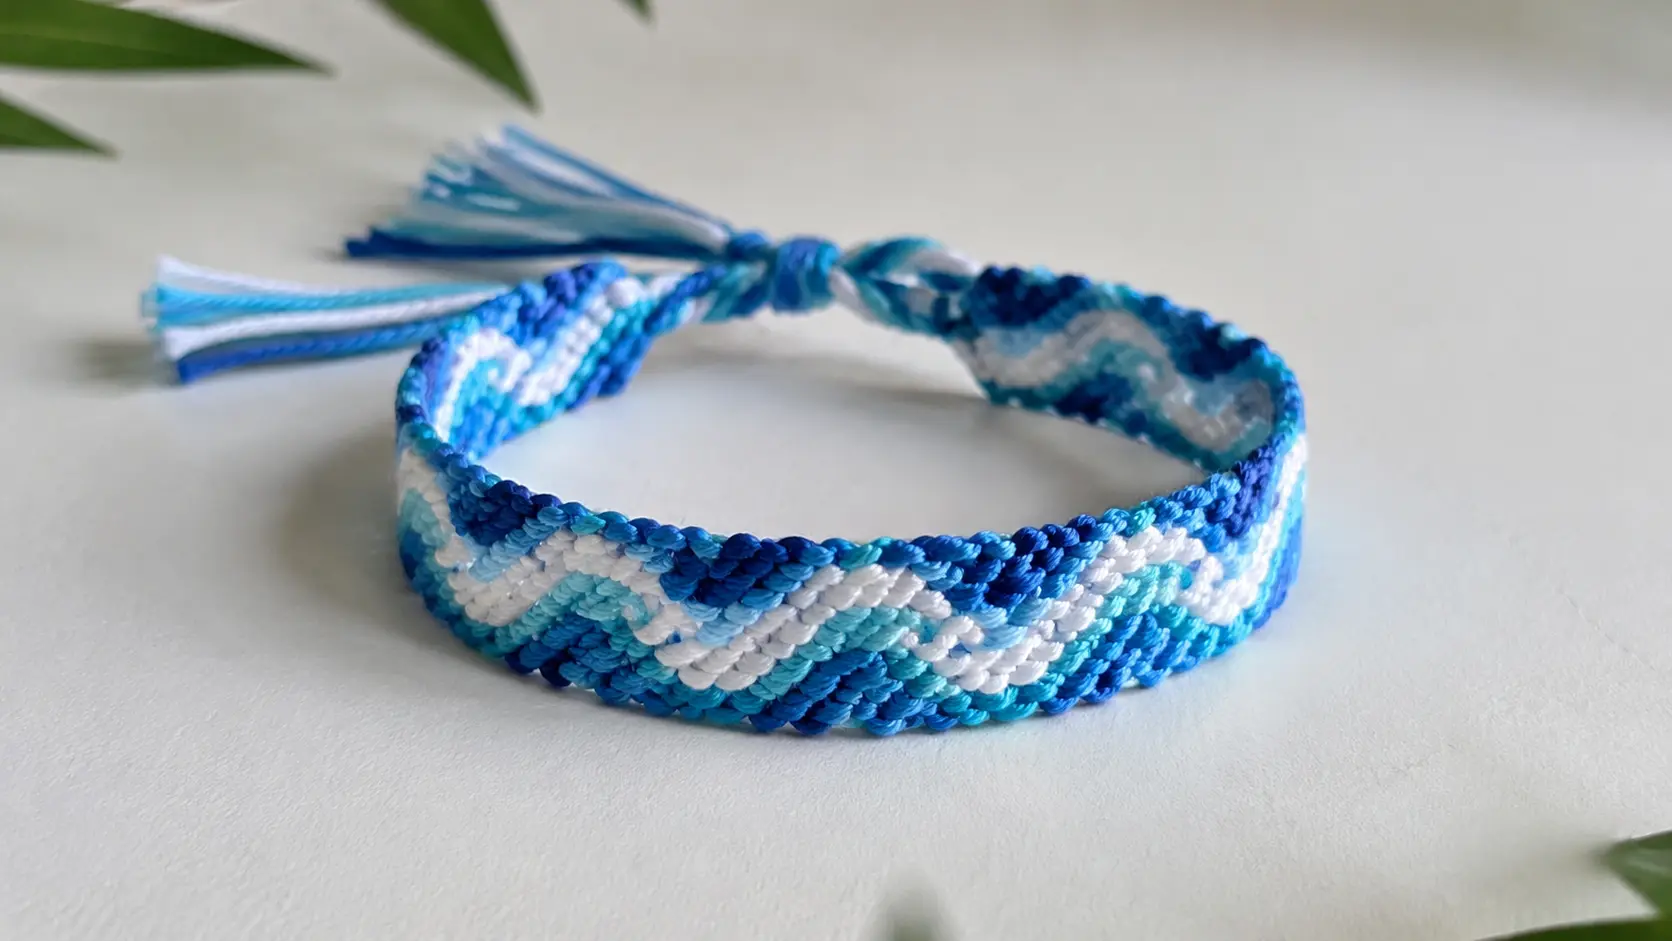
I tried the Wave bracelet when I wanted something softer than straight lines. Use a mix of forward and backward knots to create curved sections across the bracelet.
The design slowly forms a flowing pattern as you continue knotting. Different color combinations can make each bracelet look slightly different.
10. Zig Zag Friendship Bracelet Pattern
The Zig Zag bracelet caught my attention because the pattern changes direction across the bracelet. Tie rows using alternating knot sequences so the colors alternate.
As the bracelet grows, the design begins to form sharp angles. I liked how the finished bracelet looked active and full of movement.
11. Daisy Chain Friendship Bracelet Pattern
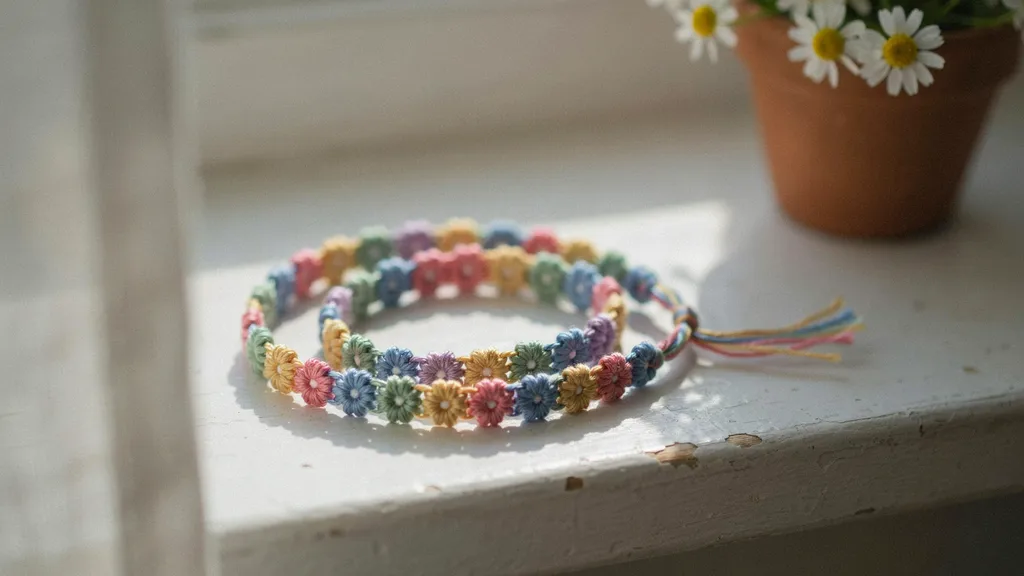
The Daisy Chain bracelet was one of the more playful patterns I tried. Create small flower shapes by arranging knot colors around a center section.
Repeat the flowers along the length of the bracelet until you reach the desired size. The finished pattern feels cheerful and works well with bright colors.
12. Zipper Friendship Bracelet Pattern
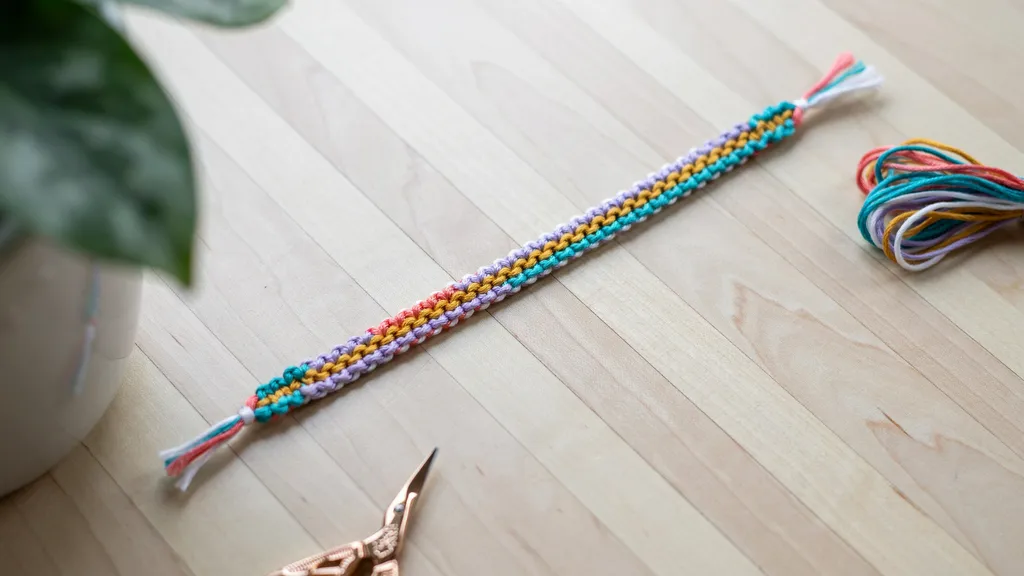
I tried the Zipper bracelet after seeing how different it looked from traditional patterns. Use one center string while knotting the surrounding strings around it in a repeating sequence.
The knots gradually create a design that resembles a zipper. It uses simple steps but produces a unique finished look.
13. Arrowhead Friendship Bracelet Pattern
The Arrowhead bracelet reminded me of a Chevron pattern with a sharper shape. Tie knots on both sides toward the center, adjusting the color arrangement as needed.
The pattern gradually forms pointed sections across the bracelet. I liked how clearly the design stood out once several rows were finished.
14. Sliding Knot Friendship Bracelet Pattern
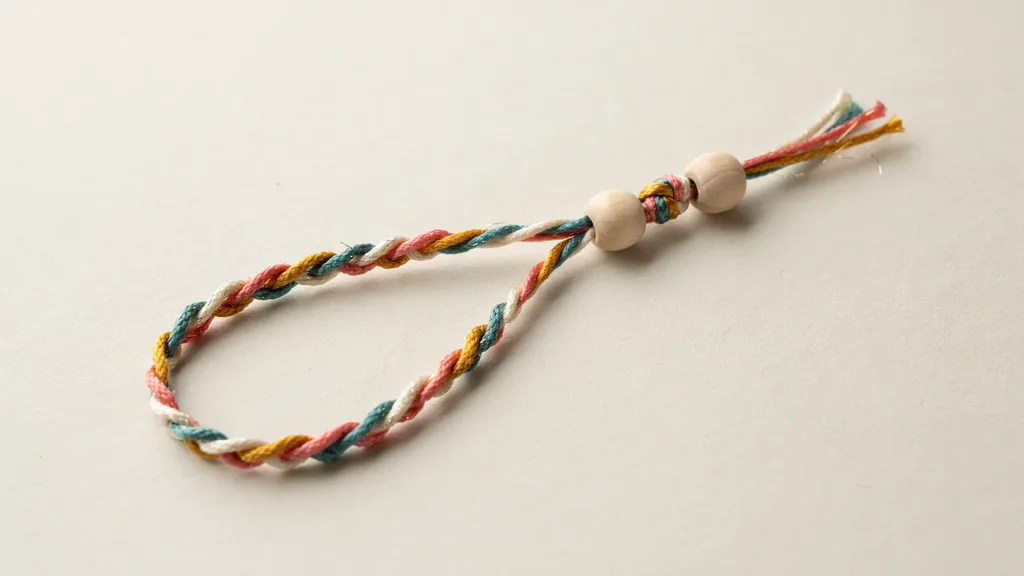
I started making sliding knot bracelets when I wanted something adjustable. Create the bracelet using your preferred pattern, then finish it with a sliding knot closure instead of a fixed tie.
This allows the bracelet to tighten or loosen when needed. I found it useful when making bracelets as gifts.
Advanced Friendship Bracelet Patterns
These patterns took more attention than the earlier ones. I liked saving them for times when I had more patience and wanted a bracelet with a stronger design.
15. Diamond Friendship Bracelet Pattern
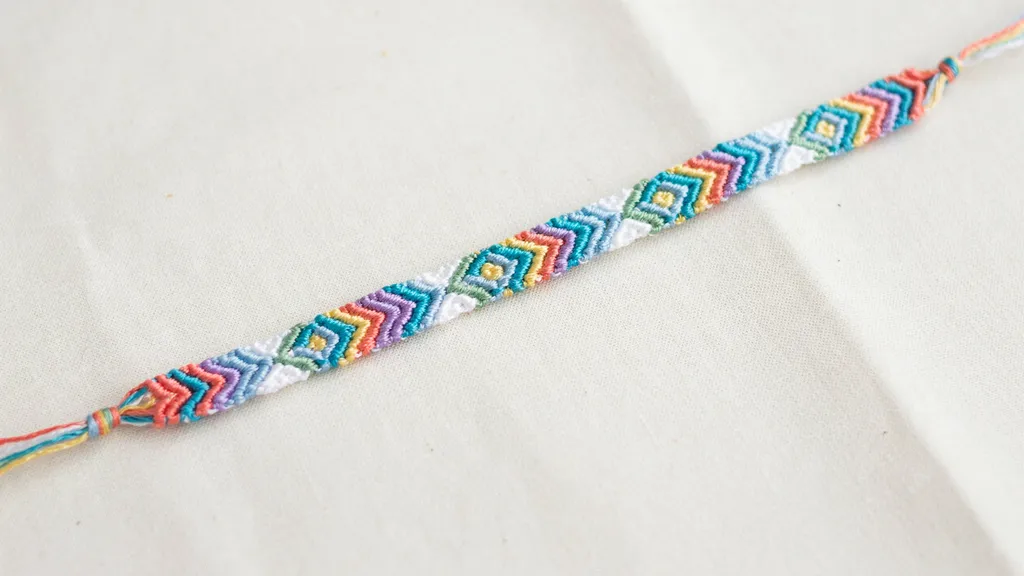
The Diamond bracelet was one of the first detailed patterns I tried. Arrange the strings evenly, then use forward and backward knots to build small diamond shapes across the bracelet.
Keeping the color order steady matters here. I liked this pattern because the design became clearer with each finished section.
16. Heart Friendship Bracelet Pattern
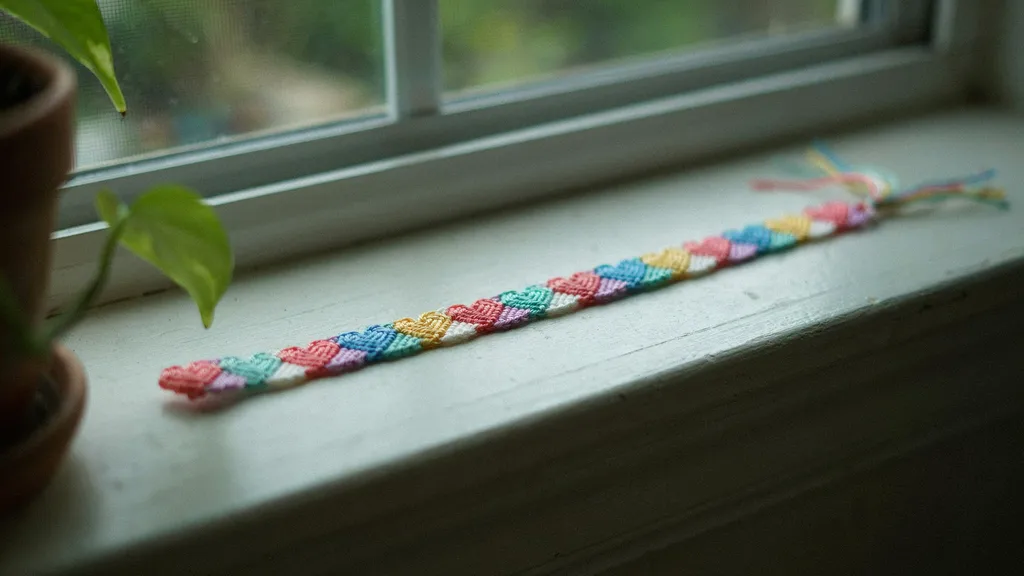
I made the Heart bracelet when I wanted something that felt more personal. Start with two or more colors and use direction-changing knots to shape each heart.
The pattern needs careful row tracking, especially near the curves. Once finished, it makes a small, handmade gift.
17. Chain Link Friendship Bracelet Pattern

The chain-link bracelet felt different because it had more space and shape than flat patterns. Work the knots in small linked sections, leaving openings between parts of the design.
The bracelet slowly forms a chain-like look. I liked how it felt lighter on the wrist than thicker patterns.
18. Kumihimo Friendship Bracelet Pattern
I tried Kumihimo when I wanted a braided bracelet that looked round instead of flat. Place the strings on a Kumihimo disk, then move them around the circle in a repeating order.
The braid forms as the strings cross. This style felt calm once I learned the movement.
19. Paracord Friendship Bracelet Pattern
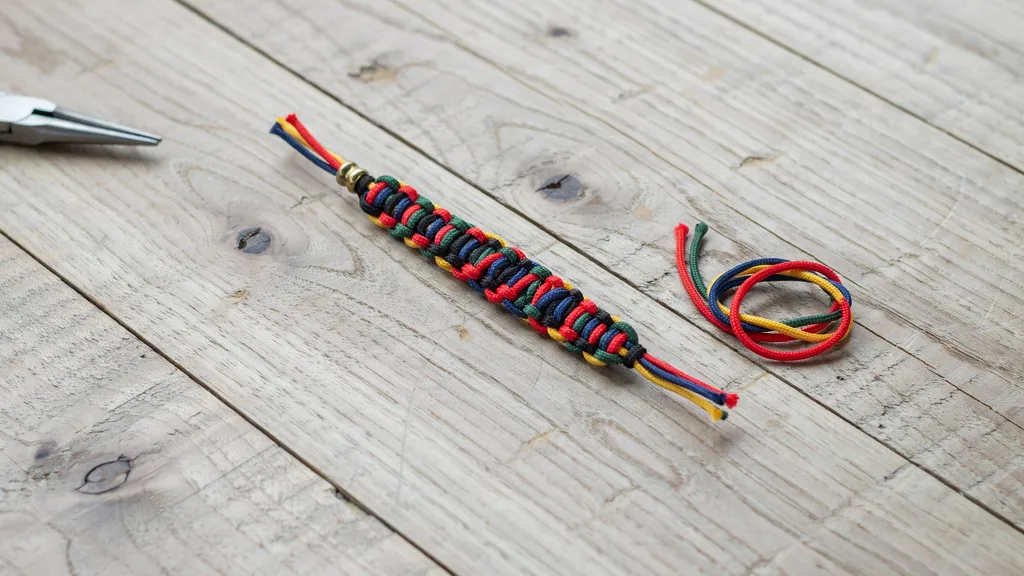
The Paracord bracelet was the strongest style I tried because the cord is thicker than embroidery floss. Fold the cord, tie repeated knots, and shape the bracelet to fit the wrist.
It works better for a sturdy everyday bracelet. I liked this one when I wanted something less soft and more practical.
How to Choose the Best Friendship Bracelet Pattern
Picking the right pattern at the beginning often made the whole process more enjoyable. Start with a pattern that matches your skill level.
Simpler designs are usually easier to follow when you’re still getting comfortable with basic knots, while detailed patterns often require more attention. Think about the time you have available.
Some bracelets can be finished in one sitting, while others may take a few sessions to complete. Colors can also change the look of a bracelet.
I like placing the strings side by side before starting so I can get a rough idea of how the finished pattern might look.
The type of friendship bracelet string you use matters, too. Different strings can affect the bracelet’s appearance, and some materials feel easier to work with than others.
Common Mistakes When Making Friendship Bracelet Patterns
Small mistakes initially changed the look of my bracelets, but they became easier to spot with practice.
- Starting with hard patterns made the process frustrating, so I moved back to simple designs until the knots felt easier.
- Pulling knots too tightly made some bracelets curl or feel stiff on the wrist.
- Cutting the strings too short made it harder to finish the bracelet neatly.
- Losing track of color order changed the pattern, especially in designs with stripes, arrows, or shapes.
- Leaving loose finishing knots made the bracelet slip, so learning how to tie a bracelet helped the ends feel more secure.
- Rushing through rows made the knots look uneven and harder to fix later.
Once I slowed down and checked each row, most bracelet patterns became easier to finish neatly.
Conclusion
Trying different types of friendship bracelets showed me how much variety a few simple strings can create. Some patterns are quick to finish, while others take a little more patience, but each one offers a different look and experience.
As I worked through different designs, I found that trying new patterns helped me become more comfortable with knots, colors, and bracelet-making in general.
Pick one pattern that catches your eye, gather your favorite colors, and give it a try. Your next favorite friendship bracelet might be the one you have not made yet.
Frequently Asked Questions
Which Friendship Bracelet Pattern Uses the Fewest Strings?
Simple braided and Candy Stripe bracelets can be made with as few as three or four strings.
Can Friendship Bracelets Be Made without Embroidery Floss?
Yes, some patterns can be made with yarn, cord, paracord, or other bracelet-making materials.
What is the Hardest Friendship Bracelet Pattern to Make?
Detailed patterns such as Diamond, Heart, and Kumihimo bracelets usually require more attention and practice.
How Do I Keep Friendship Bracelet Colors from Looking Messy?
Choosing complementary colors and keeping the string order organized can make patterns easier to see.