
I used to think friendship bracelets were easy until the strings started tangling and the knots looked uneven. It can feel a little confusing when all you have are thread and scissors, with no clear starting point.
That is why I like keeping the process simple. A few colors, basic knots, and the right string can turn into something sweet and personal. Beads can also make the bracelet feel more thoughtful without making it too hard.
Below, I will walk through how to make friendship bracelets, how to add beads, and what to fix when the bracelet does not look right.
Friendship Bracelet Knots You Need to Know
Understanding a few basic knots is all you need to start creating friendship bracelets. Patterns are built by repeating these knots in different sequences.
| Knot Name | Direction | Common Use / Pattern |
|---|---|---|
| Forward Knot | Left → Right | Creates diagonal lines, basic stripe patterns |
| Backward Knot | Right → Left | Shapes, arrows, color changes |
| Forward-Backward Knot | Left → Right, then Right → Left | Color transitions, pattern shaping |
| Backward-Forward Knot | Right → Left, then Left → Right | Pattern shaping, chevrons, curves |
Once you understand these knots, learning to tie friendship bracelets becomes much easier, and you can start experimenting with colors and beads.
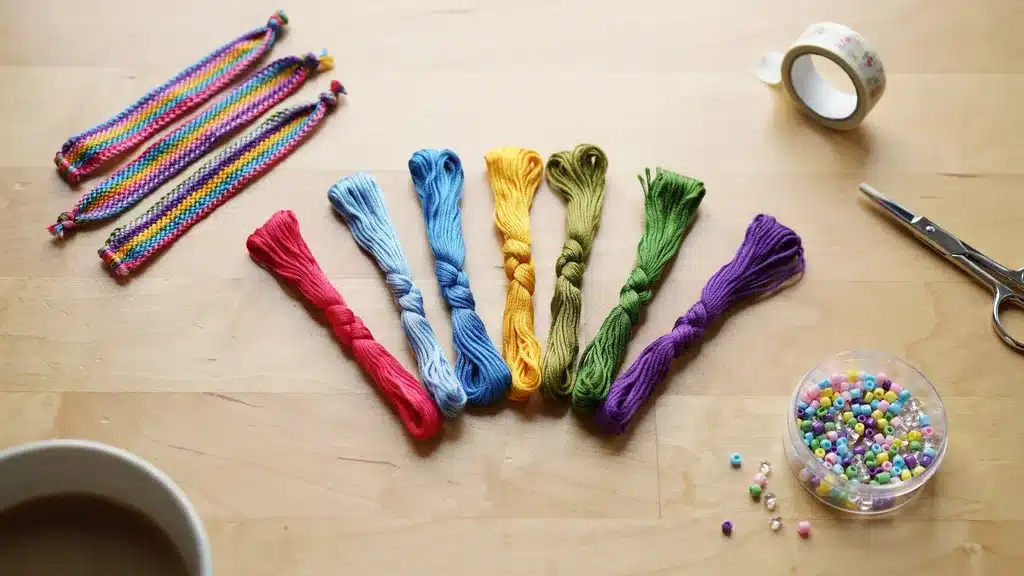
What You Need to Make Friendship Bracelets
|
How to Make a Basic Friendship Bracelet
I start with a simple stripe pattern because it is easy to learn and perfect for beginners.
Step 1: Choose Your Colors
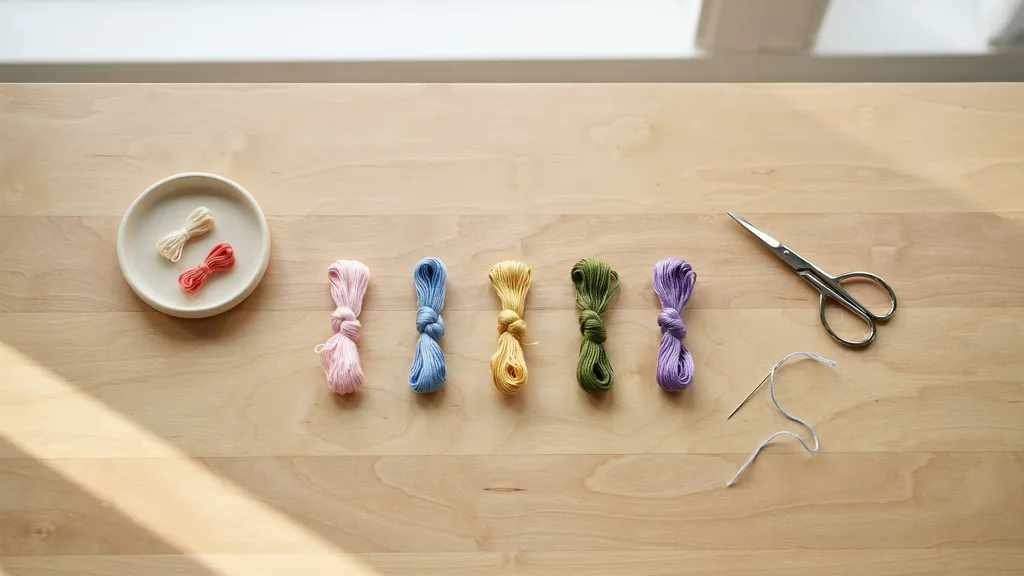
I begin by selecting four to six embroidery floss colors that look good together. The combination can be bright, pastel, or based on a favorite theme.
I also think about the order of the colors because it affects the final appearance of the bracelet and determines how the stripes will be displayed.
Step 2: Cut and Arrange the Strings
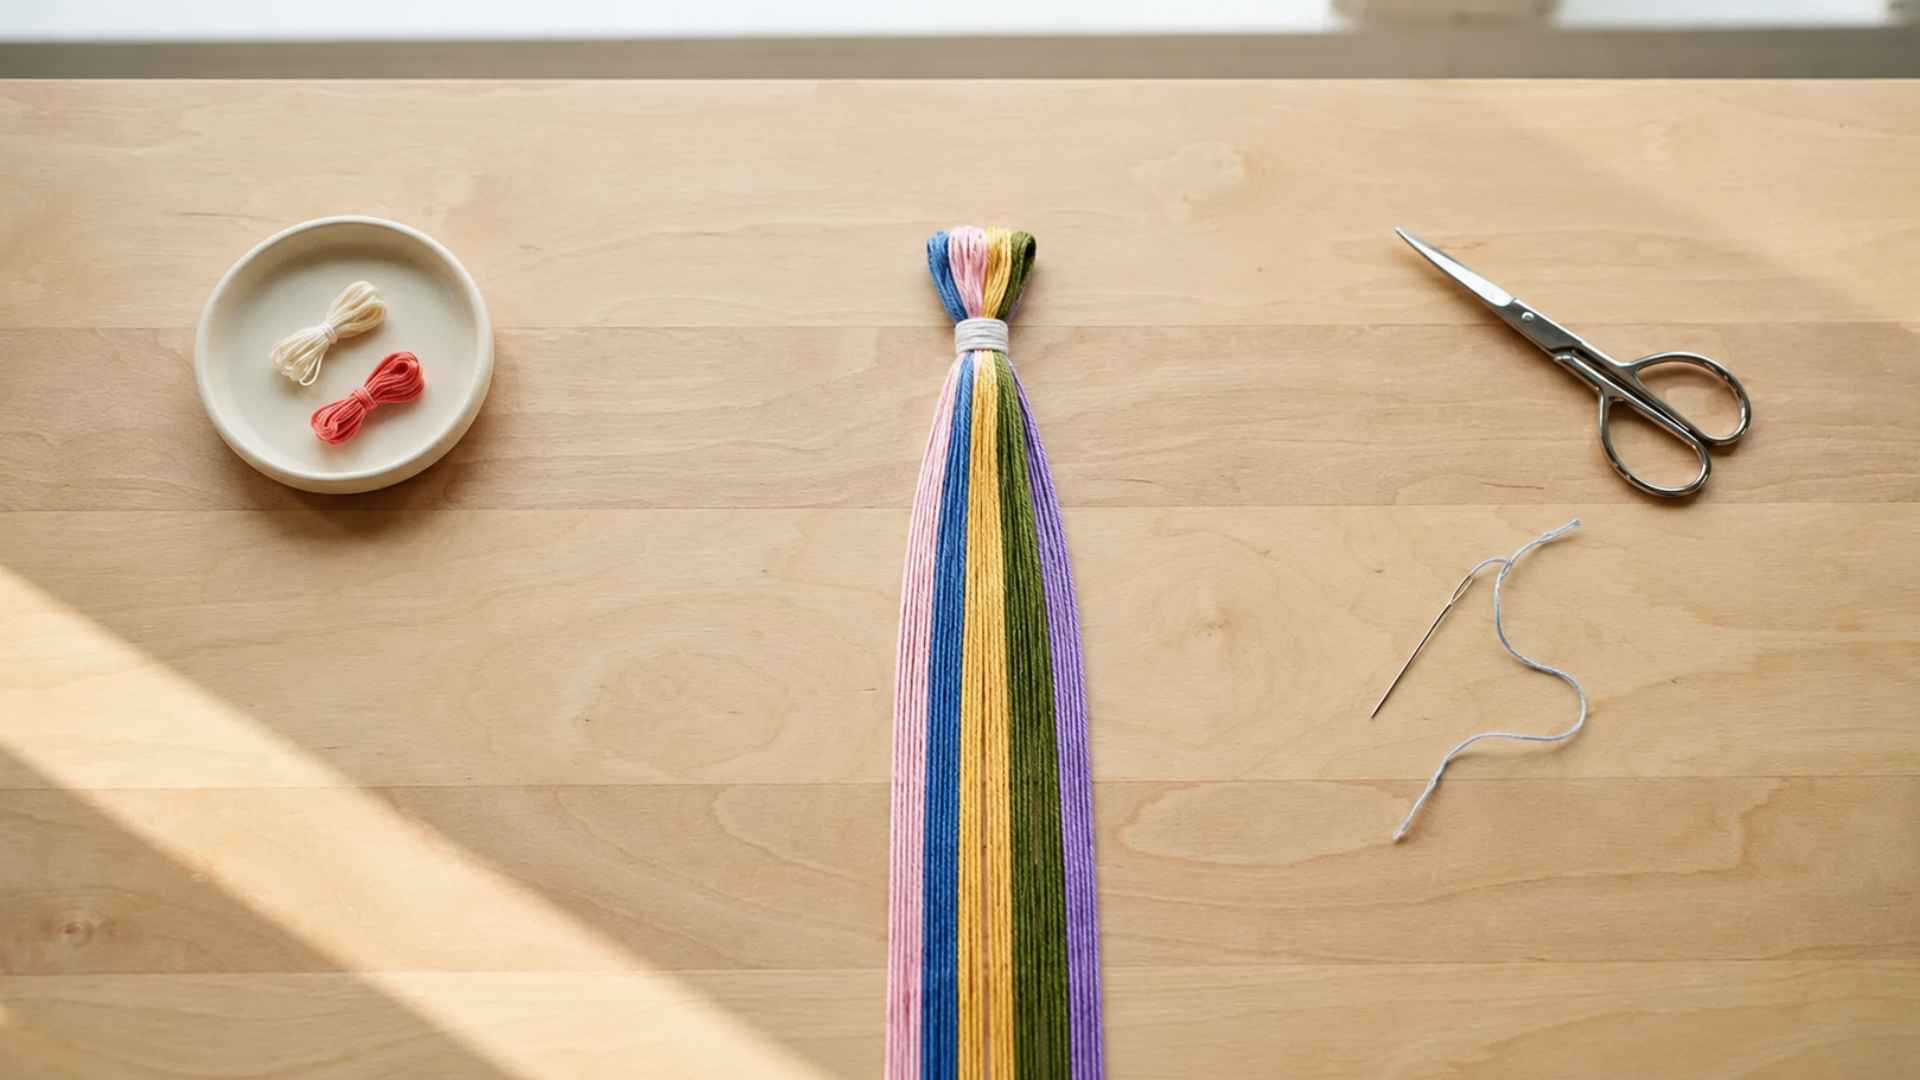
I cut each strand to approximately 36 inches. A useful formula is to measure the wearer’s wrist, then multiply that measurement by 5 or 6. That gives you enough length to knot comfortably and still have leftover for tying.
Running short midway through is the most common beginner mistake, so cutting a little extra is always the safer call. After gathering all the strands together, I tie a knot near one end. Then I arrange the colors in the sequence I want so the pattern starts cleanly.
Step 3: Secure the Bracelet
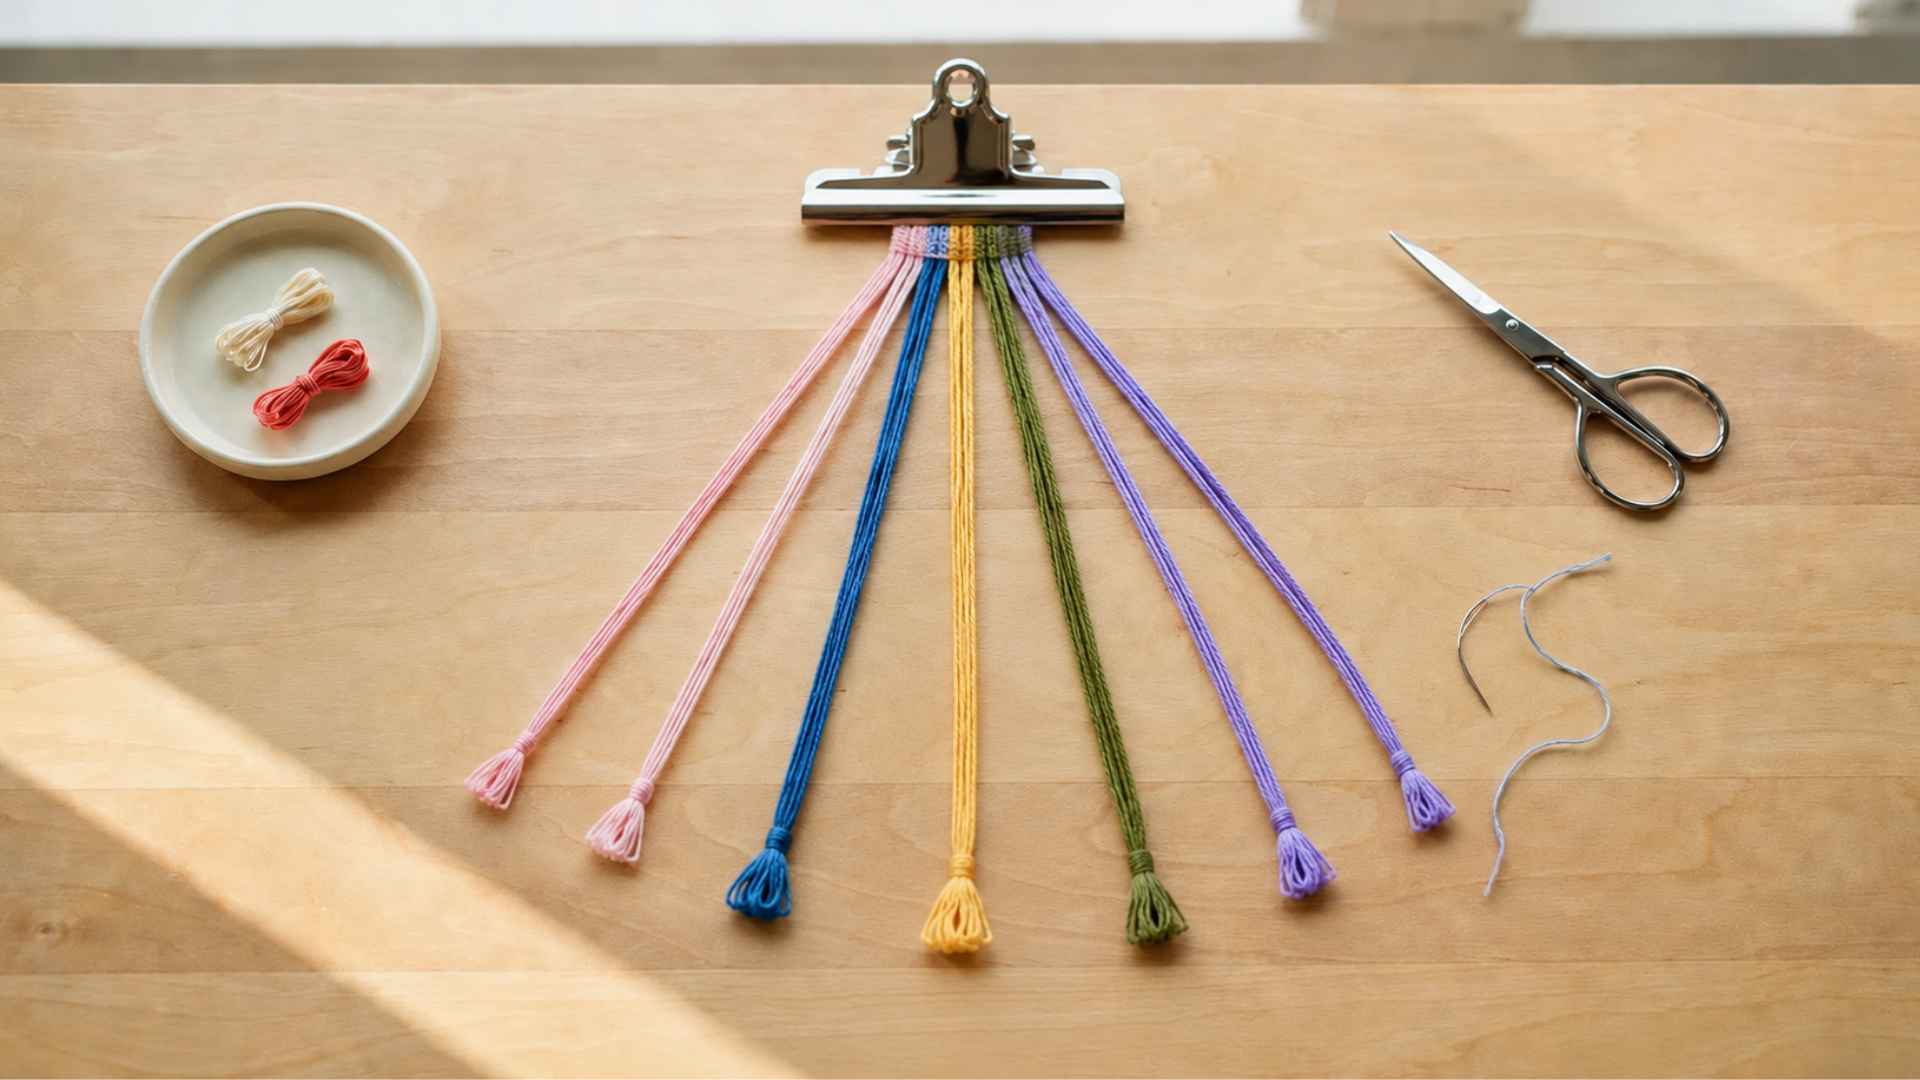
I secure the knotted end of the bracelet before I begin knotting. Tape works well on a flat surface, while a clipboard or safety pin can also keep the strands steady.
Holding the bracelet firmly in place prevents slipping and allows me to create neat, consistent knots more easily.
Step 4: Start Knotting
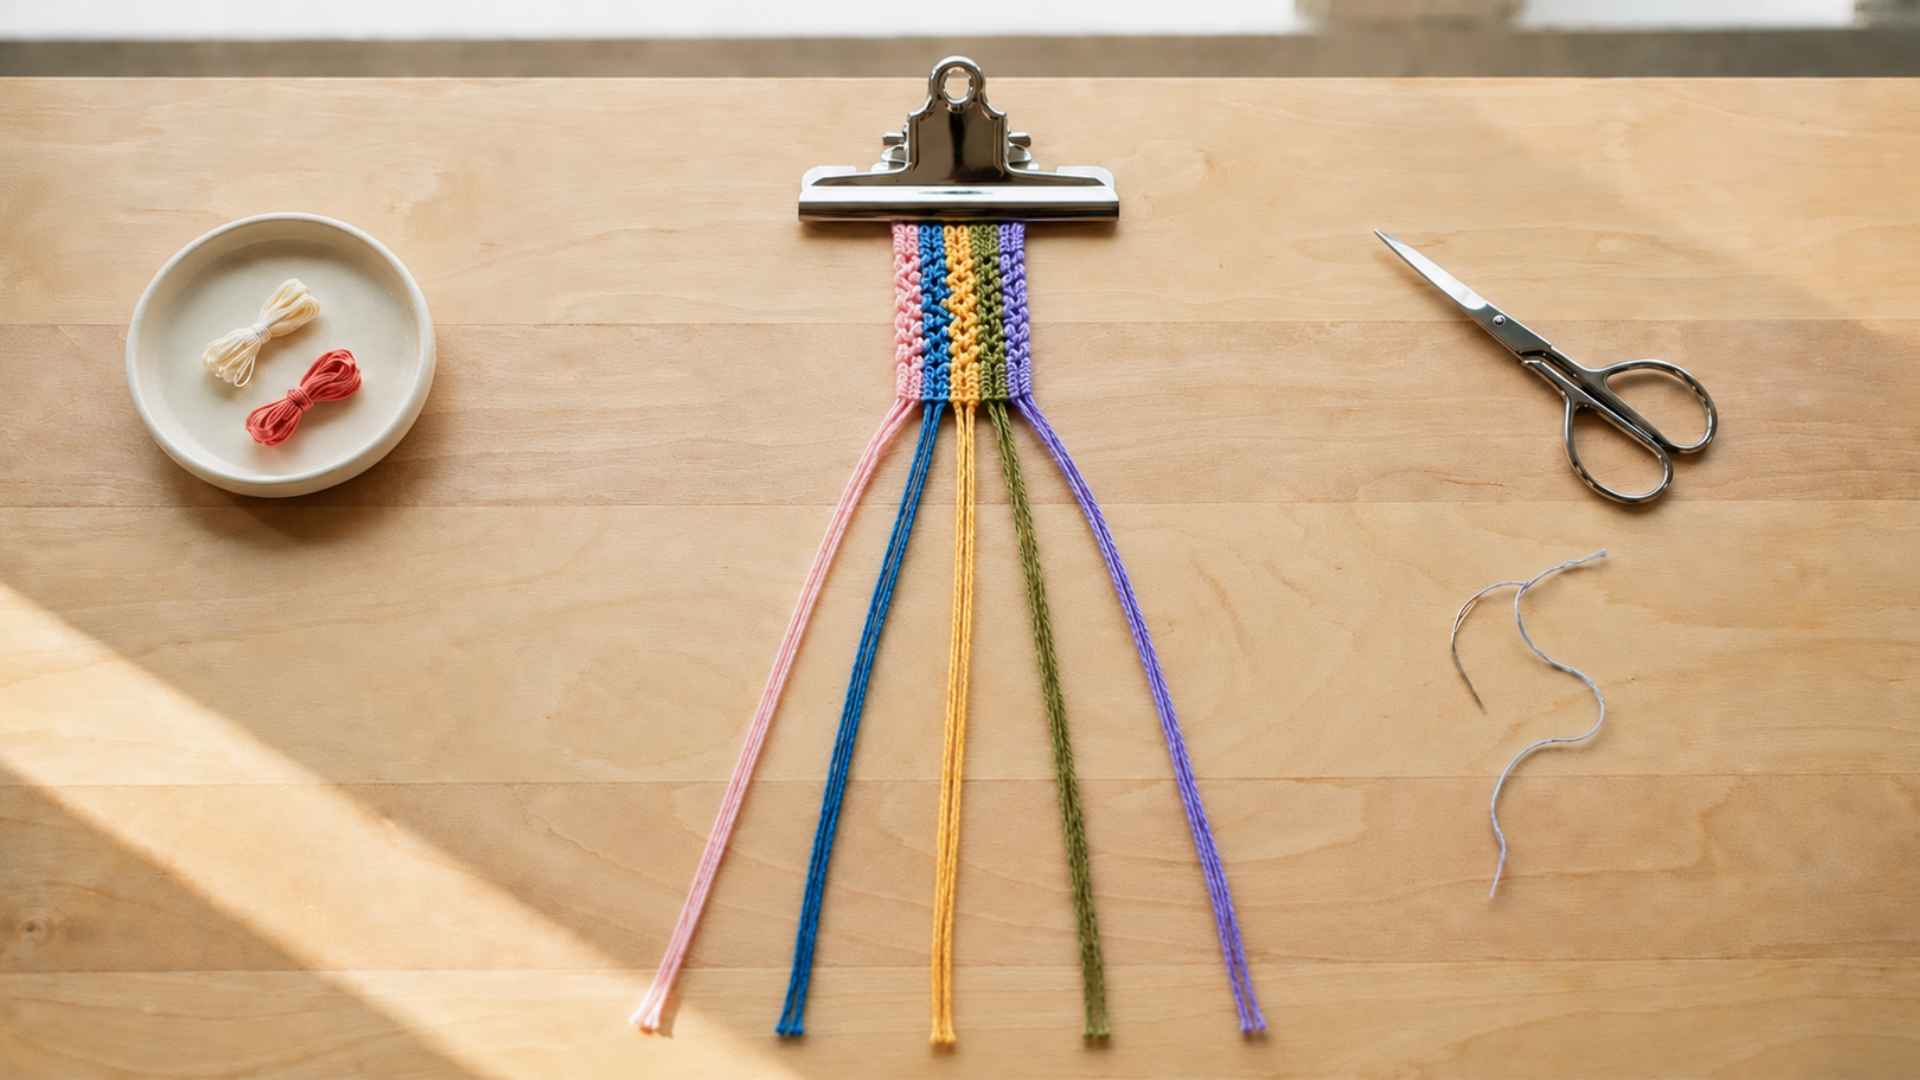
I take the string positioned on the far left and use it to tie two forward knots around the string next to it. Then I continue the same process across the row.
By repeating these knots carefully and evenly, I begin to form the recognizable pattern that defines the bracelet’s design.
Step 5: Continue the Pattern

When the working string reaches the far right side, I switch to the new string on the far left and repeat the knotting process.
Continuing this sequence row after row creates a clean diagonal stripe pattern. Consistent tension and careful knot placement help the bracelet maintain a neat appearance.
Step 6: Finish the Bracelet
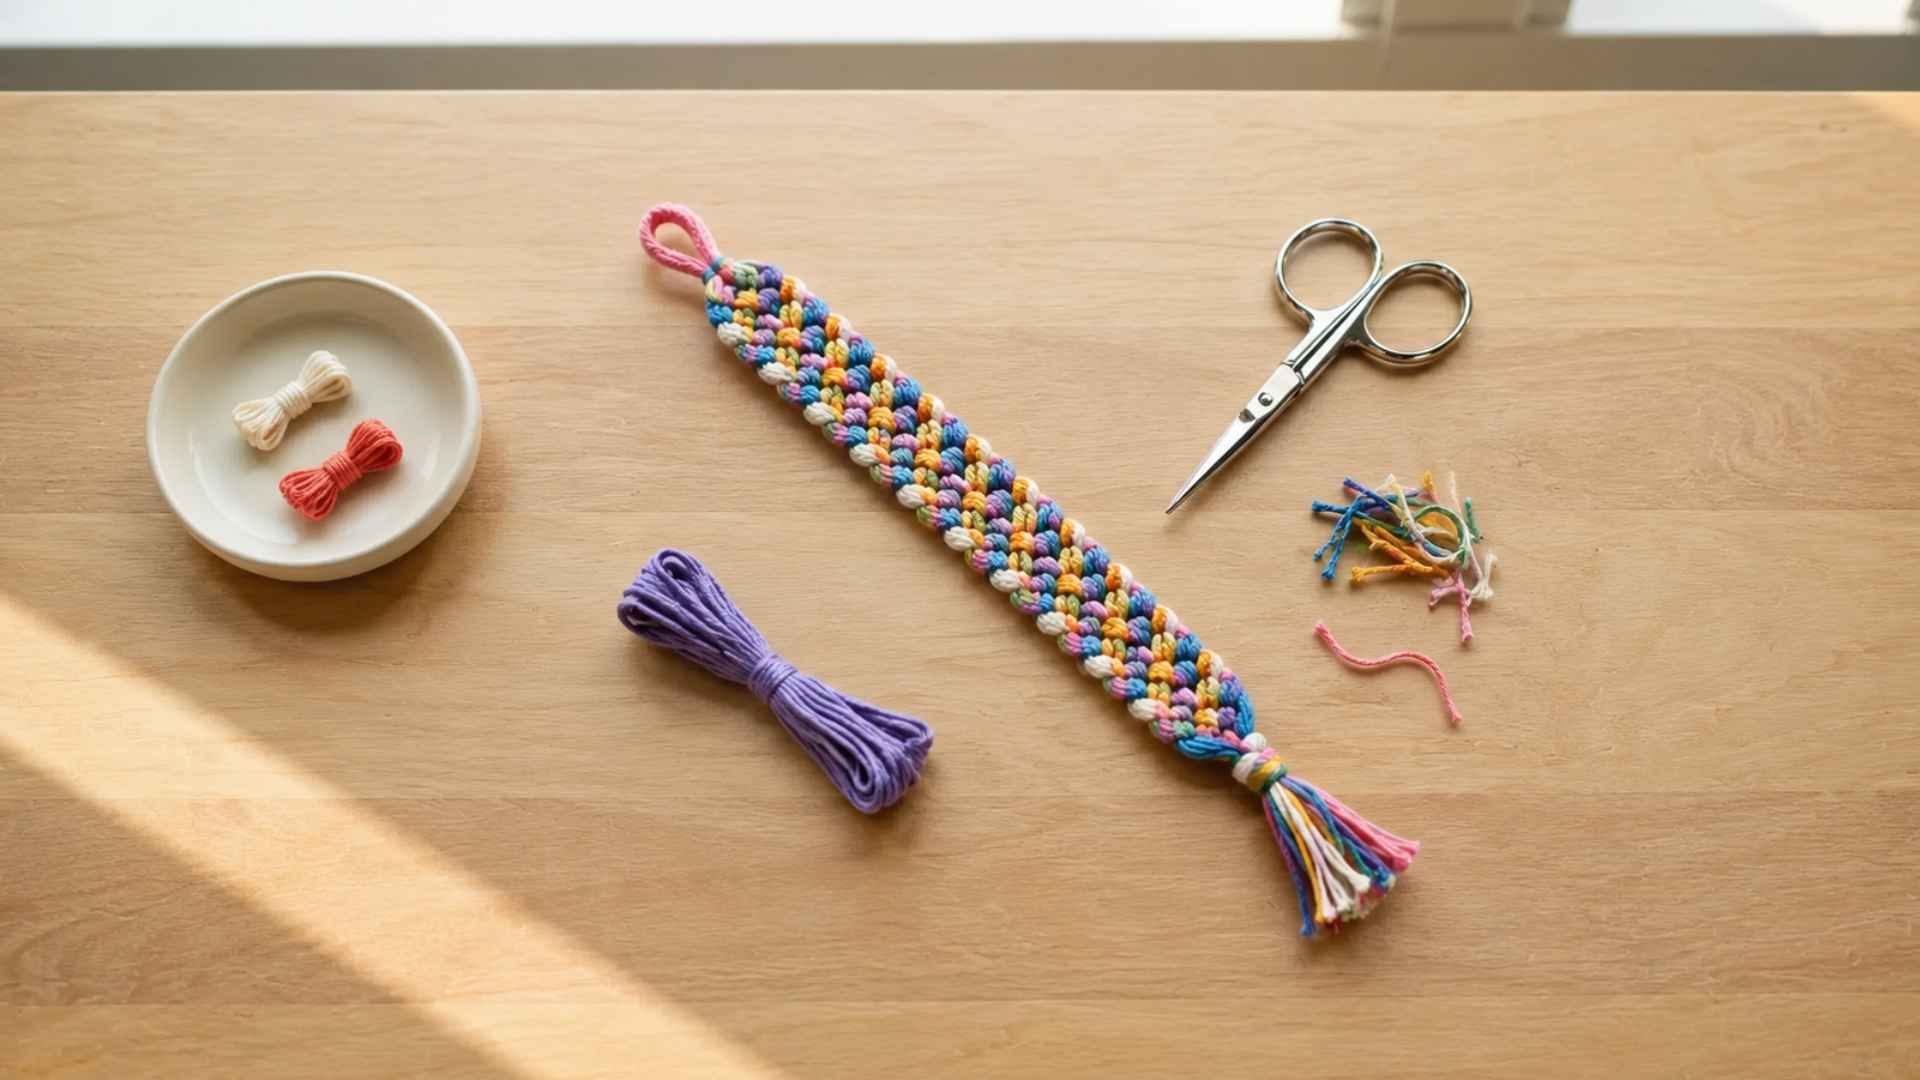
Once the bracelet reaches the desired length, I tie a secure knot at the end to prevent it from unraveling.
I then braid, twist, or tie the remaining strands to secure the fastening. This final step ensures the bracelet stays secure and is comfortable to wear regularly.
How to Make a Friendship Bracelet With Beads
Adding beads to a friendship bracelet string is an easy way to create a more colorful, personalized design.
- Gather embroidery floss or elastic cord, along with your chosen beads.
- Ensure the bead holes are large enough for the string.
- Start the bracelet by knotting a few rows if using embroidery floss.
- Slide a bead onto the working string at the desired position.
- Continue knotting, adding more beads at intervals.
- Arrange letter beads beforehand if spelling a name or word.
- For a stretch bracelet, thread all the beads onto the elastic cord.
- Check the fit and secure the ends with a strong knot.
A few beads can add personality without making the design feel busy. I usually keep the placement simple for a cleaner look.
Watch a Friendship Bracelet Tutorial
Special thanks to Masha Knots for creating a beginner-friendly tutorial that makes each step easy to follow.
If you prefer learning by watching, this video shows the knotting process from start to finish. I found it helpful to see how the strings move and how the pattern comes together in real time.
Easy Friendship Bracelet Patterns to Try Next
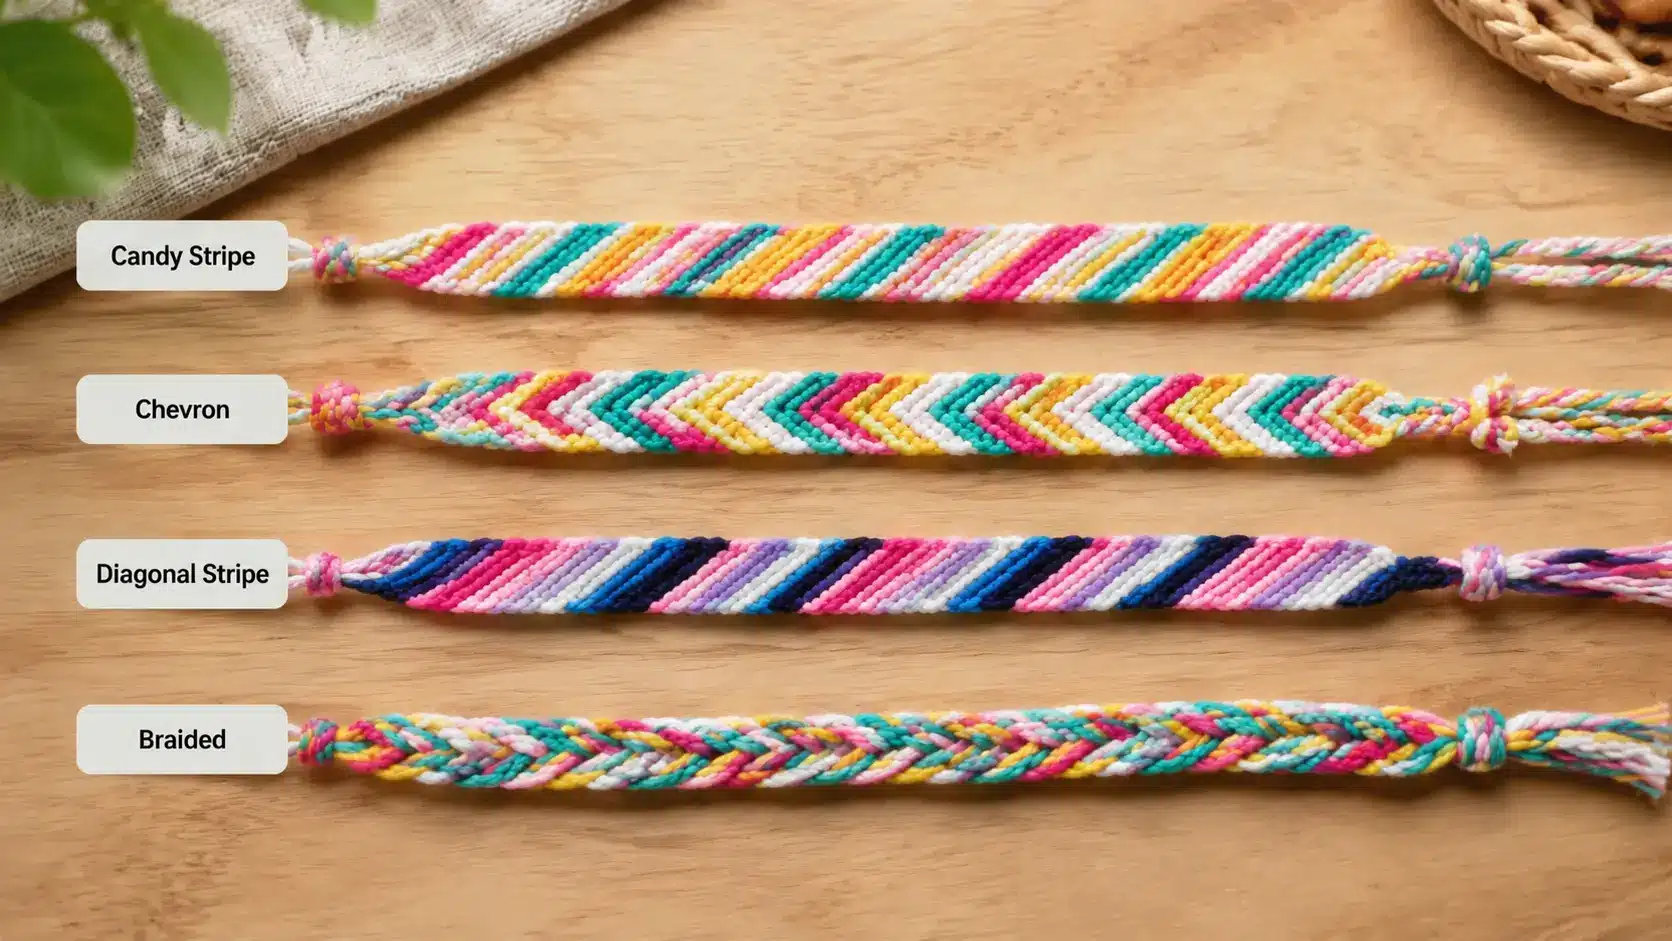
Once I feel comfortable with the basic stripe bracelet, I like trying small pattern changes. A candy-stripe bracelet is usually the easiest next step because it uses the same knot throughout.
A chevron bracelet is another good option. It creates a V-shaped pattern and looks more detailed, but it still uses basic knots. A diagonal stripe bracelet is also simple and works well when I want the colors to stand out clearly.
For something quicker, a braided bracelet is a good choice because it does not need the same knotting steps.
The chevron pattern is a good choice after the stripe because it introduces the backward knot in a visible, predictable way. The V-shape makes it easier to see whether your knot tension is consistent across both sides.
Common Friendship Bracelet Mistakes
Small mistakes are common when making friendship bracelets. Most are easy to fix with a few simple adjustments.
- Uneven rows can happen when the knot tension keeps changing.
- Curling usually means the knots are being pulled too tightly.
- Short strands can make the bracelet hard to finish.
- Mixed-up string order can change the pattern.
- Loose ends may come undone without a firm knot.
- Skipping knots can create gaps and make the pattern look uneven.
A little extra attention during each step can help the bracelet look cleaner and make the pattern easier to follow.
Conclusion
Learning how to make friendship bracelets does not have to feel complicated. Once I understood the basic knots, choosing colors, adding beads, and trying new patterns became much easier.
It is a simple craft that allows plenty of room for creativity while using just a few supplies. The best way to improve is to start with a basic design and practice regularly.
Each bracelet helps build confidence and makes the next one easier to create. Pick your favorite colors, gather your supplies, and make your first friendship bracelet today.
Frequently Asked Questions
How Many Strings Do I Need for a Friendship Bracelet?
Most beginner friendship bracelets use four to six strands, though wider patterns may need more.
Can I Make a Friendship Bracelet without Embroidery Floss?
Yes, cotton thread, yarn, and other bracelet strings can work depending on the design.
What Is the Best Length for Friendship Bracelet Strings?
Around 30 inches per strand is a common starting point for many basic patterns.
How Long Does It Take to Make a Friendship Bracelet?
A simple bracelet can take less than an hour, while larger patterns may take several hours.