After eighteen years of planning weddings, holiday galas, and private celebrations, I can tell you this: nothing sets the tone for an event quite like a wreath on the door.
Long before I started sourcing them from florists, I learned to make them myself. It was faster, more affordable, and honestly more satisfying than anything I could order.
Most people assume wreath-making is a skill reserved for professional crafters or florists. It is not.
To simplify your trouble of how to make a wreath by yourself, I have covered everything. With the right supplies, a basic form, and a clear process, anyone can make a beautiful wreath from scratch.
I have also included a quick section on how to make mesh wreaths, which have become one of the most requested styles among my clients for front doors and seasonal decorating.
Basic Wreath-Making Supplies
|
How to Make a Wreath Step by Step
Making a wreath from scratch is far simpler than it looks; all you need is a wreath form, a roll of floral wire, and a handful of greenery to get started.
Step 1: Gather Your Materials
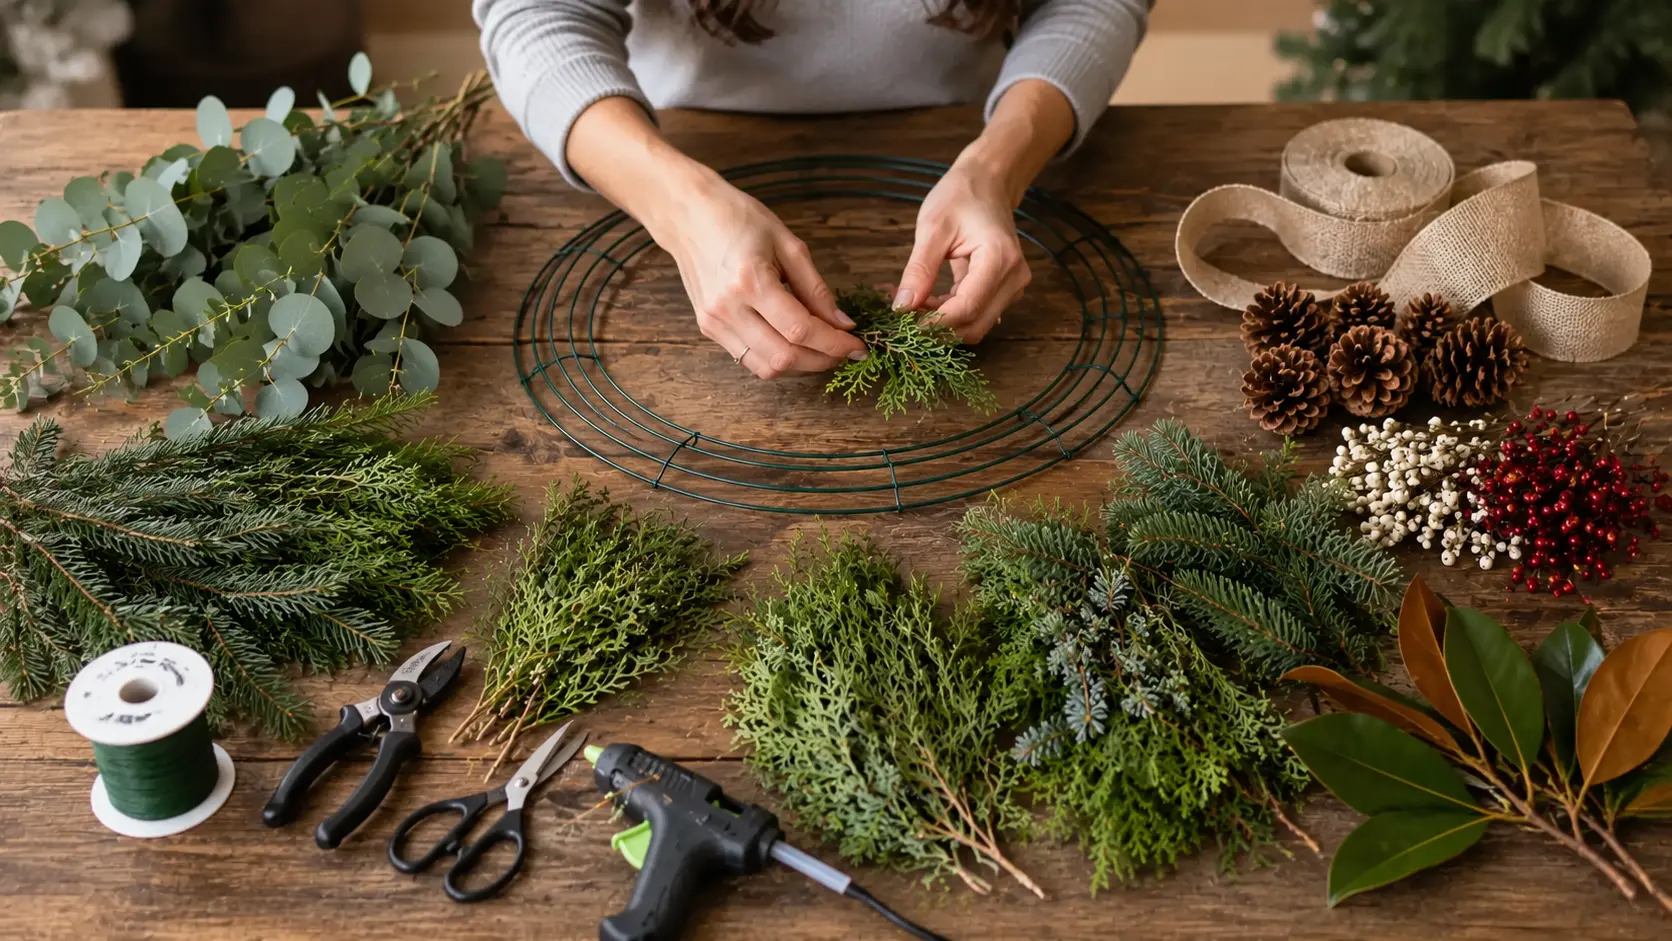
Before touching your wreath form, get everything sorted and within reach. Clear a sizeable workspace, gather your tools, and make sure your materials are in order.
Lay out your greenery, wire, scissors, glue gun, ribbon, and any decorative elements. Pre-cut your greenery into manageable segments.
For a structured, symmetrical wreath, clip branches into 4- to 6-inch segments. For a wilder, more natural look, vary them between 4 and 8 inches.
Mindy’s Tip: Before any event installation, I lay every single element out on a table in the order I plan to use it. Wreath-making works the same way. Stopping mid-build to search for scissors or more wire breaks your flow and often results in uneven spacing.
Step 2: Prepare Your Wreath Base
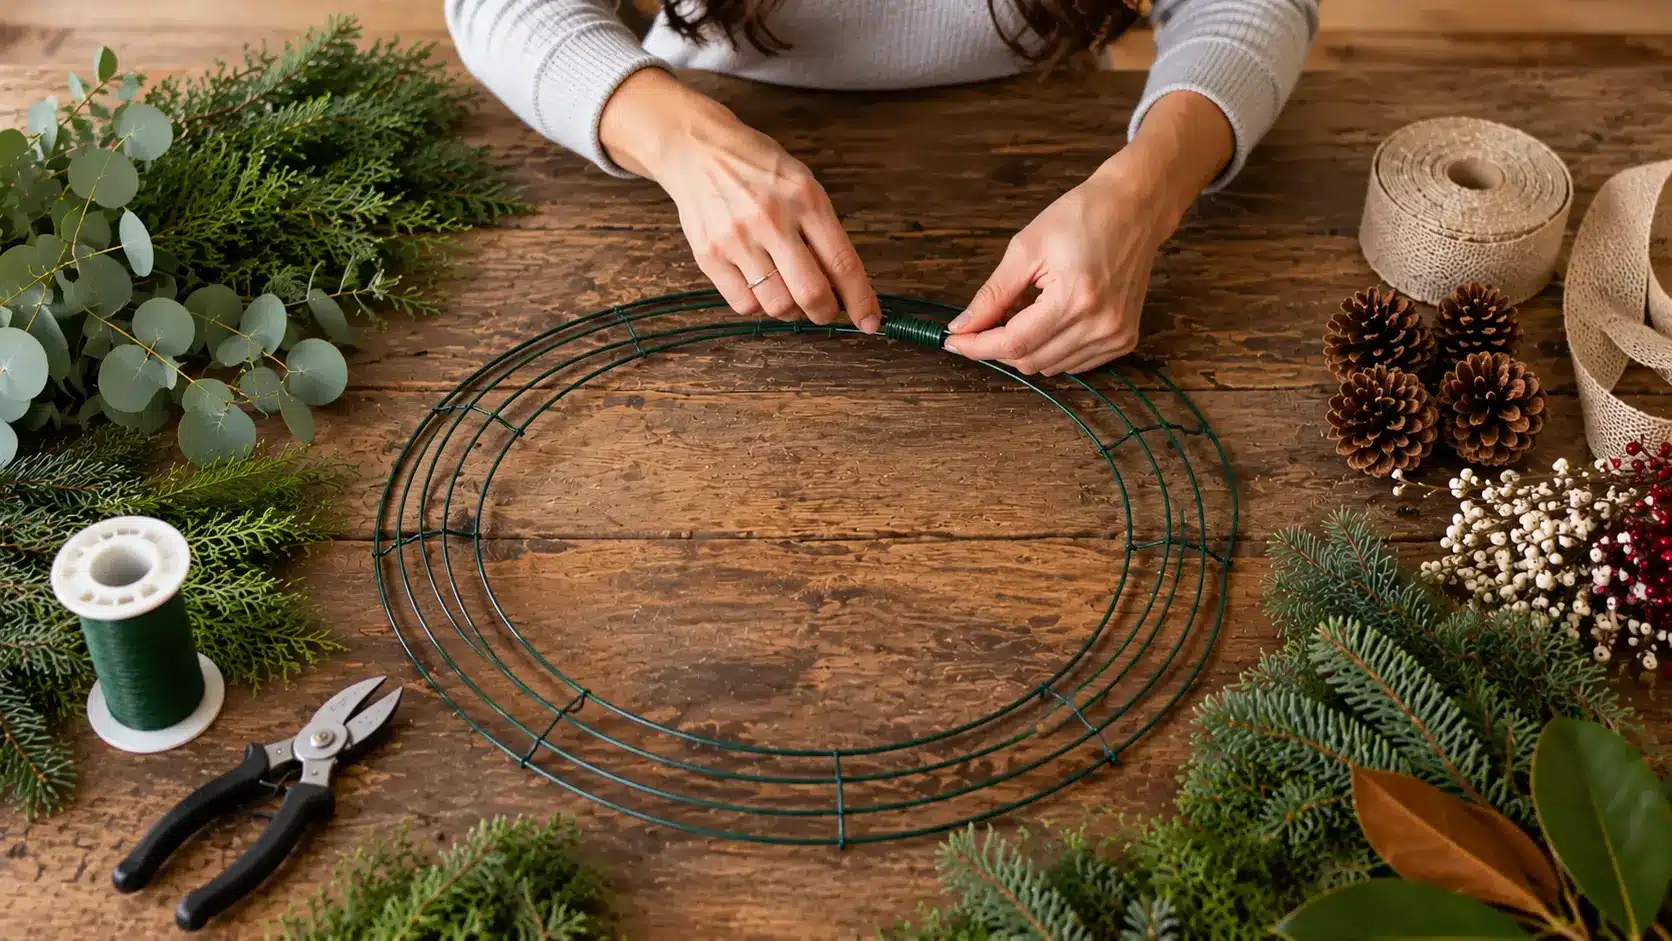
If you are using a wire frame, secure your wire to the form before adding any greenery by wrapping it around the frame a couple of times first.
This anchors everything that follows. For a grapevine base, you can skip this step; the vine’s texture holds materials without a preliminary anchor.
Mindy’s Tip: When wrapping a wire frame for an event entrance wreath, I use a few extra rounds of wire at the top where the hanging point will be. That area takes the most stress and it is worth reinforcing before you build the rest.
Step 3: Attach Greenery Around the Frame
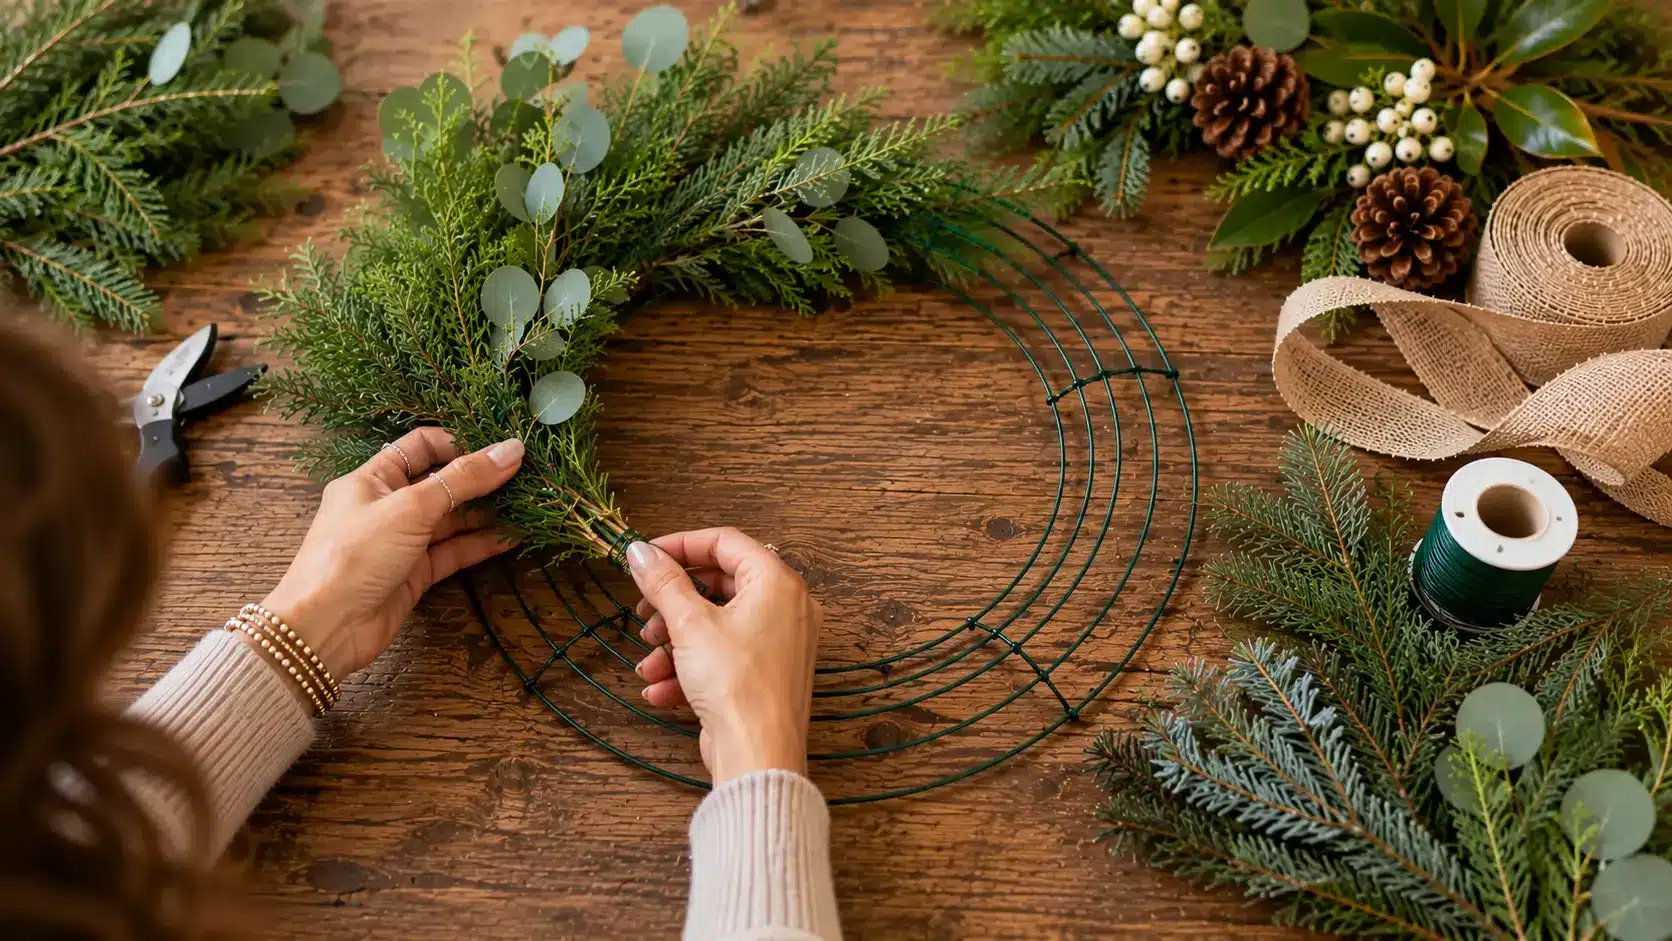
This step builds the foundation of your wreath. Lay your first bundle onto the wreath form and wrap the wire around the base of the bundle several times to secure it tightly.
Continue adding bundles, keeping them roughly the same size to create a uniform result. Each new bundle should overlap the previous one to cover the stems.
Work in one direction, counter-clockwise, is standard, and keep your spacing consistent as you go.
Mindy’s Tip: When I create wreaths for event entrances, I always step back several feet after each layer. Small gaps only become noticeable from a distance, and catching them early is far easier than trying to fill them at the end.
Step 4: Fill Empty Spaces for a Balanced Look
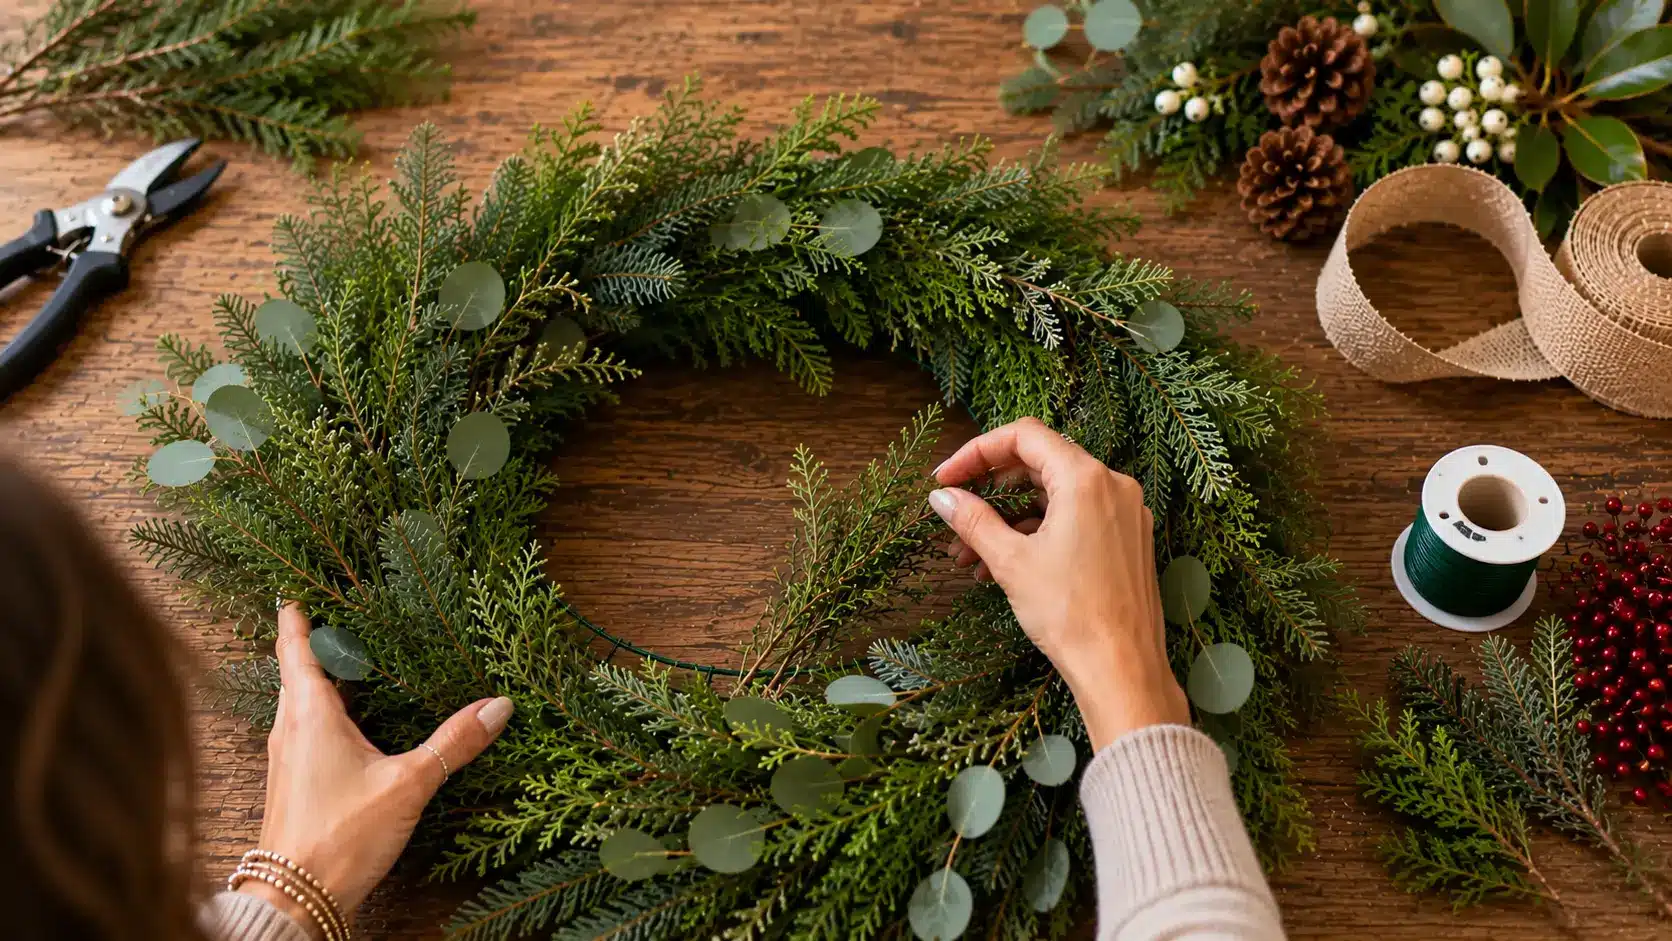
Once you have gone around the full frame with your base layer, hold the wreath up and examine it carefully.
Check for any gaps or thin areas, then turn the wreath around and look from the back as well.
Fill any gaps by tucking in smaller bundles or individual stems. Build this second layer in the same direction as the first.
Mindy’s Tip: I photograph my wreath against a plain wall at this stage. Something about looking at it through a lens rather than with your eyes makes gaps and lopsided areas immediately obvious. I do this at every stage of event styling, and it works just as well for wreaths.
Step 5: Add Decorative Elements
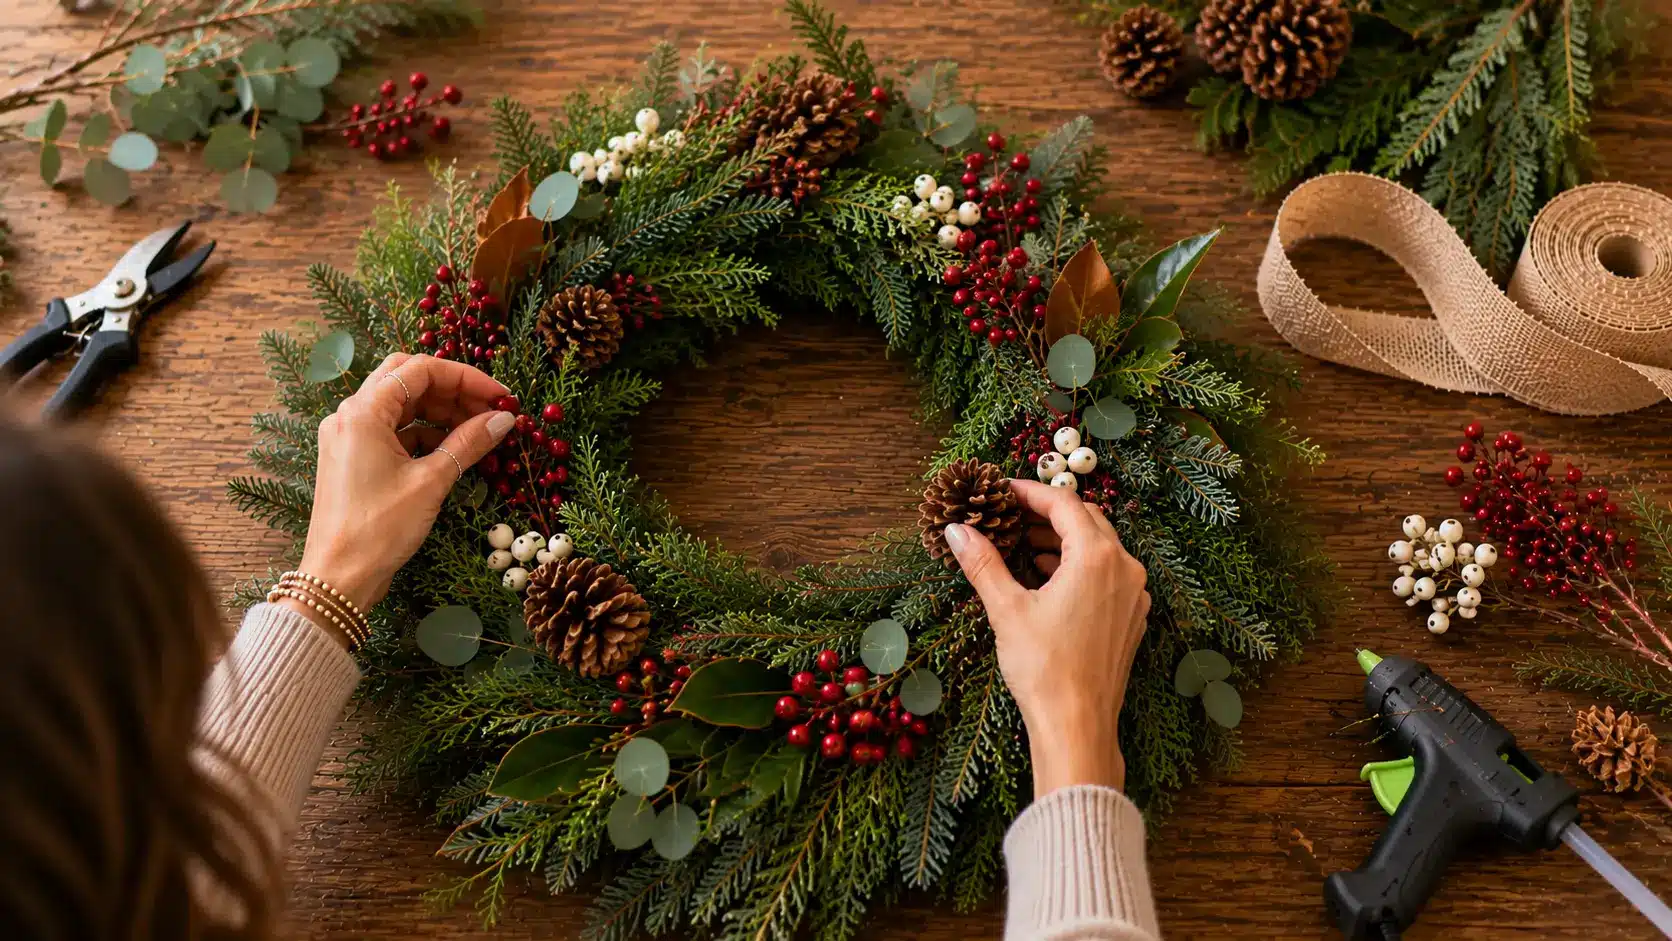
With your greenery base fully in place, now comes the part most people enjoy most. Add berries, pinecones, dried flowers, ornaments, or any seasonal picks.
Berries can dry up and fall off quickly on fresh wreaths, so faux berries are a practical choice; they can also be reused season after season.
Space your accents evenly around the wreath before securing any of them. Lay them on the surface first, step back, and adjust placement until the balance feels right.
Mindy’s Tip: I always work with an odd number of focal accents, three or five looks more natural than two or four. This is a classic design principle I apply everywhere from table centrepieces to door wreaths.
Step 6: Secure Everything in Place
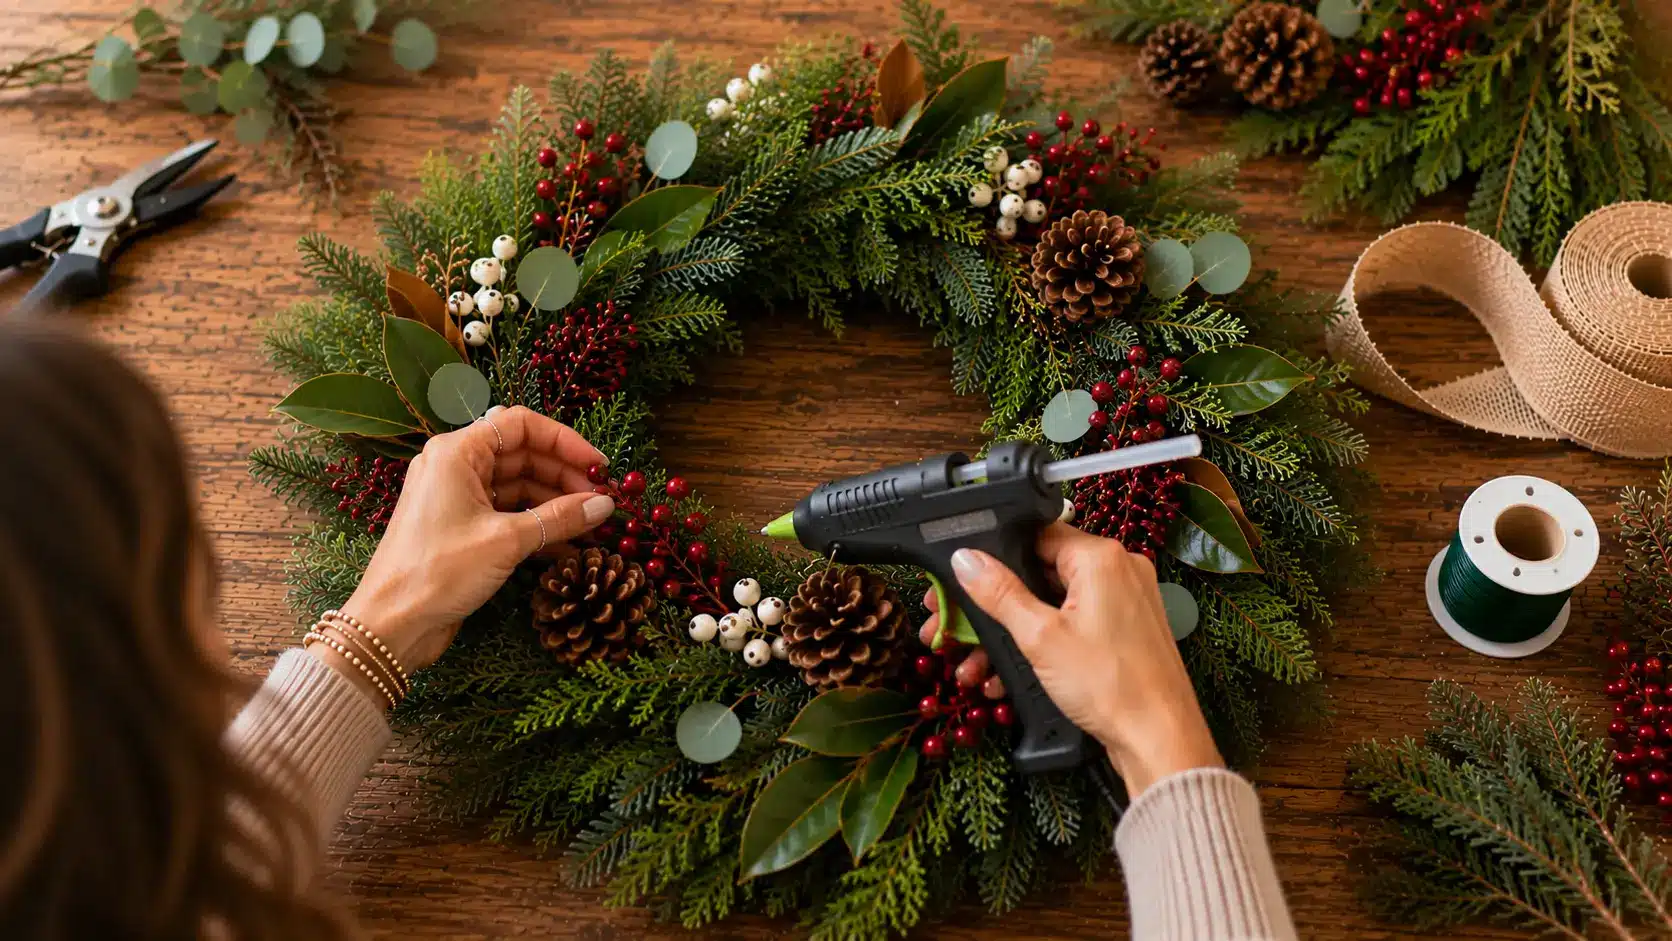
Use your hot glue gun or floral wire to permanently attach all decorative elements.
For heavier items like pinecones or signs, wire them directly to the frame rather than relying on glue alone. Use a staple gun to secure signs or heavier embellishments.
Tuck any exposed wire ends into the back of the wreath so they don’t catch on anything or create a safety hazard.
Mindy’s Tip: For outdoor wreaths, especially ones that will hang through rain or wind, I double-secure every decorative element with both glue and wire. Glue can fail in heat or wet conditions. Wire holds.
Step 7: Attach a Hanging Loop and Ribbon
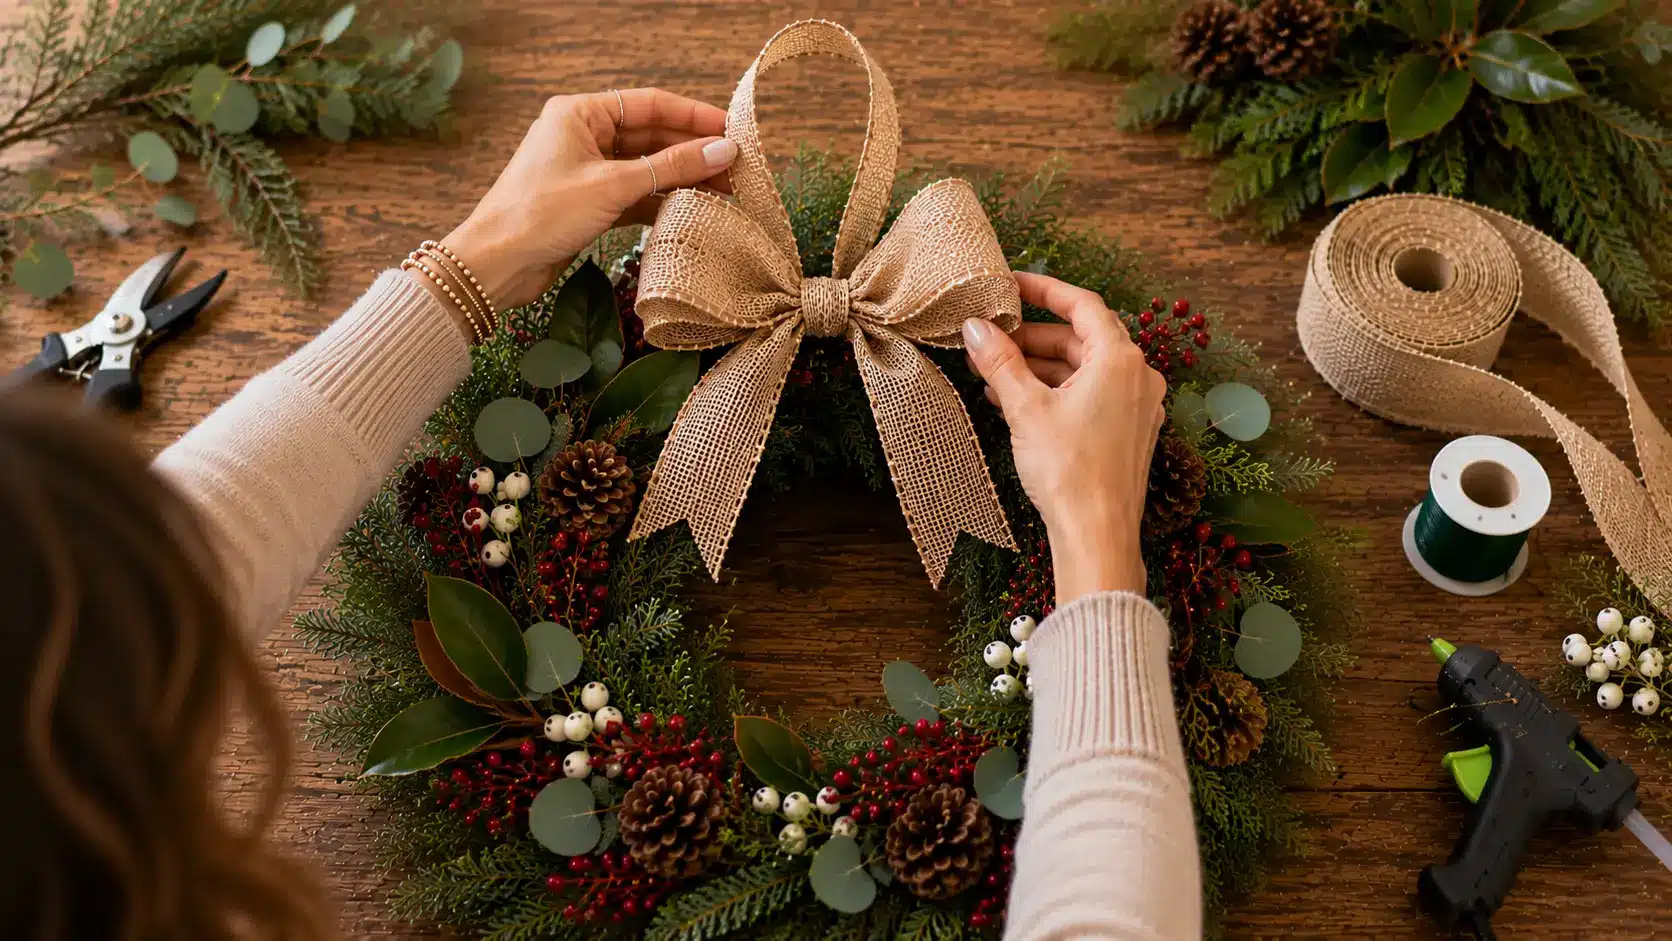
To hang your wreath, create a floral wire loop and secure it to the back of the frame. You can also use ribbon to create a loop.
For the ribbon, create a bow or a double loop at the top or bottom of the wreath. Wired ribbon holds its shape best and stays full even in outdoor conditions.
Mindy’s Tip: For large event wreaths, I use a sturdy wreath hanger rated for the weight rather than a nail or hook. An 18-inch wreath with fresh greenery is heavier than it looks, and the last thing you want is it falling during an event.
Common Wreath Styles You Can Make
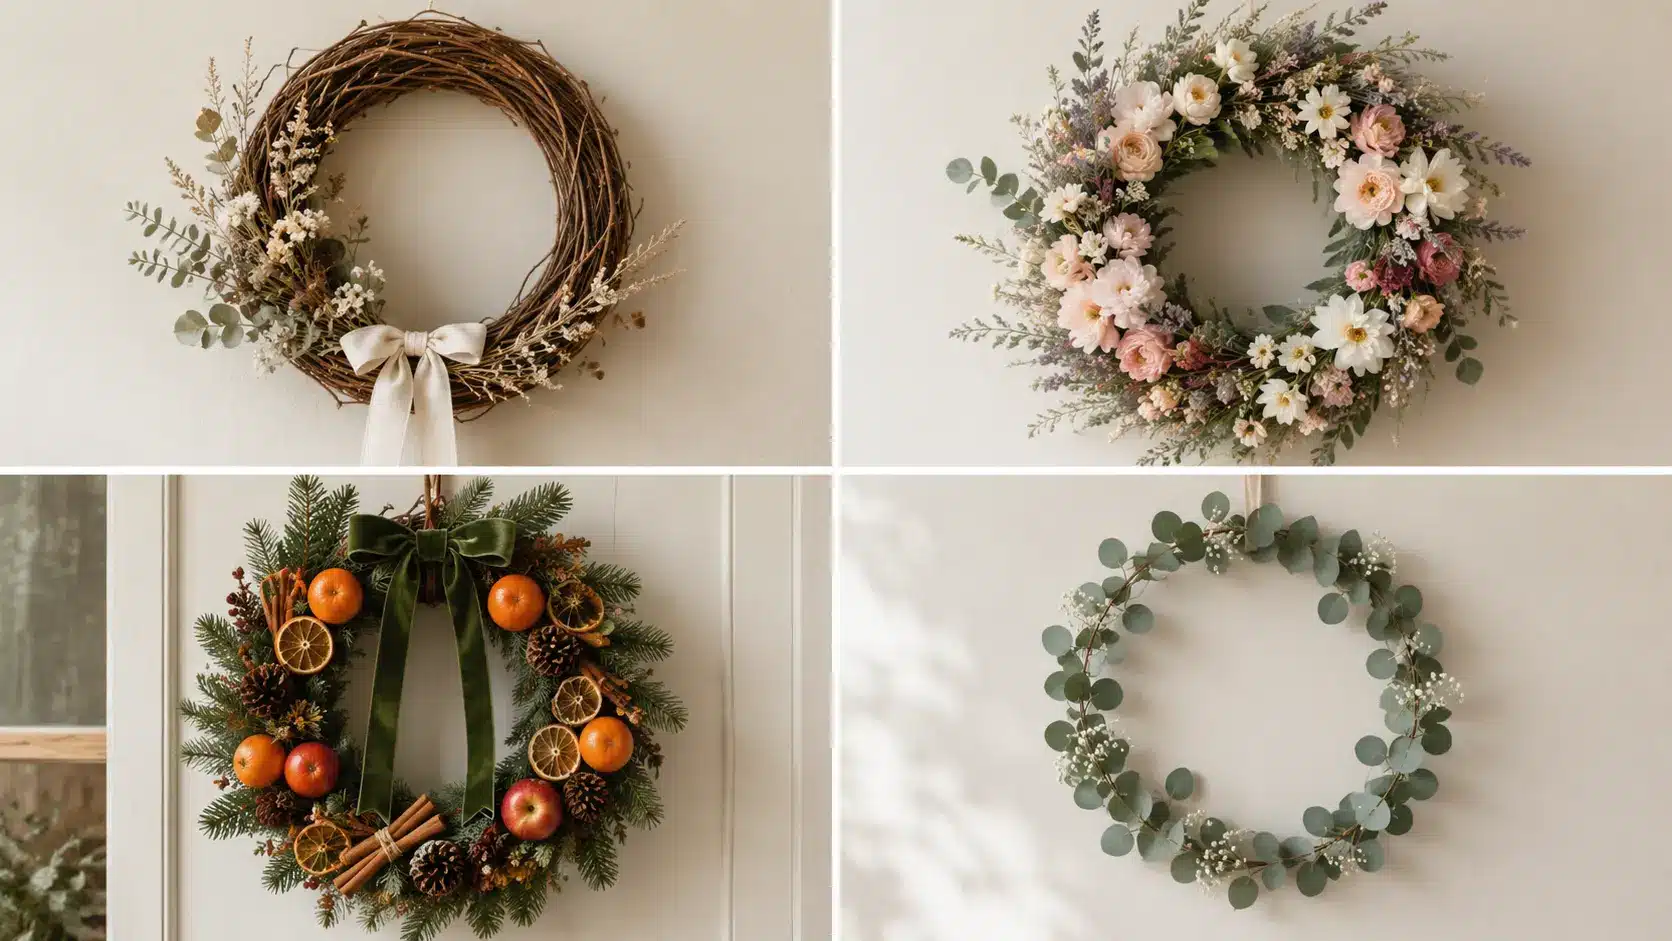
Once you know the basic technique, the styles you can create are surprisingly varied, from full, fresh-greenery wreaths to clean, minimalist designs that suit a modern front door year-round.
Grapevine Wreath
A warm, textured wreath that works year-round. The vine base gives natural depth without adding many materials. Add dried flowers, ribbon, or a single botanical stem for a simple, elegant look.
Floral Wreath
A DIY flower wreath can be made with faux or fresh flowers on a foam or grapevine base. Spring flowers, dried peonies, lavender, and wildflowers all work well. This style photographs beautifully and is a favorite for weddings and celebrations.
Seasonal Wreath
Designed to rotate with the calendar. Apples wired to an autumn wreath, clementines and cinnamon sticks, wired pinecones, and ribbon tied to a holiday wreath are just a few examples of easy seasonal elements to try.
Minimalist Wreath
Clean lines, little or no greenery, and a single statement element. An embroidery hoop with dried grasses, or a wire frame with just eucalyptus and a linen bow, fits modern and Scandinavian interiors especially well.
Watch: How to Make a Wreath Step-by-Step Video Tutorial
A special thanks to Good Housekeeping UK for this wonderful video tutorial.
If you are someone who learns best through visual demonstrations, watching a wreath being built in real time is one of the fastest ways to build confidence before you start.
The video walks through the full process step by step, showing exactly how greenery is layered, how the wire is handled, and how the finished wreath comes together from start to finish.
Pair it with the written steps above for the clearest picture of the whole process.
How to Make Mesh Wreaths for Beginners

A mesh wreath is made with deco mesh, a wide, pliable, ribbon-like material that holds its shape after folding and bunching.
Deco mesh is a wide ribbon that is pliable yet holds its shape, and it is available at most large craft stores and on Amazon.
It creates a full, textured wreath with minimal effort, which is why it has become one of the most popular front-door styles in recent years.
Mesh wreaths work particularly well for seasonal decorating (Christmas, fall, patriotic, and spring themes all translate easily), for large statement wreaths on wide doors, and for crafters who want a high-impact result without working with fresh or faux florals.
Mesh wreaths often sell for $60–$80 at craft fairs and on Etsy, but you can make one for a fraction of that price.
Supplies Needed for a Mesh Wreath
|
Note on wreath forms: The work wreath form comes with pipe cleaners already attached and has both an inner and outer layer, unlike the standard flat wire form. This makes it easier to build a fuller, more layered mesh wreath.
My Favorite Tips for First-Time Wreath Makers
After making wreaths for professional events and personal celebrations for well over a decade, here is what I wish someone had told me at the start.
Start with fewer decorations than you think you need. You can always add more, but removing things once they’re glued or wired in often damages what surrounds them.
Work in layers. Build your greenery base fully before adding any decorations. Doing everything at once leads to a crowded, uneven result.
Photograph your wreath at every stage. A phone camera reveals gaps and color imbalances that are easy to miss with the naked eye.
Build around one focal point. Decide what the hero element is, a bow, a flower, a sign, and let everything else support it.
Save leftover ribbon for seasonal updates. A fresh ribbon swap and a few new picks can turn an autumn wreath into a Christmas one in minutes.
Do not compare your first wreath to a professional piece. Wreath-making improves quickly with practice. Your third wreath will surprise you.
Conclusion
Wreath-making is one of those skills that looks harder from the outside than it actually is once you pick up the materials and start.
My advice to anyone making their first wreath is this: choose a simple design, use a base that matches your materials, and do not overthink it.
There is no single correct way to make a wreath. The style that works for a farmhouse front door is completely different from what suits a modern apartment hallway, and both are equally valid.
Start simple. Work in layers. Step back often. Your second wreath will be noticeably better than your first, and your fifth will surprise you.
Frequently Asked Questions
How Much Mesh Do I Need for a Wreath?
For a standard 18-inch wire-work wreath form with two layers, plan to use one full 10-yard roll of 10-inch deco mesh per color. Most wreath makers use the entire roll of mesh for one wreath when working with a single color and two layers.
What Type of Wreath Base Works Best?
Wire frames suit greenery and mesh. Grapevine suits floral and farmhouse. Foam suits faux flowers and lightweight embellishments. For outdoor wreaths specifically, grapevine or wire frames hold up better in weather than foam frames.
How Long Does it Take to Make a Wreath?
A beginner’s first greenery wreath typically takes 1.5 to 2 hours, including time spent organizing materials and making adjustments.