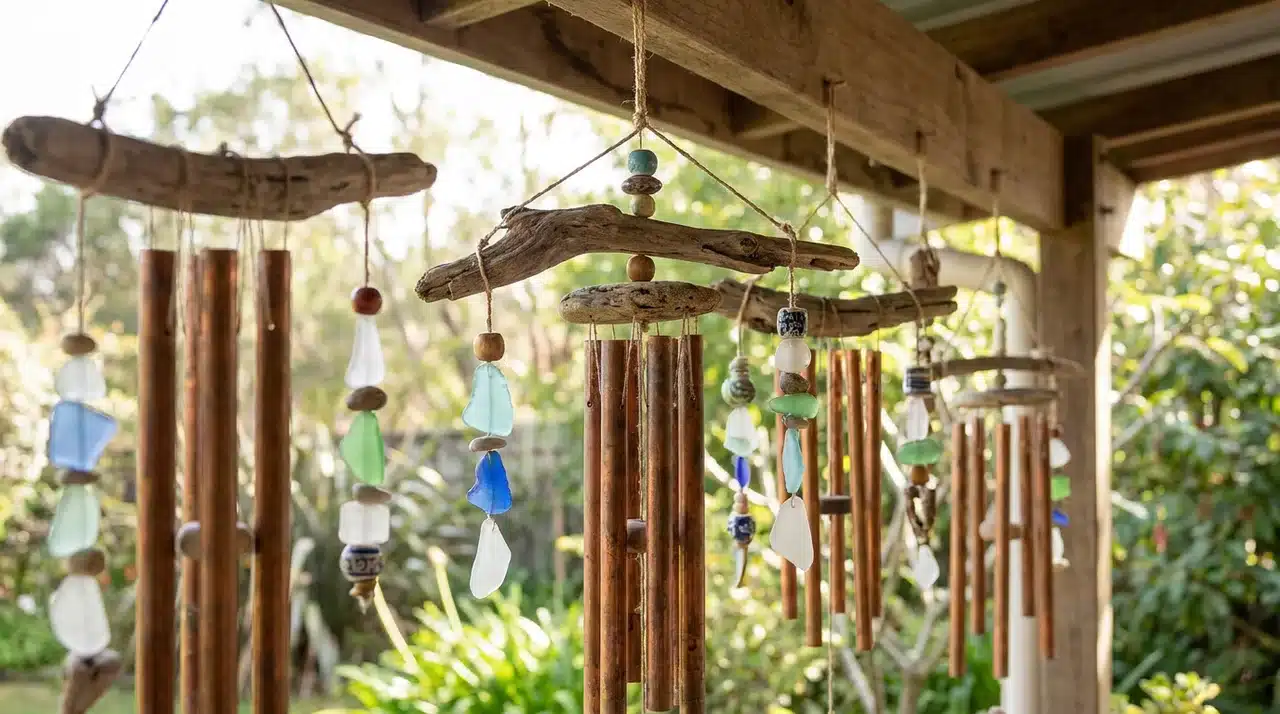
You want your garden or porch to feel peaceful, but it still feels like something is missing.
A set of wind chimes can change that, and the best part is that you do not need to buy one.
Making DIY wind chimes is easier than most people think, costs very little, and gives you something truly personal to hang outside. You can match your style, pick your materials, and control how loud or soft they sound.
Even complete beginners can finish a project in an afternoon. In this post, you will find ideas across every style and skill level, from simple bead crafts to tuned copper pipe chimes.
What You Need Before Making DIY Wind Chimes
You only need a handful of basic supplies to get started, most of which you likely already own.
- Base: A branch, driftwood piece, wooden dowel, or metal ring to hang everything from.
- Cord or twine: Jute, nylon, or waxed cord all work, depending on the look you want. One thing worth knowing up front: cotton and jute look lovely but rot within a season outdoors. For anything that lives outside, use nylon or waxed cord, or seal natural twine.
- Drill and the right bit: Wood and thin metal take a standard bit. Glass, sea glass, stone, and ceramic need a diamond-tipped bit used with a little water to keep them from cracking.
- Chime elements: Washers, shells, beads, keys, pipes, or whatever material you choose.
- Connectors: Jump rings, wire loops, or simple knots to join pieces together.
The heavier and harder your chime material, the louder and longer the sound it produces.
Colorful and Creative DIY Wind Chimes
These bright projects use basic craft store materials and take no more than an afternoon to finish. They are beginner-friendly and a good activity to do with kids on the weekend.
1. Painted Ceramic Ornament Wind Chime

Pick up small ceramic ornaments from a craft store, then use Sharpie markers and a drop of rubbing alcohol to create a watercolor swirl effect on each one. The alcohol spreads the ink unpredictably, so no two ornaments will look the same.
Thread each ornament onto a length of cord and tie it at varying heights to a painted wooden stick. Space them close enough to tap each other in a breeze.
Materials used: small ceramic ornaments, Sharpie markers, rubbing alcohol, cord, and a painted wooden stick
2. Colorful Beaded Wind Chime

Cut six to eight lengths of beading thread and string bright plastic or glass beads onto each one, mixing sizes to add weight at the bottom. Tie a small bell to the end of each strand so they ring when they touch.
Attach all strands to a short, smooth branch and hang it somewhere with a light, steady breeze. This is a good first project for kids.
Materials used: beading thread, plastic or glass beads, small bells, thin branch
3. Spray-Painted Washer and Bead Wind Chime

Lay the metal washers on newspaper outside and spray-paint them in your chosen colors. Let them dry fully before handling. Once dry, thread each washer onto a piece of twine, alternating with craft beads between each one.
Tie the finished strands to a piece of driftwood or scrap wood at equal or staggered lengths. The washers knock against each other with a bright, cheerful clank.
Materials used: metal washers, spray paint, craft beads, twine, driftwood
4. Vintage Key Wind Chime

Collect old keys from thrift stores or junk drawers and give each one a coat of bold acrylic paint. Let them dry, then use a jump ring or a short length of cord to attach each key to a painted wooden branch.
Arrange the keys so they overlap slightly, which helps them move and knock together easily. The metal-on-metal sound is sharper and more musical than you would expect.
Materials used: old keys, acrylic paint, jump rings or cord, painted wooden branch
5. Tin Can Wind Chime

Wash and dry empty tin cans, then punch a small hole in the bottom of each one using a nail and hammer. Paint the outside in a solid color and let it dry fully.
Thread twine through each hole and tie a bead inside to act as a stopper. Hang all the cans from a wooden dowel at different lengths, and they will knock together with a hollow, clinking tone.
Materials used: empty tin cans, nail and hammer, acrylic paint, twine, wooden beads, wooden dowel
These five projects are ideal for anyone who wants a fast, low-cost craft that children can join in on, too.
Sea Glass, Shell, and Coastal DIY Wind Chimes
Beach materials like sea glass, shells, and pebbles make some of the most naturally pretty wind chimes. Always check local beach rules before collecting anything yourself.
6. Classic Sea Glass Wind Chime

Use a small drill bit to drill a hole near the top of each piece of sea glass. Thread the cord through each hole, then tie a knot below to hold the glass in place. Space your strands evenly along a smooth birch branch using a printed spacing template to keep the finished piece looking clean.
Hang it somewhere it will catch the light and the wind. The frosted glass pieces glow when the sun hits them.
Materials used: sea glass, small drill bit, cord, birch branch
7. Sea Glass Memory Wind Chime

Drill a small hole into each piece of sea glass and a few flat pieces of driftwood. Mix the two materials on each strand so the textures alternate down the length. This works well as a keepsake from a specific beach trip.
Write the date or location on the driftwood pieces with a permanent marker before assembly, and seal everything with a coat of outdoor varnish to help it withstand the weather.
Materials used: sea glass, small flat driftwood pieces, drill, cord, permanent marker, outdoor varnish
8. Sea Pebble Wind Chime

Choose smooth, flat pebbles from a beach or garden center, and drill a small hole near the top edge of each. Thread them onto cord in groups of three or four per strand, with a gap of cord between each stone so they can swing freely.
The sound is lower and softer than glass or metal, more of a gentle knock than a ring. It suits a quiet garden corner or a sheltered patio.
Materials used: smooth flat pebbles, drill, cord, driftwood base
9. Flower Pot and Shell Wind Chime
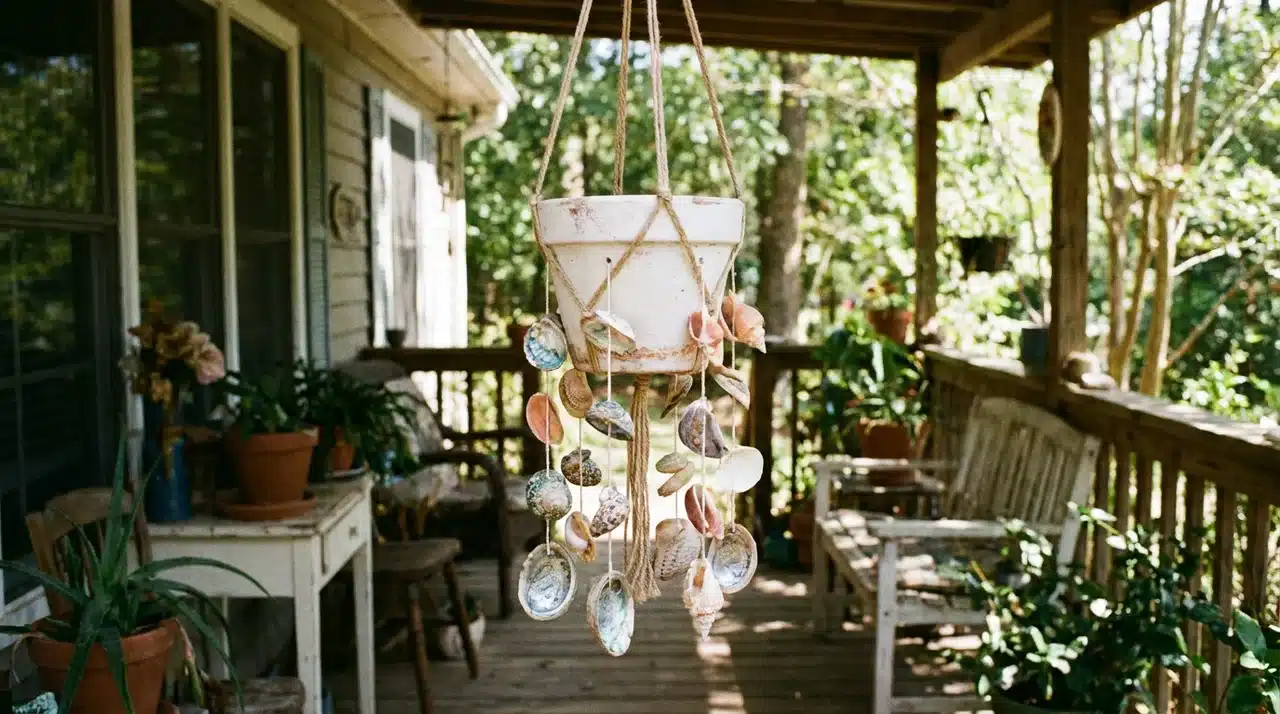
Drill four evenly spaced holes around the rim of a small terracotta or ceramic flower pot. Thread cord through each hole and tie a collection of shells onto the ends, varying the length of each strand slightly.
The pot acts as the top piece and can be painted or left plain. Hang it from the drainage hole at the top using a length of twine. The shells tap against each other and the pot, producing a layered, soft sound.
Materials used: small flower pot, shells, drill, cord, twine, acrylic paint (optional)
10. Seashell and Blue Bead Wind Chime

Thread shells and blue glass beads alternately onto each strand of cord, putting a knot between each item so nothing slides. Tie all strands onto a short piece of driftwood at varying lengths.
The blue beads pick up sunlight well and give the whole piece a strong coastal feel, even when it is hanging on an inland porch. Use shells with a natural hole to skip the drilling step.
Materials used: seashells, blue glass beads, cord, driftwood
These five ideas work just as well indoors near a window as they do outside on a covered porch.
Natural and Driftwood DIY Wind Chimes
Driftwood and bamboo produce a low, soft knock that suits quiet gardens and covered outdoor sitting areas. These projects are among the cheapest on this list and require the fewest tools.
11. Simple Driftwood Wind Chime
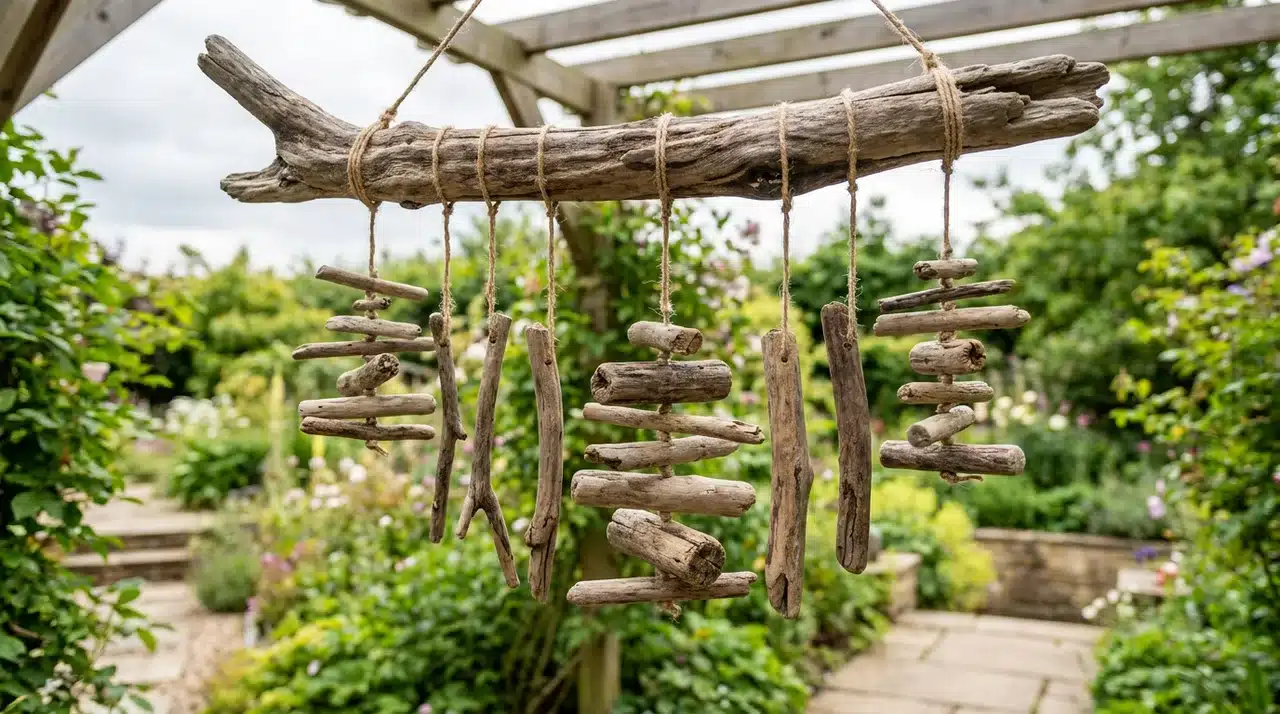
Collect pieces of driftwood in a range of sizes and drill a small hole near the top of each one. Thread the cord through each hole and hang the pieces in a row from a longer, thicker piece of driftwood at the top.
Let the lengths vary so the pieces sit at different heights. The natural shapes of driftwood mean no two finished chimes will look alike. This costs almost nothing if you collect the wood yourself.
Materials used: driftwood pieces in varied sizes, drill, cord, twine
12. Driftwood and Bead Wind Chime

Combine flat driftwood pieces with large decorative beads and small pendants on each strand to add visual interest. Alternate beads and wood pieces along each length of cord, tying a knot between each item.
Attach all strands to a single long piece of driftwood at the top, then hang it using jute twine. The beads catch light and add color while the driftwood keeps the overall look warm and natural.
Materials used: driftwood pieces, large decorative beads, pendants, cord, jute twine
13. Classic Bamboo Wind Chime
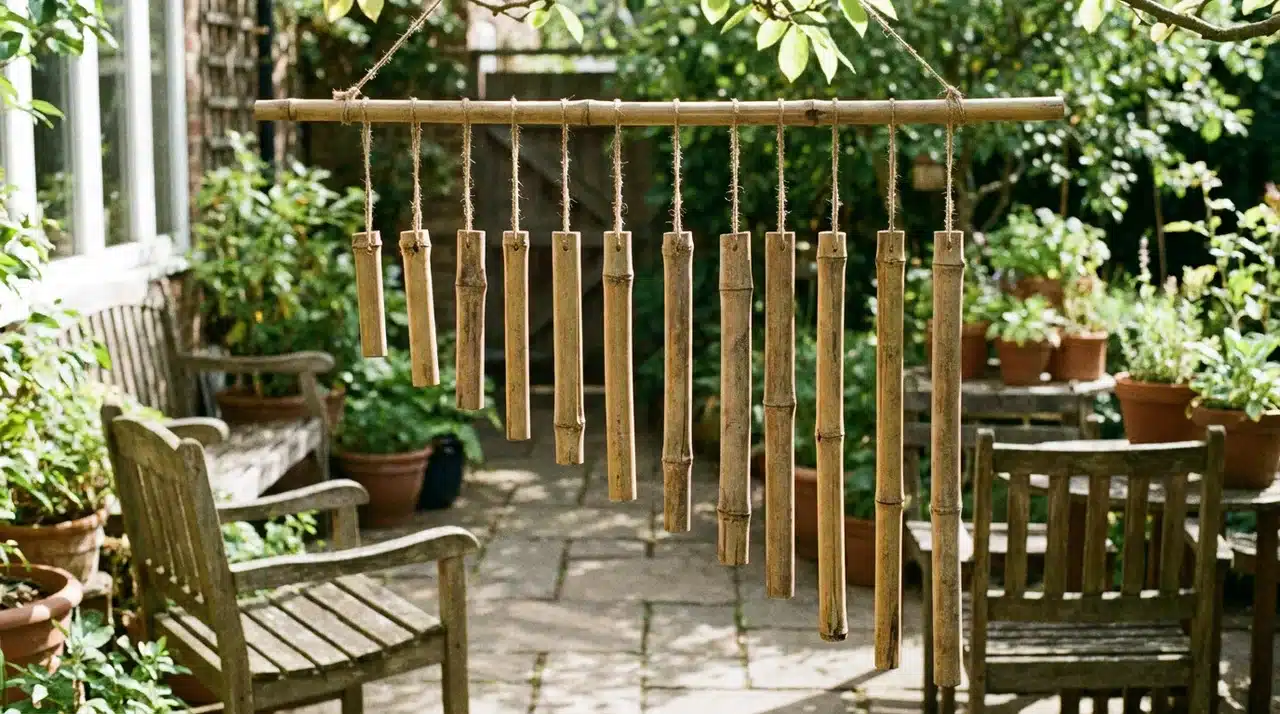
Cut bamboo garden stakes to varying lengths and sand the cut ends smooth. Drill a small hole near the top of each piece and thread cord through, tying a tight knot to hold. Hang all pieces from a horizontal bamboo cane at the top.
The longer the piece, the lower the note it produces. Cutting them in graduating lengths gives you a simple scale of tones. Leave the bamboo natural or paint it with outdoor-grade acrylic paint.
Materials used: bamboo garden stakes, saw, sandpaper, drill, cord, outdoor acrylic paint (optional)
14. Bamboo and Feather Wind Chime

Cut bamboo to varied lengths as above, then add a feather and a small dried botanical or leaf shape to each strand between the bamboo pieces. Use a dab of strong craft glue to hold the feathers onto the cord.
The feathers catch the wind more readily than bamboo alone, so this version moves even in a very light breeze. It suits a boho or farmhouse-style garden well.
Materials used: bamboo stakes, saw, drill, cord, craft feathers, dried botanicals, craft glue
These four projects are among the most beginner-friendly on this list and require the fewest specialized tools.
Copper Pipe and Metal DIY Wind Chimes
Metal chimes ring clearly and carry sound farther than any other material on this list. To get tuned musical notes, cut your tubes to these length ratios from longest to shortest: 0.9439L, 0.8909L, 0.8170L, 0.7711L, and 0.7071L.
15. Classic Copper Pipe Wind Chime

Buy copper tubing from a hardware store and cut it to your chosen lengths using a tube cutter. Smooth the cut ends with a file, then drill a small hole near the top of each piece at the 0.224 point.
Thread the cord through each hole and hang all pipes from a circular wooden platform. Add a flat wooden windcatcher at the bottom center to hit the pipes when the wind moves it. The sound is clean and bright, and it carries well across a yard.
Materials used: copper tubing, tube cutter, file, drill, cord, circular wooden platform, flat wooden windcatcher
16. Coiled Copper Tube Wind Chime

Gently bend short lengths of copper tubing into loose coils using a round form, like a bottle or dowel. The coil shape changes how the tube vibrates, giving a slightly softer tone than a straight pipe.
Thread cord through the center of each coil and hang them from a bamboo base alongside a few crystal beads for color. The finished piece has a sculptural quality that looks designed rather than handmade.
Materials used: copper tubing, round dowel or bottle, cord, bamboo base, crystal beads
17. Hardware Store Wind Chime
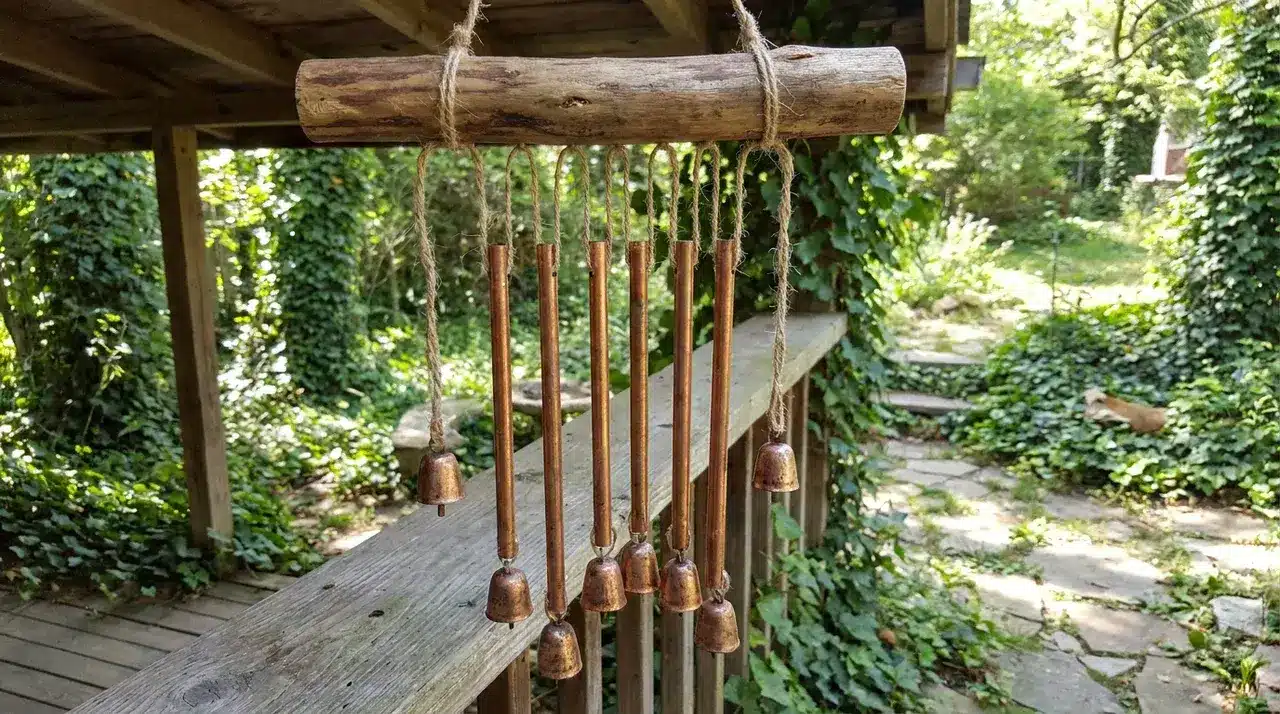
Pick up copper tubing and small copper bells from the fishing section of a hardware or outdoor store. Cut the tubing to graduated lengths and hang them alongside the bells on a wooden base.
The bells add a higher-pitched layer of sound to the deeper ring of the tubes. This is one of the most affordable metal chime projects and takes under an hour to put together.
Materials used: copper tubing, small copper fishing bells, wooden base, cord, tube cutter
18. Vintage Silverware Wind Chime

Visit a thrift store and pick up old spoons and forks. Before buying, hold two pieces loosely by the handles and let them tap together to check the sound. Different makers and weights produce very different tones.
Drill a small hole through the end of each handle and thread the cord through. Hang them from a wooden base at varying lengths so they swing freely and tap against each other.
Materials used: vintage spoons and forks, drill, cord, wooden base
Of all the categories here, metal chimes last the longest outdoors and need the least maintenance over time.
Boho, Clay, and Whimsical DIY Wind Chimes
These projects lean more toward visual appeal than volume, making them a good fit for apartments and small balconies. They are also among the quickest to put together on this list.
19. Macrame Wind Chime
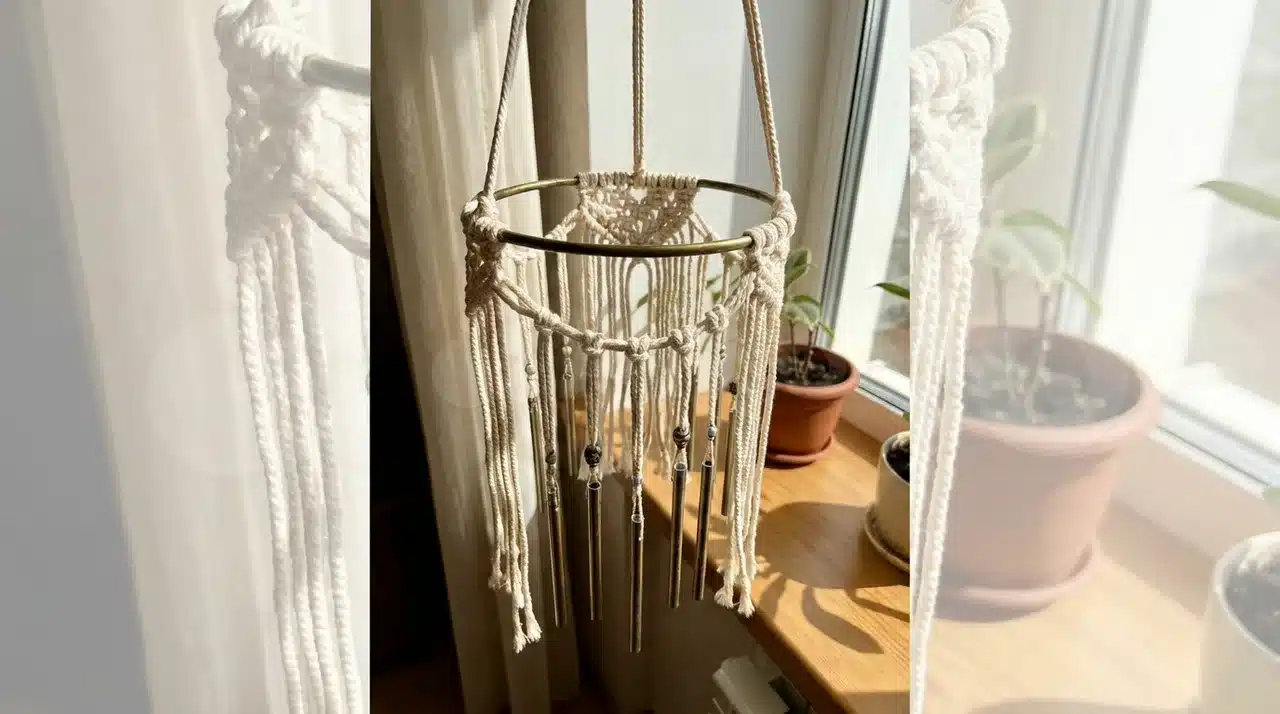
Cut lengths of cotton macrame cord and tie them onto a metal ring using simple square knots, building downward in a pattern. Leave the lower ends loose and fringed. Attach two or three small metal chime tubes to the lower strands using extra cord so they hang free.
The macrame frame is the main visual element, while the chime tubes provide a soft, subtle sound. This suits a bedroom window or covered outdoor space well.
Materials used: cotton macrame cord, metal ring, metal chime tubes, scissors
20. Moon Phase Clay Wind Chime
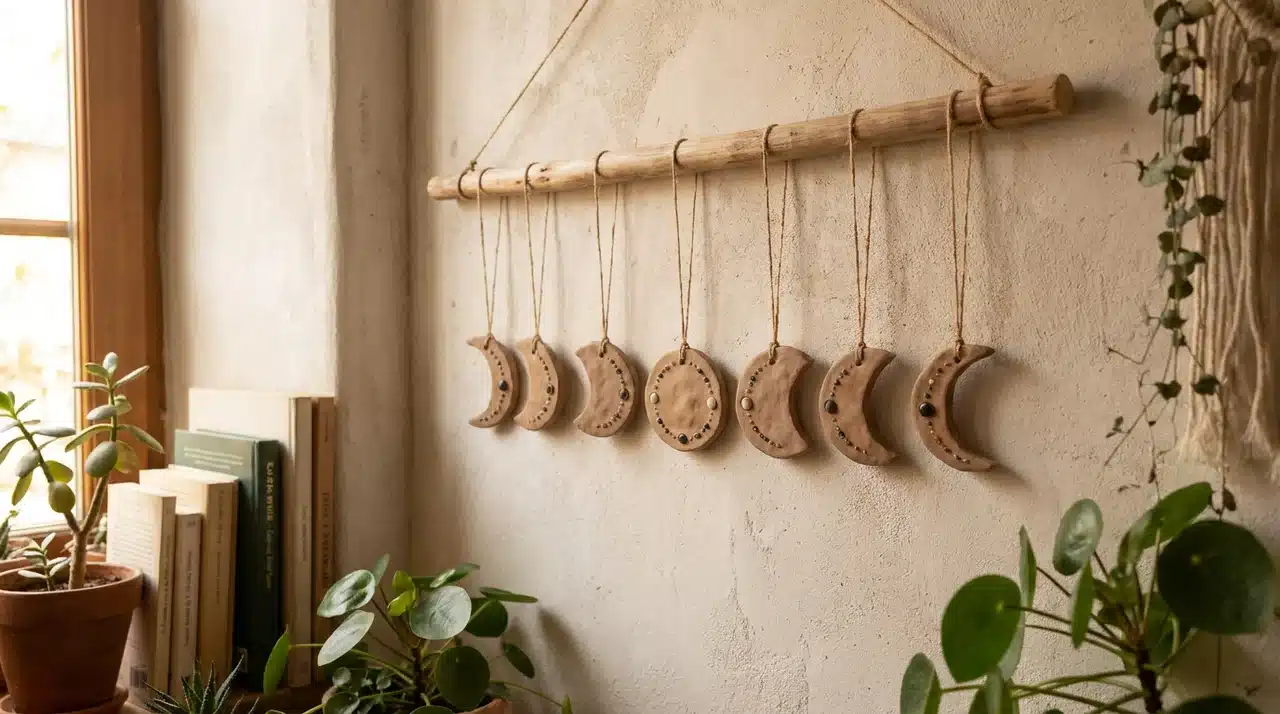
Roll out air-dry or oven-bake clay and cut it into the eight moon phase shapes using templates printed from a free source. Press small beads into the surface of each shape before it sets, then bake or let it dry as directed.
Drill or punch a small hole at the top of each shape, thread cord through, and hang them in order from a wooden dowel. Spray the finished pieces with outdoor sealer before hanging them outside.
Materials used: air-dry or oven-bake clay, moon phase templates, small beads, cord, wooden dowel, outdoor sealer spray
21. Modern Planter Wind Chime

Take a small ceramic planter with a narrow neck and tie a length of faux leather cord through the drainage hole to create the hanging loop.
Thread several large wooden beads onto shorter lengths of cord and tie them around the neck of the planter so they hang loose and swing against it.
When the wind moves the beads, they strike the planter’s body with a soft, hollow tap. The whole project takes about ten minutes and suits modern or minimalist outdoor spaces.
Materials used: small round ceramic planter, faux leather cord, large wooden beads, scissors
Pick one idea, gather your materials, and set aside an afternoon. Once you have made your first chime, a second one follows quickly.
Conclusion
Making your own wind chimes is one of those projects that gives back more than they take. You spend an afternoon crafting something, and it rewards you with sound and personality every time the wind moves through your space.
DIY wind chimes also make genuinely thoughtful gifts for anyone who loves their garden or outdoor space. No two turn out the same, which makes each one worth keeping or giving.
Pick one idea from this list, gather your materials, and get started this weekend. If this post helped you, share it with a friend who loves a good craft project.
Frequently Asked Questions
Can I Leave a DIY Wind Chime Outside All Year?
Copper and sealed clay hold up year-round, but untreated driftwood and glued beadwork should be brought inside during heavy rain or frost.
Do Wind Chimes Need to Be Tuned to Sound Good?
No, most handmade chimes sound pleasant without tuning, though cutting metal tubes to specific ratios gives a more musical result.
What is the Best Knot to Use so Wind Chimes Do Not Fall Apart?
A Double Overhand Knot Below Each Chime Piece Holds Firmly Against Weight and Movement without Loosening Over Time.
How Do I Stop My Wind Chimes From Tangling in the Wind?
Space strands at least two centimeters apart, vary their lengths, and use a weighted windcatcher at the center to control swing direction.