

Your current driveway feels cramped when you try to park two cars side by side. The narrow space makes it hard to open the car doors without hitting the other vehicle.
Many homeowners face this exact problem and want to expand their driveway space.
We promise to show you exactly how to widen your driveway using pavers without hiring expensive contractors. This method saves thousands of dollars while giving you a professional-looking result that adds value to your home.
This guide covers everything from ground preparation to final installation. You’ll learn proper excavation techniques, base preparation methods, and paver laying strategies.
We’ll also share maintenance tips and common mistakes to avoid during your project.
Why Choose Pavers for Driveway Extension
Pavers offer several benefits over concrete or asphalt for driveway widening projects. They provide better drainage, resist cracking from freeze-thaw cycles, and allow for easy repairs if needed.
When one paver gets damaged, you can replace just that piece instead of redoing the entire section.
The interlocking design creates a strong surface that can handle vehicle weight while maintaining flexibility. Pavers also come in various colors and patterns, allowing you to match your existing driveway or create a contrasting design element.
Widen Your Driveway: Step-by-Step with Pavers
Learn how to efficiently widen your driveway using pavers with this straightforward, step-by-step DIY guide for lasting curb appeal and functionality.
Tools and Materials Needed
| Tools Required | Materials Required |
|---|---|
| Shovel | Villa P pavers (Manor color) |
| String line | 3/4 inch crushed recycled concrete |
| Measuring tape | Sand for leveling |
| Plate compactor | Half-inch conduit pipe |
| Level | Sherlink bonding sand |
| Chalk line | Concrete for border edging |
| Rubber mallet | Landscape fabric (optional) |
| Wheelbarrow | Stakes and string |
| Screed board | Safety glasses |
| Push broom | Work gloves |
Step 1: Site Preparation and Excavation
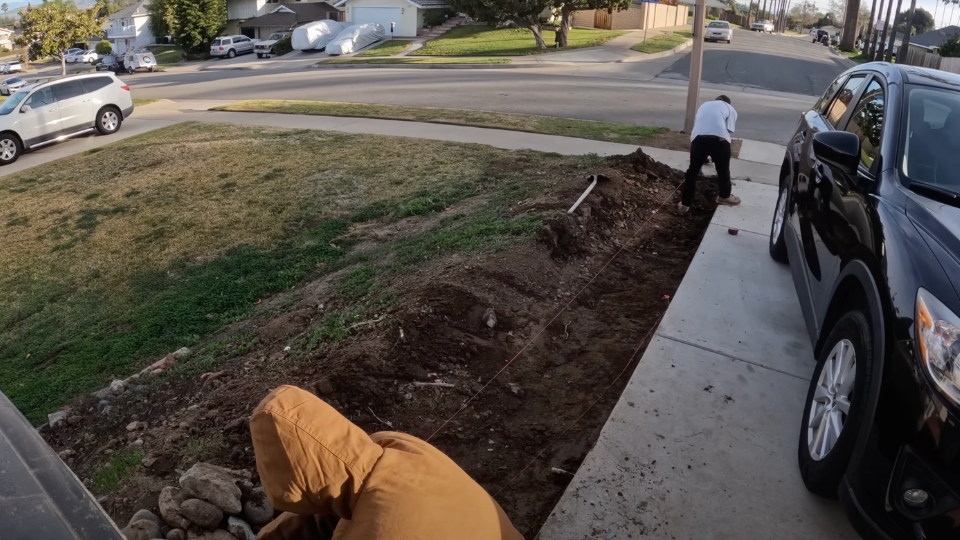
Start by marking the area where you want to extend your driveway. Use spray paint or stakes with string to outline the exact boundaries.
Clear all grass, plants, and debris from the marked area. Excavate to a depth of 6-7 inches below the final paver height. This depth accounts for the base material, sand layer, and paver thickness
Instructions:
- Mark boundaries clearly
- Remove all vegetation
- Dig to proper depth
- Check measurements frequently
Materials needed in this step:
- Shovel, measuring tape, stakes, string, and spray paint
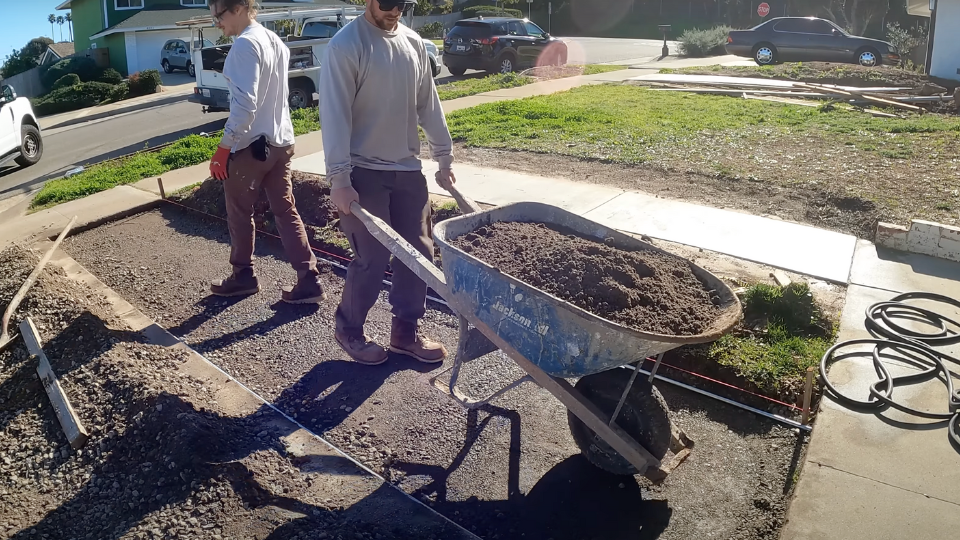
Step 2: Installing the Base Layer
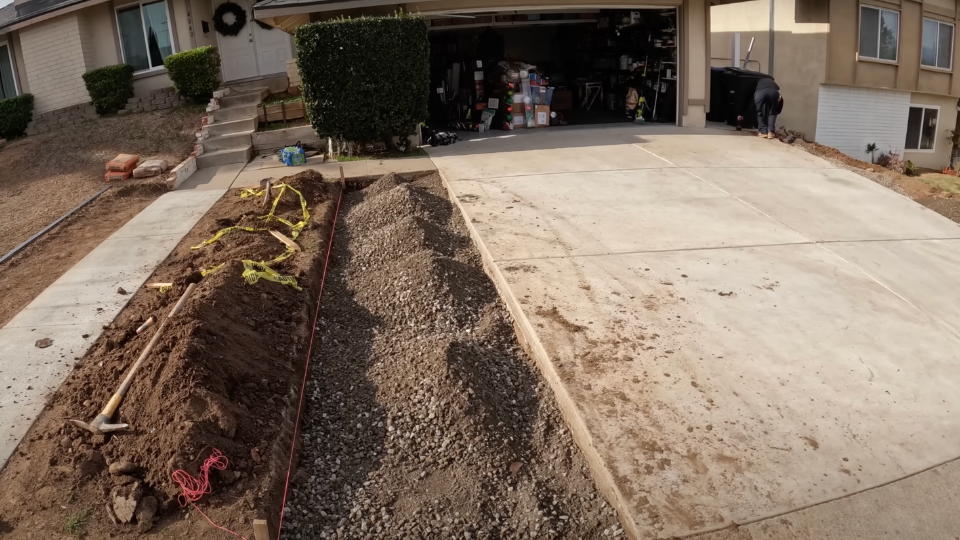
The base layer provides the foundation that supports your pavers and prevents settling. Spread 3/4 inch crushed recycled concrete evenly across the excavated area. Set up a string line at the proper height and use a screed board cut to 2 3/4 inches to level the base material.
Instructions:
- Spread the base material evenly
- Set the string line at the correct height
- Screed to a consistent level
- Prepare for compaction
Materials needed in this step:
- 3/4 inch crushed recycled concrete, string line, screed board, rake
Step 3: Compacting the Base
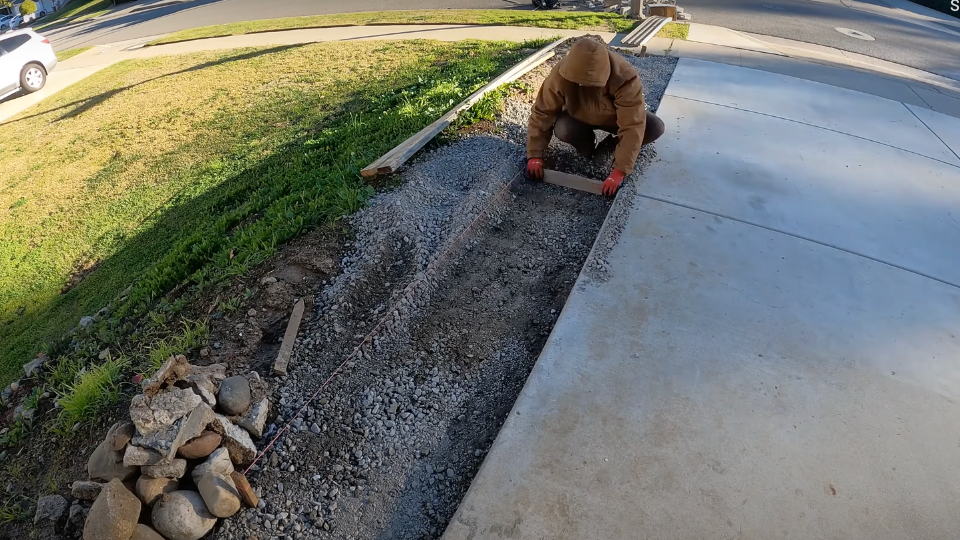
Proper compaction prevents future settling and creates a stable surface for your pavers. Run the plate compactor over the entire base area in overlapping passes. Pay special attention to edges and corners. Check height after compacting and add more material if needed.
Instructions:
- Make overlapping compactor passes
- Focus on edges and corners
- Check the final height
- Re-compact if material added
Materials needed in this step:
- Plate compactor, additional base material if needed
Step 4: Adding the Sand Layer
The sand layer allows you to make fine adjustments to paver height and provides a smooth surface for installation. Install half-inch conduit pipes as screed rails 2 1/4 inches above the compacted base. Spread clean coarse sand between the rails and screed level with a straight board.
Instructions:
- Install conduit pipe rails
- Spread sand between the rails
- Screed to level surface
- Work in small sections
Materials needed in this step:
- Clean coarse sand, half-inch conduit pipe, straight screed board
Step 5: Establishing Square Layout
Check that your installation area is square using measuring tape and string lines. Use the 3-4-5 triangle method to verify square corners. Start your paver installation from the squared corner rather than assuming existing structures are square. This prevents the frustration of having pavers that don’t line up properly as you work across the area.
Instructions:
- Check existing structures for a square
- Establish square reference lines
- Verify with the 3-4-5 method
- Mark a clear starting point
Materials needed in this step:
- Measuring tape, string line, chalk line, square, or level
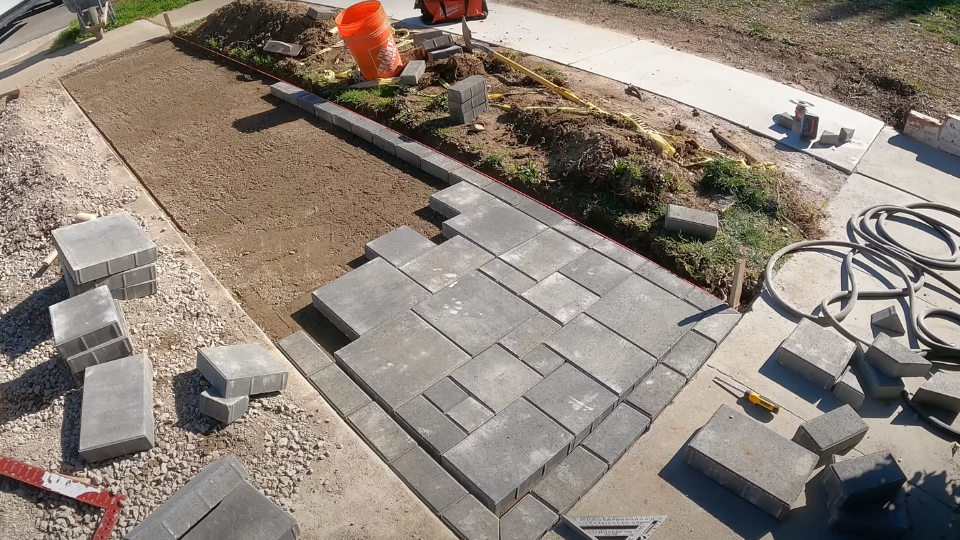
Step 6: Installing the Pavers
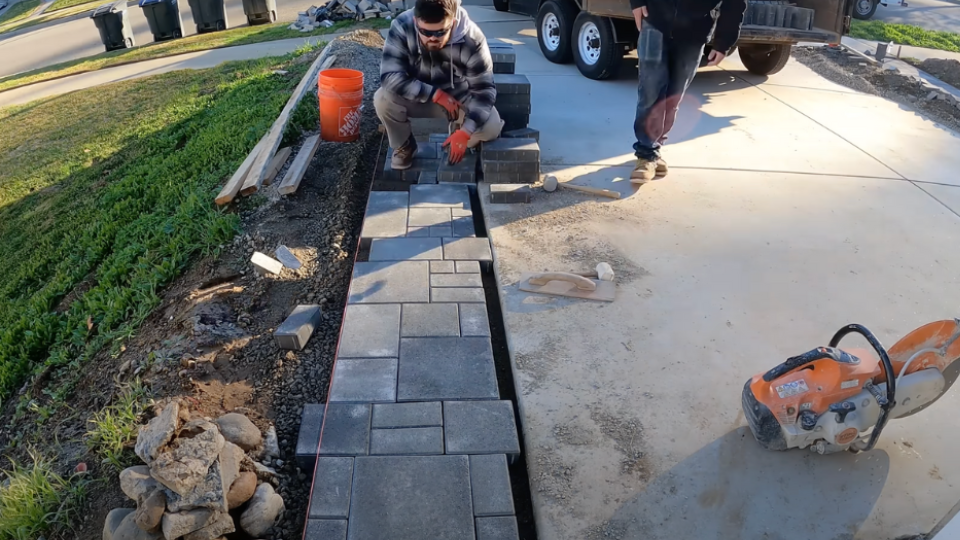
Begin laying pavers from your established square corner. Place each paver carefully without sliding. Cut border pavers to fit rather than leaving small sliver pieces. Small pieces look unprofessional and are more likely to shift over time. Measure and mark each cut carefully for clean, straight edges.
Instructions:
- Start from the square corner
- Place pavers without sliding
- Check alignment regularly
- Cut larger border pieces
Materials needed in this step:
- Villa P pavers, rubber mallet, measuring tape, paver saw
Step 7: Final Details and Joint Sand
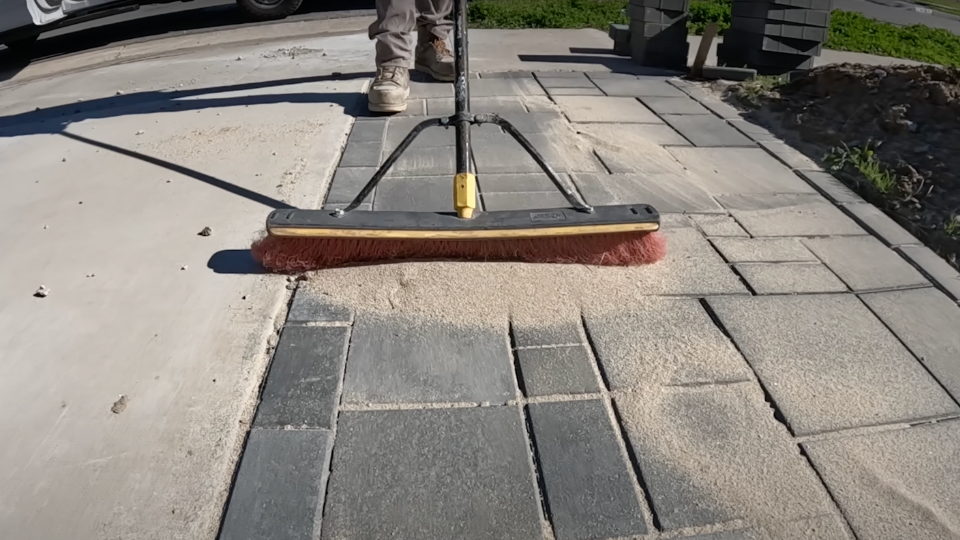
Install concrete edging along exposed edges to lock pavers in place. Sweep Sherlink bonding sand into all joints and compact the surface to settle pavers and vibrate sand into joints.
Instructions:
- Install concrete edging
- Sweep the joint sand completely
- Leave a thin sand layer on top
- Compact and clean surface
Materials needed in this step:
- Concrete mix, Sherlink bonding sand, push broom, plate compactor
Video Tutorial
Special thanks to Odell Complete Concrete for providing valuable insights in their video, which I referenced while creating this guide.
Cost to Widen Driveway with Pavers
| Category | Cost Estimate | Notes |
|---|---|---|
| Pavers (Villa P, Manor color) | $3–5/sq ft | Depends on the supplier and the region |
| Base Material (Crushed Concrete) | $30–40/ton | Used for driveway base layer |
| Sand & Joint Sand | $1–2/sq ft | Used for leveling and locking pavers |
| Tool Rental (Plate Compactor) | $40–60/day | If not already owned |
| Material Overage (10%) | 10% of the total materials | For waste, cuts, and spares |
| Professional Installation (All-In) | $15–25/sq ft | Includes both materials and labor |
| DIY Savings Estimate | $7–10/sq ft saved | Based on 200 sq ft: Save $1,400–2,000 in labor costs |
Driveway Paver Maintenance Tips
Simple care routines and seasonal tips to keep your paver driveway clean, durable, and looking great for years to come.
1. Regular Cleaning and Inspection
Clean your paver driveway regularly to prevent stains and maintain its appearance. Use a pressure washer on low setting or garden hose with soap for routine cleaning. Inspect for any loose or damaged pavers during the cleaning process.
Check joint sand levels annually and add more as needed. Weather and traffic can cause joint sand to wash away or settle. Keeping joints full prevents pavement movement and weed growth.
2. Seasonal Preparation
Prepare your paver driveway for winter by ensuring proper drainage. Clear leaves and debris from the surface to prevent ice formation. Good drainage prevents freeze-thaw damage that can cause pavers to shift.
Apply ice melt products carefully if needed. Avoid using rock salt, as it can damage pavers over time. Use sand for traction instead of chemical ice melts when possible.
3. Stain Prevention and Removal
Seal your pavers every 2-3 years to protect against stains and weather damage. Choose a sealer appropriate for your paver material and local climate conditions. Apply sealer according to the manufacturer’s instructions.
Clean spills immediately to prevent permanent staining. Oil and grease are the most common driveway stains. Use absorbent materials first, then clean with appropriate degreasers.
4. Repair and Replacement
Replace damaged pavers immediately to prevent further problems. Remove the damaged paver carefully to avoid disturbing the surrounding pavers. Check the sand bed and adjust if needed before installing the replacement.
Keep extra pavers from your original installation for future repairs. Store them in a dry location to prevent damage. Having matching pavers ensures repairs blend seamlessly with the existing surface.
5. Professional Maintenance Services
Consider professional cleaning and sealing services for large driveways or complex stain issues. Professional services often utilize specialized equipment and products that may be more effective than DIY methods.
Schedule professional inspections every few years to catch potential problems early. Experienced contractors can spot issues that homeowners might miss and recommend preventive measures.
Paver Driveway: Common Mistakes to Avoid
| Mistake | Why It’s a Problem | How to Avoid It |
|---|---|---|
| Skipping base preparation | Causes settling and uneven surface | Always excavate and compact properly |
| Not checking for square | Results in crooked paver lines | Use measuring tools to establish a square |
| Leaving small sliver cuts | Looks unprofessional and shifts easily | Cut larger pieces instead |
| Insufficient compaction | Leads to settling and movement | Make multiple compactor passes |
| Wrong sand type | Fine sand washes away easily | Use coarse, clean sand only |
| Ignoring drainage | Water damage and frost heaving | Ensure proper slope and drainage |
| Rushing the process | Leads to mistakes and poor results | Take time for each step |
Wrapping It Up
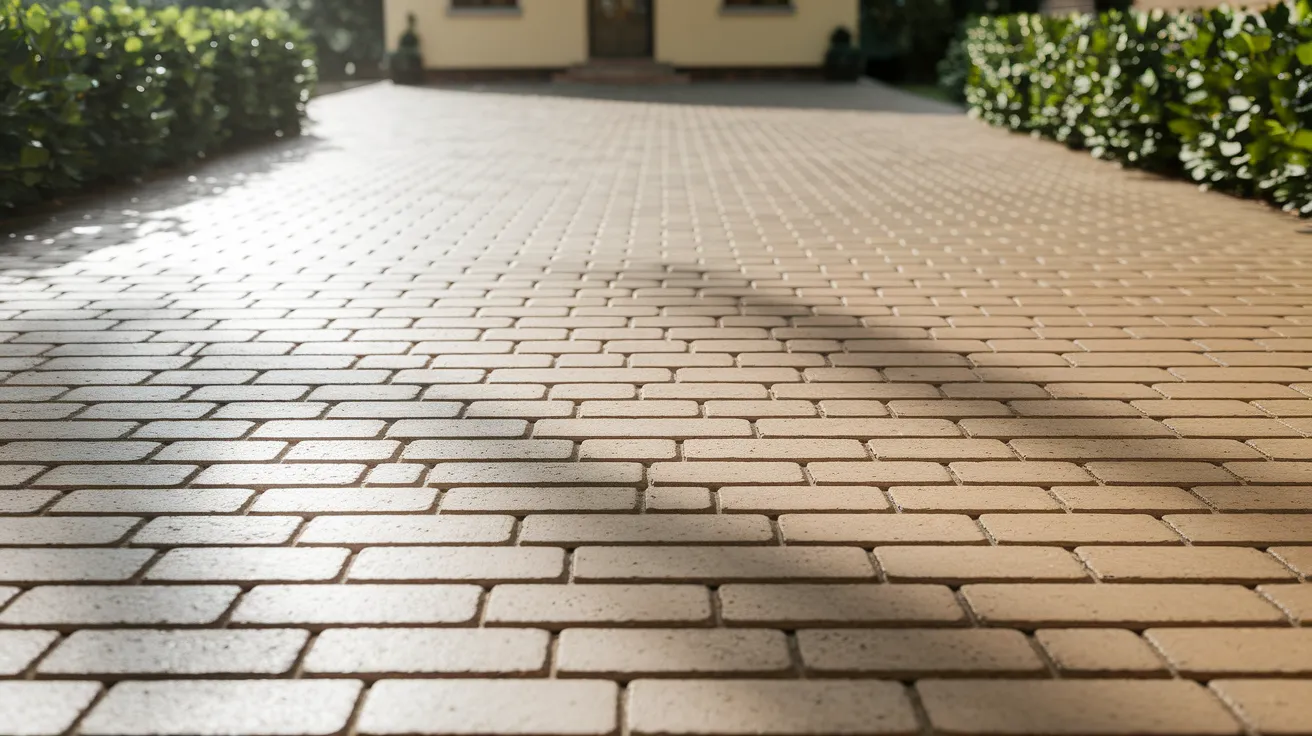
Widening your driveway with pavers is a manageable DIY project that adds value and functionality to your home. The key to success lies in proper preparation, taking time to establish square reference lines, and following each step carefully.
Quality materials and adequate technique create a driveway extension that lasts for decades.
Remember that this project requires physical effort and attention to detail. Please don’t rush through the preparation steps since they determine the final quality of your installation. The extra time spent on base preparation and square layout pays off with professional-looking results.
Your new paver driveway extension will provide years of reliable service when installed correctly. Regular maintenance keeps it looking great and functioning properly.
Take time to enjoy your expanded driveway space and the satisfaction of completing this valuable home improvement project yourself.
Frequently Asked Questions
Can you Use Pavers to widen a Driveway?
Yes, pavers are an excellent choice for driveway widening since they handle vehicle weight well and blend seamlessly with existing surfaces.
How Much Does It Cost to Widen a Driveway with Pavers?
DIY paver driveway widening costs $8-15 per square foot for materials, saving $7-10 per square foot compared to professional installation.
How Can I Widen My Driveway Cheaply?
Using pavers for DIY installation is the most cost-effective method, requiring only basic tools and a weekend time commitment.
Can you Extend Your Driveway with Pavers?
Absolutely – paver extensions are durable, easy to install yourself, and can be completed in sections over multiple weekends.