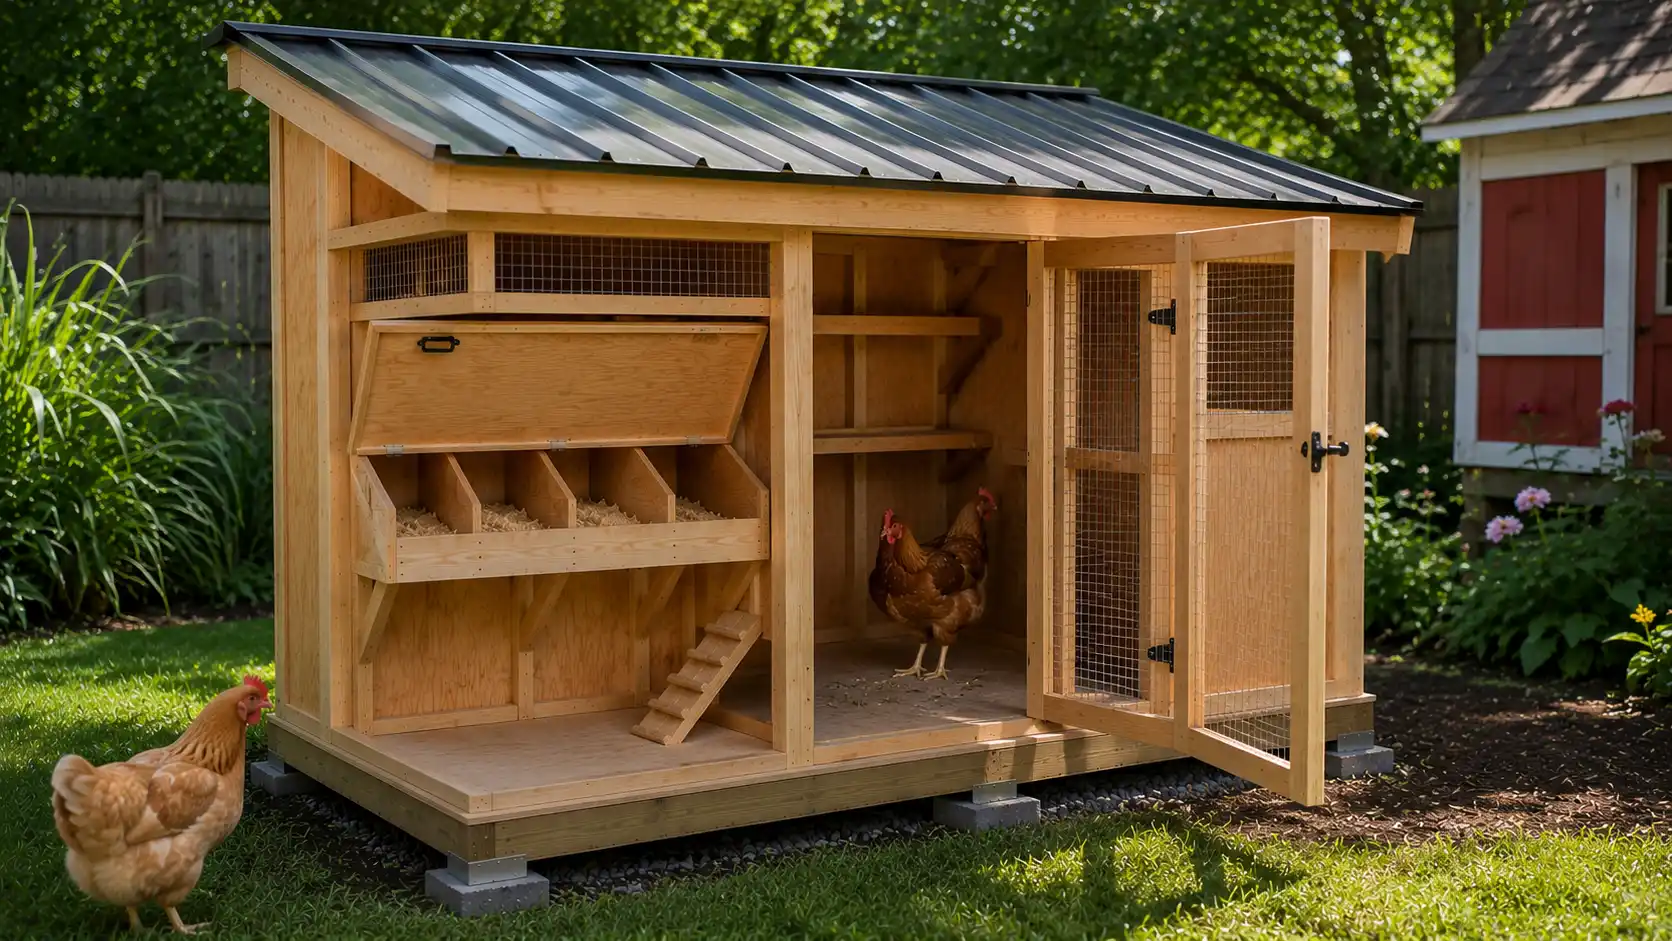
I’ve spent years helping people plan projects they’ve never done before, and one thing always holds true: good planning prevents costly mistakes.
When I built a chicken coop for my backyard flock, that same thinking helped me avoid problems with space, location, cleaning, and safety.
A coop doesn’t need to be complicated, but it does need to fit your chickens, your yard, and your local rules.
Once those basics are clear, the building process feels much easier.
You can choose materials with confidence, set up the inside properly, and create a coop that keeps your chickens safe, dry, and comfortable.
If you’re working with a tight budget, I also put together a guide to low-cost DIY chicken coop ideas and plans that offer great durability.
Chicken Coop Size Guide
Sizing is the most common place beginners go wrong. The most frequently repeated standard is 4 square feet of coop space per chicken and 10 square feet of run space per chicken.
That’s a workable minimum, but it only applies to standard-size breeds like Rhode Island Reds, Plymouth Rocks, or Leghorns.
Large breeds like Jersey Giants or Brahmas need more space — closer to 6 square feet inside and 15 square feet in the run. Bantam breeds can get by with slightly less.
| Number of Chickens | Coop Space | Run Space |
|---|---|---|
| 2 | 8 sq ft | 20 sq ft |
| 4 | 16 sq ft | 40 sq ft |
| 6 | 24 sq ft | 60 sq ft |
| 8 | 32 sq ft | 80 sq ft |
Common Coop Sizing Mistakes
A mistake can mess up your process; here are some of the common issues I often notice.
Building for the flock you have, not the flock you’ll have. Add 20-30 percent more space than you think you need right now.
Using interior square footage that includes the nesting boxes. Nesting boxes are separate. Floor space is floor space.
Forgetting vertical space. Chickens roost off the ground at night. If the ceiling is too low, roosting bars can’t be placed high enough, and birds will crowd together at the same level.
Sizing the run too small. The run is where your birds spend most of their active hours. Cramped runs lead to bare dirt, boredom, and behavioral problems fast.

Before You Build: Local Permit Requirements
Checking local rules before you build saves you from fines, forced removal, and wasted money.
- Rules vary widely, from permissive rural counties to strict urban ordinances banning roosters or requiring neighbor consent
- Most cities allow 3 to 8 hens, ban roosters, and charge permit fees of $20 to $50 per year
- Setback distances range from 5 to 35 feet from neighboring properties
- Co-ops over 200 sq ft or using electricity typically require a building permit
- HOA bylaws can override city rules entirely
Always verify hen limits, setbacks, and permit requirements with your local planning or animal control office before you buy a single board.
Tools and Materials You’ll Need
Having the right tools ready makes the build smoother and safer. I like to gather everything first, so I don’t have to stop halfway through to find screws, mesh, or the right drill bit.
Essential Tools
These are the basic tools needed to measure, cut, frame, and secure the coop. You do not need a professional workshop, but accurate measuring and strong fastening matter.
| Tool | Purpose |
|---|---|
| Circular saw or hand saw | Cutting lumber to length |
| Drill and drill bits | Fastening framing and hardware |
| Hammer | Nailing framing and roofing |
| Tape measure | Accurate measurements throughout |
| Level | Keeping walls, floor, and roof square |
| Staple gun (heavy duty) | Attaching hardware cloth |
| Wire cutters | Cutting hardware cloth and mesh |
| Speed square | Checking angles on framing |
| Pencil and chalk line | Marking cuts |
Basic Building Materials
Choose outdoor-rated materials that can handle rain, sun, and daily use. The coop should feel solid, stay dry, and withstand both weather and predators.
| Material | Use |
|---|---|
| Pressure-treated 4×4 lumber | Foundation skids or posts |
| 2×4 framing lumber | Wall framing, floor frame, rafters |
| 3/4 inch plywood (exterior grade) | Floor, walls, roof decking |
| Metal roofing or asphalt shingles | Weatherproof roof covering |
| 1/2 inch hardware cloth | Ventilation openings and run enclosure |
| Exterior wood screws (2.5 to 3 inches) | Framing fasteners |
| Galvanized joist hangers | Securing floor joists |
| Exterior wood paint or stain | Weather protection |
| Door hinges and latches (heavy duty) | Coop door, nesting box lids, run gate |
| Gravel or concrete pavers | Optional: under the foundation for drainage |
How to Build a Chicken Coop Step by Step
A standard 4×8-foot coop works well for four to six standard-sized hens. The steps below cover that size, but the process scales up or down by adjusting your cut lengths.
Step 1: Choose and Prepare the Location
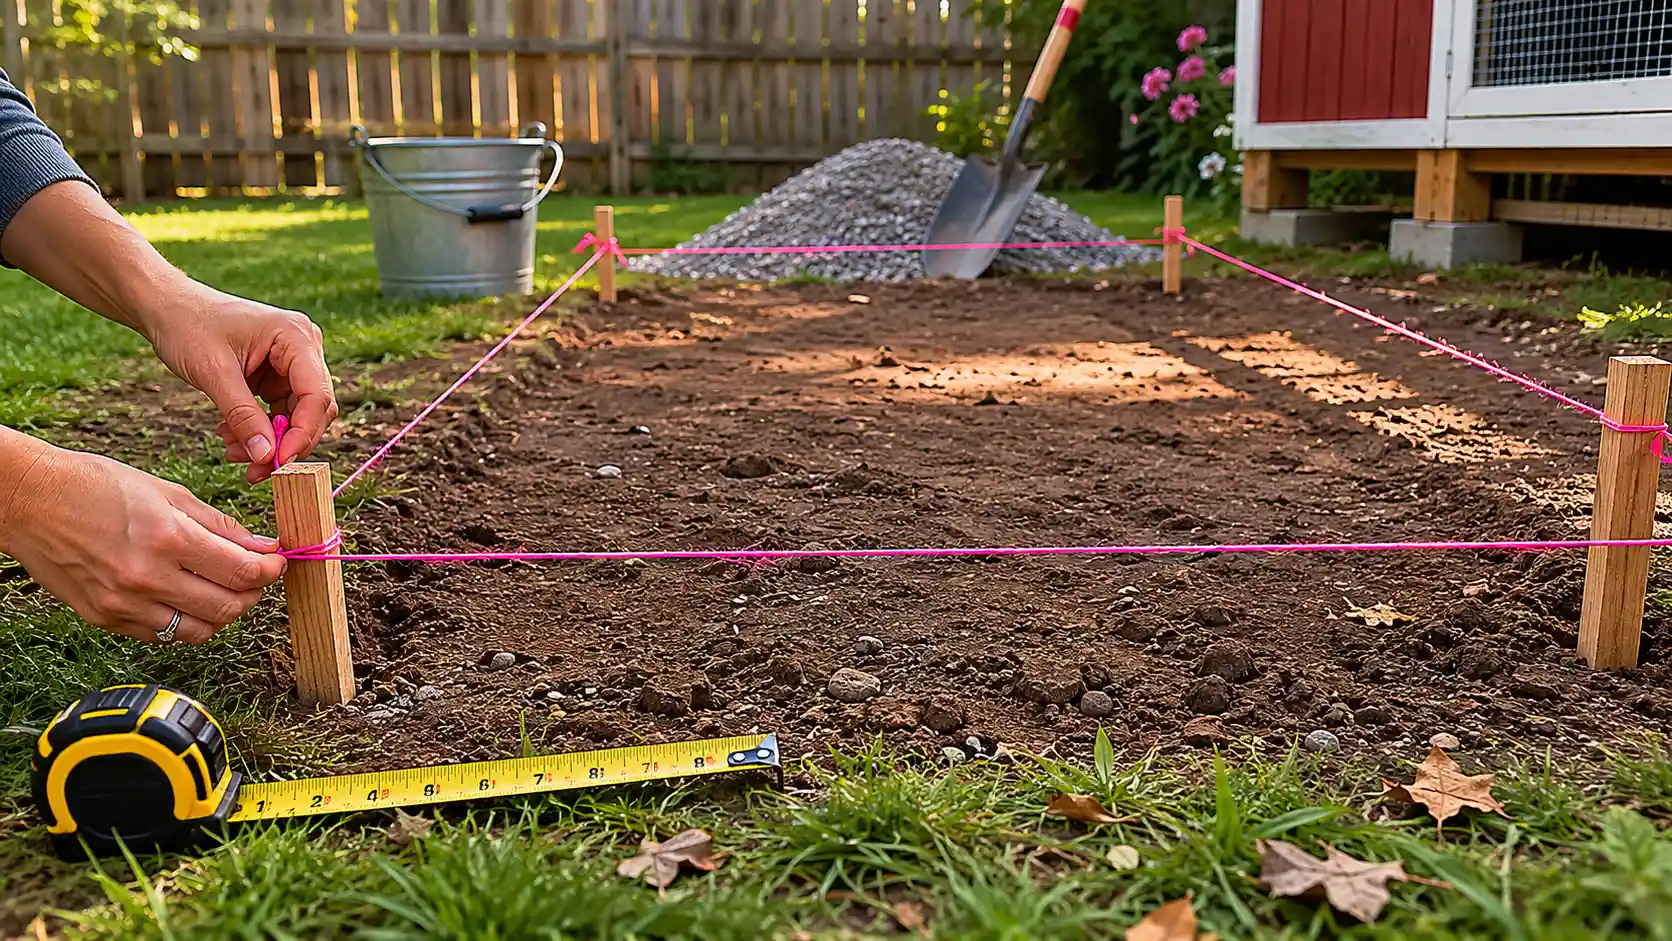
Pick a spot with morning sun and afternoon shade. Morning sunlight helps dry overnight moisture in the coop; afternoon shade keeps the interior from overheating in summer.
Clear the ground of grass, weeds, and debris. If your soil drains poorly, lay down a 2 to 3-inch layer of gravel before placing your foundation.
Good drainage under the coop reduces moisture buildup, which is one of the main causes of respiratory problems in chickens and rot in the structure.
Mark out your coop footprint with stakes and string before you start building.
Step 2: Build the Foundation and Floor Frame
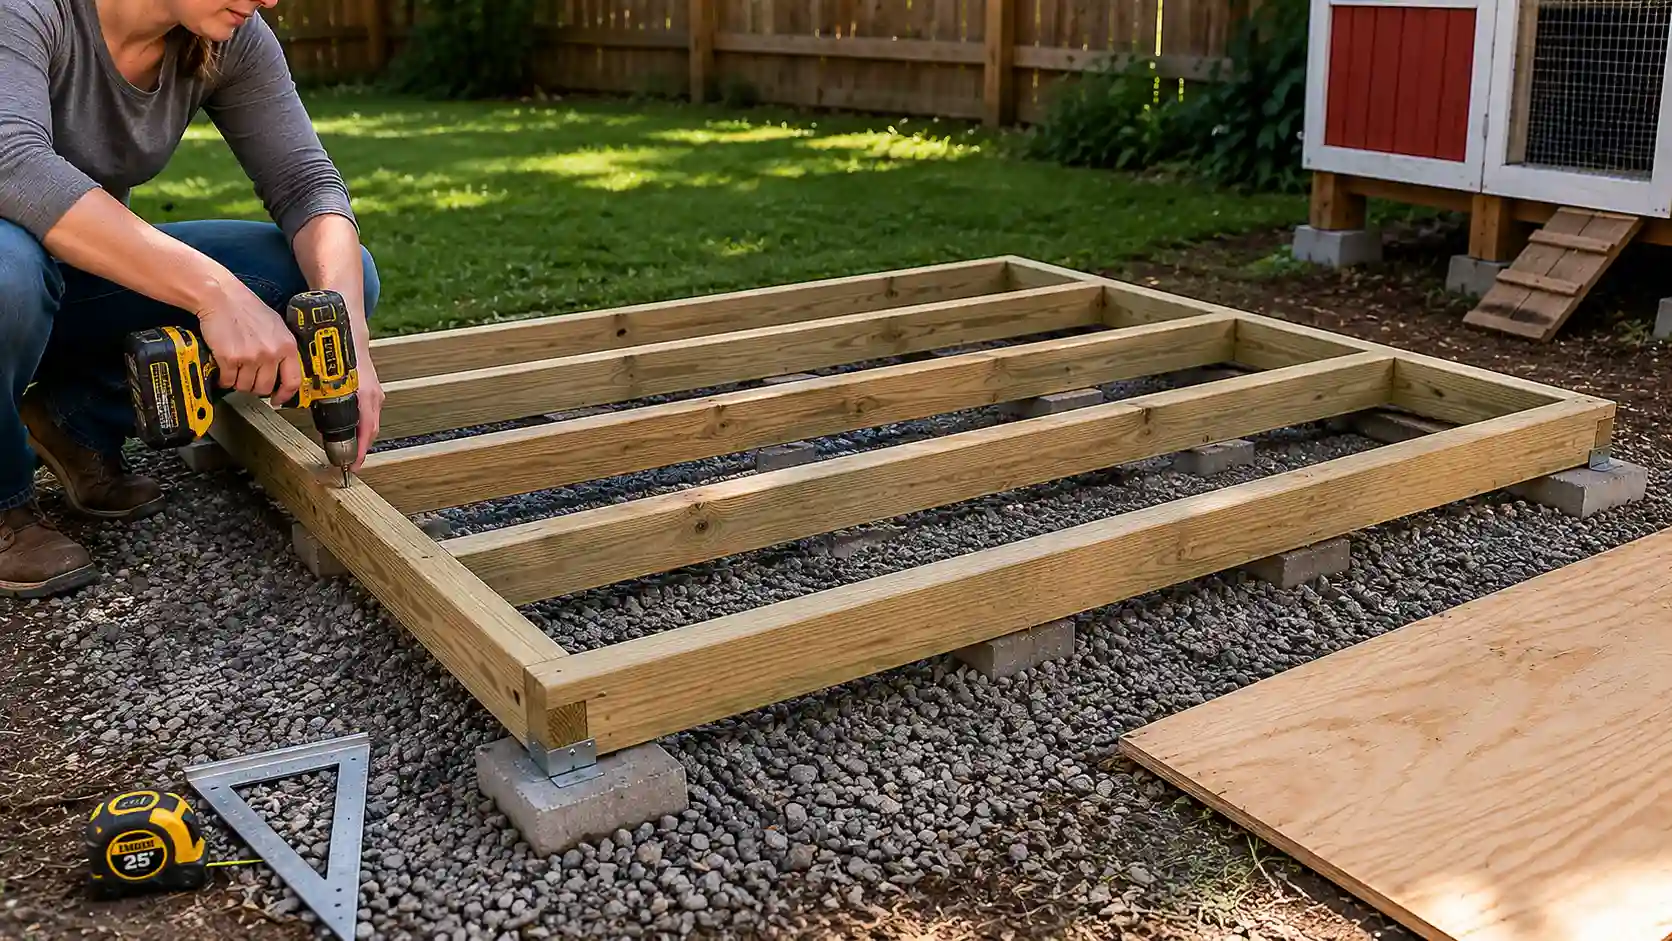
For a stationary coop, pressure-treated 4×4 skids laid directly on the ground (or on gravel) work well for small to mid-size structures.
For a larger coop or wet climate, use concrete deck blocks or post anchors set into the ground.
Build the floor frame from 2×4 lumber. Cut two long pieces (rim joists) and several short pieces (floor joists) spaced 16 inches apart.
Assemble with 3-inch exterior screws or galvanized joist hangers. The frame should sit flat and level — check this before moving on.
Cut a piece of 3/4-inch exterior-grade plywood to fit the floor frame and screw it down. This becomes your coop floor.
Step 3: Frame the Walls
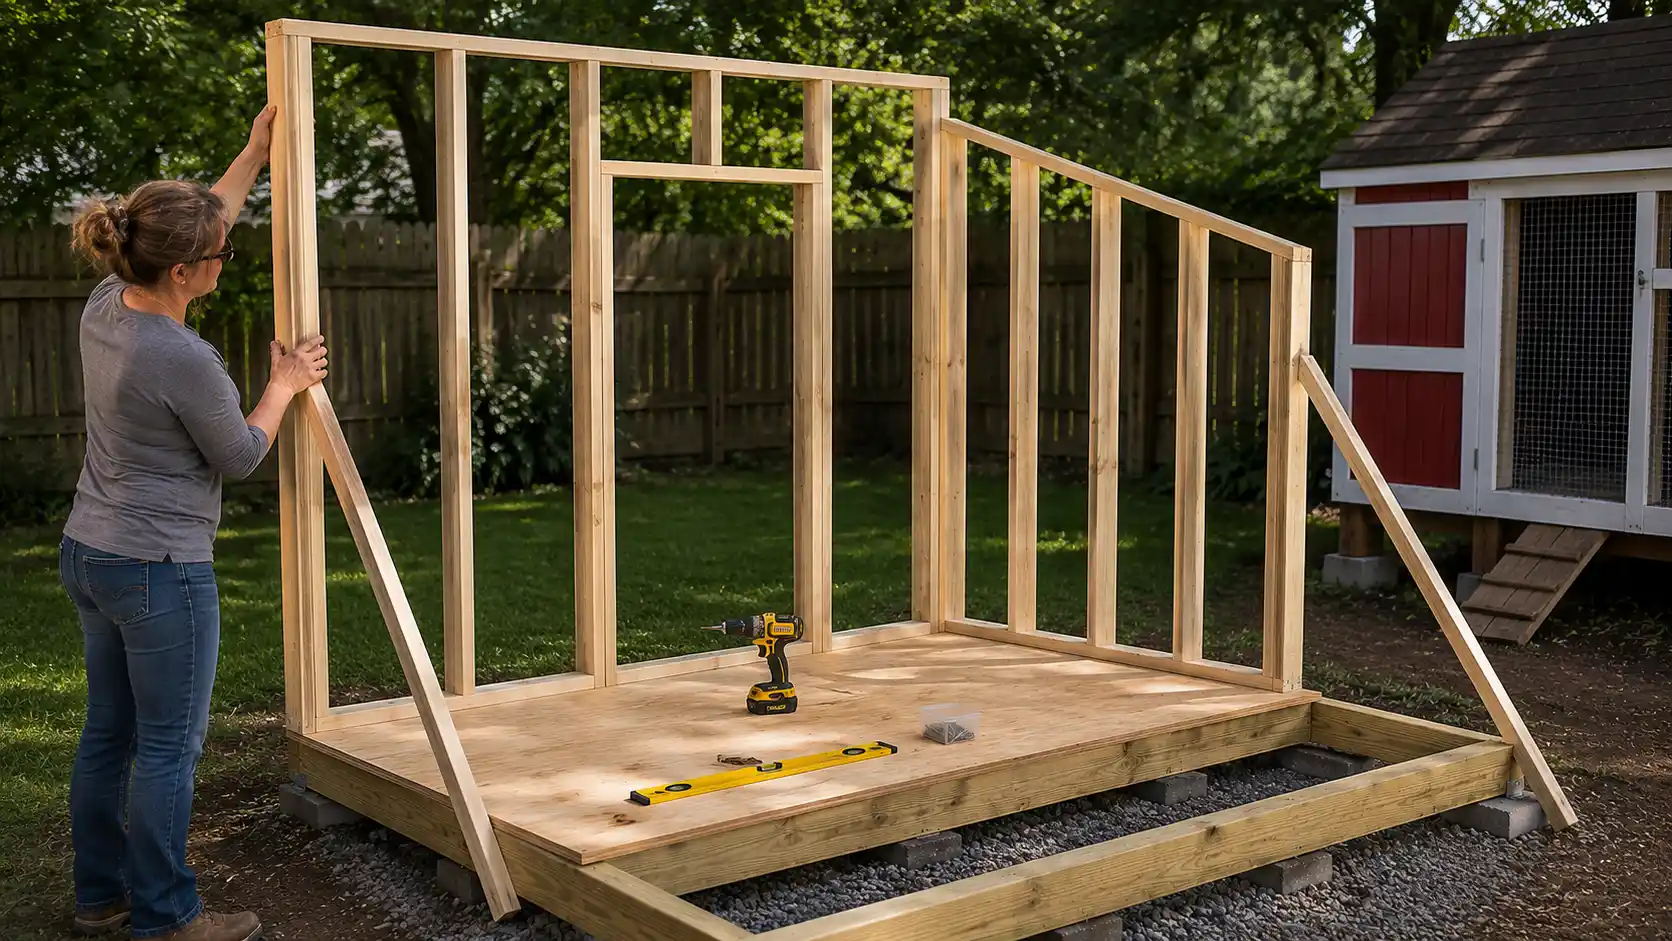
Cut your wall studs from 2×4 lumber. Standard stud spacing is 16 inches on center.
Build each wall flat on the ground before standing it up; it’s much easier than trying to nail studs into a top plate while standing.
For a simple shed-style coop, two walls are the same height (the front and back) and two walls are different heights (the side walls, which create the slope for the roof).
A 7-foot front wall and a 6-foot back wall give you a gentle slope that sheds rain.
Stand the walls, check for plumb with a level, and brace them temporarily while you fasten them together at the corners and to the floor frame.
Step 4: Add Doors and Ventilation Openings
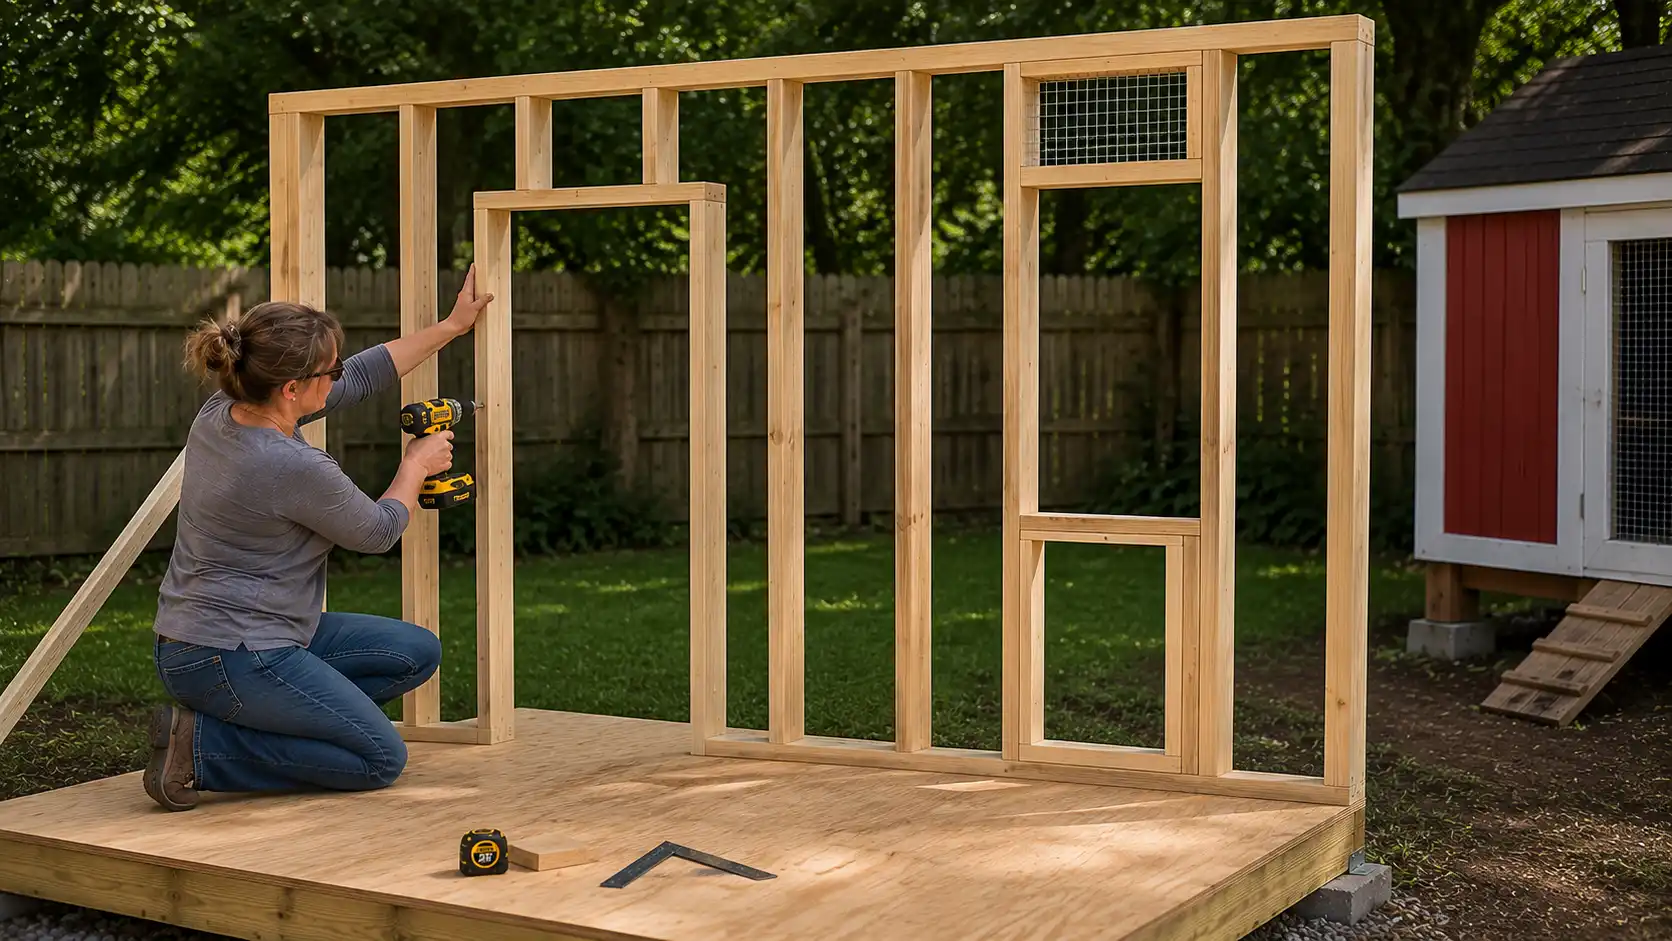
Frame in your openings while the walls are going up; it’s much easier than cutting them out afterward.
You need at least two openings: a people door for you to access the coop (2 feet wide by 5 to 6 feet tall is comfortable), and a pop door for the chickens to move between the coop and the run.
Pop doors are typically 10 to 12 inches wide and 12 to 14 inches tall.
Frame ventilation openings near the top of the walls, below the roofline. These should account for at least 1 square foot of ventilation per 10 square feet of coop floor space.
Step 5: Install the Roof
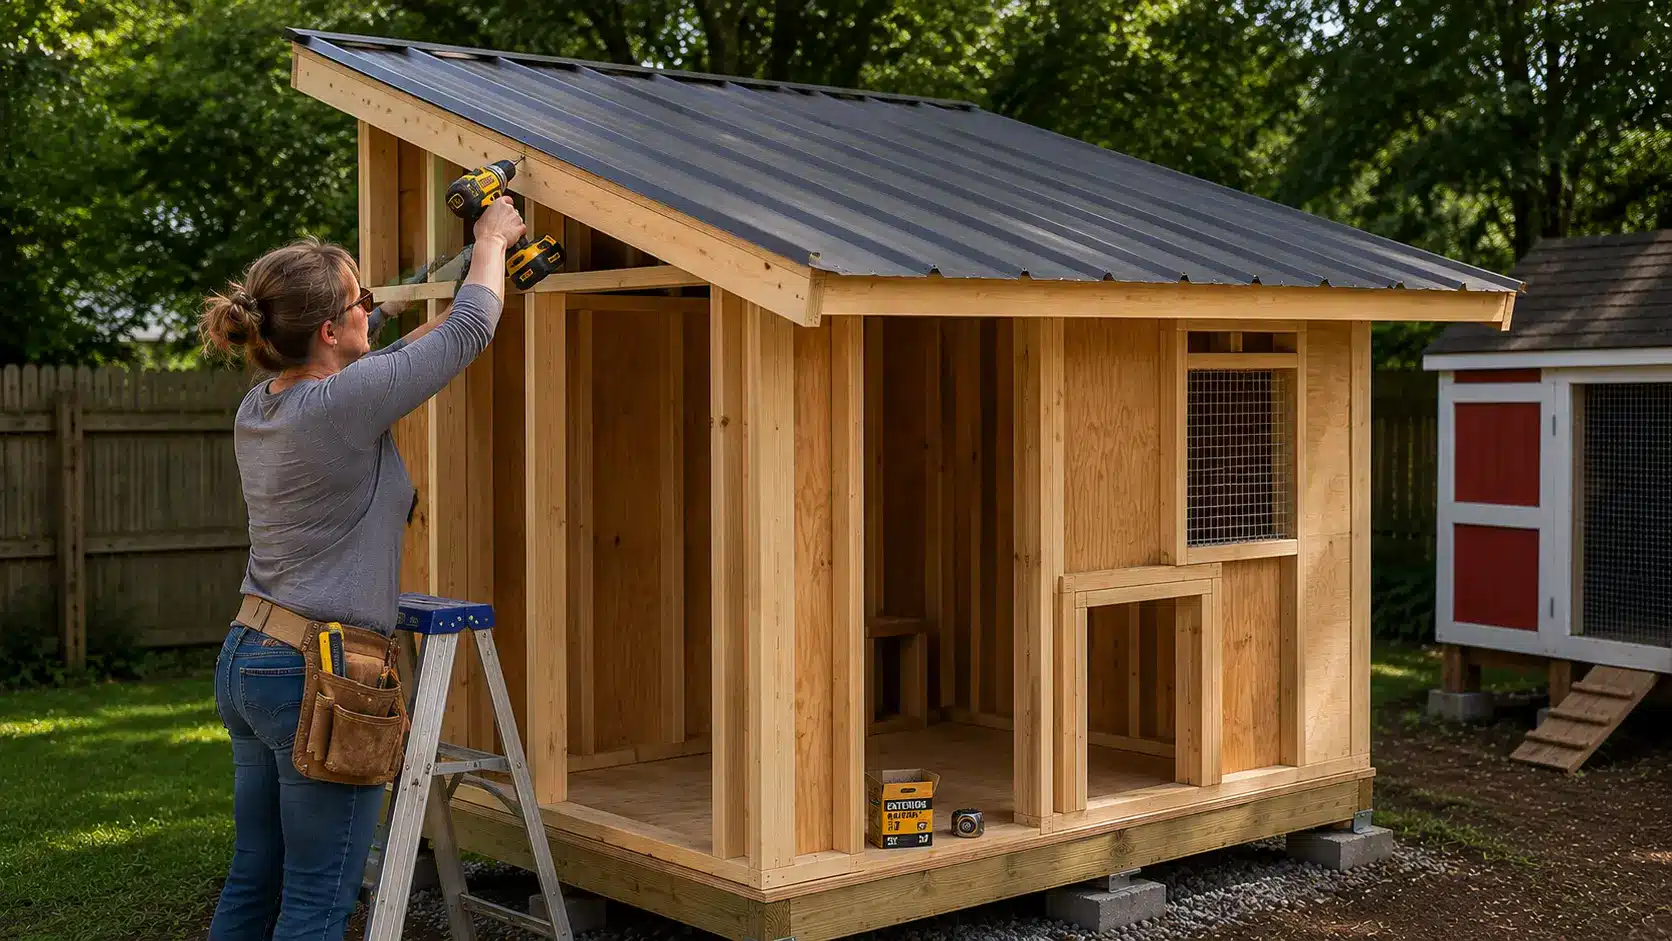
A shed roof (single slope, draining to the rear) is the simplest option and the most practical for a backyard coop.
Cut your rafters from 2×4 lumber, space them 16 to 24 inches apart, and notch them at the top plate with a bird’s mouth cut so they sit flat.
Sheath the roof with 3/4 inch exterior plywood, then cover it with metal roofing panels or asphalt shingles.
Metal roofing is worth the extra cost for a chicken coop; it lasts for decades, sheds rainwater cleanly, and doesn’t retain moisture the way shingles can.
Extend the roof 6 to 12 inches past the front wall as an overhang to keep rain out of the coop entrance and off the ventilation openings.
Step 6: Build Nesting Boxes
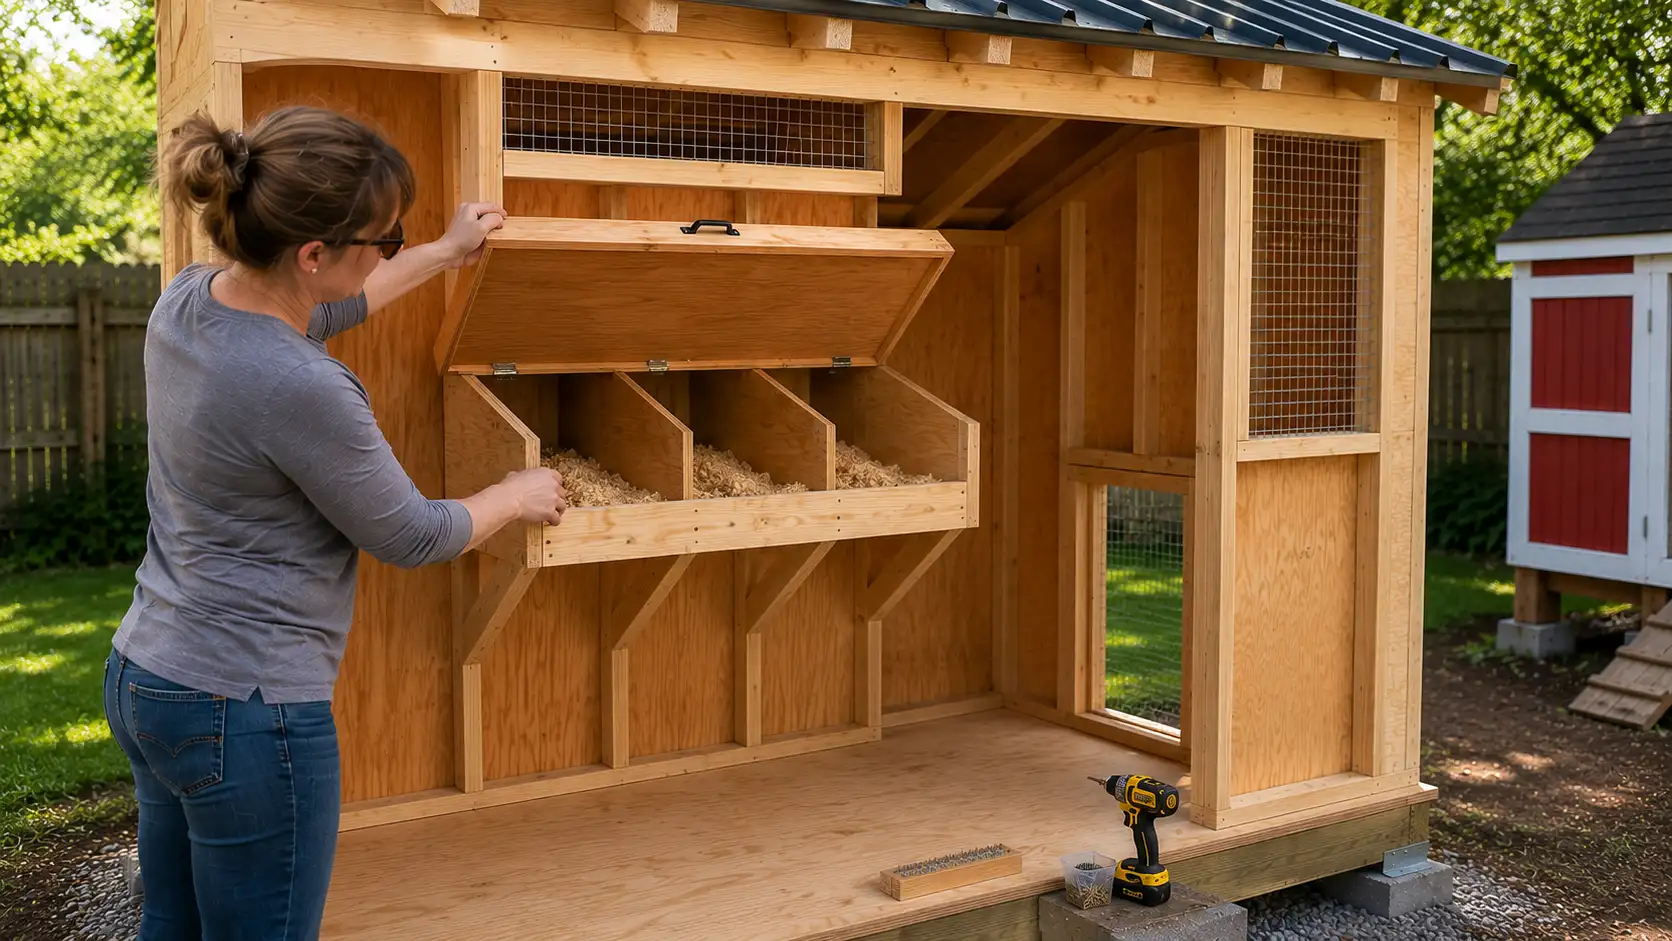
Nesting boxes can be built into the coop wall or attached as an external box that hangs outside the coop with a lid you open from outside.
External boxes save interior floor space and make egg collection much easier; you lift the lid from outside instead of going into the coop.
Each box should measure roughly 12 inches wide, 12 inches deep, and 12 inches tall. One box per three to four hens is the standard recommendation, though in practice most flocks favor one or two boxes regardless of how many you provide.
Mount the boxes 12 to 18 inches off the floor. Higher than that, and younger birds may struggle to access them. Add a small lip at the front (about 3 inches) to keep bedding and eggs from rolling out.
Step 7: Install Roosting Bars
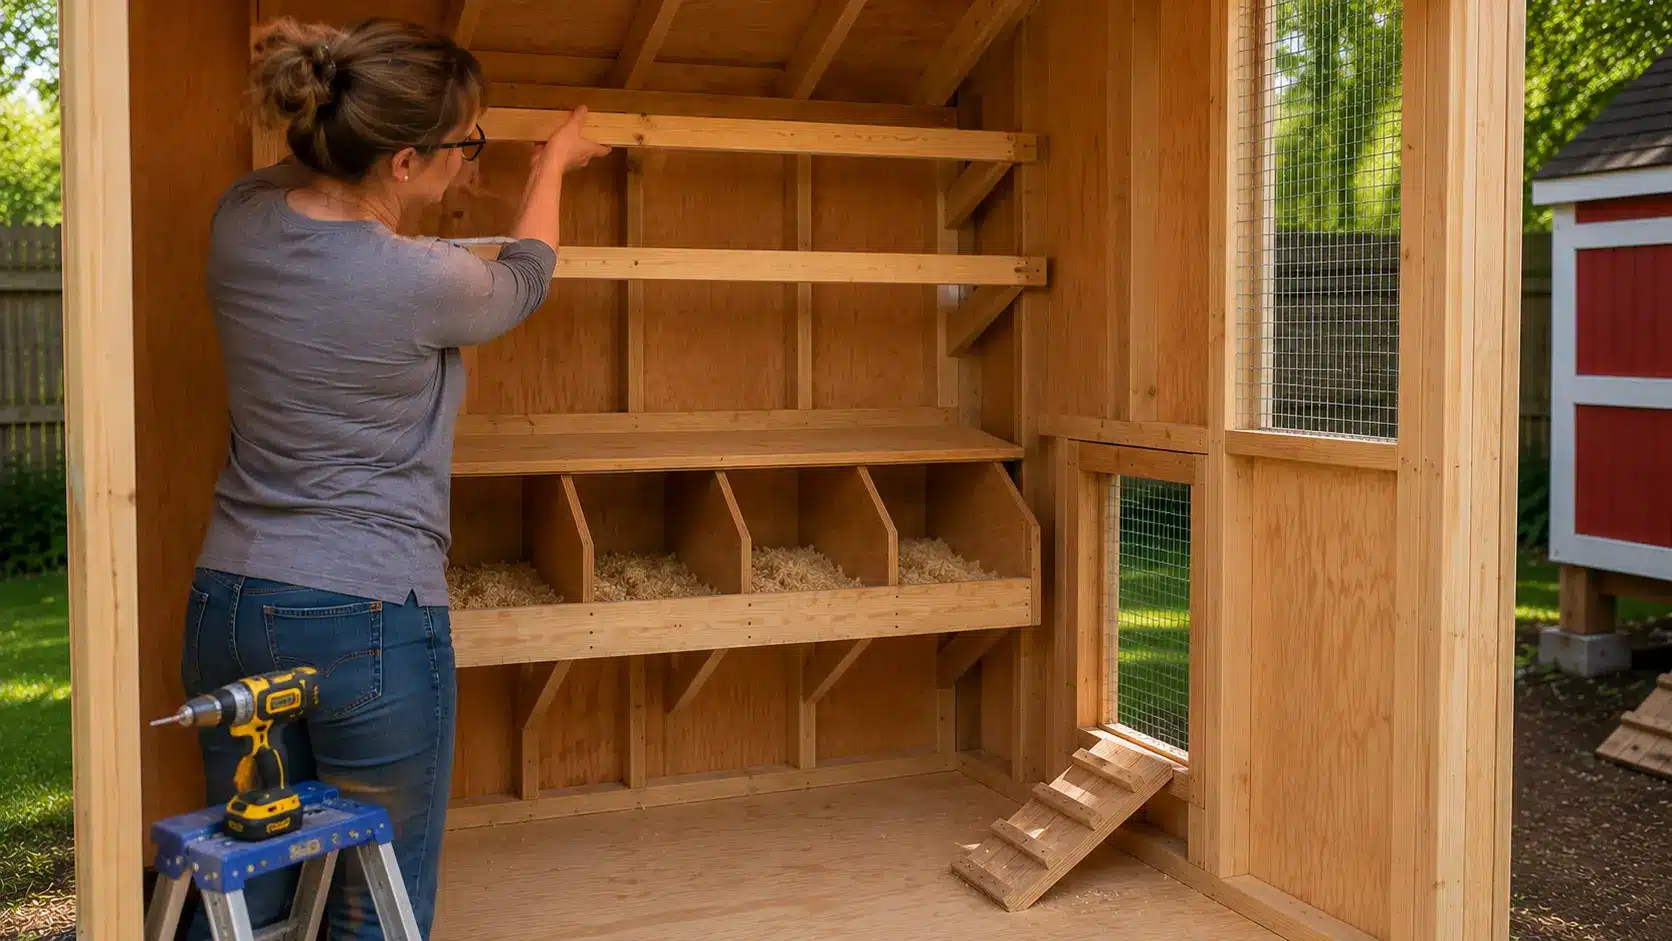
Chickens sleep on roosting bars, not on the ground or in nesting boxes. Getting this right matters; birds that can’t roost properly are more stressed and more prone to respiratory problems from sleeping in damp bedding.
Use 2×4 lumber laid flat (wide face up) rather than round dowels. The flat surface lets birds rest their entire foot on the bar, keeping their toes warm in cold weather.
Position roosting bars higher than the nesting boxes; otherwise, birds will roost in the boxes and foul them with droppings.
18 to 24 inches off the floor works for most standard breeds. Allow at least 8 to 10 inches of bar length per bird.
Step 8: Secure the Coop With Hardware Cloth
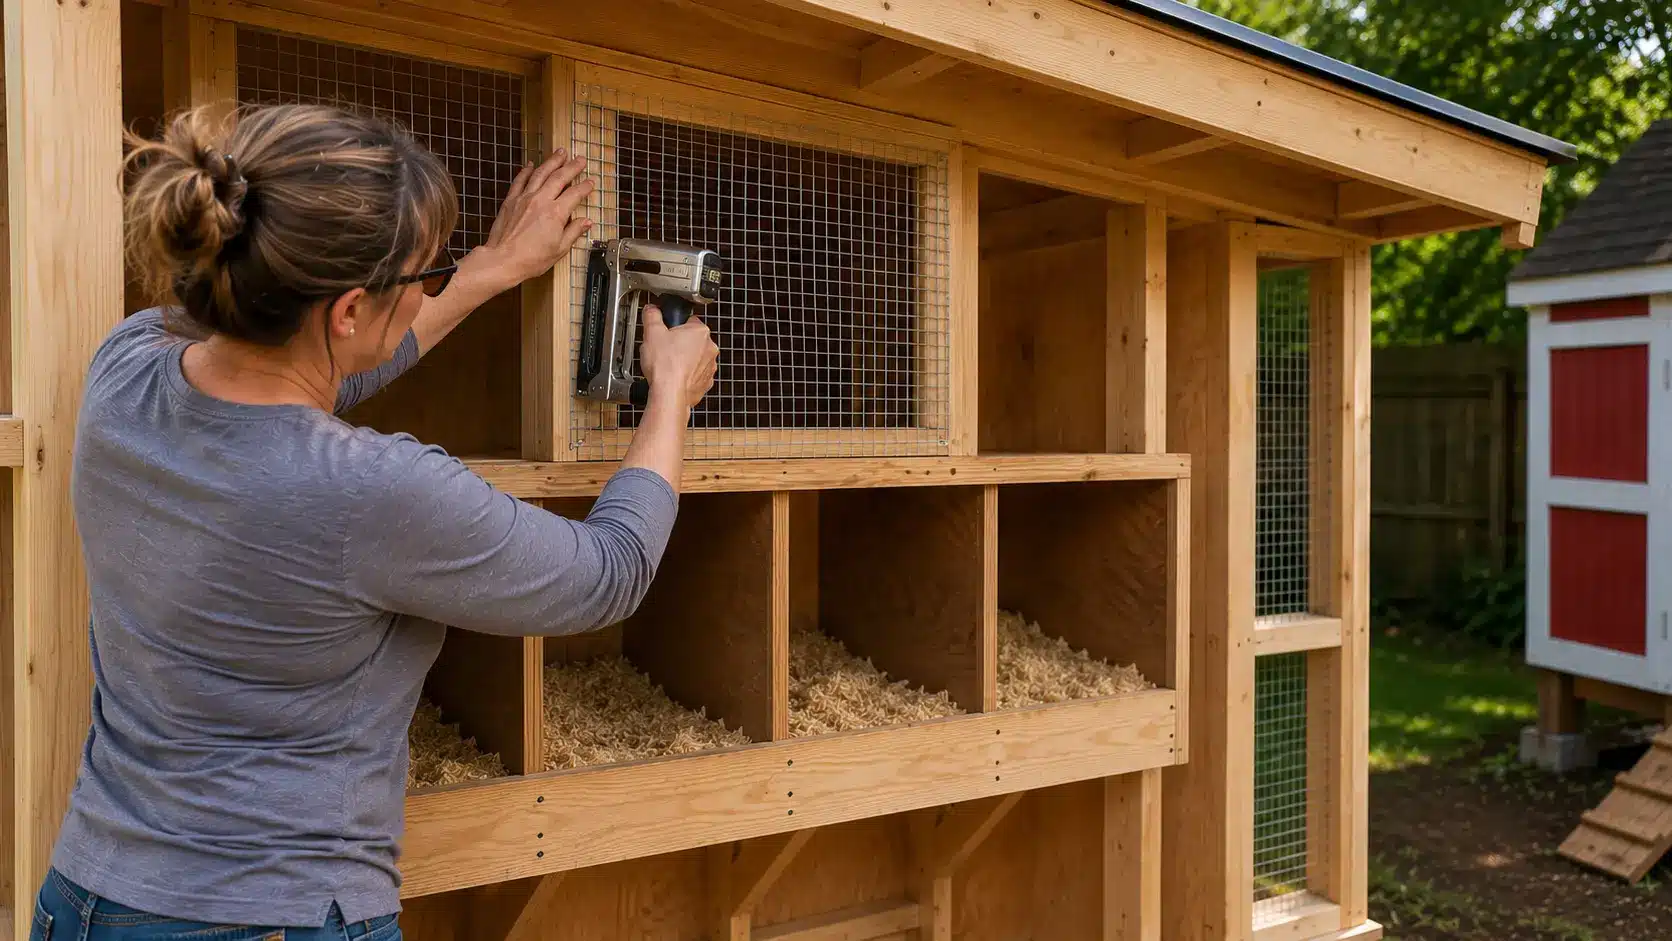
Cover all ventilation openings with 1/2 inch hardware cloth. Cut it to size with wire cutters and fasten it with a heavy-duty staple gun, then add a wood frame (1×2 lumber works) over the edges to prevent predators from pulling it loose.
Check every gap where walls meet the floor and where the roof meets the walls. Any opening larger than 1/2 inch is a potential entry point for weasels and rats.
Seal gaps with caulk, wood filler, or additional hardware cloth.
Step 9: Add Bedding, Feeders, and Waterers
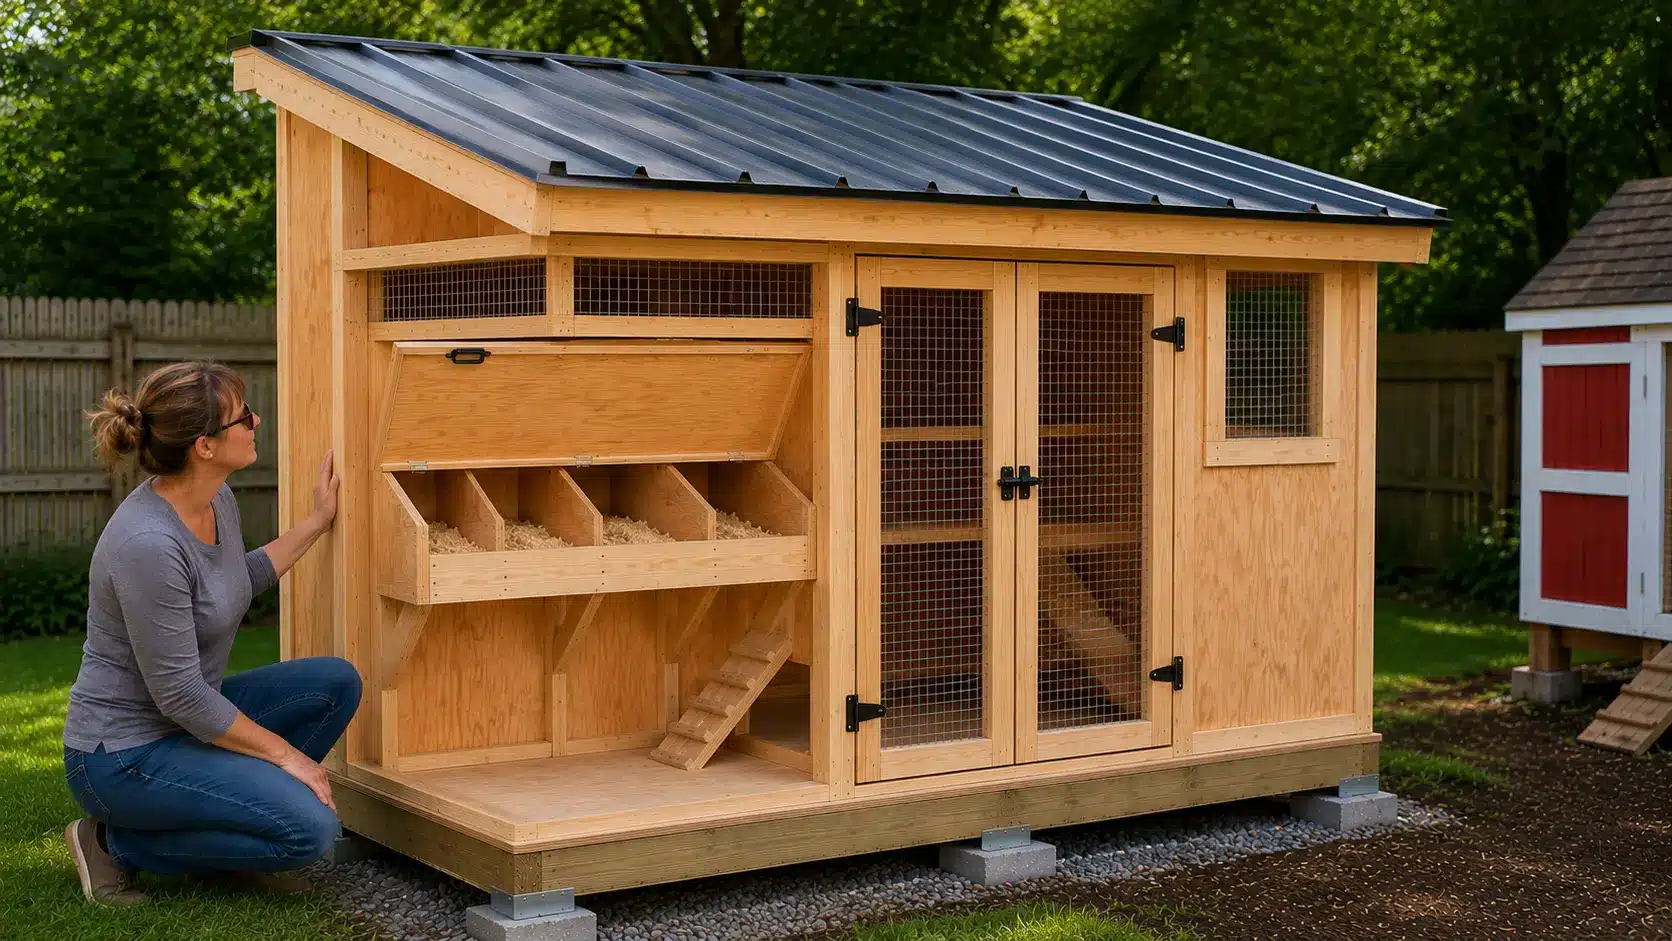
Spread 3 to 4 inches of bedding across the coop floor before your birds move in. Pine shavings are the most widely used option; they’re absorbent, easy to find, and have mild antimicrobial properties.
Hang feeders and waterers at shoulder height for your birds (roughly 6 to 8 inches off the floor for standard breeds).
Use a nipple-style waterer or a covered poultry waterer rather than an open bowl. Open water sources get fouled quickly and become breeding grounds for bacteria and algae.
What Should Be Inside a Chicken Coop?
A functional coop has six things: nesting boxes, roosting bars, feeders, waterers, bedding, and ventilation. Here’s how to do each one right.
Nesting Boxes
One box for every three to four hens. 12x12x12 inches minimum. Mounted 12 to 18 inches off the floor, lower than the roosting bars.
Fill with 2 to 3 inches of bedding — pine shavings, straw, or wood excelsior (also called aspen nesting material, which stays clean longer and discourages mites).
Fake eggs or golf balls placed in boxes during the first few weeks help new layers figure out where to lay.
Roosting Bars
One continuous bar or a step-ladder arrangement works. Flat 2×4 lumber, rough side up. 8 to 10 inches per bird minimum. 18 to 24 inches off the floor.
Positioned higher than any nesting box. Space multiple bars at least 12 inches apart horizontally so birds on higher bars don’t drop waste on birds below.
Feeders and Waterers
Hanging tube feeders and hanging bell waterers are the standard for a reason: they work reliably, they’re easy to refill, and hanging them keeps the contents cleaner.
A 7-pound hanging feeder handles four to six hens for a few days. Use a heated waterer or heated base in winter if temperatures drop below freezing.
Bedding Options
| Bedding Type | Absorbency | Cost | Notes |
|---|---|---|---|
| Pine shavings | High | Low | Most commonly used, widely available |
| Straw | Medium | Low | Good insulation, but molds if wet |
| Sand | Low | Low-Medium | Easy to clean, poor insulation |
| Hemp bedding | Very high | Higher | Long-lasting, excellent for the deep litter method |
| Wood pellets | Very high | Medium | Breaks down into sawdust when wet |
Ventilation Openings
At minimum, 1 square foot of ventilation per 10 square feet of floor space. Placed near the top of the walls, below the roofline, so fresh air moves through without drafts hitting birds at roost height. Cross-ventilation, openings on opposite walls, works better than openings on a single wall.
Video Tutorial on How to Build a Chicken Coop
Sometimes seeing the process in action makes everything click. The video below walks through a full chicken coop build from the ground up, so you can follow along visually as you work through each step in this guide.
Special thanks to Third Coast Craftsman for putting together this excellent tutorial on building the ultimate courtyard chicken coop. It is one of the most thorough and beginner-friendly walkthroughs available, and well worth watching before you start your build.
How to Predator-Proof a Chicken Coop
Predators look for weak spots before they try to force. A safe coop needs strong mesh, secure latches, and protected edges.
- Use 1/2-inch hardware cloth instead of chicken wire on vents, windows, runs, and small gaps.
- Add a 12-inch hardware-cloth apron around the run to deter foxes, skunks, dogs, and other digging predators.
- Use spring-loaded clips, barrel bolts with pins, or padlocks instead of simple hook-and-eye latches.
- Build a sturdy run frame so dogs cannot push, bend, or knock it over from the outside.
- Frame hardware cloth edges with 1×2 lumber and check regularly for rust, loose staples, or gaps.
A few extra safety steps during the build can prevent serious losses later. I would rather over-secure the coop once than repair it after a predator finds a weak spot.
Conclusion
When I started planning my coop, I did what I do with any project: I made a list, checked the rules, thought through the logistics, and then started building.
If you take one thing from this read, let it be this: build for the right number of birds, put ventilation where it belongs, and take predator-proofing seriously from the start. T
Those three things determine whether your coop works long-term more than any aesthetic choice or fancy feature.
A simple, well-built 4×8 structure with a covered run, secure hardware, and proper airflow will serve your flock better than a showpiece coop with poor drainage and chicken wire sides.
Start simple. Build it right. You can always add on later.
Frequently Asked Questions
Do Chickens Need a Light Inside the Coop?
Not for health, but a light on a timer extends laying through winter by mimicking longer daylight hours.
Can I use a Plastic Storage Shed as a Chicken Coop?
Yes, but add extra ventilation cutouts and hardware cloth covers; plastic sheds hold heat and moisture badly.
What Temperature is Too Cold for Chickens in a Coop?
Most breeds tolerate down to 20°F without supplemental heat if the coop is dry, draft-free, and well-ventilated.
Do I Need a Rooster for Hens to Lay Eggs?
No. Hens lay eggs without a rooster. You only need one if you want fertilized eggs for hatching.
How do I Stop a Chicken Coop From Smelling?
Clean droppings weekly, maintain dry bedding, and ensure strong cross-ventilation. An ammonia smell means that both moisture and airflow are problems.