I still remember staring at a plain white shirt and feeling completely stuck. I loved the colorful designs I kept seeing everywhere, but I had no idea how people created them.
The folds looked confusing, and I assumed tie-dye was much harder than it actually was. One afternoon, I decided to stop overthinking and simply try a few different tie-dye patterns for myself.
Some turned out better than others, but each one taught me something new. Over time, I realized that changing the fold could create a very different design.
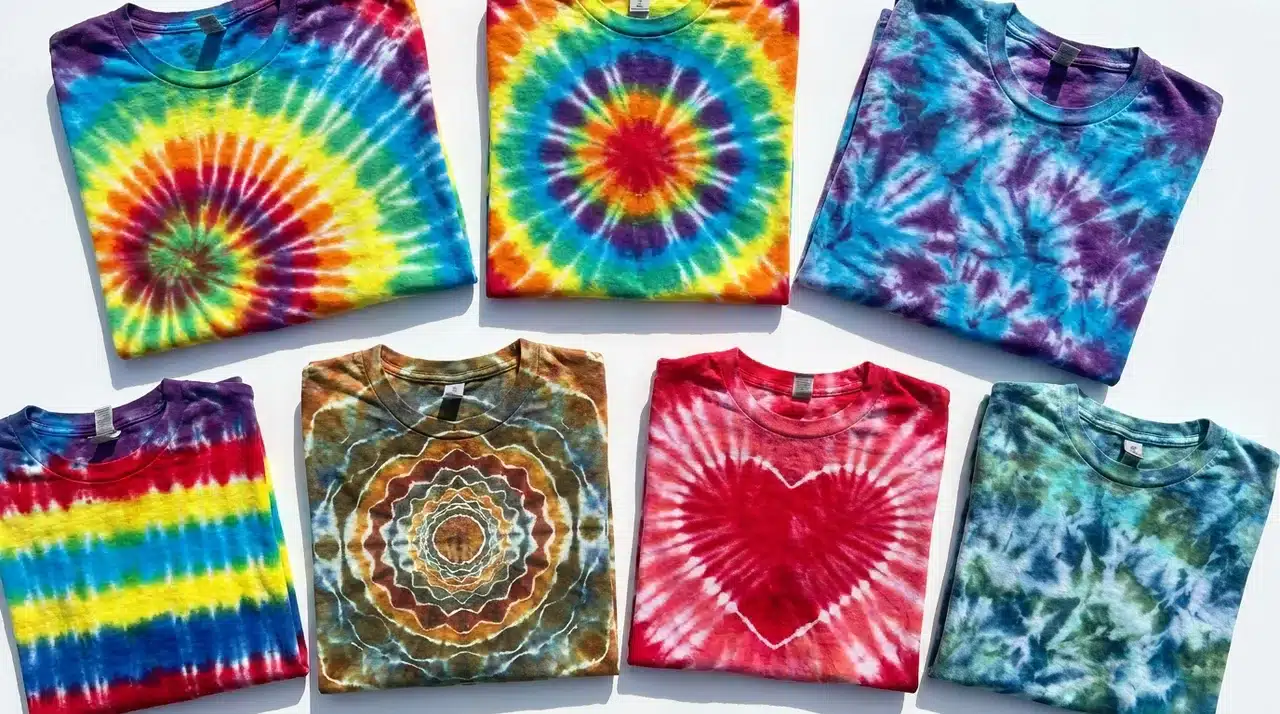
In this post, you’ll learn different tie-dye patterns, how they are created, and which ones are easiest to start with.
What Makes a Tie Dye Pattern Work
The fold creates the basic shape of the pattern, while the placement of the dye affects the final look. Creases, twists, and rubber bands can limit how much dye reaches certain parts of the fabric.
The areas that get dyed show color. The areas that are tightly folded or tied often stay lighter than the surrounding fabric. That contrast is what creates the design.
Before picking a pattern, make sure you have the basics down. Knowing how to tie dye properly, from prepping your fabric to applying dye and rinsing, makes every folding technique on this list easier to pull off.
Once you understand the basics, changing the fold can create very different results.
Tie-Dye Techniques to Create Different Patterns
The pattern you get depends on how you fold, twist, and tie your fabric. Simple changes can make a big difference in the final look.
- Spirals and Twists: Twisting fabric creates circular, radiating patterns and sharper lines with tighter twists.
- Accordion Folds: Folding back and forth forms stripes or geometric shapes in any direction.
- Crumple or Scrunch: Random bunching creates soft, marbled designs with unique results.
- Tying with Rubber Bands: Blocks dye in sections and leave lighter shapes where bands are placed.
- Layered Folds: Triangles, squares, or wedges create repeating patterns and stay neat with cardboard.
- Ice and Water Techniques: Ice or dripping dye produces soft, watercolor-like, organic effects.
Try these methods to see how folds and ties affect the design, and start simple before moving to intricate patterns.
What You Need Before You Start
Before you start, gather a few basic supplies to make the process go more smoothly and be less messy.
- Use a 100% cotton garment or natural fiber item.
- Choose a fiber reactive dye or a beginner kit like Tulip One-Step.
- Keep soda ash ready for pre-soaking.
- Use rubber bands or zip ties to create your pattern.
- Fill squeeze bottles with dye for better control.
- Wear plastic gloves to protect your hands.
- Cover your work surface with a plastic table cover or trash bags.
- Use resealable plastic bags while the dye sets.
- Choose lightweight cotton for brighter, more even results.
With the right tie-dye fabric and supplies, your project will be much easier to manage.
Creative Tie-Dye Designs to Experiment With
From beginner-friendly designs to more intricate folds, these tie-dye patterns offer a variety of unique color combinations and effects.
1. Spiral
Skill level: Beginner
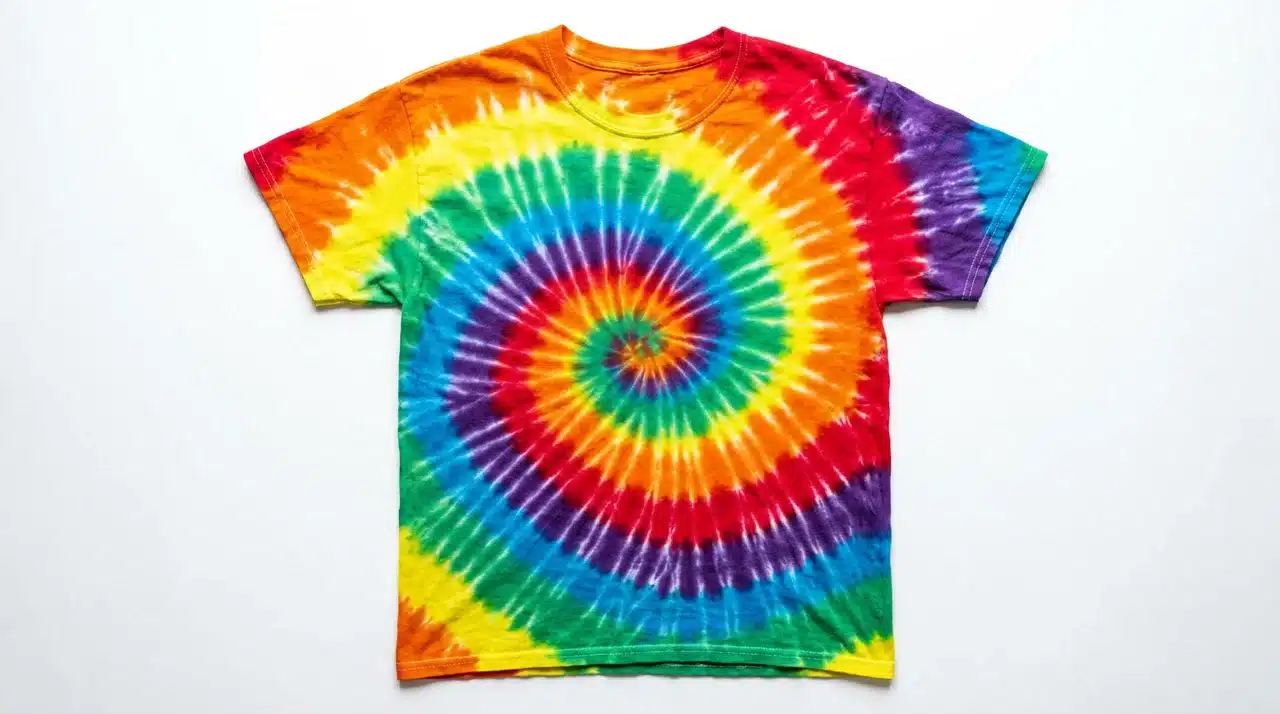
The spiral is one of the most common tie-dye patterns and is often recommended for beginners. Lay your damp shirt flat and pinch the center.
Twist the fabric clockwise, keeping your hand close to the table to keep the shirt flat as it coils. Keep twisting until the whole shirt forms a flat disc shape.
Wrap three to six rubber bands over the disc so they cross at the center, dividing it into equal wedge sections.
Apply a different color to each wedge and repeat on the other side. For the cleanest spiral, place colors in rainbow order so each one blends naturally into the next.
2. Bullseye
Skill level: Beginner
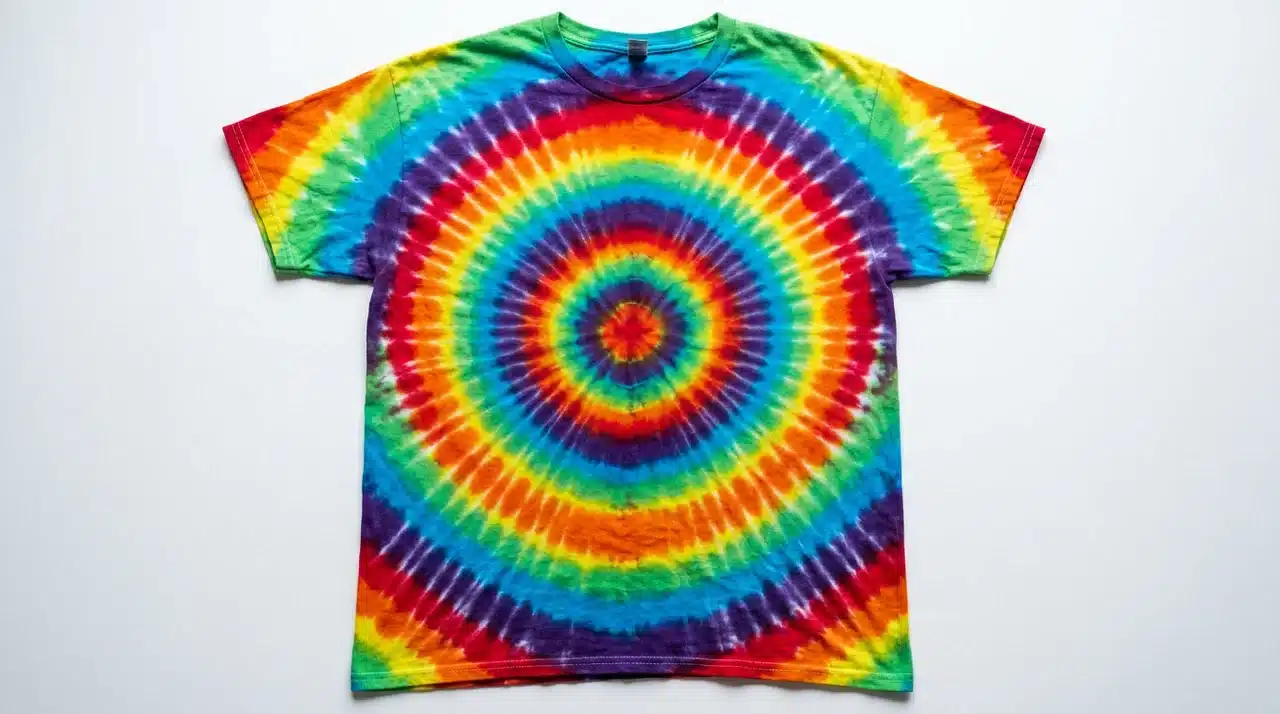
Lay your shirt flat and pinch a small section of fabric wherever you want the center of the bullseye to sit.
Pull that section straight up into a point, and smooth the rest of the shirt down around it to form a cone.
Wrap rubber bands around the cone at even intervals, starting about an inch from the tip. Each band creates a ring of color in the final design.
Apply alternating colors between each band. The more rubber bands you use, the more rings you get.
3. Crumple or Scrunch
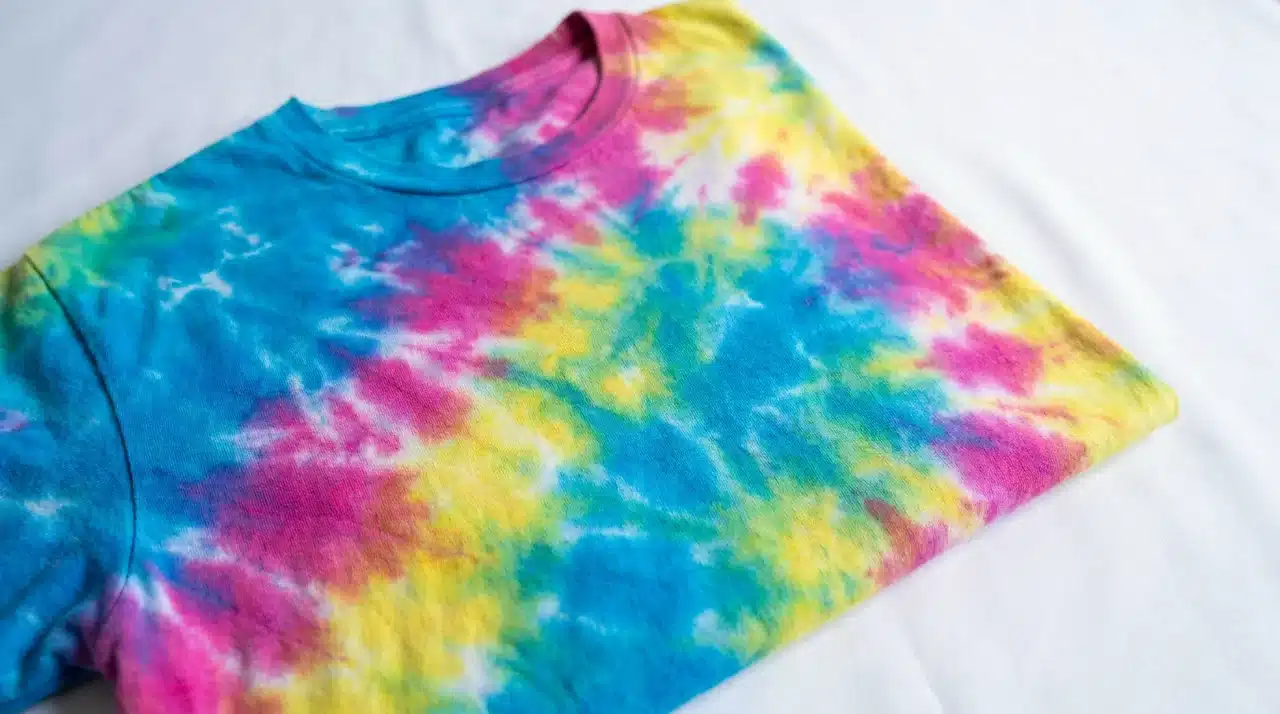
Skill level: Beginner
Many beginners find this pattern easier because the folds do not need to be precise.
Lay your shirt flat and start scrunching random sections of fabric together with your hands. Keep gathering until the whole shirt is bunched into a loose, flat disc.
Wrap several rubber bands around it at random intervals and apply your chosen colors across the surface. Flip and repeat on the other side.
The crumple pattern is flexible, so small mistakes usually do not affect the final design. Every result comes out different, and that is exactly the point.
4. Horizontal Stripes
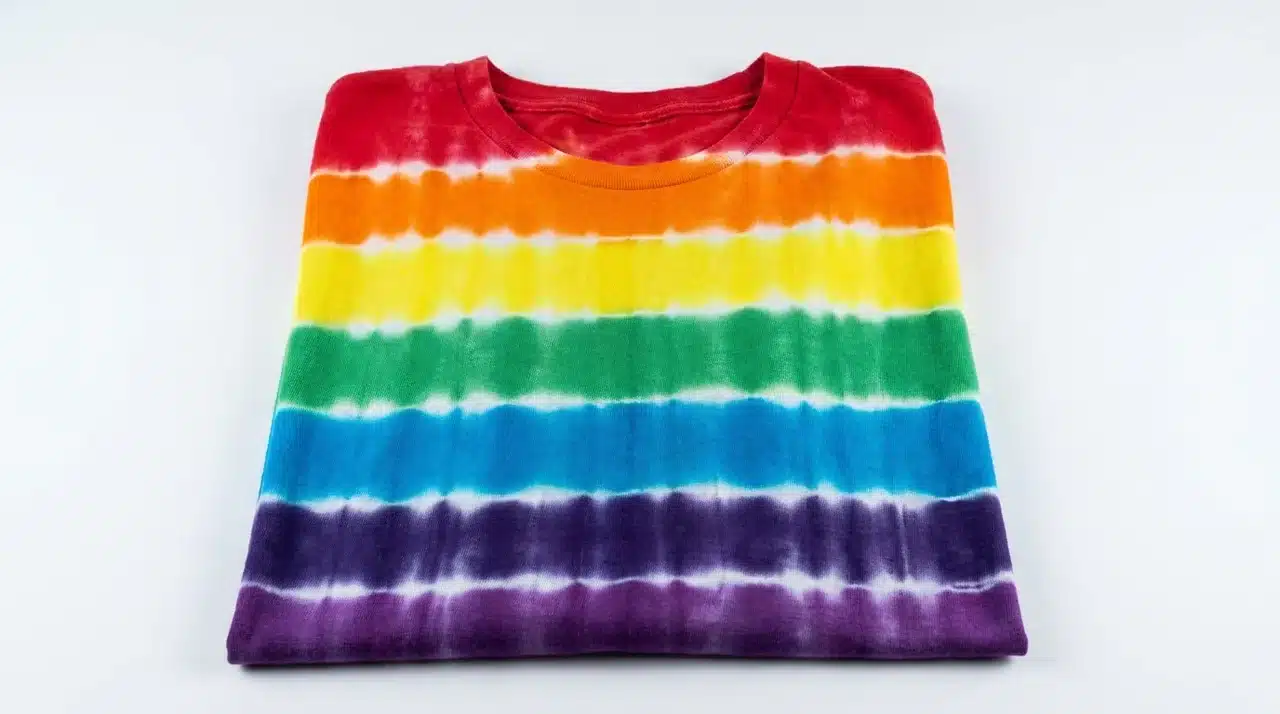
Skill level: Beginner to Intermediate
Lay your shirt flat and fold it into accordion pleats starting from one sleeve across to the other, moving left to right.
Each pleat should be about one inch wide. Once the whole shirt is folded into a long strip, wrap rubber bands around it every one to two inches.
Apply a different color to each band. The bands create the white lines and the sections between them become the colored stripes.
Tuck the sleeves inside before folding to keep the lines clean.
5. Vertical Stripes
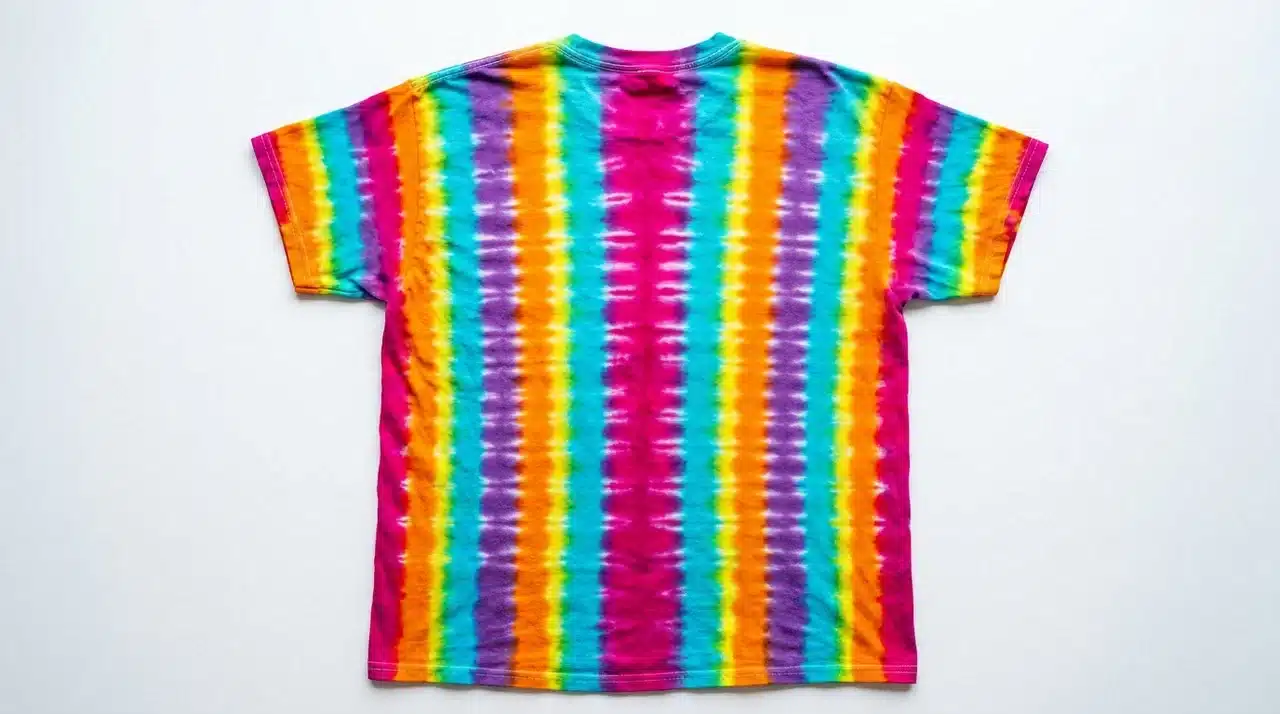
Skill level: Beginner to Intermediate
This works the same way as horizontal stripes, but the accordion folds run from the bottom hem up toward the collar rather than across the shirt.
Fold in one-inch pleats from the hem to the collar, wrap rubber bands every 1 to 2 inches, and alternate colors between bands.
Vertical stripes tend to look longer and more structured than horizontal ones on a finished shirt.
6. Diagonal Stripes
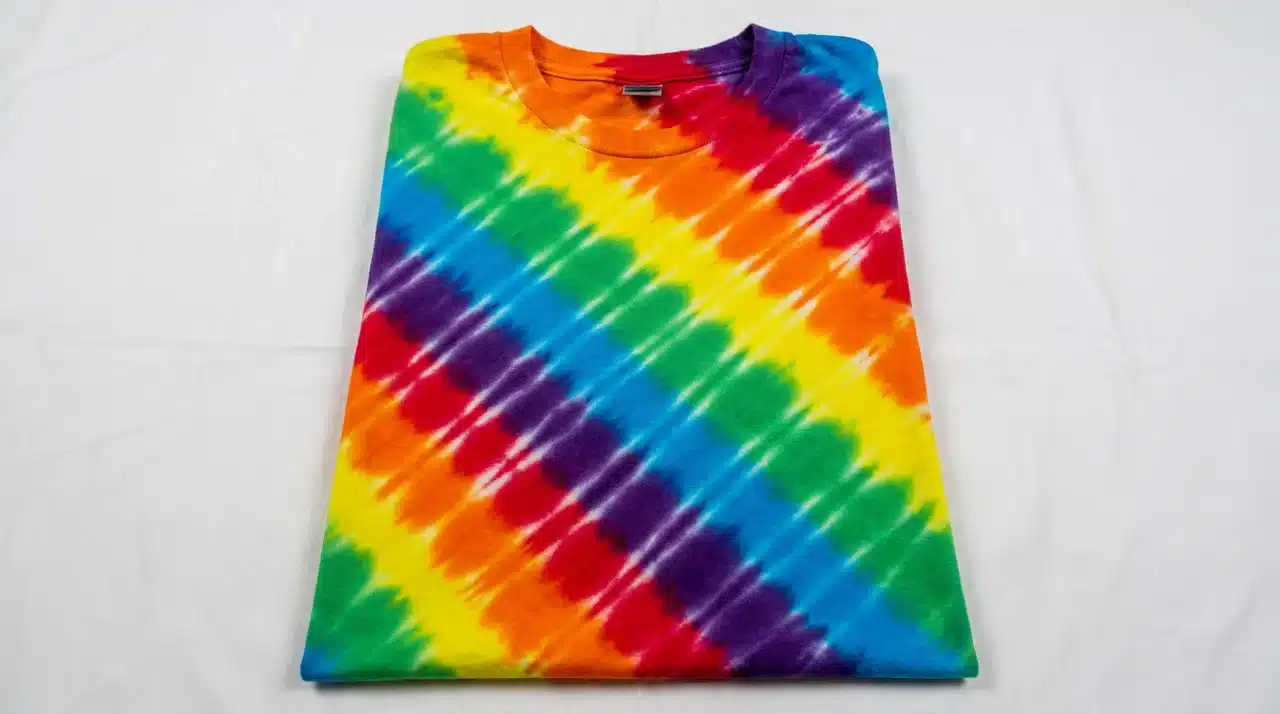
Skill level: Intermediate
Start at the bottom-left corner of the shirt and fold accordion pleats diagonally across the fabric at a 45-degree angle.
Keep the pleats as consistent as possible and tuck the sleeves in line with the rest of the folds as best you can.
Secure with rubber bands every 1 to 2 inches, and apply colors in alternating sections. Diagonal stripes give a more relaxed, less structured look than straight stripe patterns.
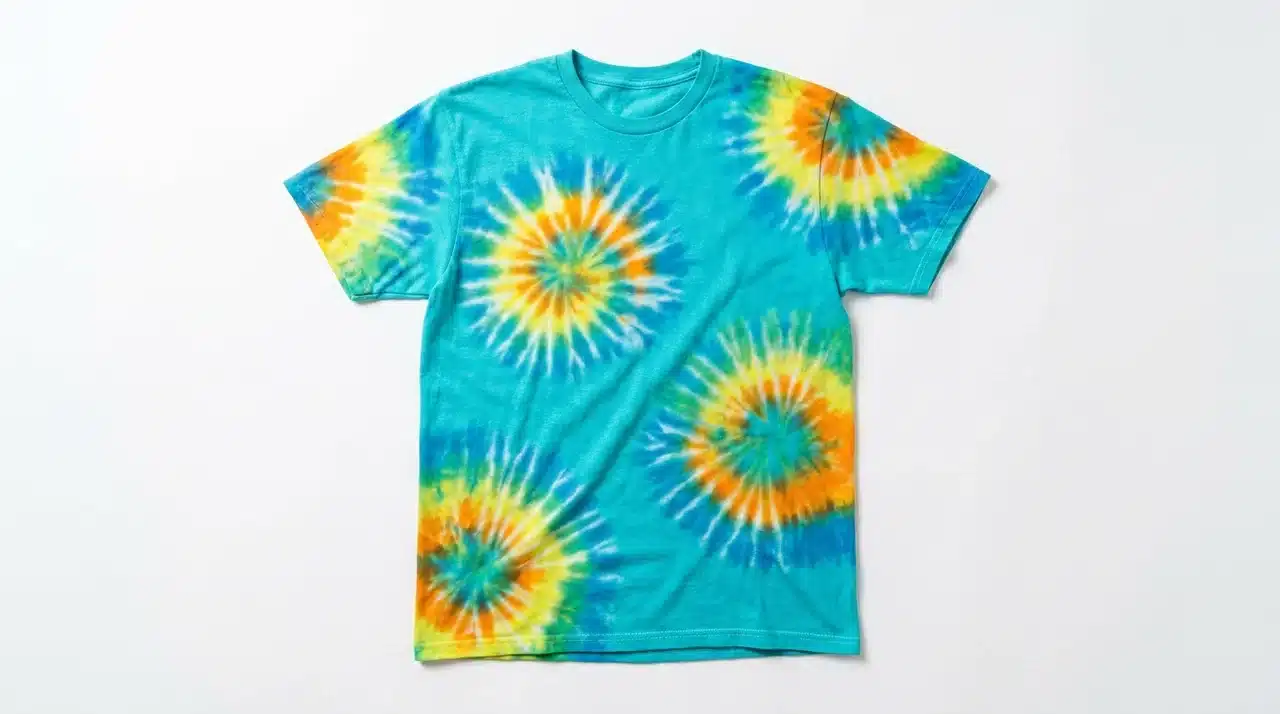
7. Sunburst
Skill level: Intermediate
The sunburst is a series of small bullseyes placed across the shirt rather than one large central ring.
Pinch a small section of fabric anywhere on the shirt and pull it up into a small cone.
Wrap a single rubber band around the cone about half an inch from the tip. Repeat this across the shirt, creating as many sunbursts as you like.
Apply one or two background colors across the rest of the shirt. Placing the sunbursts in a loose cluster rather than a rigid grid gives a more natural result.
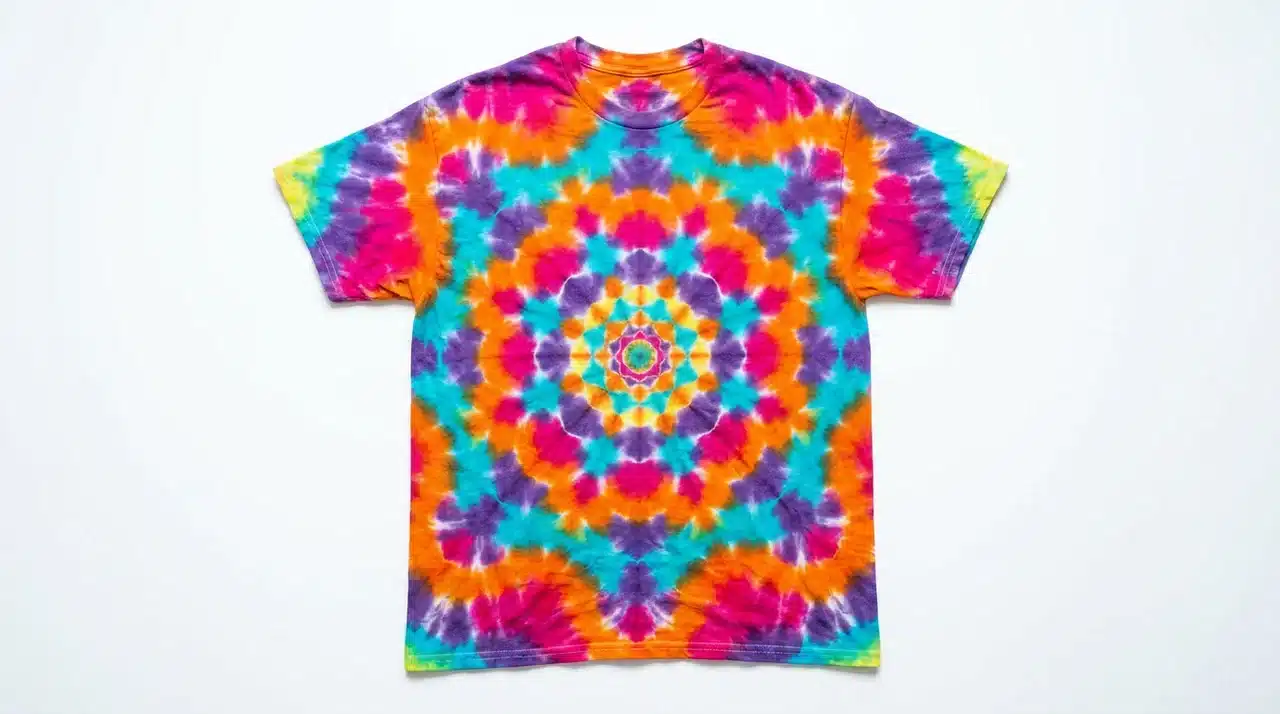
8. Mandala or Kaleidoscope
Skill level: Intermediate to Advanced
Fold the shirt in half lengthwise, then in half again widthwise so it is now in quarters.
Fold it diagonally once, then diagonally again, so the shirt forms a small wedge. Secure with rubber bands, then apply color to each section between the bands.
When unfolded, the symmetry of the fold creates a repeating pattern that resembles a mandala or a kaleidoscope.
Using three to four colors can make the pattern easier to distinguish. Too many colors can muddy the final pattern.
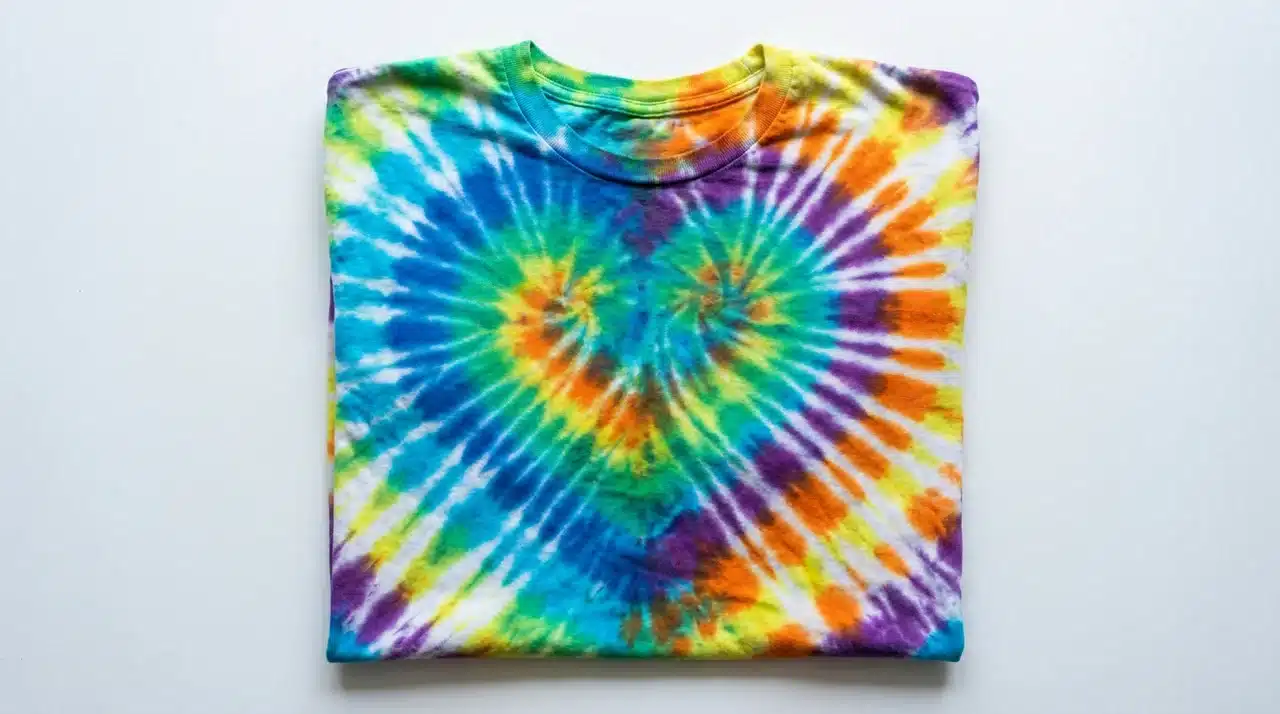
9. Heart
Skill level: Intermediate
Fold the shirt in half lengthwise. Use a washable marker to draw half a heart shape along the folded edge.
Starting at one end of the line, create small accordion pleats that follow the curve of the drawn line.
The marker line should appear straight along the top edge of the pleats as you fold. Once the fabric is fully pleated, secure it with a thick rubber band placed along the line.
The color you apply to the top section will become the heart when unfolded. Most washable markers rinse out easily, but testing on a small area first is a good idea.
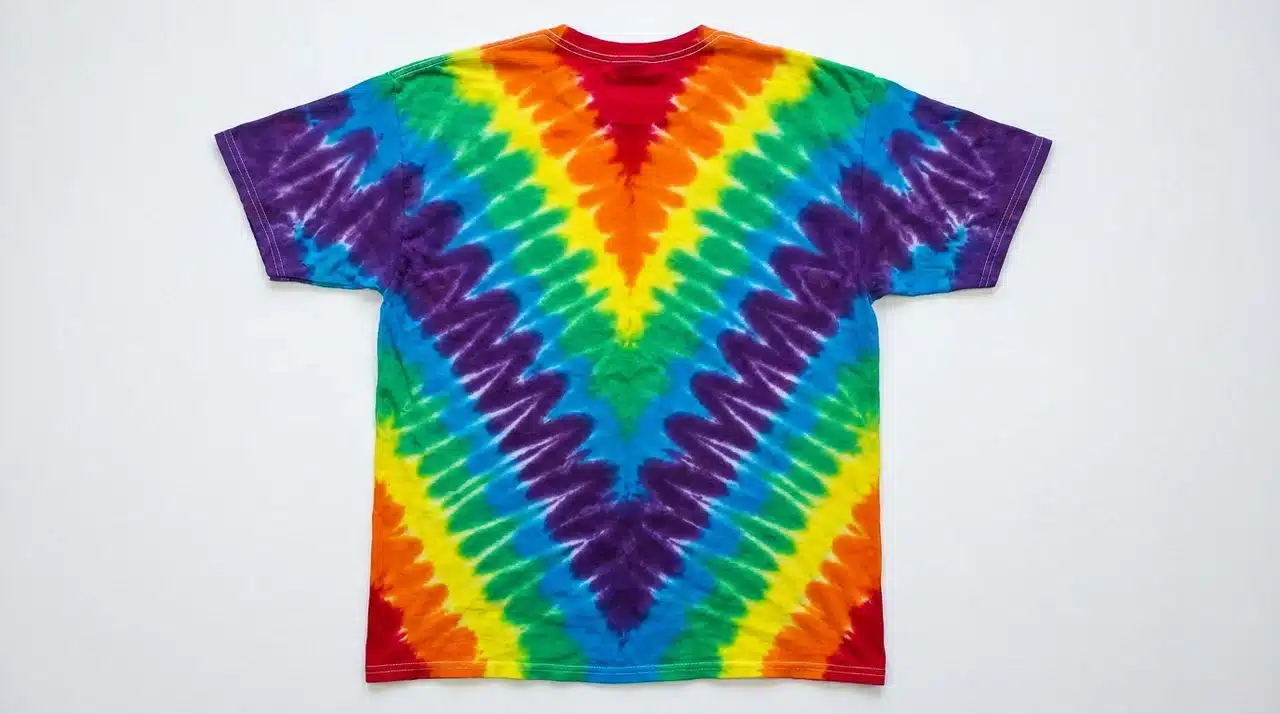
10. Chevron
Skill level: Intermediate
Fold the shirt in half lengthwise, then draw a V-shape along the fold with a washable marker.
Follow the line with small accordion pleats the same way you would for the heart pattern, keeping the marker line straight along the top of the folds.
Secure with rubber bands, then apply one or two colors for a bold, blocky look, or apply multiple colors in small sections for a striped chevron effect.
The steeper the V angle, the more dramatic the chevron looks when unfolded.
11. Rainbow
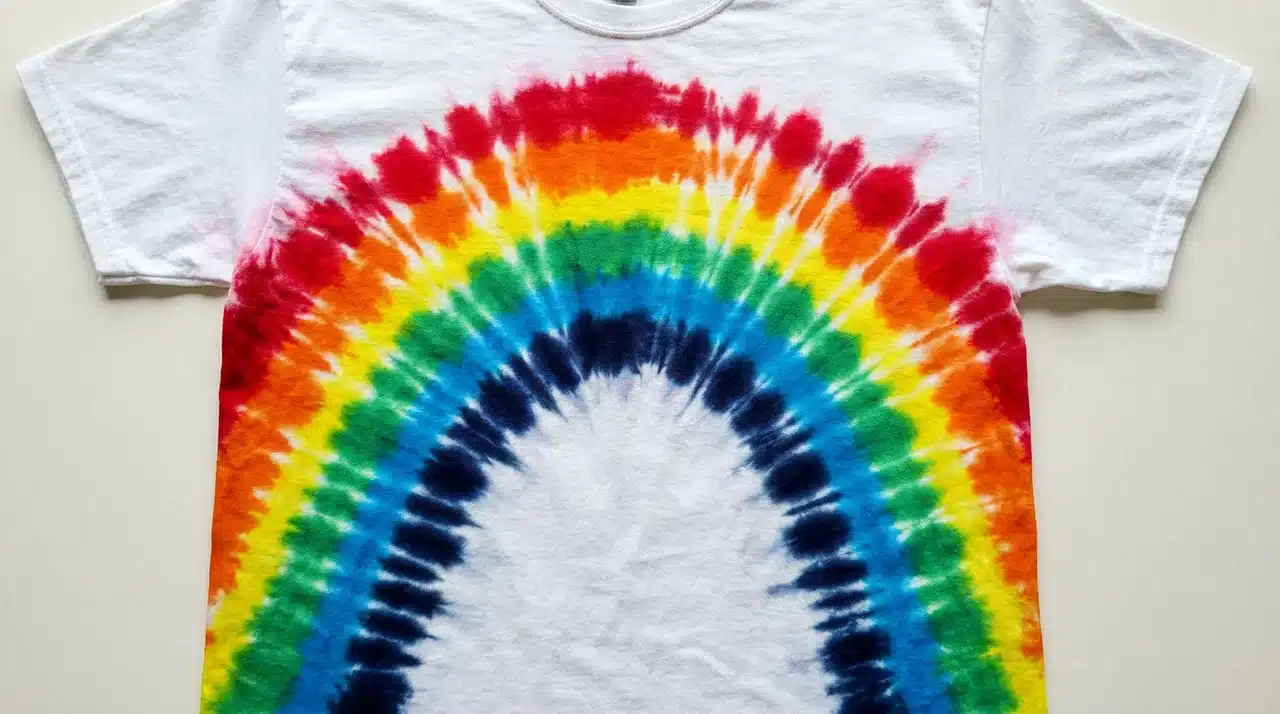
Skill level: Intermediate
Fold the shirt in half lengthwise, then draw a wide arch along the fold. Pleat along the arch line in small accordion folds, the same way as the heart and chevron patterns.
Secure with rubber bands and apply colors in rainbow order, red through violet, starting from one end of the pleated strip.
Flip and mirror the same colors on the other side. Keeping the colors in spectrum order helps the design resemble a rainbow.
12. Triangle Folds
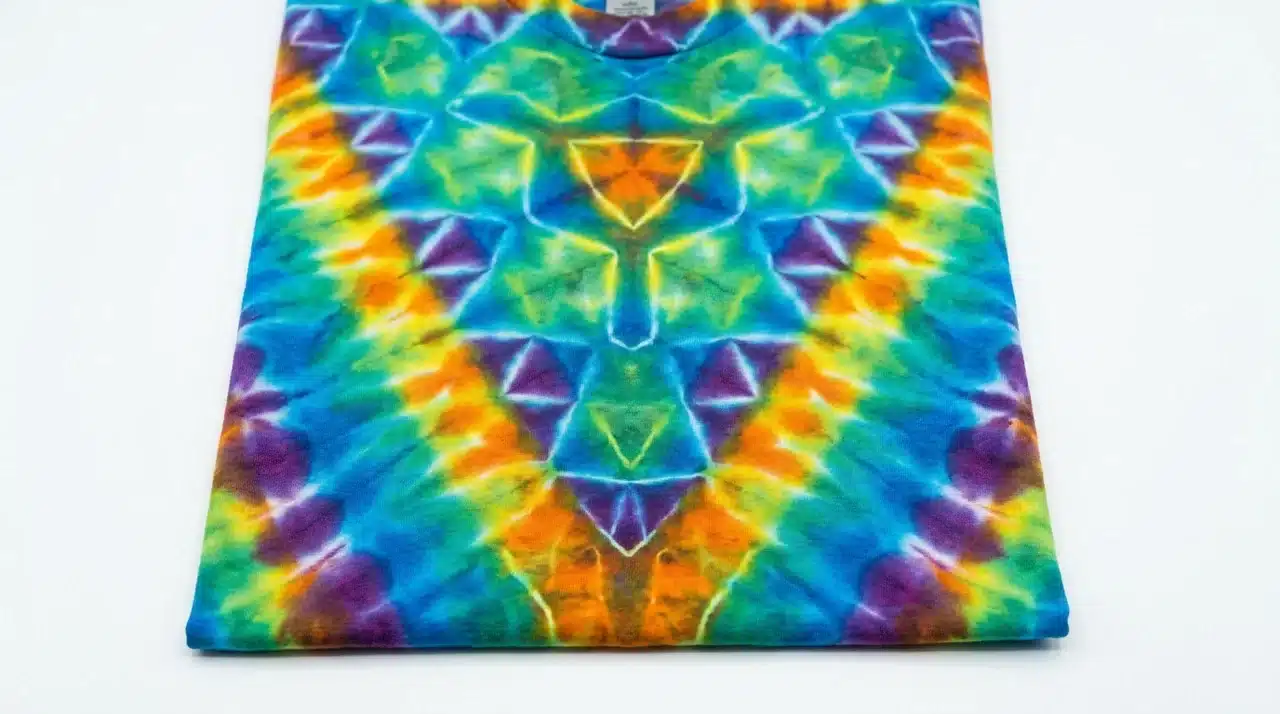
Skill level: Intermediate
Lay the shirt flat and fold it lengthwise into accordion pleats about five inches wide.
Then fold the strip of fabric into a series of triangles by folding forward at a 45-degree angle, then back over at a 45-degree angle, repeating until the whole shirt is folded into a triangle bundle.
Sandwich the bundle between two cardboard triangles and secure firmly with rubber bands.
Apply dye to the edges and corners of the bundle. Sharper creases often produce more defined geometric shapes.
13. Box Folds
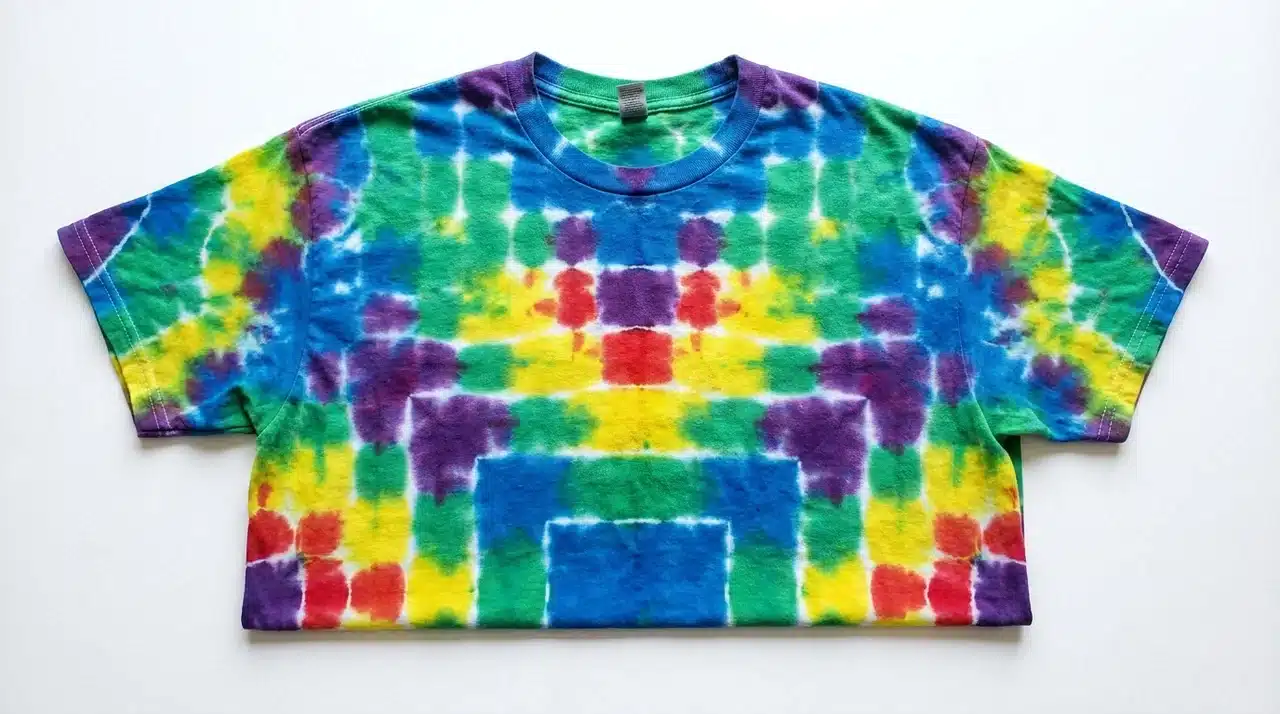
Skill level: Intermediate
Fold the shirt into accordion pleats lengthwise, pressing each crease firmly. Then fold the strip widthwise into the same size accordion pleats until you have a square bundle.
Sandwich it between two squares of cardboard and wrap rubber bands around all four sides. Dip the bundle into dye or apply it to the edges with a squeeze bottle.
This pattern gives a sharp, geometric result that looks more structured than most other tie-dye techniques.
14. Ombre Dip Dye
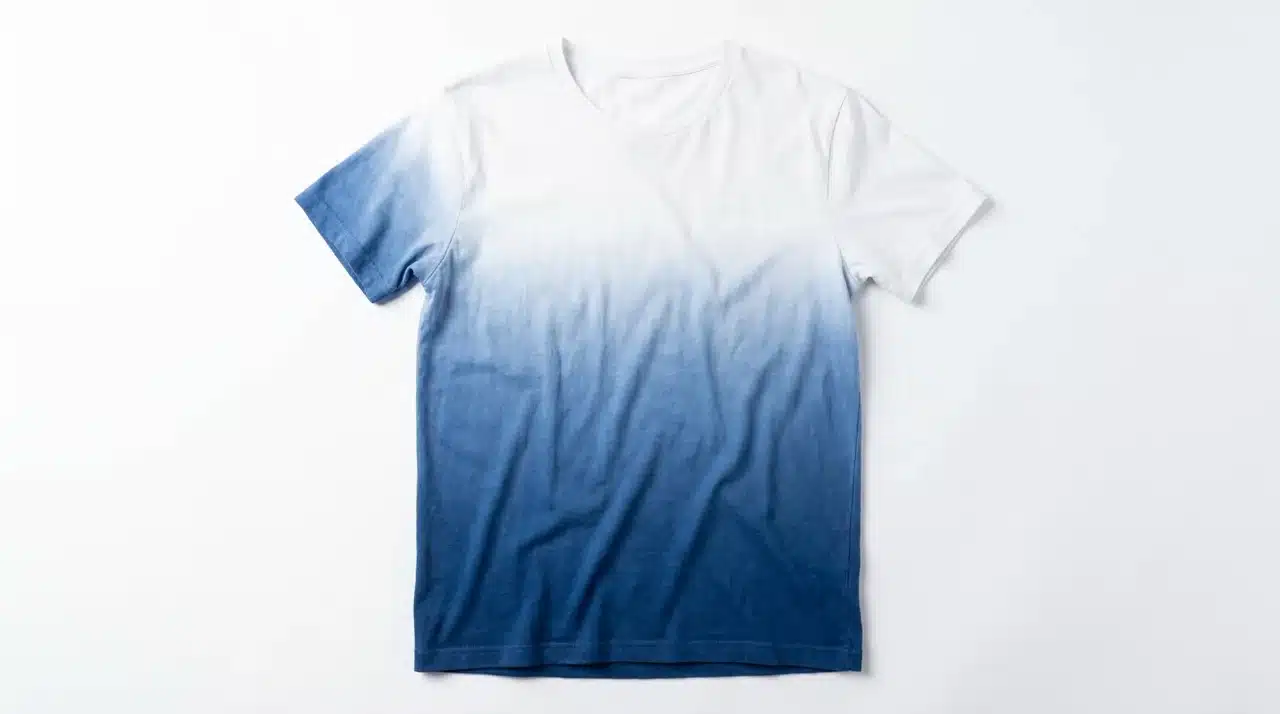
Skill level: Beginner
This technique is usually done without folding. Fill a bucket with your chosen dye color and submerge one end of the shirt into the dye.
Let it sit, and the dye will slowly move up the fabric on its own. The longer it sits, the higher the color travels.
For a two-tone effect, dip the opposite end into a second color once the first end is done. Some complementary colors can create muddy tones when blended.
15. Ice Dye
Skill level: Beginner
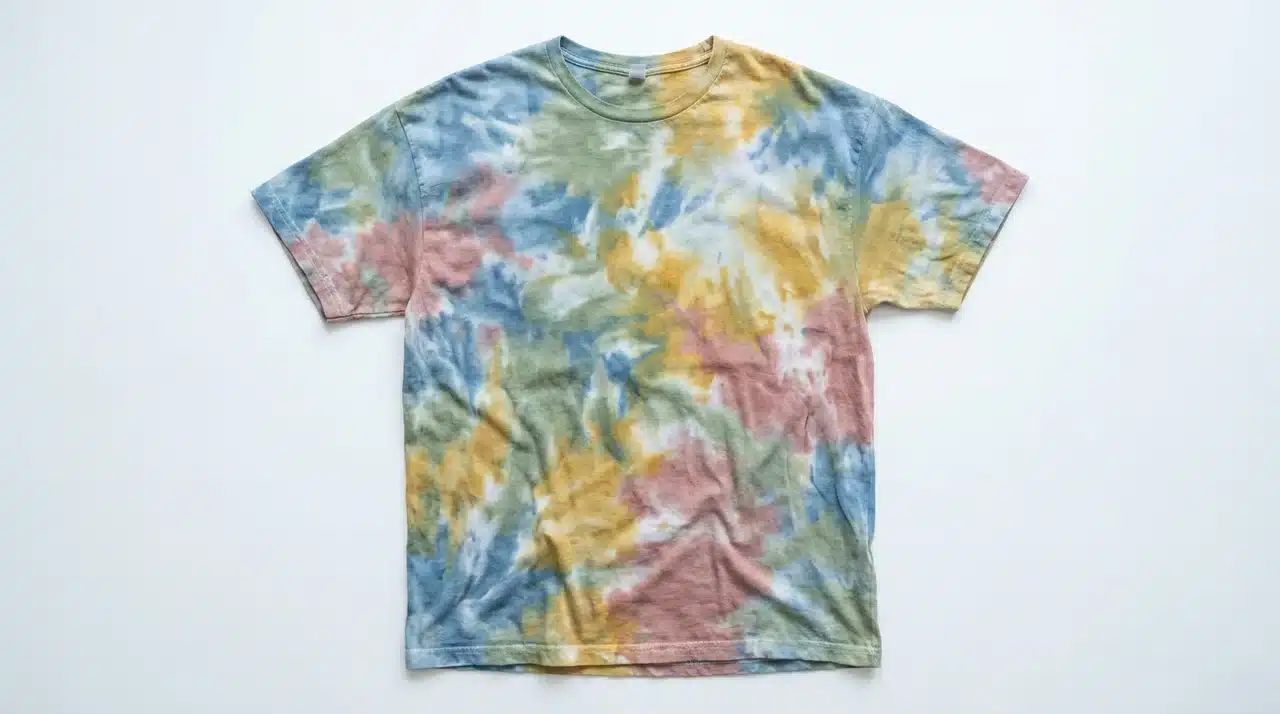
Ice dye skips the squeeze bottle entirely. Fold or crumple your pre-soaked shirt and place it on a wire rack over a tray.
Pile ice cubes on top of the fabric and sprinkle powdered dye directly over the ice.
As the ice melts, the dye runs down through the fabric in unpredictable ways, creating a watercolor-like effect.
Leave it until the ice has fully melted, then bag it and let it set as usual. The less you control where the dye lands, the better ice dye tends to look.
How Long to Let Each Pattern Sit
Once your shirt is dyed and sealed in a bag, the waiting stage allows the dye to bond with the fabric. Fiber-reactive dyes, including Procion MX and Tulip One-Step, need at least 8 hours to set, but 24 hours is better. Leaving the dye to sit for a full day gives every color molecule time to fully bond before rinsing.
Thicker folds, such as box or triangle folds, may benefit from longer setting times because the dye has more layers to reach.
Simpler techniques, like crumple or dip-dye, can sometimes be rinsed sooner, but following the dye manufacturer’s recommended setting the can help improve color development.
If you’re unsure when to rinse, learning the recommended tie-dye setting time before washing can help. Allowing the dye to set fully can help the color bond more effectively to the fabric.
Tips for Getting the Best Results from Any Pattern
A few simple habits can help any tie dye pattern turn out cleaner and brighter.
- Pre-soak the fabric in soda ash so the dye bonds properly with the fibers.
- Fold damp fabric instead of dry fabric for smoother shaping and better dye absorption.
- Keep rubber bands firm enough to hold the pattern, but not so tight that they cut into the fabric.
- Apply dye close to the fabric and press gently so it reaches the inner layers.
- Wipe bottle tips and gloves between colors to prevent muddy mixing.
- Let the dyed fabric sit long enough before rinsing so the color has time to set.
Small steps like these can make a big difference in how clean, bright, and lasting your pattern looks.
Conclusion
The best part about tie-dye patterns is that a simple change in folding technique can create a completely different design.
Once you understand how folds, rubber bands, and dye placement work together, you can make everything from classic spirals to detailed geometric patterns with confidence.
Start with a beginner-friendly design, focus on clean folds, and give the dye enough time to set for the best results.
Pick one tie-dye pattern from this list, gather your supplies, and start experimenting. The more you practice, the more unique your designs will become.
Frequently Asked Questions
Can You Use Food Coloring for Tie-Dye?
Food coloring can stain fabric, but it will not last as long as fiber-reactive dye on cotton.
Why Did My Tie-Dye Turn Brown?
Tie-dye often turns brown when too many opposite colors mix together on the fabric.
Should You Rinse Tie Dye in Hot or Cold Water?
Start with cold water to remove loose dye, then wash in warm water after the water runs mostly clear.
Can You Tie-Dye a Colored Shirt?
Yes, but the original shirt color will affect the final result, so lighter colors work better.