Are you tired of tote bags that collapse or tip over when you set them down?
I was, too, until I found the simple secret to creating bags with a flat, sturdy bottom.
Every time I place my perfectly boxed-corner tote on a table, it stands upright, holding its shape beautifully while showcasing my handiwork. The clean, professional finish makes all the difference.
You’ve probably seen these structured totes everywhere from high-end boutiques to craft fairs, but might think they require advanced sewing skills. They don’t!
In this tutorial, I’ll walk you through the straightforward method for creating boxed corners that give any tote bag a flat bottom. With basic sewing supplies and just a few extra minutes of work, you’ll change your ordinary tote into something truly useful and polished.
Before You Begin: Things to Know That Save Time Later
Proper preparation ensures smoother sewing and a professional-looking tote bag with boxed corners that stands proudly on its own.
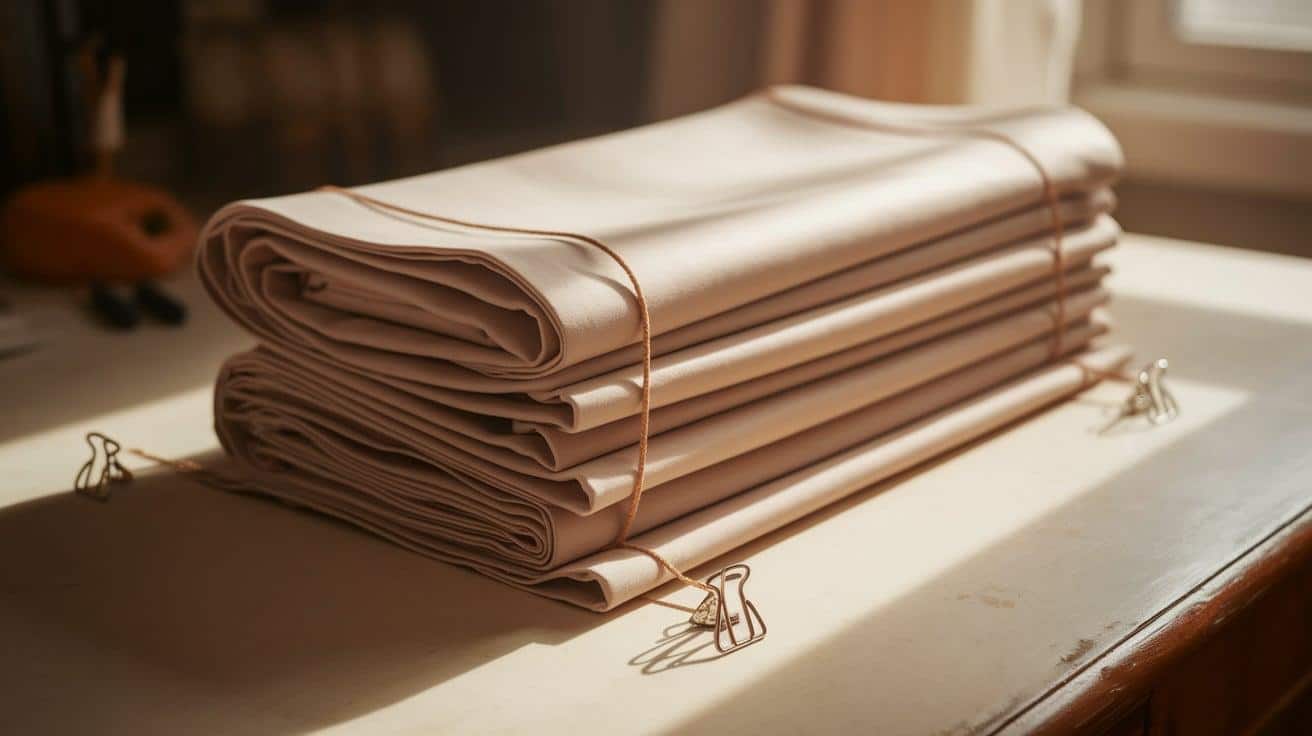
- Fabric prep tips: Pre-wash and iron your fabric to prevent future shrinkage and ensure precise measurements. For interfacing-required fabrics, apply before cutting your pattern to maintain shape.
- Choosing the right type of fabric: Select medium to heavyweight fabrics like canvas, denim, twill, or duck cloth that will hold structure. Lighter fabrics like quilting cotton work when interfaced, but avoid slippery or stretchy materials.
- Corner size planning: Decide your box corner size before cutting fabric larger corners create a wider base, smaller corners a narrower one. The standard 1.5-inch square creates a 3-inch wide base for most medium-sized totes.
- Measure twice, cut once: Double-check all measurements before cutting, especially your corner squares, as they directly impact how your bag stands and its final dimensions.
Step-by-Step Guide to Sew a Tote Bag
Change a basic tote into a professional-looking bag with sturdy, flat bottom corners using this straightforward technique that elevates both form and function.
Gather Your Tools and Materials
| Tool/Material | Purpose |
|---|---|
| Fabric | Main material for the tote bag (rectangular piece, approximately 24″x12″) |
| Clips or Pins | Secure fabric edges together during preparation and sewing |
| Square Ruler | For creating precise square corners (optional but helpful) |
| Regular Ruler | Alternative to the square ruler for measuring and marking corners |
| Scissors | For cutting out the corner squares |
| Sewing Machine | For stitching the sides and boxed corners |
| Cardboard/Foam | Can be added to the base for extra structure and sturdiness |
Step 1: Prepare and Fold the Fabric
Start with a pre-cut rectangular piece of fabric, approximately 24 inches by 12 inches, or a size of your preference. Fold the fabric in half with wrong sides together to create the basic tote shape.
Secure the sides with clips or pins to hold everything in place before sewing. This makes the foundation for your tote bag.
Mistake to Avoid: When starting with your rectangular fabric piece, avoid cutting uneven dimensions as this will result in a lopsided final product. Don’t rush the initial folding process failing to align the edges perfectly will create uneven sides and an asymmetrical bag.
Step 2: Sew the Side Seams
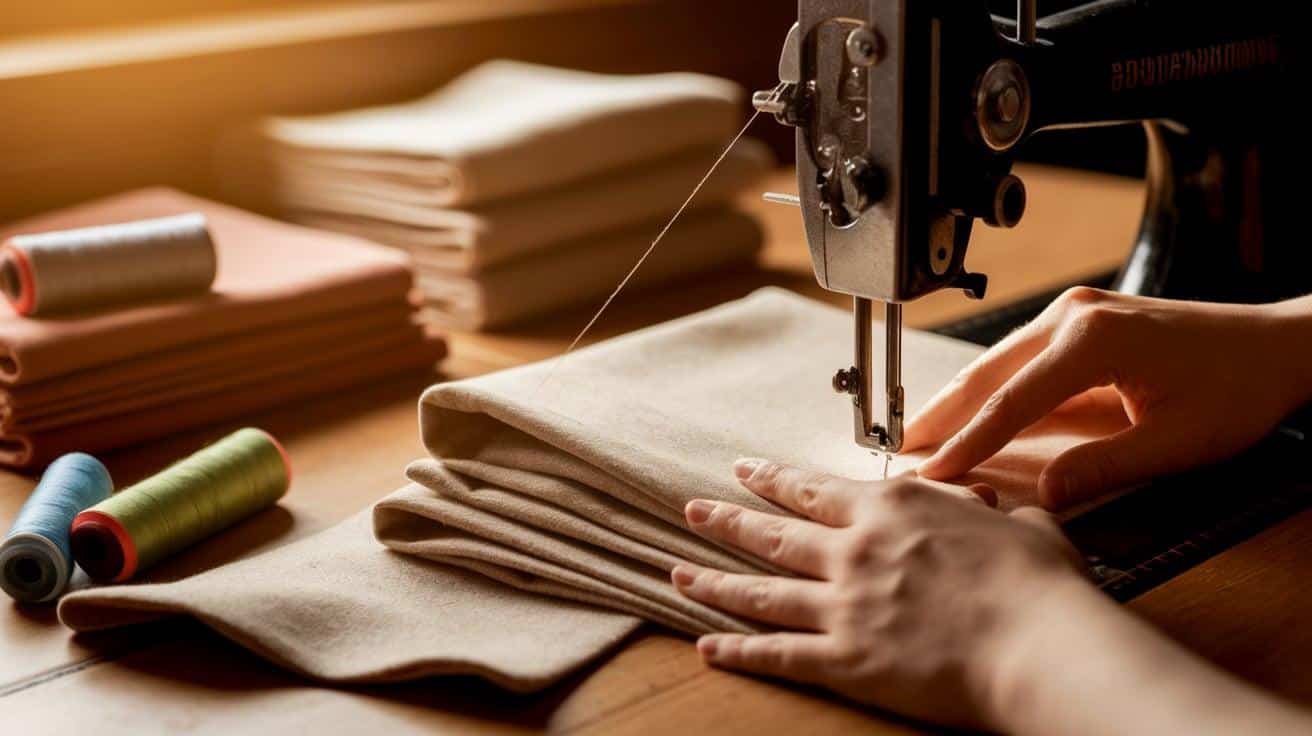
Sew along both side edges of the folded fabric using a straight stitch, making sure to leave the top edge open. This creates the basic tote bag shape. Be careful to maintain a consistent seam allowance for a professional finish. Once complete, you’ll have a simple rectangular bag with one open end.
Mistake to Avoid: When sewing the sides of your tote, avoid the critical error of accidentally stitching the top opening closed always double-check before starting your machine. Inconsistent seam allowances are another frequent problem that results in uneven sides and a misshapen bag.
Step 3: Mark the Corner Squares

For each bottom corner of the bag, measure and mark a square. Using a ruler, measure the same distance from each side of the corner (the creator uses 1.5 inches).
Draw a square by connecting these marks. The size of your square determines the width of the bottom of your box. A 1.5-inch square creates a 3-inch wide base.
Mistake to Avoid: When measuring and marking your corner squares, avoid measuring from the fabric edge instead of the stitch line, which creates incorrectly sized corners. Creating differently sized squares for each corner is a common error that results in an uneven, wobbly base.
Step 4: Cut Out the Corner Squares
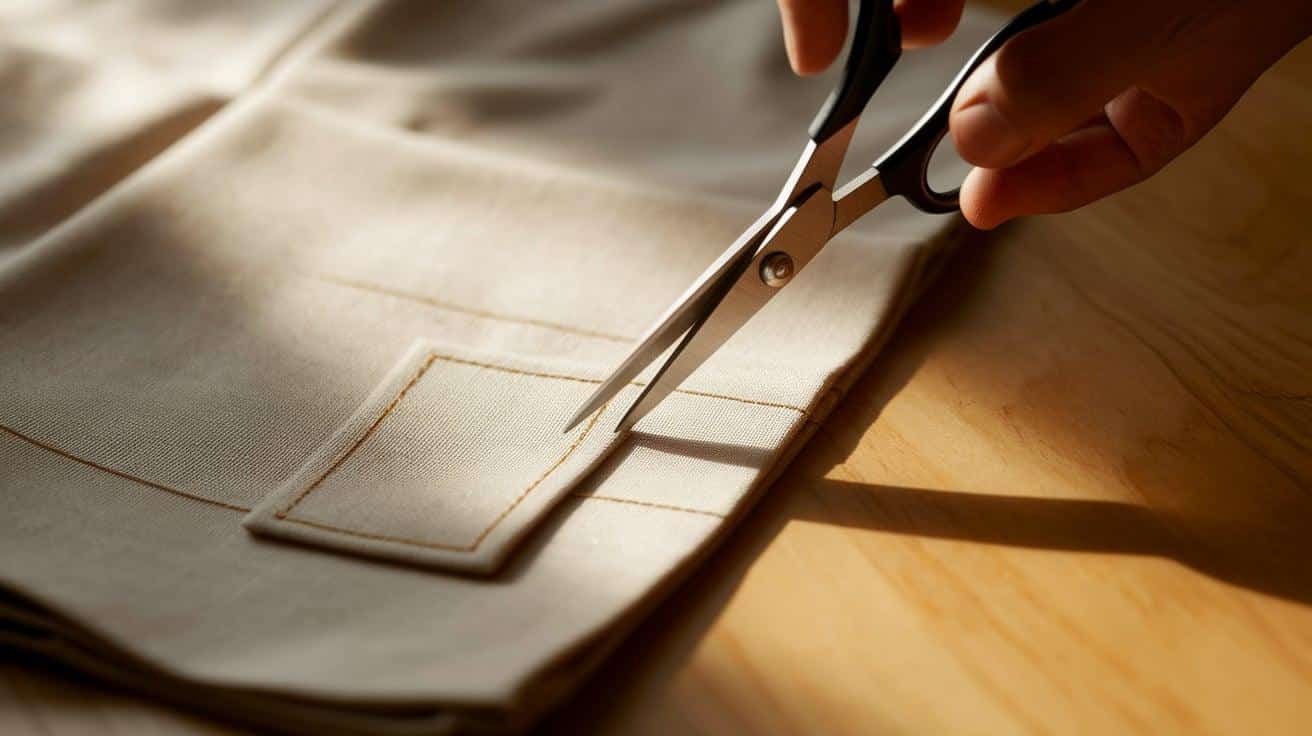
Using scissors, carefully cut out the marked squares from both bottom corners of the bag. Ensure that you cut precisely along the lines you’ve drawn.
This step removes excess fabric that would otherwise bunch up when creating the boxed corners.
Mistake to Avoid: When cutting the marked squares, avoid cutting beyond your marked lines, which affects the final dimensions of your boxed corners. Don’t forget to cut both corners – surprisingly common when focusing intently on one corner at a time.
Step 5: Create and Secure the Boxed Corners
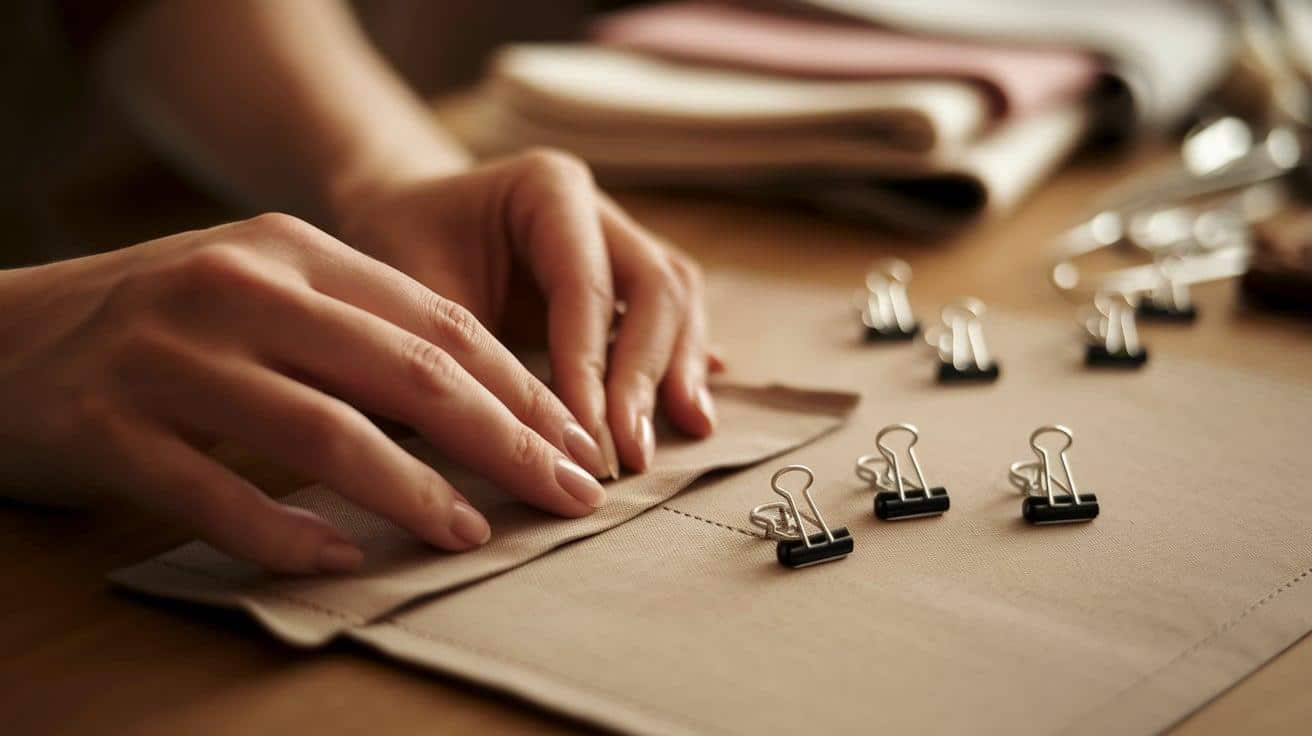
Pinch each cut corner from both sides and pull it straight to align the raw edges. This transforms the right-angle cut into a straight line with the fabric layers on top of each other.
The cut edges should align perfectly. Secure with clips or pins to hold this new arrangement in place before sewing.
Mistake to Avoid: When forming the boxed corners, avoid misaligning the cut edges, which results in uneven corners and a lopsided base. Many sewers forget to secure the pinched corners with clips before moving to the machine, causing the fabric to shift during sewing.
Step 6: Sew the Boxed Corners
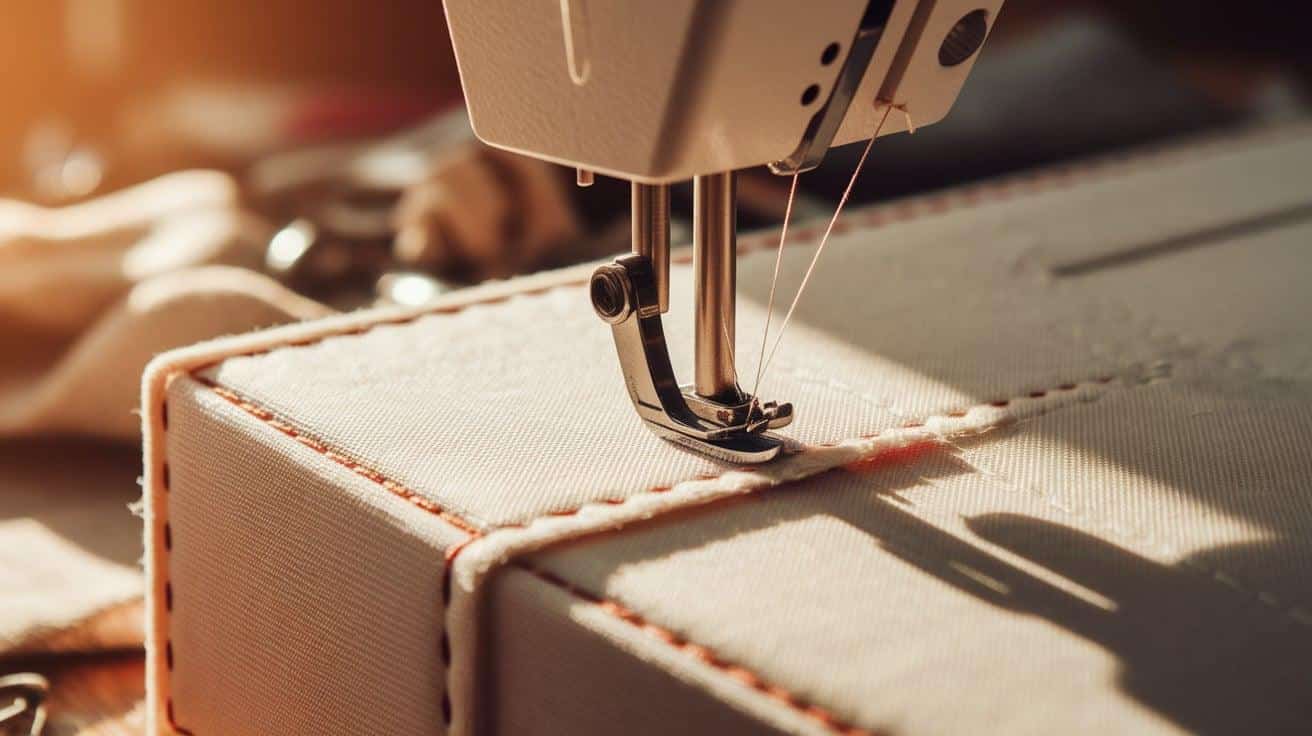
Sew straight across each pinched and aligned corner using a straight stitch. Maintain the same seam allowance as you used for the sides.
This stitching creates the structure for the boxed corner. For extra durability, consider reinforcing with a second line of stitching.
Mistake to Avoid: When stitching across the aligned corners, avoid sewing too close to the edge, which weakens the corner structure. Creating an angled stitch instead of sewing straight across is a common mistake that results in asymmetrical corners.
Step 7: Turn and Finish the Bag
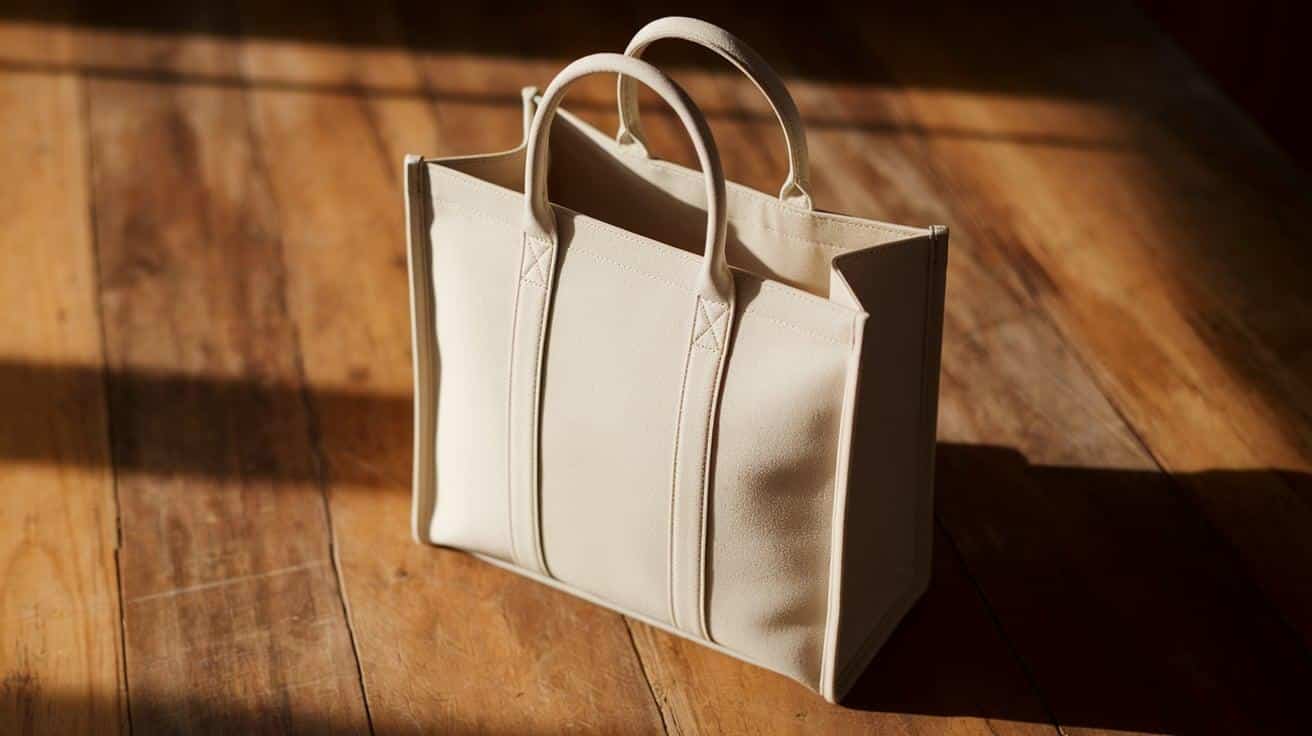
Turn your bag right side out through the top opening. Use your fingers to push out the corners from the inside, creating crisp, defined box corners.
The bag should now stand up on its own with a flat, rectangular bottom. For added structure, insert a piece of cardboard or foam cut to the size of the base.
Mistake to Avoid: When turning and finishing the bag, avoid being too aggressive and tearing the corner stitches. A common error is not fully pushing out the corners, leaving them rounded instead of crisp and defined.
Special thanks to conceptsbynikki for providing valuable insights in their video, which I referenced while creating this guide.
Design Ideas to Make Your Tote Bag Stand Out
1. Color-Blocked Canvas
Create visual interest with a color-blocked design using different canvas colors. Cut your main rectangular piece with contrasting colors for the bottom third and top two-thirds of the tote. When sewn together, the boxed corners will showcase both colors for a sophisticated look.
Add leather or faux leather handles in a complementary tone for a high-end finish. This design works beautifully with neutral combinations like cream and tan, navy and light blue, or for more impact, black and a vibrant color like mustard yellow.
2. Pocket Paradise Organizer Tote
Transform your basic boxed-corner tote into an organizational marvel by adding strategic pockets. On the exterior, create one large pocket with a magnetic snap closure. Inside, add a series of varying-sized pockets along both sides some wide for notebooks, some narrow for pens, and maybe one with a zipper for valuables.
Use contrasting fabric for the pockets that complements your main fabric. This functional design is perfect for students, professionals, or anyone who loves keeping their essentials neatly organized.
3. Reversible Two-in-One Wonder
Maximize versatility by creating a reversible tote with boxed corners on both sides. Choose two coordinating fabrics perhaps a solid color on one side and a pattern on the other. Construct the bag with all seams enclosed between the layers and add handles that work from either side.
The boxed corners will need to be created on both fabric layers simultaneously for this design to work properly. This gives you two completely different looks in one bag, perfect for changing seasons or matching different outfits.
4. Embellished Artisan Statement Bag
Start with a neutral base fabric for your boxed-corner tote, then add artistic embellishments that reflect your personal style. Consider adding a hand-embroidered design across the front panel, appliqué patterns in complementary fabrics, or even fabric paint for a truly unique piece.
Focus decorative elements on the upper portion of the bag, leaving the boxed-corner bottom clean and functional. Complete the artisan look with natural wooden handles or hand-braided fabric handles that coordinate with your embellishments for a one-of-a-kind creation that showcases your creativity.
Conclusion
With just a few simple cuts and stitches, you’ve changed a basic tote into a professional-looking bag with a flat, sturdy bottom. The boxed corners not only add structure but also create a more useful, stable bag that stands on its own.
Remember to match your corner size to your bag’s purpose larger squares for groceries, smaller ones for everyday items. You can apply this technique to bags of any size or design.
Whether you choose a basic canvas tote or experiment with color blocking, pockets, or embellishments, these boxed corners will elevate your handmade creation from homemade to high-end. Happy sewing!