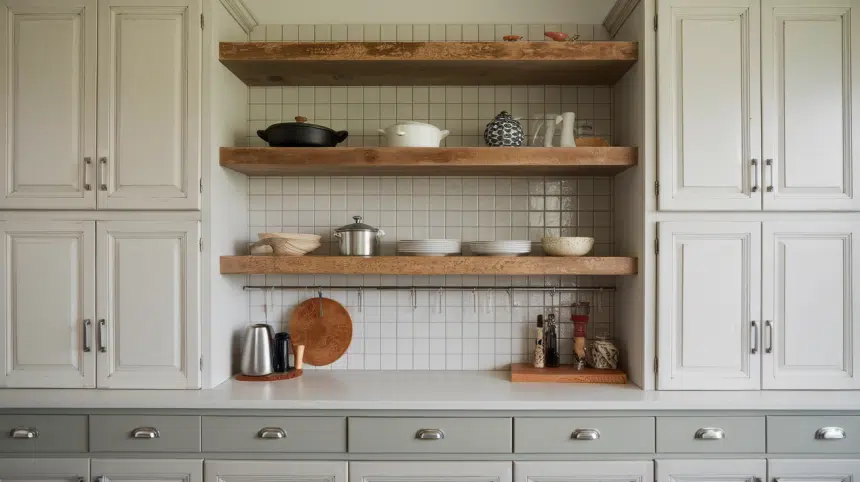
Standing in your kitchen, do you notice that empty wall space between your cabinets?
Many homeowners miss this useful spot for extra storage and display. Installing floating shelves in this area gives you practical space for daily items while adding style to your kitchen.
These shelves can hold cookbooks, plants, or favorite dishes, making your kitchen more functional and personal without major renovations. The good news? You can complete this project in one afternoon with basic tools.
This guide will show you the exact steps to install strong, good-looking floating shelves between your cabinets. We’ll cover everything from picking the right materials to hanging them safely.
Let’s start making better use of your kitchen space today.
Why Choose Floating Shelves Between Cabinets?
Floating shelves between cabinets offer a smart space-saving solution for kitchens of all sizes. They use empty wall areas that often go unused, giving you extra spots for items without taking up floor space.
These shelves add a clean, modern look to your kitchen while keeping the visual flow open and airy.
- Perfect for storing daily-use items like mugs, small plants, or cookbooks
- Can be installed at any height to fit your specific needs
- Cost much less than adding new cabinets for extra storage
You can match them to your cabinets or pick a different finish for visual contrast.
The best part is their flexibility – use them for cookbooks and spices, or display plants and family photos. In small or narrow kitchens, these shelves work wonders by moving items off countertops and into eye-level spots that are still easy to reach.
They help keep daily-use items handy without cluttering your work areas. For many homeowners, these shelves turn wasted wall space into useful, good-looking storage.
Step-by-Step: Installing Floating Shelves
Tools Required:
| Tool | Purpose |
|---|---|
| Drill | For making pilot holes and securing screws |
| Miter Saw | For cutting dowels and trim pieces to size |
| Level | To ensure shelf is properly balanced |
| Stud Finder | To locate wall studs for secure mounting |
| Brad Nailer | For attaching the plywood and trim (optional) |
Materials Required:
| Material | Purpose |
|---|---|
| 3/4″ Square Dowels | For the shelf frame support |
| 1/4″ Plywood | For the bottom of the shelf |
| 1/2″ Plywood | For the top of the shelf |
| 1″x2″ Board | For the front trim piece |
| 1 1/4″ Wood Screws | To assemble the frame |
| 3″ Screws | To mount the frame to wall studs |
| 1″ Brad Nails | For attaching plywood to frame |
| 1 1/4″ Brad Nails | For attaching front trim |
| Wood Glue | For reinforcing frame joints |
| Wood Stain | For finishing (optional) |
| Polyurethane | For protective coating (optional) |
Step 1: Measure and Cut Materials

Take careful measurements of the space between your cabinets. This will determine the length of your shelf. Cut your materials to the correct sizes based on these measurements.
- For a 3-foot shelf, cut two long square dowels at 36″ and three short ones at 3.5″
- Have the plywood pieces cut to match the length (36″) and depth (around 5-6″)
- Cut the 1×2 trim to the exact length of your shelf for a clean finish
Pro Tip: Have your plywood pieces cut at the hardware store for more precise cuts, especially if you don’t have a table saw at home.
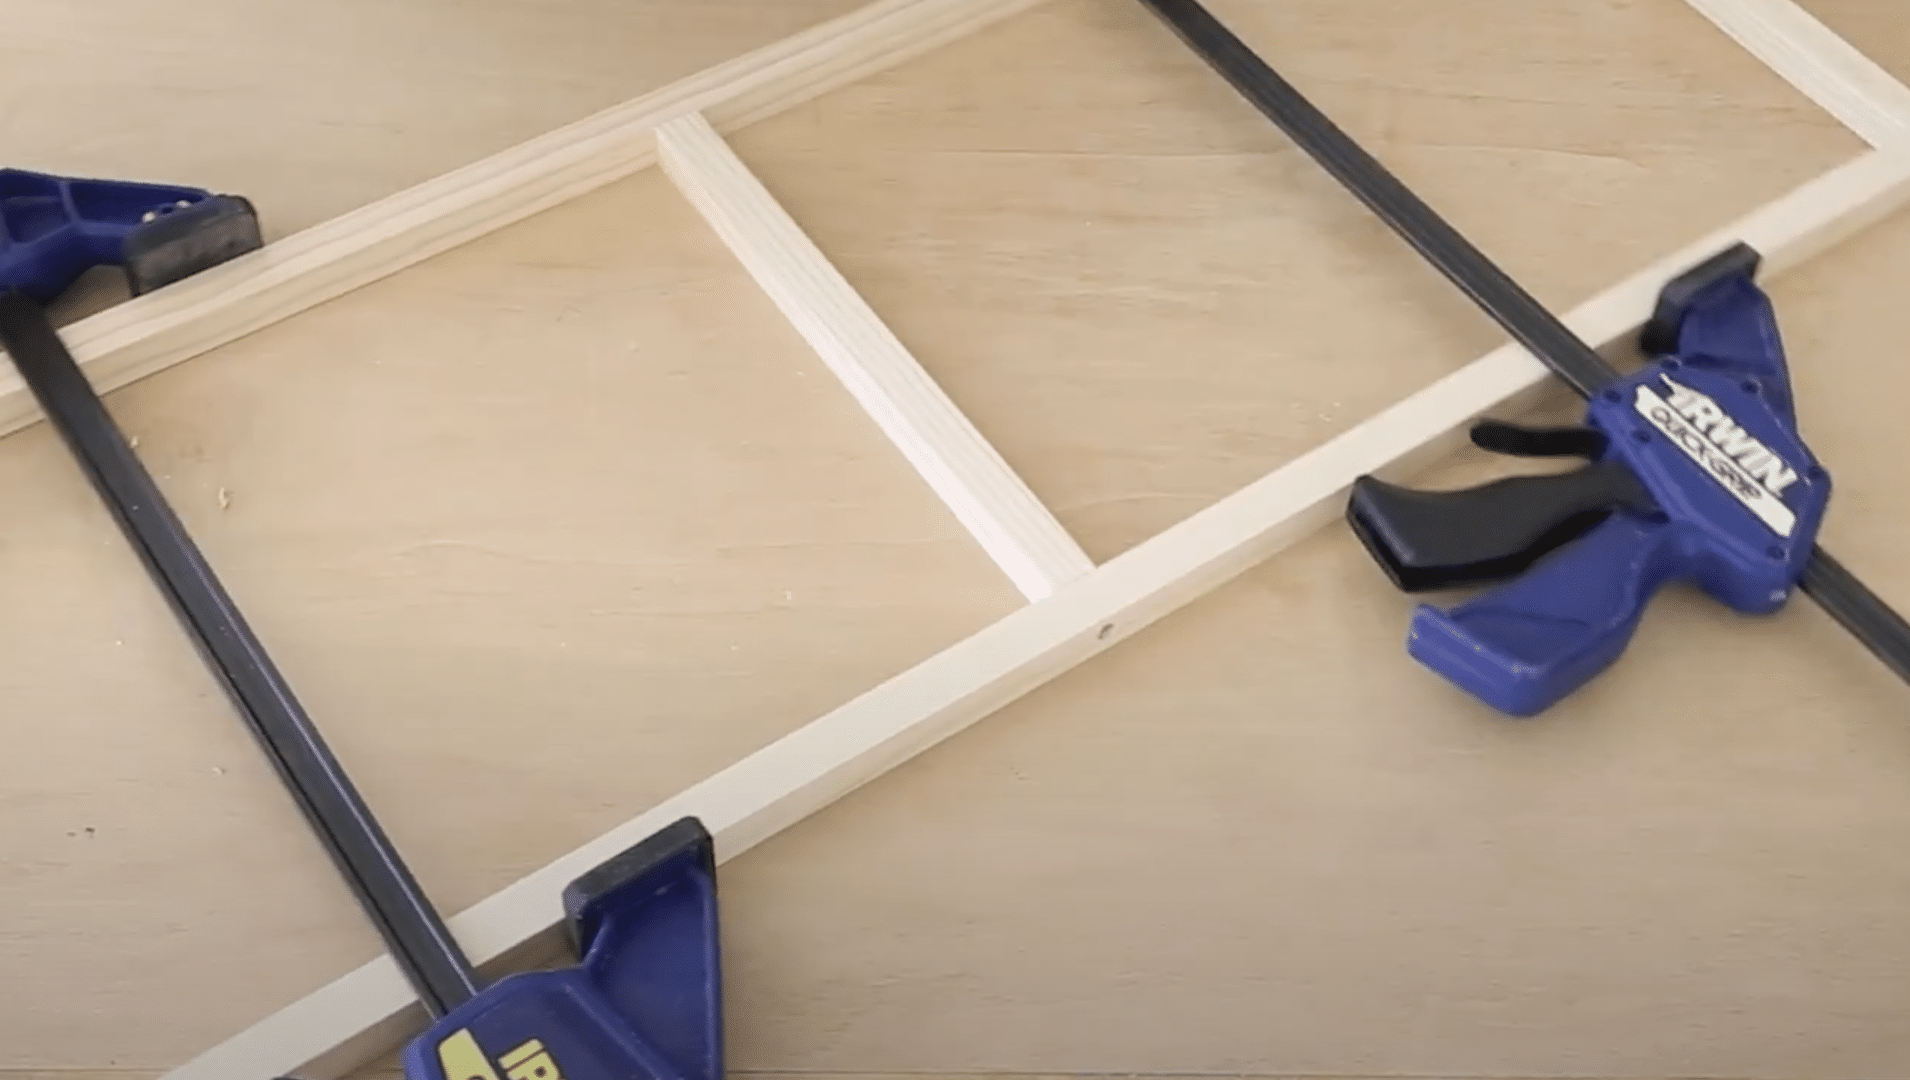
Step 2: Build the Shelf Support Frame

Start by building the basic frame that will support your shelf. Apply wood glue to the ends of the three shorter square dowels, then position them between the two longer dowels to form a rectangular frame.
- Use clamps to hold the frame together while working
- Drill pilot holes before adding screws to prevent the wood from splitting
- Secure the joints with 1¼” wood screws, making sure they sit flush or slightly countersunk
Pro Tip: Space the three support dowels evenly for balanced weight distribution. For shelves longer than 3 feet, add extra support dowels every 12 inches.
Step 3: Stain and Finish
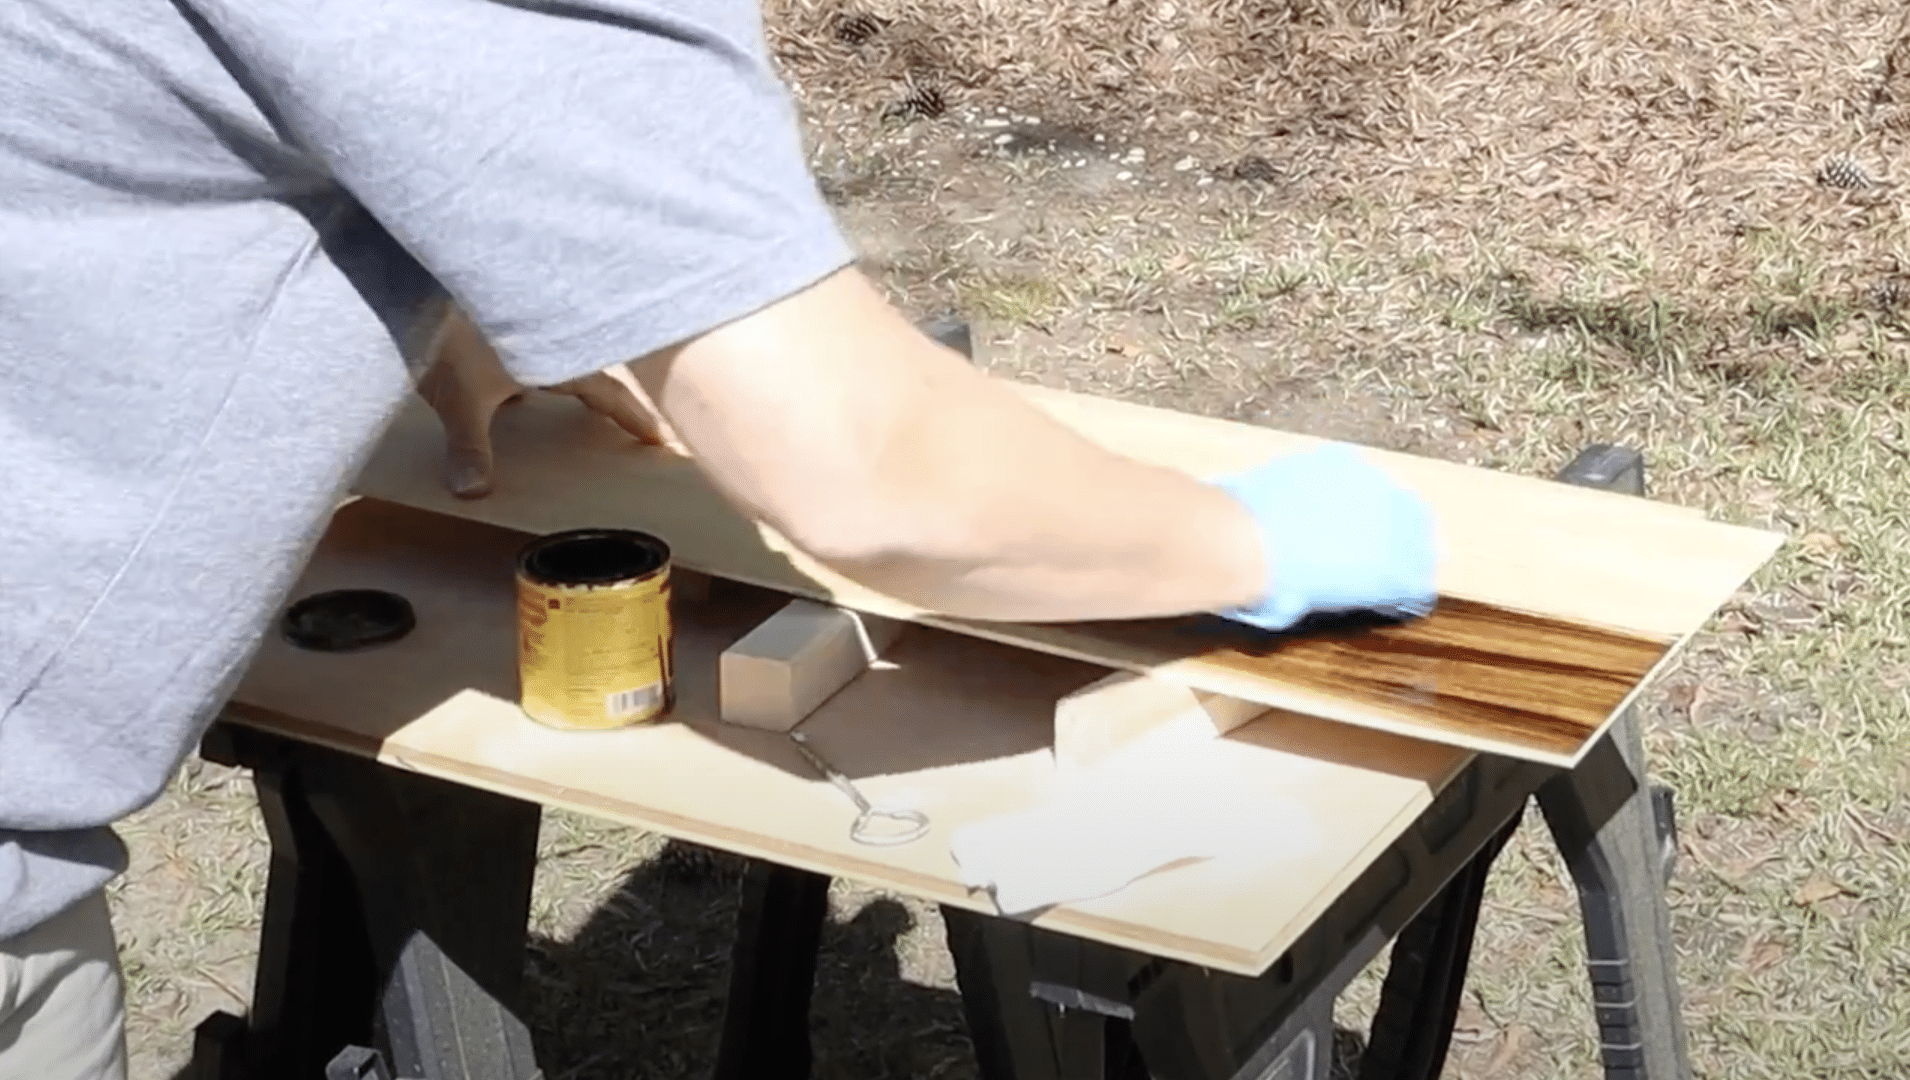
Before installation, apply stain and a protective finish to all visible wooden parts. This is easier to do before assembly and creates a more finished look when complete.
- Sand all wood surfaces lightly for better stain absorption
- Apply wood stain in the color of your choice and let dry completely
- Finish with 2-3 coats of polyurethane for protection, sanding lightly between coats
Pro Tip: Test your stain on scrap pieces first to make sure you like the color before applying it to your shelf materials.
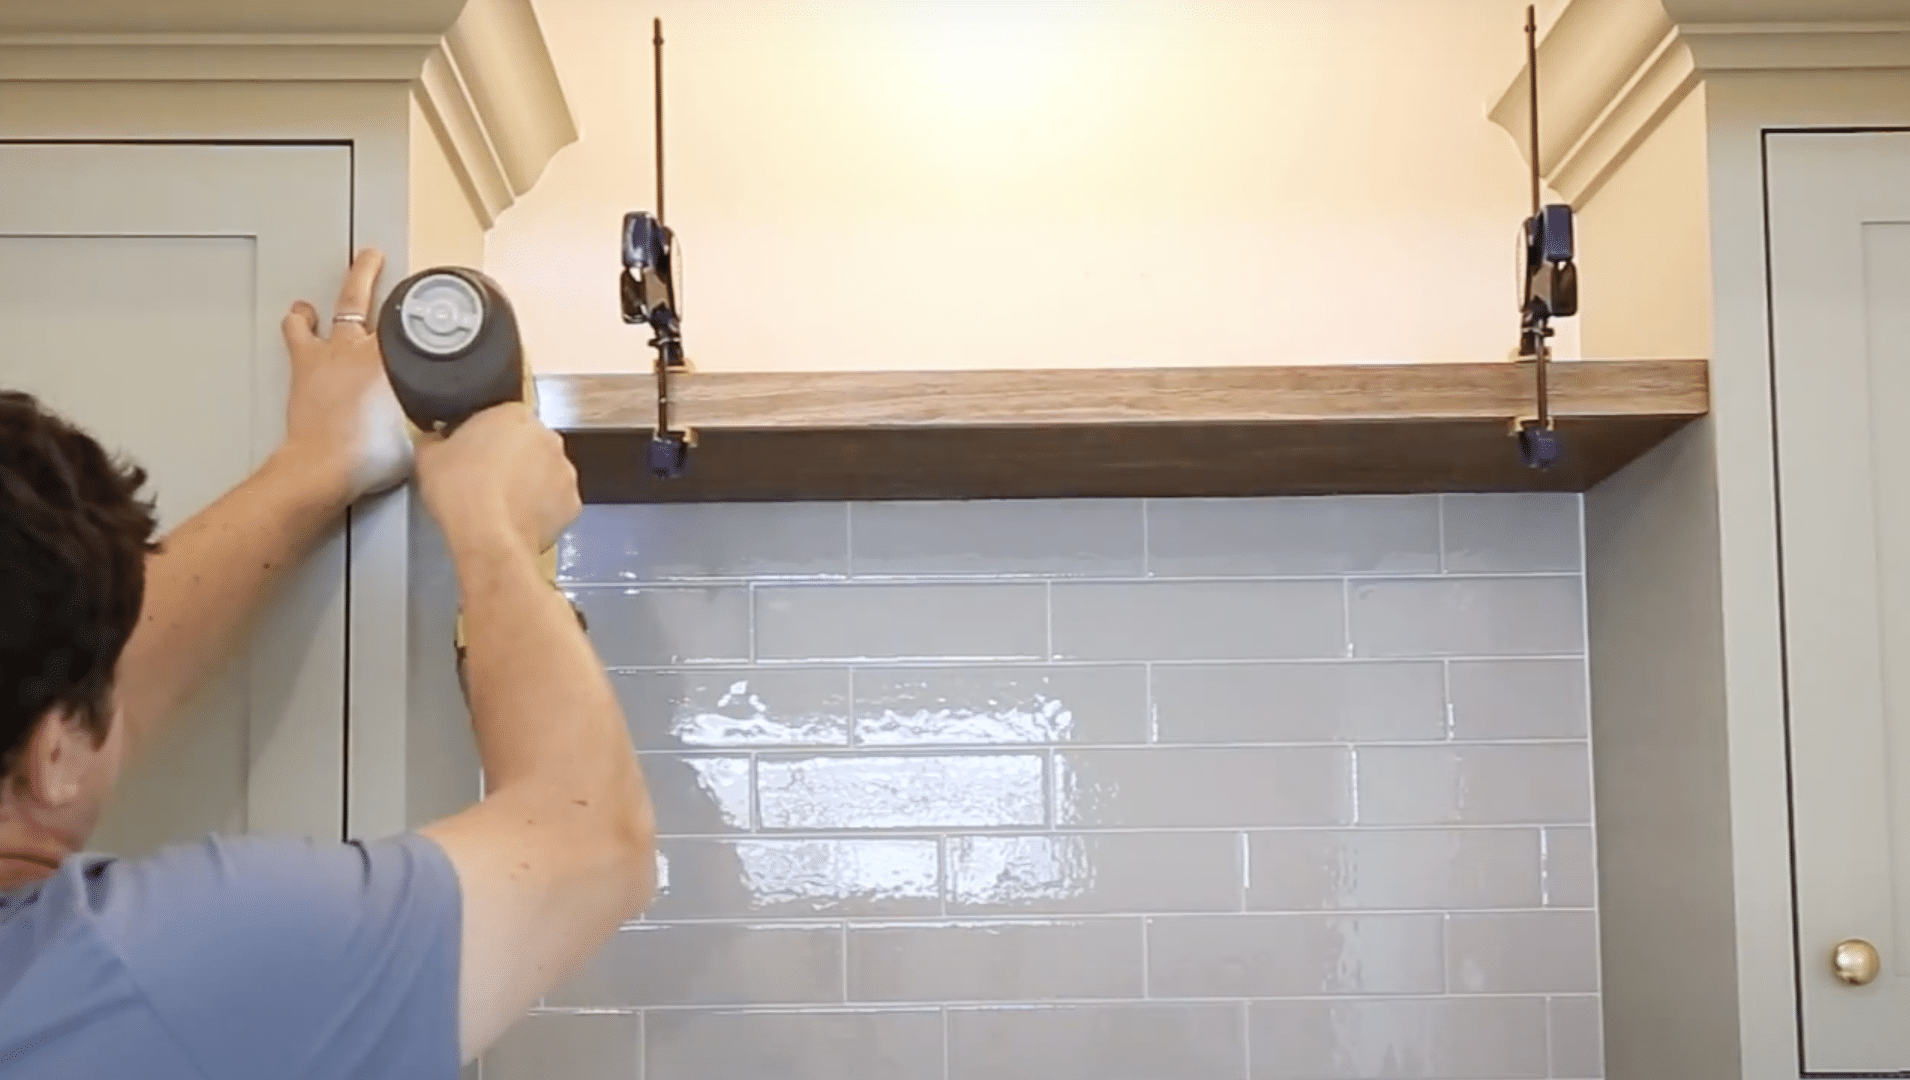
Step 4: Install the Support Frame
Find and mark wall studs between your cabinets. Position your support frame level against the wall at your desired height, and secure it firmly to the wall studs using 3″ screws.
- Use a stud finder to locate wall studs for secure mounting
- Check that the frame is perfectly level before securing it permanently
- For extra stability, attach the ends of the frame to the adjacent cabinets if possible
Pro Tip: If you can’t find studs where you need them, use heavy-duty wall anchors rated for the weight you plan to place on the shelf.
Step 5: Attach Shelf Surfaces and Trim
Place the ½” plywood on top of the frame and the ¼” plywood underneath. Secure both pieces to the frame using 1″ brad nails. Finally, attach the 1×2 trim piece to the front edge.
- Use clamps to hold pieces in place while you nail them
- Space brad nails every 6-8 inches for secure attachment
- Fill any visible nail holes with wood filler that matches your stain color
Pro Tip: For a cleaner look, apply painter’s tape along the cabinet edges before nailing to prevent any accidental marks or damage to your cabinets.
For a visual tutorial, refer to this video by Angela Marie Made
Tips for Styling and Organizing the Floating Shelves
-
Group similar items together in odd numbers (3 or 5) to create visual interest while keeping the shelf organized—try placing cooking oils in one section and spices in another for both beauty and function.
-
Mix practical and decorative items on each shelf by combining everyday kitchen tools with small plants or framed photos—this balances the shelf’s usefulness with personal style.
-
Use small baskets or containers to corral loose items like tea packets or snack bars—these act as dividers while keeping the shelf looking neat and purposeful.
-
Create height variation by placing taller items against the wall and shorter ones toward the front—this layering technique adds depth and makes the shelf display more visually appealing.
-
Leave some empty space between groupings to prevent a cluttered look—about 20-30% of your shelf should remain open to give the eye a place to rest and make each item more noticeable.
Common Mistakes to Avoid
1. Improper Wall Support Assessment:
Many homeowners skip finding wall studs before installation.
This often leads to shelves that pull away from the wall or collapse. Your floating shelf needs proper anchoring into studs to support weight.
Without this foundation, even beautiful shelves become unsafe. Always use a stud finder and mark all locations before drilling.
If studs aren’t where you need them, use appropriate heavy-duty wall anchors.
2. Incorrect Shelf Weight Calculations:
A common error is choosing materials too heavy for the mounting system or not accounting for items that will sit on the shelf.
Wood types vary in weight—oak is much heavier than pine.
Your mounting hardware must support both the shelf’s weight and everything you’ll place on it. Check the weight rating of your brackets before installation.
For kitchen shelves that might hold dishes, choose hardware rated for at least 30 pounds more than needed.
3. Uneven Installation and Poor Leveling:
Nothing ruins floating shelves faster than uneven installation.
Many DIYers rush through leveling, resulting in shelves that tilt.
This looks unprofessional and creates safety issues as items may slide off. Use a quality level during every step—when marking drill holes, mounting the support frame, and after installation.
Check from multiple angles. Remember that walls aren’t always perfectly straight, so you may need small adjustments with shims.
Maintenance and Care for Floating Shelves
1. Regular Dusting: Use a soft microfiber cloth for weekly dusting of your floating shelves, working from top to bottom—this prevents dust buildup that can scratch surfaces and make items on your shelves look dull.
2. Wood Shelf Care: Apply furniture polish or wood conditioner every 3-4 months to maintain the natural luster and protect wooden shelves—avoid water-based cleaners that can warp or stain the wood over time.
3. Metal Shelf Treatment: Clean metal shelves with a mild solution of warm water and dish soap, then dry completely to prevent water spots or rust—for chrome or stainless steel, use specific metal cleaners that prevent fingerprints.
4. Weight Distribution: Rotate heavy items periodically to prevent shelves from warping or sagging in specific spots—this simple habit extends the life of your floating shelves and maintains their straight, clean lines.
5. Seasonal Inspection: Check shelf brackets and mounting hardware twice yearly by gently testing for any movement or looseness—tighten screws as needed to keep your shelves secure and prevent wall damage.
Conclusion
Installing floating shelves between cabinets is a practical way to use wall space that often sits empty. With basic tools, some careful planning, and an afternoon of work, you can add useful storage that looks great in your kitchen.
Remember to focus on finding wall studs, building a strong support frame, and keeping everything level during installation. Once in place, your shelves offer endless possibilities for storage and display.
The beauty of these shelves is their simplicity and usefulness. They work in kitchens large and small, can match any style, and help keep your most-used items within reach.
Ready to start? Gather your materials, follow our steps, and enjoy your new kitchen storage space!