
Air plants have become a popular choice for home decorating in recent years. These unique plants don’t need soil to grow, making them perfect for creative displays.
They add a fresh, natural touch to any room without taking up much space.
Making your own air plant holders is a fun way to show off these special plants. You can save money compared to buying ready-made holders from stores.
Plus, you get to pick colors and styles that match your home perfectly.DIY holders let you be creative and make something truly your own.
You can use materials you already have at home or try new crafting techniques. The best part is that even beginners can make beautiful holders with just a few simple steps.
Step-by-Step DIY Air Plant Holder (Macrame Pod)
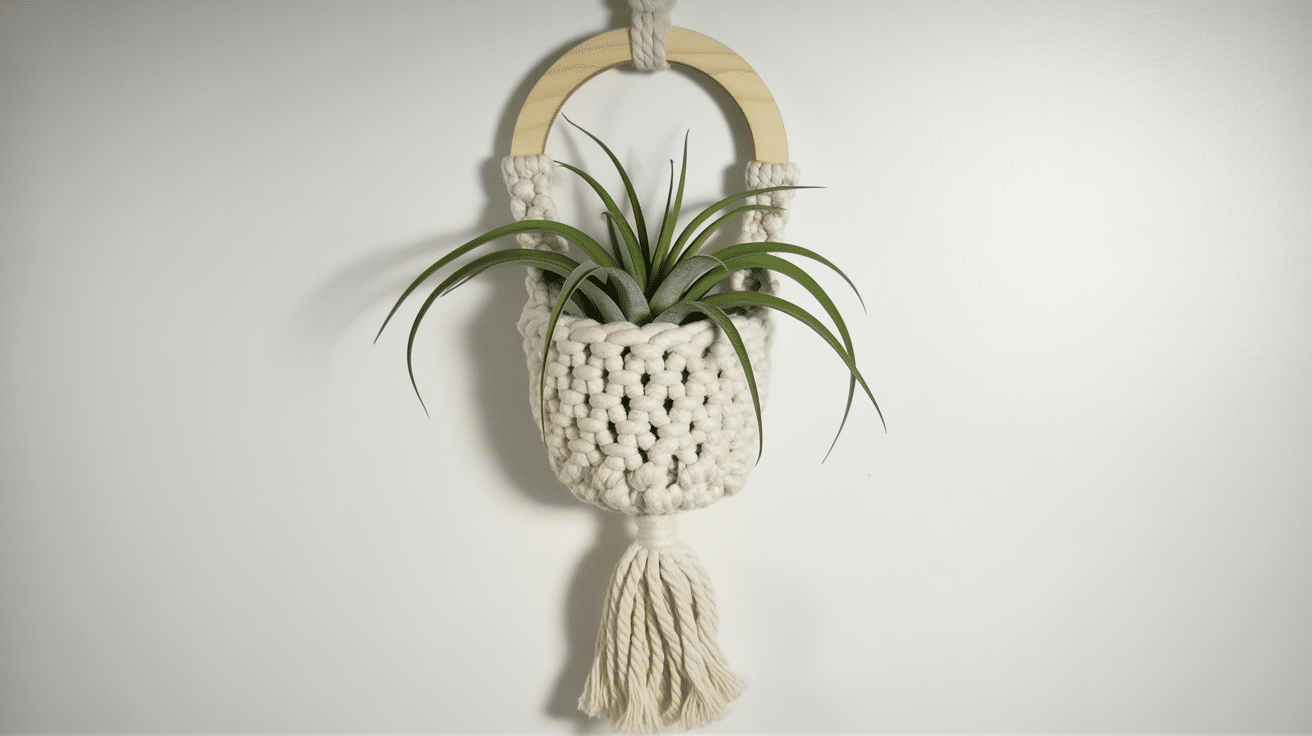
This macrame pod holder looks great hanging in any room. It’s made with simple knots that anyone can learn. The finished holder cradles your air plant safely while allowing it to receive plenty of airflow.
Materials Needed
Before you start, gather these supplies:
| Item | Details |
|---|---|
| Cords (100 cm) | 21 cords total, 1 group of 10 and 1 group of 11 |
| Cord (150 cm) | 1 cord, for attaching to the hoop |
| Cord (50 cm) | 1 cord, for the final wrapping knot |
| Wooden Hoop | Approx. 3.5 cm (optional) |
| Tools | Scissors & measuring tape |
| Plant | An air plant or a small plant pot to finish |
You can find most of these materials at craft stores or online. Choose cord colors that match your room’s style.
Step 1: Attach the Main Cord to the Hoop
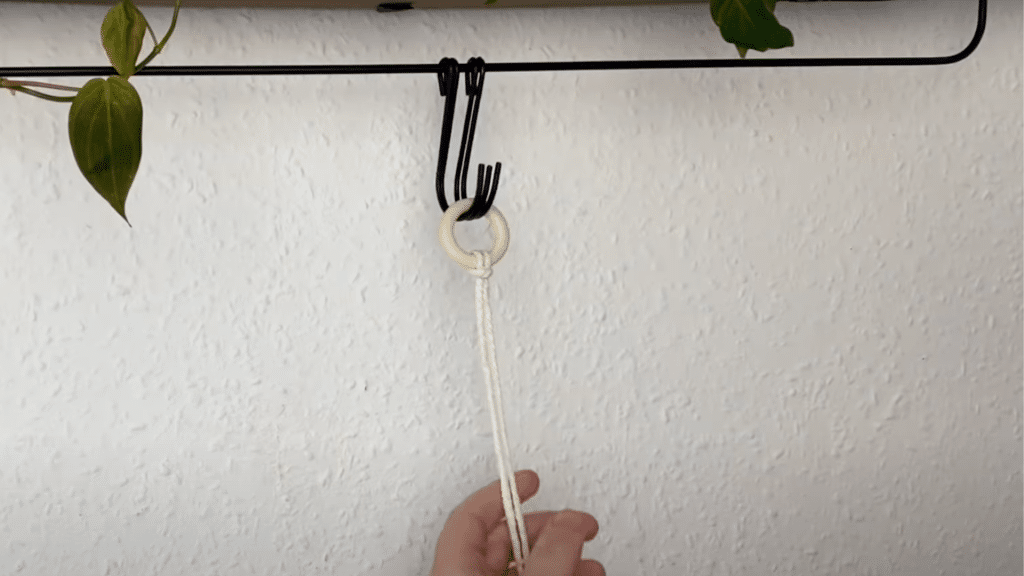
Take your 150 cm cord and fold it in half to find the middle point. Place this middle section behind the wooden hoop from the back side.
Bring the cord through the hoop from front to back, then pull both ends through the loop you just made.
This creates what crafters call a lark’s head knot. Pull both ends tight to make sure the cord stays in place on the hoop.
Step 2: Add a Simple Knot Below the Hoop

Measure about 6 cm down from the hoop along your hanging cords. Tie a basic knot with both cords together at this spot. This keeps everything neat and gives you a good starting point for the next steps.
Step 3: Attach the First 10 Cords (Left Side)
Take your 10 pieces of 100 cm cord and work with them one at a time. Fold each cord in half to find its middle point. Place this middle section behind your main hanging cord on the left side.
Bring both ends of the cord over the front of the main cord and through the loop you made. Pull tight to secure each cord. Repeat this process for all 10 cords on the left side.
Step 4: Attach the Next 10 Cords (Right Side)
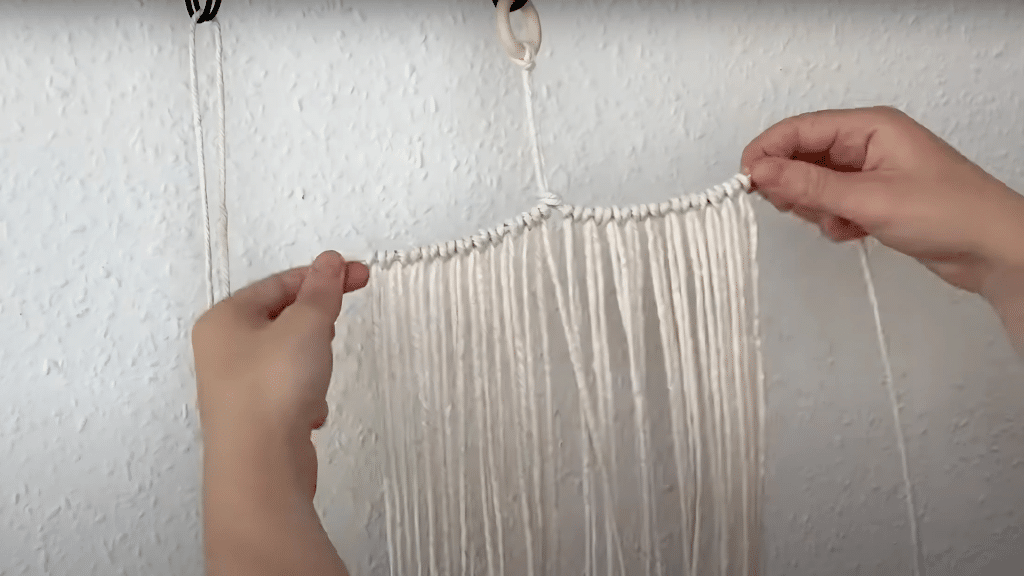
Now take 10 of your remaining 11 cords (save one for later). Attach these 10 cords to the right side of your main hanging cord. Use the same method you just learned – fold each cord in half and attach with the same knot style.
Keep one cord left over for the next step. You should now have cords hanging from both sides of your main cord.
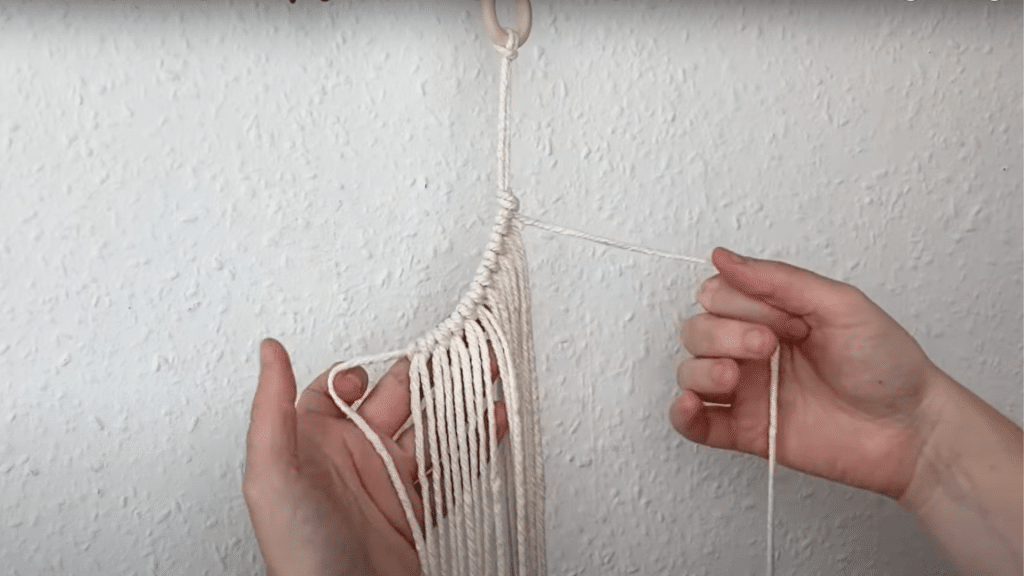
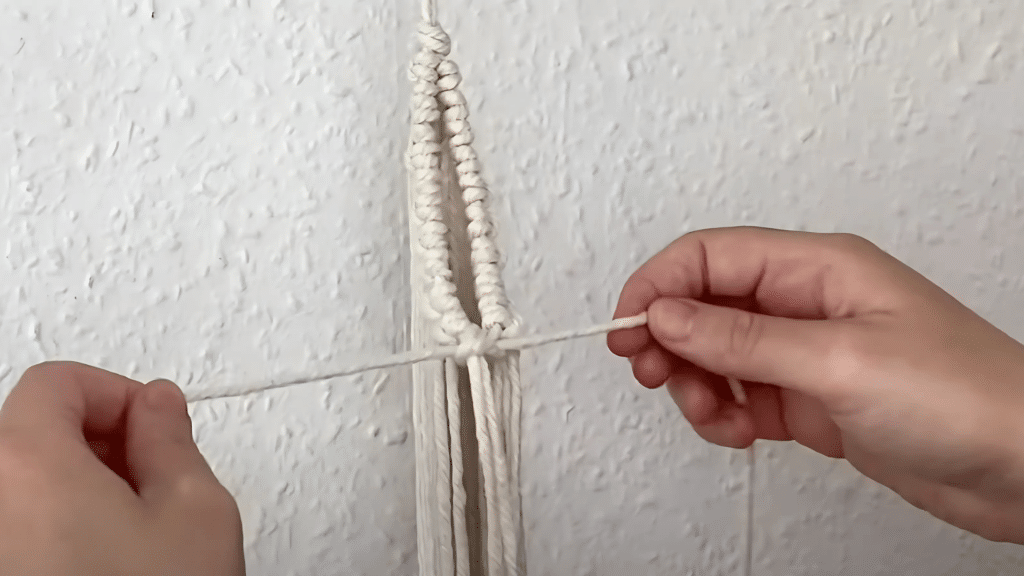
Step 5: Join Both Sides

Cross your left and right main cords where they meet at the bottom. Take your last leftover cord and fold it in half. Attach it right where the two sides cross using the same knot method you used with the hoop.
Pull this knot tight. This step connects your circle and gives your holder its round shape.
Step 6: Start Making Square Knots
Begin at the top left and pick 4 cords that hang next to each other. To make a square knot, take the left cord and bring it over the two middle cords. Then, bring it under the right cord.
Next, take the right cord and bring it under the two middle cords and through the loop on the left side. Pull both sides tight. Repeat this process in reverse to complete one square knot.
Move around your circle and make square knots with each group of 4 cords. The area where you joined the two sides will blend in naturally.
Step 7: Add Alternating Rows
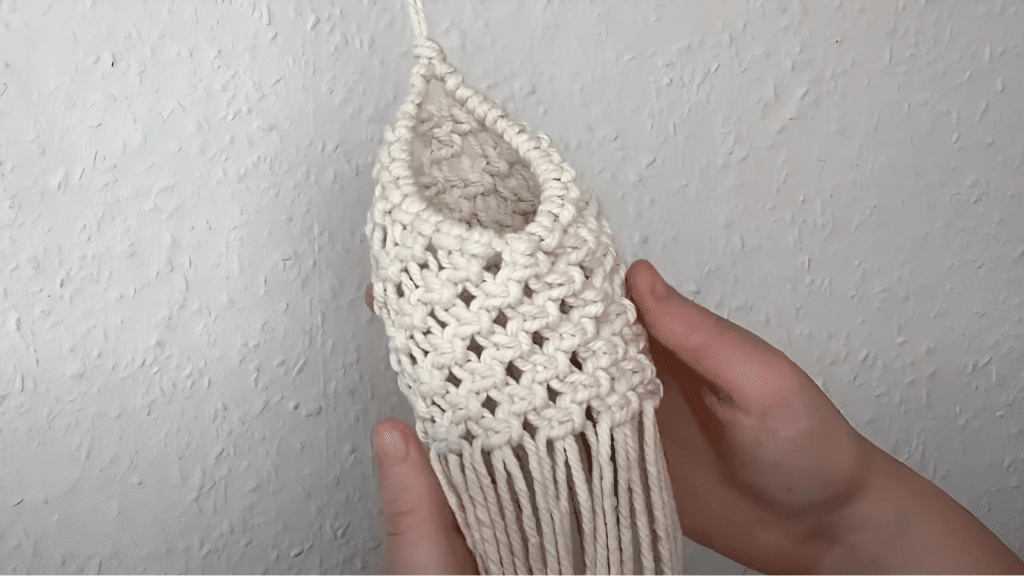
To create the pod shape, you’ll make rows that alternate positions. Take 2 cords from one square knot and 2 cords from the knot next to it. Make a square knot with these 4 cords.
Continue this pattern all the way around your holder. Each new row will be offset from the row above it. Keep adding rows until your holder reaches the length you want (about 7 rows works well).
Step 8: Secure the Bottom with a Wrapping Knot
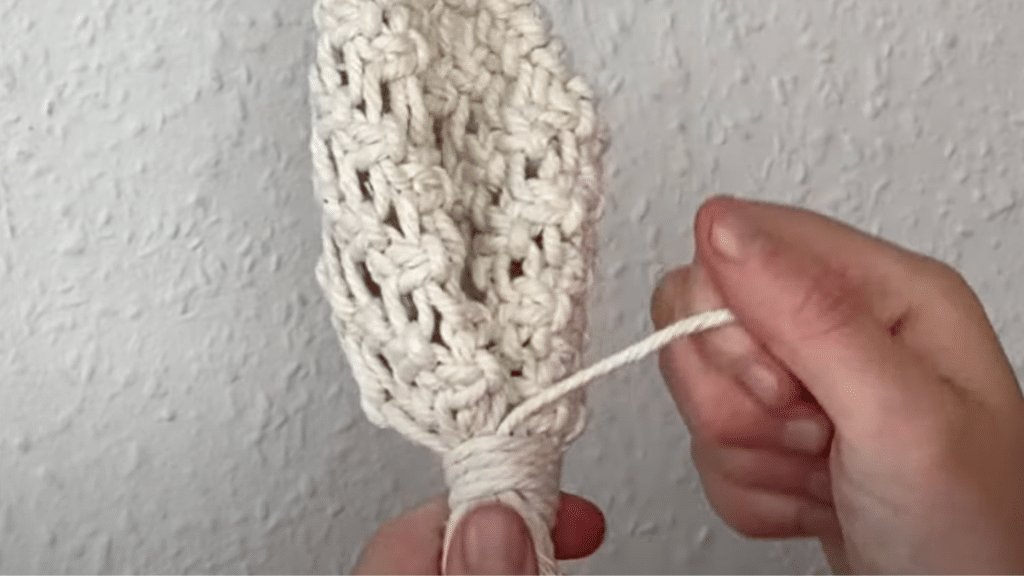
Gather all the hanging cords at the bottom in one hand. Take your 50 cm cord and create a small loop near the gathered cords. Wrap the long end around all the cords and through the loop tightly 4 to 5 times.
Pass the long end through the small loop you made. Pull the top part of the cord to close the wrap and hide it inside. This secures all your cords at the bottom.
Step 9: Trim and Shape
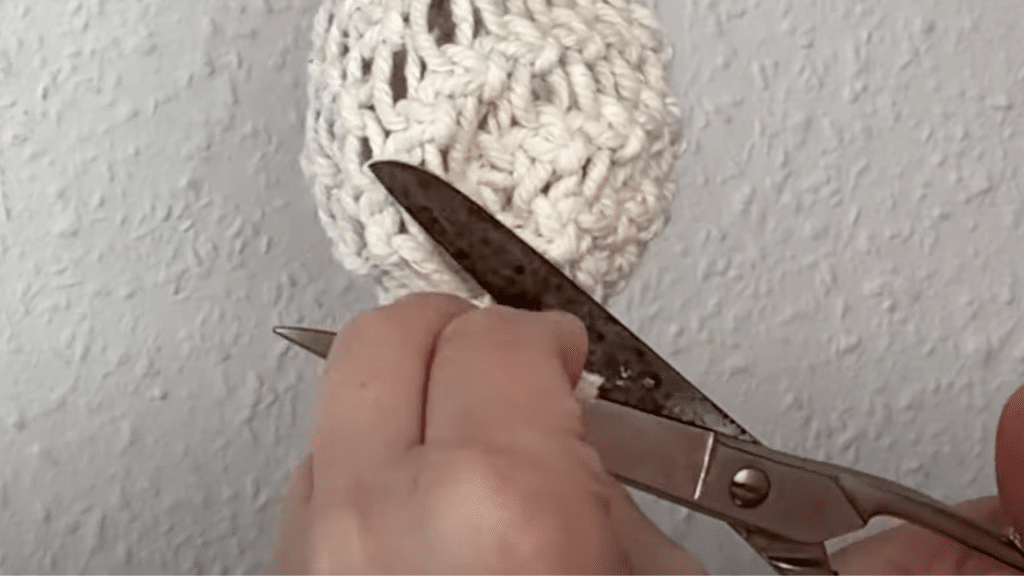
Cut the cord ends at the bottom about 10 cm below the wrap. This creates a neat fringe effect. Check your knots and adjust them if needed to make your pod look even and well-shaped.
Step 10: Add Your Plant and Enjoy!
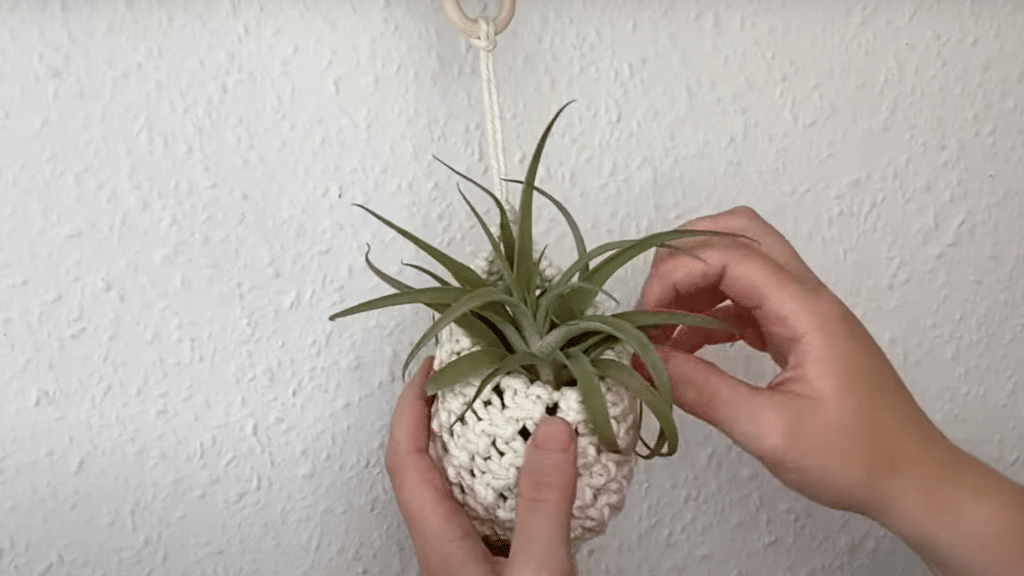
Gently place your air plant inside the macrame pod. The plant should sit comfortably without falling through. # More Easy DIY Air Plant Holder Ideas
Video Tutorial
Special thanks to Luna Crafts Online for providing valuable insights in their video, which I referenced while creating this guide.
More Easy DIY Air Plant Holder Ideas
If macrame isn’t your style, try these other simple holder ideas. Each one takes less than an hour to make. You likely already have some of these materials at home.
1. Wire or Metal Holders
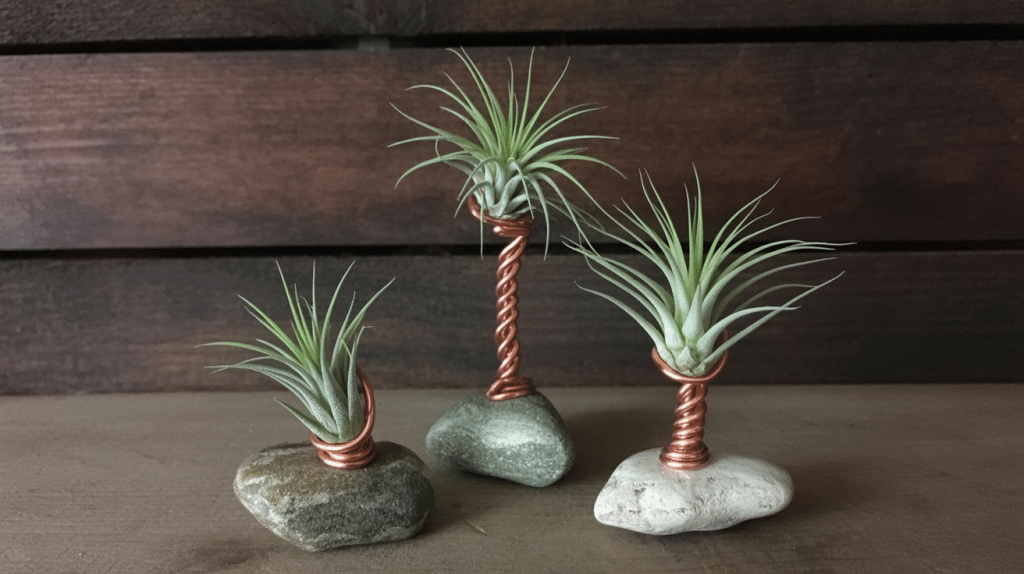
Bend craft wire into fun shapes, such as spirals, triangles, or circles. Use pliers to make clean bends and smooth edges. These holders give your space a modern, clean look.
Ensure that any sharp edges are securely tucked away within your design. You can wrap the ends with colored tape or bend them into small loops.
2. Upcycled Materials
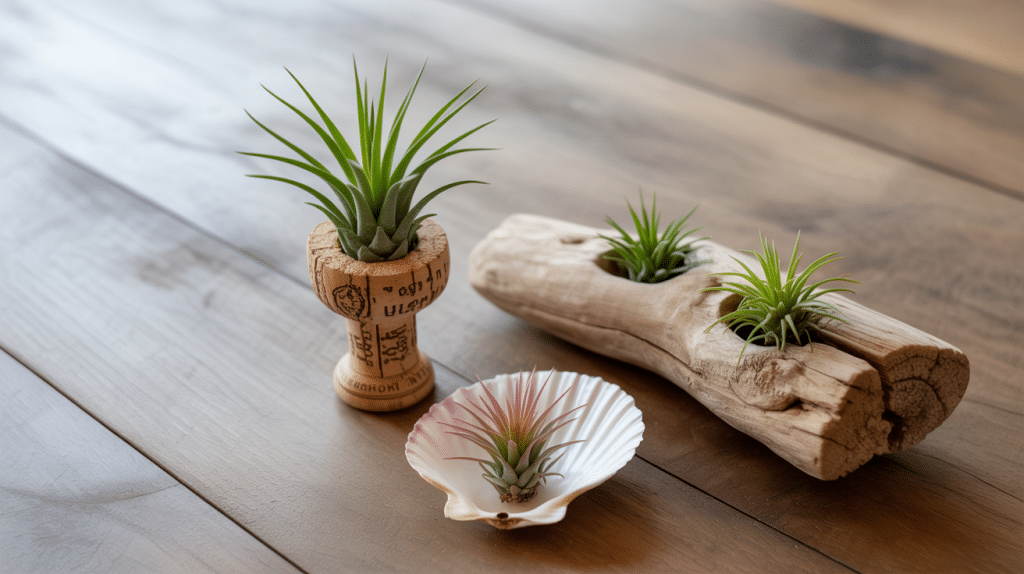
Look around your house for items that you can repurpose as plant holders. Wine corks work great; just hollow out a small space for tiny air plants. Shells from beach trips make natural-looking holders, too.
Pieces of driftwood can hold several air plants at once. Just find or drill small holes where you want each plant to sit.
3. Clay Holders
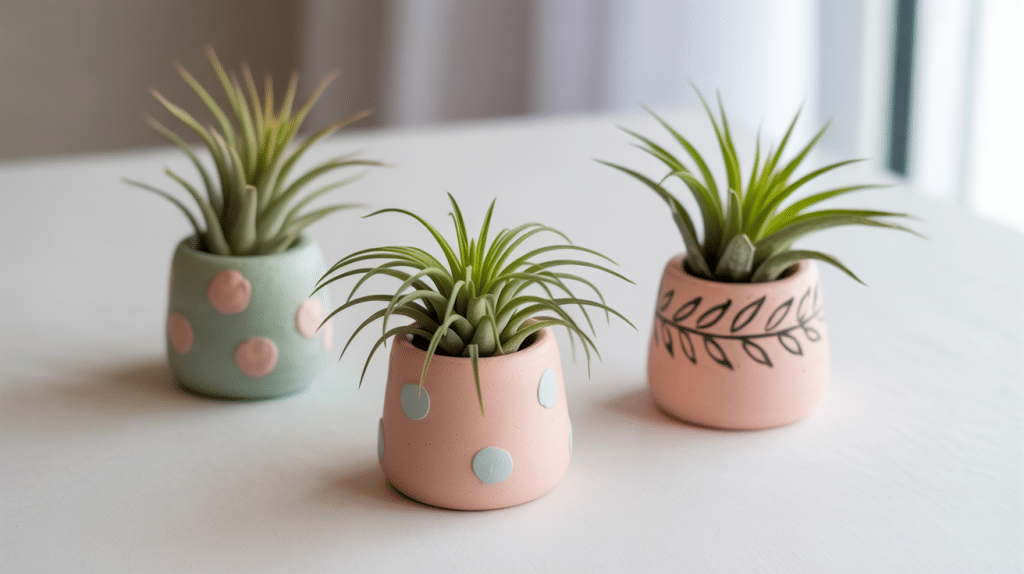
Make your own holders with air-dry clay or polymer clay. Roll the clay into small bowls or cup shapes. Let air-dry clay sit for 24 hours, or bake polymer clay according to the package directions.
You can paint these holders any color once they’re dry. Add patterns or designs to match your room.
4. Wooden Holders
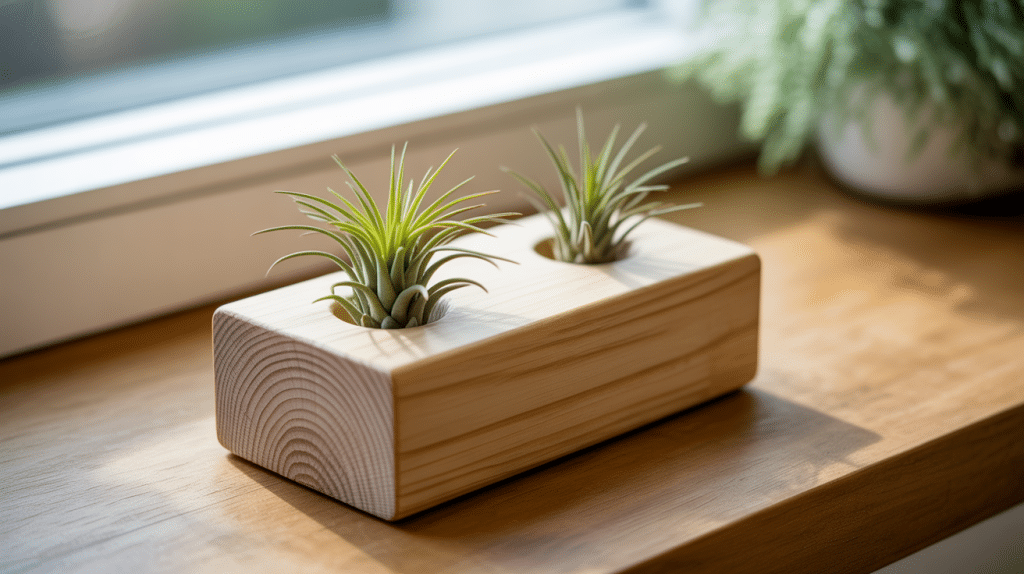
Find small blocks of wood or thick wooden dowels. Drill holes just big enough for your air plants. Sand the wood smooth, and then stain or paint it if desired.
These holders look great on shelves or window sills. You can make several in different sizes.
5. Cord Hangers
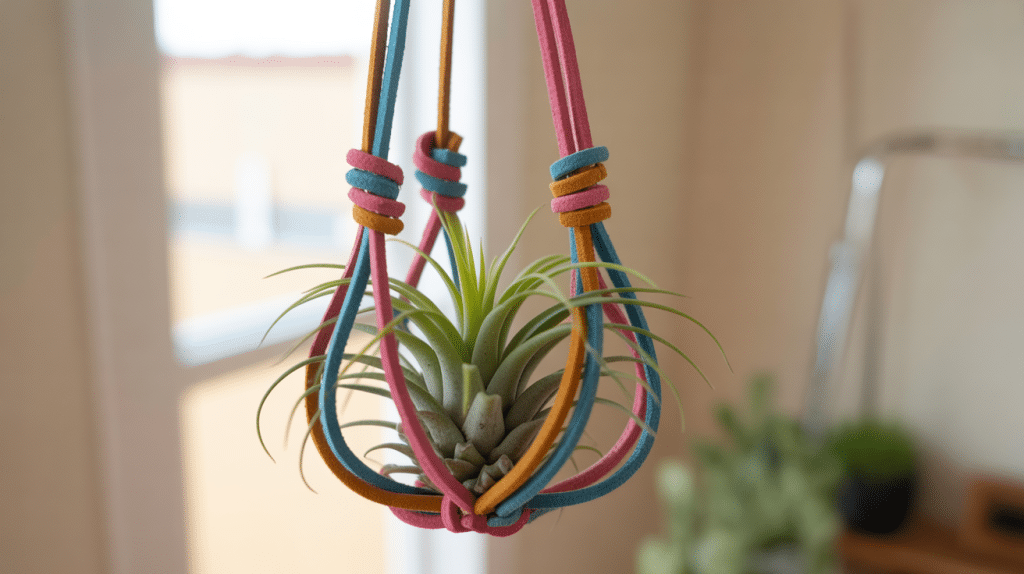
Use colorful suede cord or leather strips for simple hanging holders. These work well in bedrooms or anywhere you want a soft, cozy feel.
Cut 4 pieces of cord, each 60 cm long. Fold in half and tie together at the fold for a hanging loop. Tie cords in pairs 15 cm down, then cross and tie again 10 cm lower to form a basket.
Tips for DIY Air Plant Holders
These simple tips will help you make better holders and keep your air plants happy. A little planning goes a long way in creating holders that last.
- Choose strong materials: Pick cord or wire that can safely hold your plant’s weight. Test your holder before hanging it up high.
- Mix colors and textures: Combine different materials to make your holder more interesting. Just make sure the colors work well together.
- Adjust spacing for plant size: Make knots closer together for smaller air plants. Larger plants need more space between knots.
- Find the right light spot: Hang holders where they get bright light but not direct sun. Plants near a window usually work best.
- Save leftover materials: Keep extra cords or supplies for future projects. You may want to create matching holders or check new designs.
Conclusion
Creating your air plant holders is a fun way to add a personal touch to your home. Each holder you create will be unique and special. The best part is seeing your plants displayed in something you made yourself.
Don’t worry if your first attempt isn’t perfect. Like any new skill, making plant holders gets easier with practice. Start with simple designs and work your way up to harder projects.
Try making different types of holders for different rooms in your house. Share photos of your finished projects with friends or online. You might inspire someone else to start crafting, too!
FAQs About DIY Air Plant Holders
How Do I Care For Air Plants In A DIY Holder?
Mist your air plants with water 2-3 times per week. Remove them from holders once a week for a deeper watering. Let them dry completely before putting them back.
How Do I Secure The Air Plant So It Doesn’t Fall Out?
Ensure your holder opening is smaller than the widest part of your plant. You can also use a small piece of moss or cork to help hold the plant in place.
Where Can I Buy DIY Kits Or Supplies?
Most craft stores sell macrame cord, wire, and other supplies. Online stores often have complete kits with everything you need. Local hardware stores usually carry wire and wood materials.