
Making s’mores without a stove or microwave sounds tricky. But all you need is a cardboard box and some sunlight.
A DIY solar oven costs almost nothing to build and takes less than an hour to put together. Kids love it, and it actually works.
Here, you will learn exactly how to make a solar oven step by step using materials you already have at home. You will also find out the science behind how it works and fun activities to turn it into a proper learning project.
What You Need to Build a Solar Oven
You do not need to buy anything special. Most of these materials are already sitting in your kitchen or recycling bin.
| Material | Purpose |
|---|---|
| Pizza box or cardboard box with a lid | Main structure of the oven |
| Aluminum foil | Reflects sunlight into the box |
| Black construction paper | Absorbs sunlight and converts it to heat |
| Clear plastic wrap | Let light in and trap heat inside |
| Scissors and tape | For cutting and securing materials |
| Popsicle stick or straw | Prop the reflector flap open |
| S’mores ingredients | Your first test food |
A pizza box works best because it already has a lid attached. If you do not have one, any cardboard box with a foldable flap will do the job.
How to Make a Solar Oven Step by Step
Before you start, pick a sunny day and find a flat outdoor surface where the box can sit without tipping over.
Step 1 – Prepare the box
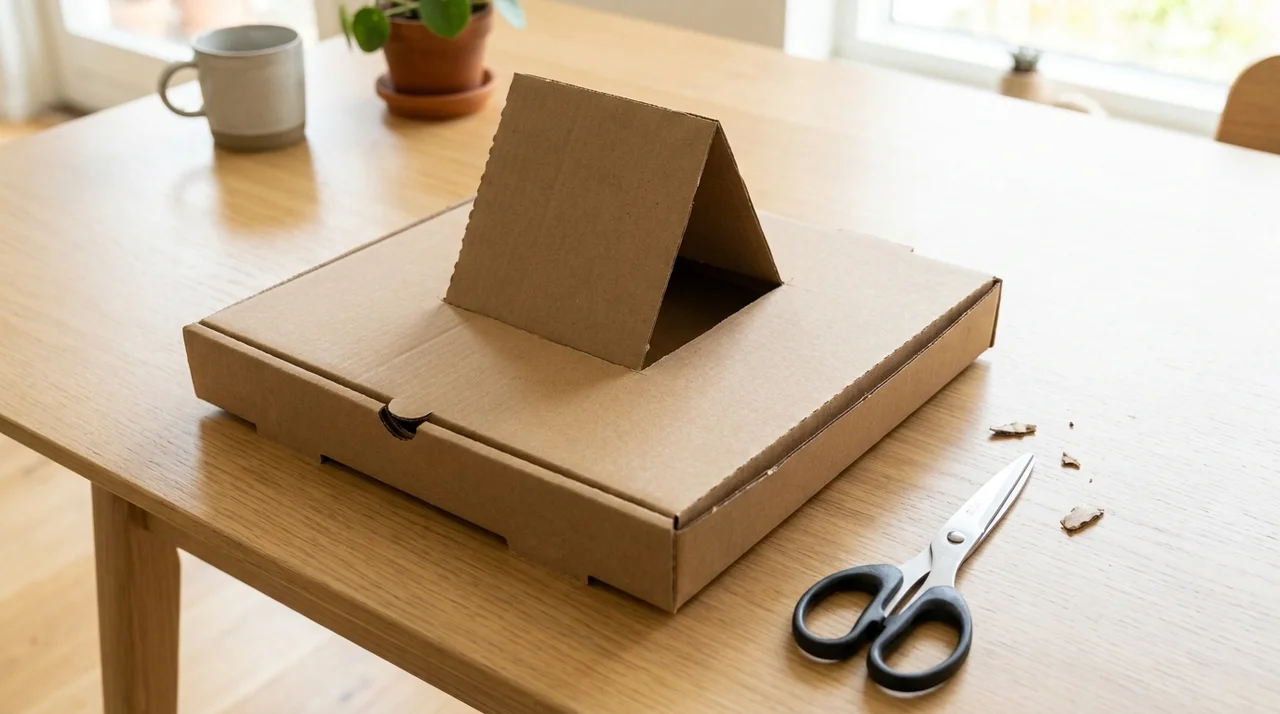
Fold the box shut. On the top lid, cut three sides of a square, leaving the side closest to the hinge uncut. Fold the cut flap upward so it stands open like a panel. This flap will act as your reflector.
Step 2 – Line it with foil
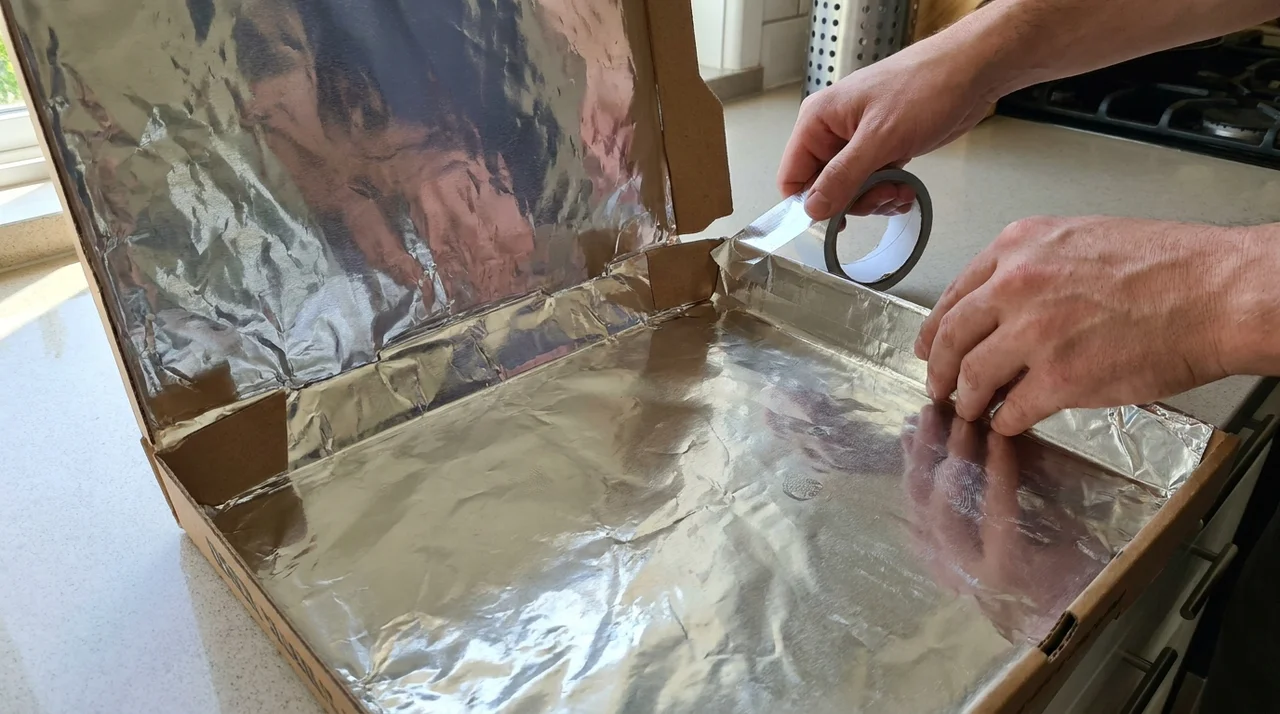
Cover the inside bottom of the box with aluminum foil and press it flat. Do the same on the underside of the flap you just created. Secure the edges with tape. The shinier and smoother the foil, the better it reflects sunlight.
Step 3 – Add the black paper
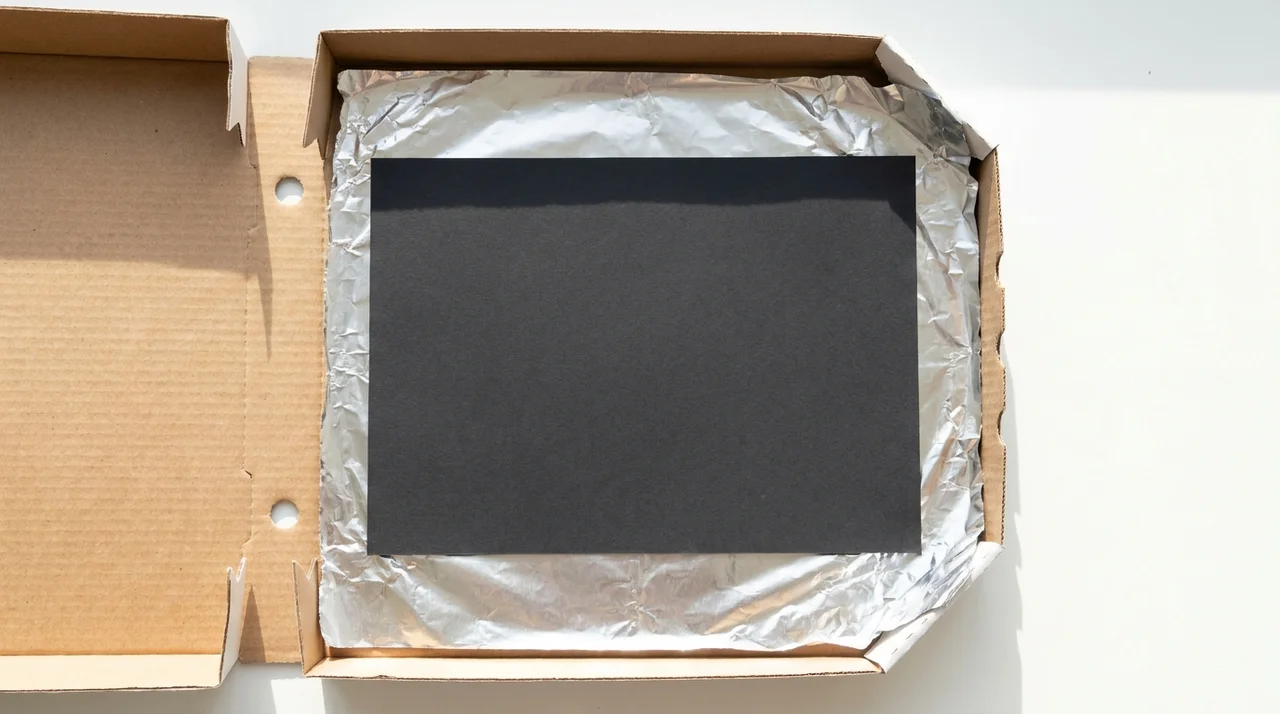
Cut a piece of black construction paper to fit the bottom of the box and place it over the foil. This is the surface that gets hot and actually cooks your food.
Step 4 – Seal it with plastic wrap
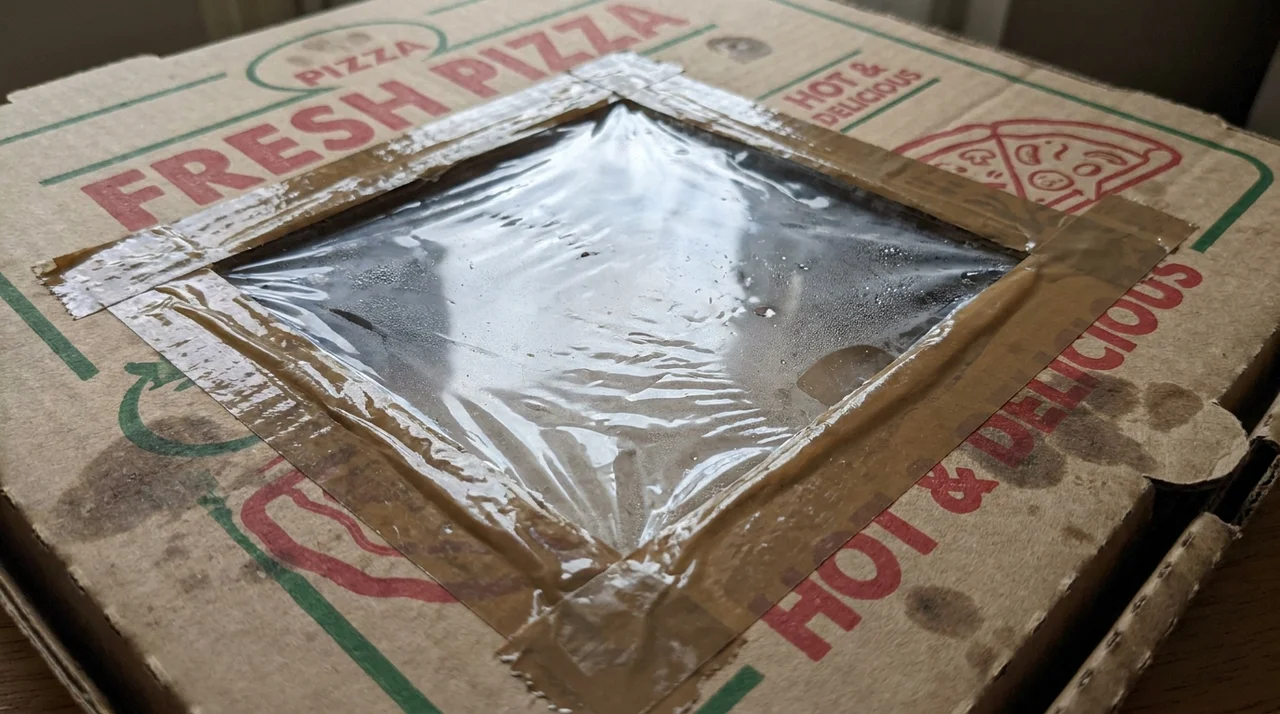
Cut a sheet of plastic wrap slightly larger than the square opening you created in Step 1. Tape it tightly over the hole. Pull it taut so there are no loose folds. This acts like a window, letting sunlight in while keeping heat from escaping.
Step 5 – Set up your food
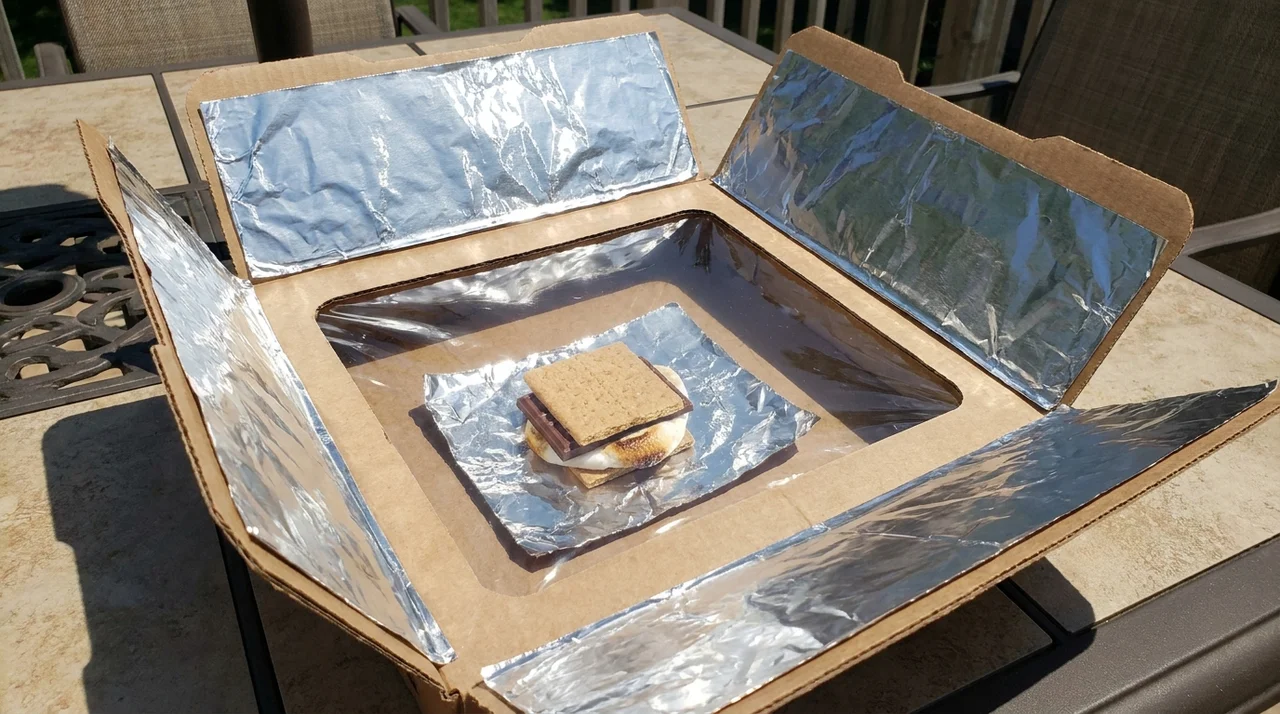
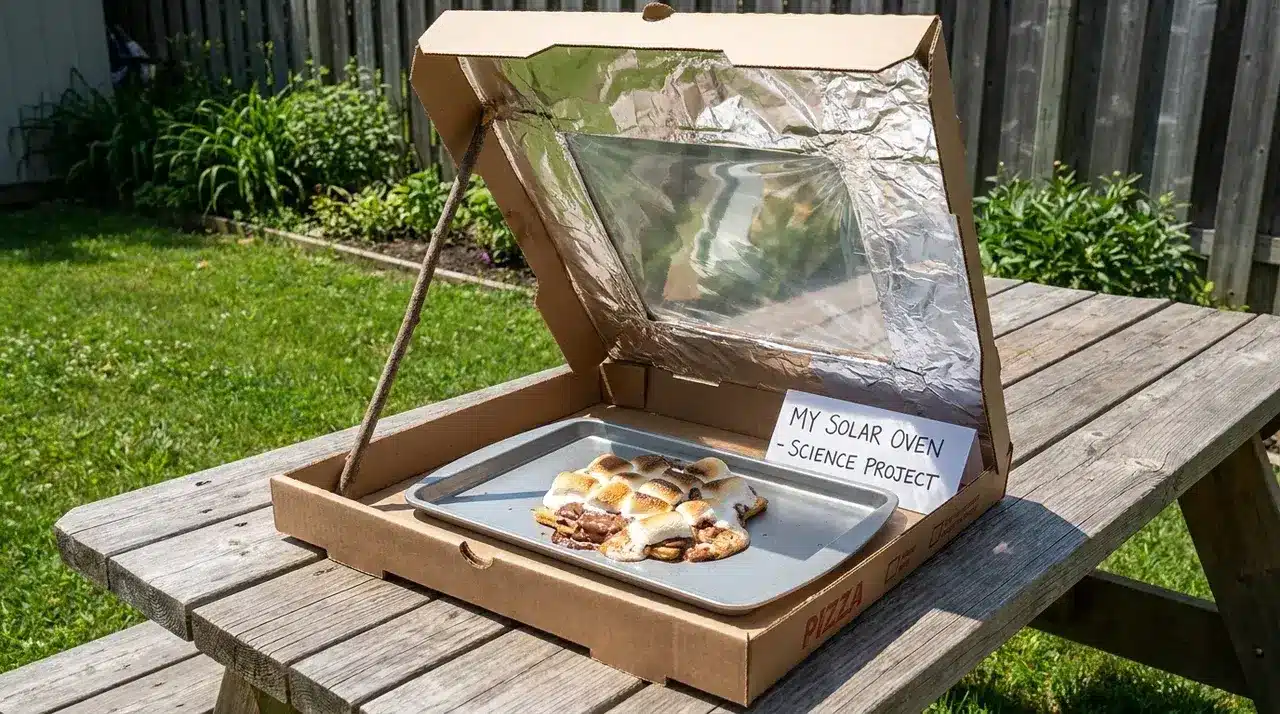
Place a small piece of foil in the center of the black paper. Stack your s’more on it: graham cracker on the bottom, then a marshmallow, then a square of chocolate on top. Close the lid gently without covering the plastic wrap opening.
Step 6 – Put it in the sun
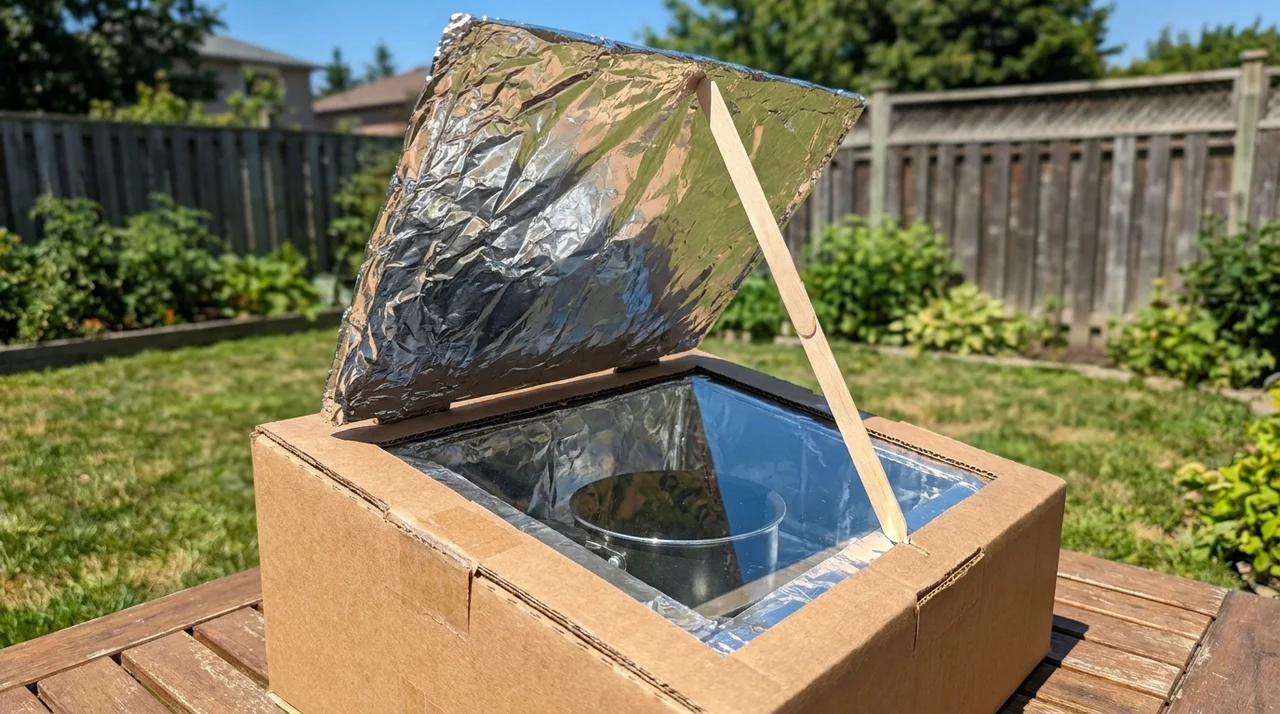
Take the oven outside and place it where it gets direct sunlight. Prop the reflector flap open with a popsicle stick or straw, and angle it so that sunlight bounces directly onto the food. On a warm sunny day, your s’more will be ready in 30 to 60 minutes. Check it every 10 minutes and reposition the flap as the sun moves.
The Science That Makes It Work
Aluminum foil is a mirror for sunlight. The foil-covered flap bounces sunlight into the box instead of letting it scatter in every direction. More light going in means more heat building up inside.
Black surfaces absorb heat from sunlight rather than reflect it. The black paper at the base of the box soaks up the reflected light and turns it into the heat that cooks your food.
The plastic wrap layer works the same way a car windshield does on a hot day. Sunlight passes through easily, going in, but the heat that builds up inside cannot escape as quickly. This is why the inside of the box gets much warmer than the outside air.
Solar Oven Science Activities for Kids
This project gives kids a hands-on way to see renewable energy at work. Here are four activities to take it further.
- Design challenge: Give kids two or three different box sizes, build a solar oven with each, then compare which one heated up the fastest to see how size affects heat collection.
- Temperature tracking: Place a thermometer inside before adding food, record the temperature every 5 minutes for half an hour, and plot the readings on a simple chart.
- Material swap test: Use white paper instead of foil in one oven and cook the same food in both at the same time to see which performs better.
- Environmental discussion: Ask kids how else we use the sun as an energy source and connect it to solar panels and solar water heaters.
All four work well as science fair projects or simple afternoon activities at home, with no special equipment needed.
Tips for Getting the Best Results
A few small adjustments before and during cooking make a real difference to how well your solar oven performs.
- Cook on a bright, cloudless day when temperatures are above 25°C, starting between 10 AM and 3 PM for the strongest sunlight.
- Keep the plastic wrap airtight and run an extra strip of tape around the edges since small gaps let heat escape.
- Reposition the reflector flap every 15 to 20 minutes as the sun moves across the sky.
- Use dark-colored plates or pans inside the box since dark surfaces absorb heat more effectively.
- Use tongs or oven mitts when removing food, and keep young kids away from the opening without adult supervision.
Get these right and your solar oven will perform well even on days when the sun is not at its peak.
Conclusion
Building a solar oven proves that you do not need expensive equipment to do something genuinely useful with science. A cardboard box, some foil, and a sunny afternoon are all it takes.
Once you know how to make a solar oven, you can keep experimenting. Try different foods, test new materials, or turn it into a full science project with kids.
The best part is that every attempt teaches you something new about how the sun works. Grab a pizza box and give it a go this weekend. Share your results in the comments and let us know what you cooked.
Frequently Asked Questions
Can a Solar Oven Boil Water?
Yes, a well-built solar oven can reach temperatures high enough to slowly boil water, though it takes longer than it does to cook food.
Does the Color of the Box Affect How Well the Solar Oven Works?
Yes, a darker outer box absorbs more ambient heat, which adds a small boost to the overall temperature inside.
Can You Use a Solar Oven in Winter?
Yes, as long as there is strong direct sunlight, a solar oven can work in winter, though cooking times will be longer due to lower sun angles.
Is Food Cooked in a Solar Oven Safe to Eat?
Yes, as long as the oven reaches a high enough temperature, food cooked inside is safe, though it is best suited for snacks and simple foods rather than raw meat.