

Imagine redesigning your kitchen into a space that feels taller, more organized, and utterly gorgeous. What if the key to unlocking this secret lies in one simple change?
Extending your kitchen cabinets to the ceiling might just be the upgrade you never knew you needed.
In this deep dive, we’ll walk you through the entire process, revealing how this bold move can elevate your kitchen’s design and functionality. From clever tricks to design secrets, you’ll know how to maximize storage, create a sleek environment, and remake your space into something extraordinary.
Ready to dive into a world where your kitchen’s potential goes beyond the surface? Keep reading—the transformation is about to begin.
Why Extend Kitchen Cabinets to the Ceiling?
Extending kitchen cabinets to the ceiling offers numerous advantages:
1. Maximized Storage Space: Utilizing the area above cabinets increases storage. You can store rarely-used items, seasonal decorations, or infrequently used appliances, keeping your kitchen organized and clutter-free.
2. Improved Visual Attractiveness: Extending cabinets to the ceiling creates a sleek look, drawing the eye upward and making the kitchen feel larger and more luxurious. This continuous line enhances the room’s height and provides a custom, cohesive appearance.
3. Hiding Structural Elements: Ceiling-height cabinets can hide unsightly beams, ducts, or uneven ceilings, instantly improving your kitchen’s look and making it feel more uniform.
By extending your cabinets, you not only enhance the kitchen’s functionality but also elevate its visual appeal.
What You’ll Need for the Project
To successfully extend your kitchen cabinets to the ceiling, gathering the right materials and tools is essential. Here’s what you’ll need to get started:
| Item | Description |
|---|---|
| Cabinet Boxes and Panels | Plywood (¾-inch thickness) for constructing custom cabinet boxes. |
| Face Frame Material | Hardwood (maple, oak, or birch) for creating face frames for a polished look. |
| Cabinet Doors | Wood or MDF boards for constructing doors, plus a router for glass inserts. |
| Crown Molding | Molding to finish the top of cabinets, along with adhesive or nails for installation. |
| Lighting Equipment | LED strips, power supply, connectors, and diffusers for cabinet lighting (optional). |
| Tools and Supplies | Table saw, miter saw, drill, wood glue, brad nails, clamps, paint or stain for finishing. |
This table outlines the essential materials and tools you’ll need to extend your kitchen cabinets to the ceiling.
The Process: How to Extend Kitchen Cabinets to the Ceiling
Extending your kitchen cabinets to the ceiling is an excellent way to maximize storage space and enhance the overall look of your kitchen.
To update your space or enhance its functionality, follow essential steps, from planning and measuring to installing finishing touches like crown molding. Each step is vital for a cohesive kitchen renovation.
Here’s a comprehensive guide to assist you in extending your kitchen cabinets to reach the ceiling.
Step 1: Planning, Measuring, and Choosing the Right Design
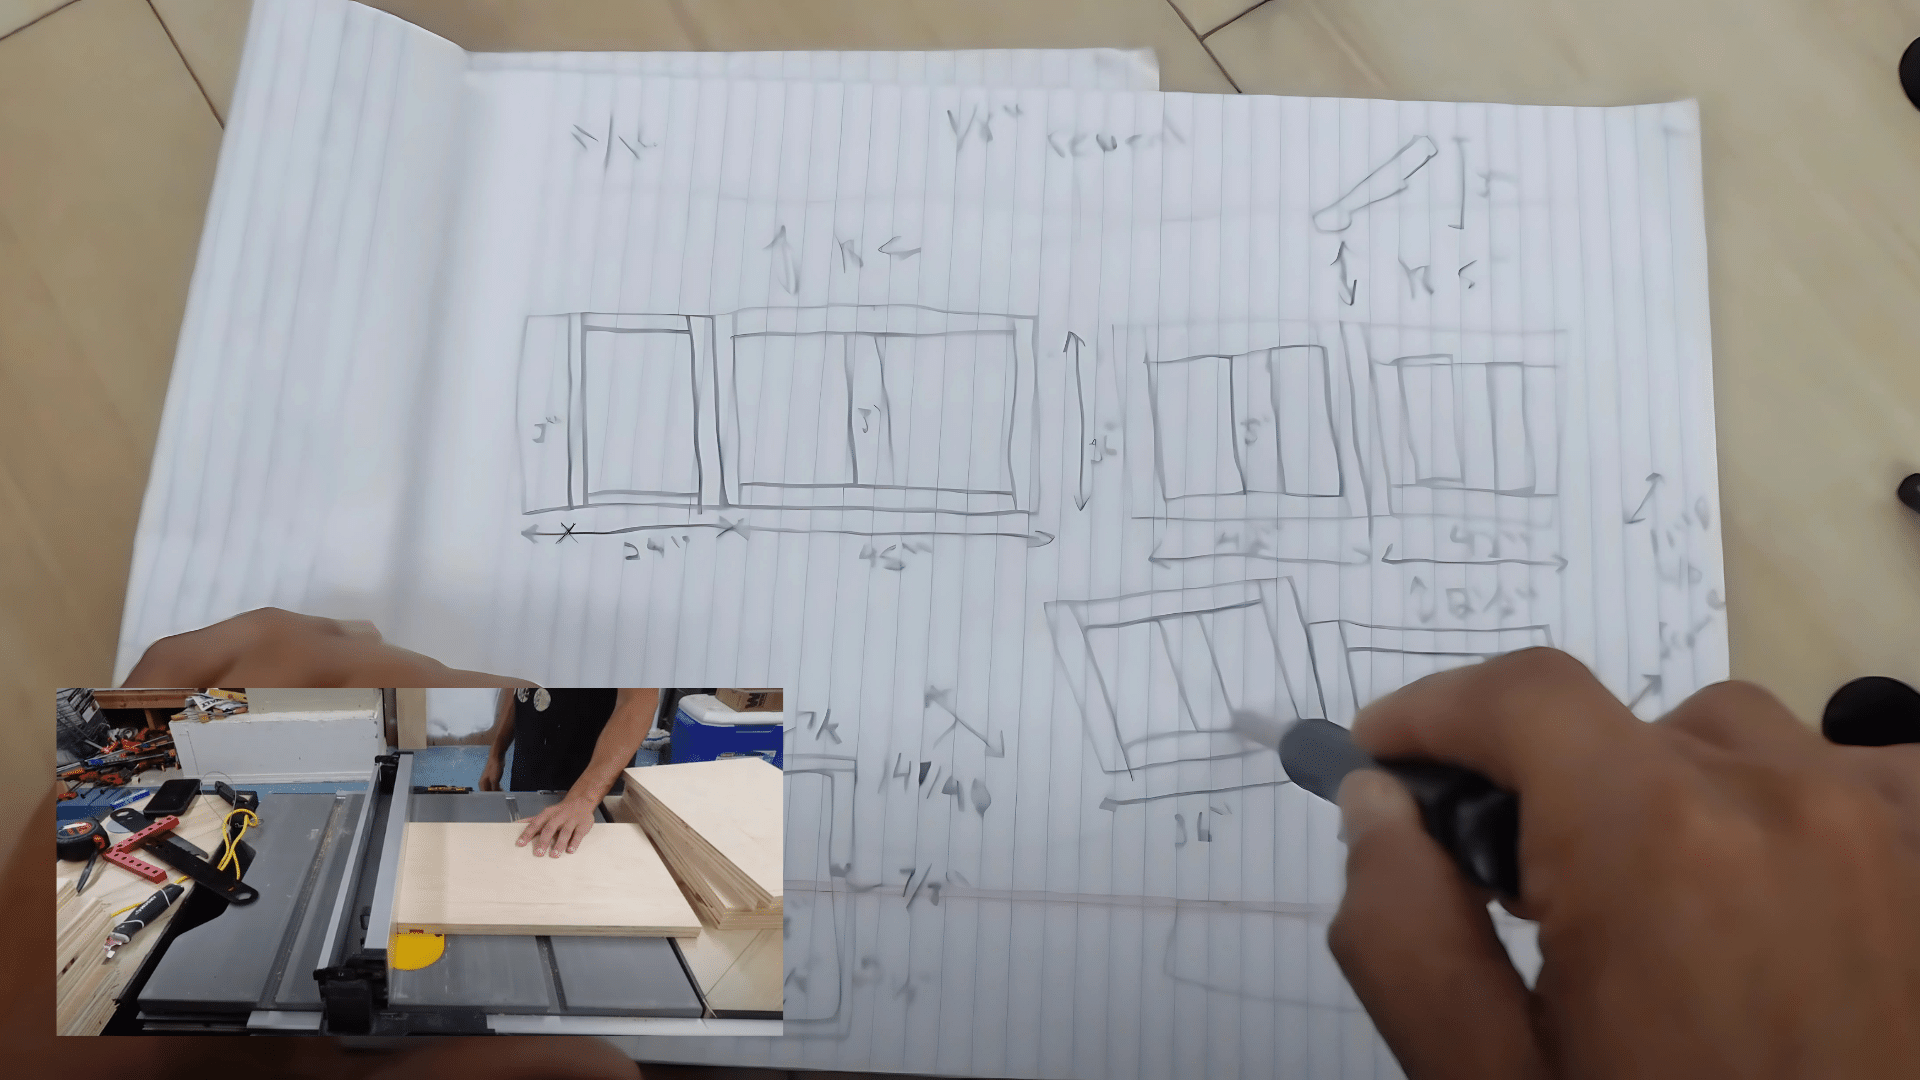
The first step is to carefully plan your project, ensuring the design suits your needs and the space available.
-
Measure the Available Space: Take accurate measurements of the space above your existing cabinets to determine how much room you have to work with.
-
Account for Obstructions: Identify any potential obstructions such as light fixtures, vents, or uneven ceiling heights that could affect the installation.
-
Design Your Cabinets: Choose whether to extend your current cabinets, add entirely new ones, or opt for open shelving. Consider how the design will integrate with your kitchen’s current aesthetic.
-
Select Additional Features: Think about adding crown molding, frosted glass panels, or LED lighting to enhance the overall look and functionality of your cabinets.
Step 2: Build Cabinet Boxes and Test Fit
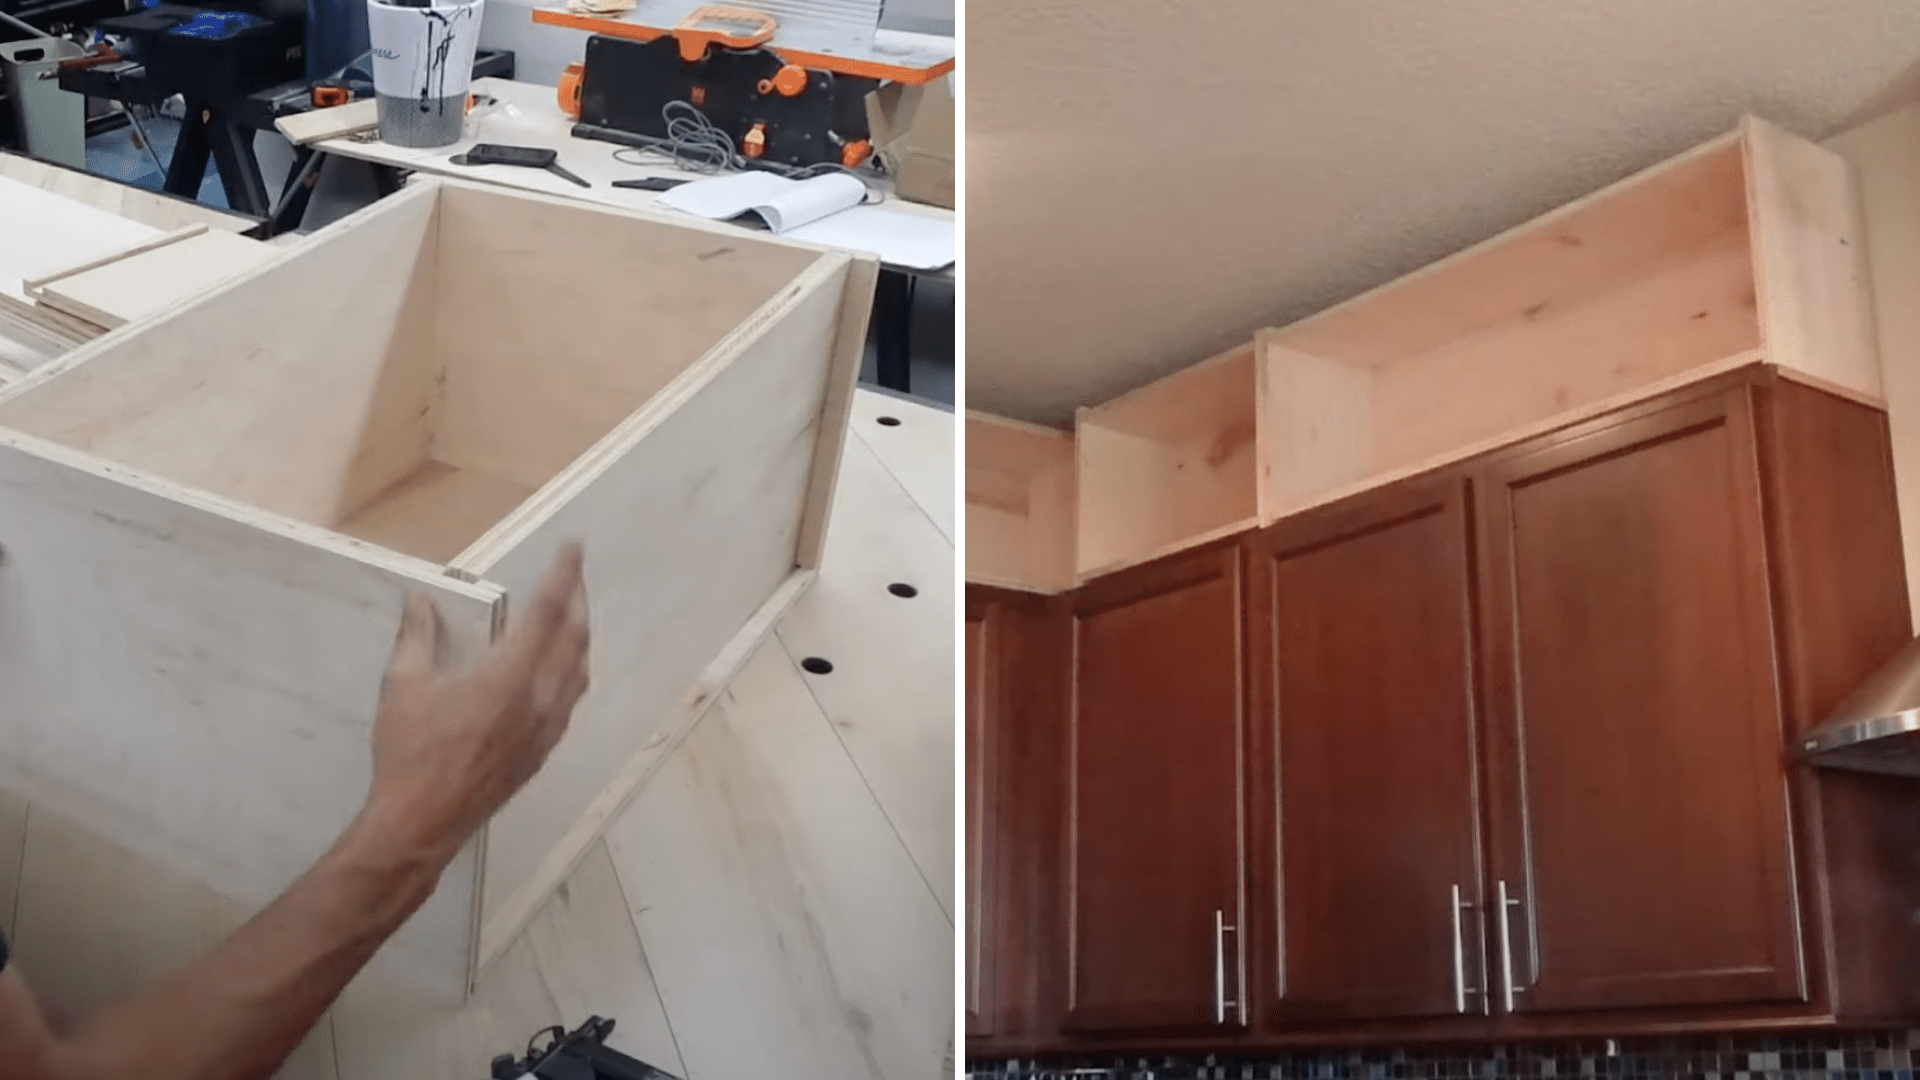
Now it’s time to get to work building the cabinet boxes and testing the fit within your kitchen.
-
Cut and Assemble Panels: Using materials like plywood, cut your panels to the appropriate size and assemble the boxes with the necessary grooves for structural support.
-
Ensure Consistency: Use a table saw or a miter saw to ensure the widths of the panels are consistent and precise.
-
Test Fit the Boxes: Before fully assembling, place the cabinet boxes into the space to ensure they fit perfectly. Trim any areas that need adjustment to ensure a snug fit.
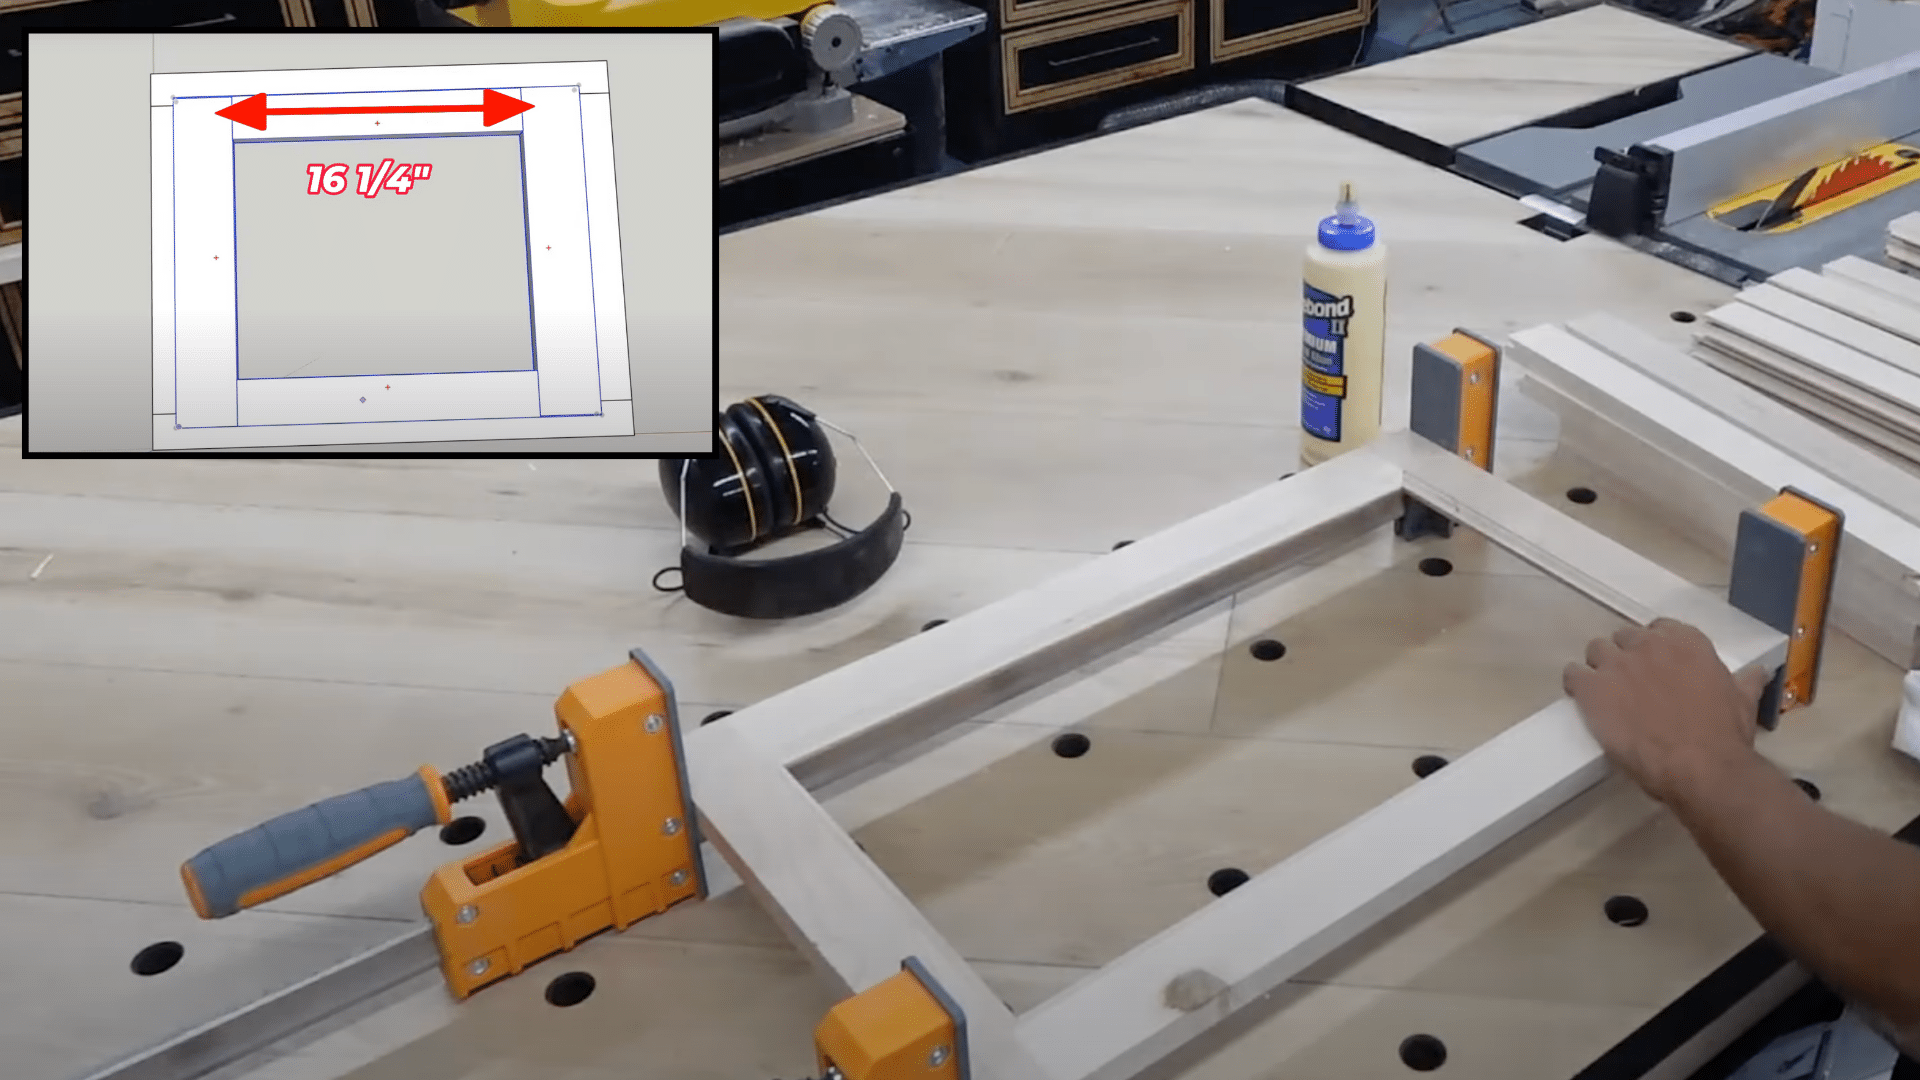
Step 3: Build the Face Frames
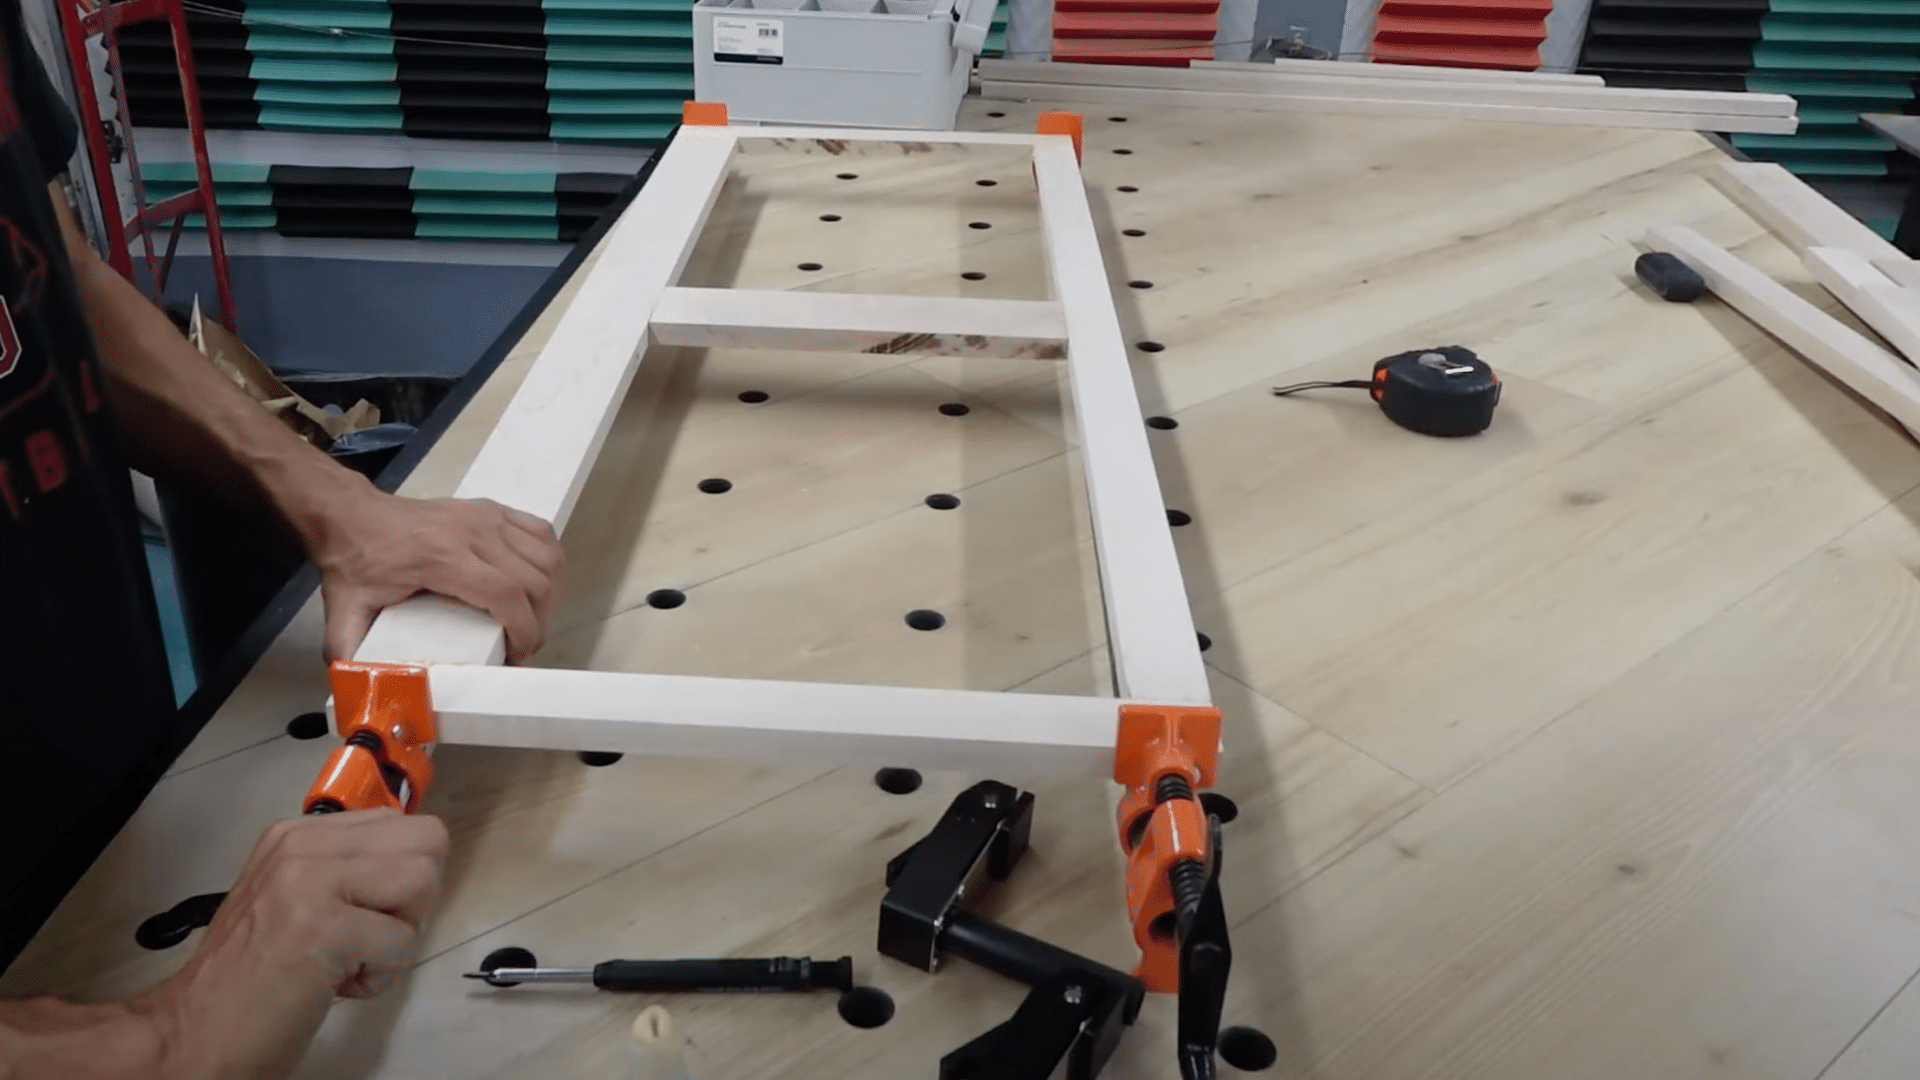
Next, you’ll create the face frames that will bring a cohesive, finished look to your cabinets.
-
Select the Right Material: Use hardwood, such as maple, to build the face frames. This will ensure durability and a professional finish.
-
Match the Existing Cabinets: Customize the dimensions of the frames to match the existing cabinets, ensuring a seamless integration between the new and old.
-
Allow Room for Crown Molding: Add extra material along the top of the frames if you plan on installing crown molding to complete the look.
Step 4: Construct and Install Doors
Once the cabinet boxes are ready, focus on building and installing the doors.
-
Cut Door Frames: Use router bits and a table saw to cut the door frames to match the design of your existing cabinetry.
-
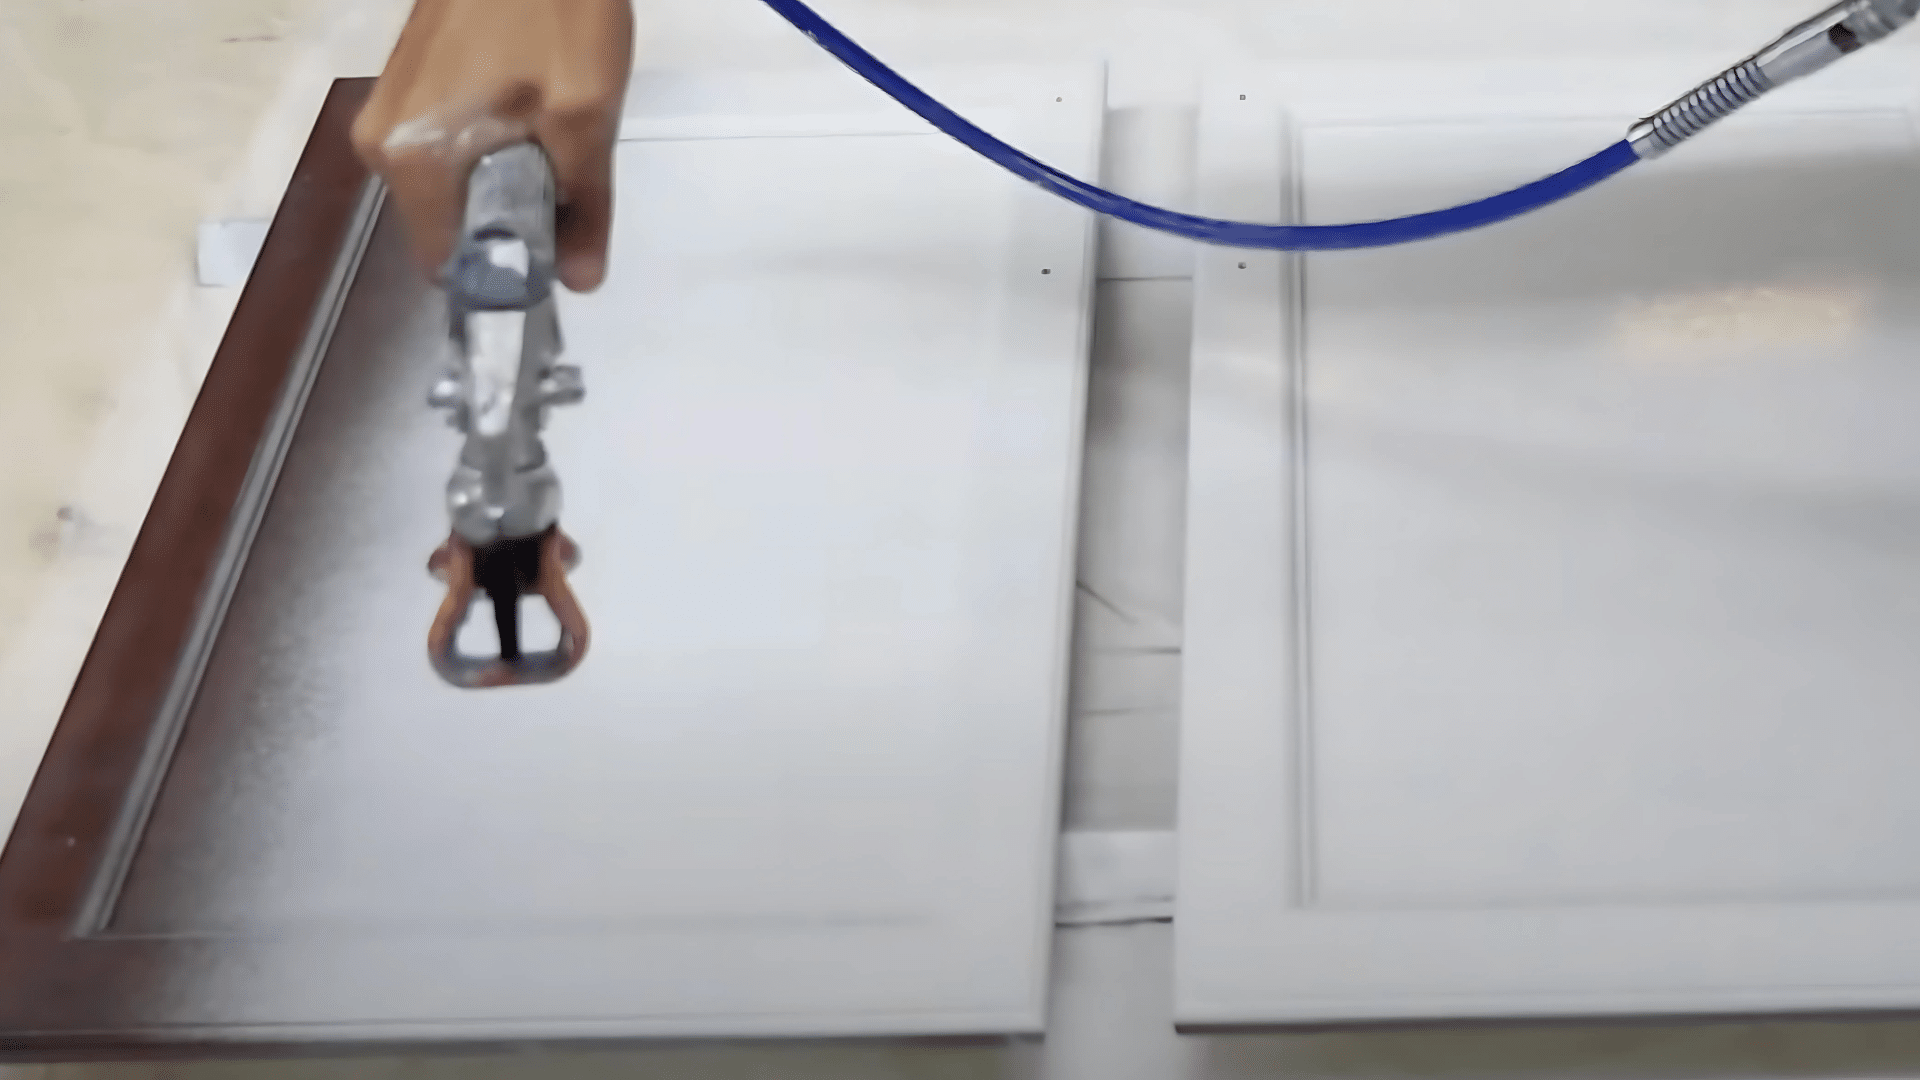
Install the Doors: Once assembled, install the doors with careful precision. Make sure they align properly and open smoothly.
Step 5: Paint the Cabinets
After the construction and installation of your cabinets, it’s time to finish them off with a fresh coat of paint.
-
Prepare the Surface: Clean the cabinets thoroughly and sand any rough spots to ensure smooth paint application.
-
Apply Primer and Topcoat: Apply a primer first, followed by a topcoat, for a consistent and durable finish. Consider a satin finish for an elegant look.
-
Touch Up Details: Use a foam brush to touch up any missed spots, and fill in any nail holes or seams with spackle for a clean, polished appearance.
Step 6: Install Cabinets and Add Crown Molding

Finally, it’s time to install the cabinets securely in place and add the finishing touch with crown molding.
-
Install the Cabinets: Secure the extended cabinets to the wall studs using shims to ensure they are level and properly aligned.
-
Add Crown Molding: To complete the look, install crown molding at the top of the cabinets. Cut the molding with precise angles for seamless corners and a finished, polished appearance.
Step 7: Final Touches
Touch up any paint or finish and fill any exposed nail holes or seams. Clean up the area, recheck the cabinet alignment, and ensure everything is securely mounted and functional.
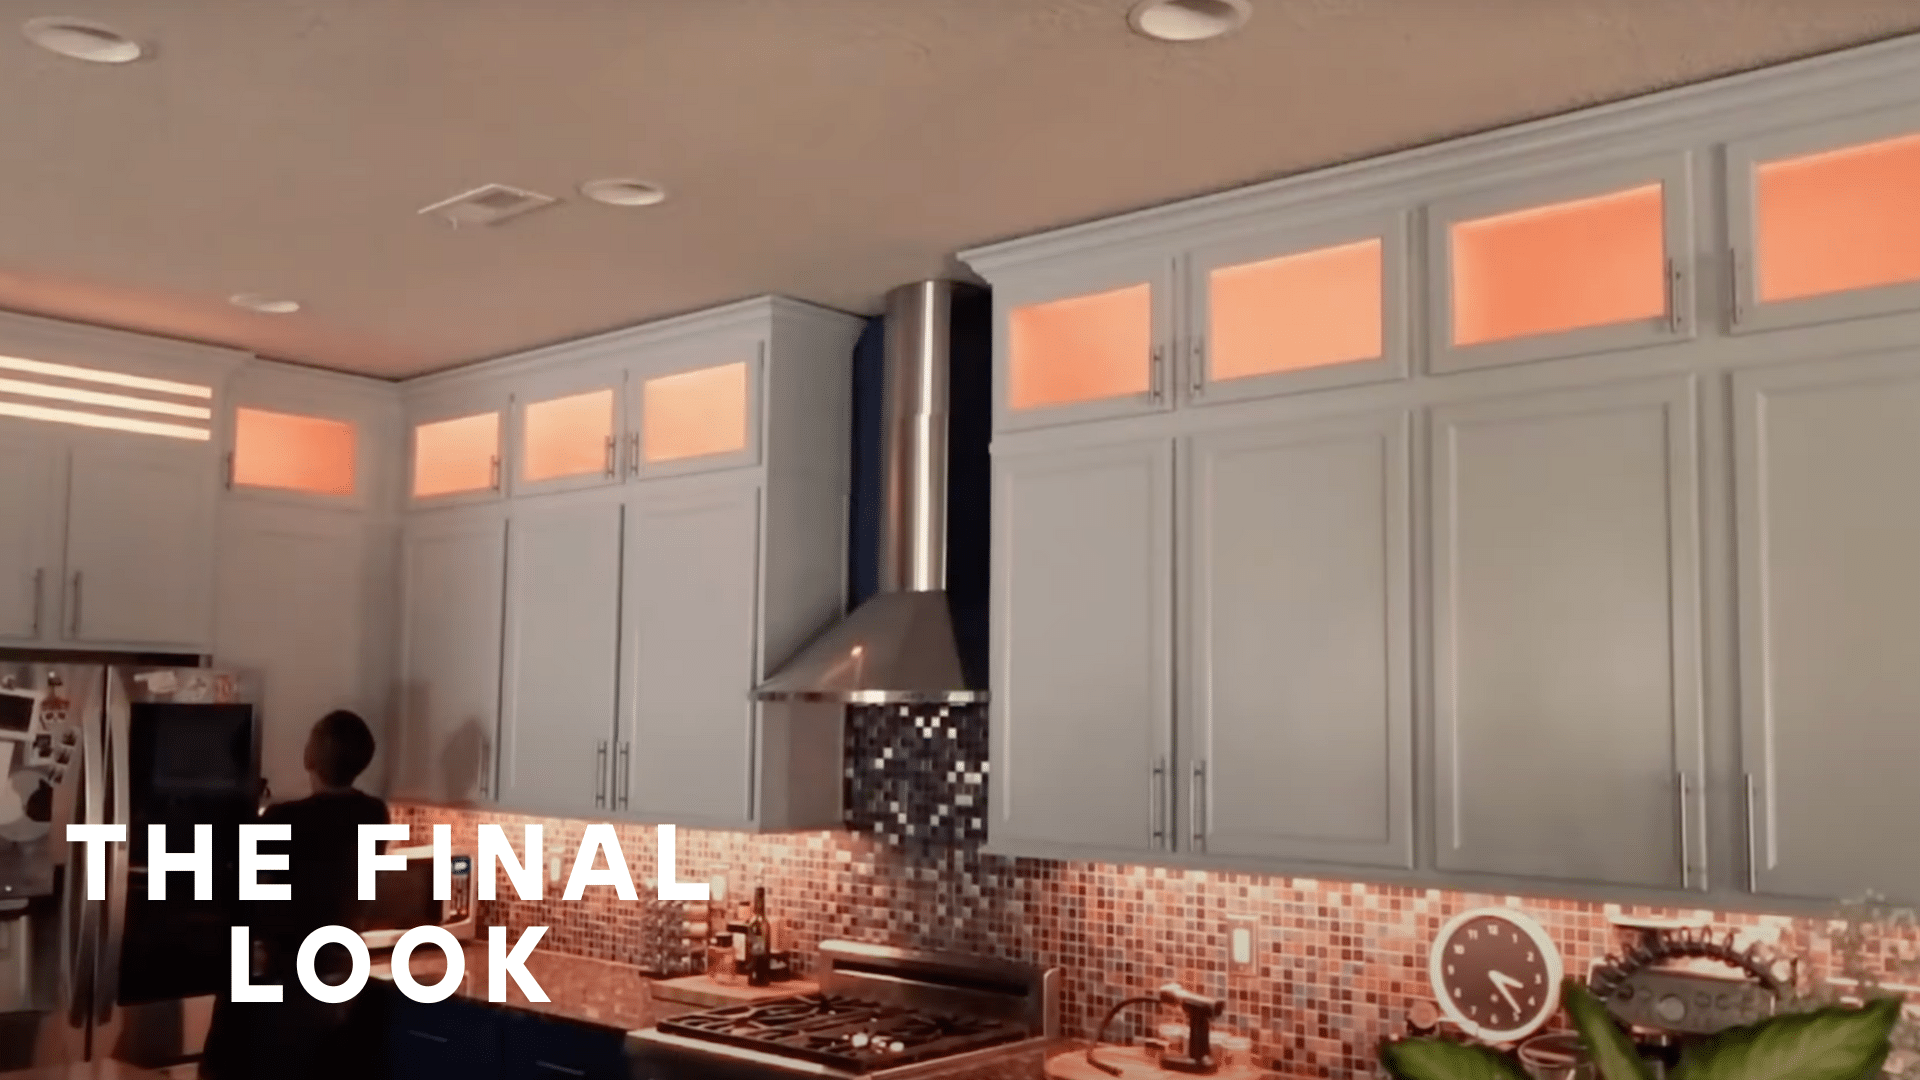
By following these steps, you will achieve a seamless and professional extension of your kitchen cabinets all the way to the ceiling, enhancing both the functionality and beauty of your space.
Before and After
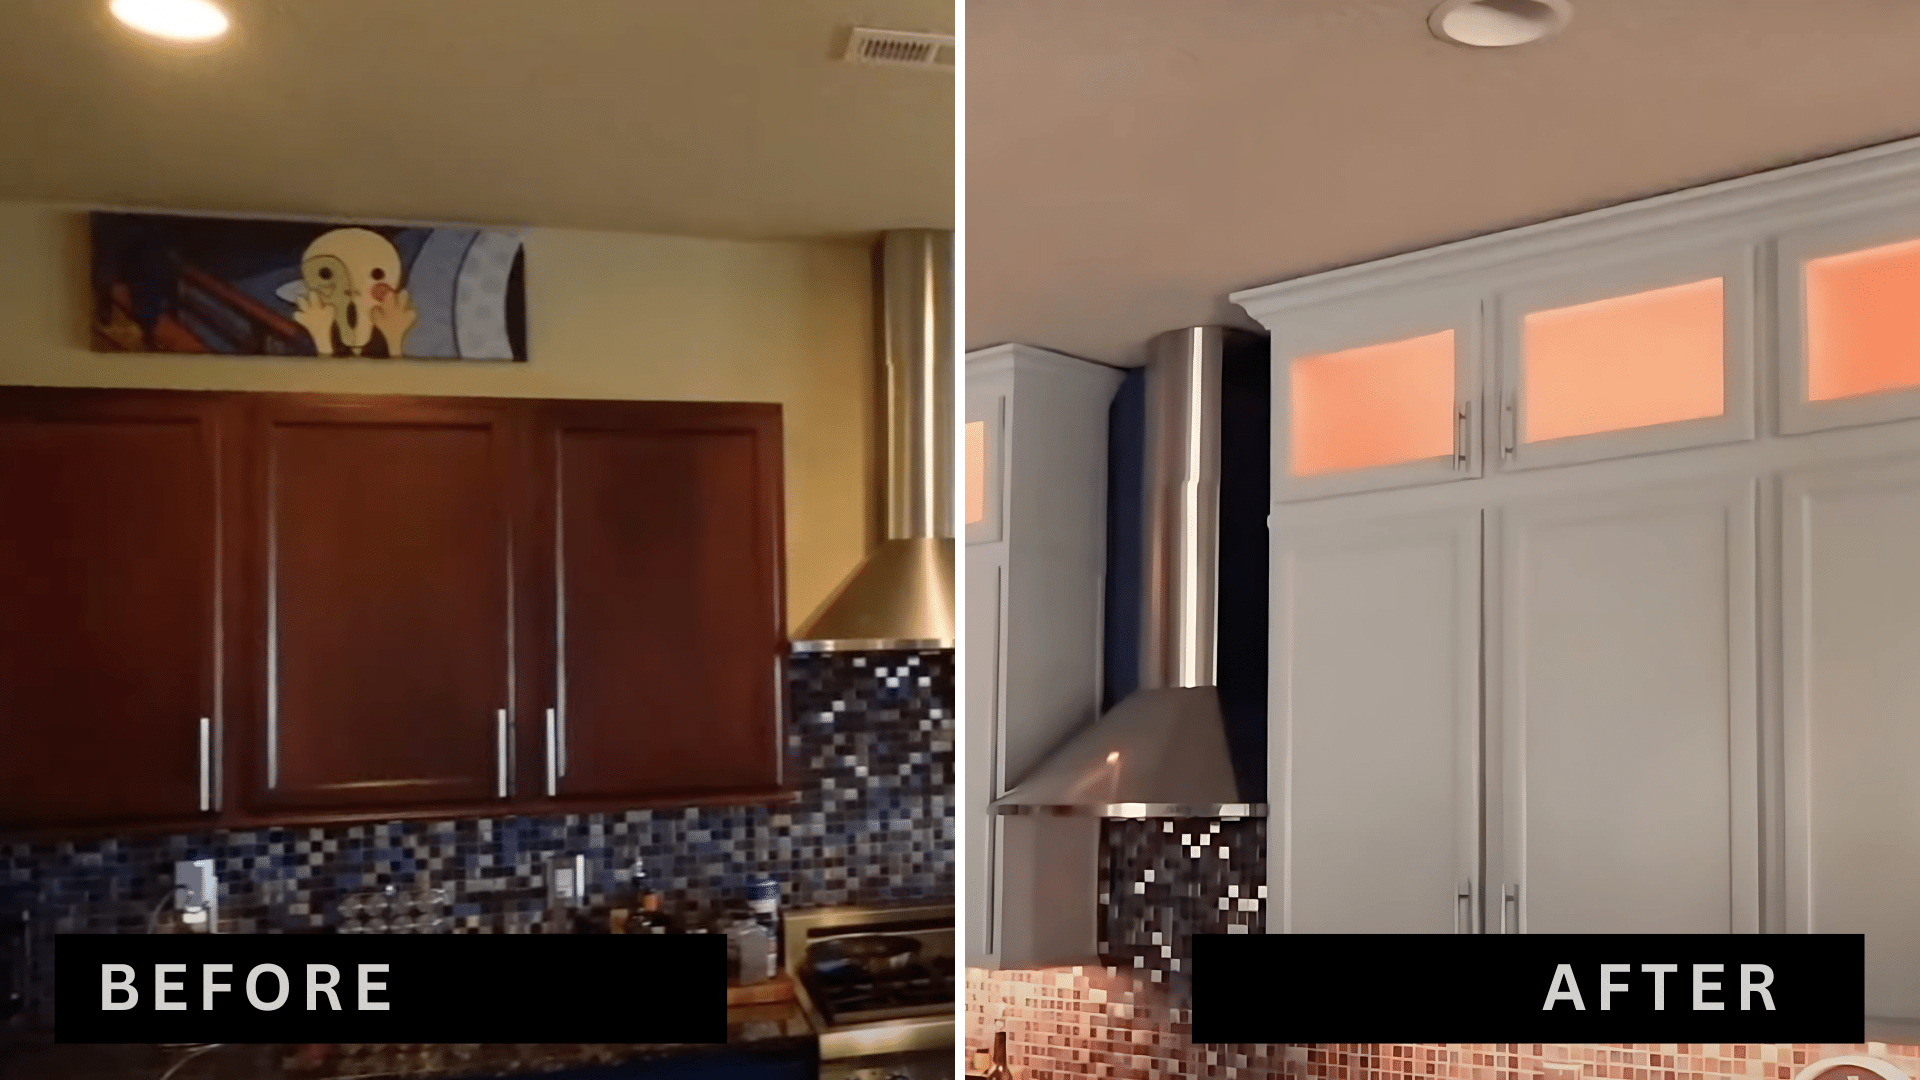
The “Before” image shows standard upper cabinets with a noticeable gap to the ceiling, making the kitchen feel incomplete. In the “After” image, the cabinets are extended to the ceiling, providing more storage and a modern, cohesive look. The new design features sleek white cabinets with frosted glass panels and soft lighting, elevating the kitchen’s space and functionality.
Video Tutorial
For more detailed information about the steps and process for extending kitchen cabinets to the ceiling, before and after, refer to this video by Vanishing Cabinets:
Not to Forget!
|
Common Challenges and How to Overcome Them
Extending kitchen cabinets to the ceiling is an exciting upgrade, but it comes with its own set of challenges. Being aware of these common issues and knowing how to tackle them will help ensure a smooth and successful project.
1. Uneven Ceiling Heights
Challenge: Not all ceilings are perfectly level, which can cause gaps or uneven cabinet installation at the top.
How to Overcome: Measure the height of the ceiling at several points around the room before starting. Use shims during installation to adjust for any variations and ensure that the cabinets align properly with the ceiling.
2. Limited Access to High Shelves
Challenge: Once your cabinets reach the ceiling, it may become difficult to reach the higher shelves for everyday use.
How to Overcome: Consider adding pull-down shelves or installing step stools for easy access. Another option is incorporating adjustable shelving, so you can move items to more accessible levels as needed.
3. Cabinet Alignment Issues
Challenge: Installing cabinets above existing ones can result in alignment issues, making the finished look uneven.
How to Overcome: Carefully measure and level the new cabinets before securing them in place. Using a laser level or a spirit level will help ensure precision and proper alignment with the existing cabinetry.
4. Structural Integrity Concerns
Challenge: Extending cabinets to the ceiling adds extra weight, which may raise concerns about the structural integrity of your walls and cabinetry.
How to Overcome: Ensure that the cabinets are securely anchored to the studs in the wall. If you’re unsure about the weight capacity of your walls, consider reinforcing them with additional support brackets or consulting a contractor for advice.
5. Budget Overruns
Challenge: The cost of extending cabinets can be higher than expected due to materials, labor, and unforeseen adjustments.
How to Overcome: Set a realistic budget and include a contingency amount for unexpected expenses. Prioritize your must-have features (such as crown molding or lighting) and opt for more affordable alternatives if necessary.
By anticipating these challenges and planning accordingly, you can smoothly overcome any obstacles and achieve a beautiful, functional kitchen with cabinets that reach the ceiling.
Bringing It All Together
Extending your kitchen cabinets to the ceiling is a smart way to maximize storage space and elevate the appeal of your kitchen. From careful planning and precise measurements to overcoming challenges like uneven ceilings and limited access to high shelves, this project requires attention to detail.
By choosing the right materials, ensuring proper alignment, and adding features like crown molding and lighting, you can create a seamless, stylish, and functional kitchen. No matter if you choose to take on the project yourself or bring in a professional, you’re sure to find that the outcome will be so rewarding!
Ready to upgrade your kitchen? Start planning your cabinet extension today and enjoy the benefits of a more organized and beautiful space!