

Do those uneven cabinet doors in your kitchen drive you crazy? Nothing ruins the look of a kitchen faster than crooked doors with strange gaps. Don’t worry – you won’t need to hire anyone to fix this problem.
With just a simple screwdriver and a few minutes of your time, you can make those doors line up perfectly.
I’ll walk you through exactly how to fix those gaps, get the seams just right, and make your cabinets look like new again. We will tackle all the troubles and questions along the way.
Understanding Your Cabinet Hinges
Every standard cabinet hinge has three ways it can move.
- The first way is up and down, which helps with height issues.
- The second way is in and out from the cabinet face.
- The third way is side-to-side, which fixes those annoying seam gaps between doors.
Each movement has its own screw that controls it. Once you know which screw does what, fixing your cabinets becomes very simple. Most hinges look different but work in very similar ways.
Different Hinge Types You Might Have
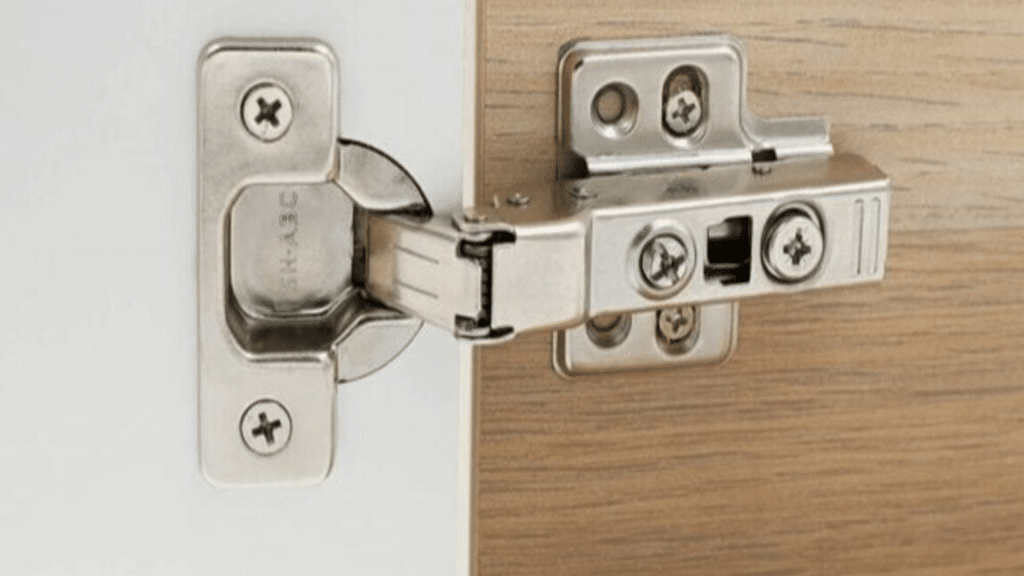
While most modern kitchens use concealed “Euro-style” hinges (the kind that hide inside the cabinet), you might have one of these other types:
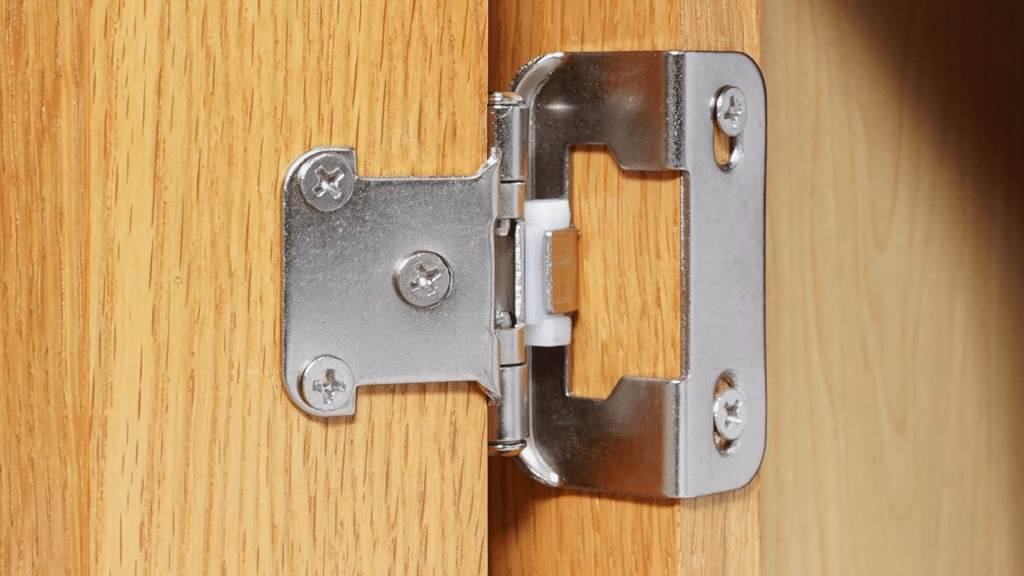
- Partial Overlay Hinges: These are visible when the door is closed and sit partially on the door and partially on the frame. They usually have fewer adjustment options, so you might only be able to fix the height.
- Face frame hinges: If your cabinets have a frame on the front, you might have these. They often need a screwdriver and a wrench to adjust properly.
- Older non-adjustable hinges: Some older cabinets have basic hinges with no adjustment screws. For these, you might need to use small shims or slightly move the hinge position by filling old screw holes.
- Soft-close hinges: These have a little mechanism that makes doors close slowly. Be careful not to bump this part when making adjustments, as it can be tricky to reset if damaged.
If you’re not sure which type you have, just look for screws on the hinge. Most modern hinges have at least one or two adjustment points, even if they don’t have all three.
How do Adjustments Differ By Hinge Type?
Not all kitchens are created equal, and neither are their hinges. Depending on your specific hinge type, the process might require small adjustments.
1. For Partial Overlay Hinges
These hinges might only have one or two adjustment screws instead of three. You’ll likely have the up/down adjustment (by loosening the screws that mount to the cabinet).
For side-to-side adjustments, you might need to loosen all screws slightly and shift the whole door.
Many partial overlay hinges have a screw on the visible face that adjusts the door depth. This screw is often the only real adjustment you can make beyond height. Turn this screw in small amounts to move the door in or out.
2. For Face Frame Hinges
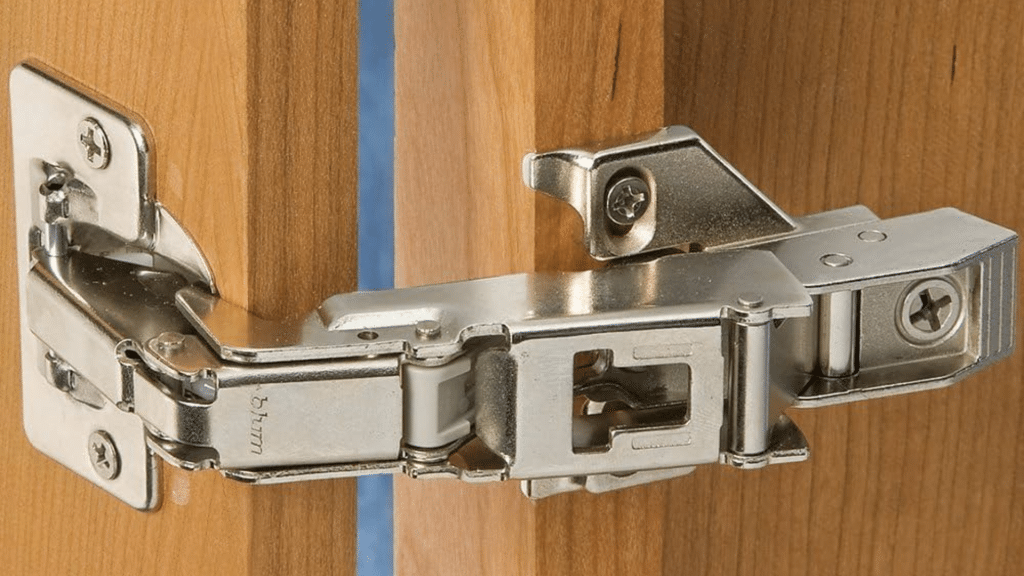
If you have face frame cabinets, you’ll adjust them a bit differently. First, find the mounting screws that attach the hinge to the frame. These control up/down movement. They’re usually inside the cabinet, not on the hinge itself.
Many face frame hinges use slots instead of holes for the screws. This design lets you loosen the screws and slide the whole hinge up or down, left or right. You might need to hold the door in position while you tighten the screws.
3. For Older Non-Adjustable Hinges
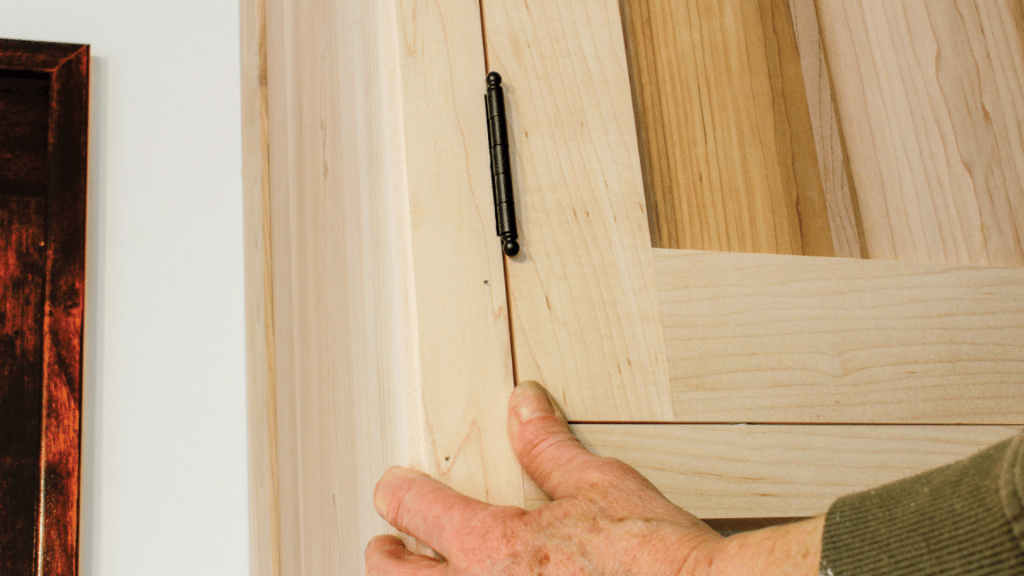
If your cabinets have old-style hinges with no adjustment screws, you’ll need to get a bit creative. To fix height issues, you can loosen all the screws, shift the door, and retighten.
For stubborn doors, you might need to remove the hinge, fill the old screw holes with wood putty, and reset the hinge in a slightly different spot.
For gaps, try adding thin washers between the hinge and cabinet to change the door angle slightly. This takes some trial and error but can work well for older cabinets.
4. For Soft-Close Hinges
Soft-close hinges adjust just like regular Euro hinges, but you need to be gentle with the soft-close mechanism. This device is usually a small cylinder attached to the hinge arm.
Don’t force any adjustments that put stress on this part. Some soft-close hinges have an extra adjustment screw that controls the closing speed.
It’s usually hidden under a small cap on the hinge arm. If your doors slam or close too slowly, check for this extra setting.
Tools You’ll Need
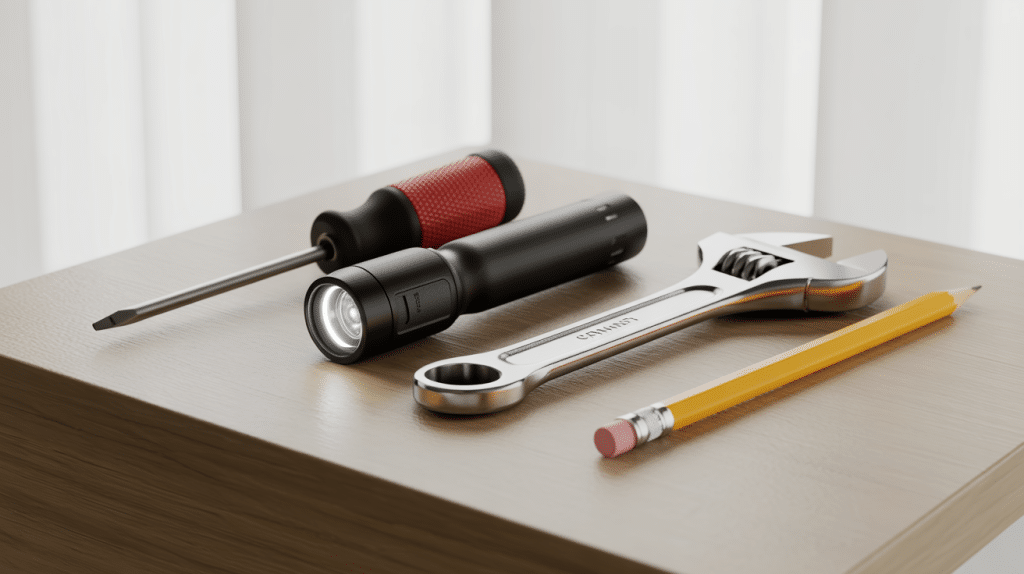
For this job, you really don’t need a lot of tools to worry about. In most cases, a Philips screwdriver is enough to get the job done, but you won’t need more than the tools listed below:
|
Tool |
Purpose |
|
Screwdriver |
For loosening and tightening hinge screws |
|
Flashlight |
To better see inside dark cabinet corners and hinge areas |
|
Wrench |
Useful for specific hinge types or securing mounting plates |
|
Pencil |
To mark alignment points before and after adjustments |
Step-by-Step Adjustment Process
With the tools in hand, let’s get started with the simple fix.
Step 1: Adjust the Depth (In and Out)
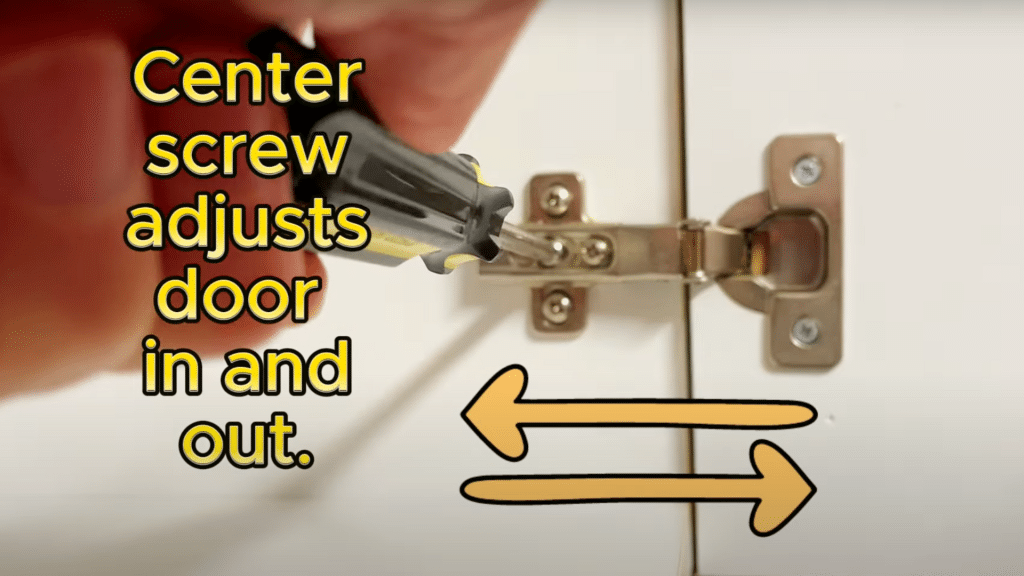
Find the center screw on the hinge and loosen it slightly. Don’t take it all the way out – just enough so the door can move. Once loose, you can slide the door forward or backward until it sits flush with the cabinet face. This fixes doors that stick out too far or sit too deep.
When you’re happy with the position, hold the door in place and tighten the screw again. Check by running your hand over the seam to make sure it feels smooth and even.
Step 2: Fix Side-to-Side Gaps Between Doors
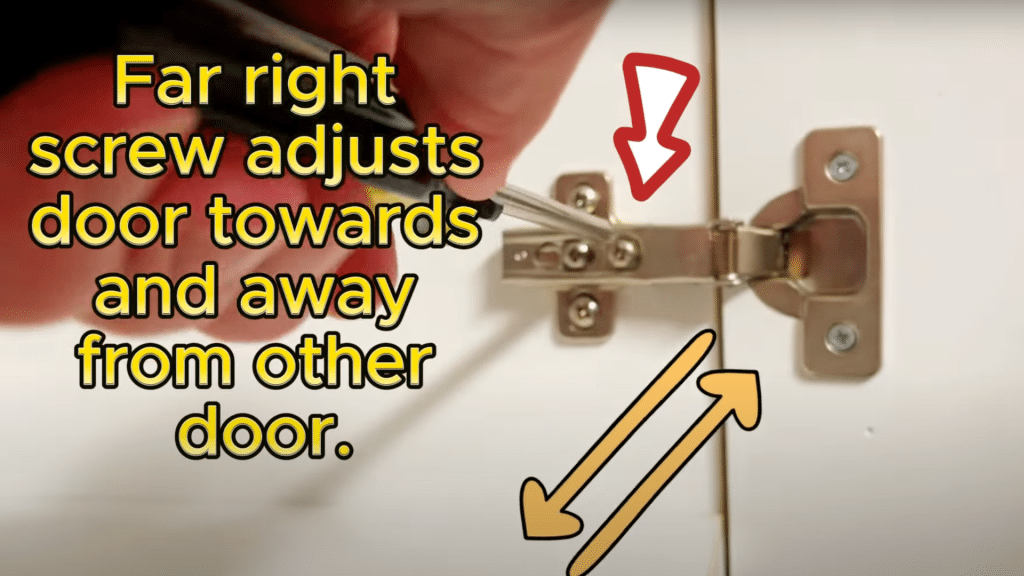
For those gaps between two doors, you’ll use the inner screw on the hinge. This screw makes tiny changes to where the door sits left-to-right. Turn the screw slowly – a little bit goes a long way!
After each small turn, close the door to check how the gap looks. Keep making small turns until the gap between doors is even from top to bottom. Your goal is a thin, even line between doors.
Step 3: Adjust Door Height (Up/Down)
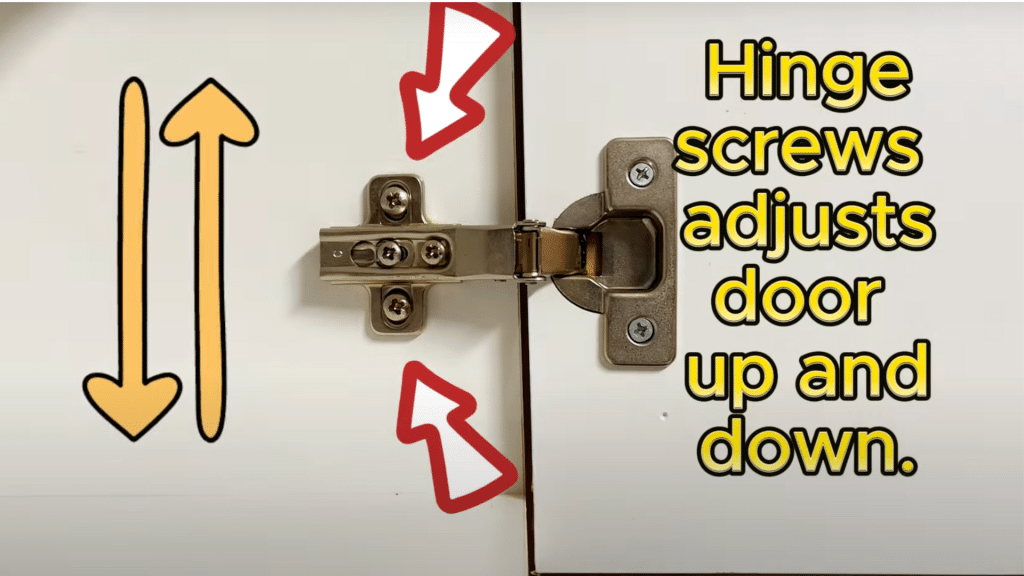
If your door sits too high or too low, find the mounting screws on the hinge. These are the screws that hold the hinge to the cabinet frame. Loosen them just enough that the door can move up or down.
Gently lift or lower the door to the height you want. While holding it in place, tighten the screws again. For the best results, adjust both the top and bottom hinges the same amount.
Video Tutorial
For a quick and easy visual guide of these steps, check out the video “How To Adjust and Align your Kitchen Cabinet Doors DIY” by Ninja DIY. Seeing the process in action makes it even easier to follow along!
Final Check & Seam Perfection
Once you’ve made all your changes, close the door slowly and look at all the edges. Check that the gap at the top and bottom is even. Make sure the gap between doors is the same width from top to bottom.
Look at the cabinet from the side to see if all door faces line up with each other. If you notice any spots that still need work, go back and make small tweaks until everything lines up just right.
Common Mistakes to Avoid
Don’t tighten screws fully until you’re sure the door is where you want it. Many people make the mistake of tightening too soon, then having to start over. Remember to adjust both hinges when changing the door height.
Make small turns of the screws – big turns can make the door move too much. Think of it like fine-tuning a radio – small moves make big changes. Take your time and check your work after each adjustment.
Conclusion
See how easy that was? With just a few turns of a screwdriver, you can make your cabinets look so much better.
This simple fix can save you money and make your kitchen look fresh and clean. Even small changes can make a big difference in how your whole kitchen looks.
Try these steps on one door first to get the hang of it. Once you see how simple it is, you’ll be fixing every cabinet in the house! Your kitchen will look neater and more put-together in no time.
Have you tried adjusting your cabinet doors? Did these tips work for you?
Share your experience in the comments below! I’d love to hear about any tricks you found helpful or other cabinet fixes you’d like to learn about next.
Frequently Asked Questions
What If My Hinge Screws are Stripped and Won’t tighten?
Fill the hole with a wooden toothpick and some wood glue. Let it dry completely, then drill a pilot hole and insert the screw again. For badly stripped holes, use a wood filler that hardens fully.
Can I Fix a Door that Won’t Stay Closed?
Check if the cabinet box is level first. If it is, adjust the door inward using the depth screw. If that doesn’t work, you might need to add a small magnetic catch to keep it closed.
How Do I Fix a Cabinet Door that Rubs Against the Frame?
Adjust the door outward using the depth screw. If it still rubs at just one spot, you might need to adjust the height or side-to-side position to create even spacing all around.