-
Have you ever looked at your garden path and thought it needed something special? Garden stepping stones add charm and personality to any outdoor space—and making them yourself is easier than you might think!
These homemade touches can transform a simple walkway into something that feels truly unique and personal. Plus, they’re fun projects that don’t break the bank.
From simple concrete designs to colorful mosaic patterns, this guide will walk you through everything you need to know about crafting your garden stepping stones.
You’ll learn which materials work best, receive handy tips for achieving perfect results, and discover creative ideas to make each stone truly unique.
What are Garden Stepping Stones and Why Use Them?

Garden stepping stones are flat pieces made from concrete, stone, or other materials that create walkable paths in your yard. They’re both functional and decorative—perfect for adding charm and structure to any garden.
Why Use Them?
-
Guide Foot Traffic – Keeps people off grass and helps protect plant beds.
-
Prevent Lawn Damage – Avoids wear and tear from frequent walking.
-
Improve Drainage – Offers dry steps over muddy or wet areas.
-
Add Visual Appeal – Breaks up greenery with design and rhythm.
-
Express Creativity – Decorate with mosaics, paint, or handprints for a personal touch.
Tools and Materials You’ll Need
Category Items Basic Materials Cement or concrete mix, water, mixing container Molds and Forms Plastic trays, pie tins, cake pans, silicone molds Decorative Items Glass beads, shells, leaves, tiles, mosaic pieces, paint Tools Gloves, trowel, mixing stick, safety gear, old towels/newspapers (for workspace) Step-by-Step Instructions for Making DIY Garden Stepping Stones
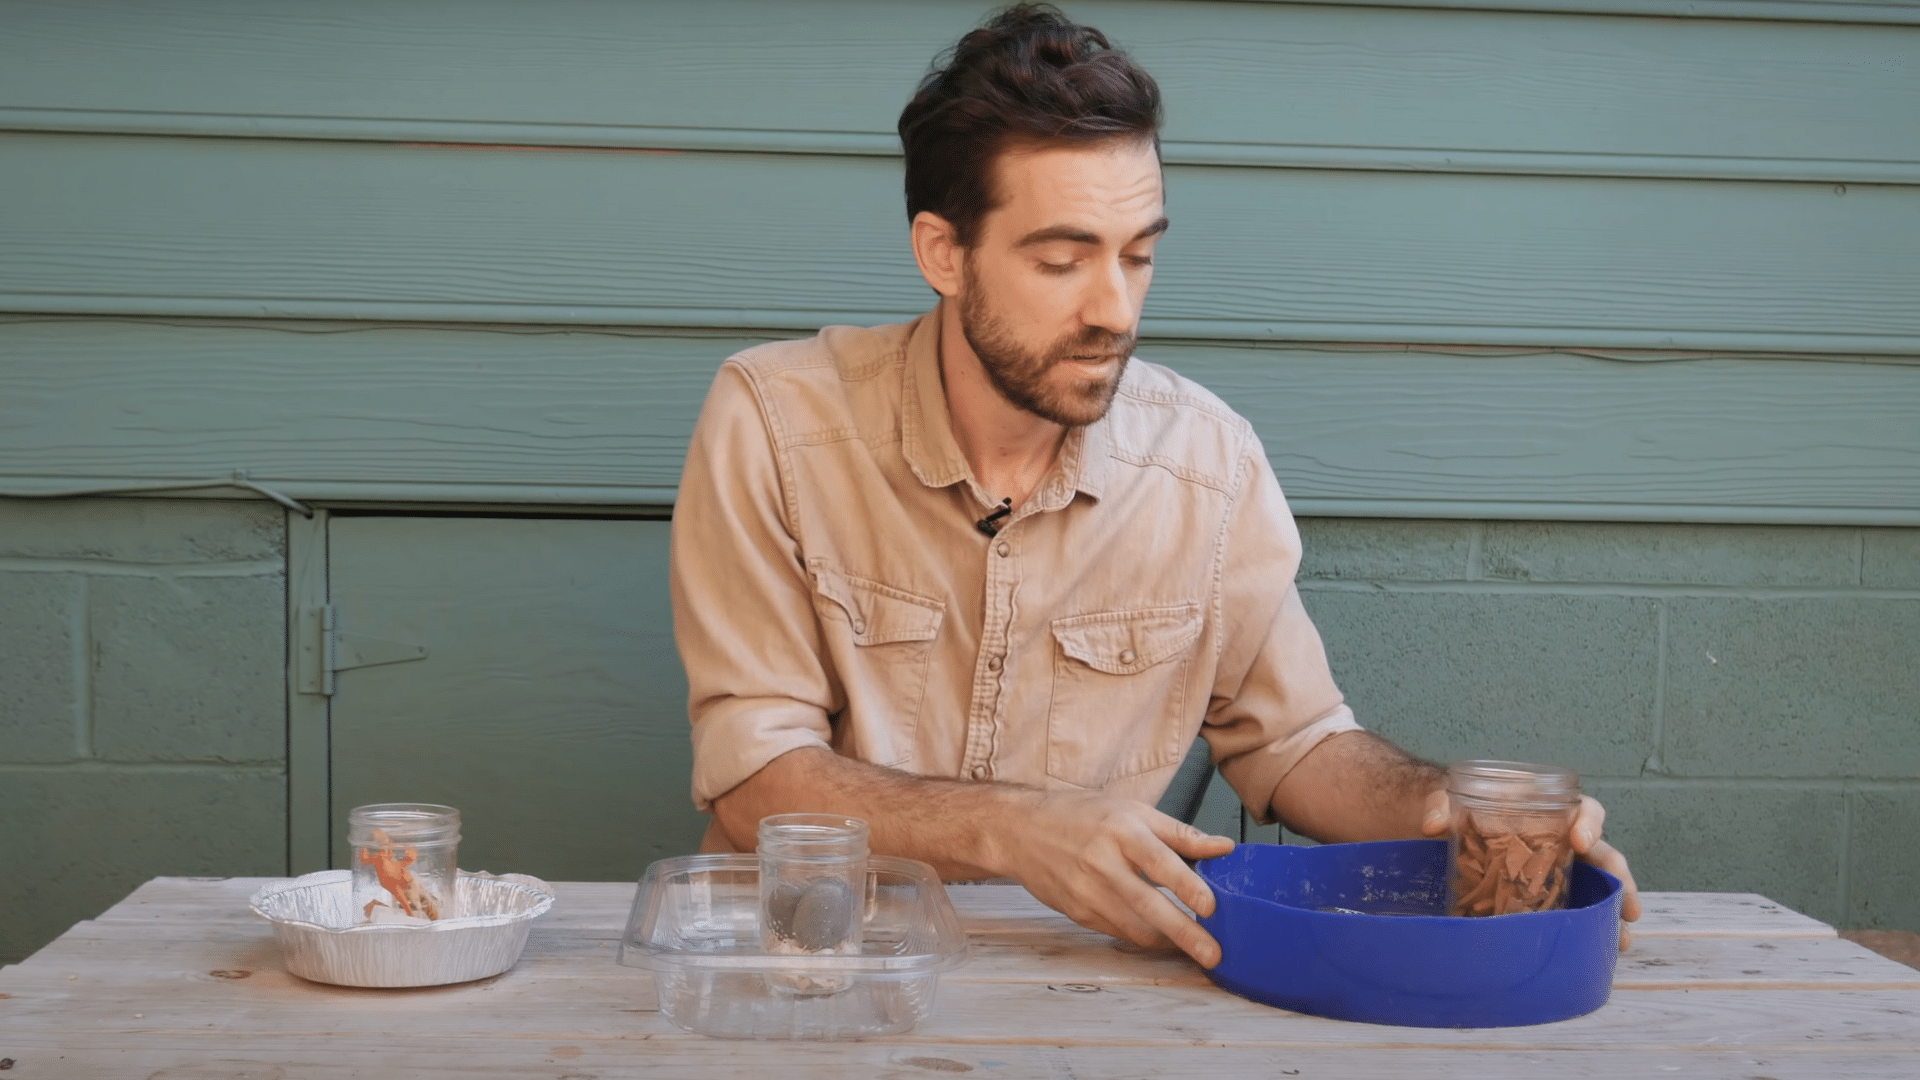
1. Gather Your Materials
Select and prepare three essential items for this fun DIY project.
-
Cement mix (fresh and sealed properly to avoid moisture damage)
-
Disposable containers to use as molds (like takeout tins, plastic lids, or buckets)
-
Personal objects for decoration (toys, rocks, tiles, broken pots)
2. Select the Right Cement
Use only well-stored cement to avoid an unusable, hardened mix.
-
Unused leftover cement may work if sealed tight in plastic
-
Avoid cement exposed to air or moisture — it solidifies
-
Store any future extra cement in airtight plastic bags
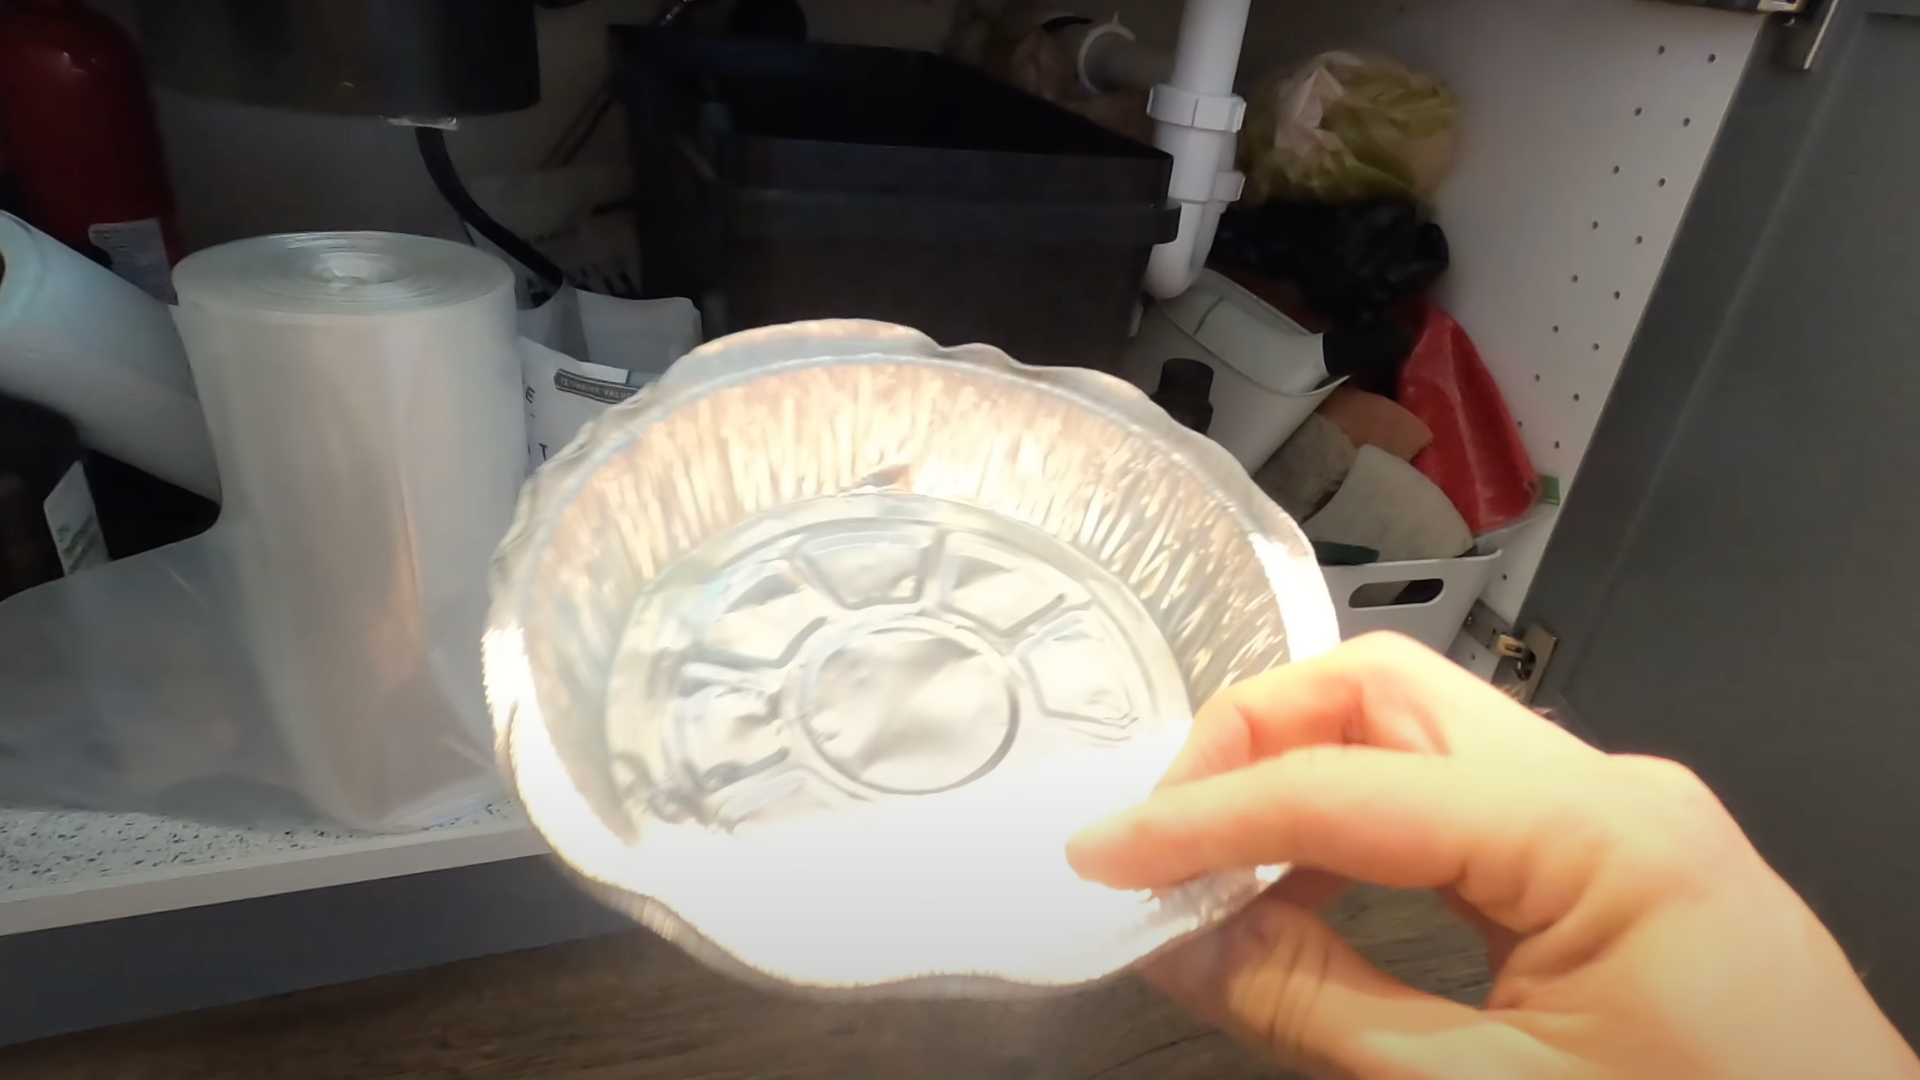
3. Pick Creative Molds
Find or repurpose items around the house to shape your stones.
-
Circular takeout containers for kid-friendly designs
-
Plastic lids for natural-themed layouts
-
Cut-off bucket bottoms for mosaic experiments
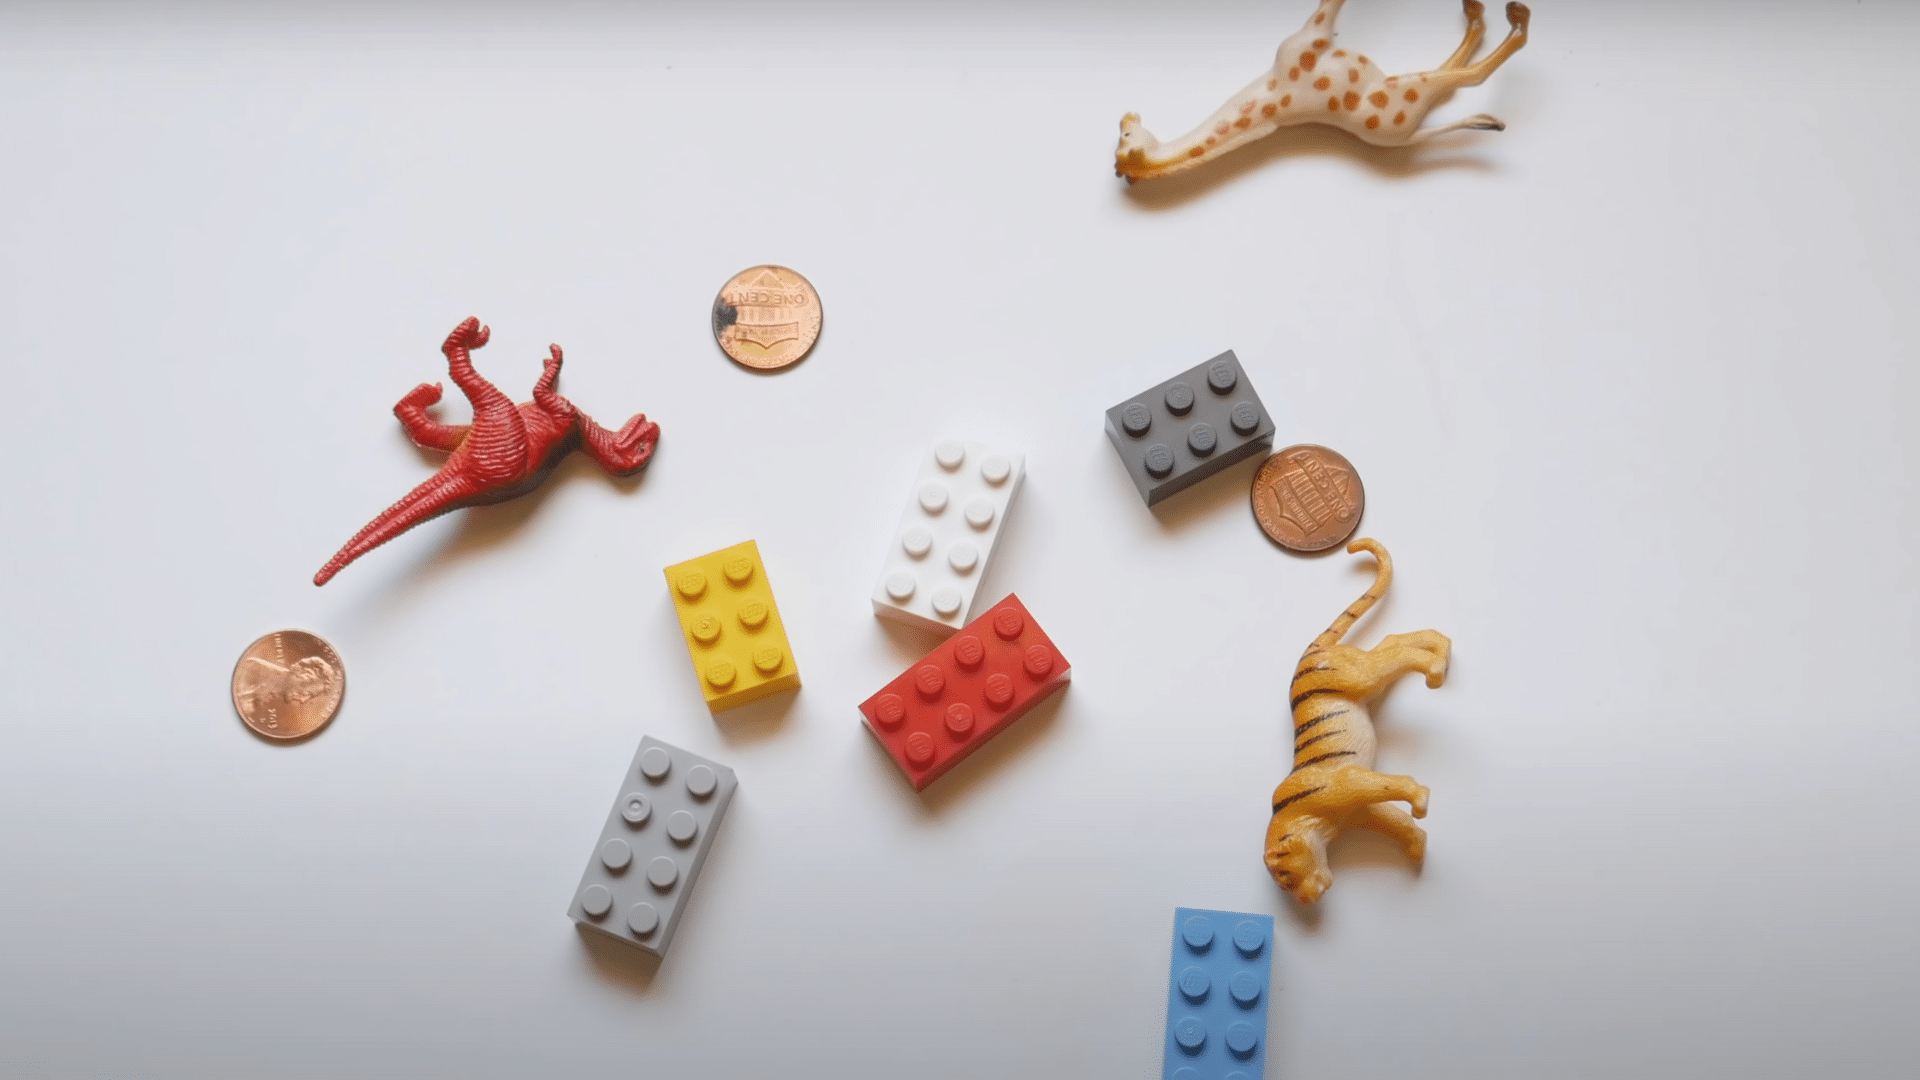
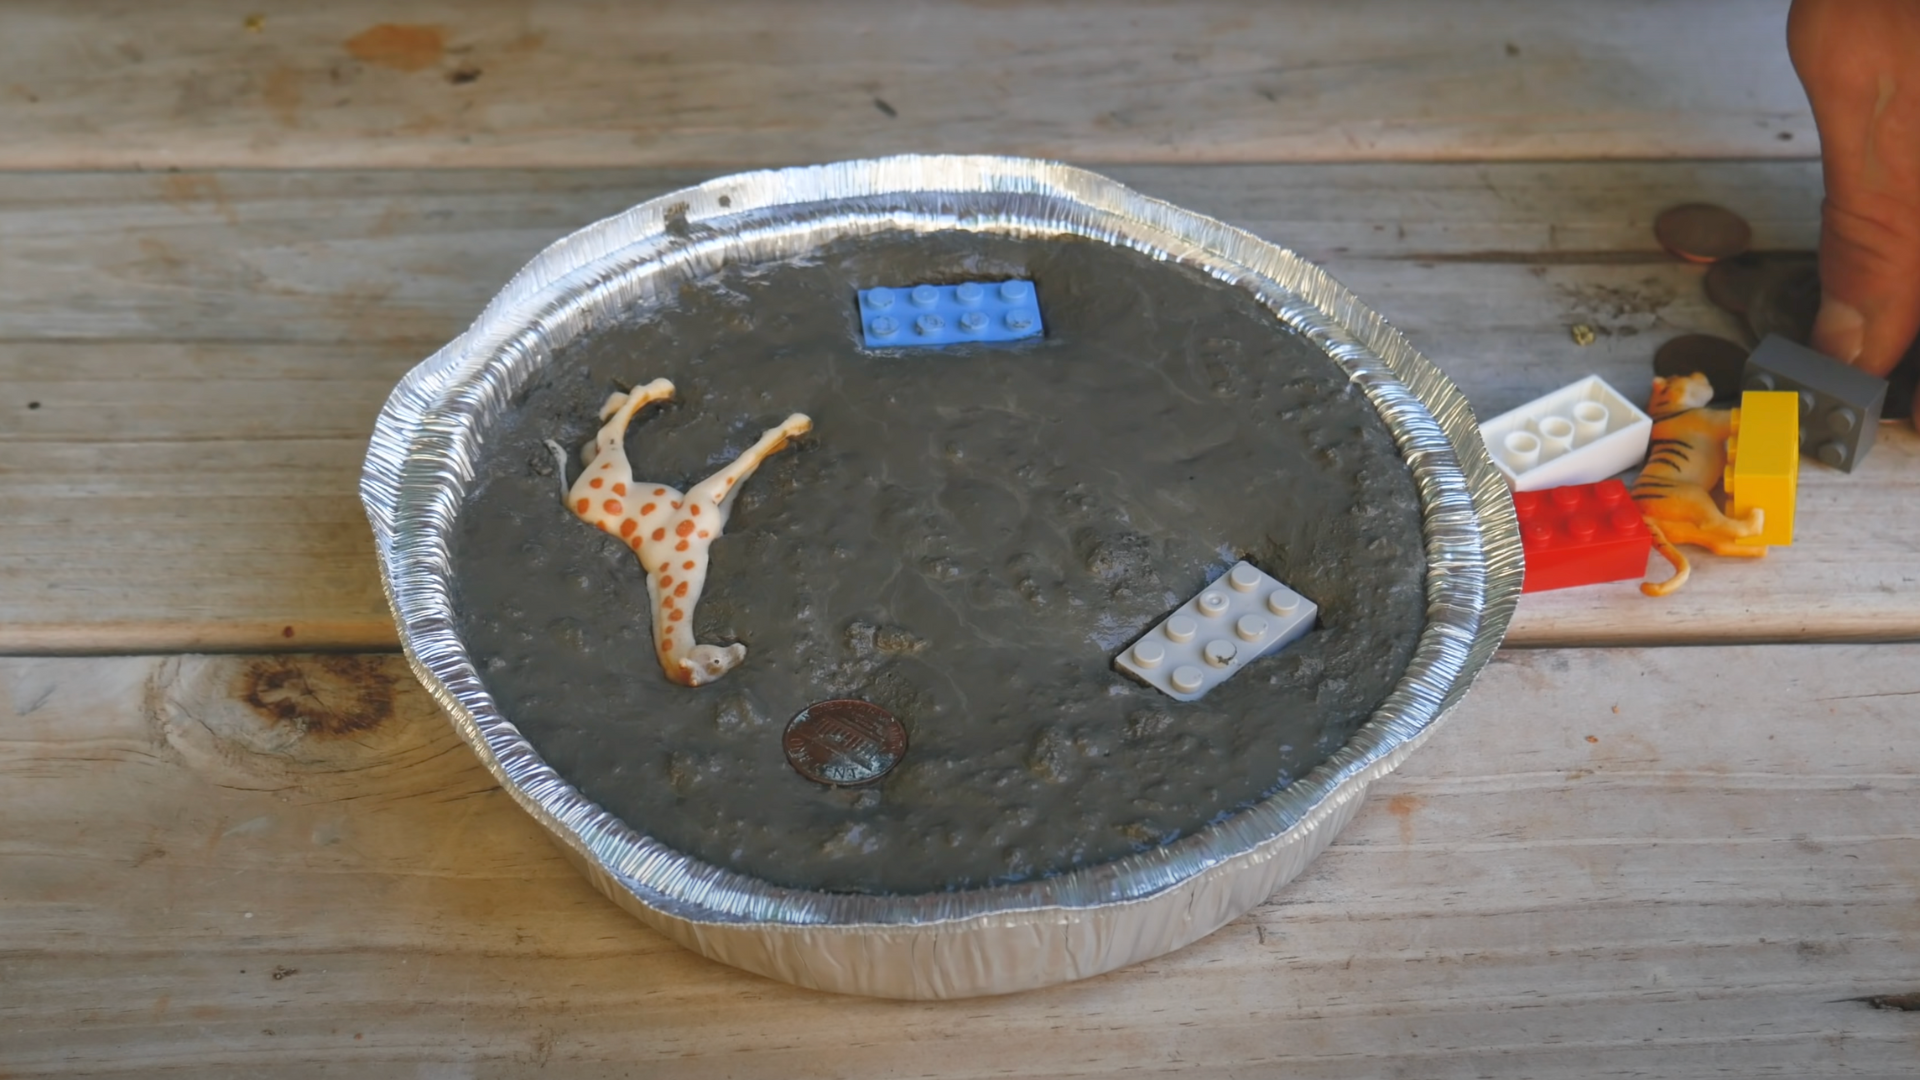
4. Choose Design Elements
Select what you’ll embed in the concrete for visual appeal.
-
Kid design: use small toys and fun knick-knacks
-
Nature design: gather rocks, pebbles, or shells
-
Mosaic design: use tiles or terracotta pot shards
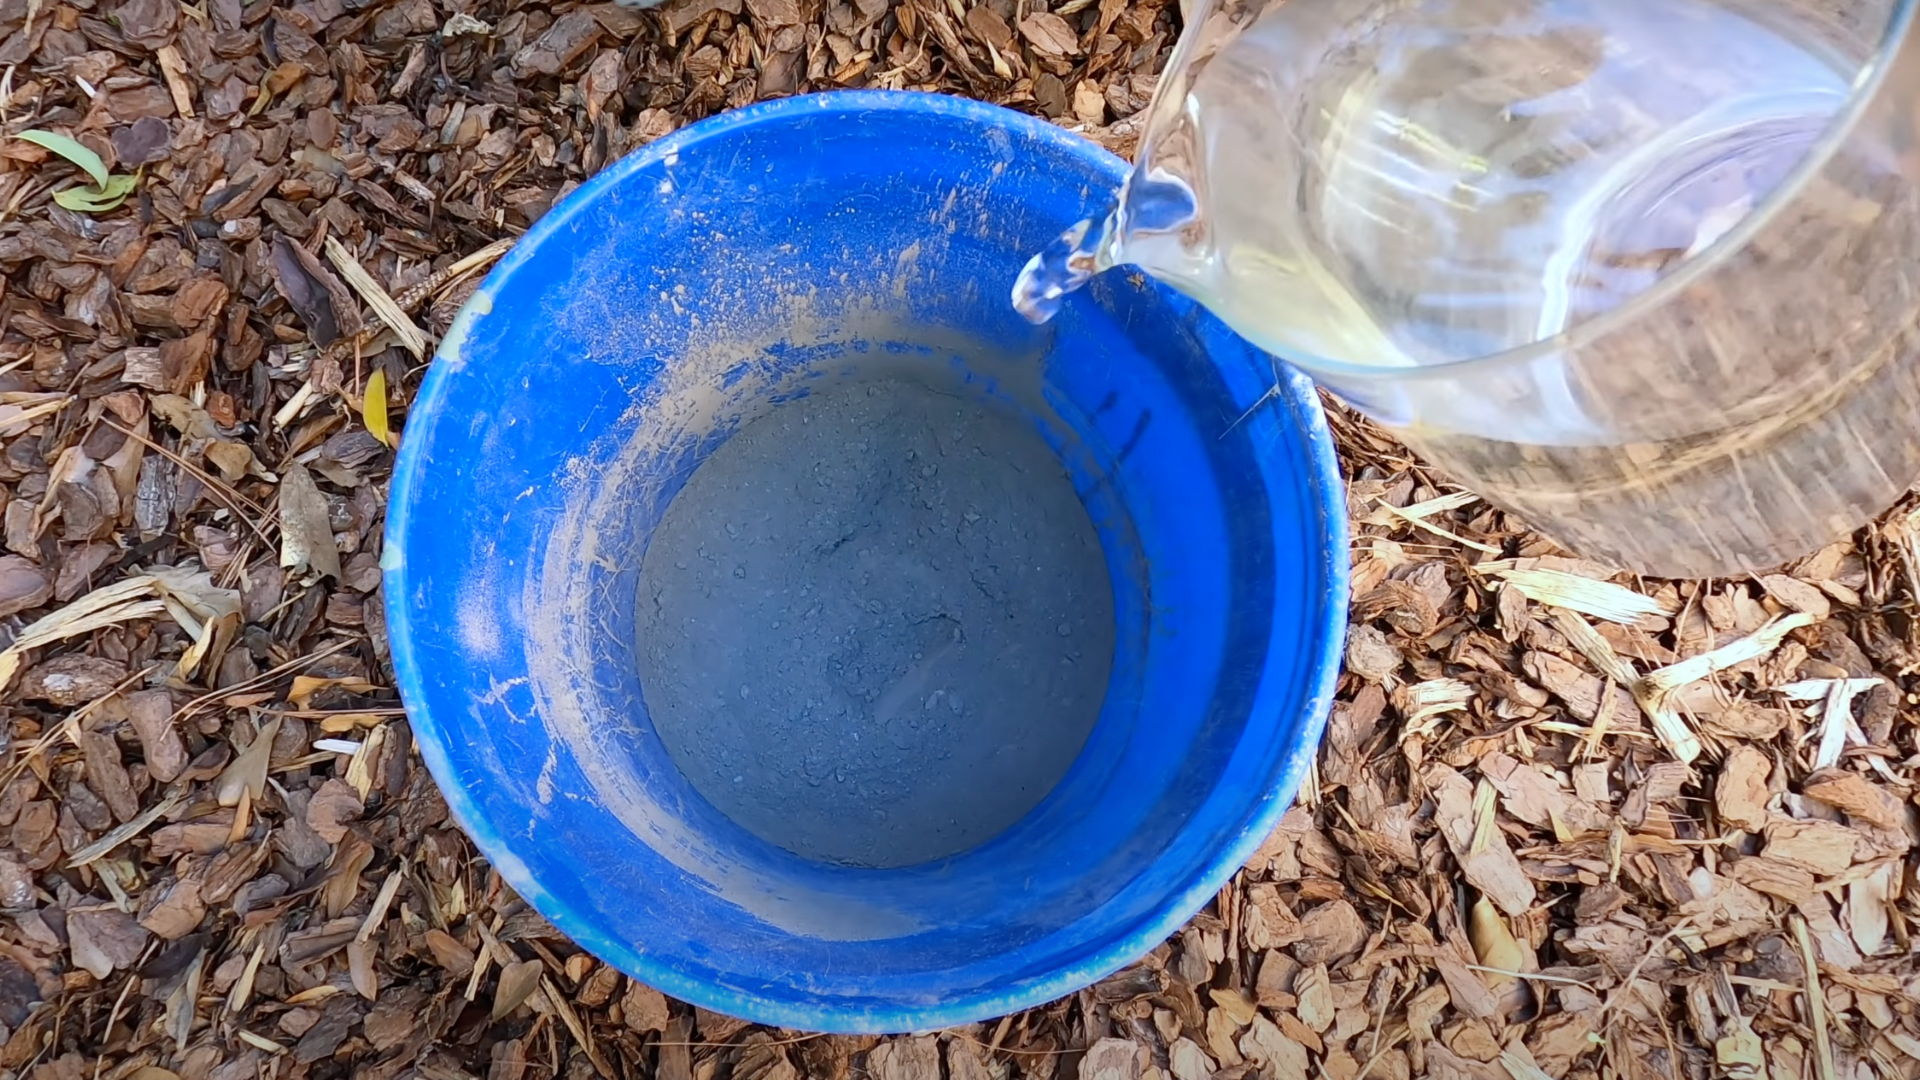
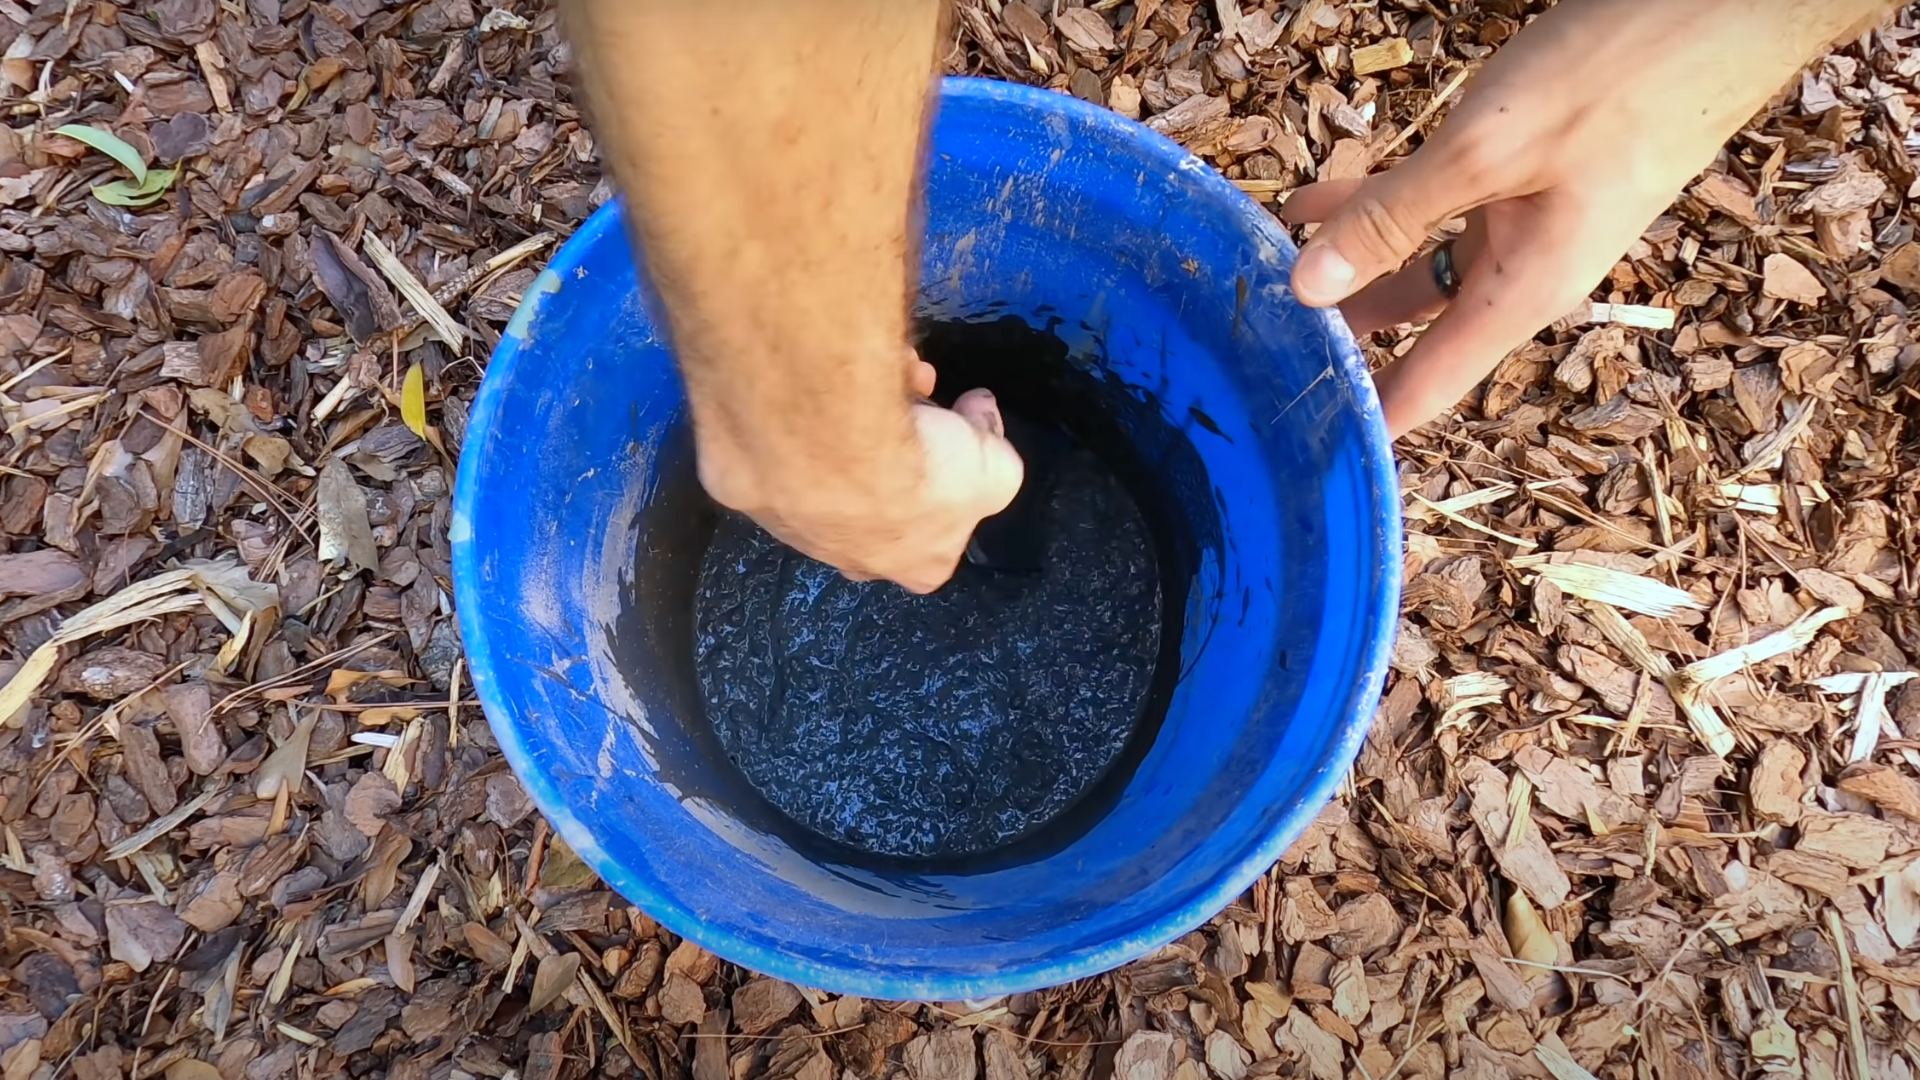
5. Mix the Concrete
Blend water and cement to the right texture.
-
General rule: 5 parts concrete to 1 part water
-
Mix until you get a thick mud-like consistency
-
Use a trowel to scoop the mix into your mold
6. Set Your Design
Press objects into the wet cement.
-
Shake the mold gently to remove air bubbles
-
Plan your layout — concrete sets fast
-
Press each item firmly, and avoid shifting once placed
7. Let It Cure
Leave the stone to set undisturbed overnight.
-
Wash tools and hands immediately after working
-
Let the stepping stone dry at least 8–12 hours
-
Avoid moving the mold during the curing phase
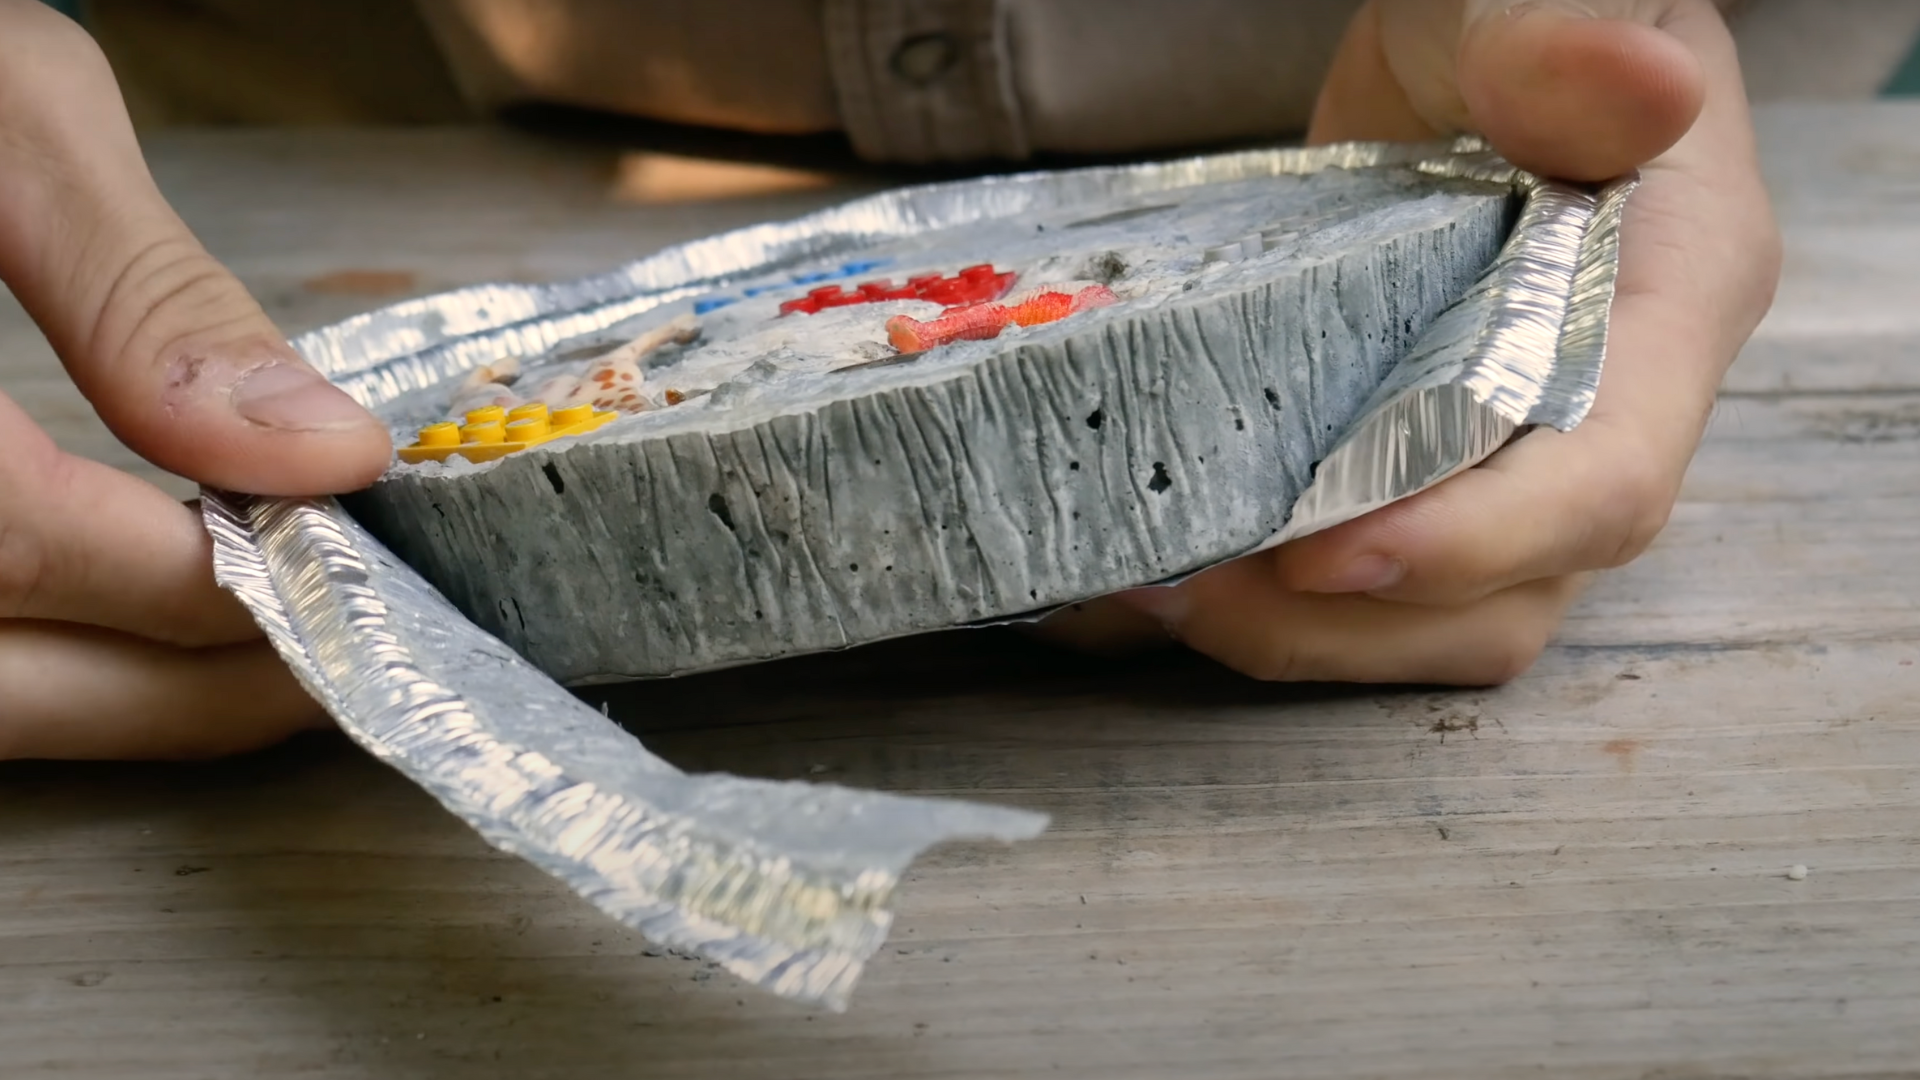
8. Remove the Mold
Carefully cut away the container to reveal your stone.
-
Mold should come off easily if fully cured
-
If stuck, cut around the edges gently — avoid cracks
-
Handle your finished stone with care
Video Tutorial
Special thanks to Lowe’s Home Improvement for providing valuable insights in their video, which you can refer while creating this guide.
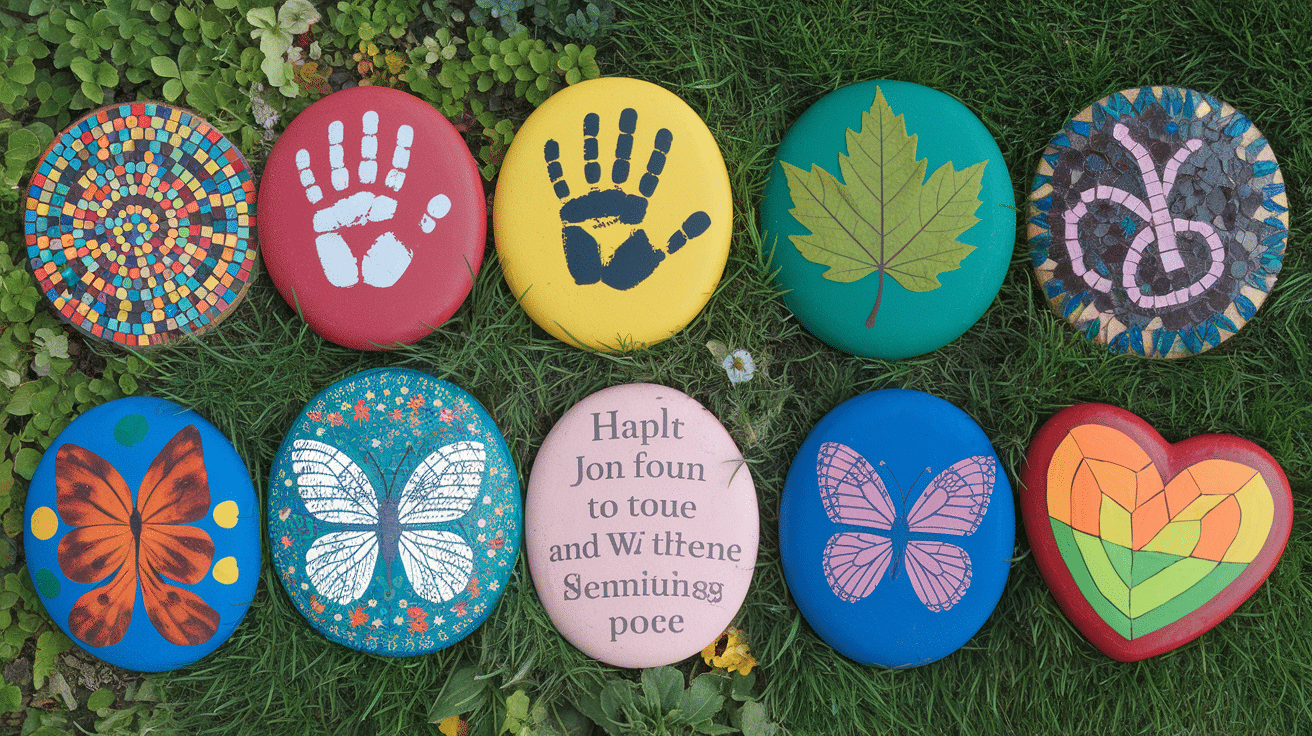
Fun Design Ideas for Unique Stepping Stones
Design Idea One-Line Description Mosaic Patterns Decorate stones with colorful tiles or glass to form eye-catching patterns. Kid’s Handprints or Footprints Capture sweet memories by pressing your child’s hand or foot into the concrete. Leaf Impressions Use real leaves to imprint natural textures into the stone’s surface. Painted Stones with Quotes Paint quotes, sayings, or plant names on dry stones with weatherproof paints. Glow-in-the-Dark Stones Add glow powder or paint to stones for a beautiful, nighttime effect. Themed Garden Paths Create stones with fun shapes or symbols, such as stars, hearts, or seasonal icons. Common Mistakes to Avoid
Creating stepping stones is fun, but a few simple mistakes can ruin your project. Here’s what to watch out for:
-
Too much water in the mix: Weakens the stone, making it prone to cracking. Aim for thickness and smoothness.
-
Removing from molds too early: Wait at least 24–48 hours so the stone doesn’t break or chip.
-
Skipping safety gear: Always wear gloves and a mask—cement can irritate skin and lungs.
-
Not letting it fully cure: After unmolding, let the stone cure for 5–7 days before use.
-
Flimsy molds: Use sturdy molds that won’t bend under wet concrete weight.
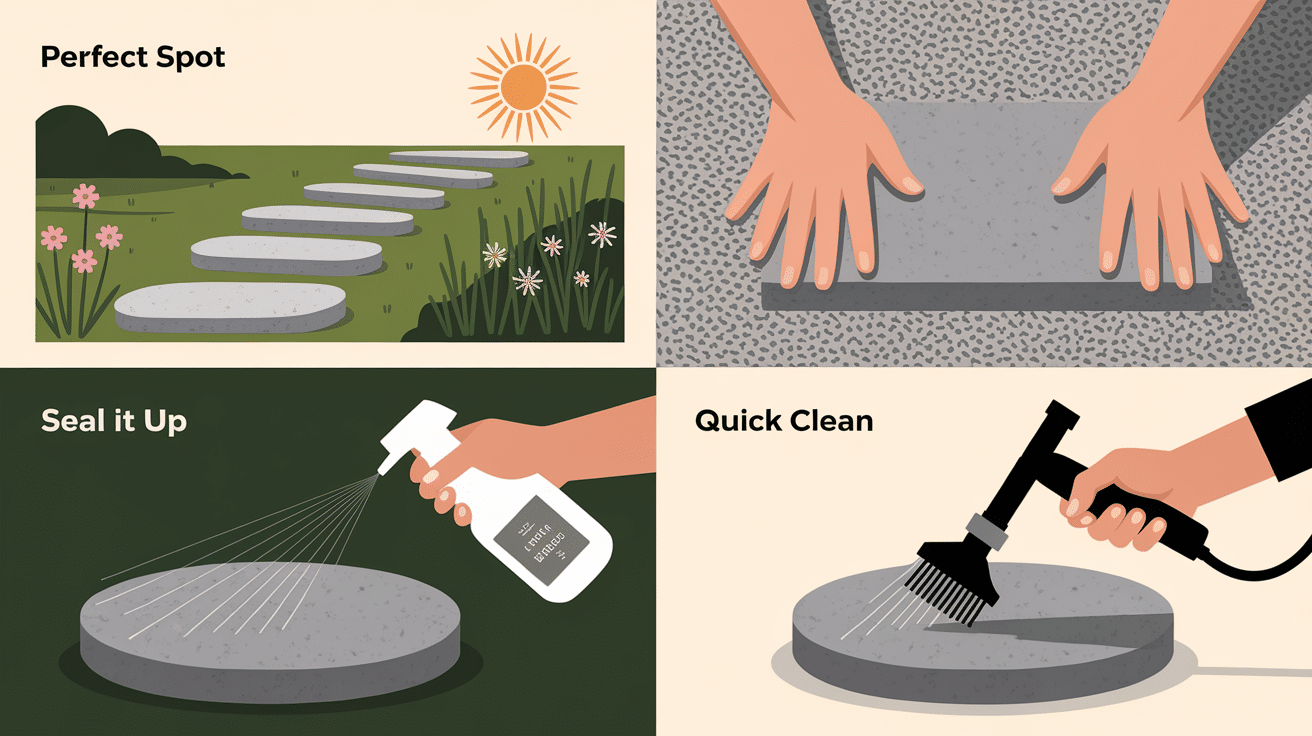
How to Maintain and Place Your Stepping Stones
-
Pick the Right Spot: Choose sunny or partly shaded areas on garden paths, near patios, or as accents around plants.
-
Create a Level Base: Use compacted sand or gravel to keep stones steady and prevent wobbling.
-
Seal for Weather Protection: Apply a clear outdoor concrete sealer to make them last through rain, sun, and frost.
-
Quick Cleaning & Care: Hose off dirt, scrub gently with soap if necessary, and reseal the unit once a year before winter.
Conclusion
Making your garden stepping stones isn’t just about saving money—it’s about putting a piece of yourself into your garden. Each stone tells a story, carrying your handprint, the imprints of leaves, or special trinkets that hold meaning for you.
The best part? Anyone can do this. No fancy skills needed. Just mix, pour, wait, and you’ve got something both useful and beautiful.
Your garden deserves that personal touch. Those store-bought stones? They can’t compare to what your hands can create.
Ready to start? Gather your supplies, set aside an afternoon, and get your hands dirty. Your future self will smile every time you walk across these stones, remembering the day you made them.
Share your creations with us on social media using #DIYGardenStones and inspire others to bring their garden paths to life!
-