
Many people think basket making is too hard to try at home. “I could never do that,” they say when seeing a handmade basket.
But what if you learned that basket making is actually one of the oldest and most basic crafts? Even first-time crafters can create useful, beautiful baskets with simple materials.
When you make your own basket, you’ll have a one-of-a-kind item for your home or a special gift that shows true care. Plus, the feeling of making something with your hands brings real joy.
This guide will show you each step to create your first basket. We’ll cover materials, basic methods, and helpful tips for new basket makers. Let’s start making!
Choosing the Right Basket Type
Baskets come in many forms, each with unique methods and uses. For first-time basket makers, knowing the main types helps you pick the best project to start with.
Woven baskets use a simple over-under pattern that most beginners find easy to learn. This method creates strong baskets with a classic look that works well in any home.
Coiled baskets are made by wrapping material around a core in a spiral. They tend to be more forgiving for beginners and easier to fix if you make a mistake.
Twined baskets involve twisting two pieces around vertical spokes. While a bit more complex, many find the rhythm soothing once they get the hang of it.
For your first project, we suggest:
- A small woven basket with flat reed
- A simple coiled bowl using raffia or yarn
- A twined mat (before moving to full baskets)
Baskets serve many purposes in daily life. They work well as kitchen storage for fruit and bread, bathroom organizers for toiletries, or living room catch-alls for small items.
Choose a type that matches both your skill level and what you plan to use it for. Many beginners start with a simple round basket for their desk or a small wall hanging.
Gathering Materials and Tools
Before starting your basket-making project, you’ll need to collect the right supplies. The materials and tools you choose depend on the basket type you want to make.
Materials:
| Basic Materials | Description | Best For |
|---|---|---|
| Reed | Flat or round plant fibers | Woven baskets |
| Willow | Flexible wooden shoots | Traditional woven designs |
| Raffia | Palm leaf fiber | Coiled baskets, binding |
| Fabric strips | Cut from old clothes or sheets | Soft, colorful baskets |
| Paper rope | Twisted paper cords | Modern, light baskets |
| Pine needles | Dried long needles | Natural coiled baskets |
Tools:
| Essential Tools | Purpose |
|---|---|
| Sharp scissors | Cutting materials cleanly |
| Spray bottle | Keeping materials damp |
| Water basin | Soaking reeds and willow |
| Clothespins | Holding pieces in place |
| Awl or bodkin | Making holes for threading |
| Measuring tape | Sizing your basket |
| Work gloves | Protecting your hands |
For beginners, start with just the basics: scissors, a spray bottle, and a basin for soaking. You can add more tools as you gain skills and try new methods.
Step-by-Step Instructions
Step 1: Create the Base
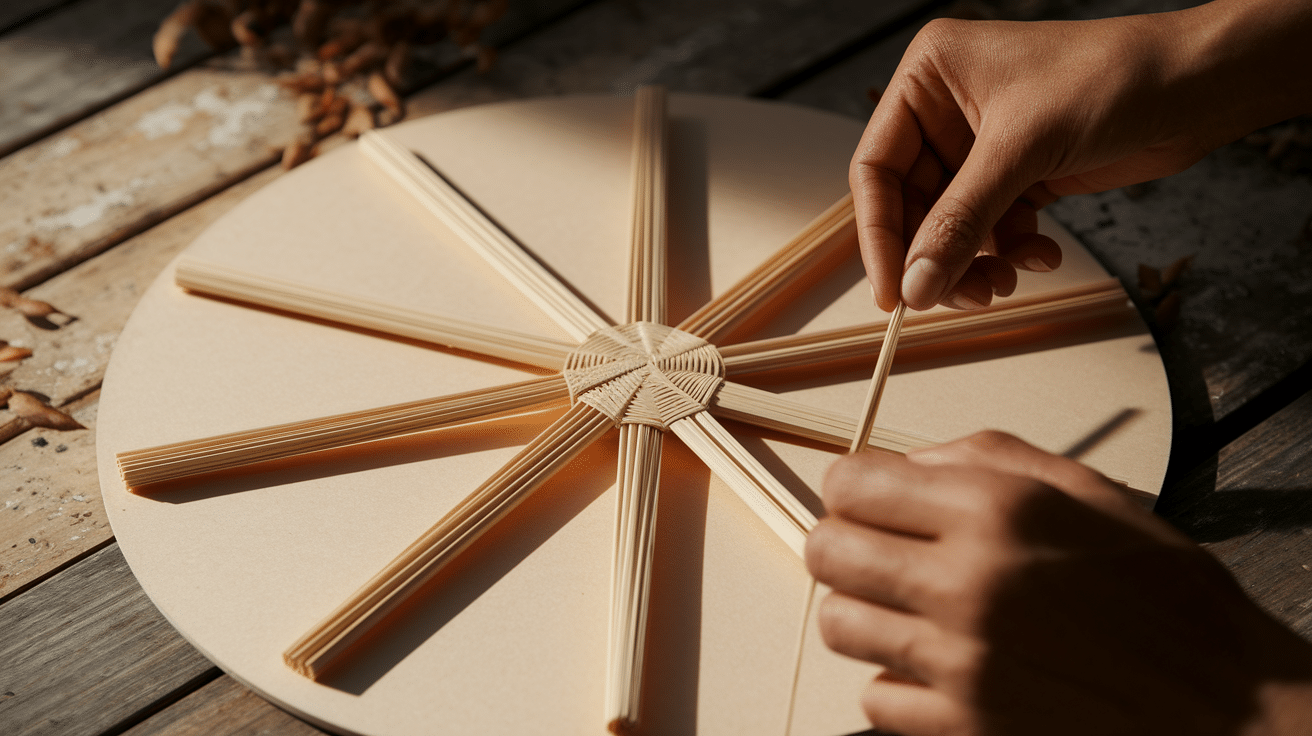
The base provides the foundation for your entire basket. Start with dry materials for measuring, then soak them before weaving to make them flexible and easy to work with.
- Lay out an odd number of spokes (7-11 works well for beginners)
- Cross half the spokes over the other half to form a star shape
- Secure the center with a piece of raffia or thin reed
- Start weaving in a circular motion around this center point
Pro Tip: Place your base on a flat surface and press down occasionally to ensure it stays level as you work.
Step 2: Building the Sides
This is where your basket takes shape. Keep a spray bottle nearby to mist your materials if they start to dry out and become less flexible during this stage.
- Bend your spokes upward at a 90-degree angle when your base reaches the desired size
- Continue the over-under weaving pattern around the vertical spokes
- Push each row of weaving down firmly to create tight, strong sides
- Check your work often to make sure the height stays even all around
Pro Tip: To fix uneven sides, weave more tightly on the taller sections and more loosely on the shorter areas.
Step 3: Adding Shape
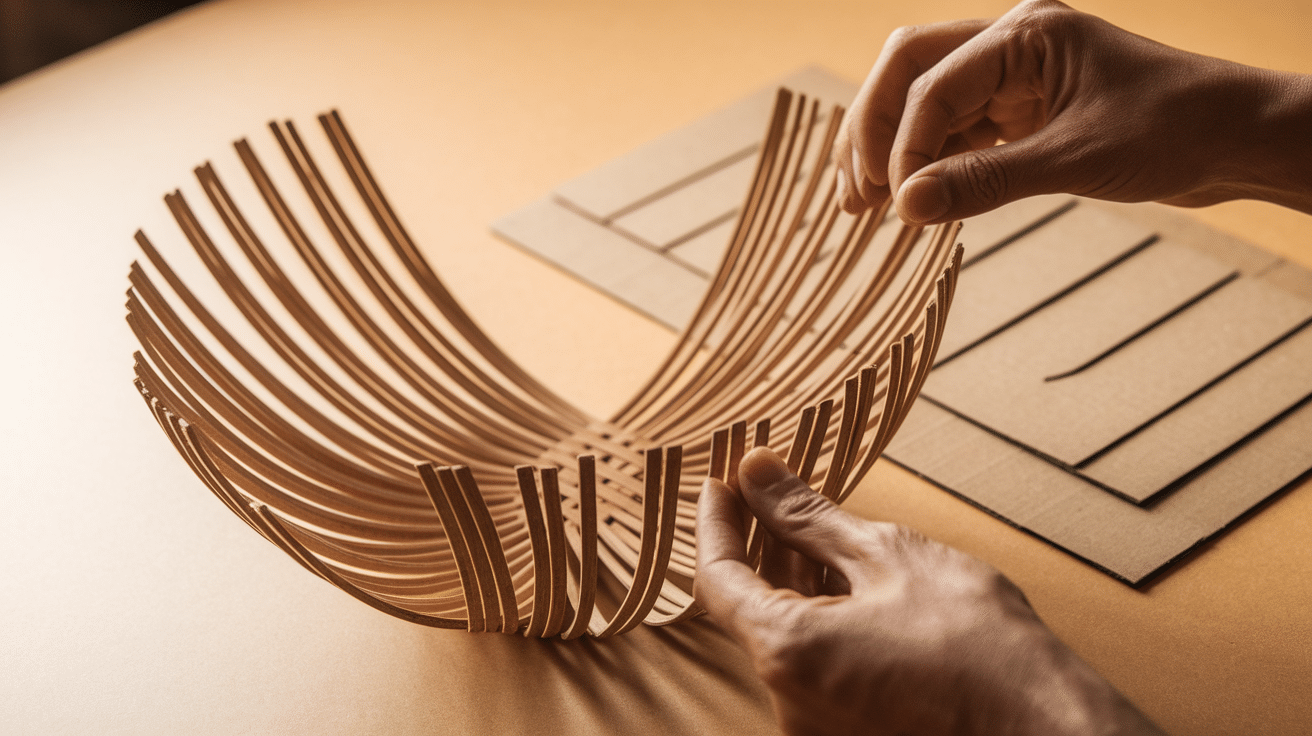
Your basket can be straight-sided or curved depending on how you position the spokes. This step determines the final look of your creation.
- For a straight basket, keep spokes at the same angle throughout
- For a rounded bowl shape, gradually angle spokes outward
- For a vase shape, angle spokes outward then inward as you weave higher
- Measure at different points around the basket to check symmetry
Pro Tip: Make a simple template from cardboard to check your shape as you go.
Step 4: Finishing the Rim
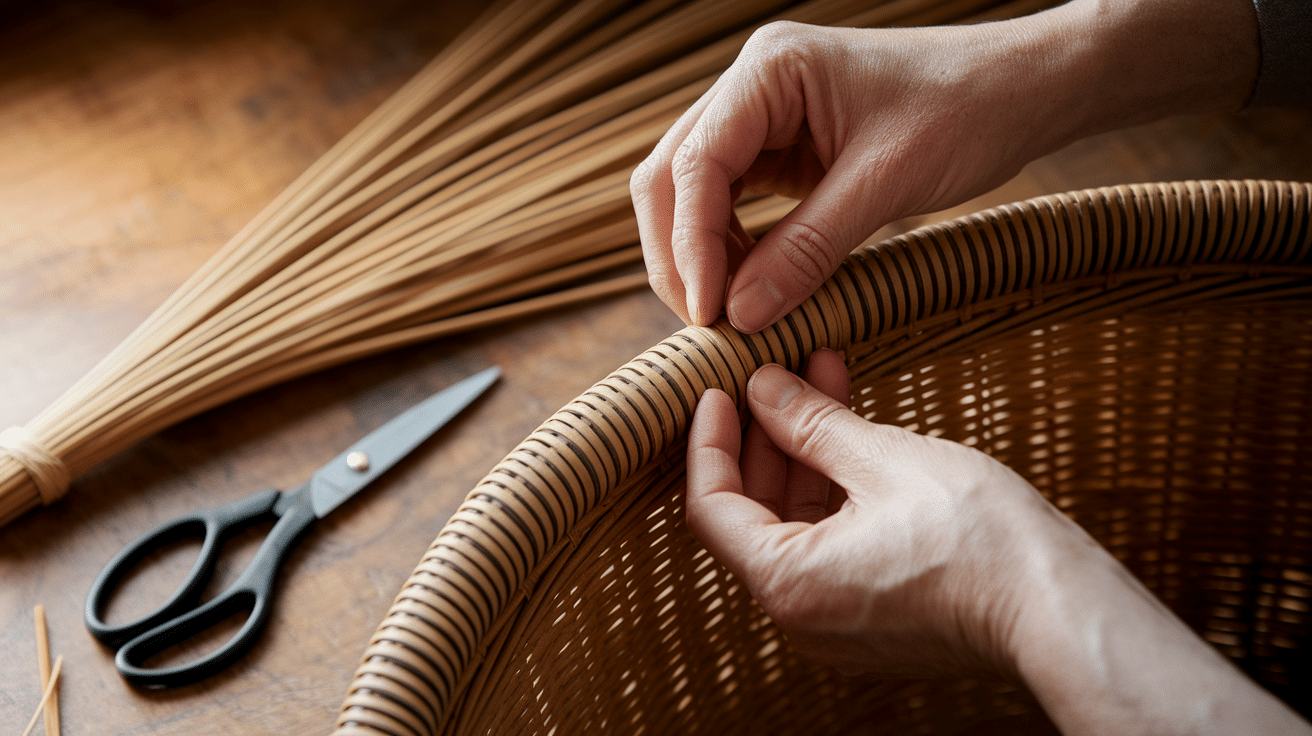
A well-finished rim makes your basket stronger and gives it a polished look. Take your time with this step as it’s quite visible in the final product.
- Soak your rim materials extra long (20-30 minutes) for maximum flexibility
- Fold each spoke over the last row of weaving and tuck it behind a nearby spoke
- Trim excess spoke length, leaving about 2 inches for tucking
- Consider a decorative border with colored material or special weaving pattern
Pro Tip: Watch the tension on your rim binding—too tight will pull the basket out of shape, too loose won’t provide enough support.
Step 5: Adding Final Touches
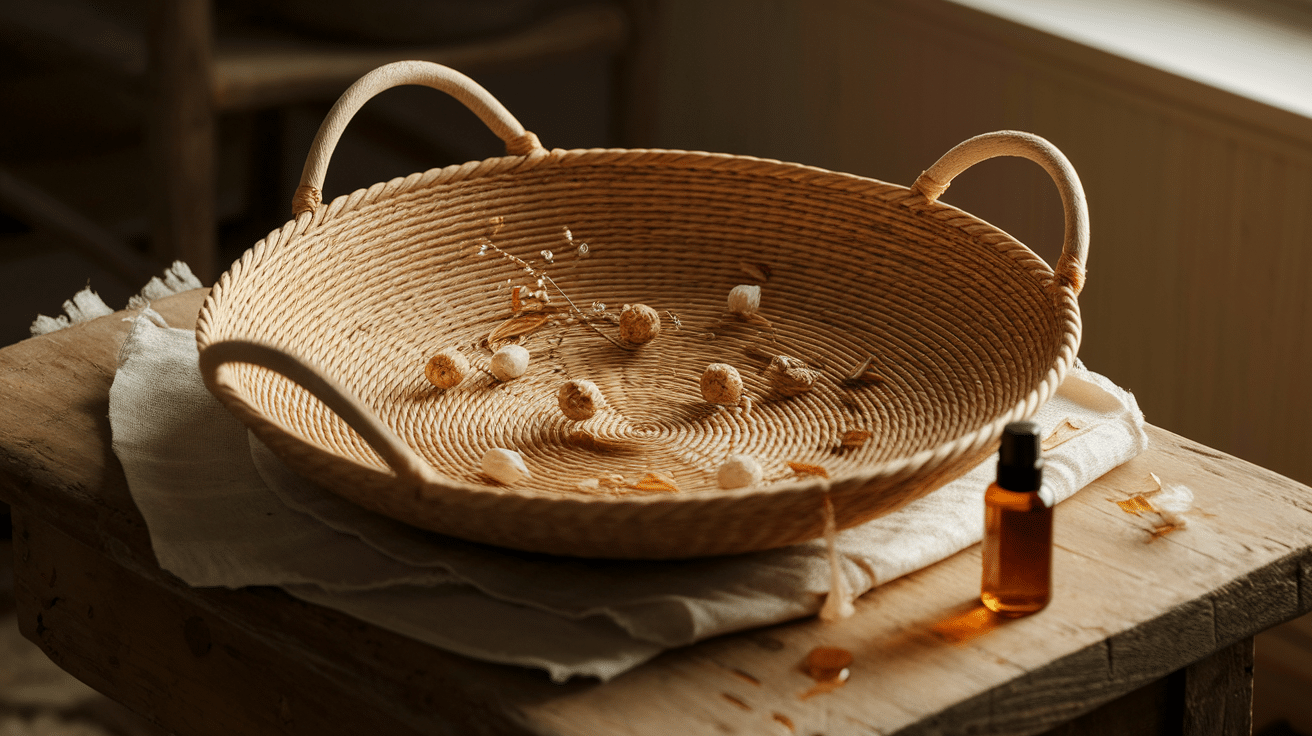
This step transforms your basic basket into a finished piece. Allow your basket to dry completely before adding any finishes or decorations.
- Apply a light coat of protective finish if desired (beeswax or linseed oil)
- Add handles by inserting pre-soaked handle pieces between weaves
- Decorate with natural items like seed pods, shells, or dried flowers
- Weave in colored materials for added visual interest
Pro Tip: Make your first few baskets without dyes or stains—the natural color variations in plant materials create beautiful patterns on their own.
Tips for Success
Keep materials at the right moisture level – Too dry and they’ll snap; too wet and they’ll stretch. Materials should feel flexible but not dripping. Mist with water as you work if they start to dry out.
Maintain consistent tension – Weave too tight and your basket will warp; too loose and it won’t hold shape. Pull each row with the same pressure throughout your project for best results.
Fix mistakes right away – If you notice a missed weave or gap, undo your work back to that point. Small errors grow into bigger problems as you continue building the basket.
Work in a comfortable position – Basket making can strain your hands and back. Sit at a table with good lighting, take breaks, and use finger guards if reeds start to hurt your skin.
Allow for proper drying time – Let your basket dry for 24-48 hours before using it. Place weights inside or use clothespins to hold the shape while it dries if needed.
Storing and Caring for Your Handmade Baskets
Keep your baskets in dry, airy spaces away from direct sun. This stops fading and keeps fibers strong.
Clean with a soft brush for dust in tight spots. For dirt, use a slightly damp cloth, never fully wet your baskets.
Lost its shape? Mist lightly with water, reshape by hand, and add weights while drying.
Protect from bugs with cedar blocks or a light wipe of cedar oil once yearly.
When not in use, nest baskets with tissue paper between them and cover with a cotton cloth for dust protection while allowing air flow.
Conclusion
Making your own basket brings real satisfaction. You’ve now learned the basics of basket crafting, from choosing types and gathering supplies to weaving and caring for your finished work.
Your first basket might not be perfect, and that’s okay. Each one you make will be better than the last. The small flaws in handmade items add value and show they’re truly made by human hands.
We hope this guide helps you start a new skill that people have enjoyed for thousands of years. Basket making offers both useful items for your home and a calming hobby that helps you slow down.
Why not gather some materials this weekend and try your first simple basket? Once you feel the joy of creating something lasting with your own hands, you might find yourself hooked on this timeless craft.
