
Struggling with a stubborn casement window that won’t budge? Before you call a repair service and pay $200+ for a simple fix, grab a screwdriver and spend the next hour learning a skill that will save you hundreds.
Most homeowners don’t realize that a faulty window operator is one of the easiest home repairs you can tackle on your own.
These mechanisms wear out from daily use and weather exposure, but replacing them requires no special training or expensive tools. You likely have most of what you need in your toolbox already.
This step-by-step guide will walk you through the entire process, from identifying the problem to testing your finished repair. By the end, you’ll have a perfectly functioning window and the confidence to handle this repair on every window in your home.
Materials & Tools You’ll Need for the Repair
Before you start, gather these simple tools and materials:
| Tools | Materials |
|---|---|
|
|
You can find most of these tools at your local hardware store. For the replacement operator, measure your old operator to find the right match.
Having everything ready before you start will make the job go much smoother.
Step-by-Step Window Crank Repair Process
Now that you have your tools ready, let’s walk through each step of the repair process. Follow these instructions in order, and don’t skip ahead; each step builds on the previous one
Step 1: Preparing the Workspace

Start by removing any window screens from your casement window. Set them aside in a safe place where they won’t get damaged. Next, open your casement window as wide as it will go.
This gives you the best access to work on the operator. Ensure you have sufficient lighting and ample room to move around comfortably. Clear away any items from the windowsill that might get in your way.
Step 2: Disconnect the Link Arm
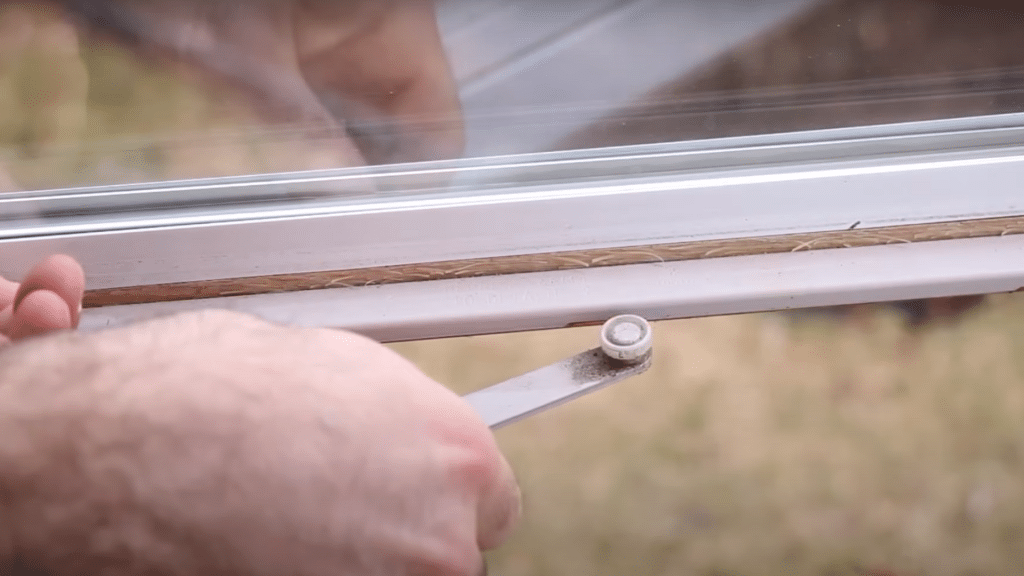
Look for a small cutout or notch in the operator track. This is where you’ll disconnect the link arm from the window sash. Turn the handle until the link arm lines up with this cutout.
Once aligned, you can lift the link arm out of its connection point. The arm should come free easily when positioned correctly. If it feels stuck, double-check that you have it lined up with the cutout properly.
Step 3: Remove the Cover (If Applicable)
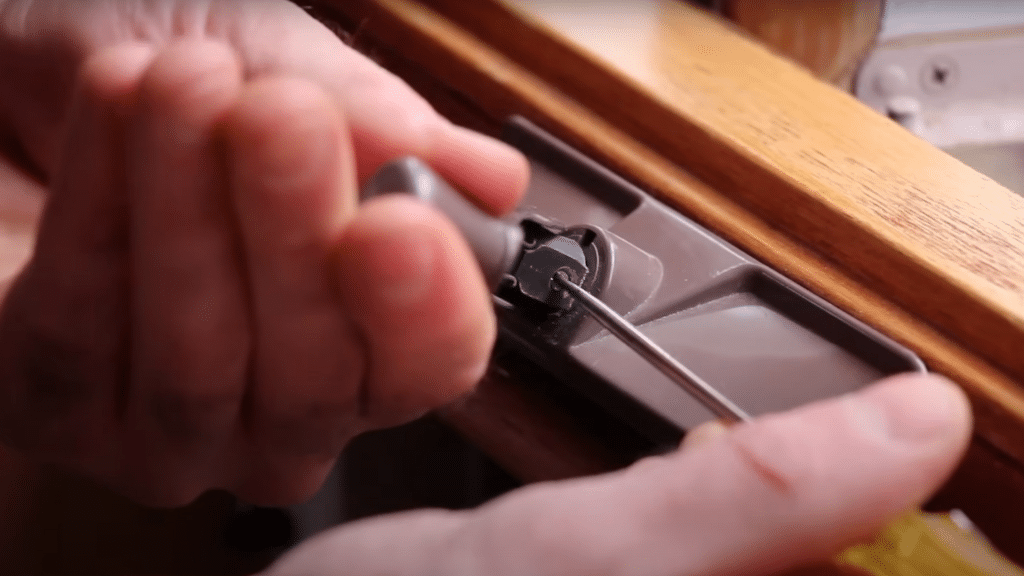
Some window operators have a plastic cover over the mechanism. If yours does, you’ll need to remove the handle first by unscrewing it. Then, carefully pop off the cover by lifting it up and away from the frame.
Not all operators have covers, so don’t worry if yours looks different. Some models have the mechanism exposed, which makes the job easier. Just skip this step if your operator doesn’t have a cover.
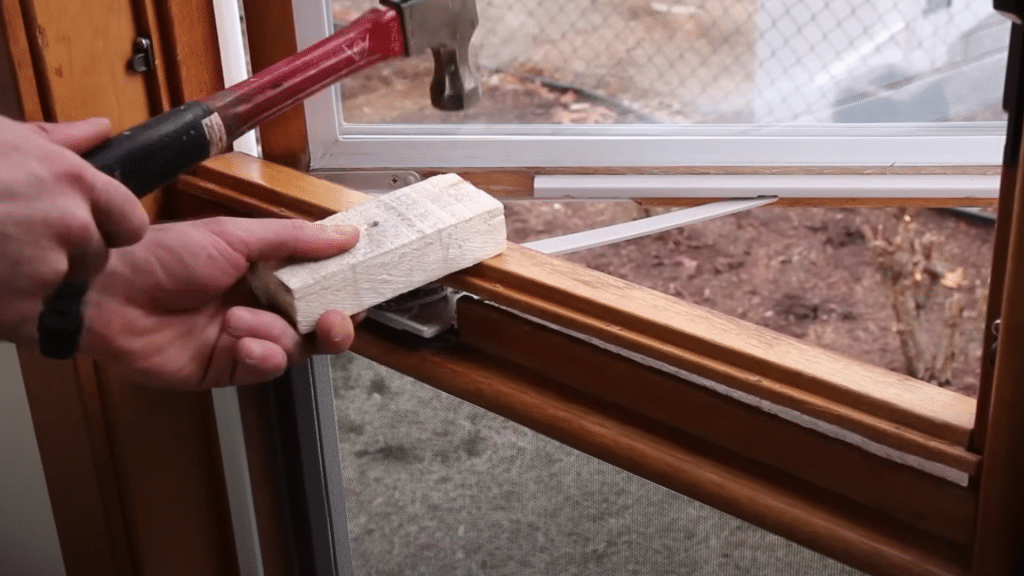
Step 4: Removing the Trim
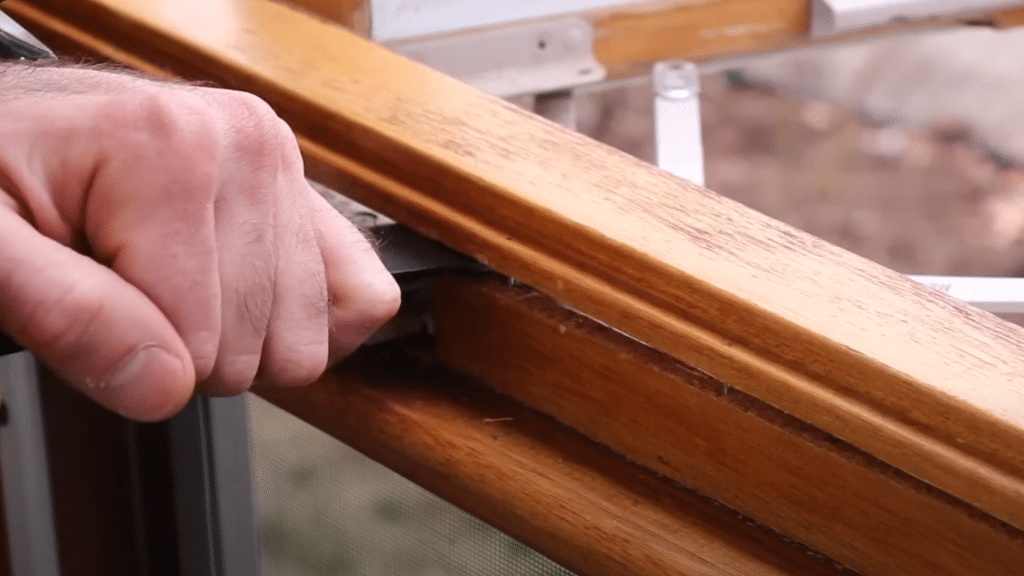
Here’s where things get a bit tricky. The screws holding your operator are often hidden under wooden trim pieces. Look for small pieces of wood trim around the edges of the operator.
You’ll need to remove this trim to get to the screws underneath. Use your utility knife to score along the edges of the trim carefully.
This cuts through any paint or caulk that might be holding it down. Then use your prybar to lift the trim up and away from the frame gently.
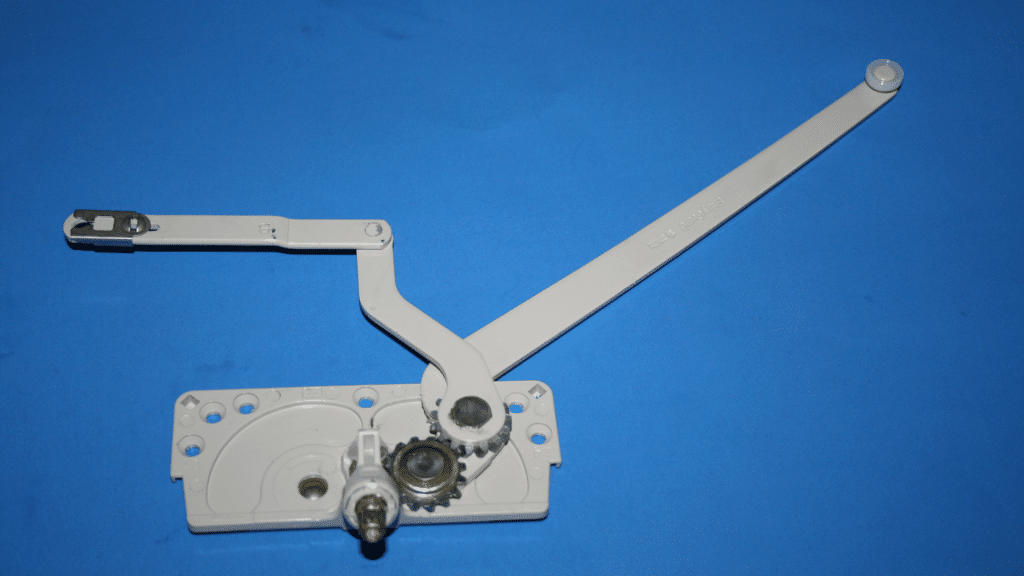
Step 5: Detach and Replace the Casement Operator
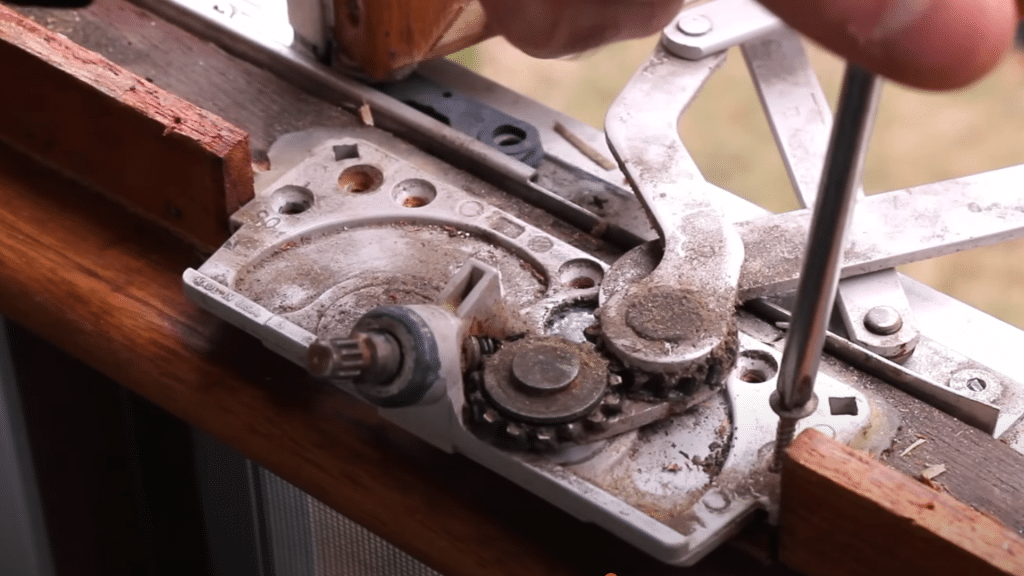
With the trim removed, you should now see the screws holding the operator in place. Use your Phillips head screwdriver to remove these screws. Keep them in a safe place since you’ll need them for the new operator.
Lift out the old operator and set it aside. Take your new operator and position it in the same spot. Line it up with the screw holes and secure it with the screws you just removed.
Make sure it sits flat and even against the frame.
Step 6: Re-attach the Wood Trim
Now it’s time to put everything back together. Place the wooden trim pieces back where they came from. Press them down firmly to make sure they’re seated properly.
You might need to use a small amount of wood glue or caulk to secure the trim if it’s loose. Use your utility knife to clean up any excess caulk for a neat finish. The trim should look just like it did before you started.
Video tutorial
Special thanks to SWISCO for providing valuable insights in their video, which I referenced while creating this guide.
Tips for a Smooth Repair
A few simple tips can make the difference between a frustrating repair and a successful one. These suggestions are based on common issues that DIYers encounter during this project.
- Take your time: Proceed slowly with each step, especially when removing the trim. Rushing can lead to cracked wood or stripped screws.
- Test before securing: Before securing the new operator, test it by hand to ensure it moves smoothly.
- Label your parts: If you’re fixing multiple windows, label the parts from each one. This prevents mixing up pieces and makes reassembly much easier.
- Keep parts organized: Store all your screws and small parts in a designated container to prevent loss.
Common Mistakes to Avoid
Even experienced DIYers can run into problems with this repair if they’re not careful. Here are the most common pitfalls and how to avoid them.
- Don’t skip trim removal: Don’t try to skip removing the trim if it’s covering the screws. You might think you can work around it, but this usually leads to damage or an incomplete repair.
- Use correct screwdriver size: Always use the right size screwdriver to avoid stripping the screw heads.
- Avoid overtightening: Be careful not to overtighten the screws when installing the new operator. Snug is enough; overtightening can crack the frame or damage the operator.
- Test before finishing: Always test your work before putting the trim back on.
Conclusion: Test Your Work & Final Thoughts
Before you call the job finished, test your new operator thoroughly. Close and open the window several times to make sure everything moves smoothly.
The handle should turn easily, and the window should open and close without binding. Check that the window stays open when you want it to and closes completely when shut.
If something doesn’t feel right, double-check that all screws are tight and the operator is appropriately aligned. With basic tools and a little patience, you’ve just completed a repair that would have cost much more if you’d hired someone else.
How did your repair go? Please drop a comment below and let us know if these steps were helpful for you or if you encountered any challenges along the way.
Frequently Asked Questions (FAQs)
How Do I Know If My Window Operator Needs to Be Replaced?
If your window is hard to open or close, won’t stay open, or the handle feels loose or wobbly, it’s time for a new operator. You might also notice that the window doesn’t seal properly when closed.
Can I Repair My Window Operator If The Handle Is Broken?
Sometimes you can replace the handle, but if the internal gears are worn out, you’ll need a completely new operator.
Where Can I Purchase A New Casement Window Operator?
Hardware stores typically carry common sizes, but for the best selection, consider checking online retailers like SWISCO.com. Measure your old operator or take a photo to ensure you get the right replacement.
