Are you tired of hiding dust and stains in your carpet? I was, too.
The truth is, most carpets hold four times their weight in dirt that vacuum cleaners can’t reach. I learned this the hard way when I pulled up my old living room carpet.
What makes hardwood floors better?
They last five times longer than carpet, clean up with simple sweeping, and can be fixed rather than replaced when damaged. Additionally, homes with wood floors tend to sell faster and for a higher price.
In this guide, I’ll walk you through the step-by-step process of replacing carpet with hardwood floors. You’ll learn which tools you need, how to handle tricky spots, and ways to keep your new floors looking great for years.
Why Say Goodbye to Carpet?
Still sitting on the fence about removing that old carpet? Here are the key reasons why hardwood flooring might be a better option for your home.
The Hidden Life of Carpet (It’s Gross)
- Carpets trap dust, dirt, and allergens that vacuums can’t fully remove
- The average rug holds up to four times its weight in accumulated debris
- Pet hair, dander, and accident odors become permanently trapped in fibers
- Mold and mildew can grow beneath carpets in humid conditions
- Stains from spills often remain visible despite cleaning efforts
- Dust mites thrive in carpet fibers, triggering allergies for many people
Why Hardwood is the Beyonce of Flooring
-
Timeless Appeal: Hardwood floors last for generations, with many homes from 100 years ago still showcasing their beauty.
-
Unique Beauty: Each plank has its own grain pattern and color shifts, giving rooms depth and warmth that vinyl or laminate can’t replicate.
-
Aging Gracefully: Unlike other floors that wear out, hardwood gains character over time with small marks and a unique “patina.”
-
Adaptable: Hardwood can be sanded and stained to match new trends, saving you from replacing the entire floor.
-
Increased Home Value: Homebuyers love hardwood, and it often increases the resale value of your home.
-
Easy Care: While it requires basic care and should be protected from excessive water or rough treatment, hardwood stays beautiful for years.
Tools and Materials Needed to Replace Carpet with Hardwood
| Item | Purpose / Description |
|---|---|
| Hardwood flooring planks | The primary material that will replace the carpet |
| Red rosin paper | Acts as a moisture barrier between the subfloor and hardwood |
| Flooring nailer | A specialized tool used to secure planks through the tongue |
| Air compressor | Powers the flooring nailer to ensure consistent nail placement |
| 2-inch flooring nails | Specifically designed to secure hardwood planks |
| Hammer | Used for manual nailing and to strike the flooring nailer |
| Fastening oil | Lubricates the nailer to ensure smooth operation |
| Spacers (1/4 inch) | Maintain expansion gaps between the flooring and the walls |
| Molding for finishing edges | Covers expansion gaps and gives the floor a clean, finished look |
| Safety gear | Protects eyes and hands during installation (e.g., gloves, goggles) |
| Measuring tape | Used to measure room dimensions and make accurate cuts |
Step by Step Guide for Replacing Carpet with Hardwood
Step 1: Remove the Carpet and Prep the Subfloor
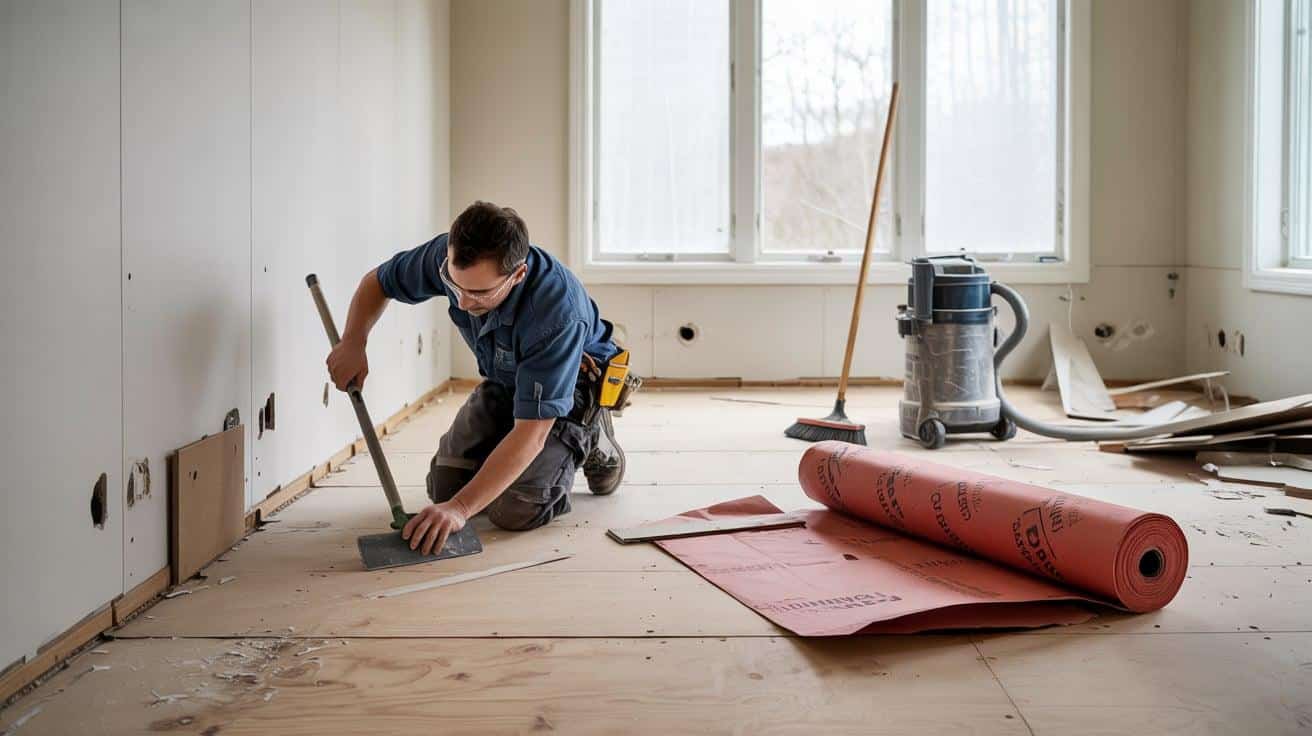
Pull up the carpet, padding, and tack strips from the entire room. Clean the subfloor thoroughly, removing all dirt and small debris that could cause bumps.
Check for uneven spots and fix them. Roll out red rosin paper across the entire floor to prevent moisture from seeping up.
Pro Tip: Use a flat pry bar to lift tack strips without damaging the wall.
Common Tip: Sweep twice to catch all small debris that could cause squeaks later.
Step 2: Plan Your Layout and First Row
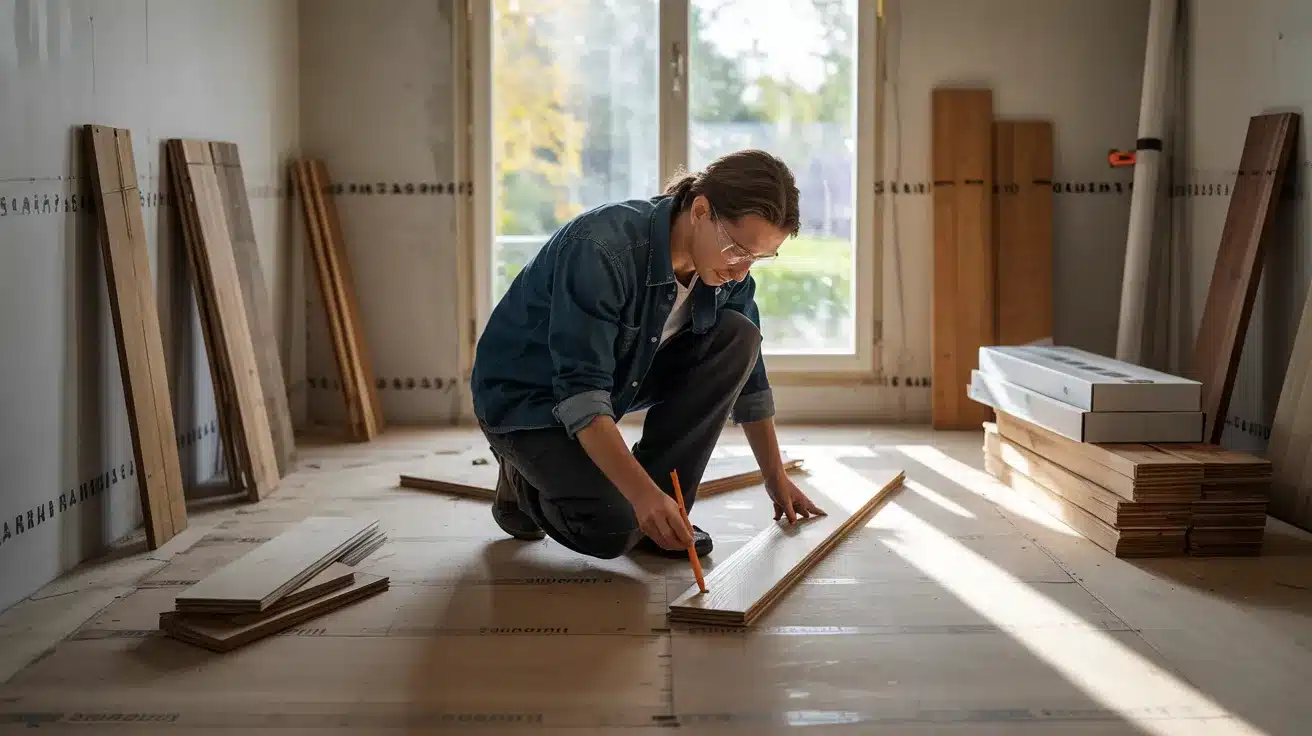
Determine which direction your boards will run, typically along the longest wall. Mix boards from different boxes to spread color tones evenly.
Place 1/4-inch spacers along the starting wall to allow wood to expand without buckling later. Plan your cuts to avoid very short pieces at the ends of rows.
Pro Tip: Let the wood sit in your house for 3 days before installing.
Common Tip: Lay out several rows without nailing first to check your pattern.
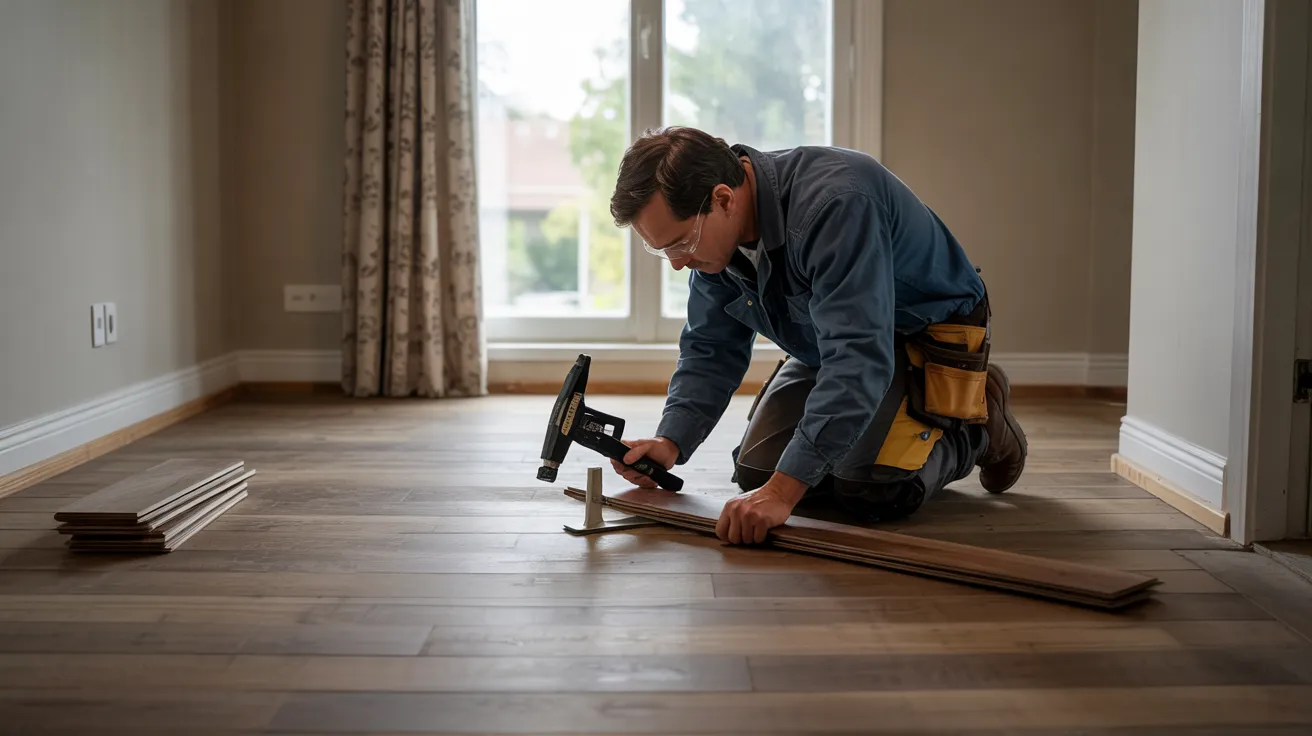
Step 3: Install the First Few Rows by Hand
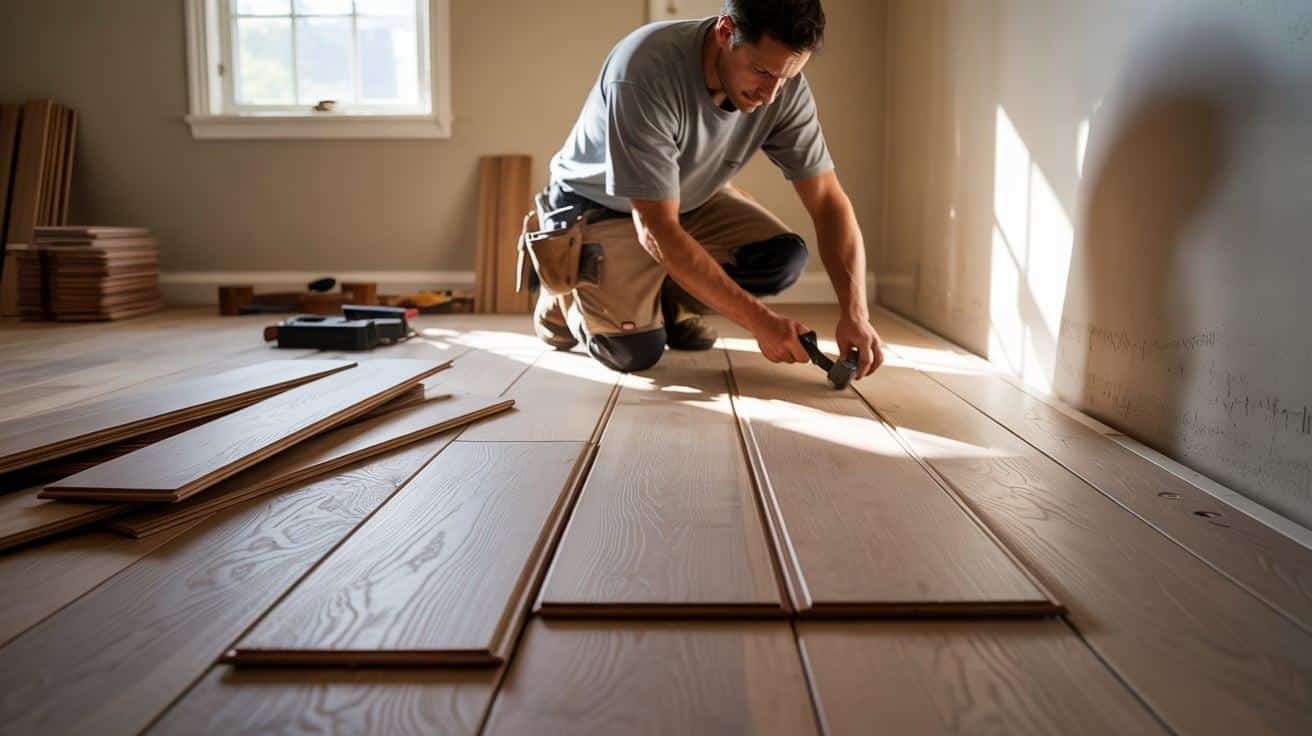
Start at the longest, most visible wall. Position the first board with the groove facing outward and spacers against the wall. Pre-drill and face-nail this row near the wall. Connect end joints tightly.
Add the second row by fitting tongues into grooves. Stagger end joints by at least 6 inches between rows.
Pro Tip: Use the straightest boards for your first row.
Common Tip: Tap boards together with a scrap piece to protect the edges.
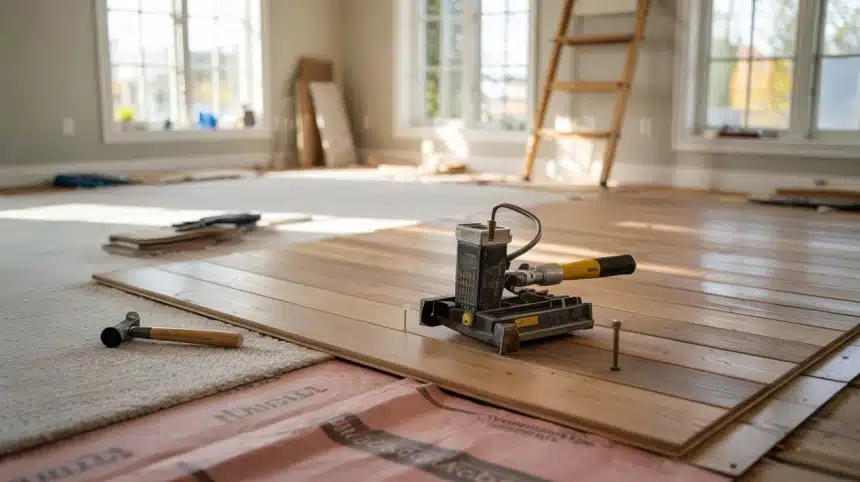
Step 4: Use the Flooring Nailer for Middle Rows
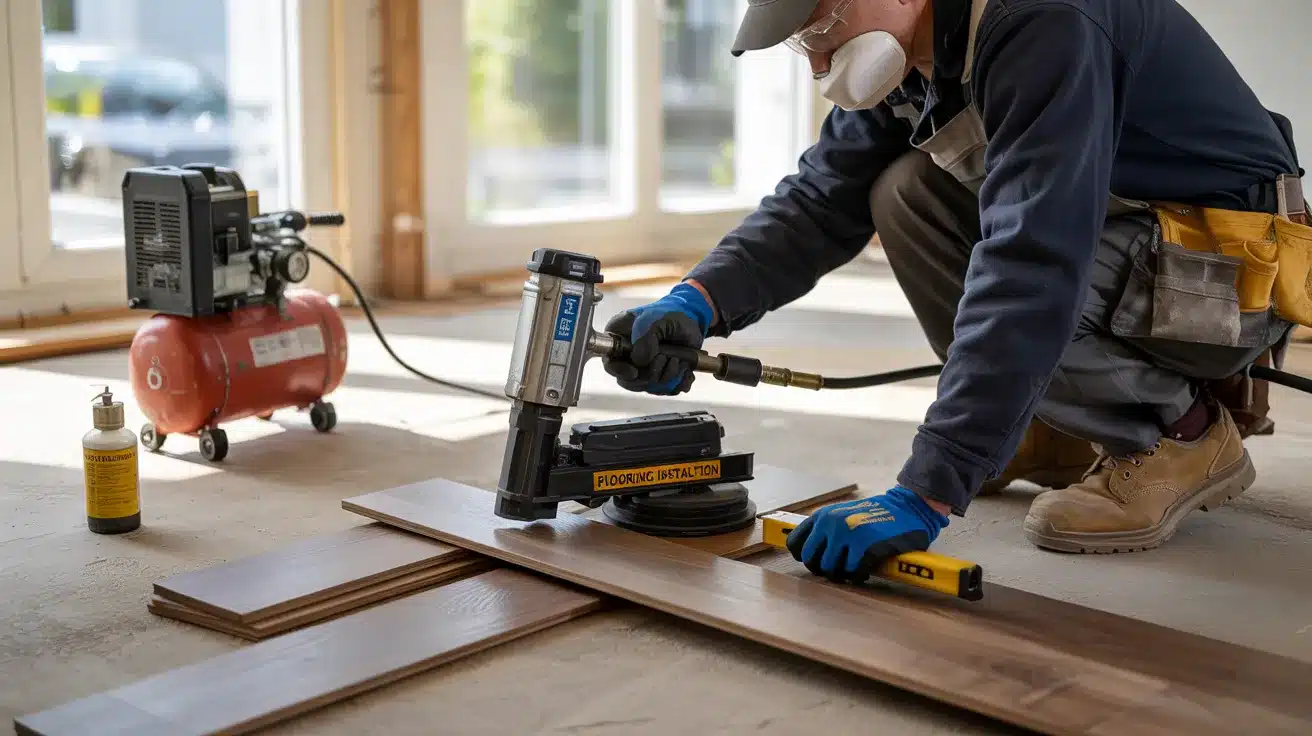
Once you have 2-3 rows in place, switch to the flooring nailer. Add fastening oil to help it work smoothly. Set your air compressor to the correct pressure setting (in pounds per square inch, or PSI).
Place the nailer at a 45-degree angle against the board’s tongue, then hit it with your hammer. Put nails every 8-10 inches along each board.
Pro Tip: Check for straight lines every few rows.
Common Tip: Keep your air hose behind you to avoid trips.
Step 5: Cut Boards to Fit Around Obstacles
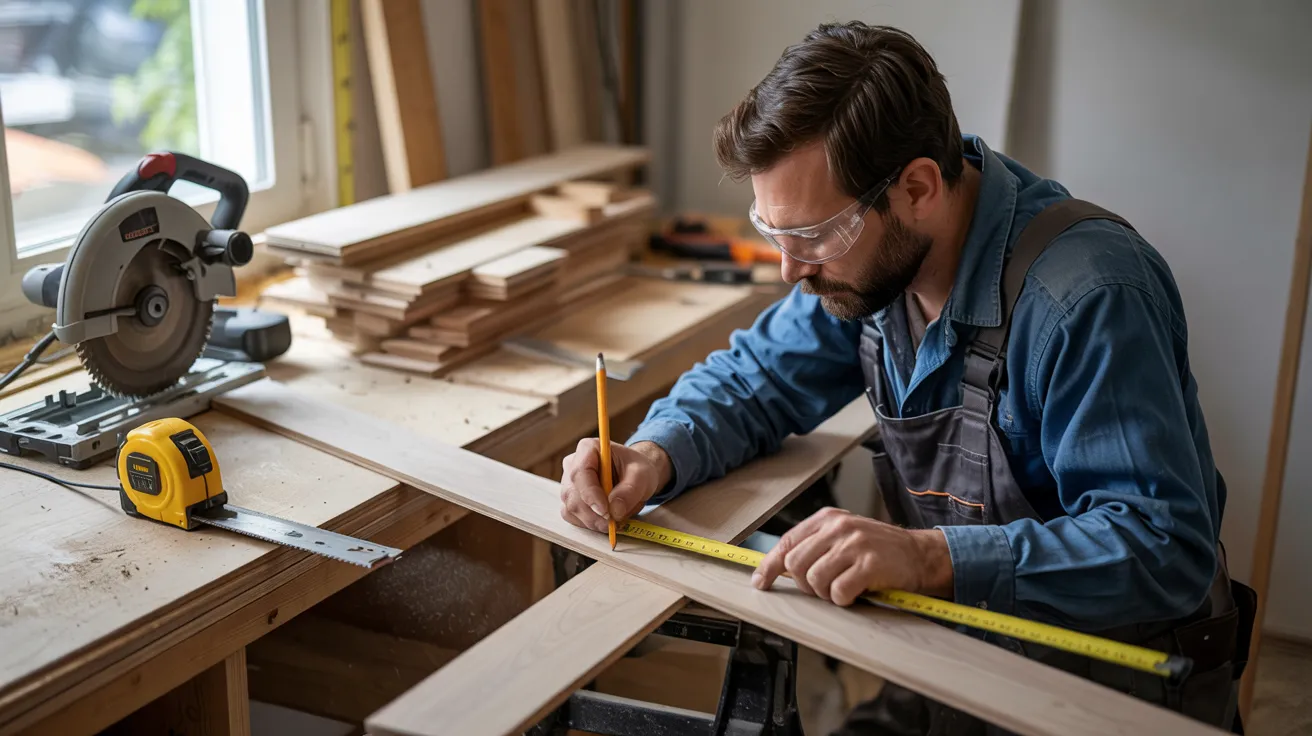
Measure the space around doorways, vents, or other fixed items. Mark your boards and cut them to fit these spots. Use a circular saw for straight cuts and a jigsaw for odd shapes.
Test each piece before nailing. For tight spots where the nailer doesn’t fit, face-nail by hand or use wood glue.
Pro Tip: Cut boards slightly short near heating vents.
Common Tip: Always wear eye protection when cutting wood.
Step 6: Install the Final Row and Moldings
Measure the gap for the last row at several points. Cut the boards to the desired width, leaving room for the expansion gap. Face-nail the final row since the nailer won’t fit.
Remove all spacers once done. Install baseboards or quarter-round molding to cover the gaps along walls. Add threshold strips where the hardwood meets other flooring.
Pro Tip: Save extra planks for future repairs.
Common Tip: Use wood putty to fill visible nail holes in the final row.
I’d like to acknowledge Review Outlaw for the insightful video, which was a key reference in putting this guide together.
Hardwood + Pets = Peace or Panic?
Worried about how your furry friends will interact with new hardwood floors? Here’s what pet owners should know.
1. Scratch Resistance Tips
- Choose harder wood species, such as oak, maple, or hickory, that resist claw marks.
- Opt for wood with visible grain patterns that help hide minor scratches
- Look for “hand-scraped” or textured finishes that already have character
2. Pet-Friendly Finishes
- Matte or satin finishes show fewer scratches than high-gloss options
- Water-based polyurethane offers good moisture protection for accidents
- Site-finished floors (vs. pre-finished) have fewer seams for liquid to seep into
3. Rugs and Runners for High-Traffic Spots
- Place washable runners in hallways where pets race
- Use non-slip pads under area rugs to prevent bunching
- Choose indoor/outdoor rugs that clean easily for accident-prone areas
Hardwood Floor Care: Keep Them Looking New for Decades
Your new hardwood floors can stay beautiful for decades with the right care. Here’s how to keep them looking their best.
Cleaning Tools to Avoid
- Never use steam mops; they force moisture into the wood
- Skip wet mops that leave standing water on the surface
- Avoid vacuum cleaners with beater bars that can scratch
- Say no to harsh scrubbing brushes that damage the finish
Safe Products for Wood
- Use cleaners made specifically for your floor’s finish type
- Look for pH-neutral solutions without ammonia or vinegar
- Try a mixture of mild soap and water for sticky spots (barely damp)
- Apply felt pads to furniture legs to prevent scratches • Use rubber or silicone mats under pet water bowls
Yearly Deep Clean Checklist
- Check for loose boards and fix them before they worsen
- Look for scratches that might need touch-up with a repair kit
- Clean baseboards and trim to complete the fresh look
- Remove furniture to clean hidden areas and check for water damage
Wrapping It Up
Removing old carpet and installing hardwood floors changes the way your home looks and feels. The steps may seem daunting at first, but with the right tools and some care, most homeowners can complete this job themselves.
Remember these key points: prepare your subfloor thoroughly, allow the wood to acclimate to your home’s environment before installation, use spacers to fill any necessary gaps, and take extra care with the first and last rows.
Your reward?
Floors that look good for decades instead of years, fewer allergy problems, and easier cleaning after spills and pet accidents.
What flooring project are you currently working on? Share your questions or tips in the comments. I’d love to hear about your home updates!
Frequently Asked Questions
1. Is It Worth Replacing Carpet with Hardwood?
Yes, it’s worth replacing carpet with hardwood. Hardwood lasts longer, improves air quality, cleans easier, adds home value, and looks better with almost any décor.
2. What to Do with Wood Floors After Removing Carpet?
After removing the carpet, inspect the wood floors for damage, clean them thoroughly, sand if necessary, fill any gaps or holes, refinish with stain if desired, and apply a protective finish coat.
3. How Long Does It Take to Remove Carpet and Replace It With Wood?
For an average room, expect a total of 1-3 days, consisting of approximately 4 hours to remove the carpet and prepare, followed by 1-2 days to install the hardwood.