

Are you looking for a simple way to make beautiful paper crafts at home? Origami lotus flowers are both fun to create and lovely to display.
Many people struggle with paper-folding techniques and give up before seeing results. Good folding methods make all the difference in creating successful origami projects.
This guide will walk you through making your own origami lotus flower in seven simple steps.
You’ll learn how to prepare your paper correctly, form the base shape, and create realistic-looking petals. By the end, you’ll have a stunning paper flower to show off or give as a gift.
Follow along as we share the exact techniques, helpful tips, and common mistakes to avoid when making your origami lotus flower.
Why Origami Lotus?
The lotus flower holds profound significance in many cultures worldwide. In Buddhist traditions, the lotus symbolizes how beauty can emerge from mud, much like goodness can arise from adversity.
The flower sits clean above muddy water, which many see as a sign of staying pure despite tough surroundings. In Hindu beliefs, gods and goddesses often hold lotus flowers or sit on them. The flower opens with the morning sun and closes at night, showing the cycle of life.
This simple paper craft allows you to bring these rich meanings into your home through art you create yourself.
Required Materials for Folding a Lotus Flower
| Material | Description |
|---|---|
| Square Origami Paper | A square piece of paper (recommended sizes: 15cm x 15cm or 20cm x 20cm). You can use plain or colored paper for a more artistic effect. |
| Sharp Crease Tool | A bone folder or any flat, blunt tool to help create crisp folds and sharp creases. (Optional but helps for precision). |
Step-by-Step Origami: Create Your Lotus Flower
Learn how to fold a beautiful and symbolic lotus flower using simple origami techniques with this easy-to-follow, step-by-step guide.
Step 1: Preparing the Paper
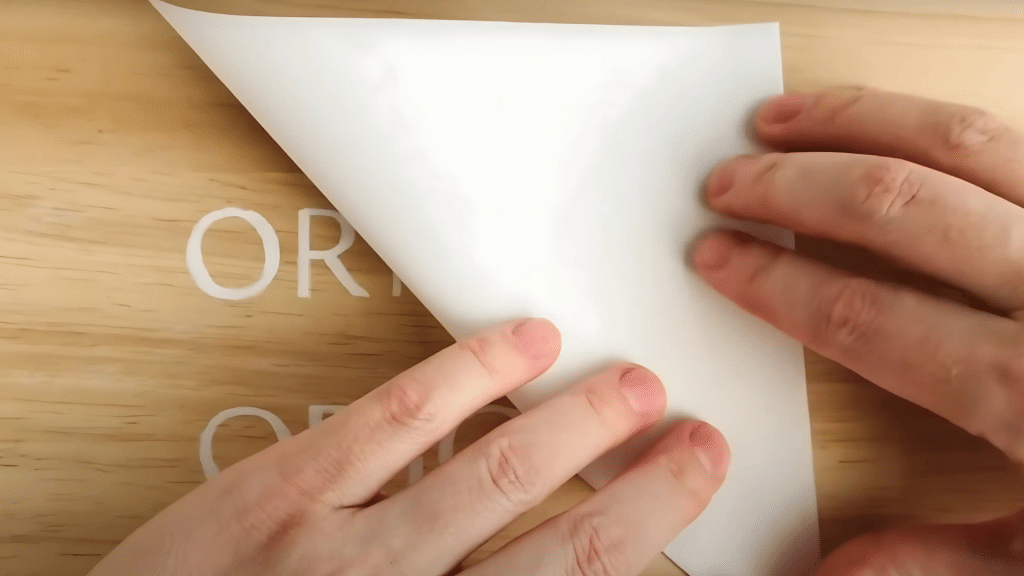
Begin with a square piece of origami paper. The best size for beginners is about 15 cm or 20 cm square. Fold your paper in half diagonally from one corner to the other. Press down firmly along the fold line, then open it back up. Do the same fold in the other diagonal direction.
These folds will create two creases that cross in the middle, making an X shape. Good creases are key to a clean final result. Run your fingernail or the edge of a ruler along each fold to make them crisp and clear.
Step 2: Creating the Base Shape
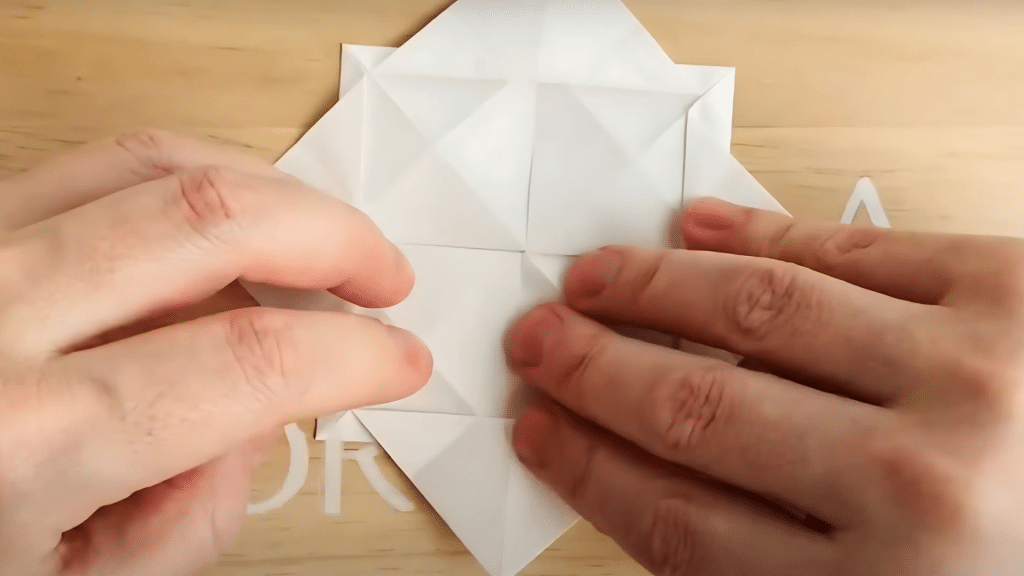
Now fold your square in half from top to bottom. Make sure the edges line up perfectly, then press down to create a firm crease. Open the paper and fold it in half from left to right, again making a strong crease.
When you open your paper, you should see both an X and a + shape from all your creases. Next, take each corner of your square and bring it toward the center point where all creases meet. This creates a smaller square with four flaps. Ensure that all corners align at the center point without gaps for optimal results.
Step 3: Forming the Petals
With your smaller square facing you, take each of the four corners and fold them into the center point. Press each fold flat as you work. These folds will form the first set of petals for your lotus flower. The folds should be equal in size and shape on all four sides.
Take the time to ensure your creases are clean and the tips of each fold meet exactly at the center point. This step builds the foundation for your lotus flower’s shape, so careful work here will pay off in the final look.
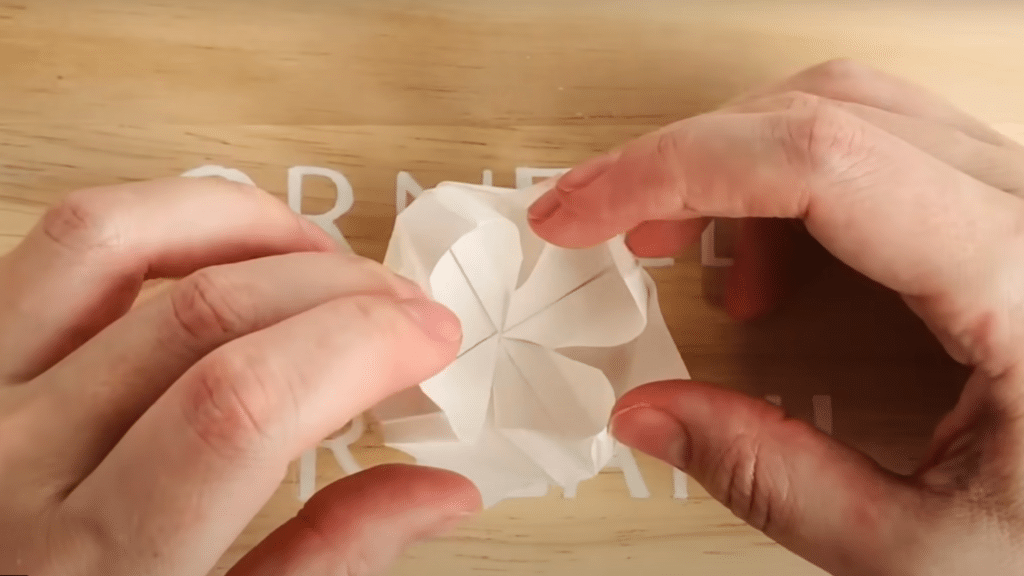
Step 4: Shaping the Petals
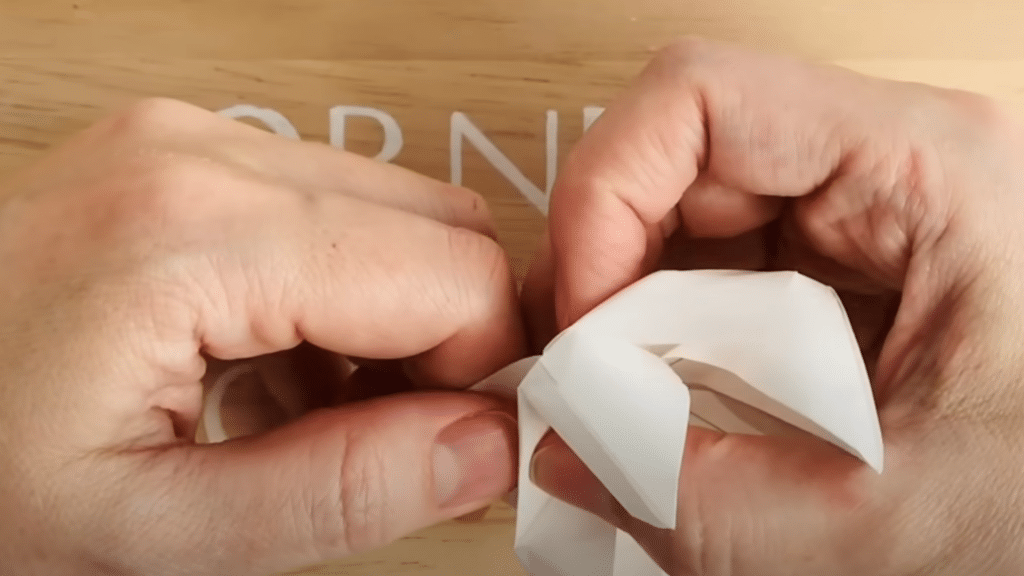
Now comes the fun part where your lotus starts to take shape. One by one, carefully lift and pull each pedal out. Start with the outer layer first. Place your finger under each pedal and gently lift it upward, creating a slight curve.
The fold lines you made will guide how the petals bend. Do the same for all outer petals first, then move to the inner petals. For a more realistic look, gently roll the edges of the petals slightly inward between your fingers. This small touch adds depth to your flower and makes each petal seem less flat.
Step 5: Shaping the Lotus Flower
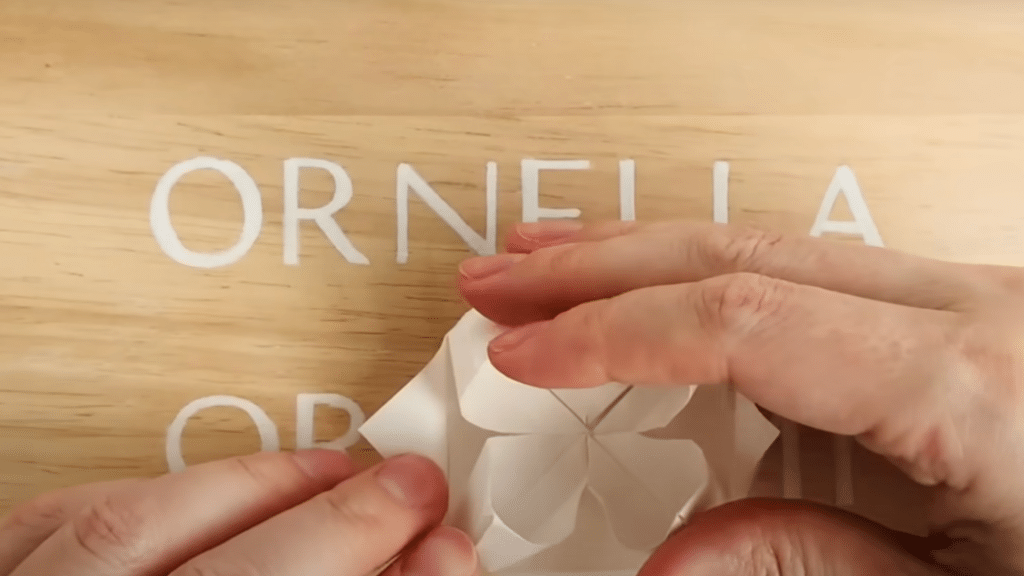
Look at your flower from above. The goal is to create a full, open lotus with well-spaced petals. Adjust each petal’s position to get a balanced, round shape. If some petals seem too closed, gently open them wider. If others stick out too much, press them in slightly.
The flower should have an even, circular form when viewed from above. Straighten any petals that may have become bent during the process. Your lotus should now have a clear two-layer effect, with inner and outer petals forming a full bloom.
Video Tutorial
I’d like to acknowledge Ornella Origami for the insightful video, which was a key reference in putting this guide together.
Best Practices and Mistakes to Avoid in Origami Lotus Folding
| Tip Category | Description |
|---|---|
| Choosing the Right Paper | Consider using different colors or patterned paper for added visual appeal. |
| Paper with a slightly thicker texture may be easier to handle, but ensure it’s not too stiff. | |
| Common Mistakes to Avoid | Skipping crease lines: Ensure each fold is crisp for clean, precise petals. |
| Uneven folds: Ensure the corners and edges align properly at each step. | |
| Forgetting to shape the petals: Take your time to lift and adjust each petal for the best result carefully. |
Conclusion
Making an origami lotus flower takes just a few minutes once you know the steps. We’ve walked through the whole process from picking your paper to shaping the final petals.
The key points to keep in mind are making clean folds, working patiently, and taking time to shape each petal with care.
Your finished lotus can sit on a desk, float in a bowl, or serve as a thoughtful gift for someone special. The simple beauty of paper folding demonstrates how basic materials can be transformed into something truly special.
Want to try more paper crafts? Begin by creating several lotus flowers in various sizes and colors. You might create a small group of them for a table setting or as party favors. You can also try making stems and leaves to complete the look.
What will you do with your paper lotus? Share your creation or ask questions in the comments below!
Frequently Asked Questions
What Type of Paper Works Best for Origami Lotus Flowers?
The best paper is thin, crisp origami paper, but you can also use square gift wrap, thin scrapbook paper, or cut standard printer paper into squares.
How Long Does It Take to Make an Origami Lotus Flower?
For beginners, it takes about 15-20 minutes, but with practice, you can complete one in under 5 minutes.
Can I Make a Multicolored Lotus Flower?
Yes, use two-sided colored paper or glue two different colored sheets back-to-back before starting your folds.
Will My Paper Lotus Flower Last a Long Time?
Your lotus can last for months or years if kept away from moisture, direct sunlight, and dust.