Welcome to your step-by-step guide for converting embroidery into gorgeous wall art! This comprehensive walkthrough will modernize your showcase of needlework.
Mount your favorite embroidery designs onto pre-made canvas using basic tools and straightforward techniques.
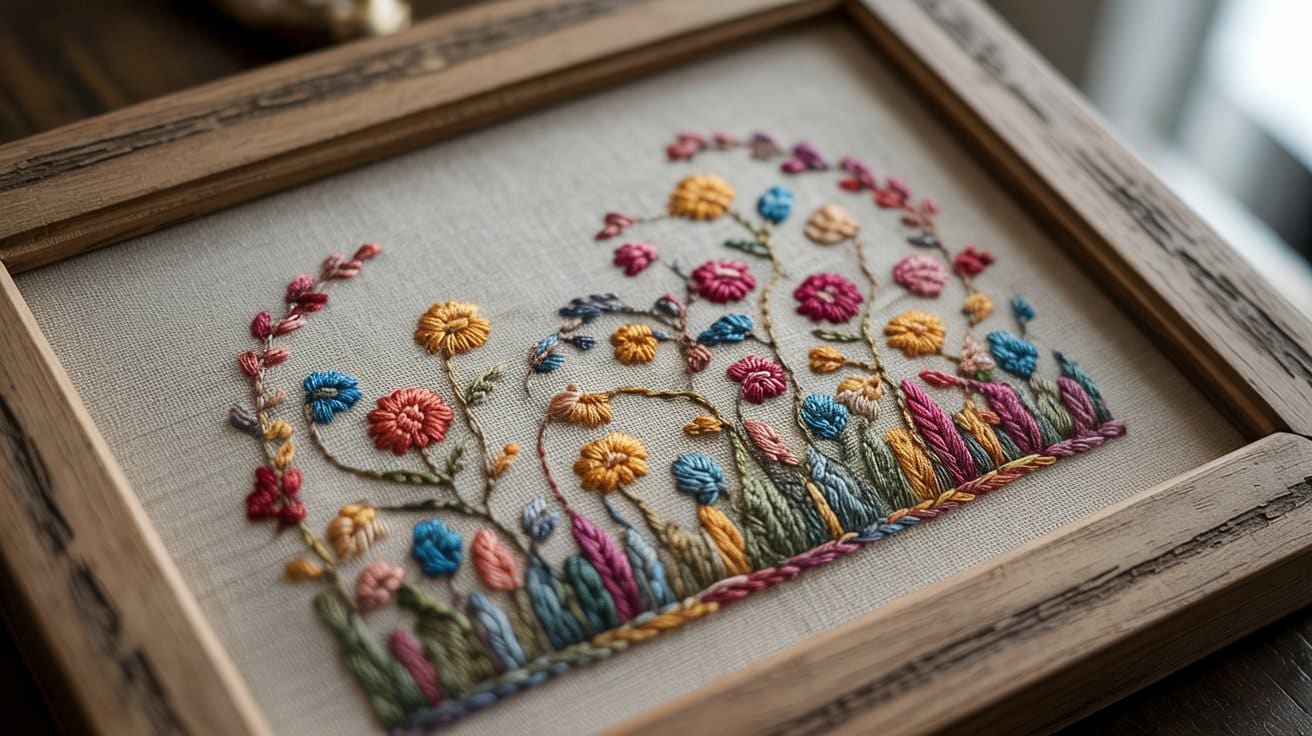
This method upgrades your embroidery from fabric to a framed artwork, creating professional-looking displays without the need for expensive framing.
You’ll create gallery-worthy presentations that highlight your stitching skills, make meaningful personalized gifts, and preserve your needlework for years to come.
No more hiding beautiful designs in drawers or limiting them to functional items! Follow these simple steps to convert your embroidery into conversation-starting wall art that displays your creativity with pride and sophistication.
Display Embroidery with a Gallery-Style Finish
This guide is ideal for anyone who wants to convert their embroidery into a polished, gallery-style presentation, without spending a fortune on custom framing.
Whether you’re a beginner looking to proudly display your first project or a seasoned stitcher with a growing collection of designs, this method offers a practical and stylish solution.
It’s perfect for:
- Hobbyist embroiderers who want their work off the hoop and onto the wall
- Crafters and DIY decorators seeking affordable, creative home décor ideas
- Gift makers looking to create heartfelt, handmade presents with a professional finish
- Textile artists aiming to display their stitching at art shows or markets
- Organized creators who want a clean, consistent way to preserve and showcase their work
If you’ve ever tucked away your finished embroidery or hesitated to display it because of awkward framing options, this guide is made for you.
Mounting Embroidery on Canvas: A Step-by-Step Masterclass
Tools and Materials Needed:
| Item | Purpose |
|---|---|
| Pre-made canvas (8-inch recommended) | Base for mounting your embroidery |
| Completed embroidery design | Artwork to be displayed |
| Staple gun | Secures fabric to canvas frame |
| Extra staples | Ensures you have enough fasteners |
| Sharp scissors | Cuts fabric and stabilizer precisely |
| Pencil | Marks are cutting lines on the stabilizer |
| Light-colored marker | Alternative for marking on darker fabrics |
| Ruler (optional) | Helps create straight alignment lines |
| Spray adhesive (optional) | Temporarily holds fabric in position |
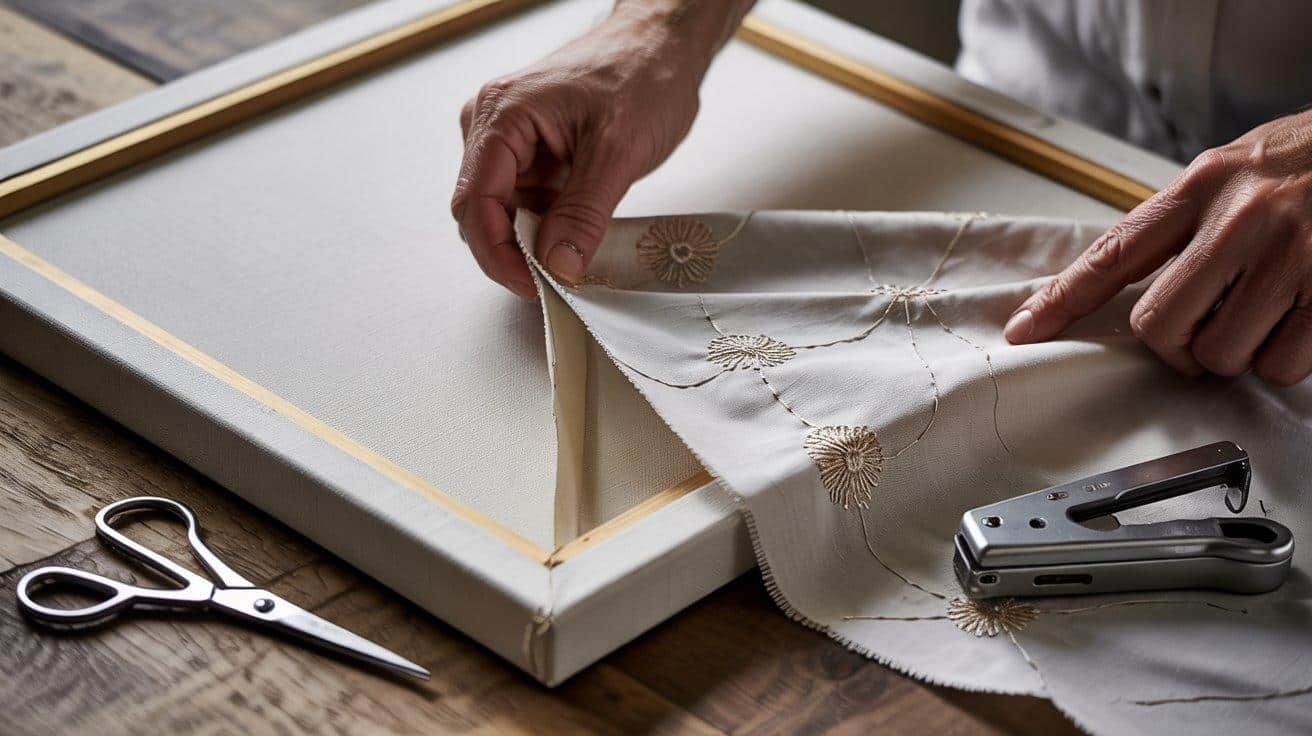
Step 1: Position Your Embroidery
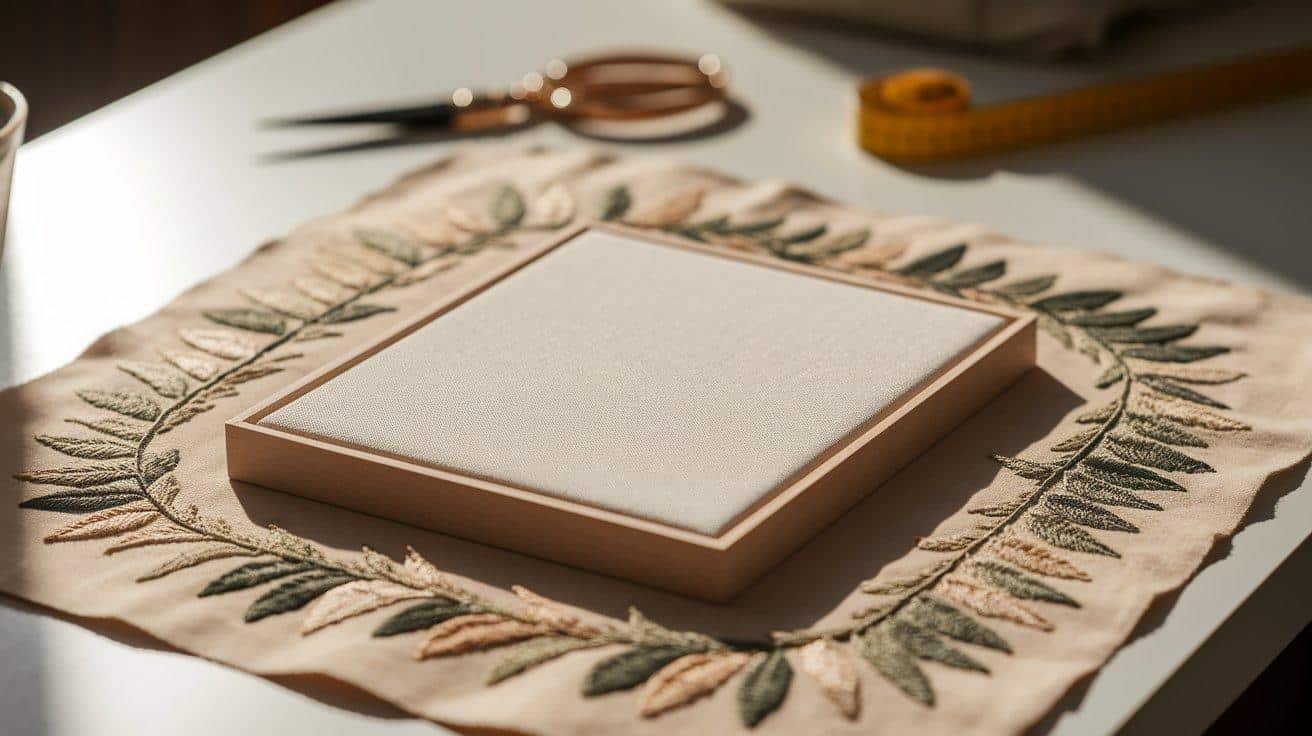
Place your completed embroidery face down on a clean surface. Position your canvas on top of the embroidery, centering your design exactly how you want it to appear.
Ensure equal spacing on all sides of the design relative to the canvas edges. This careful positioning is crucial for achieving a professional, balanced appearance in your final piece.
Take your time here, as this alignment determines how your artwork will display once mounted.
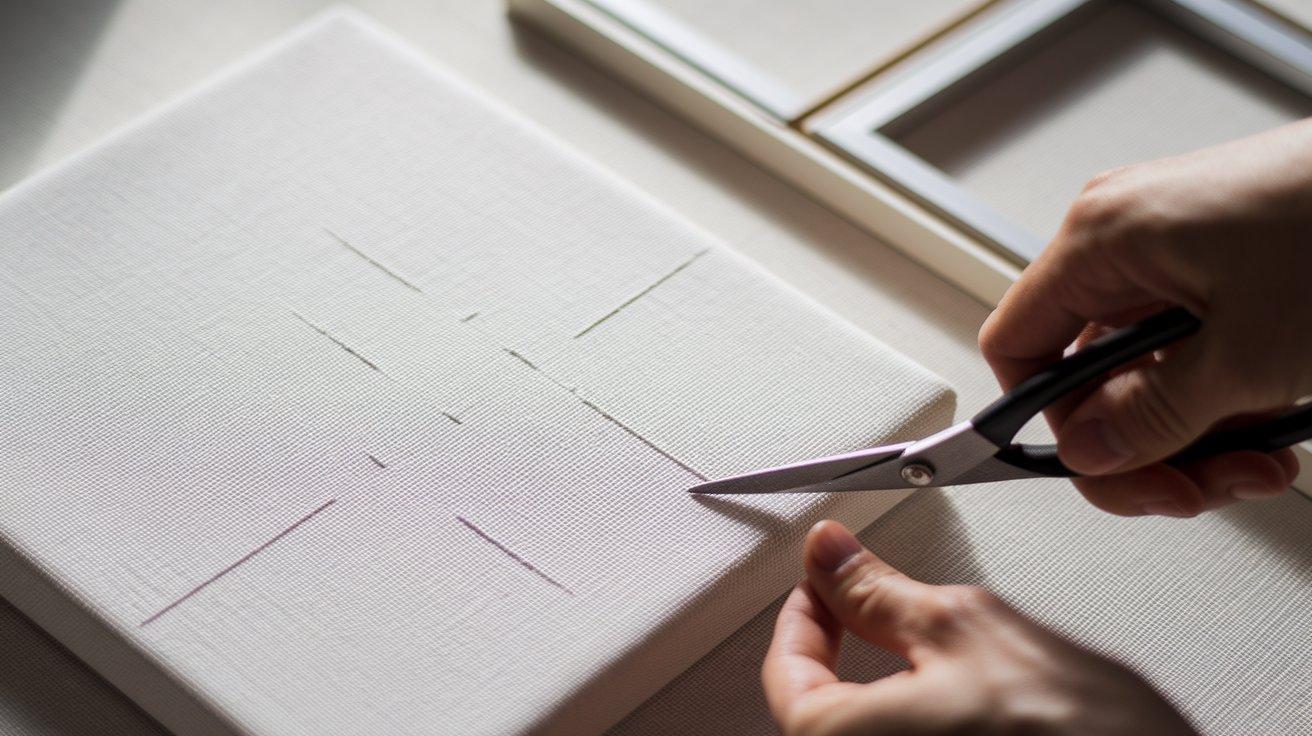
Step 2: Mark Your Cutting Lines
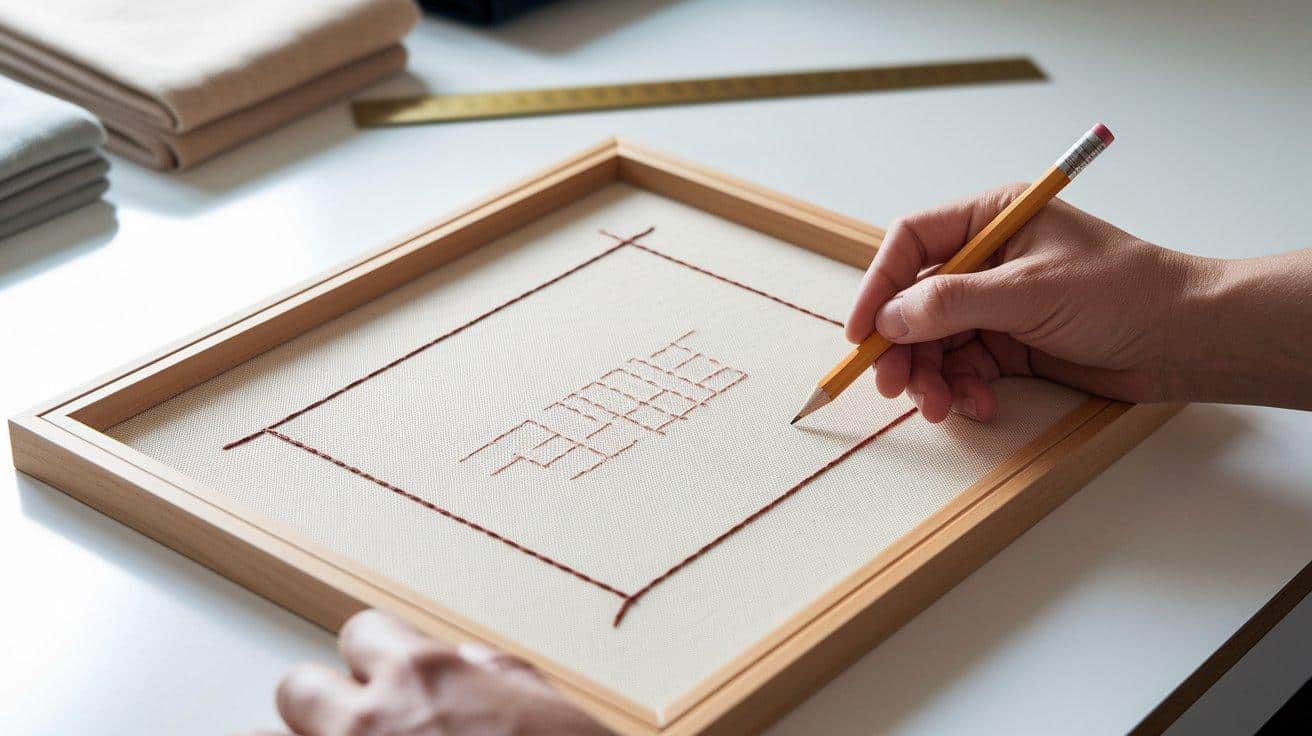
With the canvas still positioned on your embroidery, carefully flip everything over, maintaining the alignment. Use your pencil to trace around the inner edge of the canvas frame, marking directly onto the stabilizer.
Then create a second outline approximately 2-3 inches beyond the first line. This outer line marks where you’ll cut your fabric, providing enough material to wrap around the canvas edges.
Double-check that your embroidery remains properly centered within these guides.
Step 3: Cut Your Fabric
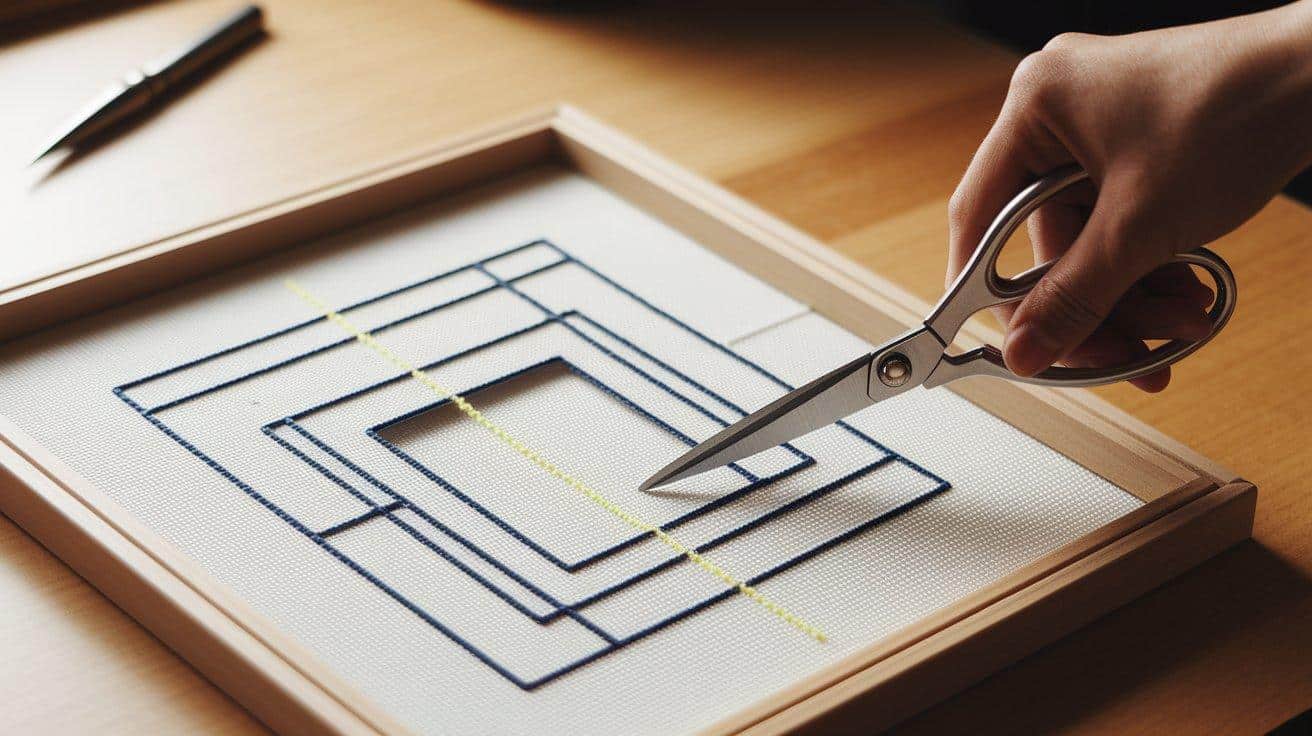
Remove the canvas and cut along the outer marked line using sharp scissors. Cut through both the fabric and stabilizer in one clean motion, maintaining even spacing from your marked line.
Your cut should create a larger square that extends beyond the canvas size. Next, cut just the stabilizer along the inner line, being careful not to cut through your fabric.
This creates a window that will help you align your work perfectly on the canvas.
Step 4: Trim the Corners
Cut small triangles from each of the four corners of your fabric square. Remove just enough material to reduce bulk when folding the fabric around the corners of the canvas frame.
This trimming prevents excessive material buildup at the corners, which could create unsightly bumps or prevent your embroidery from lying flat on the front of the canvas.
Clean corners contribute significantly to a professional-looking finished product.
Step 5: Position on Canvas
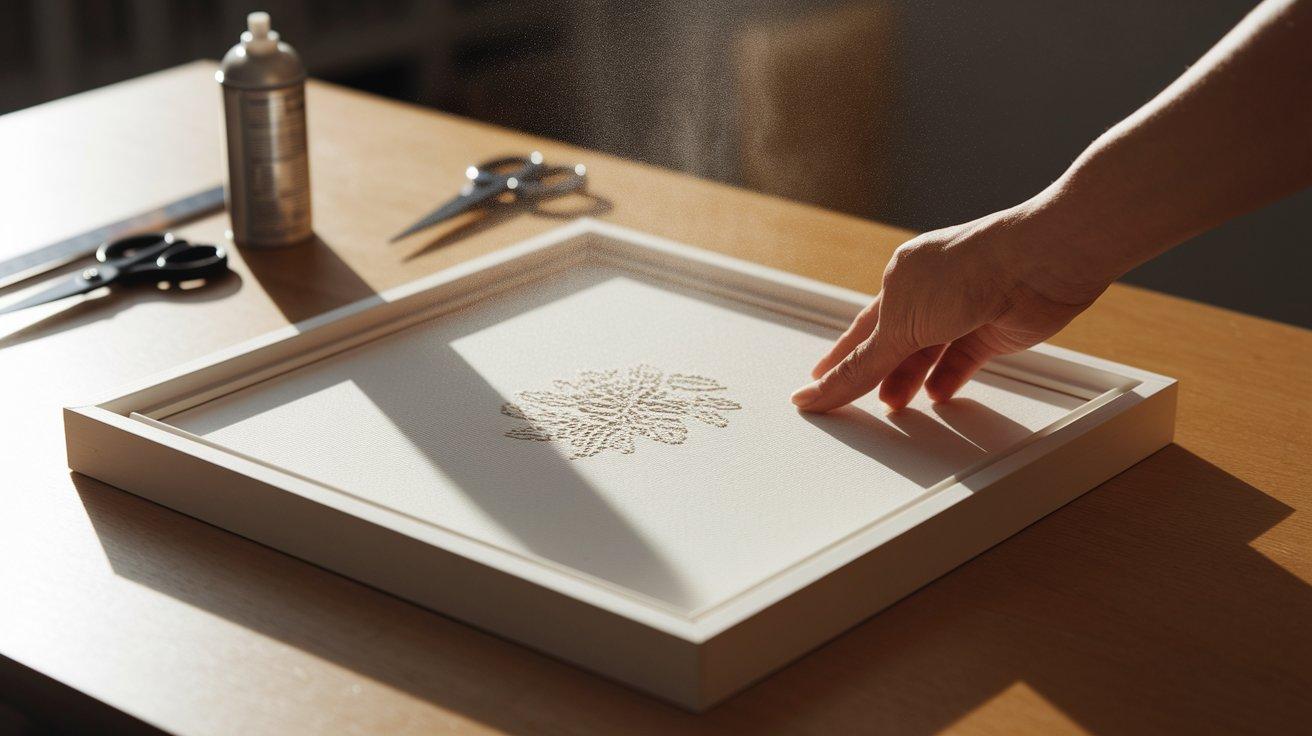
If using spray adhesive, lightly spray the front of your canvas and carefully place your embroidery onto it, using the inner cut line as your guide for perfect alignment.
Press the embroidery gently onto the canvas surface to temporarily secure it. Make any small adjustments needed to ensure your design is perfectly centered and straight.
The adhesive will hold everything in place while you work on securing the edges.
Step 6: Secure the Center Points
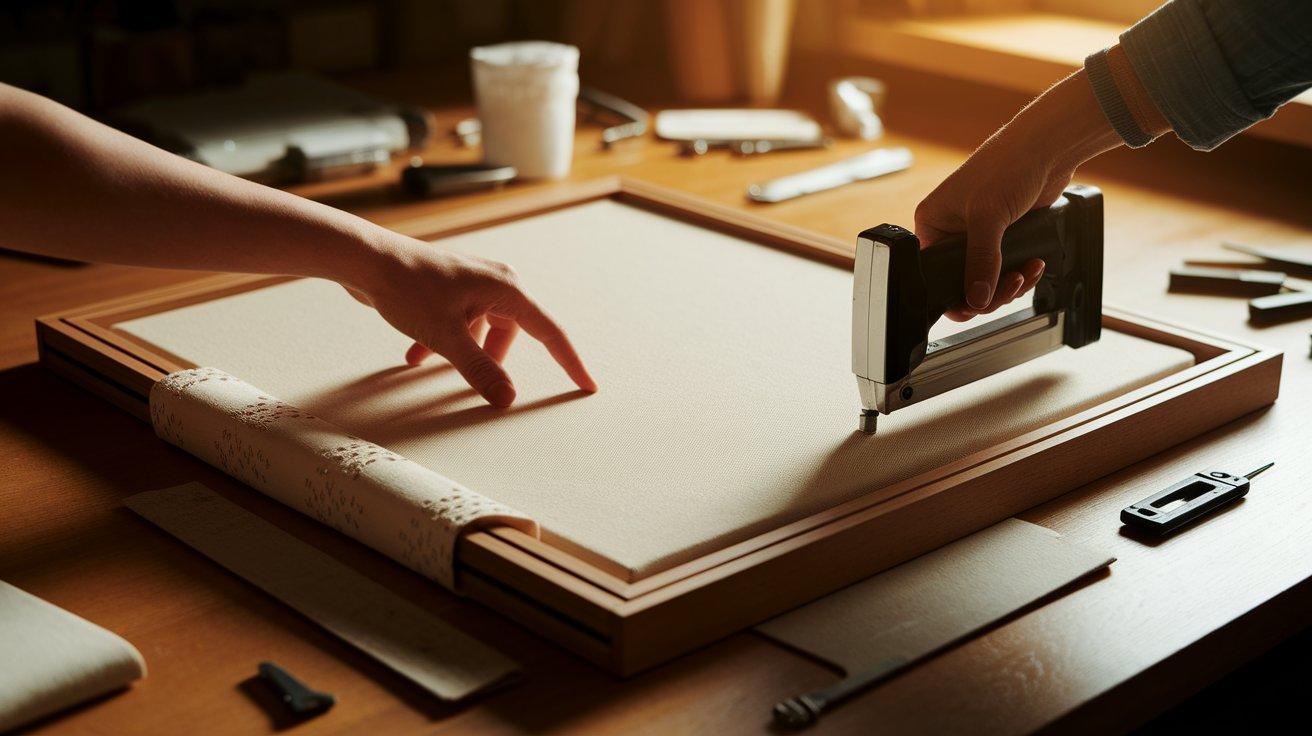
Turn the canvas over and begin securing your fabric with the staple gun. Start by placing one staple in the exact center of each side, working in pairs of opposite sides.
First, secure the top and bottom centers, pulling the fabric taut as you staple. Then secure the left and right centers, again pulling the fabric tight before stapling.
This center-first approach ensures your embroidery remains properly centered and prevents shifting during the remaining steps.
Step 7: Complete the Sides
Continue adding staples along each side, working from the center outward toward the corners. Place staples approximately one inch apart, consistently pulling the fabric tight before securing each one.
This methodical approach maintains even tension across your embroidery, preventing wrinkles or sagging. Work systematically, alternating between opposite sides to maintain balanced tension across the entire piece, ensuring your embroidery displays perfectly on the front.
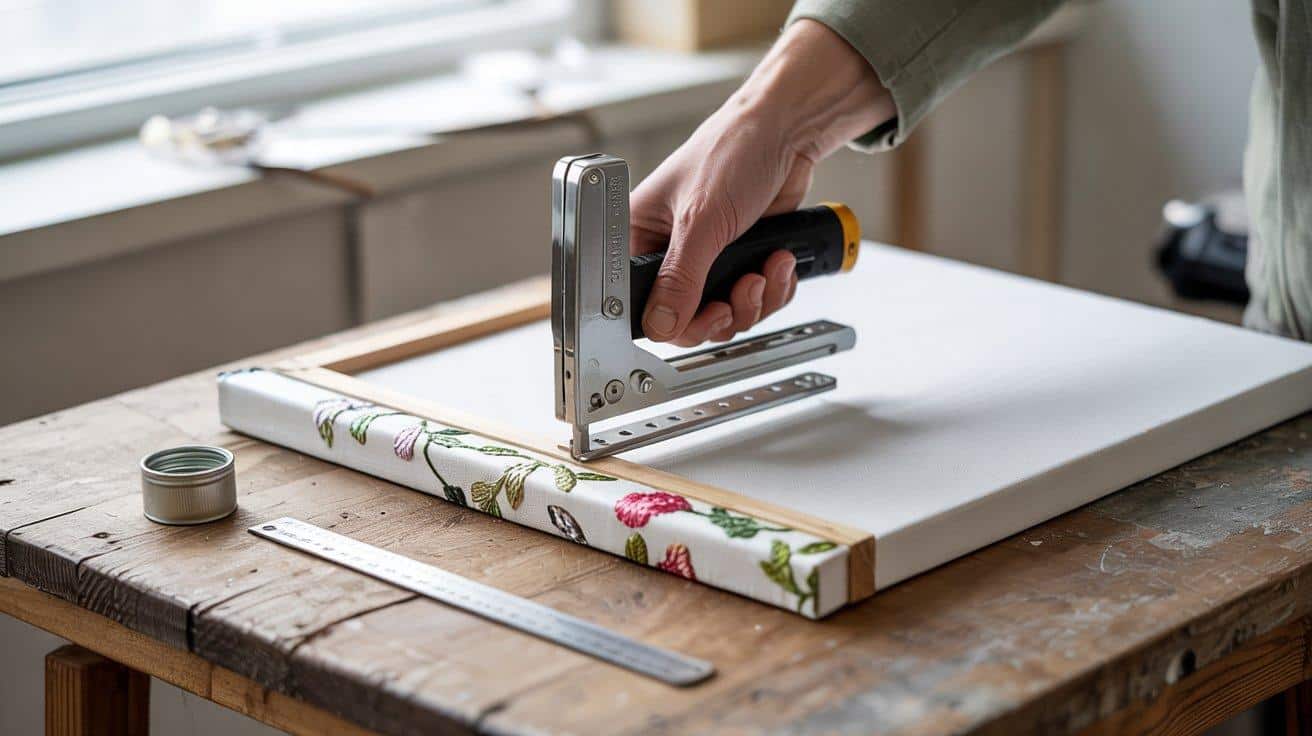
Step 8: Finish the Corners
For each corner, fold the fabric neatly, creating a clean diagonal fold similar to wrapping a present. Pull the fabric tight and secure with several staples, ensuring the corner remains sharp and well-defined.
Proper corner folding is essential for a professional finish, as these areas are most prone to bulging or unevenness. Take extra care with this step to achieve clean, crisp corners that complete your professional presentation.
Step 9: Final Inspection

Turn your canvas over to examine the front. Check that your embroidery lies flat and centered, with no wrinkles or unevenness.
If adjustments are needed, you can carefully remove the staples and reposition them as necessary before resecuring.
Once satisfied, your mounted embroidery is ready to display! The professionally finished piece showcases your needlework beautifully, making it a true work of art worthy of any wall space.
Video Tutorial
I want to give credit to John Deer’s Embroidery Legacy for their informative video, which served as a reference for this guide.
Embroidery Mounting Prep: Quick & Clean
1. Freshen Up
Gently hand wash your embroidery using mild, dye-free soap in cool water. Lay it flat between clean towels to blot out moisture—never wring or twist. Press while damp from the back side using a pressing cloth. Avoid direct sunlight and heat to prevent fading or fabric distortion.
2. Test the Threads
Before washing, use a damp cotton swab to test each thread for color bleeding. If any color runs, skip washing and treat the area with a textile fixative like Retayne. Stick with high-quality threads such as DMC, which are typically colorfast but always worth testing.
3. Stabilize the Base
If your fabric is flimsy or stretchy, add body with a light spray starch or a soft fusible stabilizer. This helps it hold shape without adding bulk. Choose lightweight options and fuse gently from the back to avoid damaging your stitches.
4. Clean the Backstage
Trim off stray threads and flatten any bulky knots to tidy up the reverse side. For light or translucent fabrics, consider adding a thin cotton or muslin backing to hide the threadwork and protect it from damage during mounting or display.
5. Store Smart
Until you’re ready to mount, store embroidery flat with acid-free tissue between layers. Avoid folding, which can leave creases, and steer clear of plastic—use breathable materials like cotton bags or archival boxes to keep moisture out.
Creative Ways to Display Your Embroidery
If you’re looking to go beyond the traditional stretched canvas display, here are more inspiring and stylish ways to highlight your embroidery work.
1. Shadow Box Framing
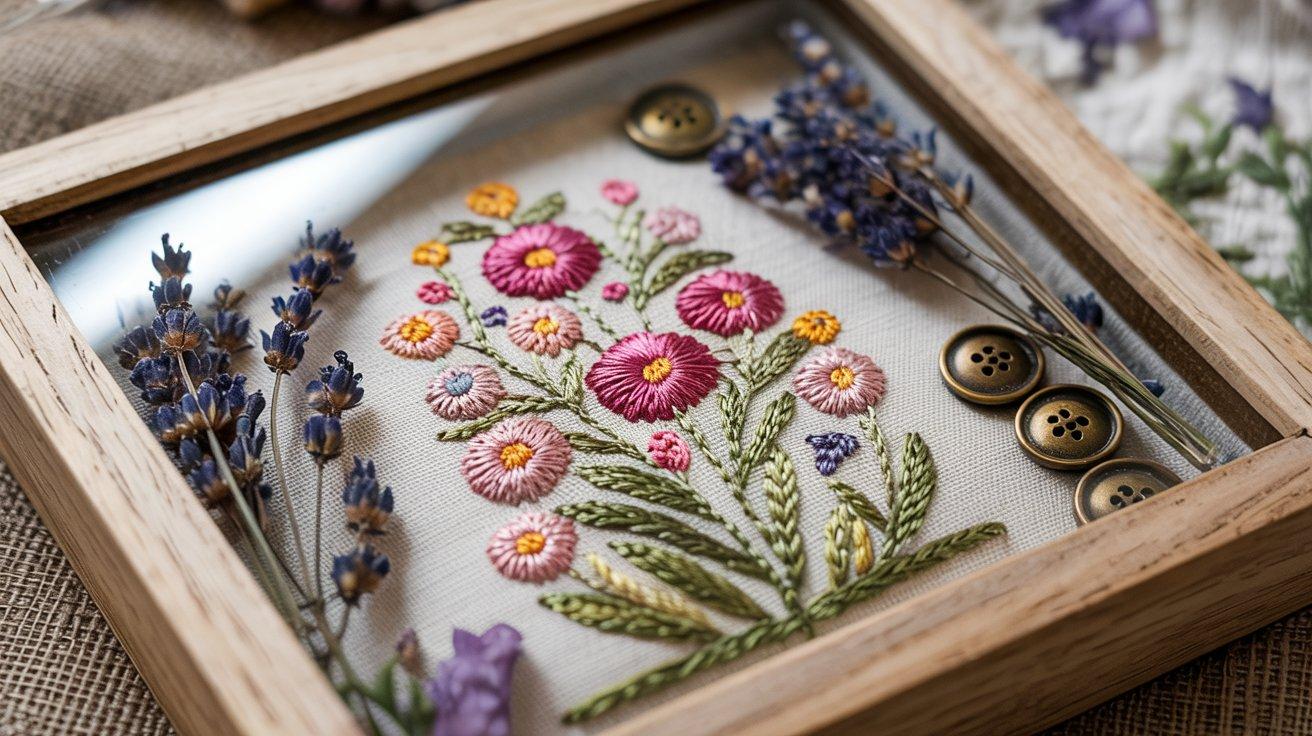
Turn your embroidery into a miniature exhibit by placing it inside a shadow box frame. This method not only protects your stitching behind glass but also provides space to layer with keepsakes, buttons, or dried florals, allowing you to tell a deeper story.
It’s perfect for textured embroidery, adding an artistic depth to your display.
2. Embroidery Hoop Gallery Wall
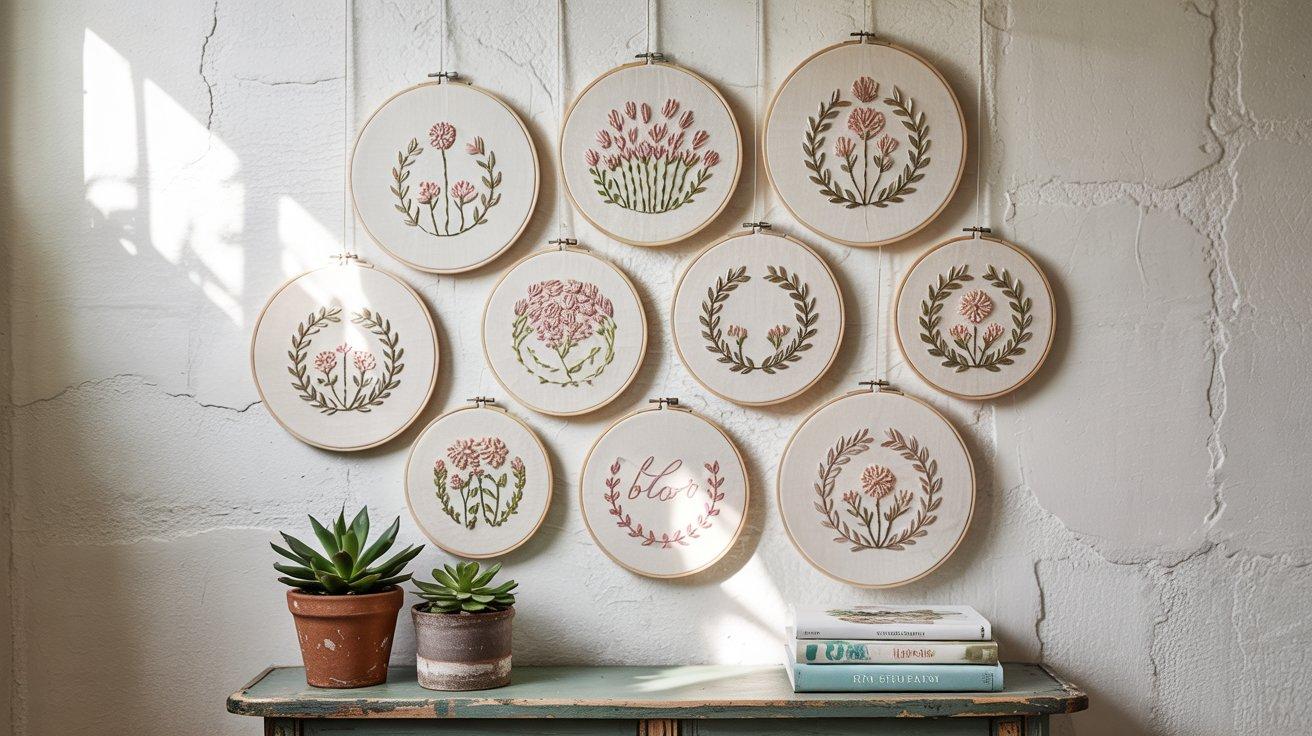
Transform your wall into a curated art collection using embroidery hoops. Group different hoop sizes together for a dynamic look and experiment with various themes, such as floral, seasonal, or quotes.
This approach keeps things flexible—you can easily swap or rearrange pieces as you create new ones.
3. Fabric Banners and Wall Hangings
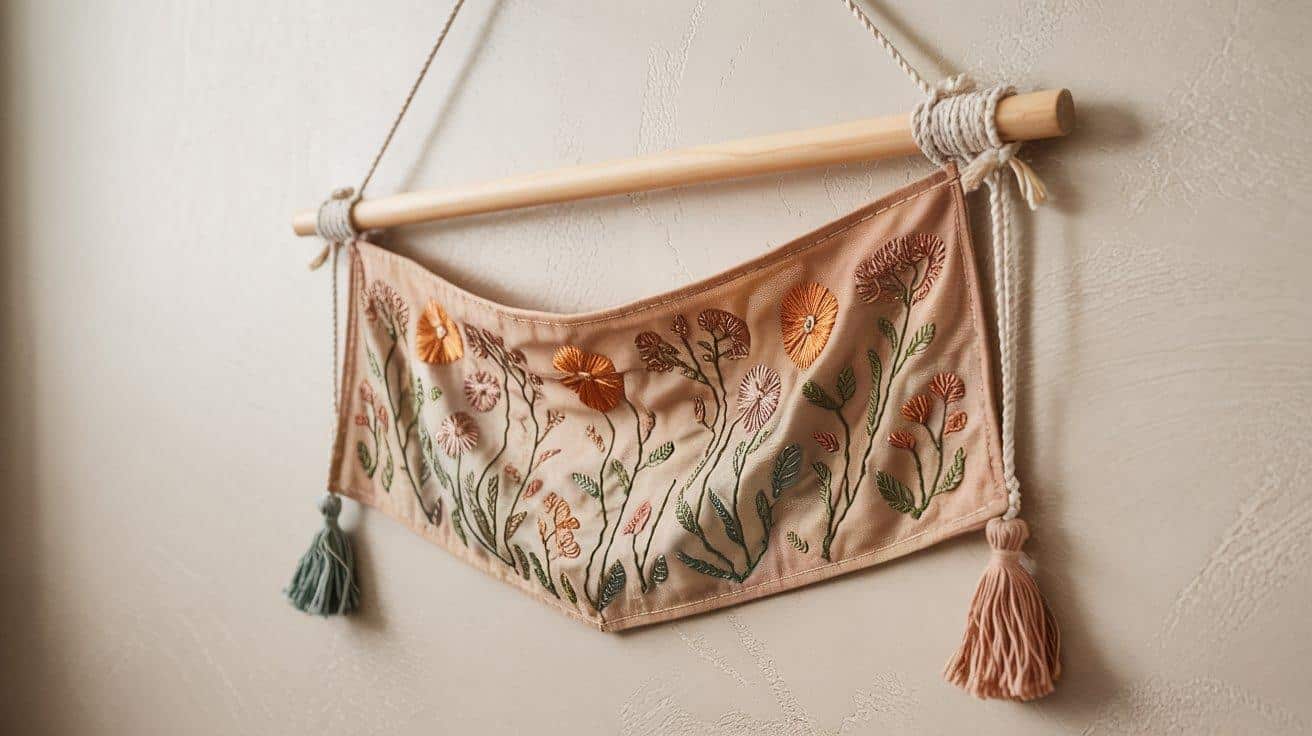
For a relaxed, bohemian feel, stitch your embroidery onto a larger piece of fabric to create a hanging banner. Please attach it to a dowel rod with string or twine and let it drape naturally.
Adding tassels or fringe gives it extra texture and charm. This style works especially well for vertical designs and statement pieces.
4. Functional Home Décor
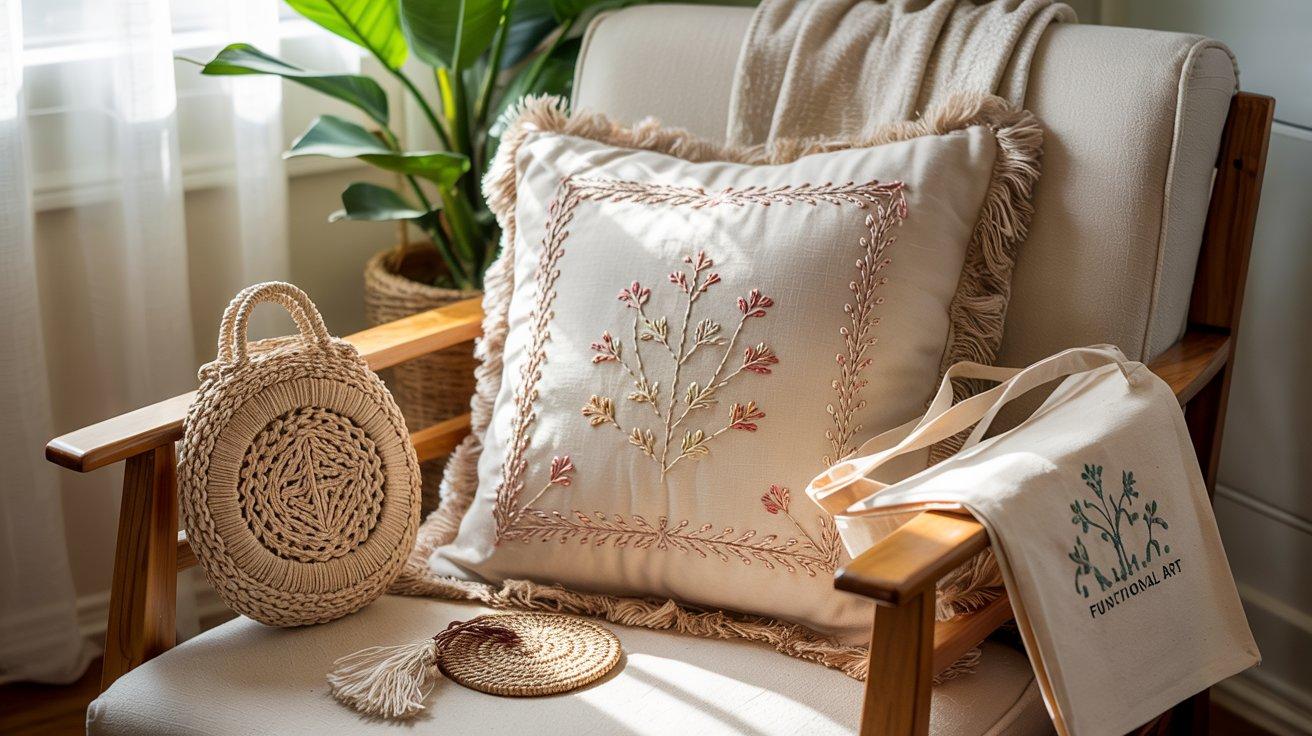
Incorporate your embroidery into everyday items that double as décor. Stitch onto cushion covers, storage pouches, or tote bags to create useful pieces that showcase your art.
These functional formats enable your work to shine in everyday life, offering thoughtful, handmade gifts with a personal touch.
Common Mistakes to Avoid When Mounting Embroidery
| Mistake | Consequence | Fix |
|---|---|---|
| Dull scissors | Jagged edges | Use sharp, fabric scissors; sharpen regularly |
| Too little fabric overlap | Can’t stretch properly | Allow 1-2 inches extra on all sides |
| Uneven tension | Wrinkles in design | Work from the center outward; check tension |
| Not trimming corners | Bulky corners | Cut at a 45° angle; use the “hospital corner” technique |
| Staples are too far apart | Sagging fabric | Space staples 1-2 inches apart |
| Weak staples | Loose over time | Use proper framing staples, not office supplies |
| Dirty hands | Stains | Wash hands; consider cotton gloves |
| No measuring | Off-center display | Mark centers of embroidery and board |
| Rushed folding | Messy corners | Use pins temporarily; secure sections gradually |
| Direct sunlight | Color fading | Use UV glass; display away from sunlight |
Maintenance & Care Tips for Mounted Embroidery
- Dust Prevention – Gently remove dust using a soft makeup brush or a microfiber cloth. For deeper cleaning, use a vacuum with a brush attachment on low suction, hovering slightly above the fabric to clean the surface gently. Regular dusting keeps colors vibrant and threads clean. Consider framing behind glass for added protection.
- Light Exposure – Avoid direct sunlight to prevent fading, especially for vibrant or naturally dyed threads. Display in shaded areas or use UV-filtering glass. Rotate pieces occasionally to ensure even light exposure.
- Humidity Control – Maintain a moderate humidity level (40–60%) to prevent mold growth and thread brittleness. Use dehumidifiers or humidifiers as needed, and avoid placing pieces in areas with high humidity, such as bathrooms or kitchens. A humidity monitor helps preserve valuable works.
- Handling Guidelines – Always hold by the canvas edges, not the stitched surface. Clean, dry hands are essential. For transport, wrap the item in acid-free tissue and place it in a sturdy container to protect the stitches.
- Smart Storage – Store flat with acid-free tissue between items to prevent damage. Use archival boxes, avoid damp or hot areas, and label each piece clearly. Inspect periodically for pests or damage, and open the windows occasionally to let in fresh air.
Conclusion
Mounting your embroidery on canvas upgrades your needlework into gallery-worthy wall art that commands attention and admiration.
This straightforward technique converts hours of detailed stitching into a professionally displayed piece that preserves and showcases your creativity.
Whether you keep these mounted pieces for your collection or gift them to appreciative friends and family, the professional presentation adds significant value to your handcrafted work.
The clean lines and professional finish of canvas-mounted embroidery draw attention to the intricacy of your stitches, providing a contemporary display option that complements any décor style.
With minimal materials and some careful attention to detail, you can create lasting art pieces that celebrate your embroidery skills.
Frequently Asked Questions
How Do People Display Their Embroidery?
People display their embroidery by mounting it on canvas, framing it in hoops or shadow boxes, changing it into wall hangings or banners, or incorporating it into functional items such as pillows, bags, or table linens.
What to Do with Finished Embroidery Projects?
You can frame finished embroidery, mount it on canvas, turn it into wall art, sew it onto pillows or bags, create banners, gift it, or store it in a portfolio for preservation.
What Can I Use to Cover Embroidery?
You can cover embroidery with glass in a frame, fabric backing, clear vinyl, or use a shadow box for protection while keeping it visible and dust-free.
