
Looking at that empty wall space and thinking it could work harder for you? Built-in cabinets might be the perfect solution.
Custom cabinets can change any room from ordinary to organized, adding both storage and style. While hiring a pro costs thousands, doing it yourself saves money and gives you exactly what you want.
Don’t worry if you’ve never built anything before. With the right tools, materials, and patience, you can create cabinets that appear to have always been there.
This guide breaks down the process into simple steps, from measuring to applying the final coat of paint.
Ready to build something great? Let’s get started!
How to Plan Your Built-In Cabinet Project Like a Pro
A well-thought-out plan will set the foundation for success before you even pick up a single tool. This section guides you through the key steps to take before installation, ensuring your built-ins fit perfectly, function well, and appear as if they were always meant to be there.
-
Measure & Plan Accurately: Measure your wall’s height, width, and depth at multiple points to ensure accuracy and identify any uneven areas or obstacles.
-
Select the Right Wall and Layout: Choose a flat, low-traffic wall that is free of obstructions, such as doors. Mark stud locations early and account for vents, outlets, or switches.
-
Optimize Cabinet Size: Choose a cabinet depth (12–24″) based on your space, and consider full-height designs for a built-in look in larger rooms.
Materials and Tools Required
Assembling a coffered ceiling requires the right supplies and equipment.
Here’s what you’ll want to gather before starting your project to ensure you have everything needed for each step of the installation.
Tools Checklist with Estimated Cost
The proper tools make this project much more manageable and help create better results. Ensure you have these items on hand before beginning work on your ceiling.
| Category | Tool | Purpose | Estimated Cost |
|---|---|---|---|
| Power Tools | Drill & drill bits | Drilling holes, attaching screws | $50 – $150 |
| Hand Tools | Stud finder | Locate wall studs | $15 – $30 |
| Tape measure | Measure the wall and cabinet placement | $10 – $25 | |
| Level | Keep everything straight and aligned | $20 – $50 | |
| Caulking gun | Apply caulk for gaps and finishing | $5 – $15 | |
| Finishing Tools | Sandpaper or sanding block | Smooth out surfaces before painting | $5 – $20 |
| Tack cloth | Wipe off dust before painting | $3 – $8 | |
| Painting Tools | Paintbrush or foam roller | Smooth paint application | $5 – $25 |
Materials Checklist with Estimated Cost
Getting the correct materials is the first step to creating a coffered ceiling that looks professional. This list covers all the items you should purchase before beginning your work.
| Category | Material | Purpose | Estimated Cost |
|---|---|---|---|
| Cabinets | IKEA Havsta or prefab units | Base structure for your built-ins | $300 – $800+ per unit |
| Framing Wood | 2×4 boards | Build a base and add height/support | $20 – $50 |
| Hardware | Screws & wall anchors | Secure cabinets to the frame and the wall | $10 – $30 |
| Finishing | Crown molding & trim | Creates a seamless built-in look | $100 – $400 |
| Wood filler & caulk | Fill nail holes, seal seams | $10 – $25 | |
| Painting | Primer (e.g., Zinsser B-I-N) | Prepares the surface for painting | $20 – $40 |
| Trim paint (e.g., BM Advanced) | Durable cabinet finish | $40 – $80 per gallon |
How to Create Beautiful Dining Room Built-In Cabinets
Upgrade your dining space with stylish built-in cabinets. This step-by-step guide shows you how to plan, install, and finish them for a clean, custom look.
Step 1: Choose the Right Cabinets
Start your project with smart planning by selecting cabinets that fit your wall size and storage needs. The right depth, material, and structure make all the difference in both function and finish.
- Measure your wall and select cabinet units that balance depth, height, and traffic space.
- Flip cabinets upside down for a cleaner finish and easier alignment with the ceiling and floor. Choose solid wood or paintable surfaces and flat backs for easy painting and wall attachment.
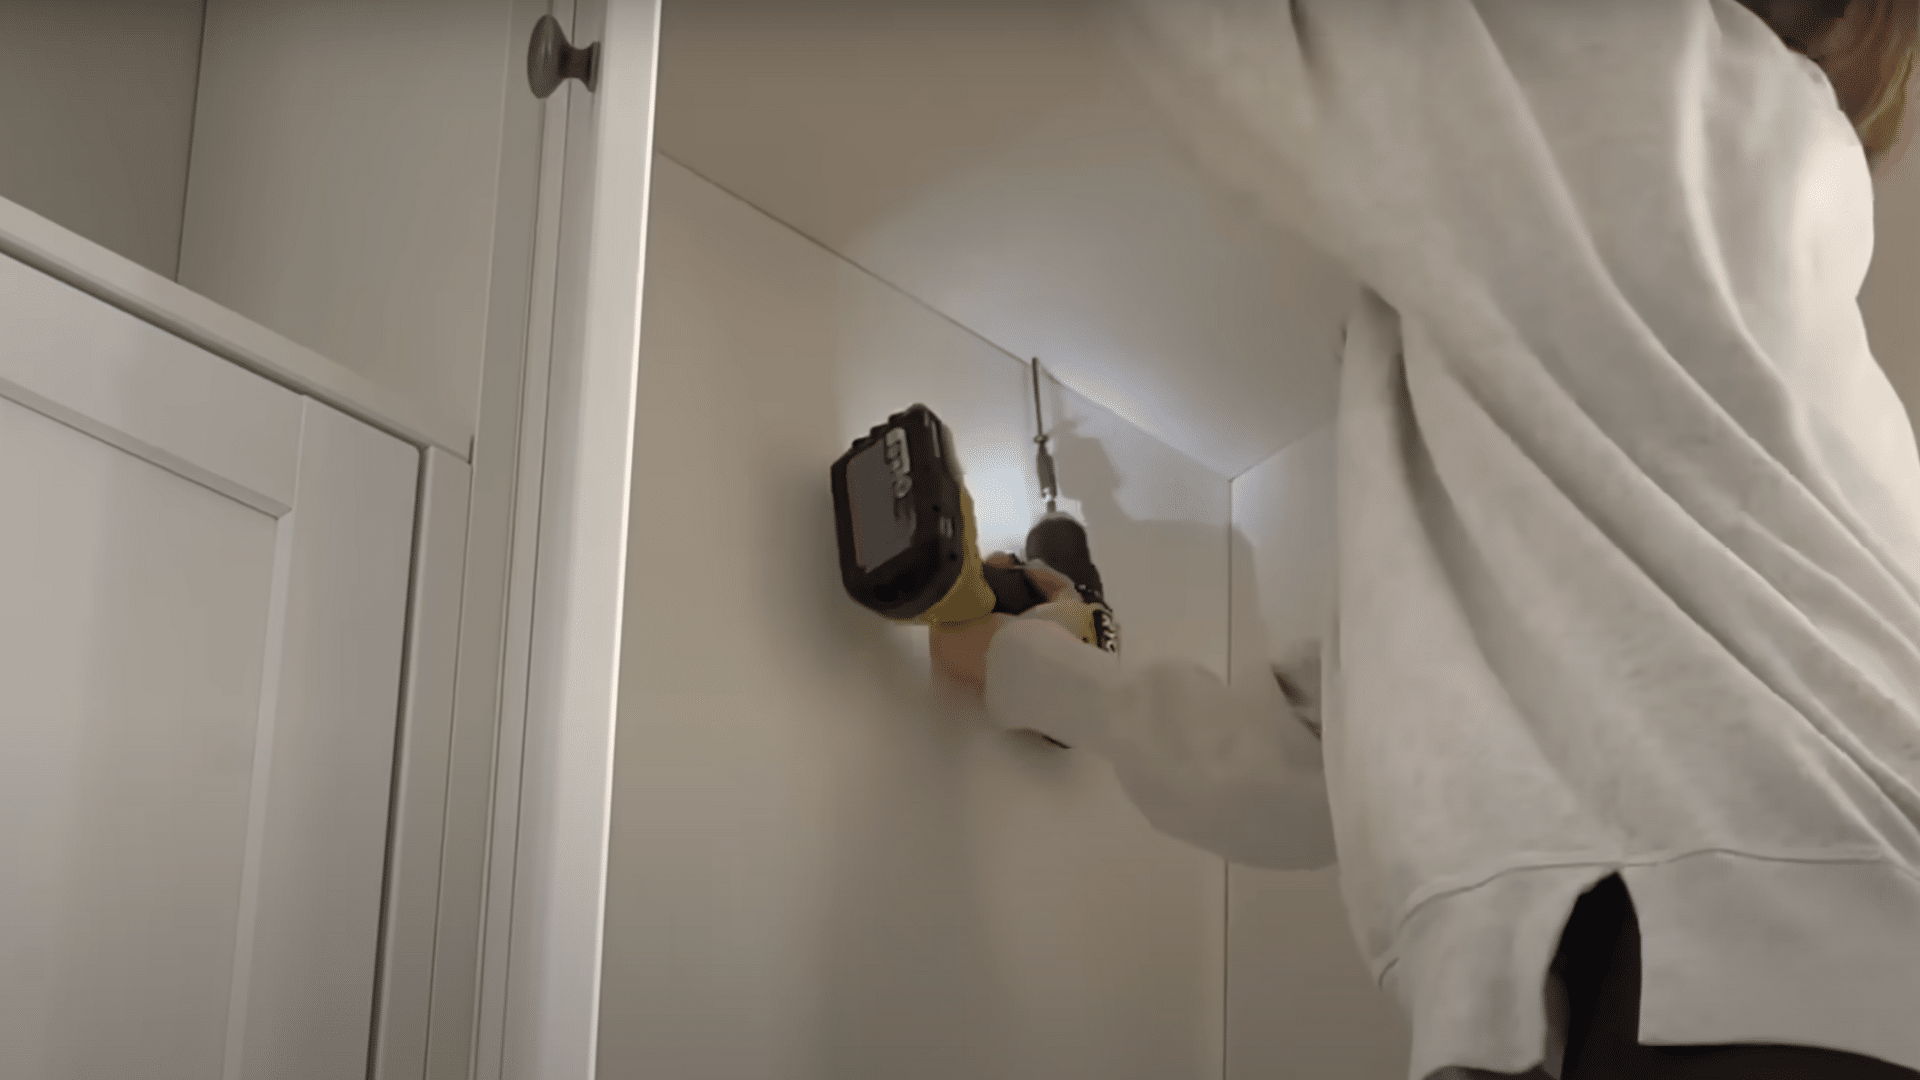
Step 2: Prepare the Wall
A smooth, clean wall is essential for a secure and polished cabinet install. Take the time to prepare the area and map out your layout before mounting anything.
- Remove the baseboards and clean the wall and floor to prepare for the installation of flush cabinets.
- Use a stud finder to mark the stud positions, and sketch your layout using a pencil and a level. Dry-fit the cabinets temporarily to check for proper fit and spacing before attaching them.
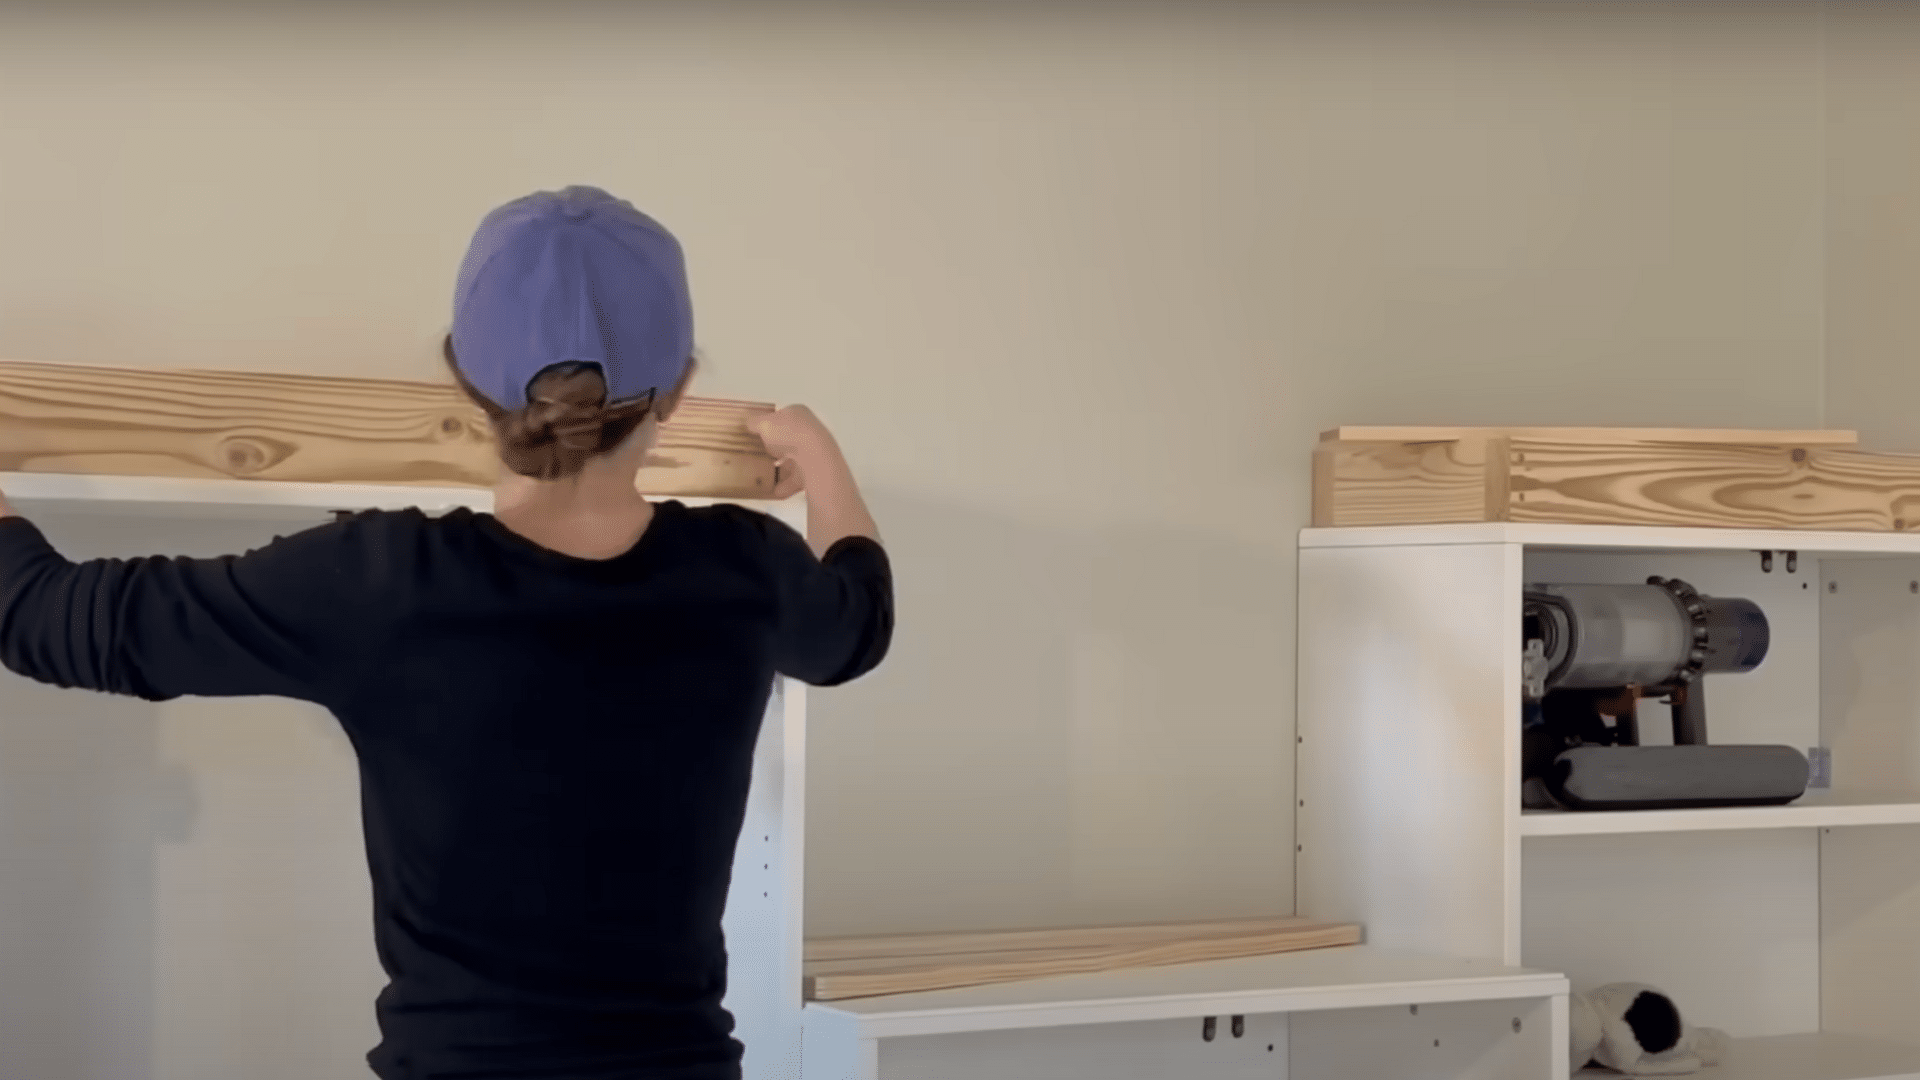
Step 3: Build a Secure Frame
A solid foundation ensures your cabinets remain level and secure for the long run. Construct a frame that supports weight and aligns perfectly with your design.

- Build a level base frame using 2x4s to lift and align cabinets to your desired height.
- Anchor the frame into wall studs using long wood screws and add vertical spacers if needed. Install furring strips or plywood backing for extra support and leveling.
Step 4: Secure and Stack Cabinets
This is where the structure begins to take shape. Stack, align, and fasten your cabinets carefully for a seamless, built-in appearance.
- Align and clamp cabinets side by side for a seamless look before fastening.
- Screw cabinets into both the 2×4 base and wall studs for strong support. Add corner braces behind hidden areas if extra stability is needed.
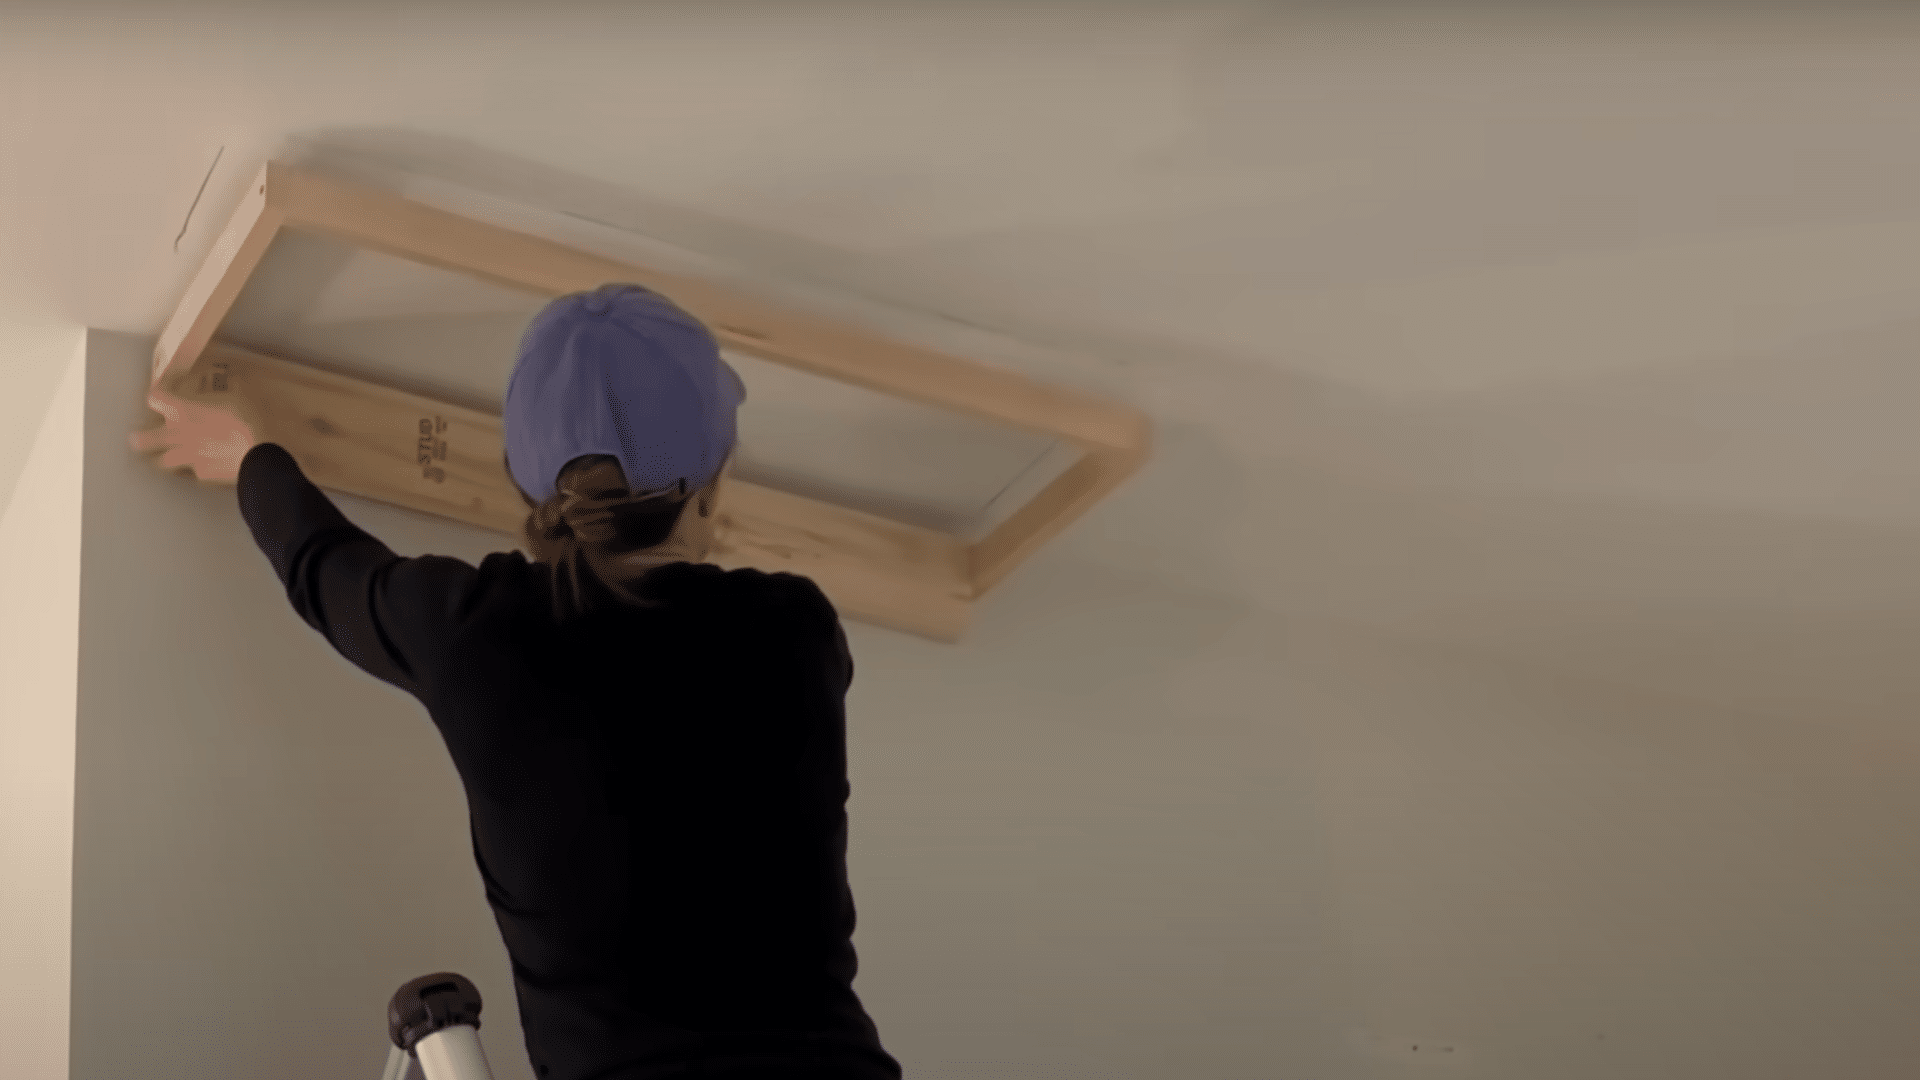
Step 5: Hide the Gaps
Now it’s time to make it look custom. Fill those awkward spaces with molding and trim to elevate your cabinet wall to a designer look.
- Install crown molding on top and baseboards at the bottom to close open gaps. Use vertical trim or fluted molding to hide seams and exposed framework.
- Secure the trim with wood glue and finish with nails, mitering the corners for clean edges.
Step 6: Detail the Sides and Edges
Don’t forget the finishing details. Sides and edges also require attention for a clean, cohesive, and professional outcome.
- Cover exposed cabinet sides with picture molding or panel trim for a finished look.
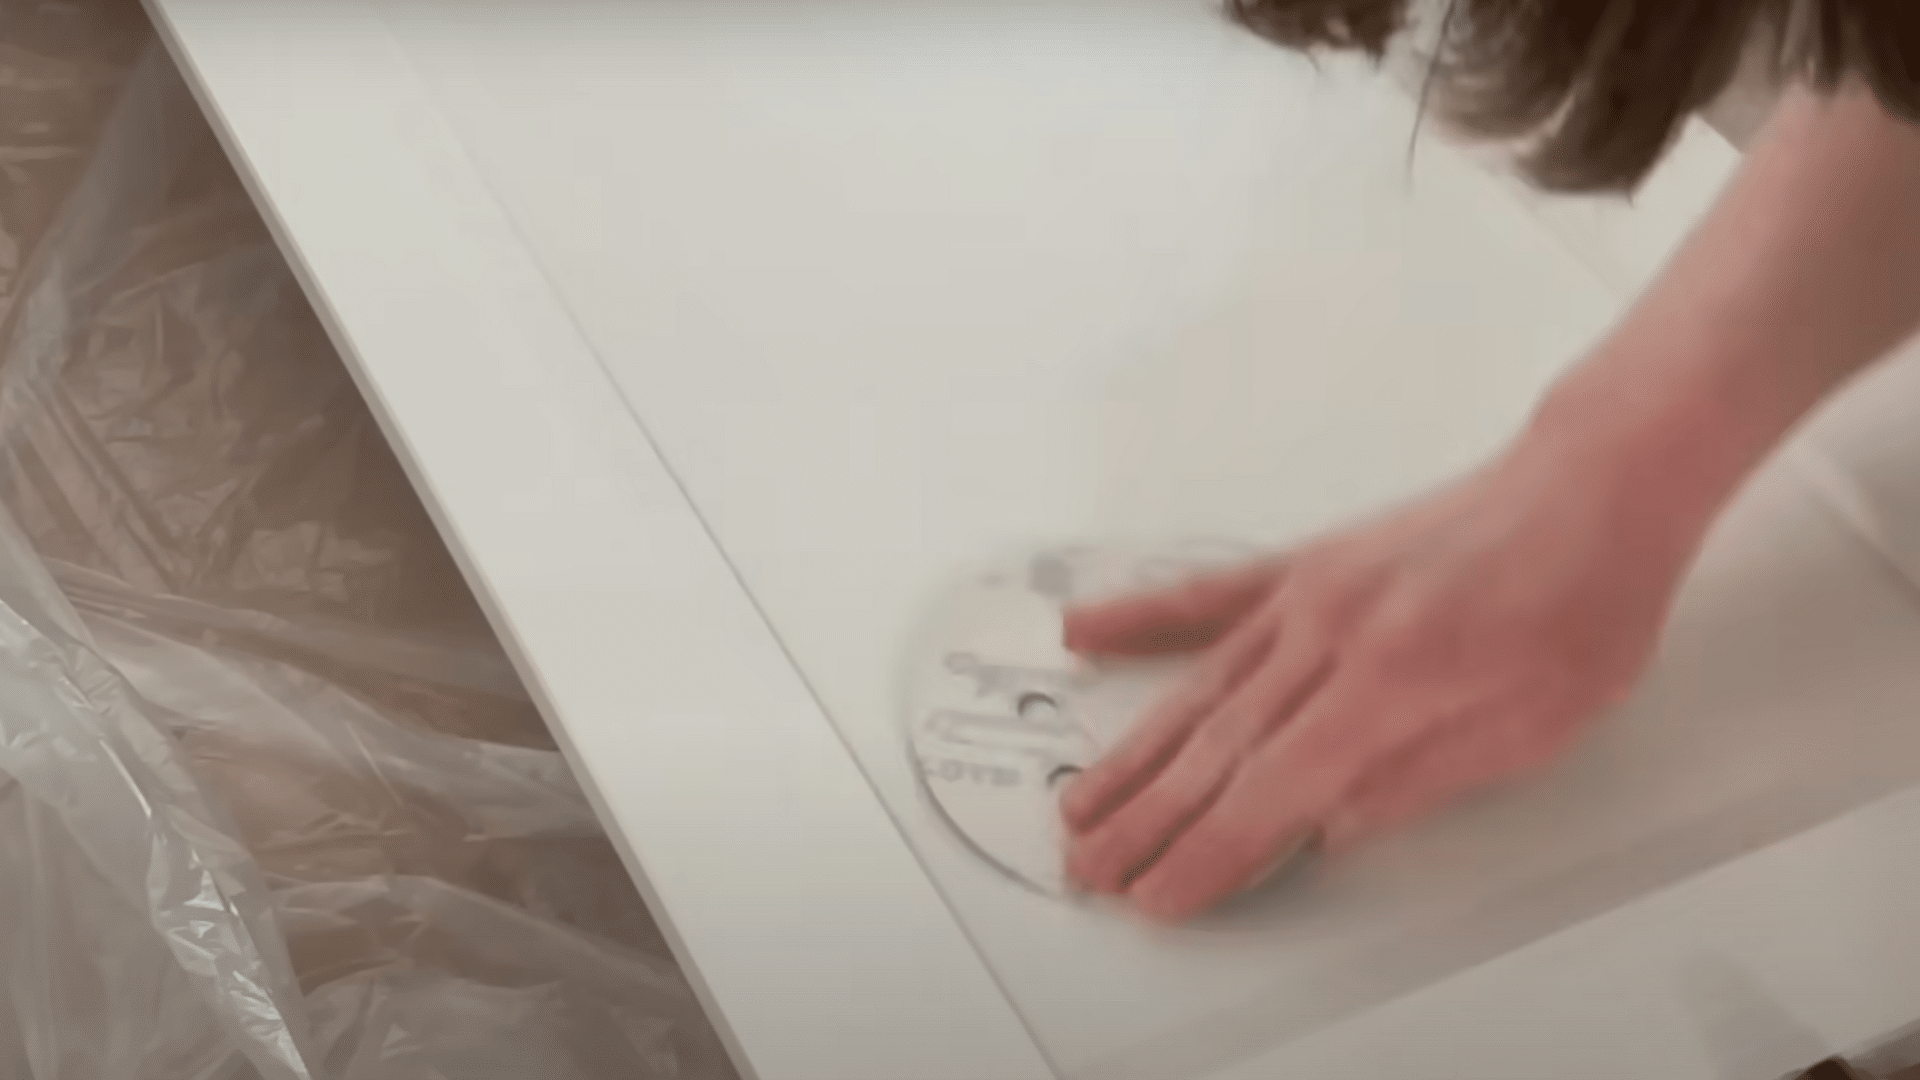
- Fill seams and cracks with caulk or wood filler, then smooth them out with sandpaper. Prime raw edges of MDF or wood to prep for even paint coverage.
Step 7: Prime and Paint
Color brings it all together. Use the right primer and painting method to achieve a smooth, durable finish that complements your style.
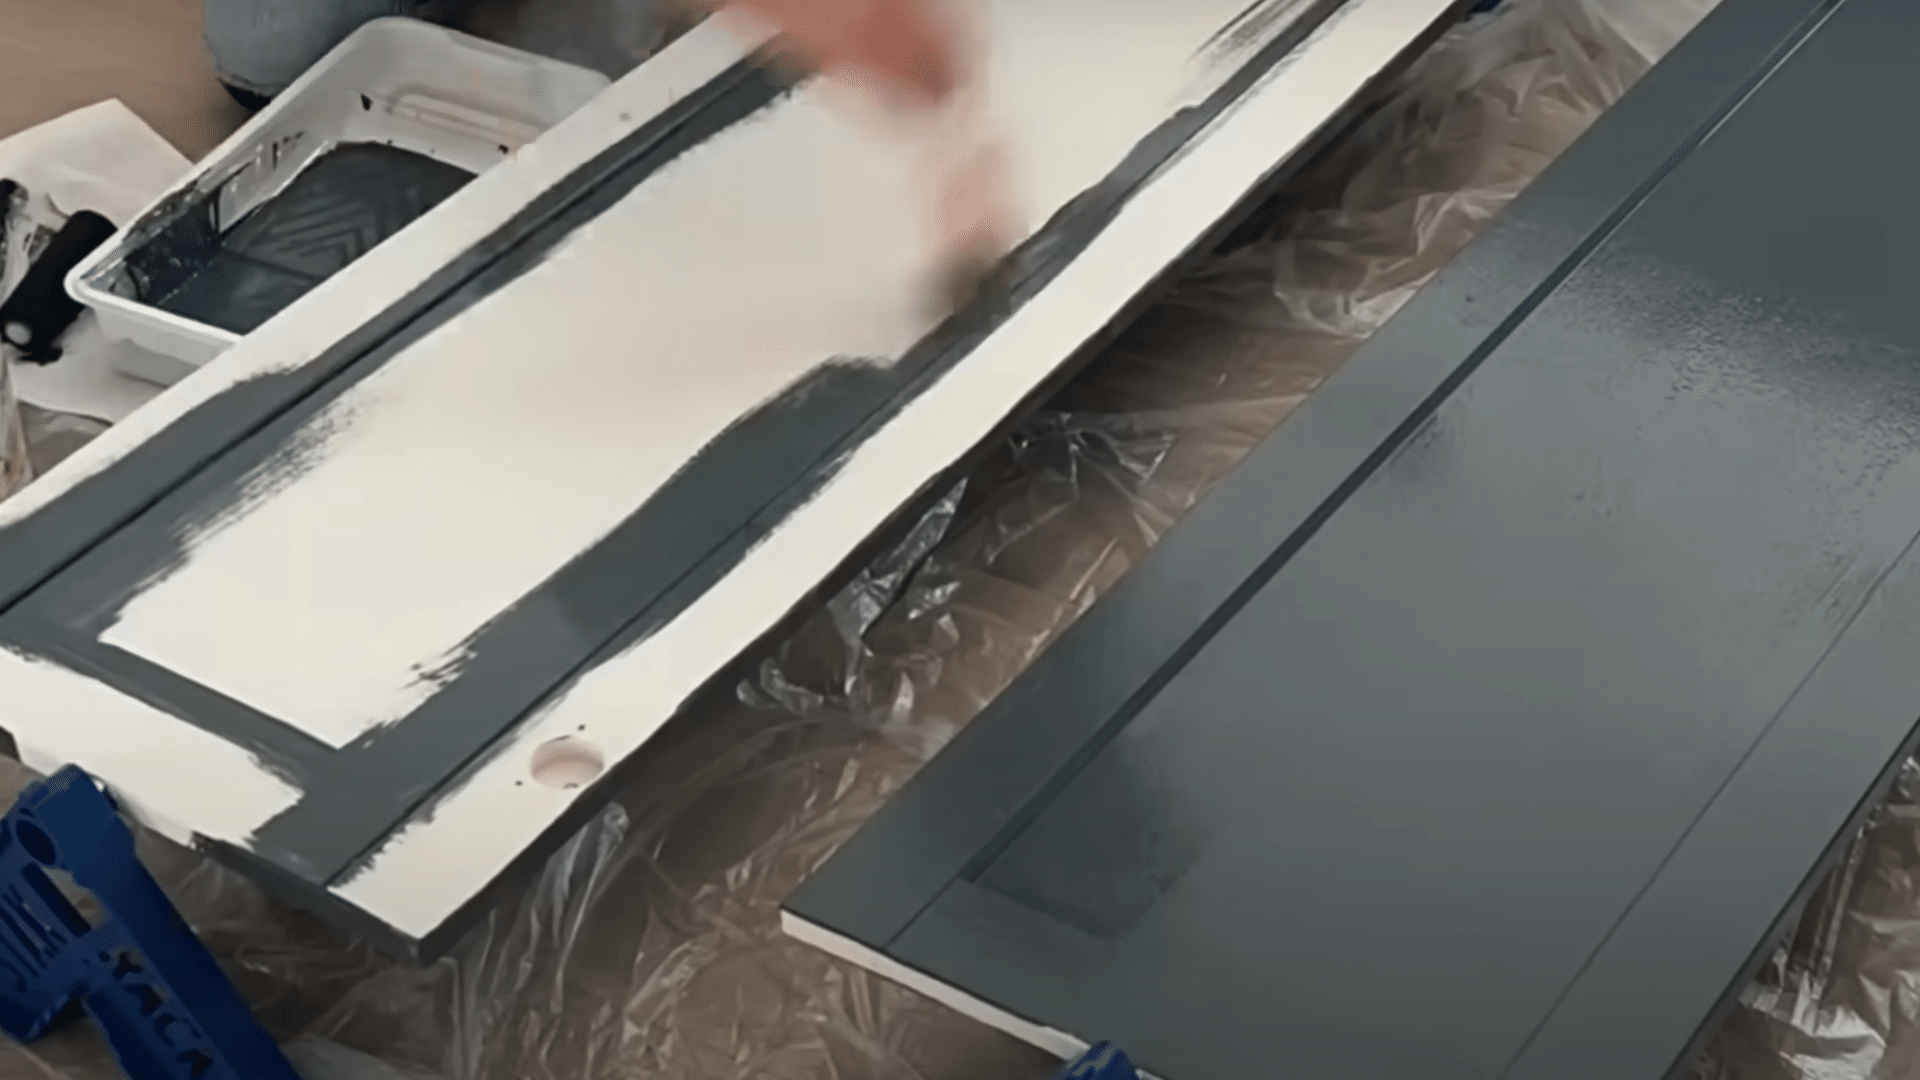
- Apply a high-bond primer, such as Zinsser B-I-N, and lightly sand after it has dried.
- Wipe all surfaces with tack cloth before applying 2–3 thin coats of trim paint. Allow each coat to dry completely between applications to prevent streaks or bubbles.
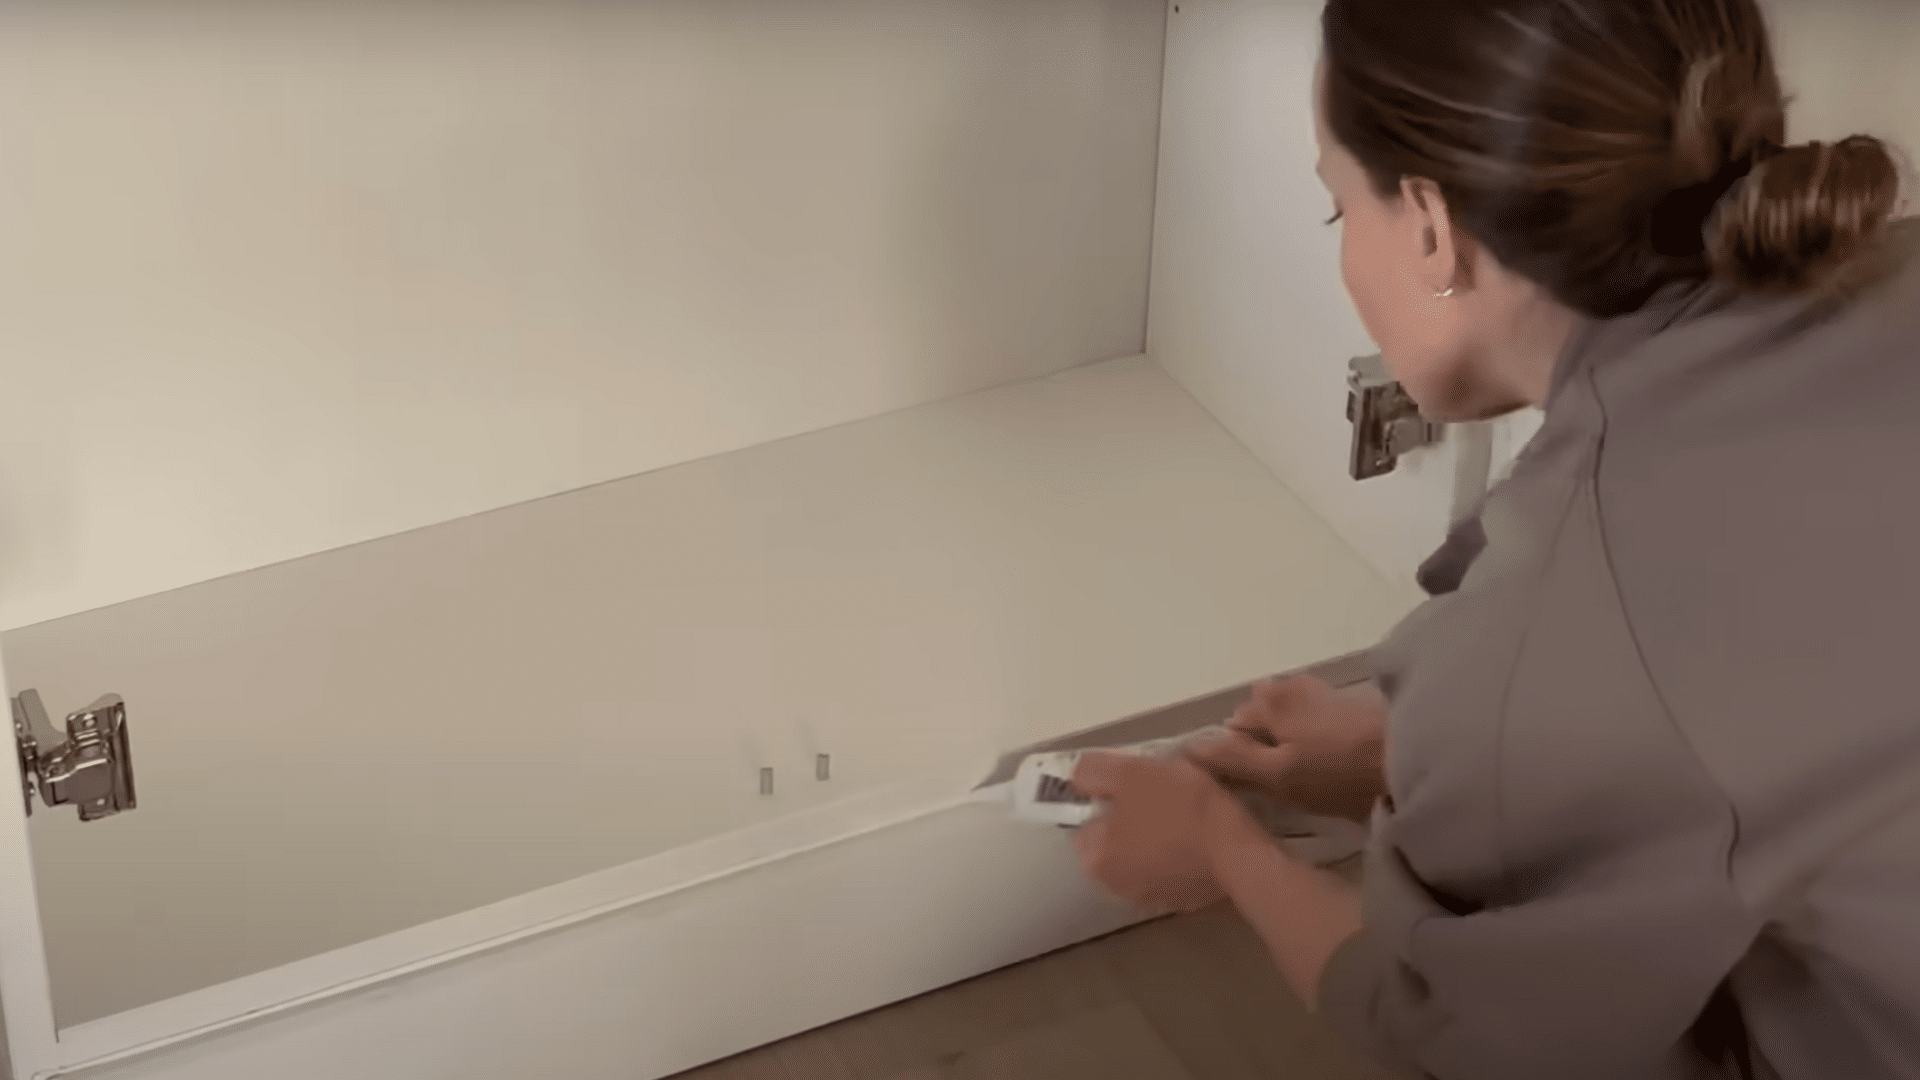
Step 8: Install Doors and Hardware
Doors and hardware add the final touch of functionality and flair. Align them precisely to ensure everything works and looks great.
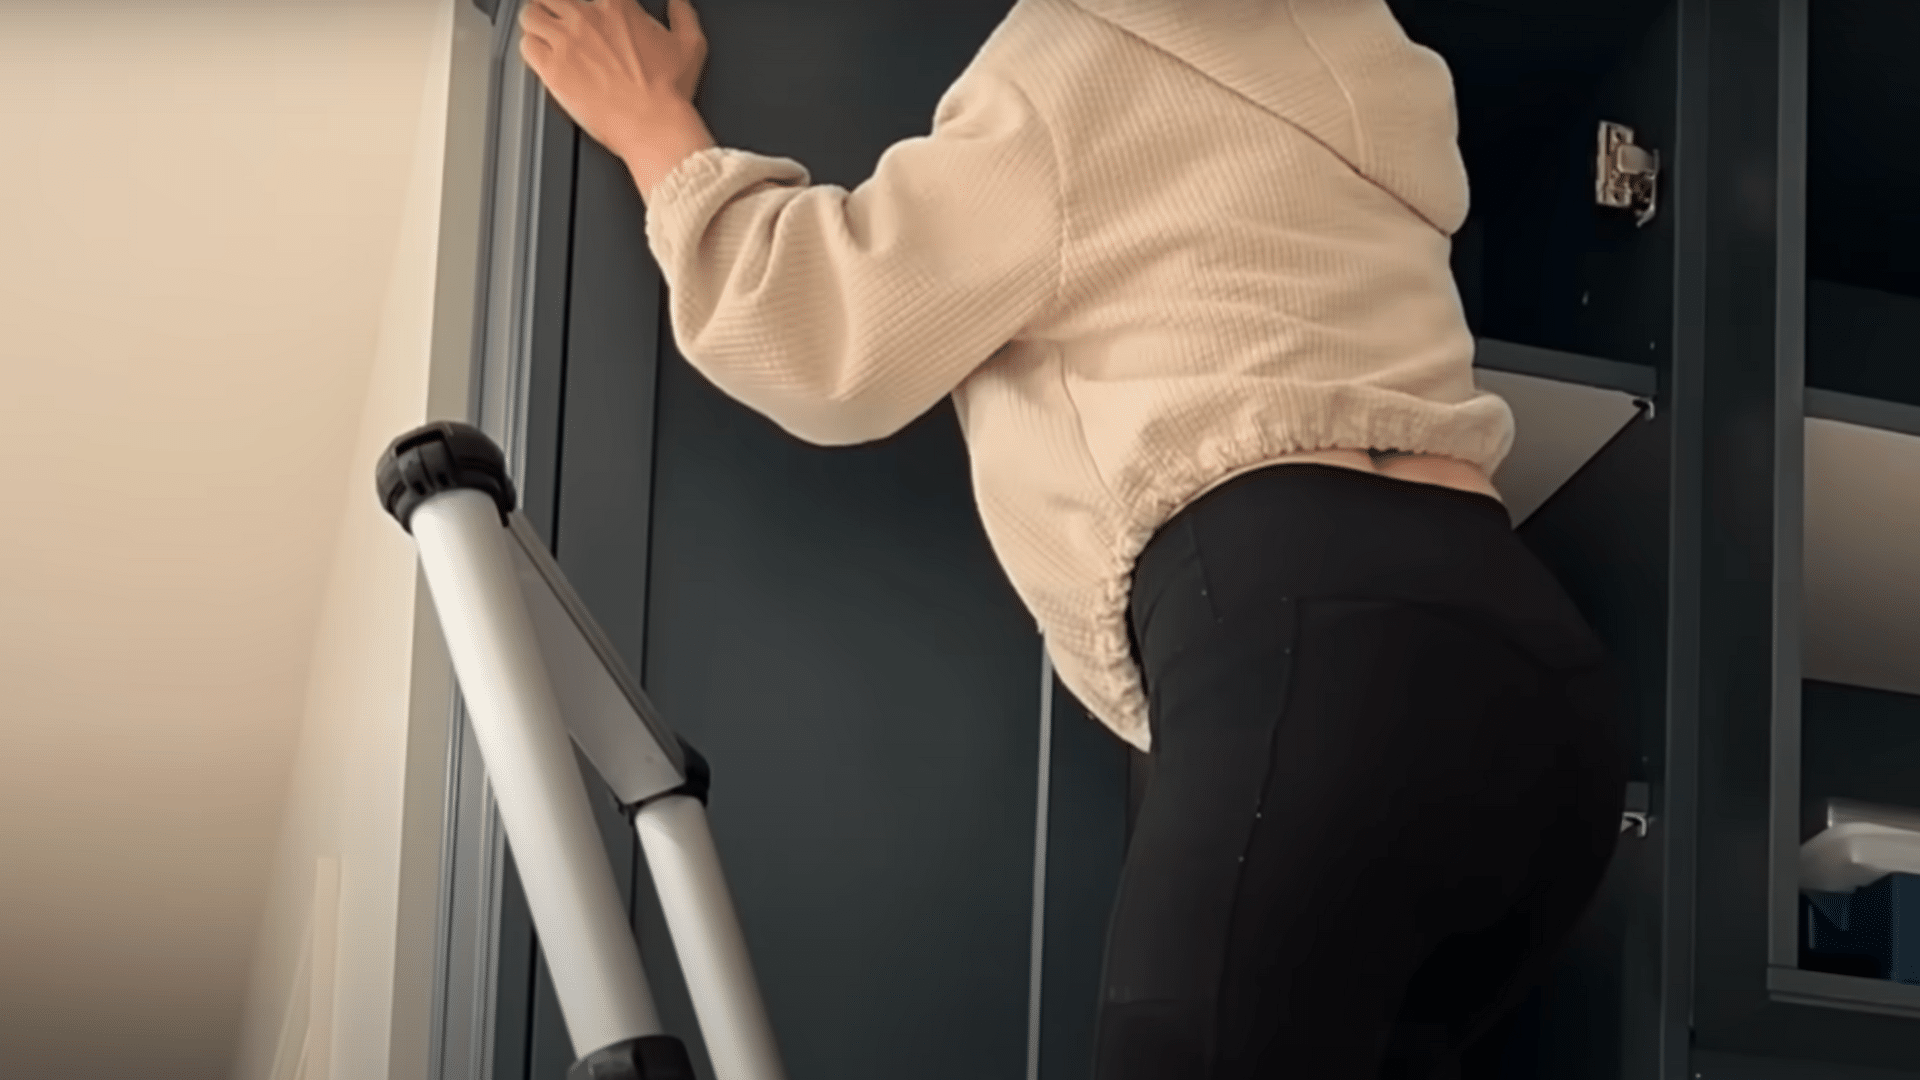
- Follow the manufacturer’s instructions to attach doors, adjusting hinges as needed.
- Use a hardware template for consistent knob/pull placement across all doors. Test every door for smooth motion and tighten any loose screws.
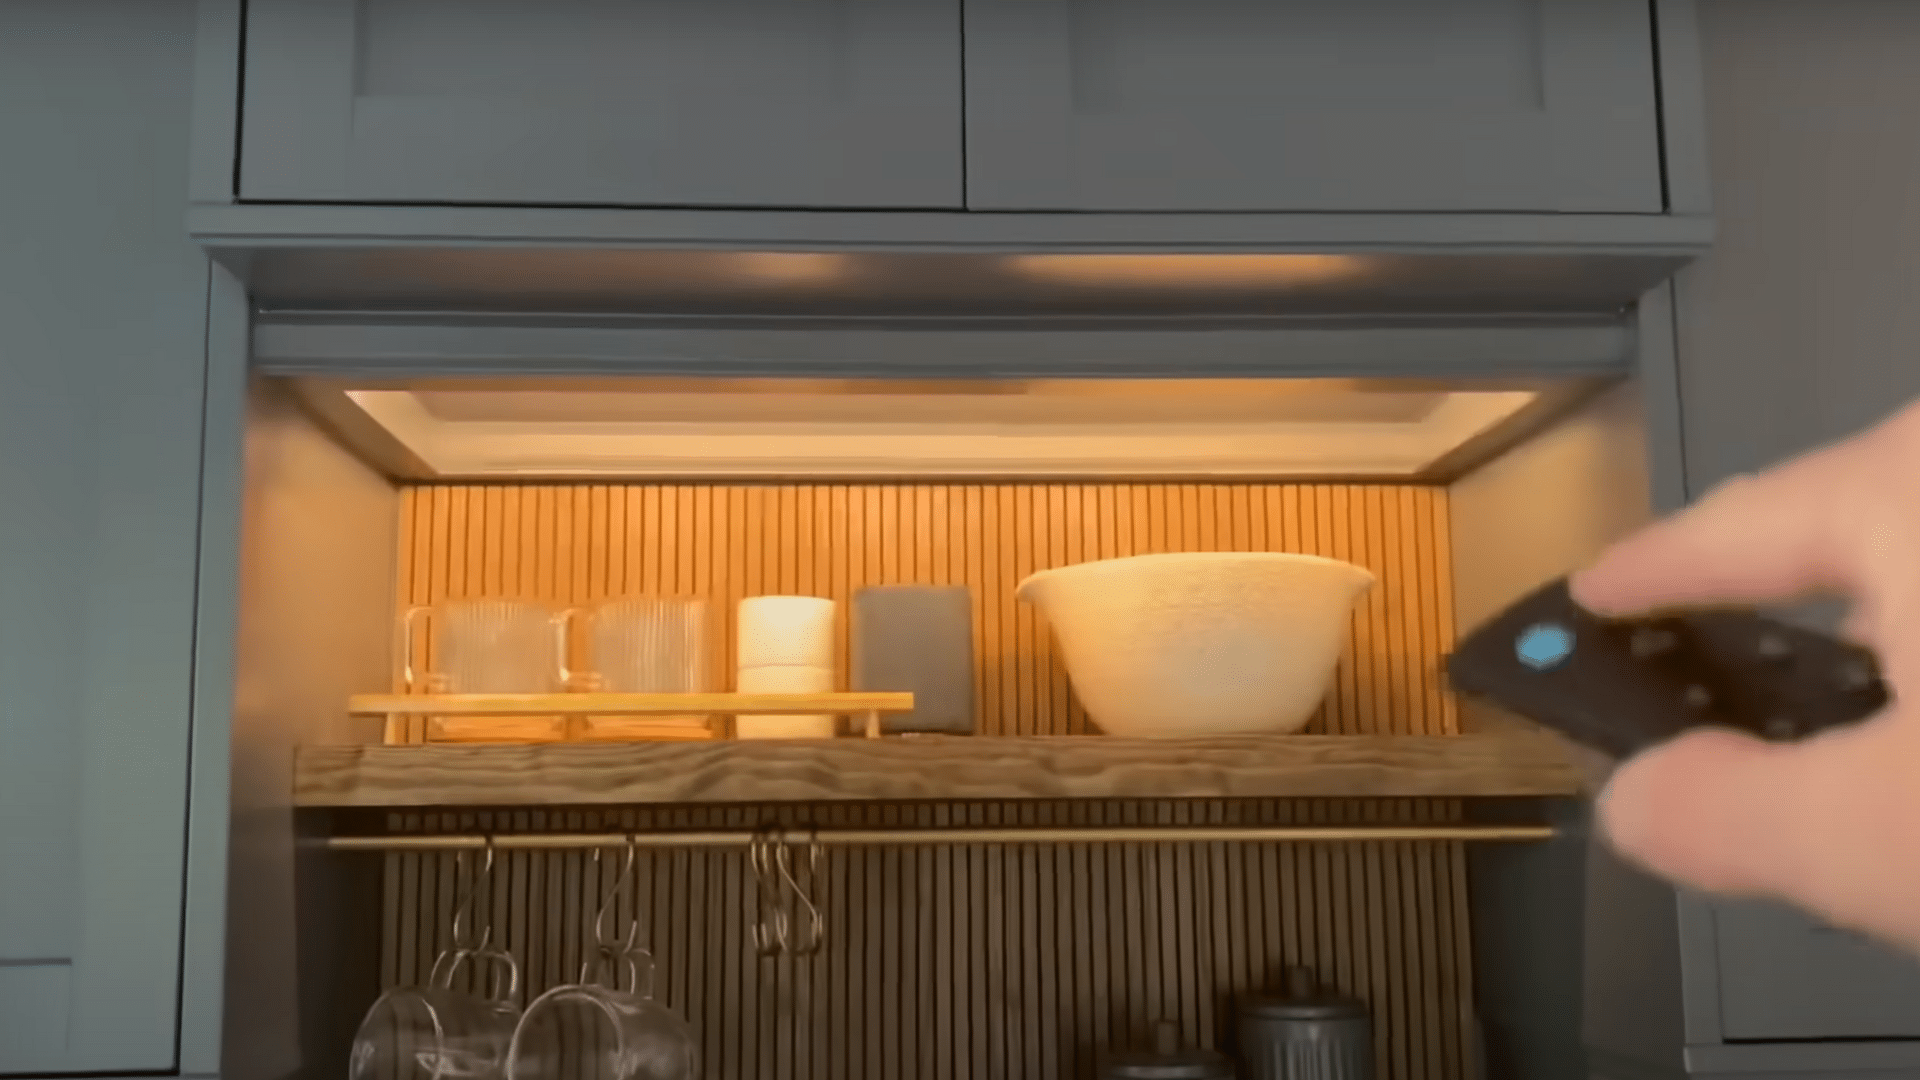
Step 9: Add a Functional Feature (Optional)
Give your cabinet wall a purpose beyond storage. A built-in coffee bar or display shelf makes it both functional and pleasing.
- Add a center countertop or floating shelves for a coffee bar or display area. Use hidden brackets for shelves and drill holes to manage cables or power access.
- Install pole wrap, paneling, or backsplash to enhance the visual design.
Step 10: Final Touches
The little things matter most in the end. Caulk, fill, light, and seal to ensure your cabinet wall looks polished and lasts for years.
- Fill nail holes, caulk trim seams, and touch up paint for a polished look.
- Add LED lights for ambiance or visibility where needed. Consider sealing painted surfaces with a clear coat for added durability.
Video Tutorial
Special thanks to Champagne Chaos for providing valuable insights in their video, which you can refer to while creating your cabinets.
Tips and Maintenance
Keep your coffered ceiling looking great with these simple care tips that take just minutes but add years to its beauty.
- Clean Regularly: Dust with a soft cloth or vacuum brush every 2-3 months.
- Fix Small Issues: Touch up paint chips promptly with saved paint.
- Check Yearly: Look for cracks in seams and fix with caulk.
- Control Moisture: Keep room humidity steady to prevent wood warping.
A little care goes a long way in keeping your coffered ceiling looking fresh and new for many years.
Conclusion
Well done! Your new built-in cabinets are now complete and ready to use.
The time and effort you put in have paid off with custom storage that fits your space perfectly. These cabinets will serve you well for years to come.
Remember that every DIY project teaches valuable skills. The measuring, leveling, and attention to detail you practiced here will be beneficial for future home improvements.
Enjoy your new cabinets and the satisfaction of having built them yourself! Comment on your favorite part of the process while creating your cabinets.
Ready for Your Next Project?
