
Looking at your fireplace and wishing it offered more than just good looks?
Standard mantels take up wall space without giving anything back in return. Your entertainment area deserves better than visible clutter and tangled cables ruining the rustic charm you worked hard to create.
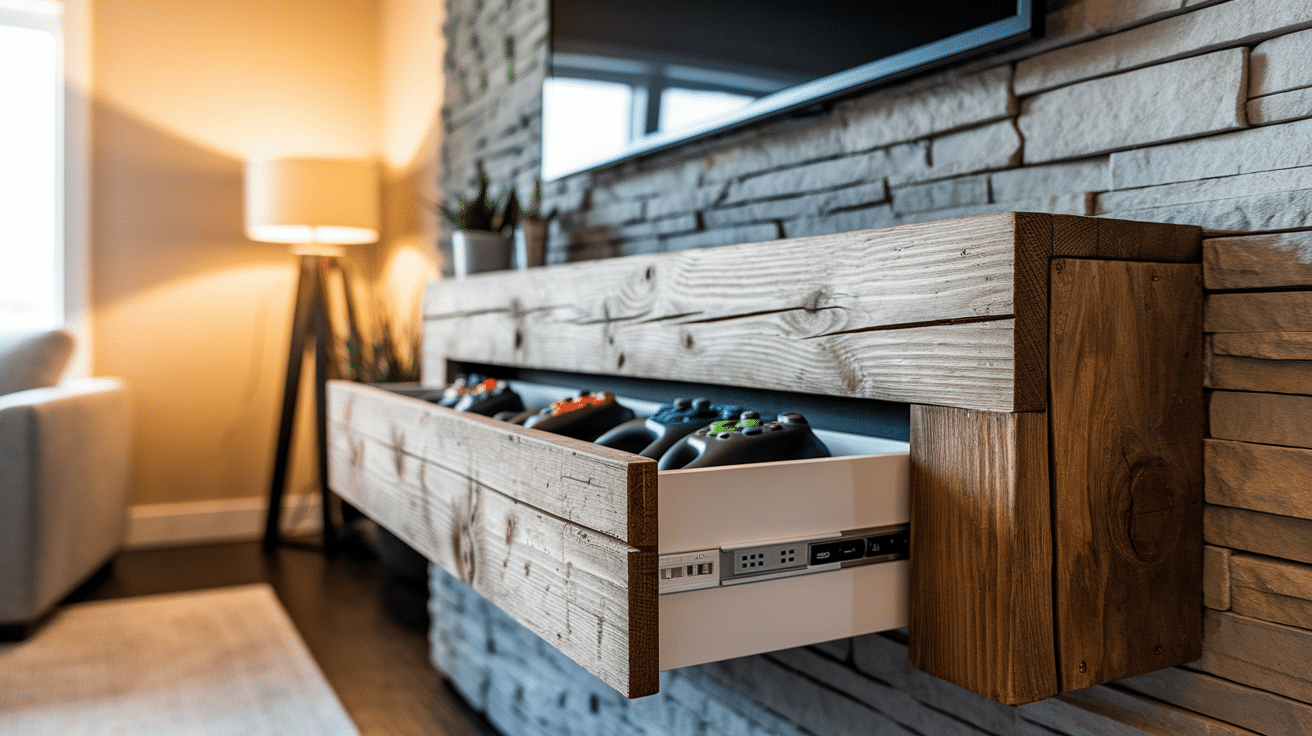
Building a diy mantel with hidden storage solves both problems at once. This project turns weathered reclaimed lumber into a functional centerpiece that secretly organizes your entire entertainment setup while maintaining that authentic rustic appearance.
This step-by-step guide walks through creating your own diy mantel with a hidden drawer that holds game consoles, remotes, and cables.
The finished piece looks like solid reclaimed wood but offers smart storage that keeps your living space clean and organized.
Step-By-Step DIY Mantel Build
Now that you understand the benefits of this project, it’s time to start building. This diy mantel construction breaks down into seven manageable steps, but first, you’ll need to gather the right tools and materials for success:
Essential Tools for Your DIY Mantel:
| Tool | Purpose |
|---|---|
| Circular saw | Cut lumber to size |
| Drill/driver | Drive screws and create pilot holes |
| Pocket hole jig | Create strong wood joints |
| Level | Keep slides aligned properly |
| Measuring tape | Ensure accurate measurements |
| Clamps | Hold pieces during assembly |
| Sandpaper (120 & 150 grit) | Smooth surfaces and prep for finish |
| Stiff brush | Clean reclaimed wood |
Materials List:
| Material | Specification | Use |
|---|---|---|
| Reclaimed wood beam | Size depends on the fireplace | Main mantel piece |
| 3/4″ lumber | Pine or similar hardwood | Drawer box construction |
| 3/8″ particleboard | Cut to drawer dimensions | Drawer bottom panel |
| Heavy-duty drawer slides | 200+ lb capacity, 16-18″ length | Support hidden drawer |
| Lag bolts | 1/4″ x 3″ | Secure the drawer to the mantel |
| Pocket screws | 1.25″ length | Join lumber pieces |
| Wood screws | Various sizes (1″, 2″, 3″) | General assembly |
| Wood cleaner | Deck cleaner or wood prep | Clean reclaimed wood |
| Wood stain | Rustic finish recommended | Final wood finish |
Product Recommendations
- Drawer Slides: Look for Accuride 3832 series or similar heavy-duty slides. Full-extension models give better access to your storage.
- Wood Stain: Minwax Provincial or a similar rustic stain works well on reclaimed wood. They bring out natural character without looking artificial.
Always buy 10% extra materials. This covers mistakes and ensures color matching on your diy mantel.
Step 1: Prep the Framing for a Hidden Drawer
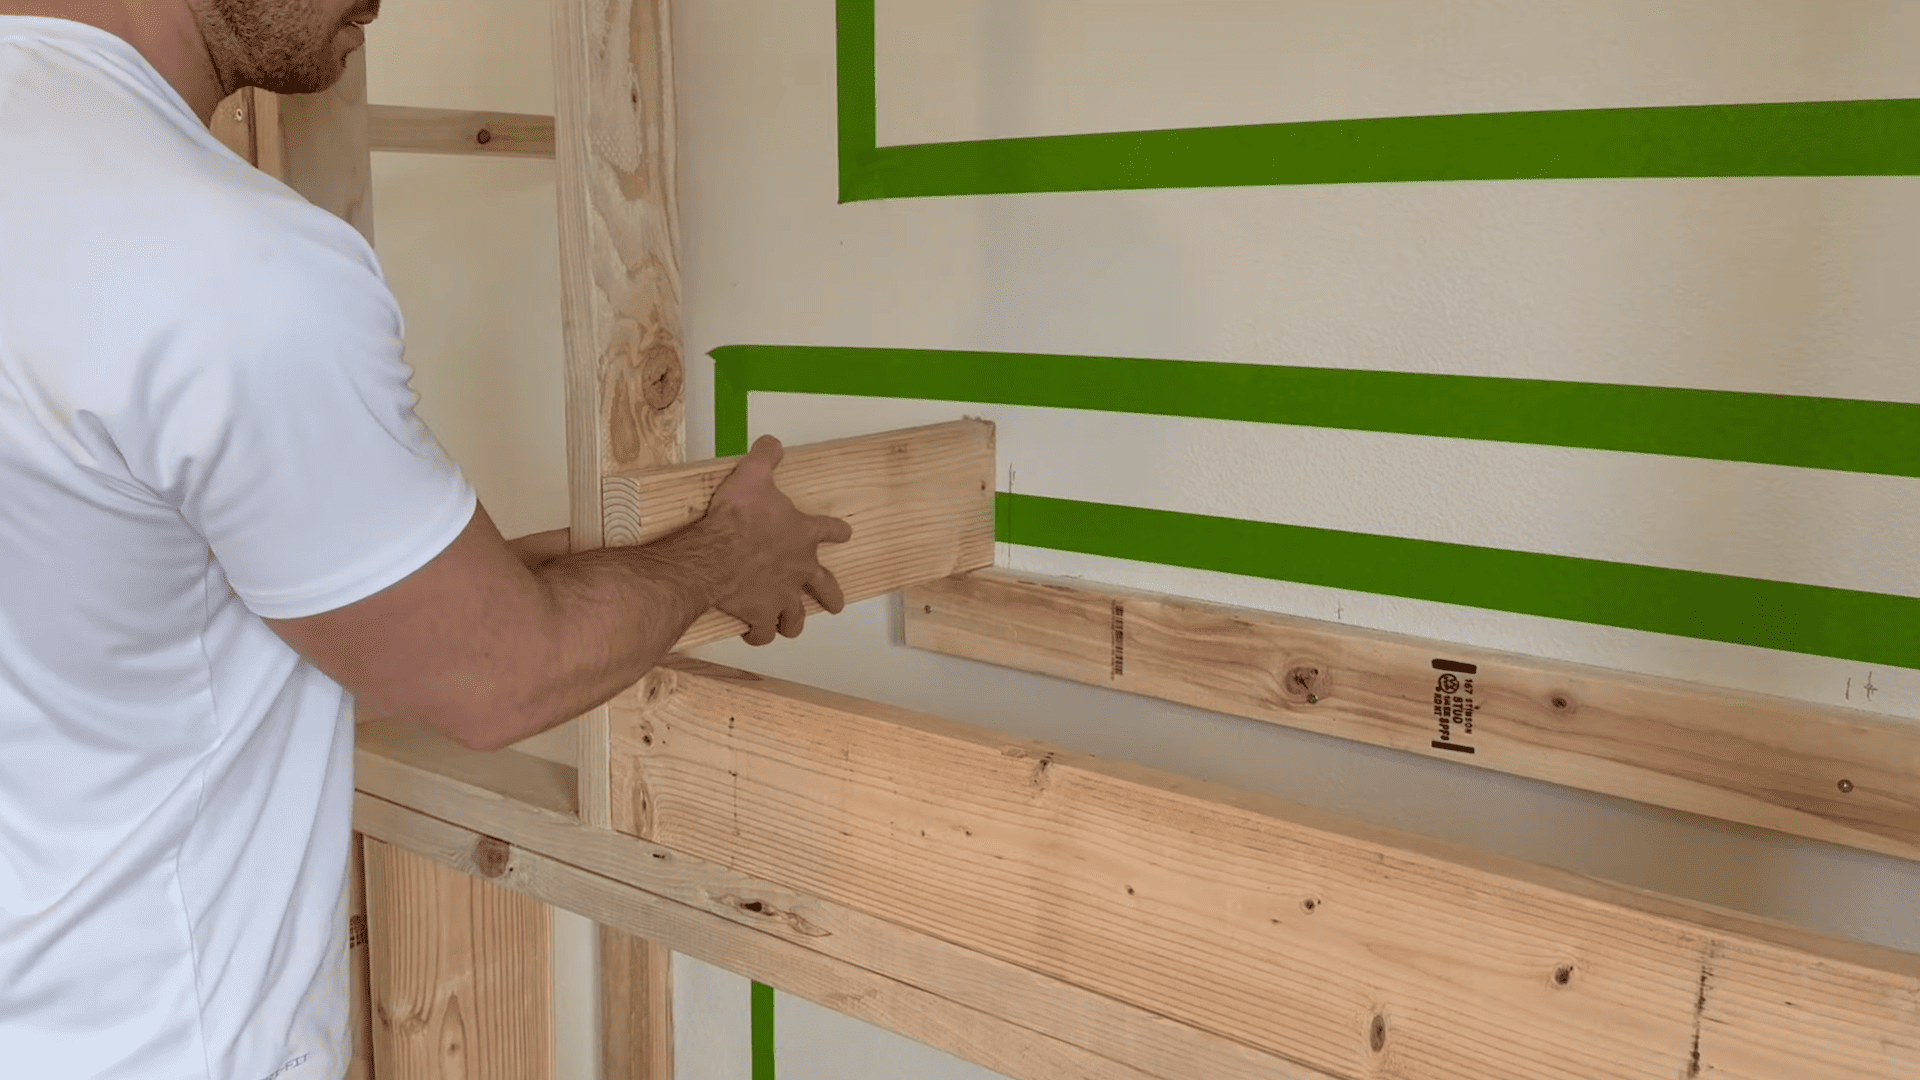
Check your existing fireplace framing to make sure it has enough depth for a hidden drawer. The frame needs at least 4-6 inches of space behind the wall to fit your DIY mantel drawer system.
Measure the opening and confirm it’s smaller than your mantel beam – this keeps the drawer completely hidden when closed.
Pro Tip: Mark your slide mounting points on both sides of the frame before starting. This ensures perfect alignment and prevents having to redo the installation later.
Step 2: Install Drawer Slides
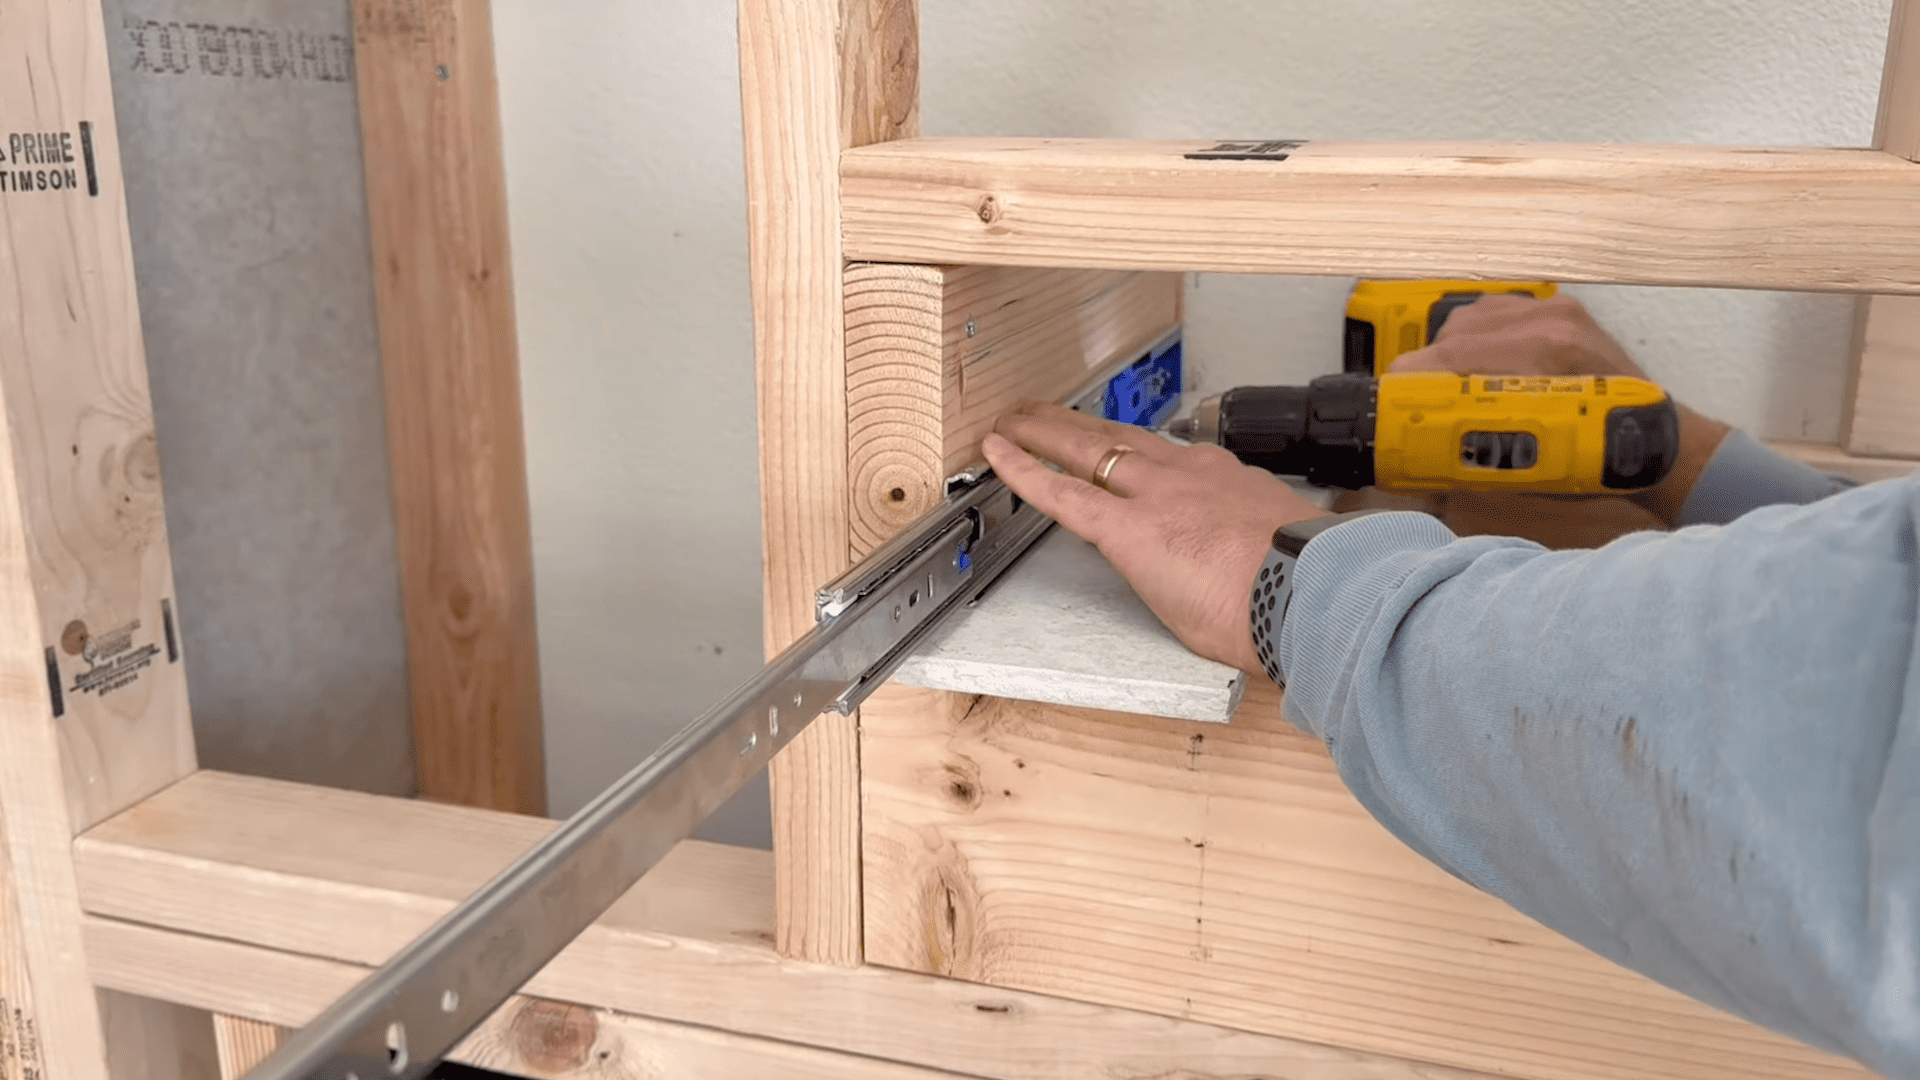
Align 2×4 blocking to your back wall to create the proper depth for slide installation. Use spacer material, such as cement board, to create clearance beneath where your drawer will sit.
Attach the drawer slides flush to the front edge of your frame using pilot holes and screws for secure mounting.
Pro Tip: Test each slide by hand after installation. They should move smoothly without binding. White lithium grease on the rails helps quiet operation.
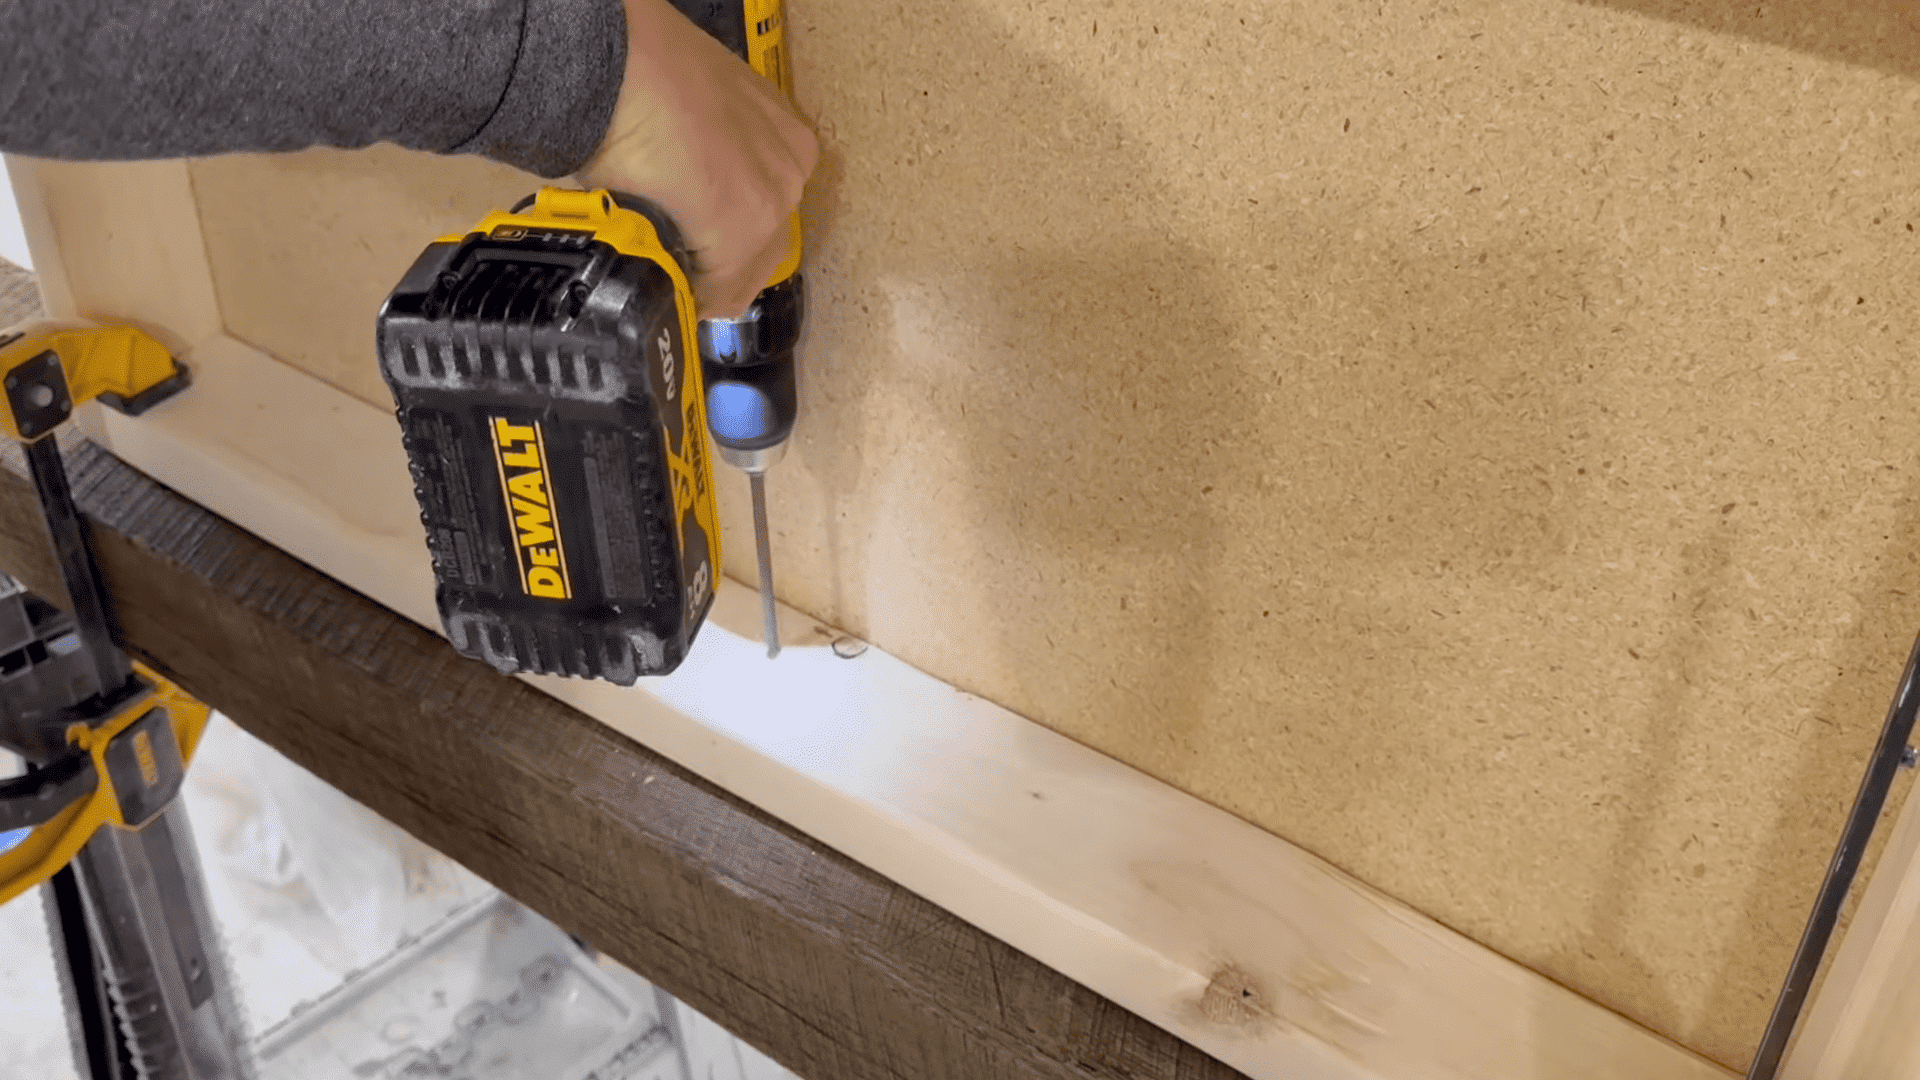
Step 3: Build the Drawer
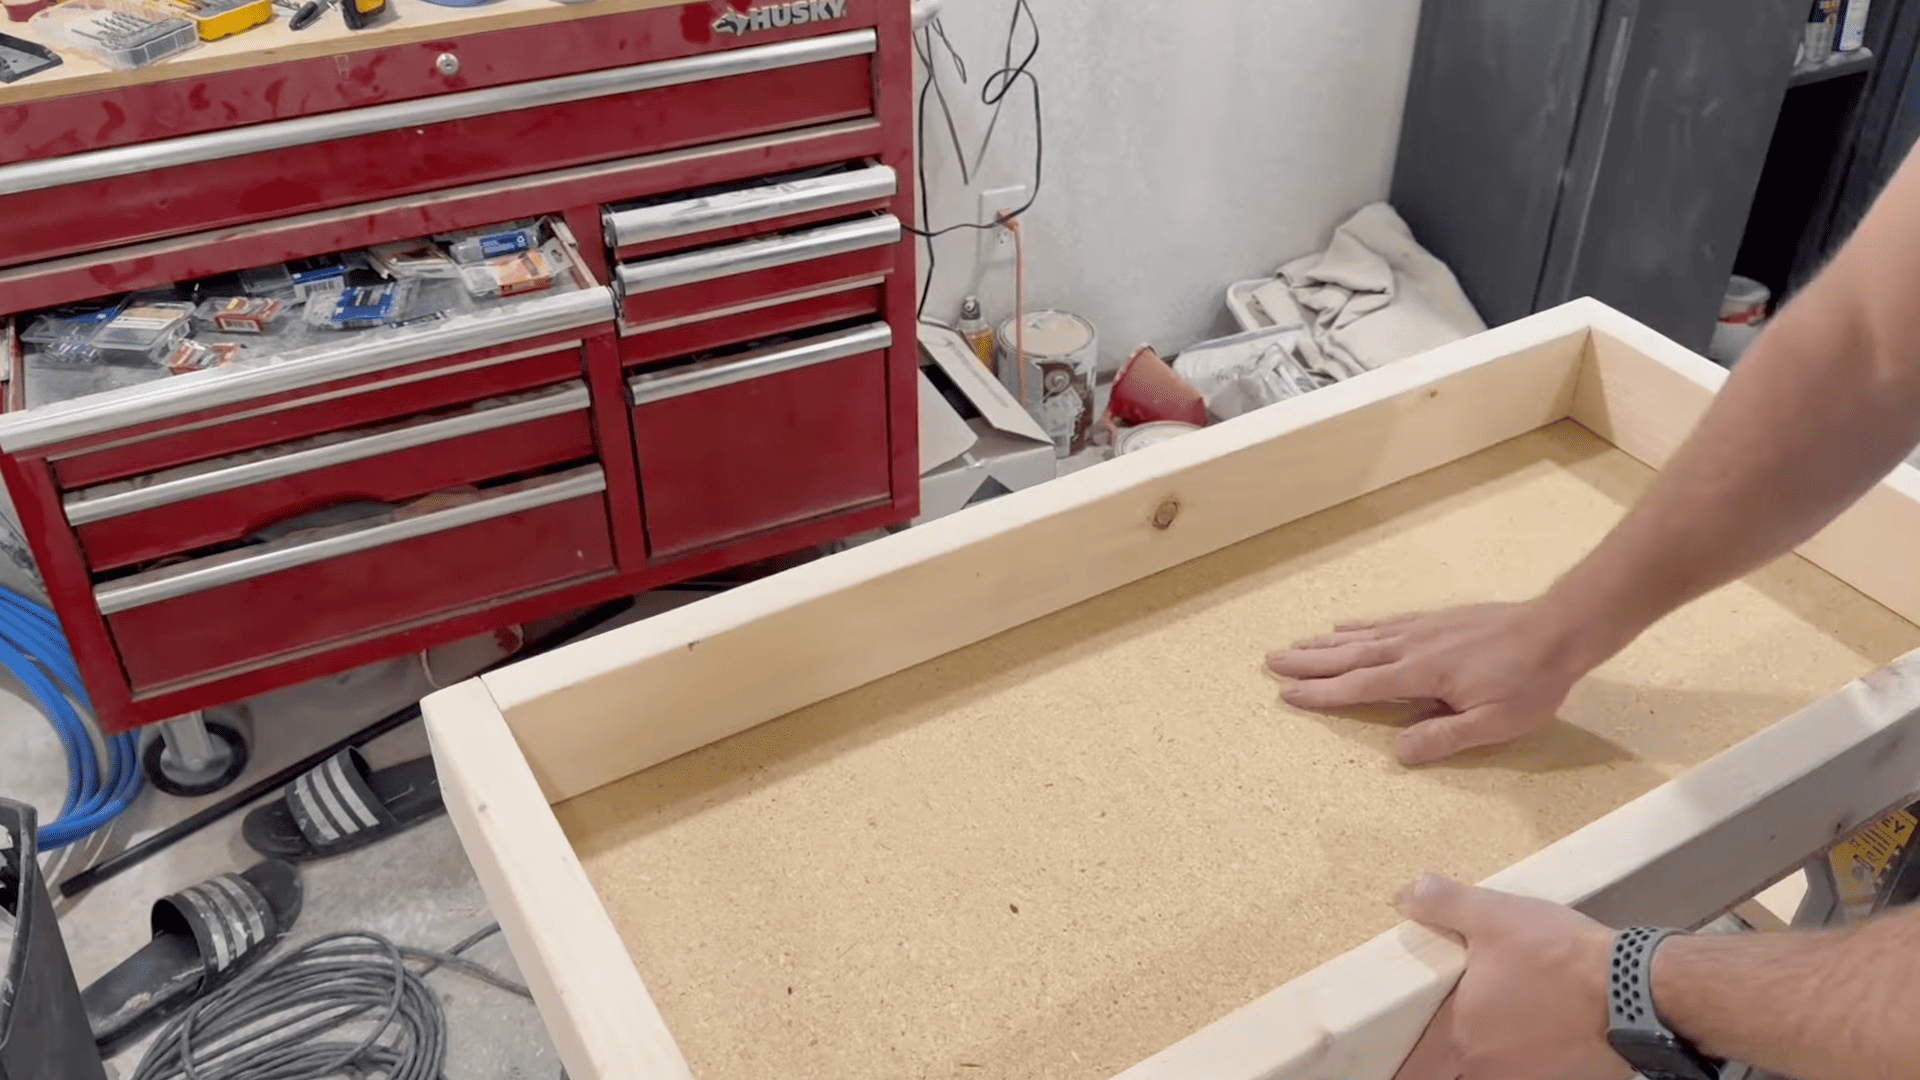
Cut your drawer panels from 3/4-inch lumber and assemble using pocket holes and 3-inch screws for strong joints.
Sand all surfaces lightly to remove rough spots that could cause binding. Cut 3/8-inch particle board for the bottom panel and secure it with screws through pre-drilled pilot holes.
Pro Tip: Build your drawer box slightly smaller than measured. Wood movement and slide tolerances turn a snug construction fit into a perfect final fit.
Step 4: Restore the Reclaimed Mantel Wood
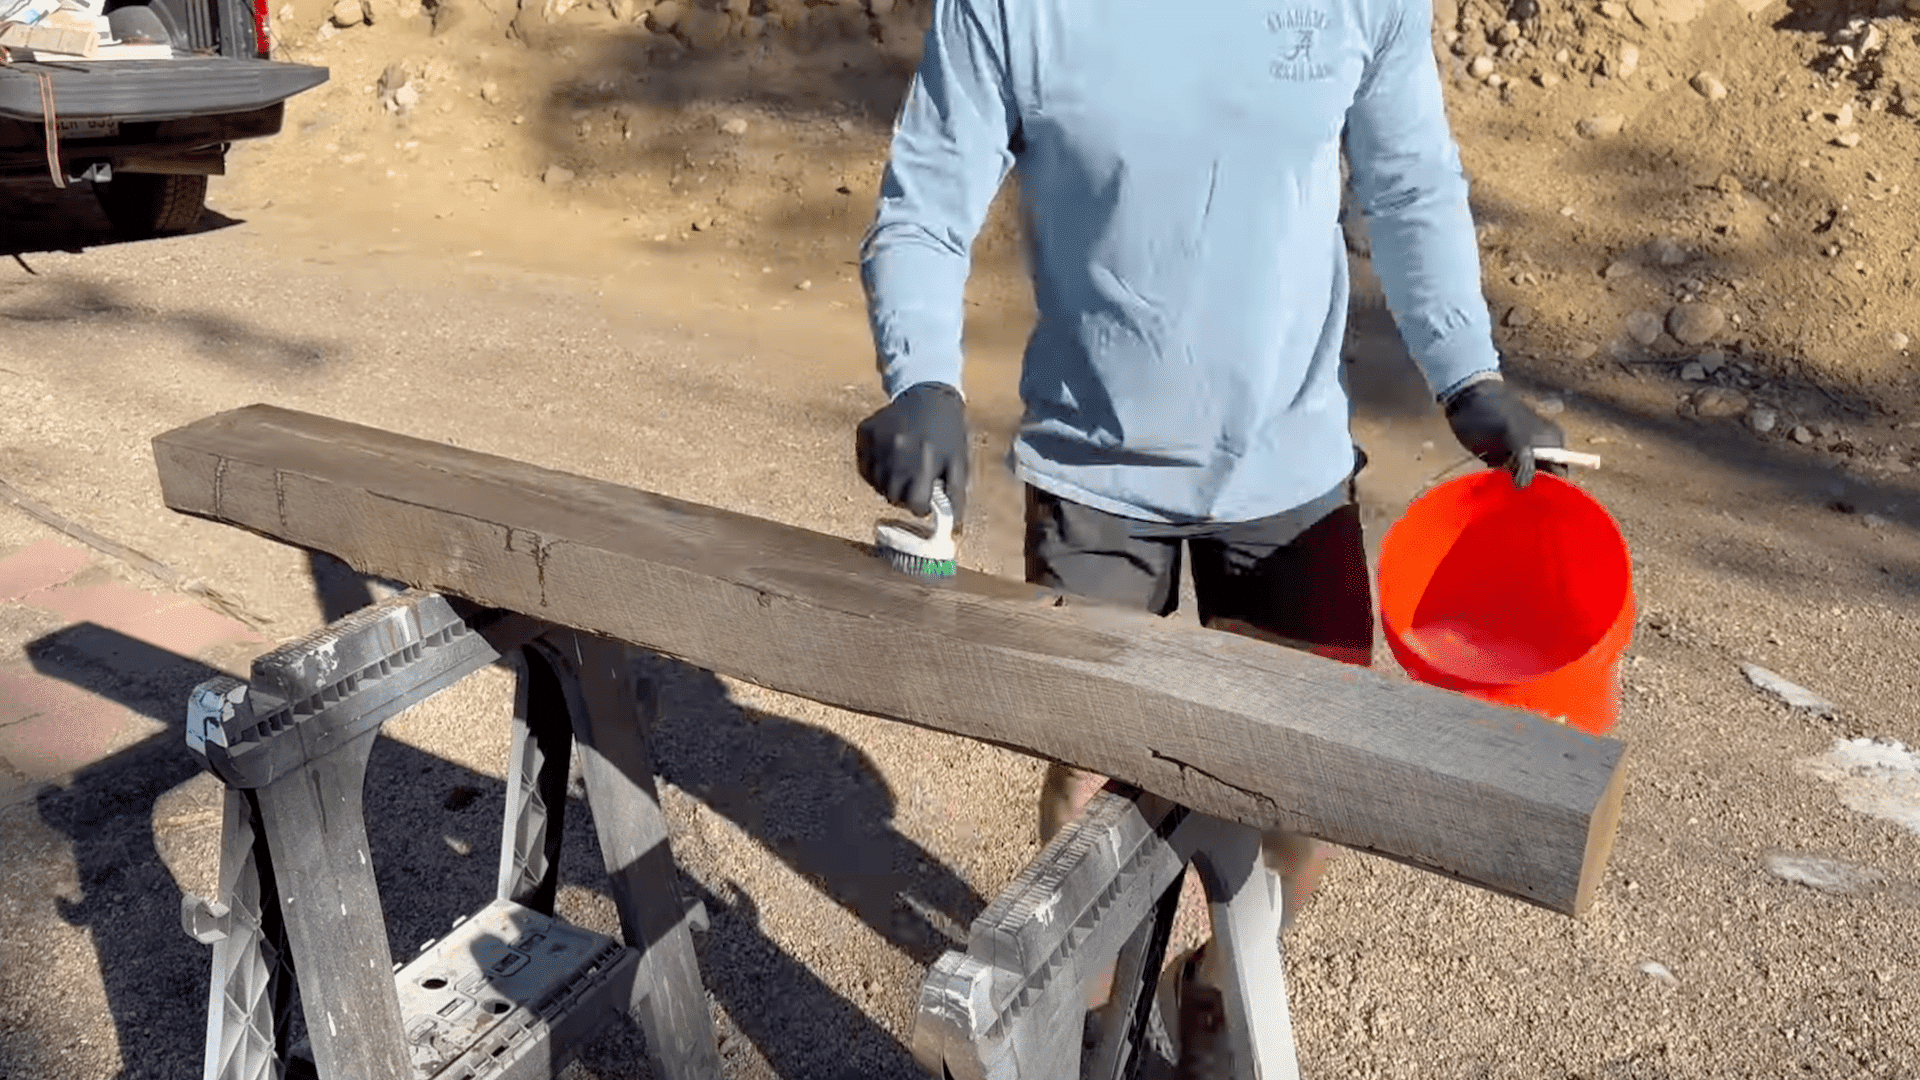
Clean your reclaimed wood beam with a stiff brush to remove surface dirt and debris. Mix deck cleaner with hot water and scrub the entire surface thoroughly, letting it sit for 10-15 minutes while keeping the wood wet.
Rinse thoroughly and let dry, then lightly sand to smooth any rough patches before applying your chosen rustic wood finish.
Pro Tip: Work in shade when cleaning reclaimed wood. Direct sunlight causes the cleaner to dry too quickly, leaving streaks and uneven cleaning results on your diy mantel beam.
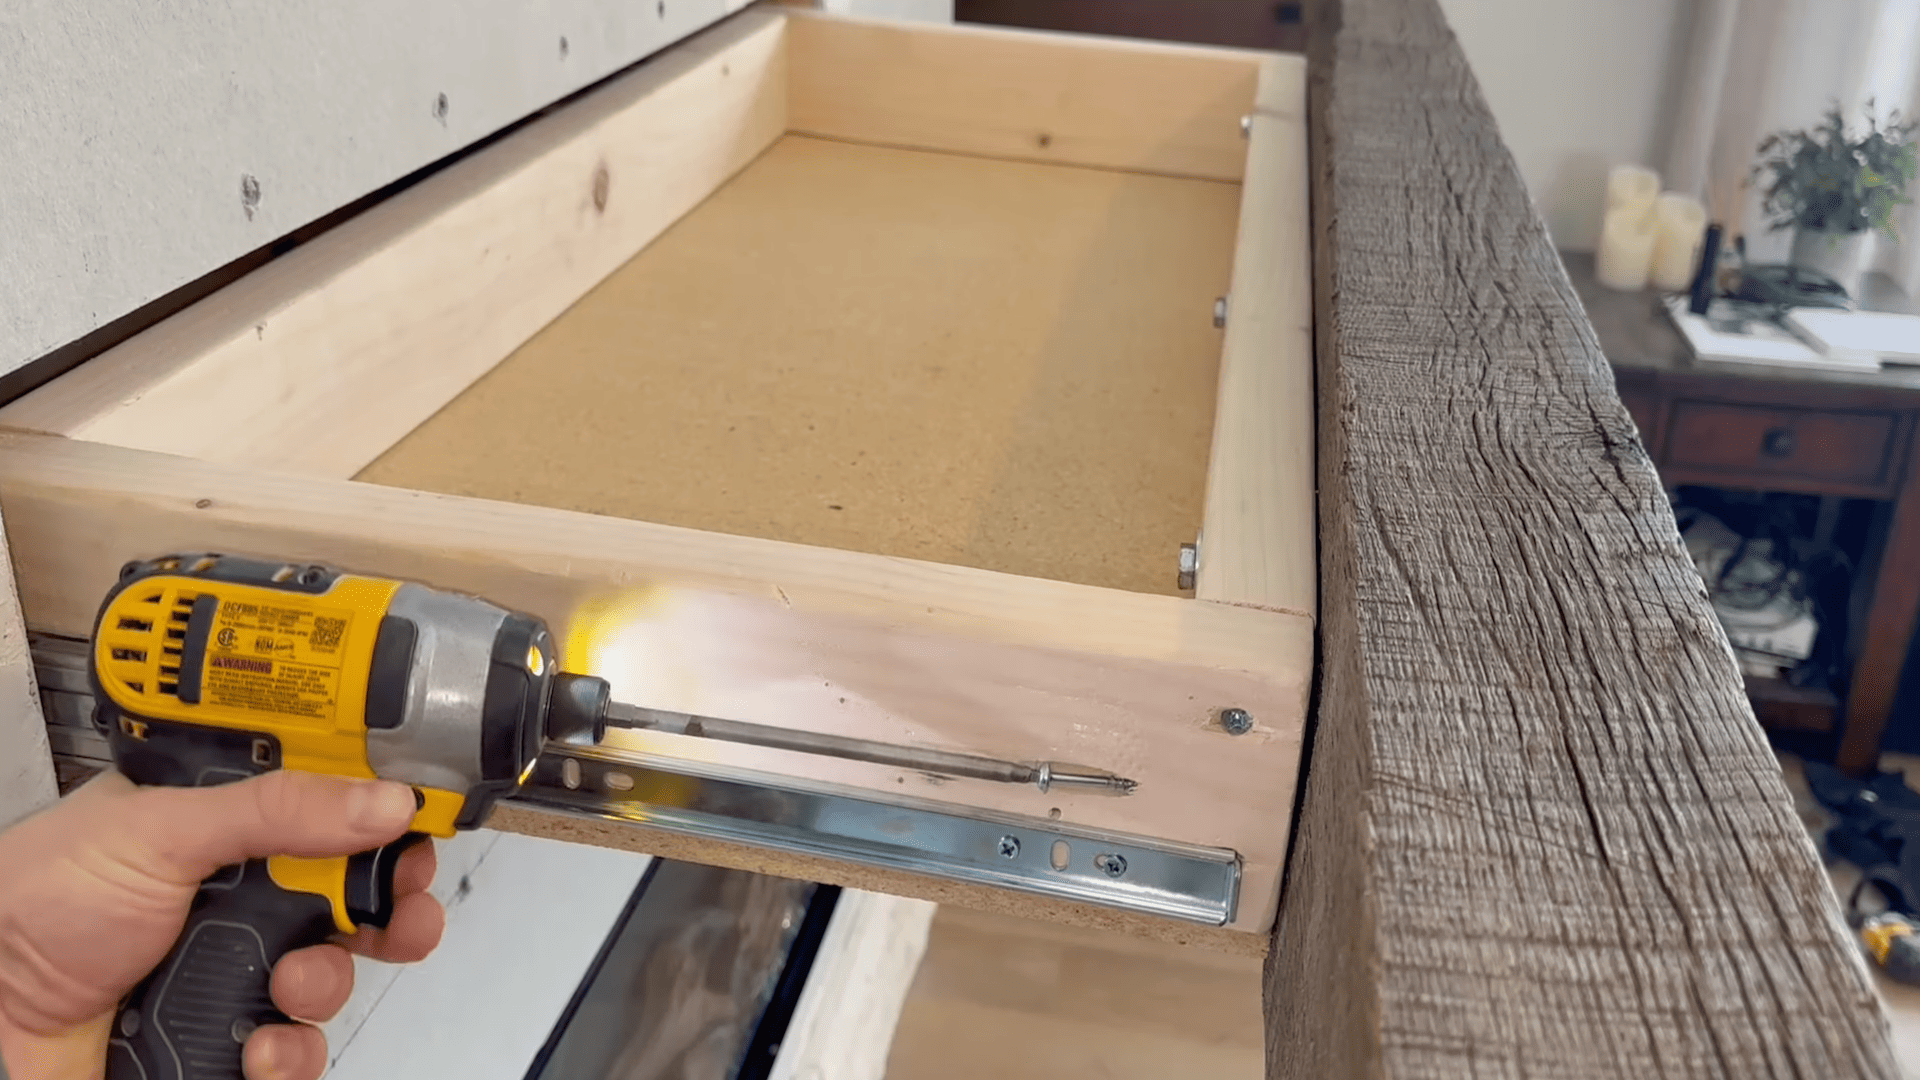
Step 5: Attach the Drawer to the Mantel
Position your completed drawer box at the back of your diy mantel beam and center it carefully from side to side.
Drill pilot holes to prevent wood splitting, then secure the connection using three heavy-duty lag bolts that penetrate about 3/4 inch into the mantel wood. Add pocket screws around the lag bolts for extra reinforcement if desired.
Pro Tip: Use a drill bit that’s 1/16 inch smaller than your lag bolt diameter for pilot holes. This creates the perfect grip without splitting the reclaimed wood.
Step 6: Final Installation
Reattach the front rail sections to your drawer and test the full sliding movement to ensure smooth operation. Install your completed diy mantel to the fireplace wall by connecting it to the wall-mounted slide sections.
Check the fit and don’t worry about minor wood bowing – stone veneer or trim will hide small gaps.
Pro Tip: Have someone help support the weight during installation. The completed diy mantel weighs around 50-55 pounds, and proper support prevents slide damage.
Step 7: Add Utility Behind the Mantel
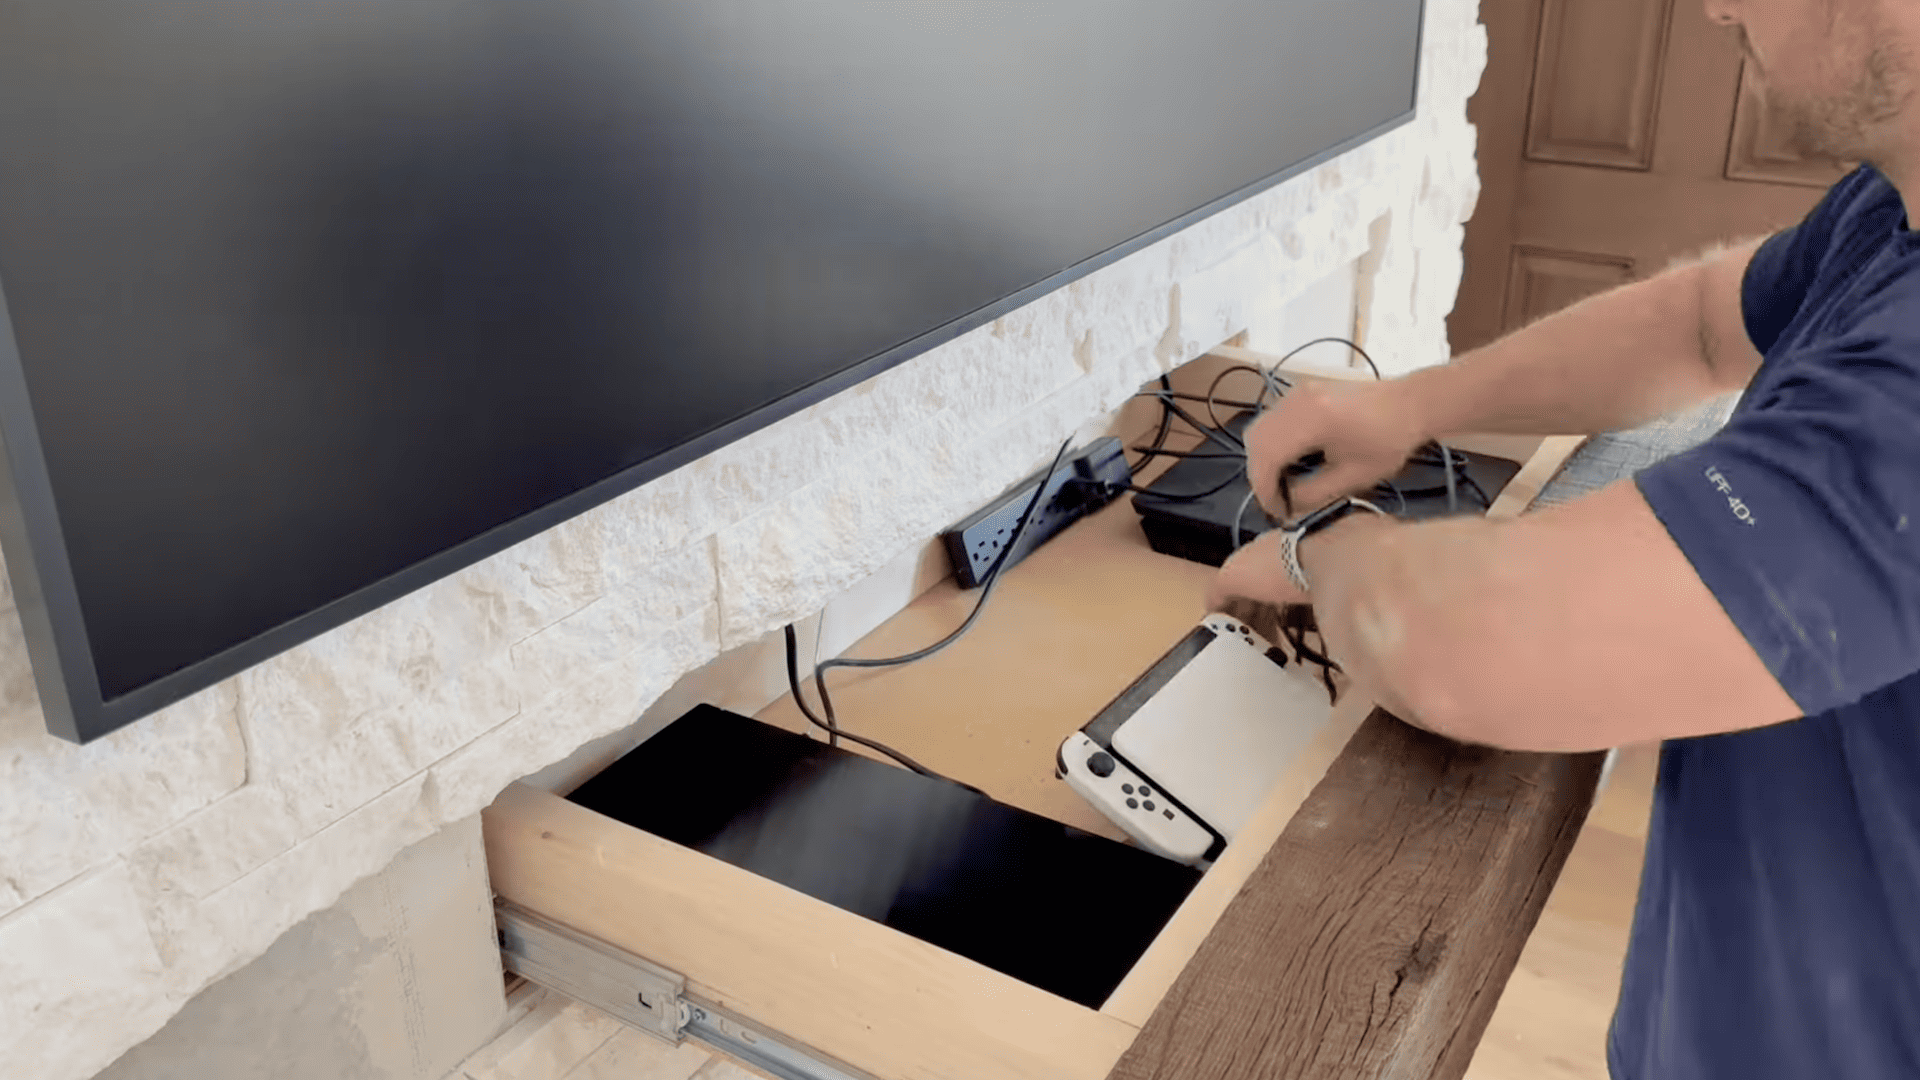
Install an electrical outlet in the space behind your TV to eliminate visible power cords running across the wall.
Use your hidden drawer to organize game consoles, streaming devices, controllers, and HDMI cables for a clean entertainment setup. This gives you easy access to all your electronics while keeping everything out of sight.
Pro Tip: Install the electrical outlet before mounting your diy mantel to the wall. This saves time and prevents having to work around the installed mantel later.
Video Tutorial
I’d like to give credit to buildsbymaz for their informative video, as a reference for this guide.
Common DIY Mantel Mistakes to Avoid
- Skipping the Pilot Holes: Always drill pilot holes before driving screws into reclaimed wood. Old lumber is often harder than new wood and will split easily without proper preparation.
- Incorrect Slide Alignment: Misaligned slides cause binding and premature wear. Use a level and measure twice before marking mounting holes. Uneven slides will make your diy mantel drawer difficult to operate.
- Inadequate Weight Rating: Don’t underestimate the weight capacity needed. Electronics, cables, and stored items add up quickly. Always choose slides rated for at least 200 pounds.
- Rushing the Wood Restoration: Take time to properly clean and dry reclaimed wood before staining. Rushing this process leads to a blotchy finish and poor stain absorption.
- Wrong Drawer Size: Making the drawer too large is a common error. The drawer must be smaller than the mantel opening to remain hidden. Leave clearance for wood movement and hardware.
- Poor Cable Management: Plan your cable routing before installation. Drilling holes after assembly is difficult and may damage your finished diy mantel.
- Ignoring Load Distribution: Don’t mount slides only to drywall. Use proper blocking and secure mounting points to distribute weight across multiple wall studs.
The Bottom Line
Building your own diy mantel with hidden storage combines authentic rustic style with smart functionality. This project proves reclaimed wood can be both beautiful and practical with thoughtful design.
The hidden drawer organizes your entertainment area, while weathered wood adds character to the fireplace. Most guests never suspect the secret storage until you reveal the surprise feature.
This diy mantel project requires patience and attention to detail, but the results speak for themselves. You’ve created a focal point that serves double duty as storage and a style statement.
Your completed diy mantel changes both form and function in your living room. The combination of reclaimed materials and modern storage design creates a timeless piece that will serve your family for decades, keeping your space organized.