Is your kitchen island too tall, too short, or just right?
Building the perfect kitchen island requires careful planning and precise measurements. The height of your island can make or break how your kitchen looks and functions.
Many homeowners struggle with islands that feel too high, too low, or awkwardly positioned, making daily kitchen activities uncomfortable.
In this guide, you’ll learn the standard kitchen island height, how to choose the right one for your needs, and what to consider when adding seating, appliances, or custom designs.
From layout spacing to material checklists and diy planning steps, this blog has everything you need to build a functional and beautiful island with confidence.
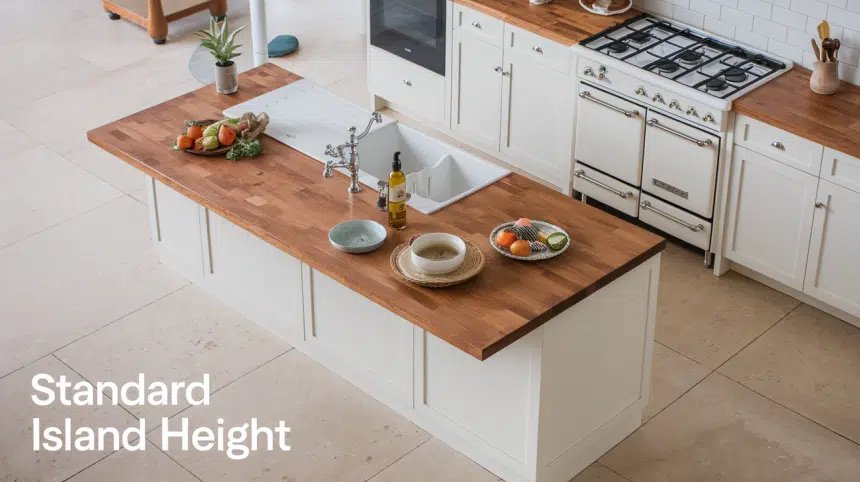
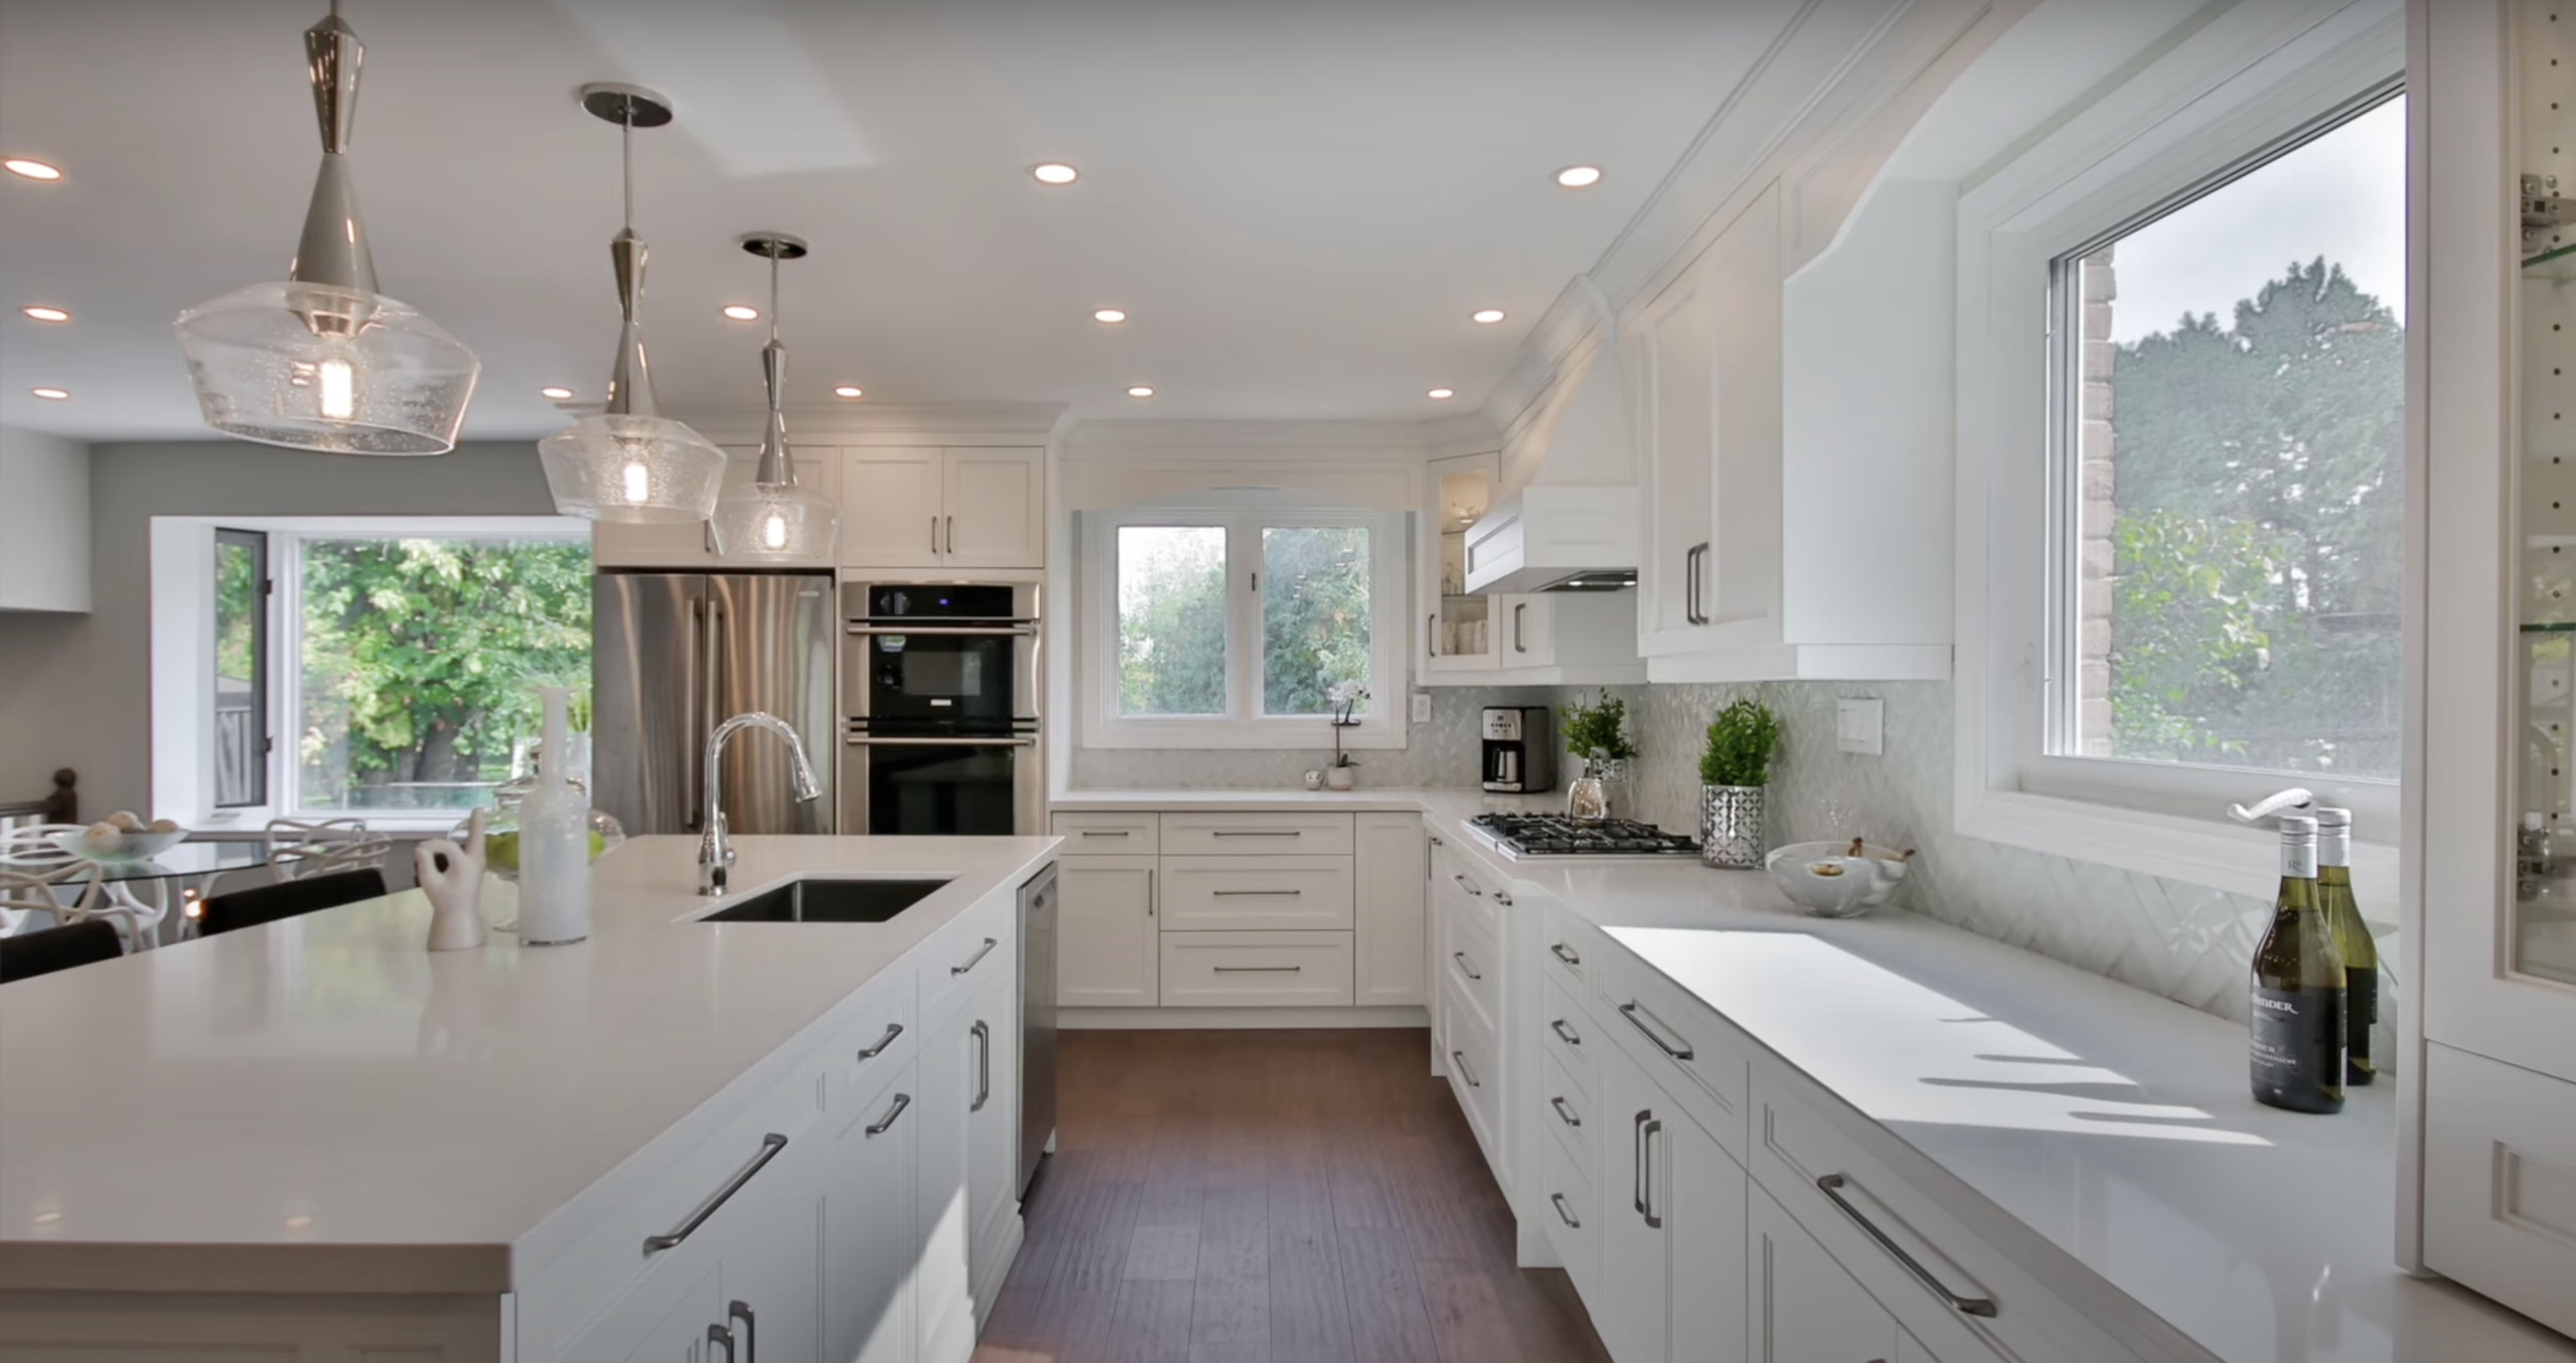
What is the Standard Height for a Kitchen Island?
The standard height for a kitchen island is 36 inches (91 cm), which matches the height of most kitchen countertops.
This consistent measurement ensures comfortable food preparation while standing and creates visual harmony across your kitchen surfaces.
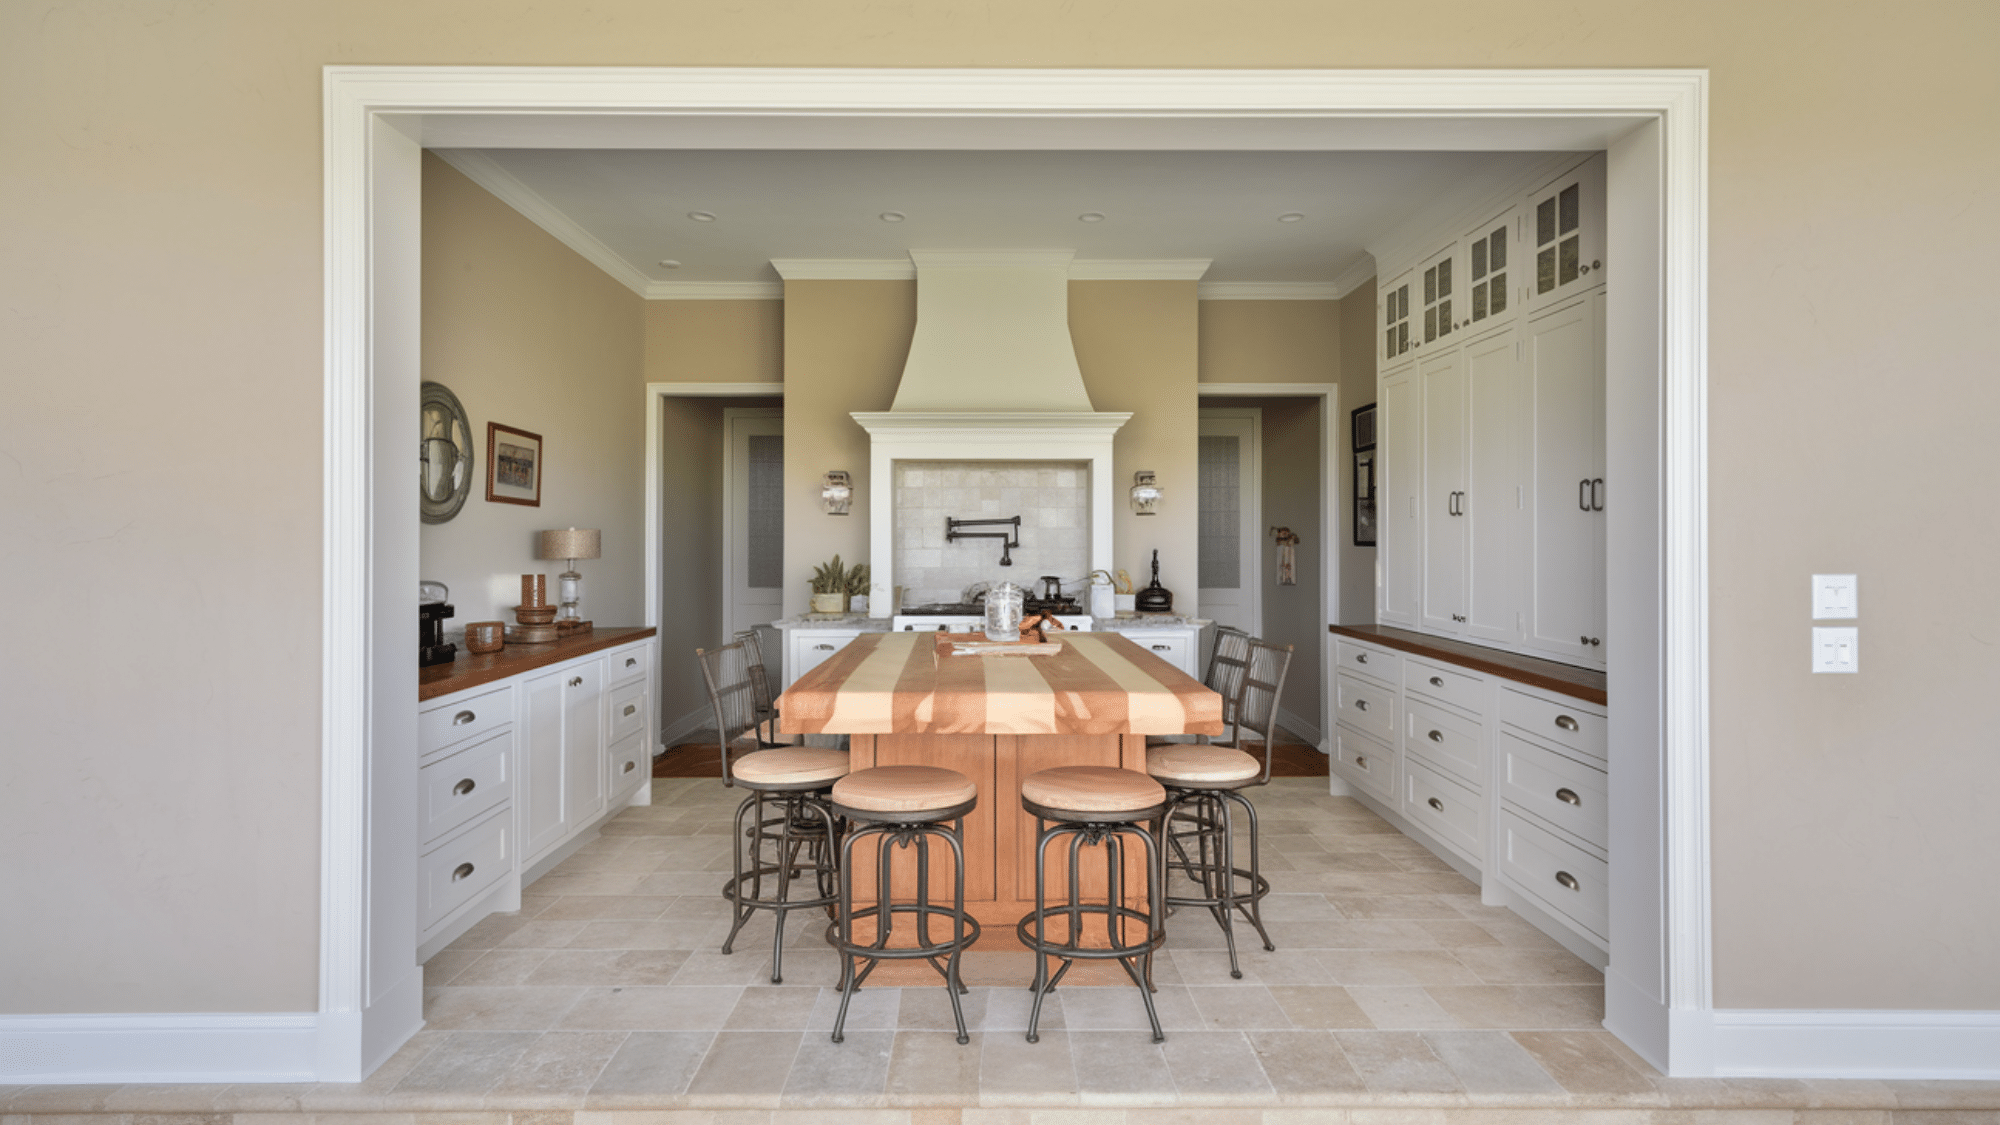
A 42-inch (107 cm) height might be more suitable for homes where the island will include bar-style seating.
This taller option works well with standard bar stools and clearly separates the cooking and dining areas of your kitchen.
How Much Space Do You Need Around a Kitchen Island?
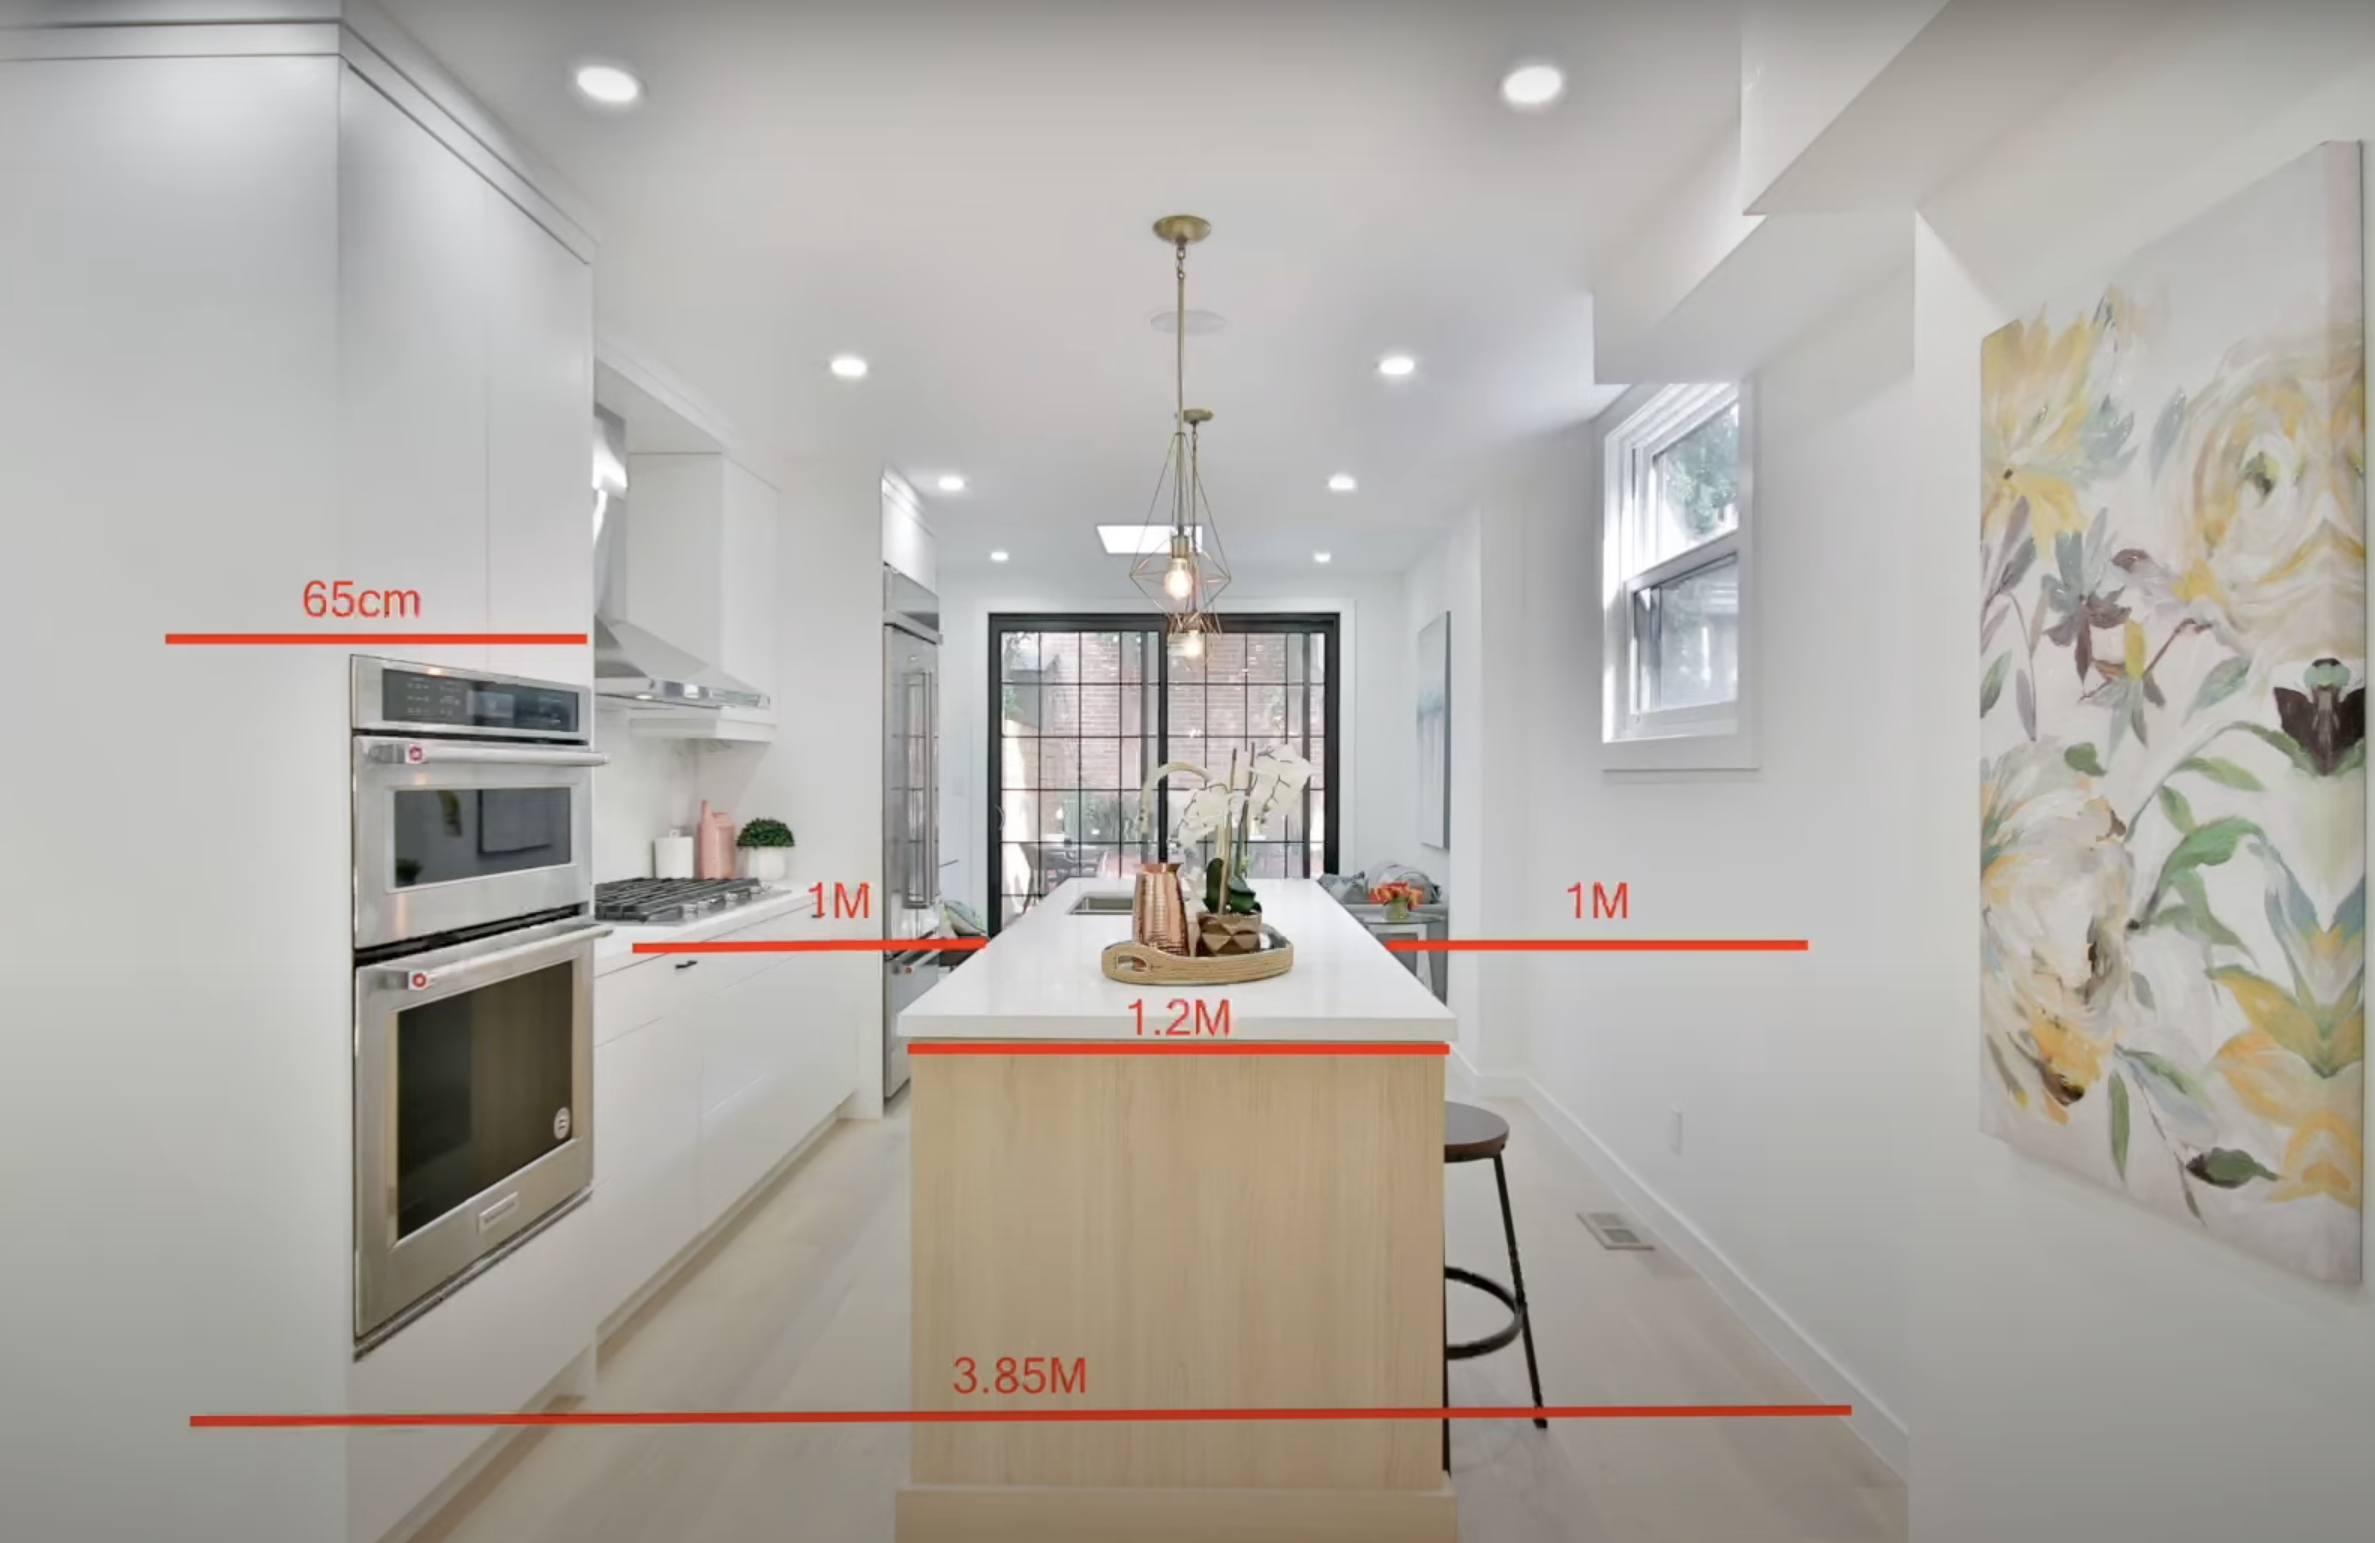
Maintain 1-1.2 meters of clearance around your kitchen island for proper functionality and safety. This spacing ensures comfortable movement and allows appliance doors (refrigerator, dishwasher, and oven) to open fully without obstruction.
If your kitchen can’t accommodate these minimum clearances, consider a peninsula instead. Attached to existing cabinetry on one side, a peninsula requires less floor space while still providing additional counter area and potential seating.
Materials Required
Here’s a simple and organized table for the materials required to build a diy kitchen island at standard island height (36 inches / 91 cm):
| Material | Purpose | Notes |
|---|---|---|
| Base Cabinets | Forms the core structure | Standard depth: 60 cm (can use 30 cm for shallow sides) |
| Countertop Slab | Work surface and seating area | Choose a size ≤ 3m x 1.4m unless using materials like corian |
| Countertop Brackets / Legs | Support for overhang | Required if overhang > 30 cm |
| Plywood / Mdf Sheets | Base paneling or custom framing | Use for wrapping cabinets if not using pre-made units |
| Screws and Fasteners | Assembling cabinets and frames | Wood screws and construction-grade fasteners |
| L-Brackets | Additional support for structure | Especially useful for diy framing |
| Paint or Finish | Good finishing on panels/cabinets | Optional – depends on style preference |
| Caulk / Sealant | Sealing joints between the counter and the cabinets | For water resistance and clean finish |
| Measuring Tape | Ensuring correct dimensions | Must-have for all layout steps |
| Level | To keep surfaces even | Essential for countertop installation |
| Painter’s Tape / Cardboard | Space planning | Helps mock up island before building |
| Optional: Electrical Outlets | If adding power point to the island | Requires safe installation and likely a professional for wiring |
| Optional: Plumbing Fixtures | If adding a sink | Needs professional setup and plumbing connection |
With these materials, you’ll be fully equipped to build a functional and stylish kitchen island at the standard height.
DIY Steps to Plan a Kitchen Island
Ready to bring your kitchen island vision to life? Follow these practical diy steps to plan and build the perfect island at the standard height.
1. Determine if You Have Enough Space
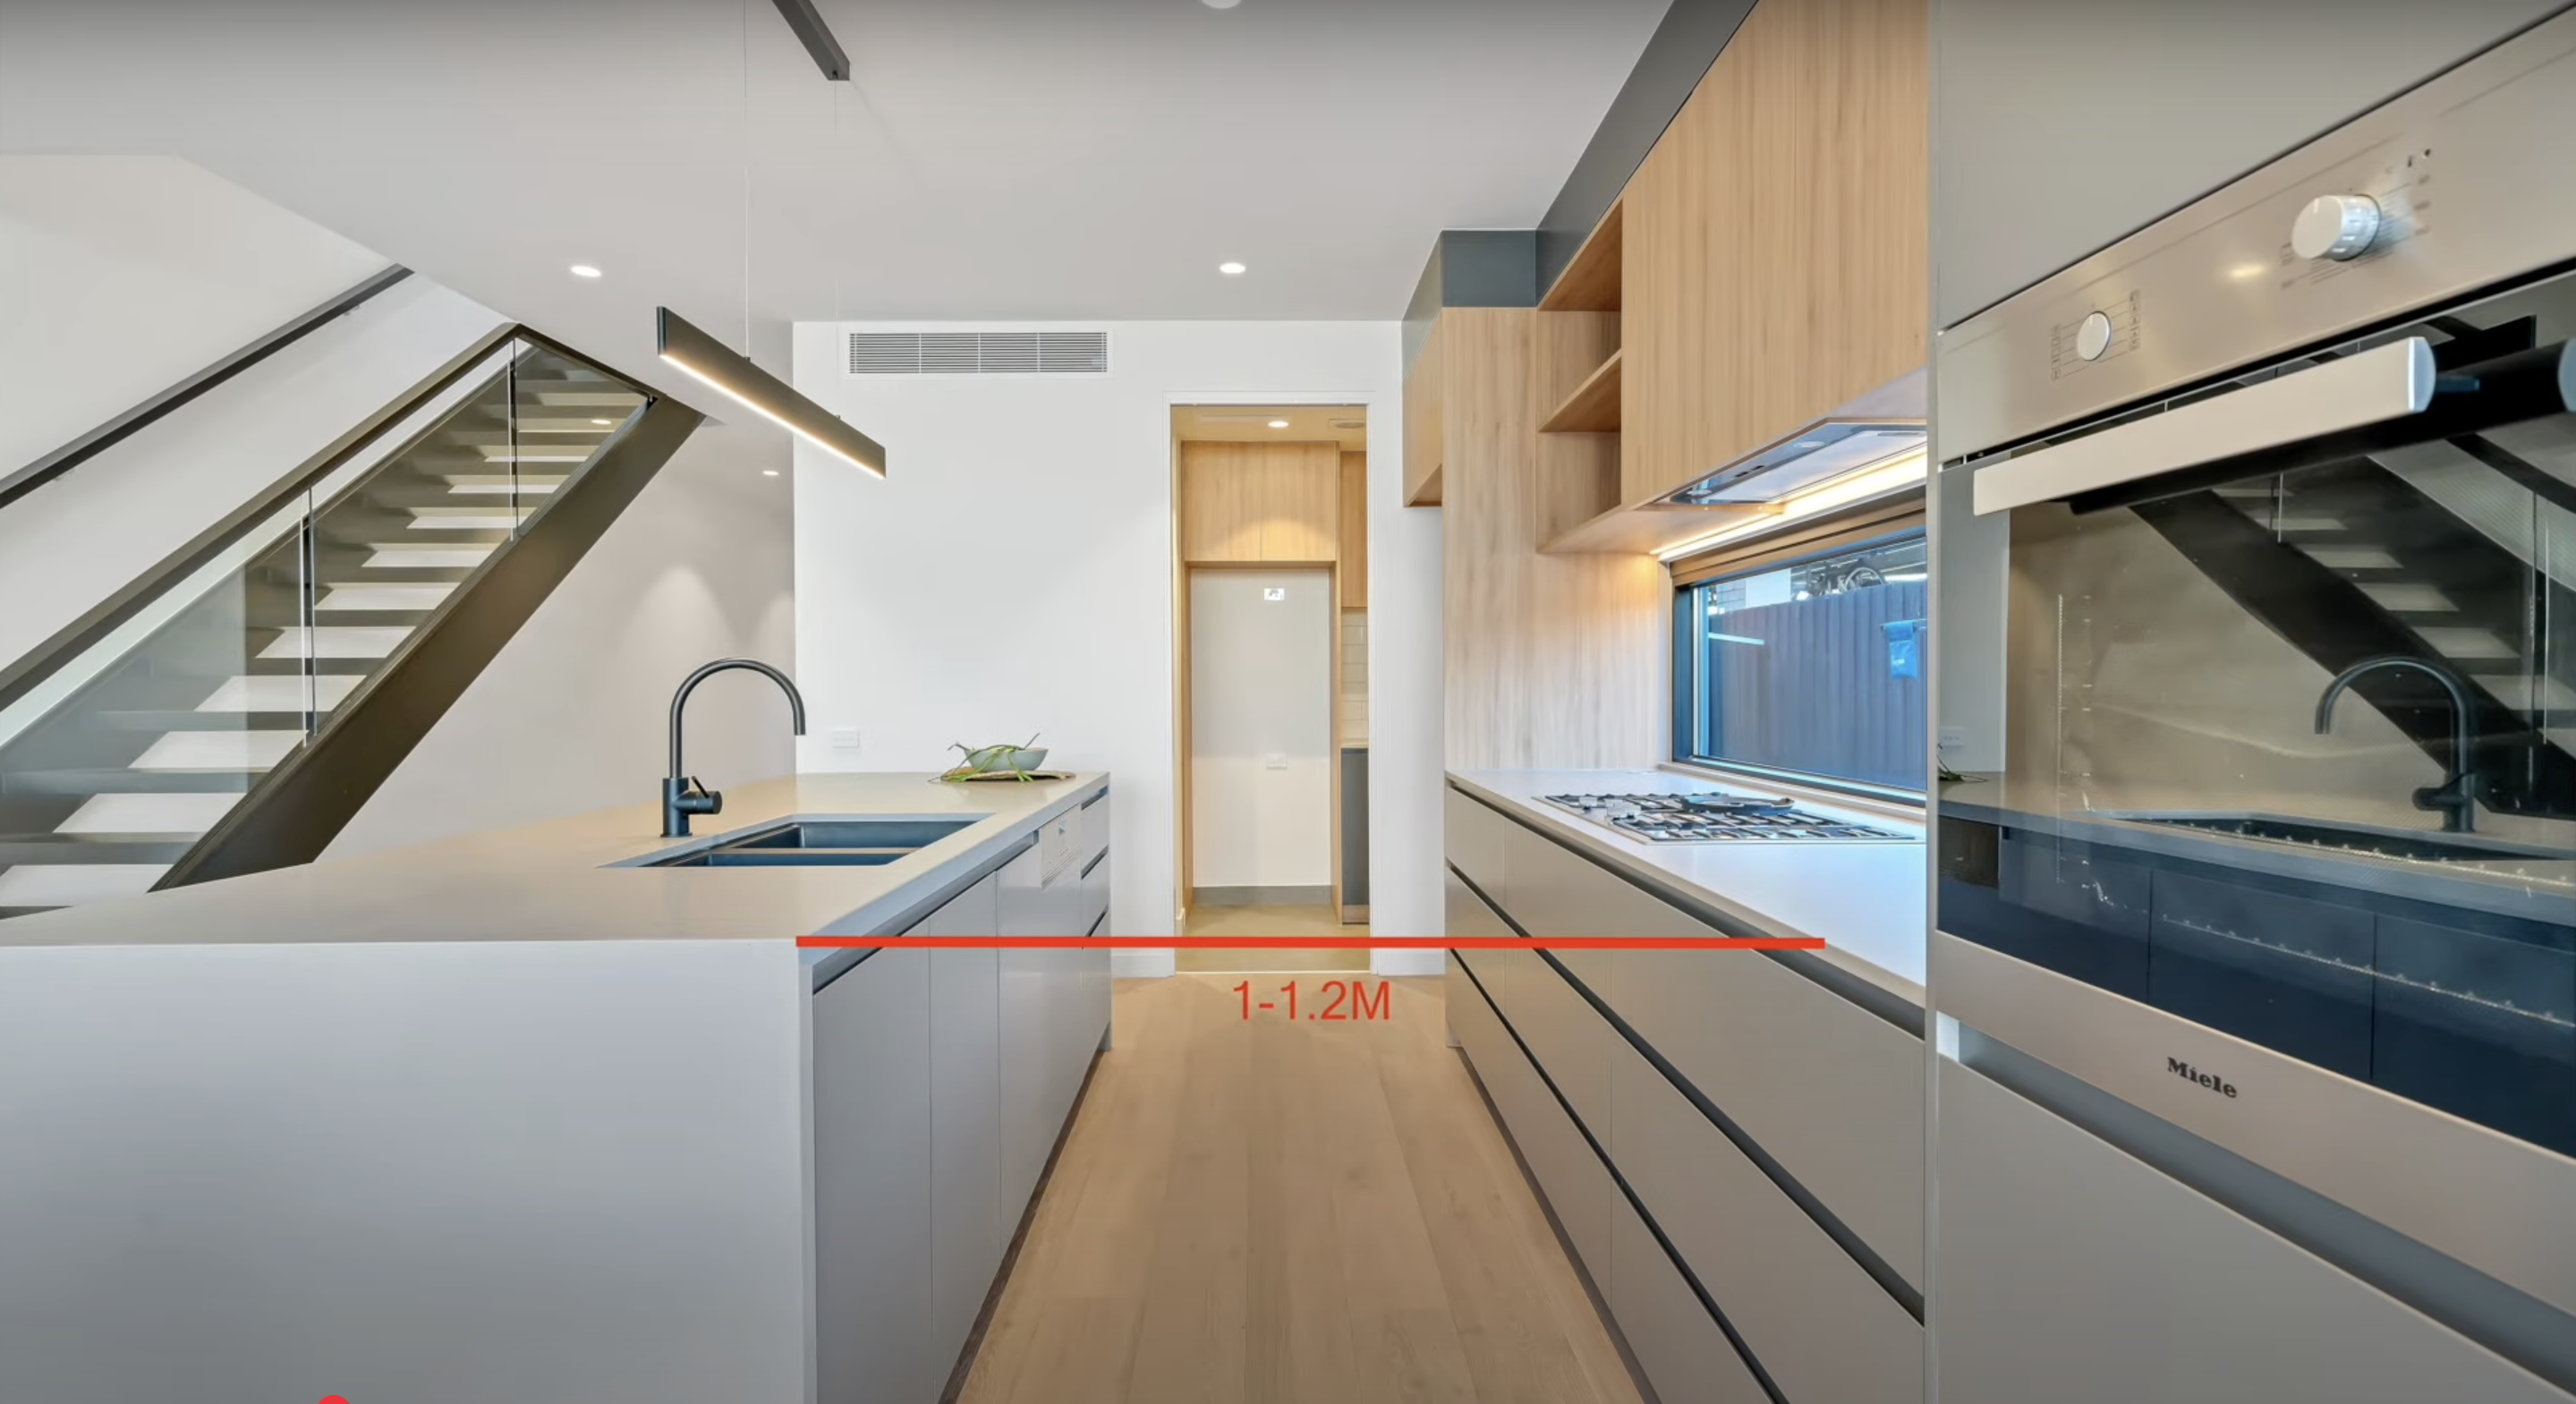
Proper clearance around your kitchen island is essential for comfortable movement and efficient workflow. Always maintain at least 1 to 1.2 meters between the island and surrounding counters or walls to prevent a cramped feeling.
Before committing to any construction, create a mock-up using cardboard boxes or painter’s tape to outline the proposed island’s footprint, then simulate daily kitchen activities to ensure the space works practically for your needs.
2. Choose the Standard Island Height
Kitchen islands typically follow the standard counter height of 36 inches (91 cm) from floor to countertop, which aligns with most kitchen appliances and provides comfortable working height for most adults.
If you desire bar-style seating, you might consider a taller section at 42 inches (107 cm), though this is less common and may create workflow inconsistencies in your kitchen design.
3. Select Island Depth and Width
A functional kitchen island with seating should ideally have a depth of about 1.2 meters (120 cm). This provides sufficient space for both food preparation and comfortable seating.
This depth can be achieved by placing two 60 cm base cabinets back-to-back or by creating mixed cabinet configurations with appropriate overhangs for seating areas, allowing for versatility in your storage options.
4. Plan the Countertop Overhang for Seating
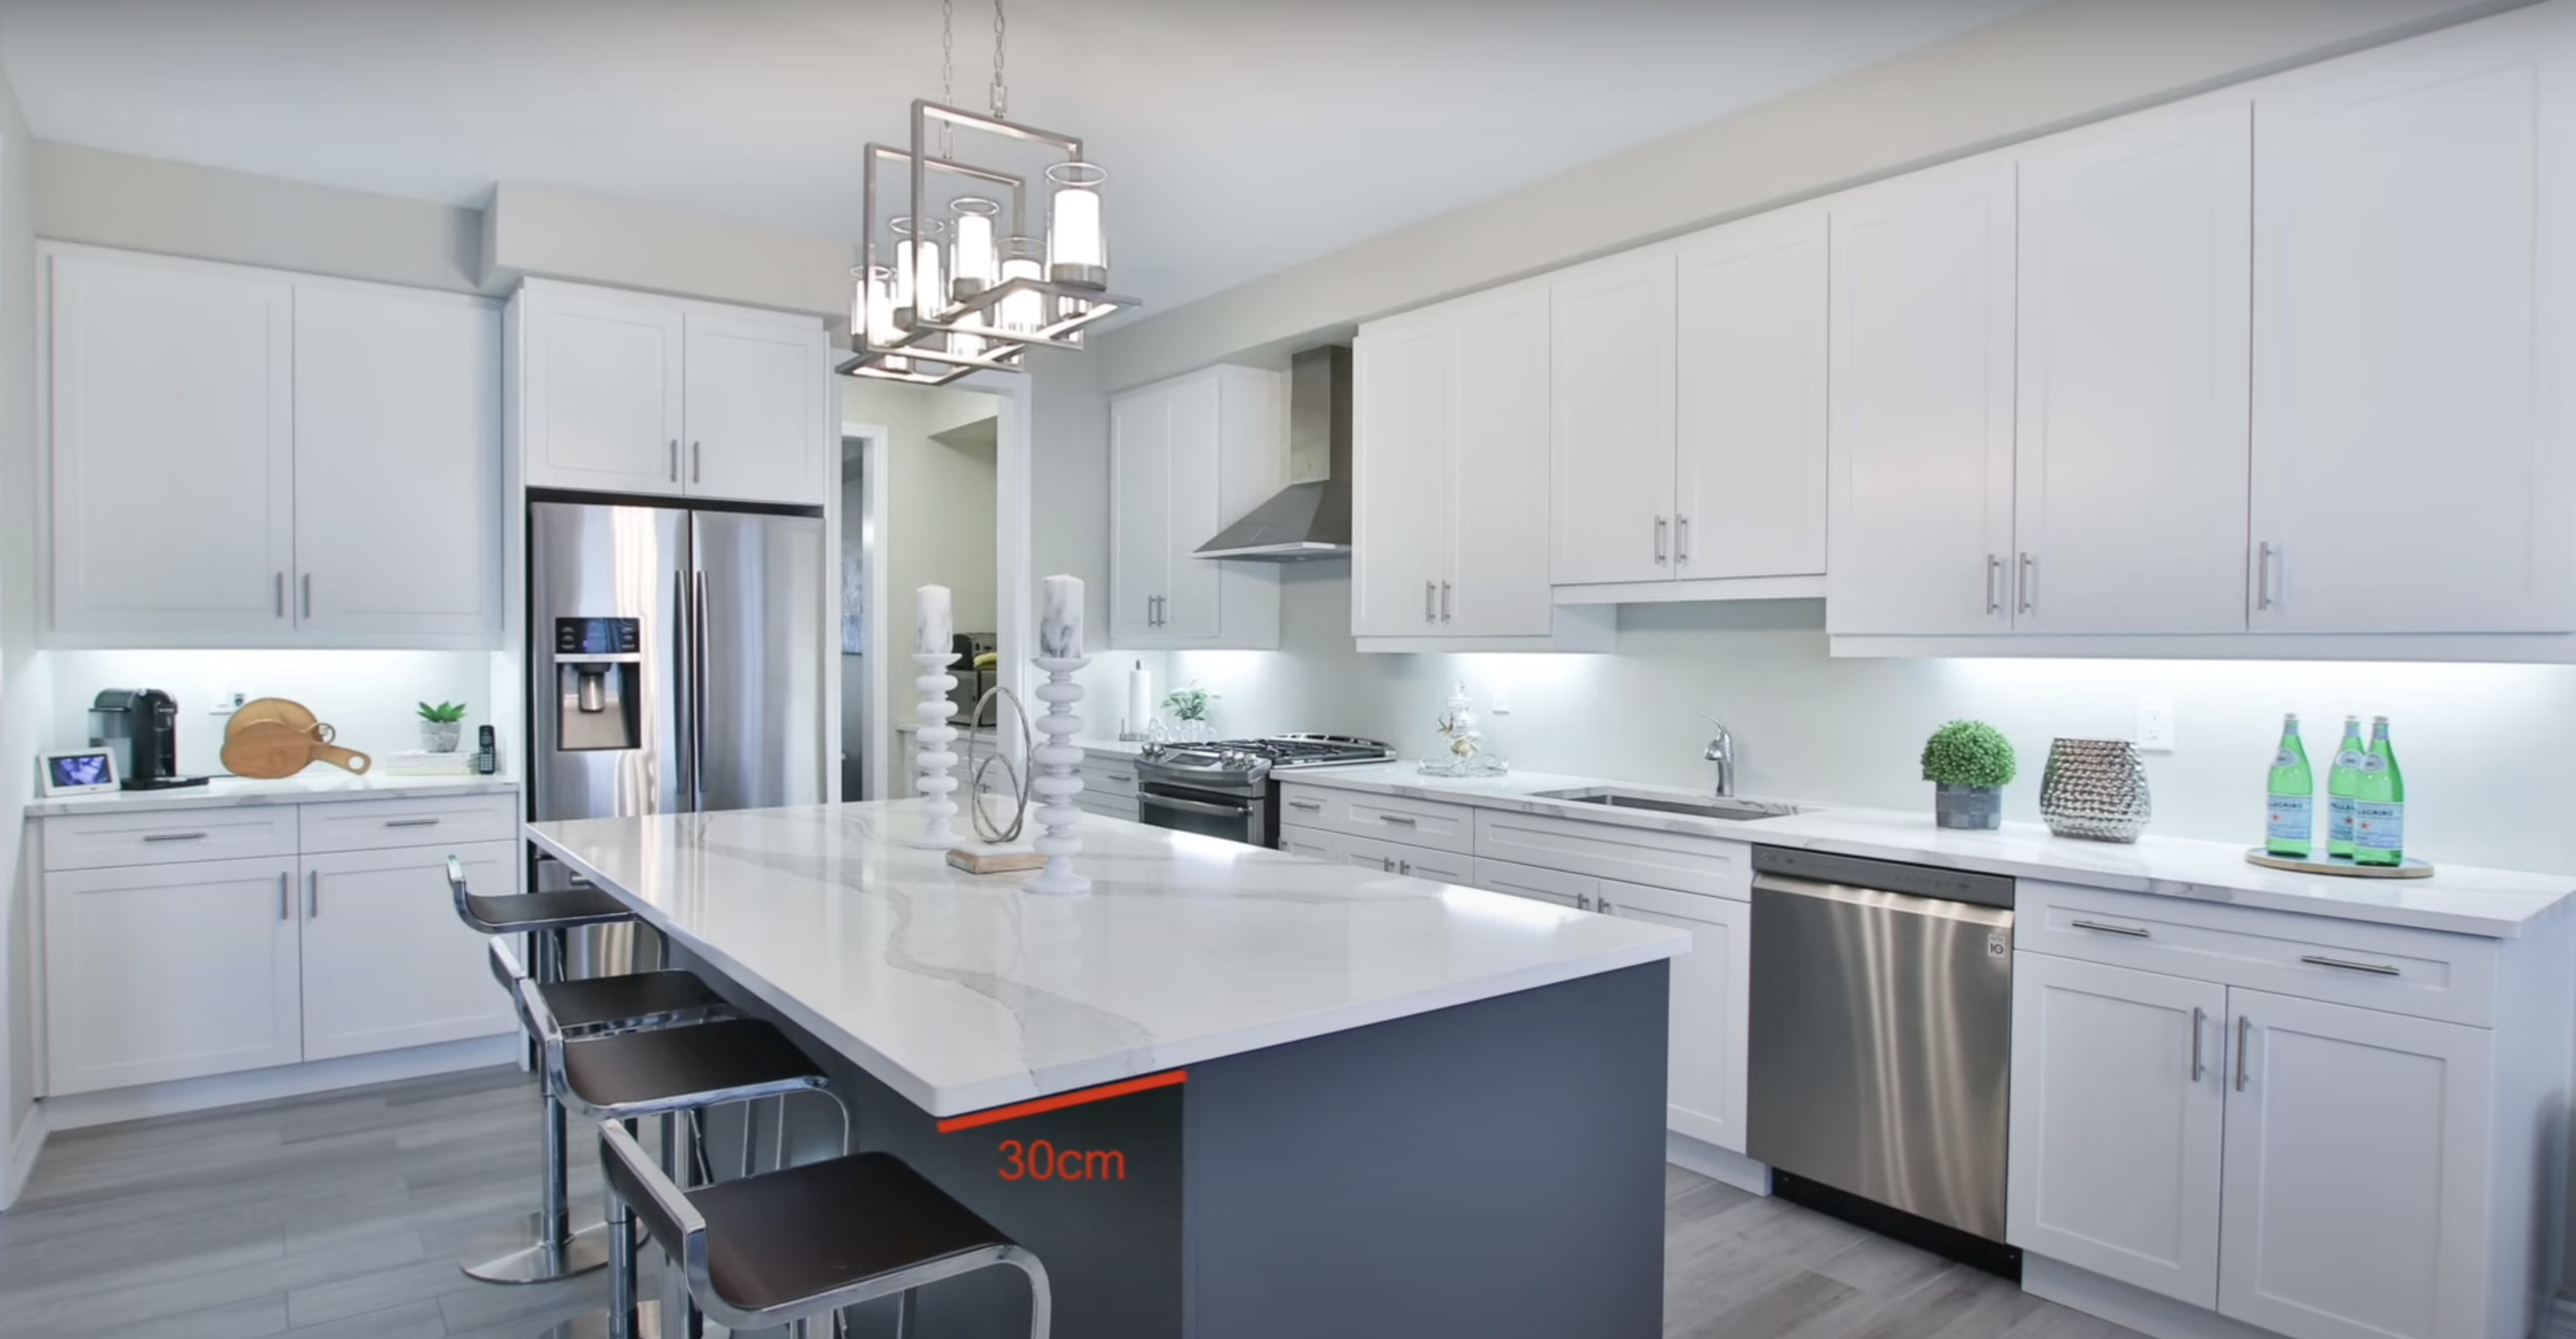
When incorporating seating at your island, the countertop should extend beyond the cabinets by about 25 cm to comfortably accommodate knees.
While 20 cm is the minimum acceptable overhang, anything beyond 30 cm requires additional support through brackets or decorative legs to prevent sagging and ensure the structural integrity of your countertop material.
5. Account for Seating Space per Person
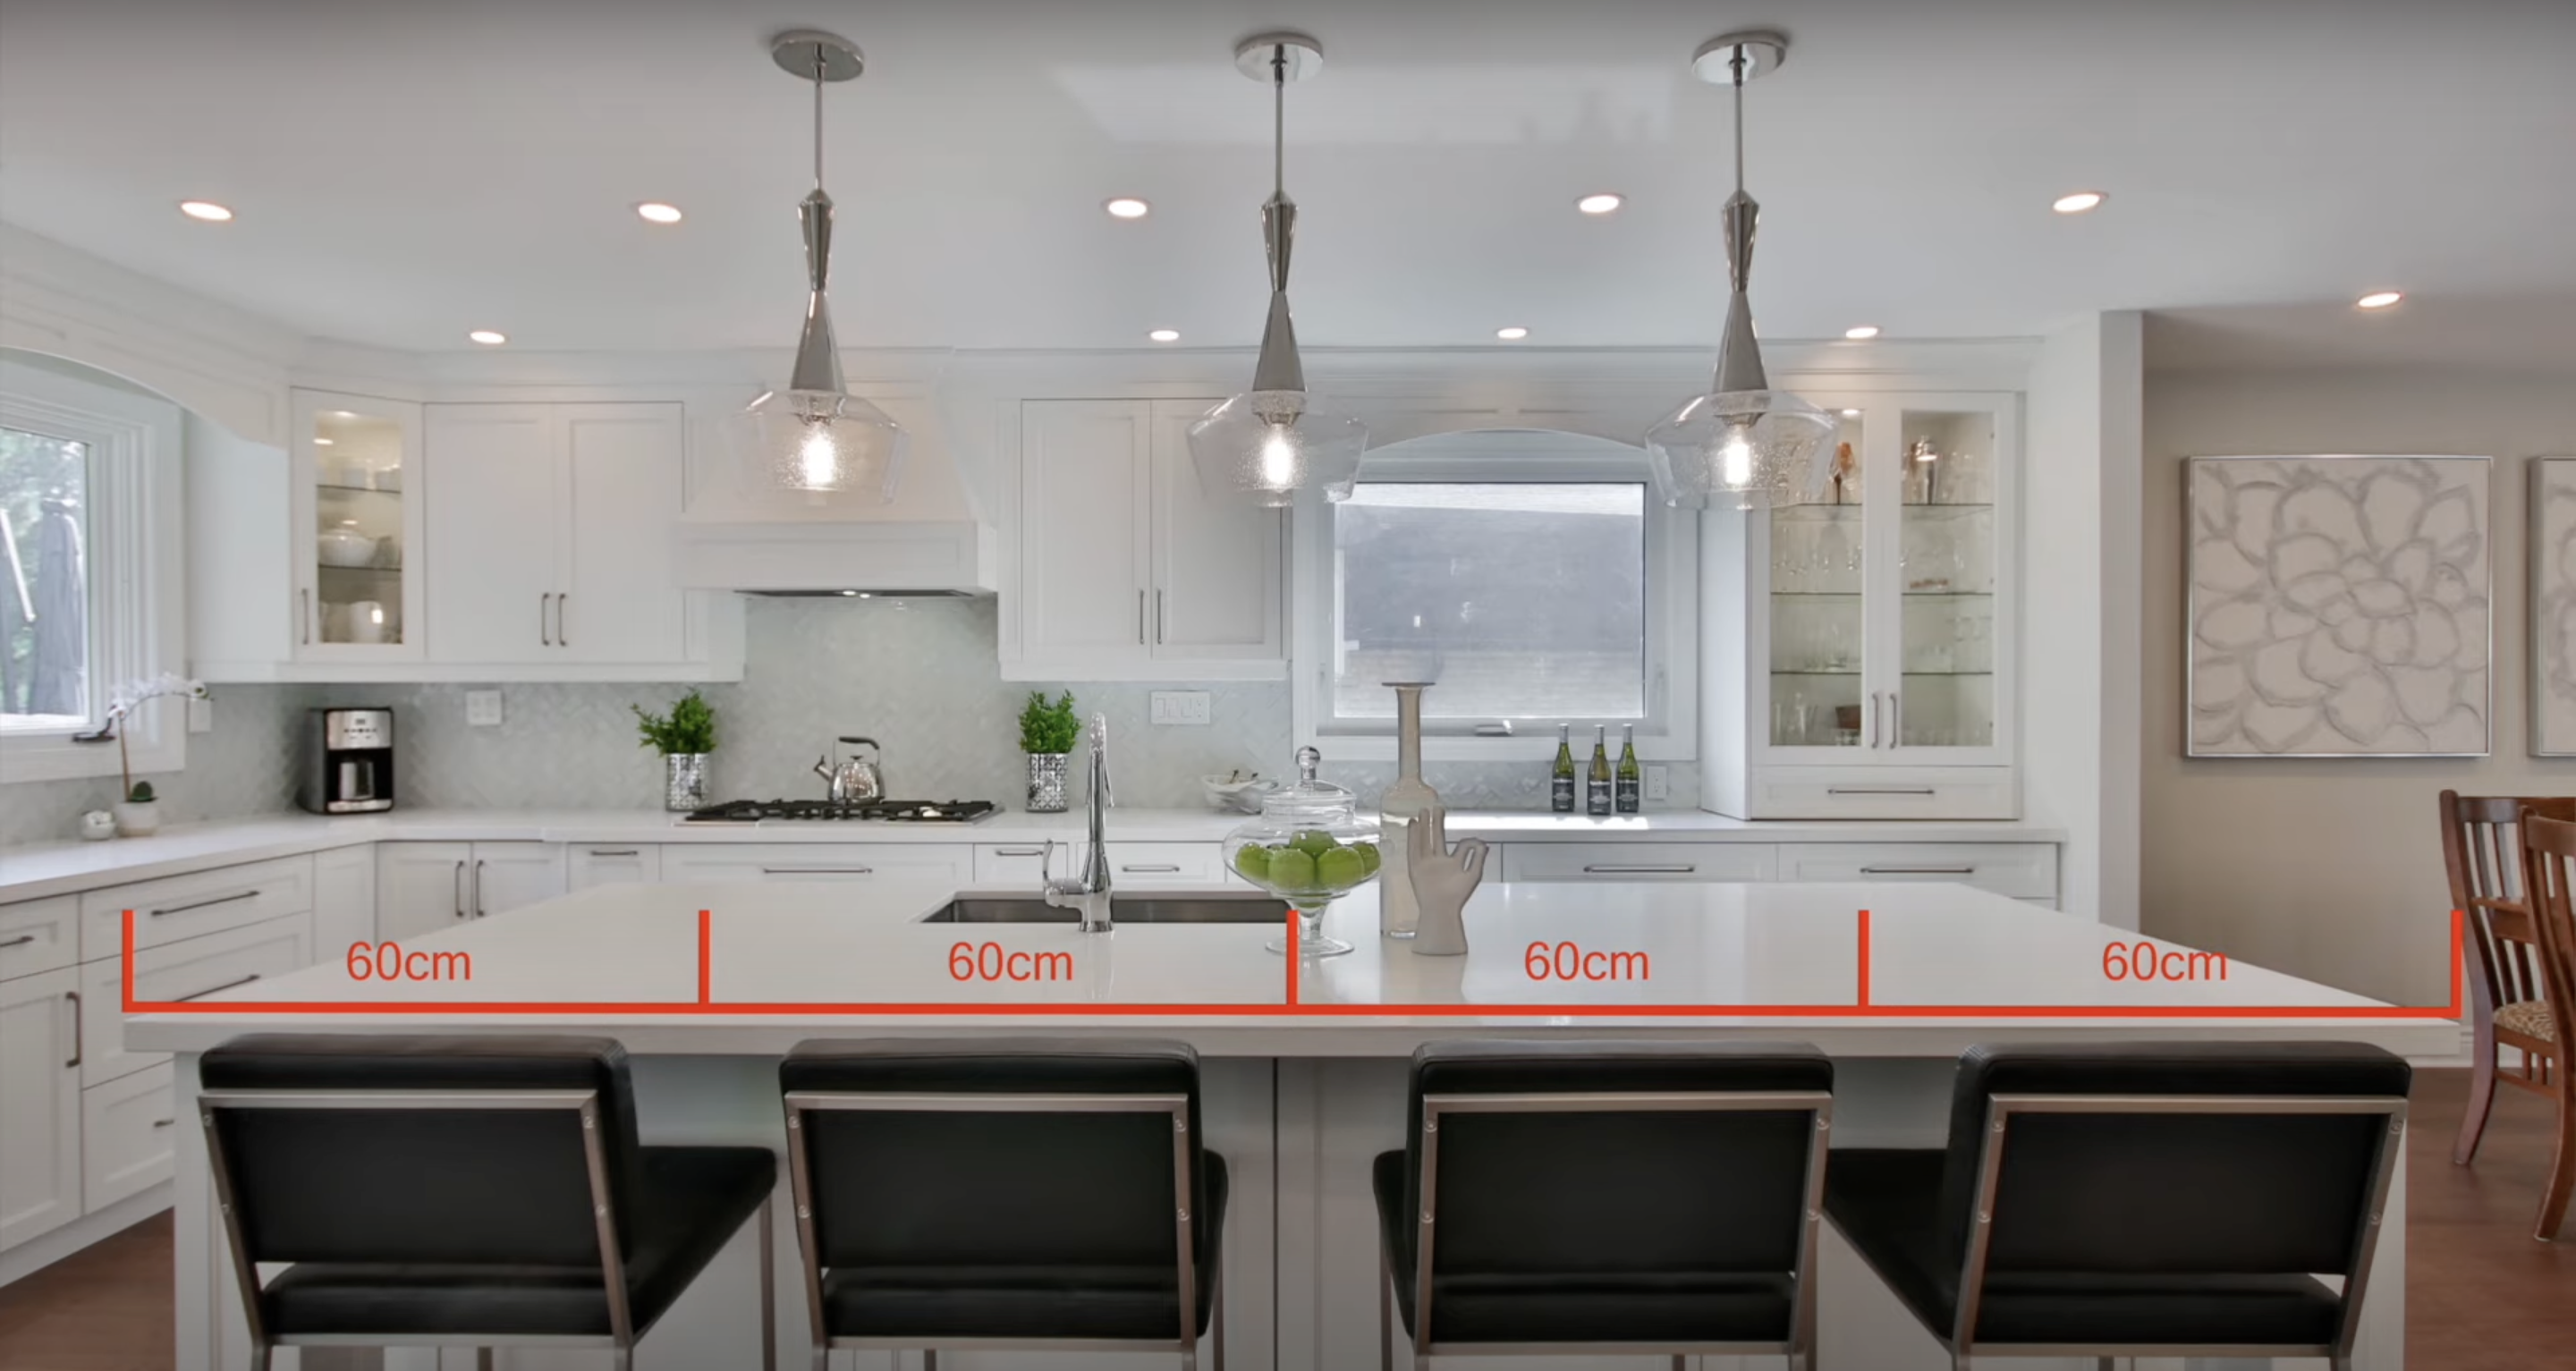
To ensure comfortable seating, allocate approximately 60 cm of countertop width per person. This provides adequate elbow room and prevents diners from feeling crowded.
If your space is limited or the seating is primarily intended for children, you can reduce this measurement to about 50 cm per person without significantly impacting comfort.
6. Know Your Countertop Limits
Most countertop materials, such as quartz and granite, come in standard slab sizes of approximately 3m x 1.4m. keep these dimensions in mind when designing your island to avoid unnecessary seams or joints.
If your design requires a larger surface, consider materials like Corian that can be seamlessly joined, or plan the layout to incorporate joints in less noticeable positions.
7. Plan for Workflow and Appliance Zones
Consider how your island will function within your kitchen workflow. If you plan to include appliances or fixtures, decide if you want to install a sink or cooktop on the island or keep it clear for food preparation and socializing.
Factor in the necessary plumbing and electrical requirements early in your planning process to avoid costly modifications later.
8. Adjust if You Don’t Have Room
If your kitchen layout doesn’t accommodate a full island, consider a peninsula as an alternative. A peninsula offers similar functionality for food preparation and casual dining, but requires less floor space since it extends from an existing wall or counter.
This option maintains the social and practical benefits of an island while working within spatial constraints.
Video Tutorial
For More Information, Check out this Video Tutorial by Kitchinsider
How to Calculate the Ideal Island Height for Your Space
Finding your perfect island height doesn’t require guesswork. With a simple calculation based on your height and intended use, you can determine the most comfortable working surface for your needs.
The Height Formula
A good starting point is to calculate half your height and then make adjustments based on how you’ll use the island:
Basic Formula: (your Height in Inches ÷ 2) ± Adjustments
For example:
- A person who is 5’6″ (66 inches) would calculate: 66 ÷ 2 = 33 inches
- For cooking prep: add 2-3 inches (35-36 inches total)
- For casual dining: add 6 inches (39 inches total)
- For bar-style seating: add 9-10 inches (42-43 inches total)
Recommended Heights Based on User Height
| User Height | Prep Surface | Dining Surface | Bar-Height Surface |
|---|---|---|---|
| 5’0″ – 5’3″ | 34″ – 35″ | 37″ – 38″ | 40″ – 41″ |
| 5’4″ – 5’7″ | 35″ – 36″ | 38″ – 39″ | 41″ – 42″ |
| 5’8″ – 5’11” | 36″ – 37″ | 39″ – 40″ | 42″ – 43″ |
| 6’0″ – 6’3″ | 37″ – 38″ | 40″ – 41″ | 43″ – 44″ |
| 6’4″ + | 38″ – 39″ | 41″ – 42″ | 44″ – 45″ |
Ergonomic Standards
The National Kitchen and Bath Association (NKBA) recommends:
- 36 inches for standard counter height
- 30 inches for seated dining surfaces
- 42 inches for bar-height counters
For accessibility compliance, the Americans with Disabilities Act (ADA) suggests a maximum height of 34 inches for work surfaces, with clear knee space underneath for wheelchair users.
Remember that these calculations provide starting points. The perfect height should ultimately feel comfortable for your specific body mechanics and kitchen activities.
Consider testing different heights by using adjustable tables or stacking books on existing surfaces to simulate your planned island height before making permanent decisions.
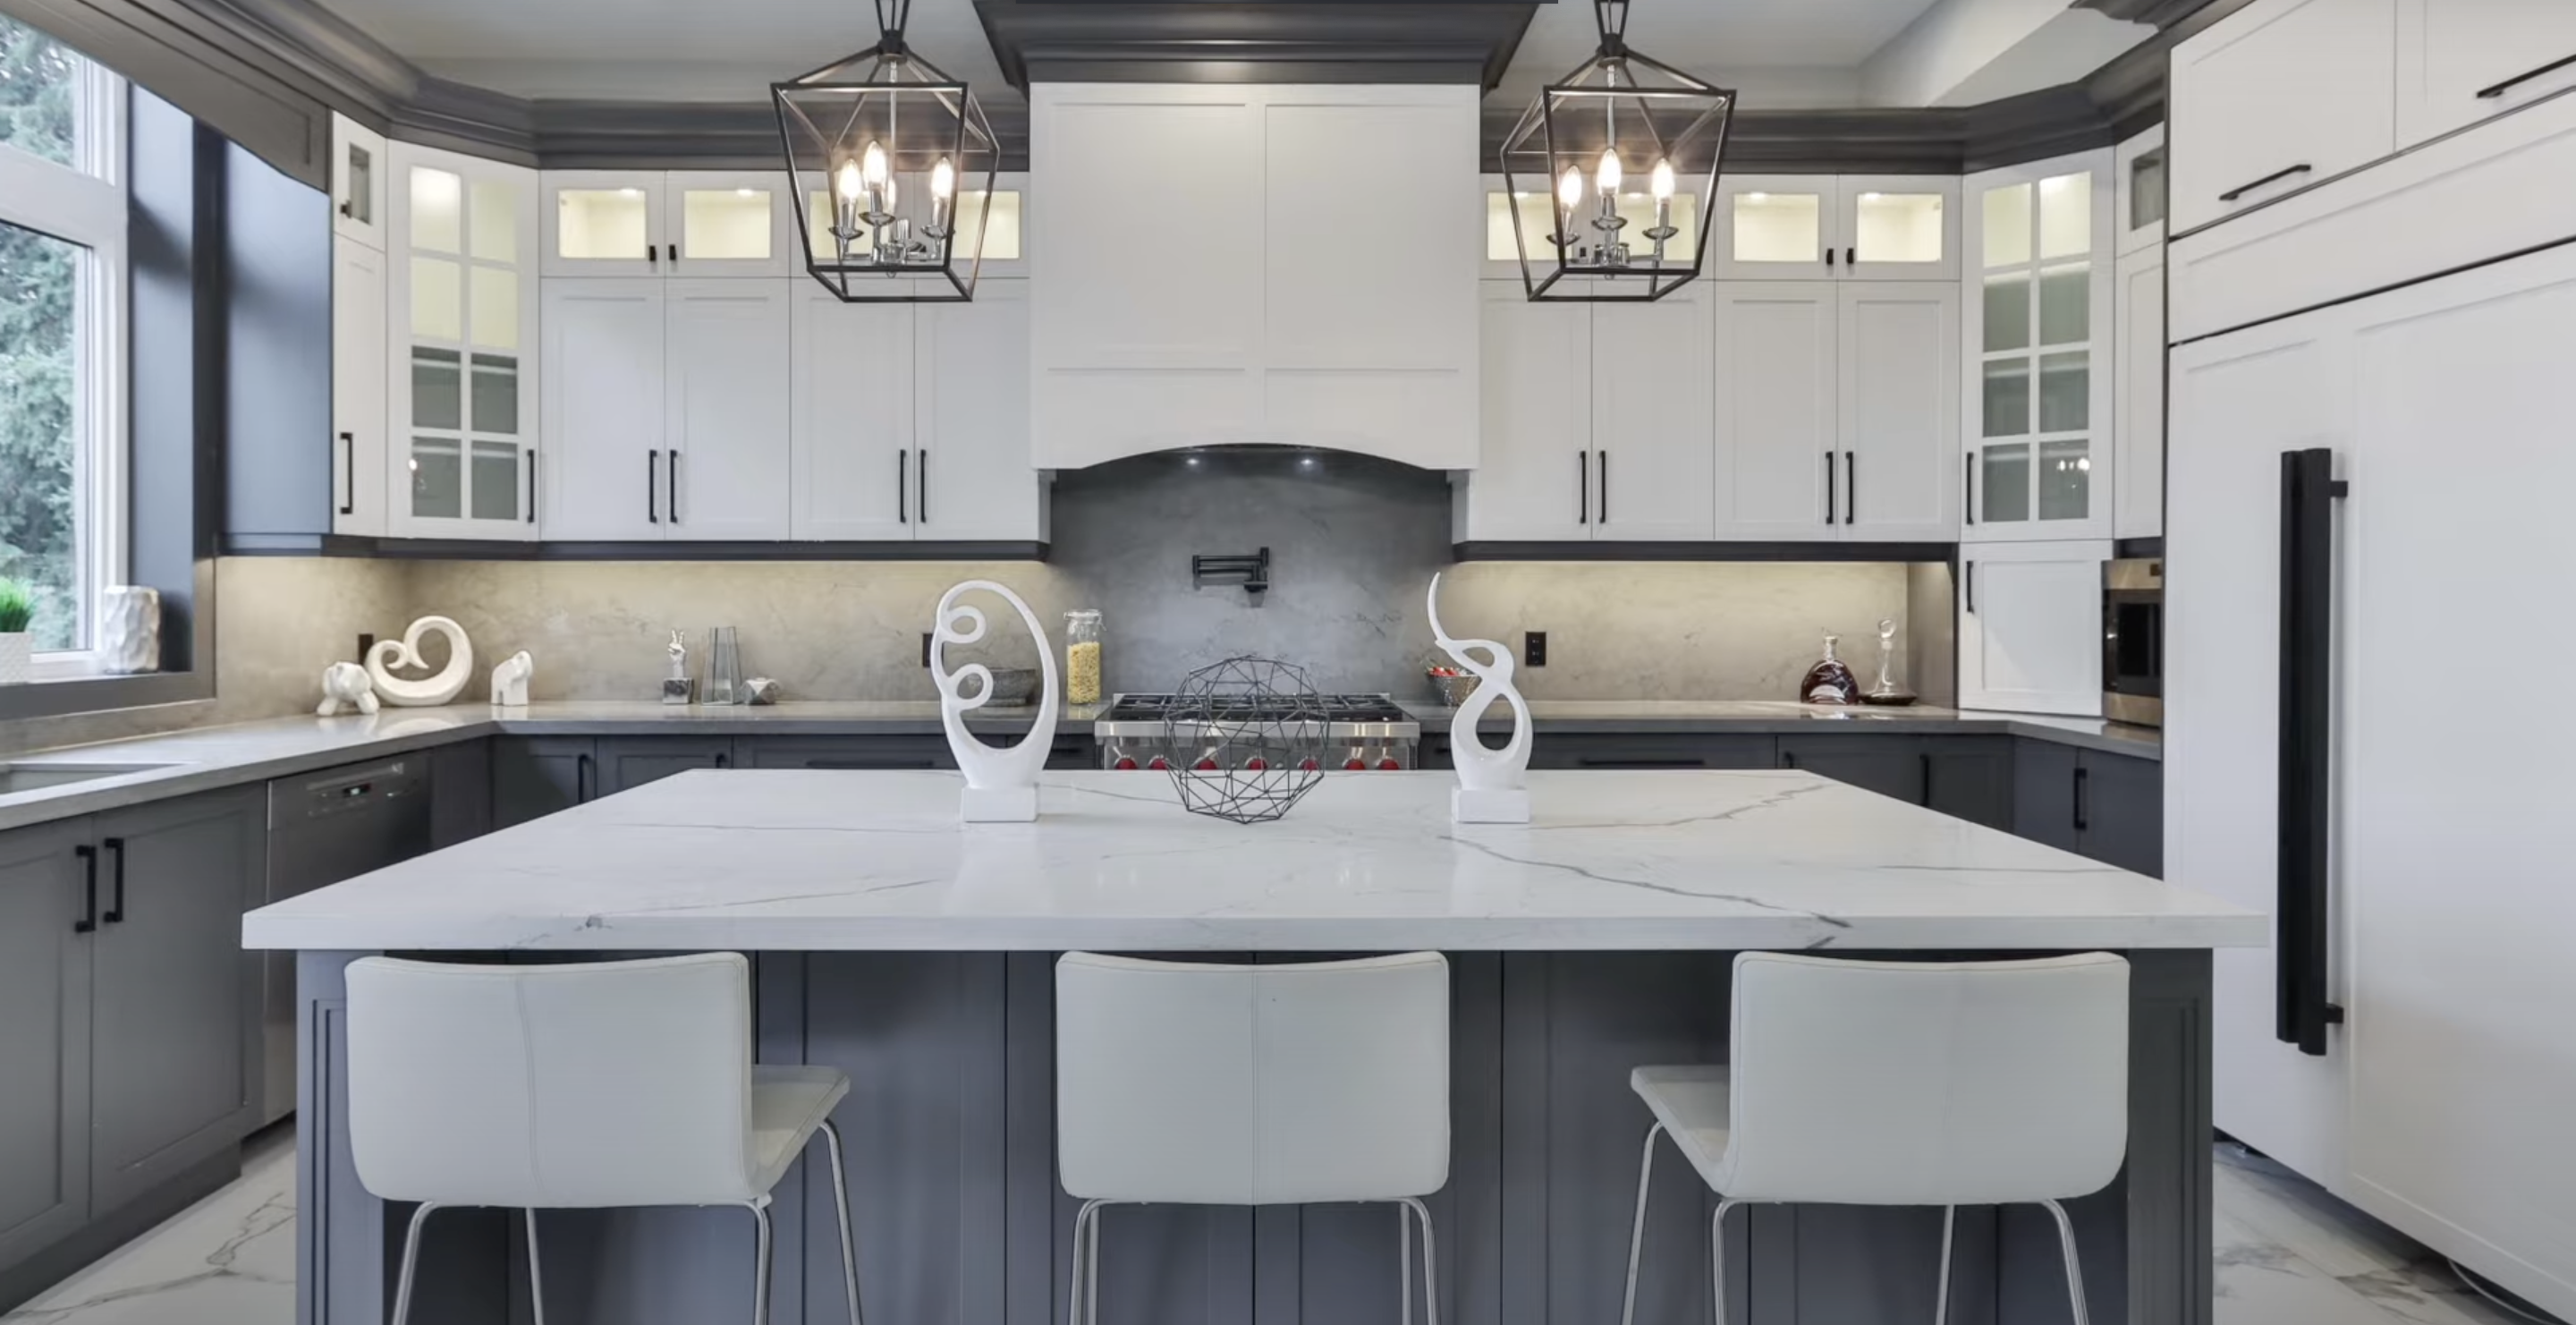
Island Height vs. Counter Height: Know the Difference
Understanding the distinction between island and counter heights helps you make smart layout and design choices. The table below provides a clear comparison and guidance.
| Aspect | Perimeter Counters | Kitchen Islands |
|---|---|---|
| Standard Height | 36 Inches | 36″ (prep), 42″ (bar), 30″ (table) |
| Location | Along walls | Central, open, accessible from multiple sides |
| Design Features | Often has a backsplash and upper cabinets | May include seating, sink, or stove; multi-level options |
| Visibility | Viewed from one side | Fully visible from all sides |
| When to Match | – Sleek, uniform look – small kitchens – chef-style setups – prep-only islands | Same as perimeter counters; works well for tight layouts |
| When to Contrast | Rarely recommended | – To define zones – add seating or dining – vary heights for different users |
| Design Integration Tips | Use the same materials, hardware, and finishes | Blend styles with consistent colors, aligned lines, and lighting |
| Workflow Impact | Streamlined work triangle | Must ensure smooth transitions and balance across heights |
Choosing between matching or contrasting island and counter heights isn’t just about style—it’s about creating a kitchen that feels good to use and looks great from every angle.
Common Mistakes to Avoid While Determining Island Height
Even seasoned designers make these critical errors when planning kitchen islands:
1. Ignoring the Work Triangle
Mistake: Positioning your island without considering movement between sink, stove, and refrigerator.
Fix: Maintain a 4-9 foot clearance between triangle points and ensure clear pathways around the island.
2. Misjudging Seating Heights
Mistake: Selecting unsuitable stools without proper clearance calculations.
Fix: For 36-inch counters, use 24-inch seats; for 42-inch counters, use 30-inch seats. Always allow 15″ knee clearance.
3. Overlooking Material Thickness
Mistake: Forgetting that countertops and flooring add to the total height.
Fix: Account for countertop thickness (1.25″-2″+) and flooring variations in your measurements.
4. Disregarding Appliance Needs
Mistake: Adding appliances without adjusting surrounding dimensions.
Fix: Plan specific clearances for cooktops, microwaves, and refrigerator drawers.
5. Neglecting Lighting Considerations
Mistake: Failing to coordinate overhead fixtures with the island height.
Fix: Position pendants 30-36″ above the surface and ensure proper task lighting without shadows.
6. Forgetting Future Flexibility
Mistake: Designing only for current needs.
Fix: Consider adjustable components and document dimensions for future modifications.
Avoid these pitfalls to create an island that’s both beautiful and functional for years to come.
Conclusion
The perfect kitchen island height strikes a balance between form, function, and flow. While the standard height of 36 inches suits most homes, customizing for comfort, accessibility, or style can make your space even better.
If you’re building from scratch or upgrading an old setup, planning with the right measurements, materials, and layout strategies will ensure long-term comfort and usability.
Ready to build your dream island? Use this guide as your starting point, and don’t forget to bookmark it for later! If you found this helpful, share it with a friend or drop your questions in the comments; we’d love to hear about your kitchen plans!
Looking for more ideas? Check out our other DIY Project guides to create a space that’s uniquely yours.