
Wallpaper stripping | Normal and vinyl coverings
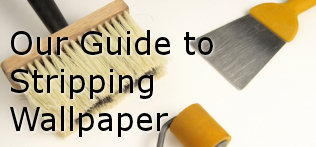
In this section we will take you through the process of stripping old wallpaper, including normal and vinyl wall coverings.
We start by going through the process of removing your old wallpaper, including how to deal with light switches and electrical outlets. The last step is finishing off and checking the wall surface.
We start by going through the process of removing your old wallpaper, including how to deal with light switches and electrical outlets. The last step is finishing off and checking the wall surface.
Please note: We will accept no responsibility for any damage or injury as a result of following this guide.
For further information please see our disclaimer, a link to which can be found at the bottom of this page.
For further information please see our disclaimer, a link to which can be found at the bottom of this page.
Related: After you have stripped your walls, see our guide to hanging wallpaper, or how to paint a wall.
To complete this task you will need:
- Wallpaper Scraper
- Bucket and Sponge
- Wallpaper Steamer (optional)
- Filler (if required)
- Sandpaper (if required)

When working at heights, always ensure that the structure is safe and secure.
Never stretch out, always get down and re-position the scaffold or trestle.
Never stretch out, always get down and re-position the scaffold or trestle.
Stripping the wallpaper
Advertisements
Normal coverings
First take your wallpaper scorer and go round the entire room gently scoring the old paper ensuring not to damage the plaster beneath.
Next go back around the room soaking the paper with warm soapy water (or your wallpaper steamer), start from the bottom of each width of paper and work your way up to the ceiling.
Now go back to the area where you started and re-soak 3 widths of paper, then take your wallpaper scraper and starting at the bottom of the first width scrap the paper ensuring not to damage the plaster (see Fig 1.1 below). Work your way up to the ceiling removing all traces of paper from the wall. Now move onto the next width and repeat the process.
When you have finished the second width re-soak (or steam) the next 3 widths, so they will be ready for stripping when you get there.
Now work your way around the room re-soaking as necessary removing all traces of paper.
Vinyl coverings
Some vinyl coverings can be simply peeled off the wall, to do this take your wallpaper scraper and lift one corner of a width and pull firmly, the paper should come away from the wall fairly easily (see Fig 1.2). Once you have peeled all of the vinyl away wash down the wall with a suitable detergent to remove any old adhesive left by the covering.
Other vinyl coverings have a paper backing, to remove these coverings lift one corner and pull the vinyl away from the backing paper, then soak the backing paper and remove as you would normal wallpaper (see above).

Fig 1.1

Fig 1.2
Light switches and electrical sockets
Isolate the power at the main fuse box and then remove the face plate with the securing screws, this will allow you to remove any old paper that is stuck behind the socket/switch. Replace the face plate when finished.
Finishing off

Fig 1.3
To finish off go around the room and check for any stray pieces of covering that may be left on the wall.
Once satisfied that all of the covering has been removed, check for any imperfections on the wall. For example, sometimes when using the scraper you can inadvertently damage the wall as you scrape. Not to mention any damage that may have been hidden by the wall covering prior to removal.
Repair any damage using a suitable filler and sand down to leave a nice flat finish.
Advertisements